turn signal bulb Seat Exeo 2011 User Guide
[x] Cancel search | Manufacturer: SEAT, Model Year: 2011, Model line: Exeo, Model: Seat Exeo 2011Pages: 313, PDF Size: 5.02 MB
Page 270 of 313

268If and when
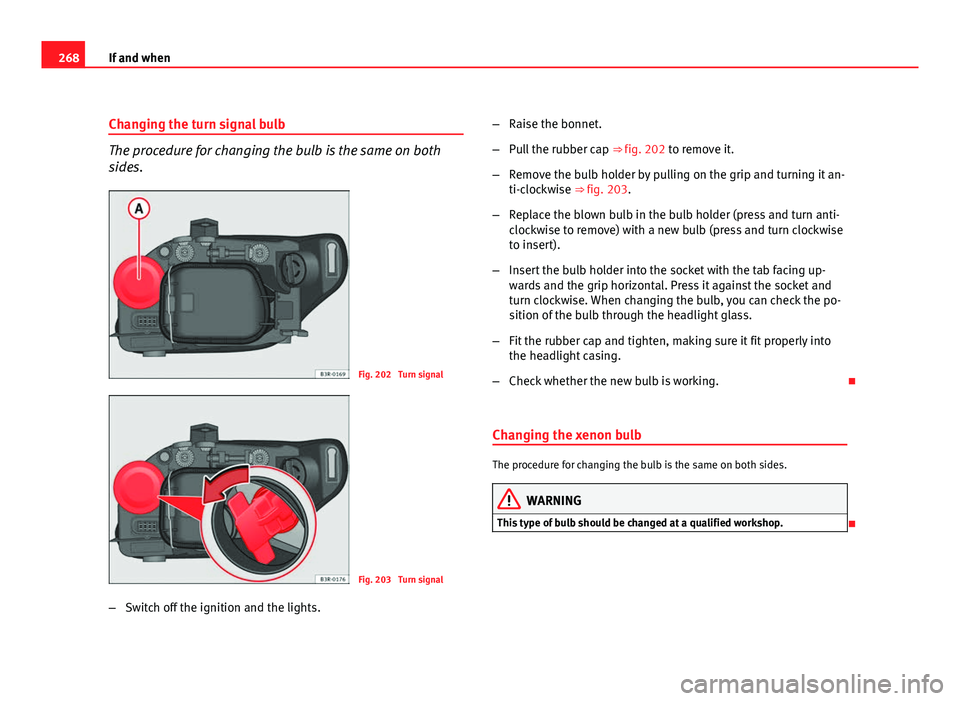
Changing the turn signal bulb
The procedure for changing the bulb is the same on both
sides.
Fig. 202 Turn signal
Fig. 203 Turn signal
– Switch off the ignition and the lights. –
Raise the bonnet.
– Pull the rubber cap ⇒ fig. 202 to remove it.
– Remove the bulb holder by pulling on the grip and turning it an-
ti-clockwise ⇒ fig. 203.
– Replace the blown bulb in the bulb holder (press and turn anti-
clockwise to remove) with a new bulb (press and turn clockwise
to insert).
– Insert the bulb holder into the socket with the tab facing up-
wards and the grip horizontal. Press it against the socket and
turn clockwise. When changing the bulb, you can check the po-
sition of the bulb through the headlight glass.
– Fit the rubber cap and tighten, making sure it fit properly into
the headlight casing.
– Check whether the new bulb is working.
Changing the xenon bulb
The procedure for changing the bulb is the same on both sides.
WARNING
This type of bulb should be changed at a qualified workshop.
Page 271 of 313

269
If and when
Changing tail light bulbs (on side panel)
Overview of tail lights
Fig. 204 Overview of tail
lights
Tail lights on side panel
● Brake light and side light
● Side lights
● Turn signal Overview of tail lights. LED lamps
Fig. 205 Overview of tail
lights
Tail lights on side panel
● Brake light and side light
● Side lights
● Turn signal
Note
● It is only possible to change the turn signal light.
● If the warning lamp for the side light and/or rear fog light (LED lights)
lights up, the tail light assembly should be replaced.
● The failure of the lamp is only shown when the LED function goes out
completely. Sometimes, a LED will stop working, without displaying the
warning as the function continues to operate.
Safety FirstOperating InstructionsPractical TipsTechnical Specifications
Page 274 of 313

272If and when
Position of the bulbs
Pos.
⇒ fig. 209Bulb function
ABrake light and side lightP21W LLBSide lightsP21W LLCTurn signalPY21W
Changing bulbs. LED lamps
All bulbs can be changed easily in the bulb holder.
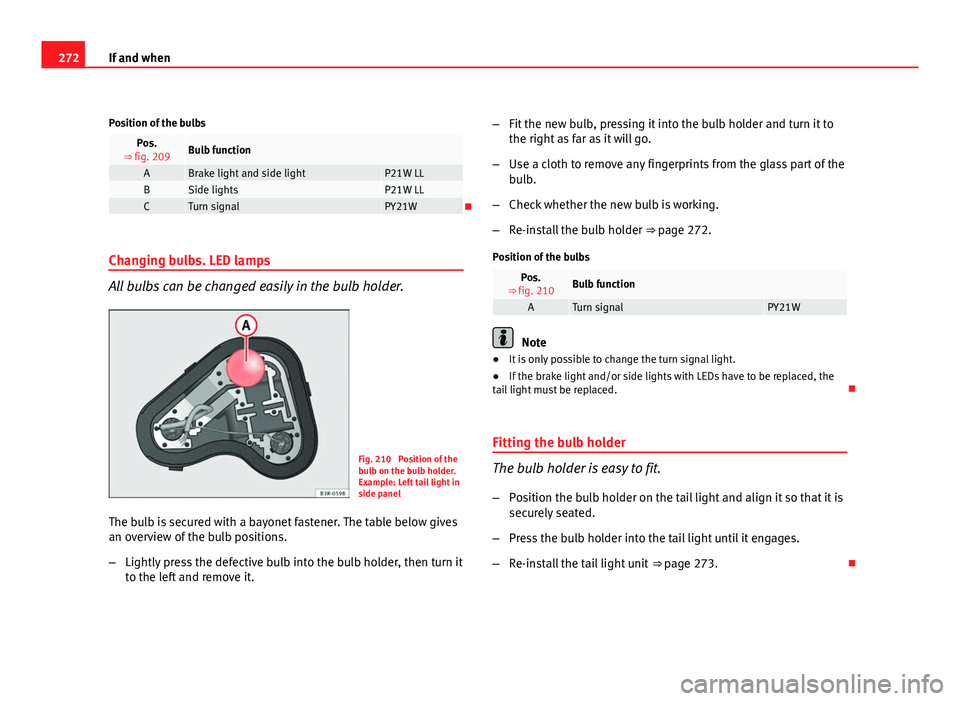
Fig. 210 Position of the
bulb on the bulb holder.
Example: Left tail light in
side panel
The bulb is secured with a bayonet fastener. The table below gives
an overview of the bulb positions.
– Lightly press the defective bulb into the bulb holder, then turn it
to the left and remove it. –
Fit the new bulb, pressing it into the bulb holder and turn it to
the right as far as it will go.
– Use a cloth to remove any fingerprints from the glass part of the
bulb.
– Check whether the new bulb is working.
– Re-install the bulb holder ⇒ page 272.
Position of the bulbs
Pos.
⇒ fig. 210Bulb function
ATurn signalPY21W
Note
● It is only possible to change the turn signal light.
● If the brake light and/or side lights with LEDs have to be replaced, the
tail light must be replaced.
Fitting the bulb holder
The bulb holder is easy to fit. – Position the bulb holder on the tail light and align it so that it is
securely seated.
– Press the bulb holder into the tail light until it engages.
– Re-install the tail light unit ⇒ page 273.
Page 279 of 313

277
If and when
Position of the bulbs
Pos.
⇒ fig. 218Bulb function
AReverse lightP21W LL
Fitting the bulb holder
The bulb holder is easy to fit. – Check that the seal is seated correctly on the bulb holder.
– Position the bulb holder on the tail light and align it so that it is
securely seated.
– Press the bulb holder into the tail light until it engages.
– Fit the cover back in the interior trim so that it engages.
– Make sure that all bulbs for the tail lights are working. Side turn signals
Fig. 219 Side turn signal
– Press the turn signal to the left or to the right to remove the
bulb.
– Remove the bulb holder from the turn signal.
– Remove the failed glass bulb and replace with a new bulb.
– Insert the bulb holder in the turn signal guide until it clicks into
place.
– First place the turn signal in the opening in the bodywork, fixing
the tabs ⇒ fig. 219, arrow 1
.
– Insert the bulb as shown by the arrow 2
⇒ fig. 219.
Safety FirstOperating InstructionsPractical TipsTechnical Specifications