warning light Seat Exeo 2011 User Guide
[x] Cancel search | Manufacturer: SEAT, Model Year: 2011, Model line: Exeo, Model: Seat Exeo 2011Pages: 313, PDF Size: 5.02 MB
Page 46 of 313

44Airbag system
Deactivating airbags
Front passenger airbag deactivation
If you fit a rear-facing child seat to the front passenger seat,
the front passenger airbag must be de-activated.
Fig. 27 In the glove com-
partment: switch for acti-
vating and deactivating
the front passenger air-
bag
Fig. 28 Warning lamp for
deactivated passenger
airbag in centre console
When the passenger airbag is deactivated, only the front airbag is
deactivated. All the other airbags in the vehicle remain activated.
Deactivating the front passenger airbag
– Switch the ignition off.
– Turn the ignition key in the key-operated switch in the glove
compartment to position 0
OFF ⇒ fig. 27.
– Check that the warning lamp “OFF” on the instrument panel
⇒ fig. 28 remains lit when the ignition is switched on ⇒
.
Activating the front passenger airbag
– Switch the ignition off.
– Turn the ignition key in the key-operated switch in the glove
compartment to position 1
ON ⇒ fig. 27.
– Check that the warning lamp on the instrument panel ⇒ fig. 28
does not light up when the ignition is switched on ⇒
.
Page 59 of 313
57
Cockpit
Operating Instructions Cockpit
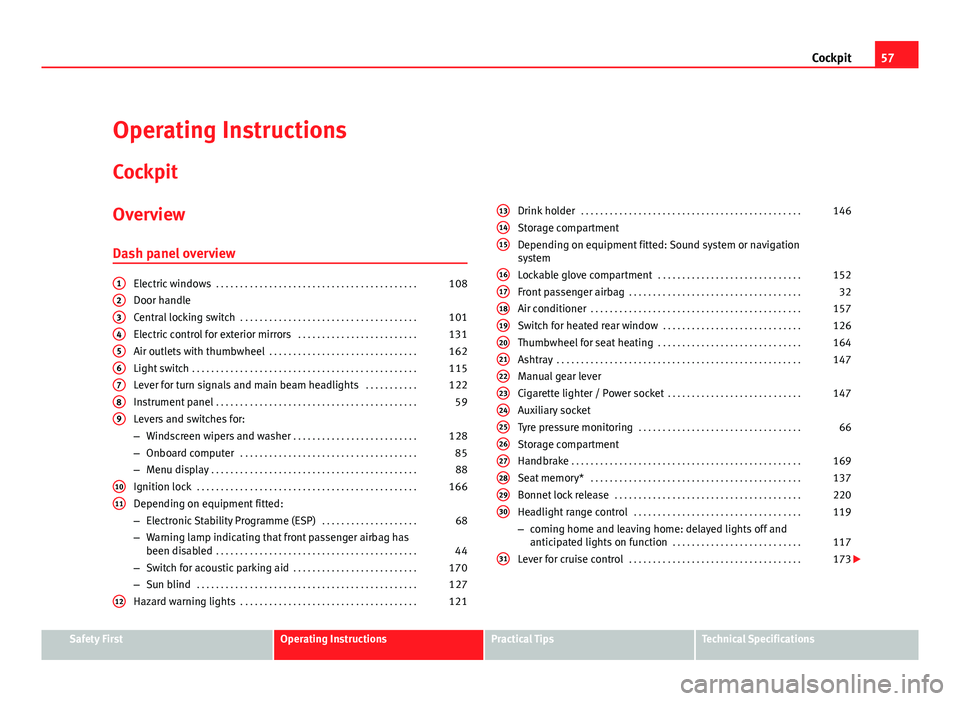
Overview Dash panel overview
Electric windows . . . . . . . . . . . . . . . . . . . . . . . . . . . . . . . . . . . . . . . . . . 108
Door handle
Central locking switch . . . . . . . . . . . . . . . . . . . . . . . . . . . . . . . . . . . . . 101
Electric control for exterior mirrors . . . . . . . . . . . . . . . . . . . . . . . . .131
Air outlets with thumbwheel . . . . . . . . . . . . . . . . . . . . . . . . . . . . . . . 162
Light switch . . . . . . . . . . . . . . . . . . . . . . . . . . . . . . . . . . . . . . . . . . . . . . . 115
Lever for turn signals and main beam headlights . . . . . . . . . . .122
Instrument panel . . . . . . . . . . . . . . . . . . . . . . . . . . . . . . . . . . . . . . . . . . 59
Levers and switches for:
– Windscreen wipers and washer . . . . . . . . . . . . . . . . . . . . . . . . . . 128
– Onboard computer . . . . . . . . . . . . . . . . . . . . . . . . . . . . . . . . . . . . . 85
– Menu display . . . . . . . . . . . . . . . . . . . . . . . . . . . . . . . . . . . . . . . . . . . 88
Ignition lock . . . . . . . . . . . . . . . . . . . . . . . . . . . . . . . . . . . . . . . . . . . . . . 166
Depending on equipment fitted:
– Electronic Stability Programme (ESP) . . . . . . . . . . . . . . . . . . . .68
– Warning lamp indicating that front passenger airbag has
been disabled . . . . . . . . . . . . . . . . . . . . . . . . . . . . . . . . . . . . . . . . . . 44
– Switch for acoustic parking aid . . . . . . . . . . . . . . . . . . . . . . . . . . 170
– Sun blind . . . . . . . . . . . . . . . . . . . . . . . . . . . . . . . . . . . . . . . . . . . . . . 127
Hazard warning lights . . . . . . . . . . . . . . . . . . . . . . . . . . . . . . . . . . . . . 121
123456789
1011
12
Drink holder
. . . . . . . . . . . . . . . . . . . . . . . . . . . . . . . . . . . . . . . . . . . . . . 146
Storage compartment
Depending on equipment fitted: Sound system or navigation
system
Lockable glove compartment . . . . . . . . . . . . . . . . . . . . . . . . . . . . . . 152
Front passenger airbag . . . . . . . . . . . . . . . . . . . . . . . . . . . . . . . . . . . . 32
Air conditioner . . . . . . . . . . . . . . . . . . . . . . . . . . . . . . . . . . . . . . . . . . . . 157
Switch for heated rear window . . . . . . . . . . . . . . . . . . . . . . . . . . . . . 126
Thumbwheel for seat heating . . . . . . . . . . . . . . . . . . . . . . . . . . . . . . 164
Ashtray . . . . . . . . . . . . . . . . . . . . . . . . . . . . . . . . . . . . . . . . . . . . . . . . . . . 147
Manual gear lever
Cigarette lighter / Power socket . . . . . . . . . . . . . . . . . . . . . . . . . . . . 147
Auxiliary socket
Tyre pressure monitoring . . . . . . . . . . . . . . . . . . . . . . . . . . . . . . . . . . 66
Storage compartment
Handbrake . . . . . . . . . . . . . . . . . . . . . . . . . . . . . . . . . . . . . . . . . . . . . . . . 169
Seat memory* . . . . . . . . . . . . . . . . . . . . . . . . . . . . . . . . . . . . . . . . . . . . 137
Bonnet lock release . . . . . . . . . . . . . . . . . . . . . . . . . . . . . . . . . . . . . . . 220
Headlight range control . . . . . . . . . . . . . . . . . . . . . . . . . . . . . . . . . . . 119
– coming home and leaving home: delayed lights off and
anticipated lights on function . . . . . . . . . . . . . . . . . . . . . . . . . . . 117
Lever for cruise control . . . . . . . . . . . . . . . . . . . . . . . . . . . . . . . . . . . . 173
131415
161718192021222324252627282930
31
Safety FirstOperating InstructionsPractical TipsTechnical Specifications
Page 61 of 313
59
Cockpit
Instruments Instrument panel overview
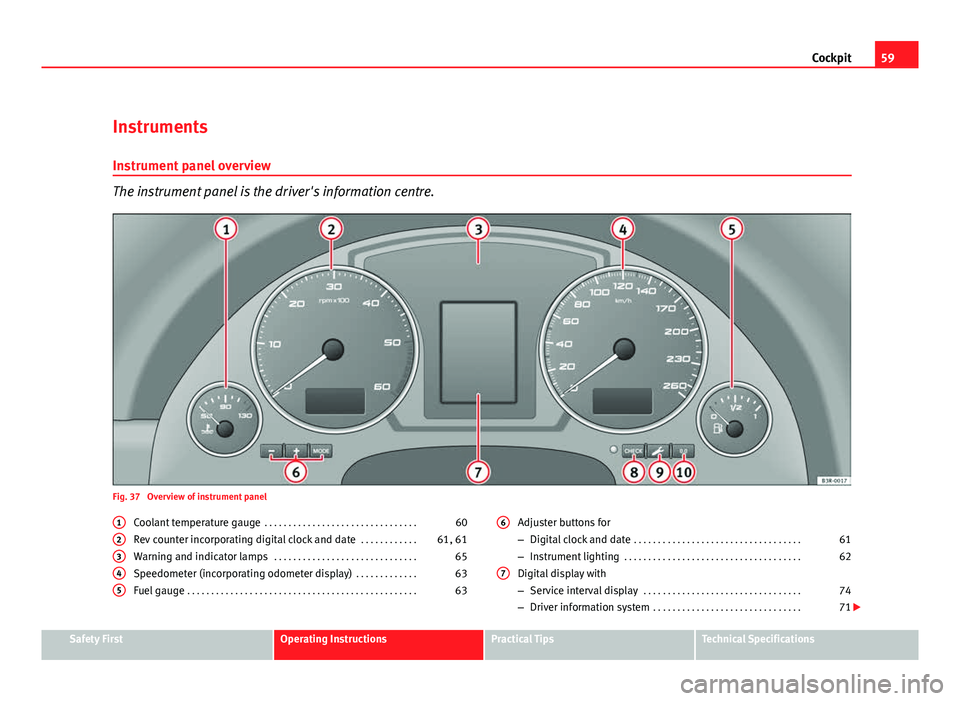
The instrument panel is the driver's information centre.
Fig. 37 Overview of instrument panel Coolant temperature gauge . . . . . . . . . . . . . . . . . . . . . . . . . . . . . . . . 60
Rev counter incorporating digital clock and date . . . . . . . . . . . .61, 61
Warning and indicator lamps . . . . . . . . . . . . . . . . . . . . . . . . . . . . . . 65
Speedometer (incorporating odometer display) . . . . . . . . . . . . .63
Fuel gauge . . . . . . . . . . . . . . . . . . . . . . . . . . . . . . . . . . . . . . . . . . . . . . . . 63
1
2345
Adjuster buttons for
–
Digital clock and date . . . . . . . . . . . . . . . . . . . . . . . . . . . . . . . . . . . 61
– Instrument lighting . . . . . . . . . . . . . . . . . . . . . . . . . . . . . . . . . . . . . 62
Digital display with
– Service interval display . . . . . . . . . . . . . . . . . . . . . . . . . . . . . . . . . 74
– Driver information system . . . . . . . . . . . . . . . . . . . . . . . . . . . . . . . 71
6
7
Safety FirstOperating InstructionsPractical TipsTechnical Specifications
Page 62 of 313
60Cockpit
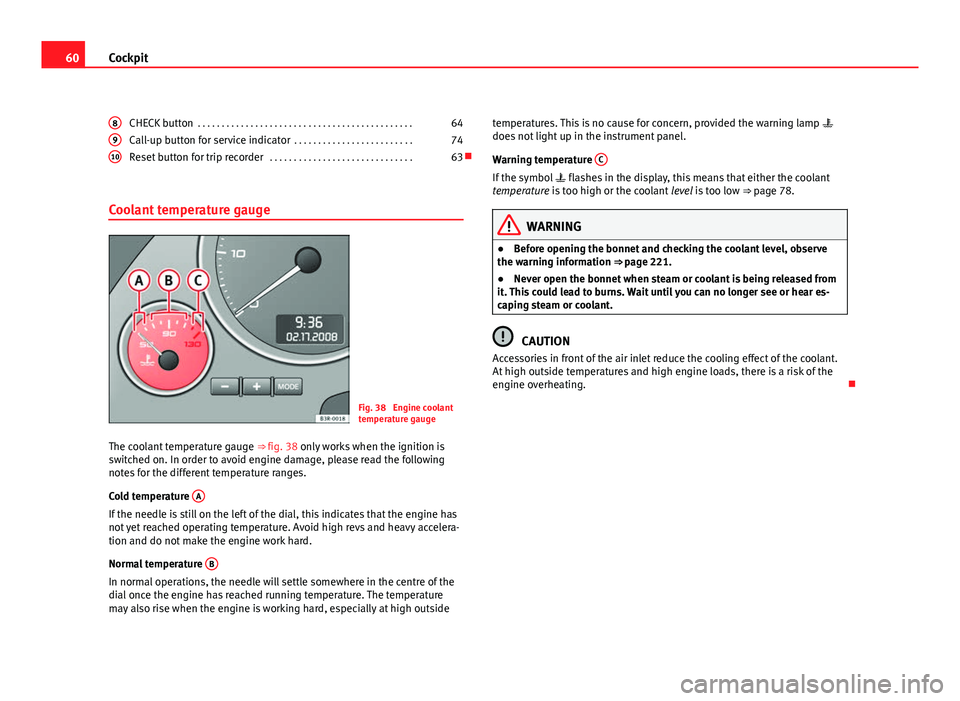
CHECK button . . . . . . . . . . . . . . . . . . . . . . . . . . . . . . . . . . . . . . . . . . . . . 64
Call-up button for service indicator . . . . . . . . . . . . . . . . . . . . . . . . .74
Reset button for trip recorder . . . . . . . . . . . . . . . . . . . . . . . . . . . . . . 63
Coolant temperature gauge
Fig. 38 Engine coolant
temperature gauge
The coolant temperature gauge ⇒ fig. 38 only works when the ignition is
switched on. In order to avoid engine damage, please read the following
notes for the different temperature ranges.
Cold temperature A
If the needle is still on the left of the dial, this indicates that the engine has
not yet reached operating temperature. Avoid high revs and heavy accelera-
tion and do not make the engine work hard.
Normal temperature B
In normal operations, the needle will settle somewhere in the centre of the
dial once the engine has reached running temperature. The temperature
may also rise when the engine is working hard, especially at high outside8
910
temperatures. This is no cause for concern, provided the warning lamp
does not light up in the instrument panel.
Warning temperature C
If the symbol
flashes in the display, this means that either the coolant
temperature is too high or the coolant level is too low ⇒ page 78.
WARNING
● Before opening the bonnet and checking the coolant level, observe
the warning information ⇒ page 221.
● Never open the bonnet when steam or coolant is being released from
it. This could lead to burns. Wait until you can no longer see or hear es-
caping steam or coolant.
CAUTION
Accessories in front of the air inlet reduce the cooling effect of the coolant.
At high outside temperatures and high engine loads, there is a risk of the
engine overheating.
Page 66 of 313
64Cockpit
CHECK button
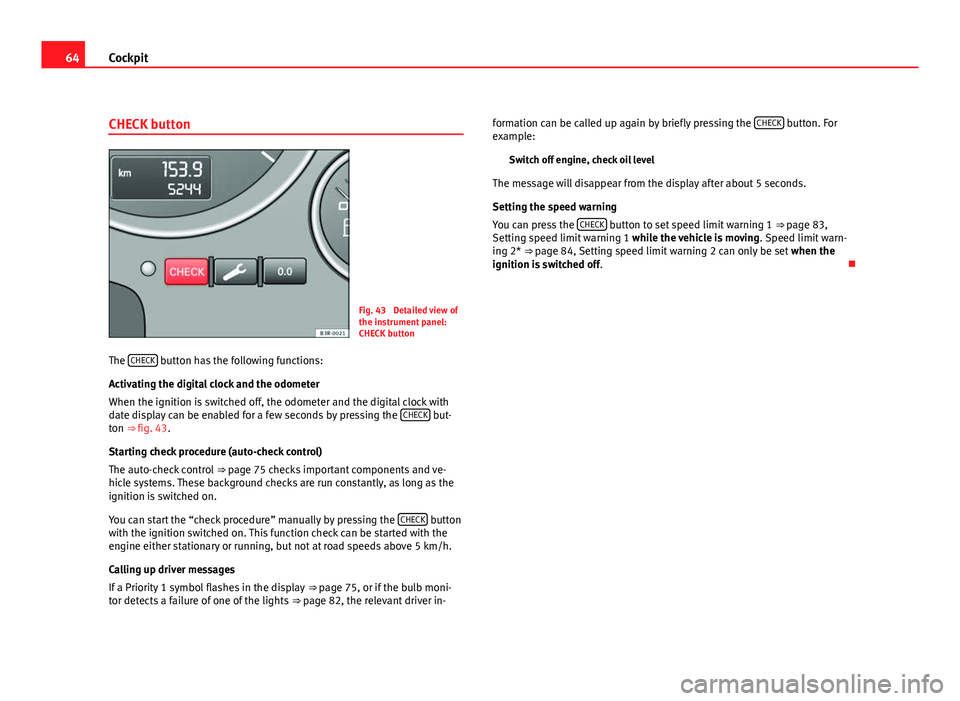
Fig. 43 Detailed view of
the instrument panel:
CHECK button
The CHECK
button has the following functions:
Activating the digital clock and the odometer
When the ignition is switched off, the odometer and the digital clock with
date display can be enabled for a few seconds by pressing the CHECK
but-
ton ⇒ fig. 43.
Starting check procedure (auto-check control)
The auto-check control ⇒ page 75 checks important components and ve-
hicle systems. These background checks are run constantly, as long as the
ignition is switched on.
You can start the “check procedure” manually by pressing the CHECK
button
with the ignition switched on. This function check can be started with the
engine either stationary or running, but not at road speeds above 5 km/h.
Calling up driver messages
If a Priority 1 symbol flashes in the display ⇒ page 75, or if the bulb moni-
tor detects a failure of one of the lights ⇒ page 82, the relevant driver in- formation can be called up again by briefly pressing the
CHECK
button. For
example:
Switch off engine, check oil level
The message will disappear from the display after about 5 seconds.
Setting the speed warning
You can press the CHECK
button to set speed limit warning 1
⇒ page 83,
Setting speed limit warning 1 while the vehicle is moving . Speed limit warn-
ing 2* ⇒ page 84, Setting speed limit warning 2 can only be set when the
ignition is switched off .
Page 67 of 313
65
Cockpit
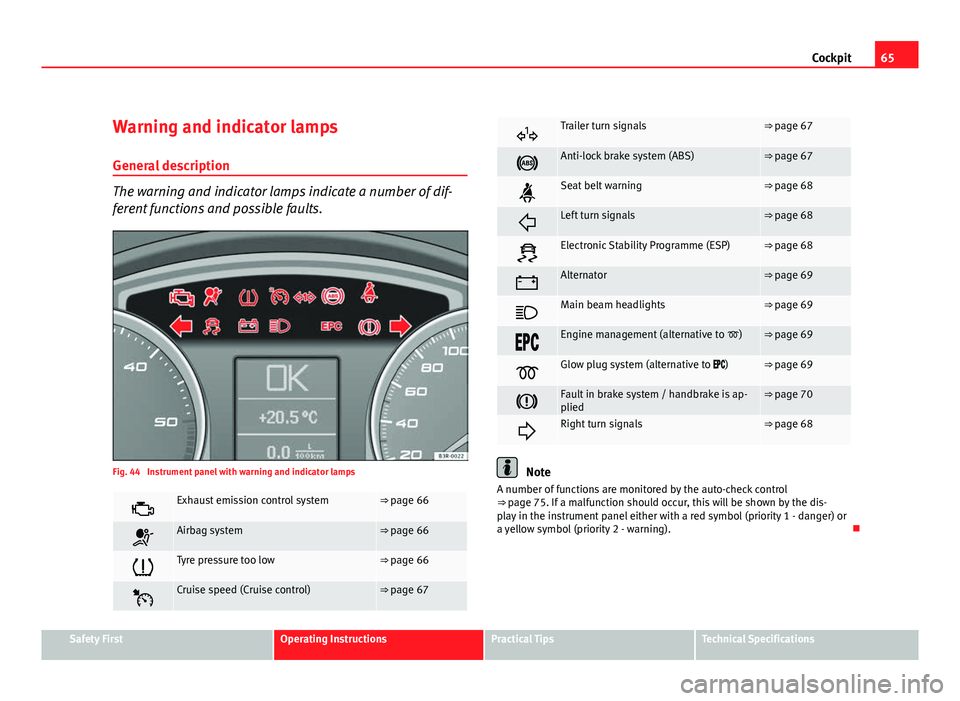
Warning and indicator lamps General description
The warning and indicator lamps indicate a number of dif-
ferent functions and possible faults.
Fig. 44 Instrument panel with warning and indicator lamps
Exhaust emission control system⇒ page 66
Airbag system⇒ page 66
Tyre pressure too low⇒ page 66
Cruise speed (Cruise control)⇒ page 67
Trailer turn signals⇒ page 67
Anti-lock brake system (ABS)⇒ page 67
Seat belt warning⇒ page 68
Left turn signals⇒ page 68
Electronic Stability Programme (ESP)⇒ page 68
Alternator⇒ page 69
Main beam headlights⇒ page 69
Engine management (alternative to )⇒ page 69
Glow plug system (alternative to )⇒ page 69
Fault in brake system / handbrake is ap-
plied⇒ page 70
Right turn signals⇒ page 68
Note
A number of functions are monitored by the auto-check control
⇒ page 75. If a malfunction should occur, this will be shown by the dis-
play in the instrument panel either with a red symbol (priority 1 - danger) or
a yellow symbol (priority 2 - warning).
Safety FirstOperating InstructionsPractical TipsTechnical Specifications
Page 68 of 313

66Cockpit
Exhaust emission control system
If the warning lamp lights up continuously you should take your vehicle to a
specialised workshop as soon as possible in order to have the fault re-
paired.
If the warning lamp flashes drive on at reduced speed and seek professio-
nal help in order to avoid damage to the catalytic converter.
For further information on the catalytic converter, see ⇒ page 192.
Airbag system
This warning lamp monitors the airbag and belt tension de-
vice system.
The warning lamp should light up for a few seconds when the ignition is
switched on.
If the warning lamp does not go out, or if it lights up, flashes or flickers
when the vehicle is moving, this indicates a malfunction in the system.
WARNING
If a malfunction should occur, have the system checked immediately by a
qualified workshop. Otherwise there is a risk that the airbag system and/
or belt tensioners may not be triggered in an accident.
Tyre pressure warning lamp*
The tyre pressure should be corrected as soon as possible if
it is too low.
Fig. 45 Display: system
fault
Fig. 46 Display: warning
message
Page 69 of 313
67
Cockpit
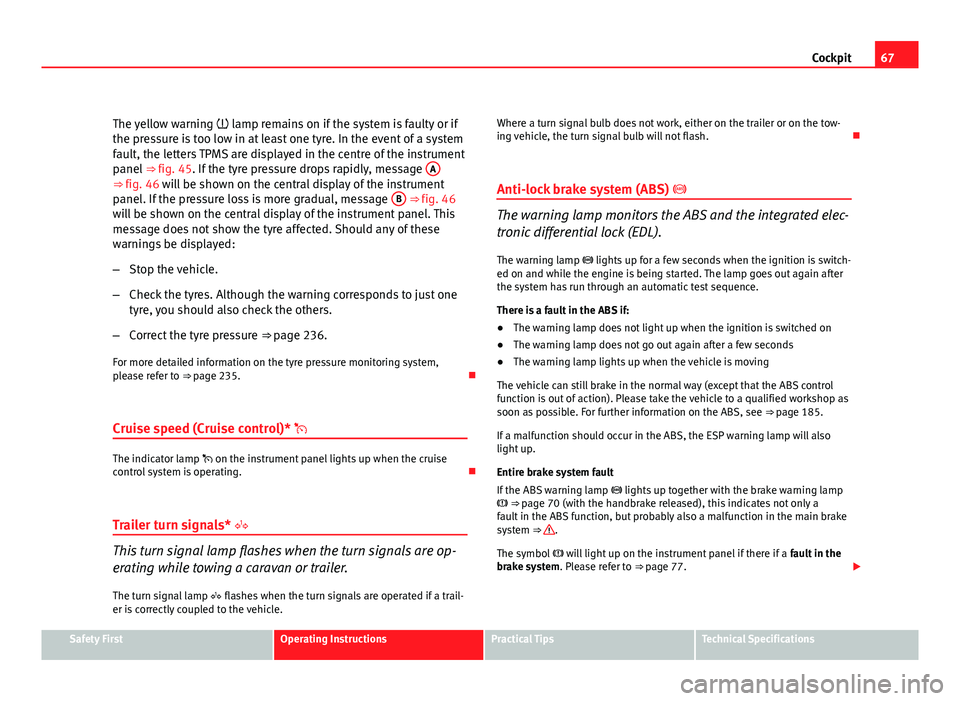
The yellow warning lamp remains on if the system is faulty or if
the pressure is too low in at least one tyre. In the event of a system
fault, the letters TPMS are displayed in the centre of the instrument
panel ⇒ fig. 45. If the tyre pressure drops rapidly, message A
⇒ fig. 46 will be shown on the central display of the instrument
panel. If the pressure loss is more gradual, message B ⇒ fig. 46
will be shown on the central display of the instrument panel. This
message does not show the tyre affected. Should any of these
warnings be displayed:
– Stop the vehicle.
– Check the tyres. Although the warning corresponds to just one
tyre, you should also check the others.
– Correct the tyre pressure ⇒ page 236.
For more detailed information on the tyre pressure monitoring system,
please refer to ⇒ page 235.
Cruise speed (Cruise control)*
The indicator lamp on the instrument panel lights up when the cruise
control system is operating.
Trailer turn signals*
This turn signal lamp flashes when the turn signals are op-
erating while towing a caravan or trailer. The turn signal lamp flashes when the turn signals are operated if a trail-
er is correctly coupled to the vehicle. Where a turn signal bulb does not work, either on the trailer or on the tow-
ing vehicle, the turn signal bulb will not flash.
Anti-lock brake system (ABS)
The warning lamp monitors the ABS and the integrated elec-
tronic differential lock (EDL).
The warning lamp lights up for a few seconds when the ignition is switch-
ed on and while the engine is being started. The lamp goes out again after
the system has run through an automatic test sequence.
There is a fault in the ABS if:
● The warning lamp does not light up when the ignition is switched on
● The warning lamp does not go out again after a few seconds
● The warning lamp lights up when the vehicle is moving
The vehicle can still brake in the normal way (except that the ABS control
function is out of action). Please take the vehicle to a qualified workshop as
soon as possible. For further information on the ABS, see ⇒ page 185.
If a malfunction should occur in the ABS, the ESP warning lamp will also
light up.
Entire brake system fault
If the ABS warning lamp lights up together with the brake warning lamp
⇒ page 70 (with the handbrake released), this indicates not only a
fault in the ABS function, but probably also a malfunction in the main brake
system ⇒
.
The symbol will light up on the instrument panel if there if a fault in the
brake system. Please refer to ⇒ page 77.
Safety FirstOperating InstructionsPractical TipsTechnical Specifications
Page 70 of 313
68Cockpit
Electronic differential lock (EDL) fault
The EDL works in conjunction with the ABS. The ABS indicator lamp will light
up to indicate an EDL fault. Please take the vehicle to a qualified work-
shop as soon as possible. For further information on the EDL, see
⇒ page 186.
WARNING
● Before opening the bonnet and checking the brake fluid level, ob-
serve the warning information in ⇒ page 221, Work in the engine com-
partment.
● If the brake warning lamp should light up together with the ABS
warning lamp , stop the vehicle immediately and check the brake fluid
level in the reservoir. If the fluid level has dropped below the "MIN" mark
you must not drive on, as there is a risk of accident. Obtain technical as-
sistance.
● If the brake fluid level is correct, the fault in the brake system may
have been caused by a fault in the ABS control function. As a result, the
rear wheels can lock relatively easily when braking. Under certain cir-
cumstances, the rear of the vehicle could suddenly sway from side to
side, with the subsequent danger of skidding. Drive carefully to the near-
est specialised workshop and have the fault repaired.
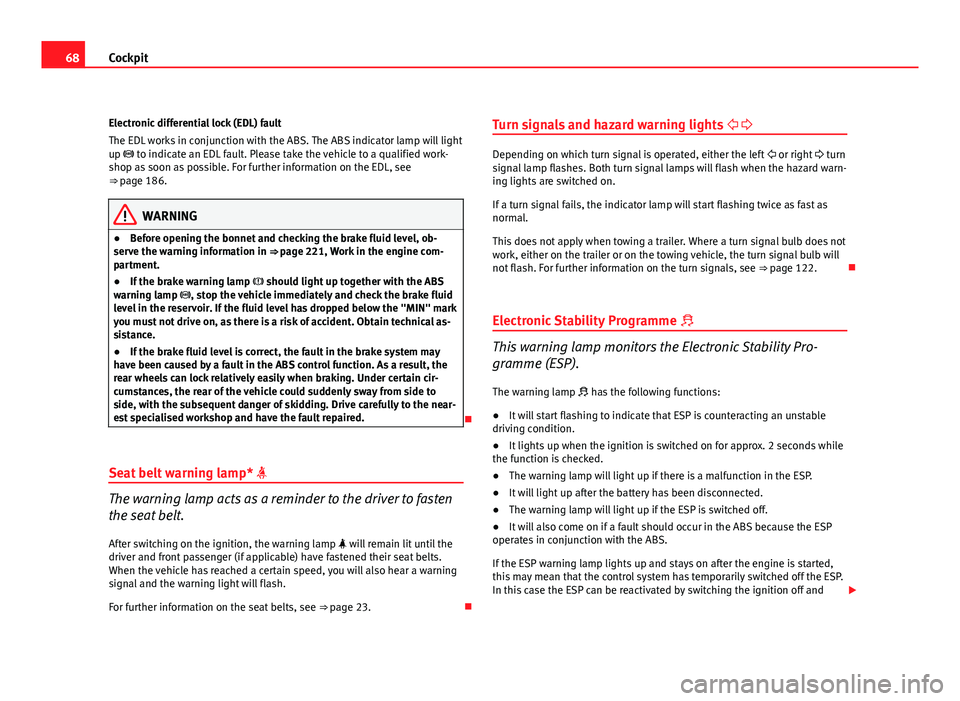
Seat belt warning lamp*
The warning lamp acts as a reminder to the driver to fasten
the seat belt. After switching on the ignition, the warning lamp will remain lit until the
driver and front passenger (if applicable) have fastened their seat belts.
When the vehicle has reached a certain speed, you will also hear a warning
signal and the warning light will flash.
For further information on the seat belts, see ⇒ page 23.Turn signals and hazard warning lights
Depending on which turn signal is operated, either the left or right turn
signal lamp flashes. Both turn signal lamps will flash when the hazard warn-
ing lights are switched on.
If a turn signal fails, the indicator lamp will start flashing twice as fast as
normal.
This does not apply when towing a trailer. Where a turn signal bulb does not
work, either on the trailer or on the towing vehicle, the turn signal bulb will
not flash. For further information on the turn signals, see ⇒ page 122.
Electronic Stability Programme
This warning lamp monitors the Electronic Stability Pro-
gramme (ESP).
The warning lamp has the following functions:
● It will start flashing to indicate that ESP is counteracting an unstable
driving condition.
● It lights up when the ignition is switched on for approx. 2 seconds while
the function is checked.
● The warning lamp will light up if there is a malfunction in the ESP.
● It will light up after the battery has been disconnected.
● The warning lamp will light up if the ESP is switched off.
● It will also come on if a fault should occur in the ABS because the ESP
operates in conjunction with the ABS.
If the ESP warning lamp lights up and stays on after the engine is started,
this may mean that the control system has temporarily switched off the ESP.
In this case the ESP can be reactivated by switching the ignition off and
Page 71 of 313
69
Cockpit
then on again. After this the warning lamp should go out to show that the
system is fully functional.
The warning lamp will light up when the ignition is switched on if the bat-
tery has been disconnected and then reconnected. It should go out again
after driving a short distance if the steering wheel is turned slightly.
For further information on the ESP, see ⇒ page 186.
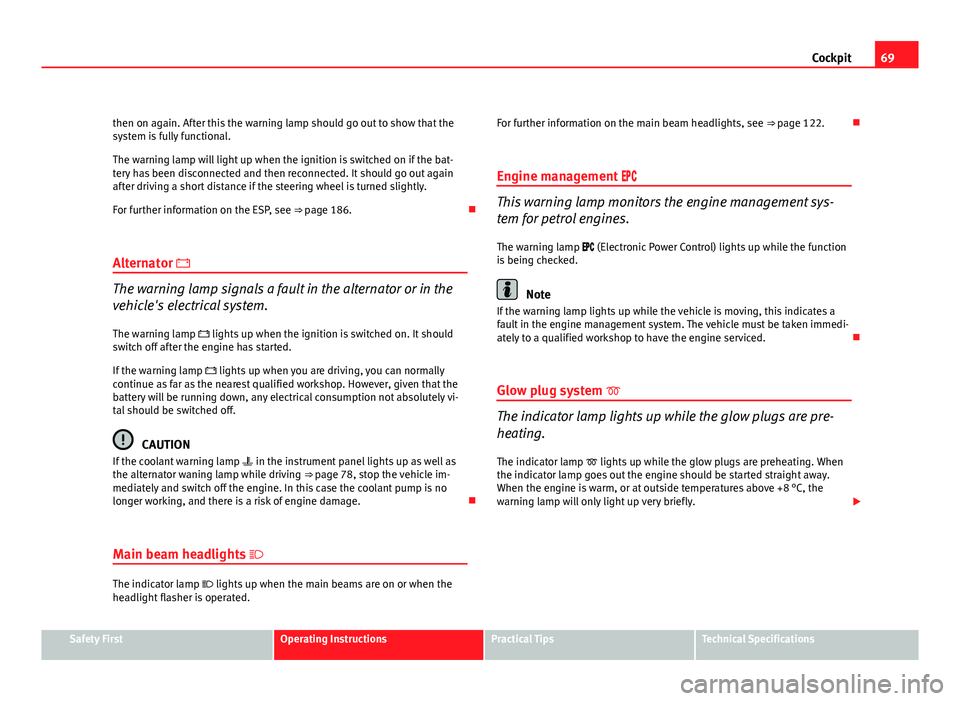
Alternator
The warning lamp signals a fault in the alternator or in the
vehicle's electrical system.
The warning lamp lights up when the ignition is switched on. It should switch off after the engine has started.
If the warning lamp lights up when you are driving, you can normally
continue as far as the nearest qualified workshop. However, given that the
battery will be running down, any electrical consumption not absolutely vi-
tal should be switched off.
CAUTION
If the coolant warning lamp in the instrument panel lights up as well as
the alternator waning lamp while driving ⇒ page 78, stop the vehicle im-
mediately and switch off the engine. In this case the coolant pump is no
longer working, and there is a risk of engine damage.
Main beam headlights
The indicator lamp
lights up when the main beams are on or when the
headlight flasher is operated. For further information on the main beam headlights, see ⇒
page 122.
Engine management
This warning lamp monitors the engine management sys-
tem for petrol engines.
The warning lamp (Electronic Power Control) lights up while the function
is being checked.
Note
If the warning lamp lights up while the vehicle is moving, this indicates a
fault in the engine management system. The vehicle must be taken immedi-
ately to a qualified workshop to have the engine serviced.
Glow plug system
The indicator lamp lights up while the glow plugs are pre-
heating.
The indicator lamp lights up while the glow plugs are preheating. When
the indicator lamp goes out the engine should be started straight away.
When the engine is warm, or at outside temperatures above +8 °C, the
warning lamp will only light up very briefly.
Safety FirstOperating InstructionsPractical TipsTechnical Specifications