turn signal Seat Exeo 2011 Owner's manual
[x] Cancel search | Manufacturer: SEAT, Model Year: 2011, Model line: Exeo, Model: Seat Exeo 2011Pages: 313, PDF Size: 5.02 MB
Page 6 of 313
Trailer towing . . . . . . . . . . . . . . . . . . . . . . . . . . . . . . 196
Trailer towing . . . . . . . . . . . . . . . . . . . . . . . . . . . . . 196
Removable towing bracket . . . . . . . . . . . . . . . . . . 199
Vehicle maintenance and cleaning . . . . . . . . . 206
General notes . . . . . . . . . . . . . . . . . . . . . . . . . . . . 206
Care of the vehicle exterior . . . . . . . . . . . . . . . . . . 207
Vehicle interior maintenance . . . . . . . . . . . . . . . . 212
Accessories, parts replacement and
modifications . . . . . . . . . . . . . . . . . . . . . . . . . . . . . 215
Accessories and spare parts . . . . . . . . . . . . . . . . 215
Technical modifications . . . . . . . . . . . . . . . . . . . . 215
Mobile phones and two-way radios . . . . . . . . . . . 216
Athermic windscreen* . . . . . . . . . . . . . . . . . . . . . 216
Checking and refilling levels . . . . . . . . . . . . . . . 217
Refuelling . . . . . . . . . . . . . . . . . . . . . . . . . . . . . . . 217
Petrol . . . . . . . . . . . . . . . . . . . . . . . . . . . . . . . . . . . 218
Diesel . . . . . . . . . . . . . . . . . . . . . . . . . . . . . . . . . . . 219
Bonnet . . . . . . . . . . . . . . . . . . . . . . . . . . . . . . . . . . 220
Engine oil . . . . . . . . . . . . . . . . . . . . . . . . . . . . . . . . 222
Cooling system . . . . . . . . . . . . . . . . . . . . . . . . . . . 225
Washer fluid and windscreen wiper blades . . . . 228
Brake fluid . . . . . . . . . . . . . . . . . . . . . . . . . . . . . . . 230
Vehicle battery . . . . . . . . . . . . . . . . . . . . . . . . . . . 231
Wheels and tyres . . . . . . . . . . . . . . . . . . . . . . . . . . 235
Wheels . . . . . . . . . . . . . . . . . . . . . . . . . . . . . . . . . . 235
If and when . . . . . . . . . . . . . . . . . . . . . . . . . . . . . . . 245
Tools, tyre repair kit and spare wheel . . . . . . . . . 245
Changing a wheel . . . . . . . . . . . . . . . . . . . . . . . . . 247
Tyre repair* (Tyre-Mobility-System) . . . . . . . . . . . 252
Fuses . . . . . . . . . . . . . . . . . . . . . . . . . . . . . . . . . . . 256
Bulbs . . . . . . . . . . . . . . . . . . . . . . . . . . . . . . . . . . . 258
Changing bulbs. Halogen headlights . . . . . . . . . 259
Changing bulbs. Bi-Xenon AFS headlights . . . . . 265
Changing tail light bulbs (on side panel) . . . . . . 269
Changing tail light bulbs (on tailgate) . . . . . . . . . 274
Side turn signals . . . . . . . . . . . . . . . . . . . . . . . . . . 277 Luggage compartment lights . . . . . . . . . . . . . . . . 278
Registration light . . . . . . . . . . . . . . . . . . . . . . . . . . 279
Sun visor light . . . . . . . . . . . . . . . . . . . . . . . . . . . . 280
Jump-starting . . . . . . . . . . . . . . . . . . . . . . . . . . . . . 280
Towing and tow-starting . . . . . . . . . . . . . . . . . . . . 283
Technical Specifications . . . . . . . . . . . 286
Description of specifications . . . . . . . . . . . . . . . 286
Important information . . . . . . . . . . . . . . . . . . . . . 286
Information on fuel consumption . . . . . . . . . . . . 288
Towing a trailer . . . . . . . . . . . . . . . . . . . . . . . . . . . 288
Wheels . . . . . . . . . . . . . . . . . . . . . . . . . . . . . . . . . . 289
Technical specifications . . . . . . . . . . . . . . . . . . . . 290
Engine specifications . . . . . . . . . . . . . . . . . . . . . . 290
Dimensions and capacities . . . . . . . . . . . . . . . . . 299
Index . . . . . . . . . . . . . . . . . . . . . . . . . . . . . . . . . . . 301
4Table of Contents
Page 38 of 313

36Airbag system
that the airbag system can only help to protect you if you are wearing your
seat belt and wearing it properly.
Remember too that airbags will deploy only once and only in certain kinds
of accidents - your seat belts are always there to offer protection in those
accidents in which airbags are not supposed to deploy or when they have
already deployed, for example when your vehicle strikes or is struck by an-
other after the first collision.
This is just one of the reasons why an airbag is not a substitute for the seat
belt. The airbag system works most effectively when used with the seat
belts. Therefore, always wear your seat belts correctly.
It is important to remember that while the airbag system is designed to re-
duce the possibility of serious injuries, other injuries, for example, swelling,
bruising, and minor abrasions can also be associated with airbags.
The knee airbag system basically consists of:
● The electronic control module
● One inflatable airbag (airbag and gas generator) for the driver
● An airbag indicator light on the instrument panel
The knee airbag system will not be triggered:
● if the ignition is switched off
● in frontal collisions when the deceleration measured by the control unit
is too low
● in side collisions
● in rear-end collisions
● in rollovers
● in the event of a system malfunction (hazard warning lights/turn signals
illuminated) ⇒ page 65.
WARNING
● Seat belts and the airbag system can only provide protection when
occupants are in the proper seating position.
● If the airbag indicator light comes on when the vehicle is being used,
have the system inspected immediately by your Authorised Service Cen-
tre. The airbag may not work properly when the vehicle acceleration in a
side collision is high enough to deploy the airbag. See also ⇒ page 65.
How knee airbags work
The risk of injury to the leg area is reduced by fully deployed
knee airbags.
Fig. 22 Inflated airbags
protect in a frontal colli-
sion.
The knee airbag system has been designed so that the airbag for the driver
is deployed in certain but not all frontal collisions.
If the front airbag deploys, the knee airbag also deploys in severe frontal
collisions.
Page 59 of 313
57
Cockpit
Operating Instructions Cockpit
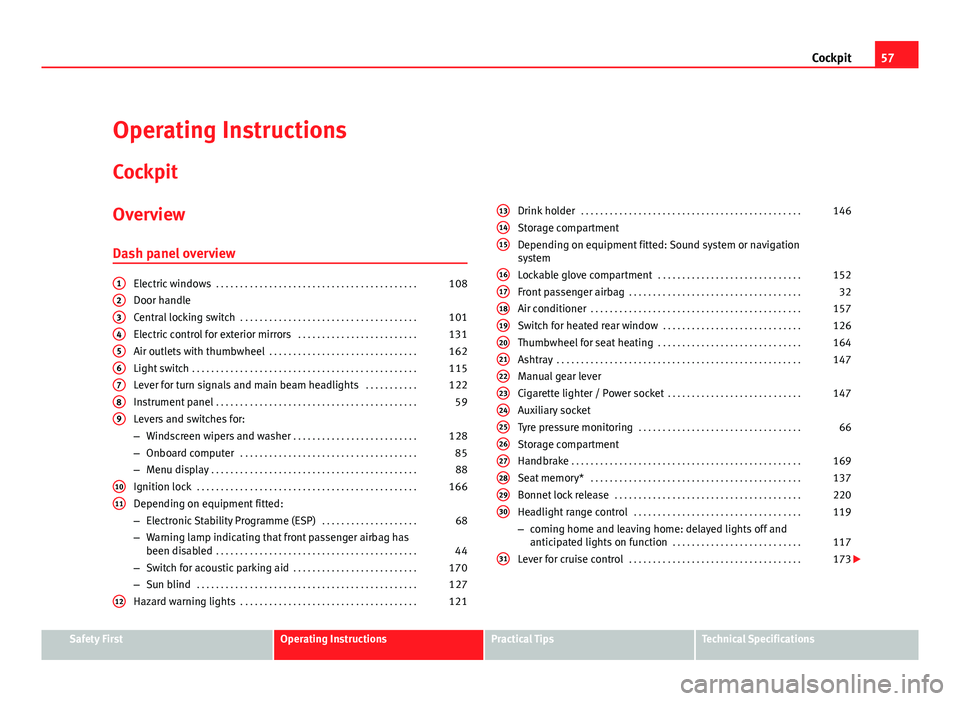
Overview Dash panel overview
Electric windows . . . . . . . . . . . . . . . . . . . . . . . . . . . . . . . . . . . . . . . . . . 108
Door handle
Central locking switch . . . . . . . . . . . . . . . . . . . . . . . . . . . . . . . . . . . . . 101
Electric control for exterior mirrors . . . . . . . . . . . . . . . . . . . . . . . . .131
Air outlets with thumbwheel . . . . . . . . . . . . . . . . . . . . . . . . . . . . . . . 162
Light switch . . . . . . . . . . . . . . . . . . . . . . . . . . . . . . . . . . . . . . . . . . . . . . . 115
Lever for turn signals and main beam headlights . . . . . . . . . . .122
Instrument panel . . . . . . . . . . . . . . . . . . . . . . . . . . . . . . . . . . . . . . . . . . 59
Levers and switches for:
– Windscreen wipers and washer . . . . . . . . . . . . . . . . . . . . . . . . . . 128
– Onboard computer . . . . . . . . . . . . . . . . . . . . . . . . . . . . . . . . . . . . . 85
– Menu display . . . . . . . . . . . . . . . . . . . . . . . . . . . . . . . . . . . . . . . . . . . 88
Ignition lock . . . . . . . . . . . . . . . . . . . . . . . . . . . . . . . . . . . . . . . . . . . . . . 166
Depending on equipment fitted:
– Electronic Stability Programme (ESP) . . . . . . . . . . . . . . . . . . . .68
– Warning lamp indicating that front passenger airbag has
been disabled . . . . . . . . . . . . . . . . . . . . . . . . . . . . . . . . . . . . . . . . . . 44
– Switch for acoustic parking aid . . . . . . . . . . . . . . . . . . . . . . . . . . 170
– Sun blind . . . . . . . . . . . . . . . . . . . . . . . . . . . . . . . . . . . . . . . . . . . . . . 127
Hazard warning lights . . . . . . . . . . . . . . . . . . . . . . . . . . . . . . . . . . . . . 121
123456789
1011
12
Drink holder
. . . . . . . . . . . . . . . . . . . . . . . . . . . . . . . . . . . . . . . . . . . . . . 146
Storage compartment
Depending on equipment fitted: Sound system or navigation
system
Lockable glove compartment . . . . . . . . . . . . . . . . . . . . . . . . . . . . . . 152
Front passenger airbag . . . . . . . . . . . . . . . . . . . . . . . . . . . . . . . . . . . . 32
Air conditioner . . . . . . . . . . . . . . . . . . . . . . . . . . . . . . . . . . . . . . . . . . . . 157
Switch for heated rear window . . . . . . . . . . . . . . . . . . . . . . . . . . . . . 126
Thumbwheel for seat heating . . . . . . . . . . . . . . . . . . . . . . . . . . . . . . 164
Ashtray . . . . . . . . . . . . . . . . . . . . . . . . . . . . . . . . . . . . . . . . . . . . . . . . . . . 147
Manual gear lever
Cigarette lighter / Power socket . . . . . . . . . . . . . . . . . . . . . . . . . . . . 147
Auxiliary socket
Tyre pressure monitoring . . . . . . . . . . . . . . . . . . . . . . . . . . . . . . . . . . 66
Storage compartment
Handbrake . . . . . . . . . . . . . . . . . . . . . . . . . . . . . . . . . . . . . . . . . . . . . . . . 169
Seat memory* . . . . . . . . . . . . . . . . . . . . . . . . . . . . . . . . . . . . . . . . . . . . 137
Bonnet lock release . . . . . . . . . . . . . . . . . . . . . . . . . . . . . . . . . . . . . . . 220
Headlight range control . . . . . . . . . . . . . . . . . . . . . . . . . . . . . . . . . . . 119
– coming home and leaving home: delayed lights off and
anticipated lights on function . . . . . . . . . . . . . . . . . . . . . . . . . . . 117
Lever for cruise control . . . . . . . . . . . . . . . . . . . . . . . . . . . . . . . . . . . . 173
131415
161718192021222324252627282930
31
Safety FirstOperating InstructionsPractical TipsTechnical Specifications
Page 67 of 313
65
Cockpit
Warning and indicator lamps General description
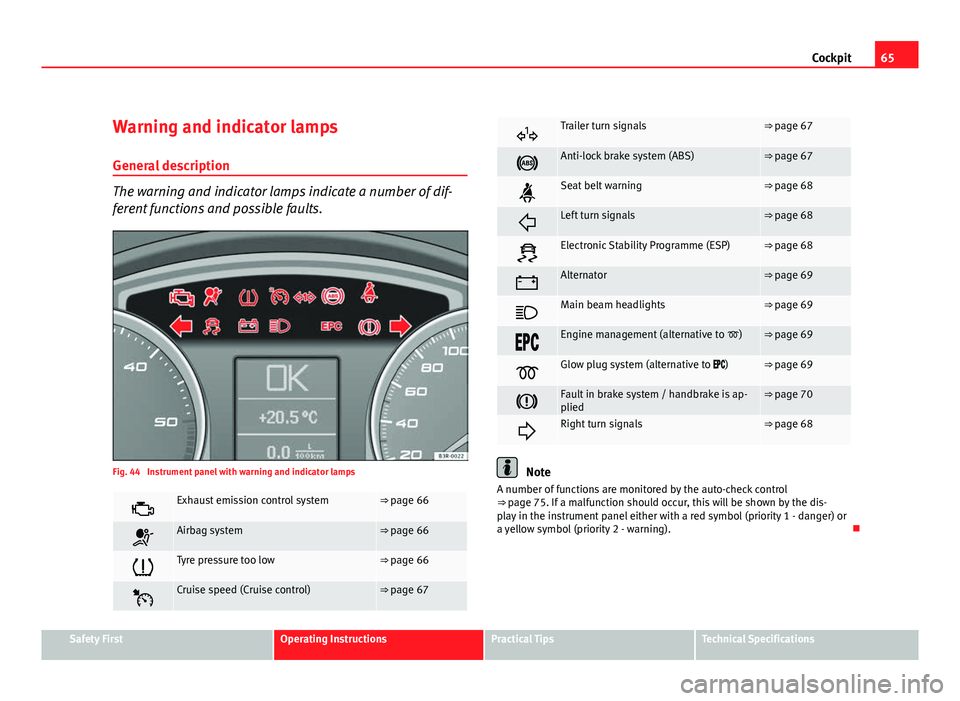
The warning and indicator lamps indicate a number of dif-
ferent functions and possible faults.
Fig. 44 Instrument panel with warning and indicator lamps
Exhaust emission control system⇒ page 66
Airbag system⇒ page 66
Tyre pressure too low⇒ page 66
Cruise speed (Cruise control)⇒ page 67
Trailer turn signals⇒ page 67
Anti-lock brake system (ABS)⇒ page 67
Seat belt warning⇒ page 68
Left turn signals⇒ page 68
Electronic Stability Programme (ESP)⇒ page 68
Alternator⇒ page 69
Main beam headlights⇒ page 69
Engine management (alternative to )⇒ page 69
Glow plug system (alternative to )⇒ page 69
Fault in brake system / handbrake is ap-
plied⇒ page 70
Right turn signals⇒ page 68
Note
A number of functions are monitored by the auto-check control
⇒ page 75. If a malfunction should occur, this will be shown by the dis-
play in the instrument panel either with a red symbol (priority 1 - danger) or
a yellow symbol (priority 2 - warning).
Safety FirstOperating InstructionsPractical TipsTechnical Specifications
Page 69 of 313
67
Cockpit
The yellow warning lamp remains on if the system is faulty or if
the pressure is too low in at least one tyre. In the event of a system
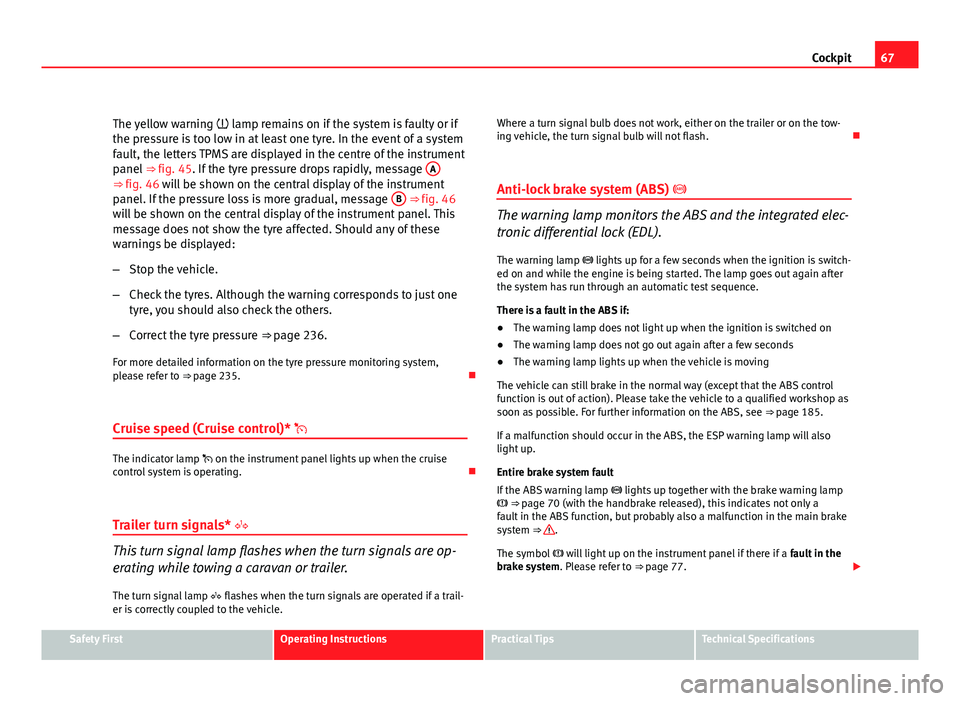
fault, the letters TPMS are displayed in the centre of the instrument
panel ⇒ fig. 45. If the tyre pressure drops rapidly, message A
⇒ fig. 46 will be shown on the central display of the instrument
panel. If the pressure loss is more gradual, message B ⇒ fig. 46
will be shown on the central display of the instrument panel. This
message does not show the tyre affected. Should any of these
warnings be displayed:
– Stop the vehicle.
– Check the tyres. Although the warning corresponds to just one
tyre, you should also check the others.
– Correct the tyre pressure ⇒ page 236.
For more detailed information on the tyre pressure monitoring system,
please refer to ⇒ page 235.
Cruise speed (Cruise control)*
The indicator lamp on the instrument panel lights up when the cruise
control system is operating.
Trailer turn signals*
This turn signal lamp flashes when the turn signals are op-
erating while towing a caravan or trailer. The turn signal lamp flashes when the turn signals are operated if a trail-
er is correctly coupled to the vehicle. Where a turn signal bulb does not work, either on the trailer or on the tow-
ing vehicle, the turn signal bulb will not flash.
Anti-lock brake system (ABS)
The warning lamp monitors the ABS and the integrated elec-
tronic differential lock (EDL).
The warning lamp lights up for a few seconds when the ignition is switch-
ed on and while the engine is being started. The lamp goes out again after
the system has run through an automatic test sequence.
There is a fault in the ABS if:
● The warning lamp does not light up when the ignition is switched on
● The warning lamp does not go out again after a few seconds
● The warning lamp lights up when the vehicle is moving
The vehicle can still brake in the normal way (except that the ABS control
function is out of action). Please take the vehicle to a qualified workshop as
soon as possible. For further information on the ABS, see ⇒ page 185.
If a malfunction should occur in the ABS, the ESP warning lamp will also
light up.
Entire brake system fault
If the ABS warning lamp lights up together with the brake warning lamp
⇒ page 70 (with the handbrake released), this indicates not only a
fault in the ABS function, but probably also a malfunction in the main brake
system ⇒
.
The symbol will light up on the instrument panel if there if a fault in the
brake system. Please refer to ⇒ page 77.
Safety FirstOperating InstructionsPractical TipsTechnical Specifications
Page 70 of 313
68Cockpit
Electronic differential lock (EDL) fault
The EDL works in conjunction with the ABS. The ABS indicator lamp will light
up to indicate an EDL fault. Please take the vehicle to a qualified work-
shop as soon as possible. For further information on the EDL, see
⇒ page 186.
WARNING
● Before opening the bonnet and checking the brake fluid level, ob-
serve the warning information in ⇒ page 221, Work in the engine com-
partment.
● If the brake warning lamp should light up together with the ABS
warning lamp , stop the vehicle immediately and check the brake fluid
level in the reservoir. If the fluid level has dropped below the "MIN" mark
you must not drive on, as there is a risk of accident. Obtain technical as-
sistance.
● If the brake fluid level is correct, the fault in the brake system may
have been caused by a fault in the ABS control function. As a result, the
rear wheels can lock relatively easily when braking. Under certain cir-
cumstances, the rear of the vehicle could suddenly sway from side to
side, with the subsequent danger of skidding. Drive carefully to the near-
est specialised workshop and have the fault repaired.
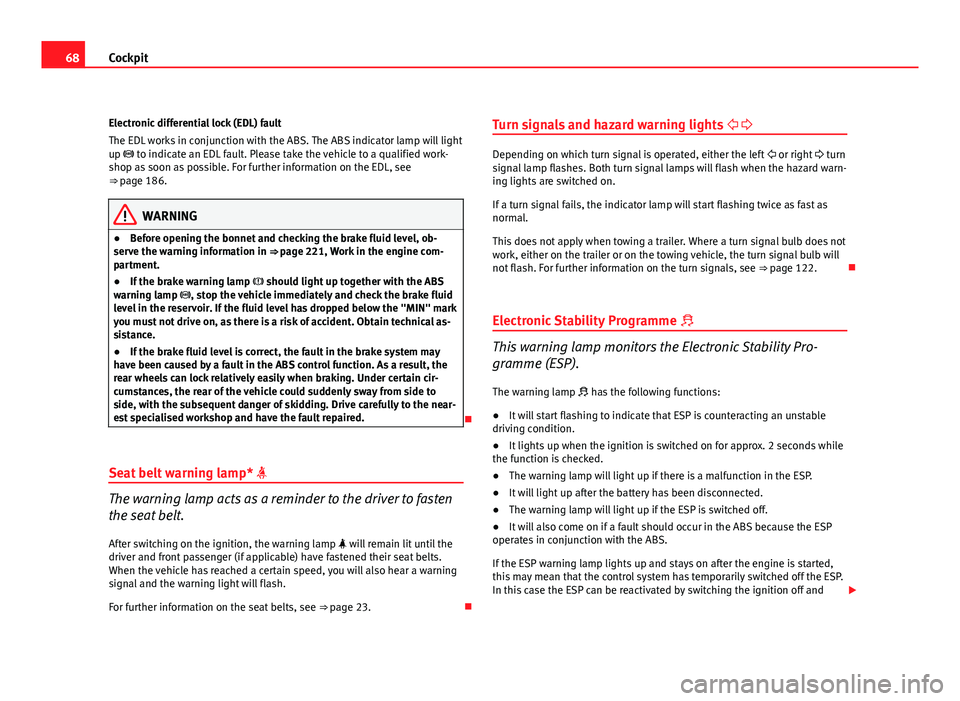
Seat belt warning lamp*
The warning lamp acts as a reminder to the driver to fasten
the seat belt. After switching on the ignition, the warning lamp will remain lit until the
driver and front passenger (if applicable) have fastened their seat belts.
When the vehicle has reached a certain speed, you will also hear a warning
signal and the warning light will flash.
For further information on the seat belts, see ⇒ page 23.Turn signals and hazard warning lights
Depending on which turn signal is operated, either the left or right turn
signal lamp flashes. Both turn signal lamps will flash when the hazard warn-
ing lights are switched on.
If a turn signal fails, the indicator lamp will start flashing twice as fast as
normal.
This does not apply when towing a trailer. Where a turn signal bulb does not
work, either on the trailer or on the towing vehicle, the turn signal bulb will
not flash. For further information on the turn signals, see ⇒ page 122.
Electronic Stability Programme
This warning lamp monitors the Electronic Stability Pro-
gramme (ESP).
The warning lamp has the following functions:
● It will start flashing to indicate that ESP is counteracting an unstable
driving condition.
● It lights up when the ignition is switched on for approx. 2 seconds while
the function is checked.
● The warning lamp will light up if there is a malfunction in the ESP.
● It will light up after the battery has been disconnected.
● The warning lamp will light up if the ESP is switched off.
● It will also come on if a fault should occur in the ABS because the ESP
operates in conjunction with the ABS.
If the ESP warning lamp lights up and stays on after the engine is started,
this may mean that the control system has temporarily switched off the ESP.
In this case the ESP can be reactivated by switching the ignition off and
Page 71 of 313
69
Cockpit
then on again. After this the warning lamp should go out to show that the
system is fully functional.
The warning lamp will light up when the ignition is switched on if the bat-
tery has been disconnected and then reconnected. It should go out again
after driving a short distance if the steering wheel is turned slightly.
For further information on the ESP, see ⇒ page 186.
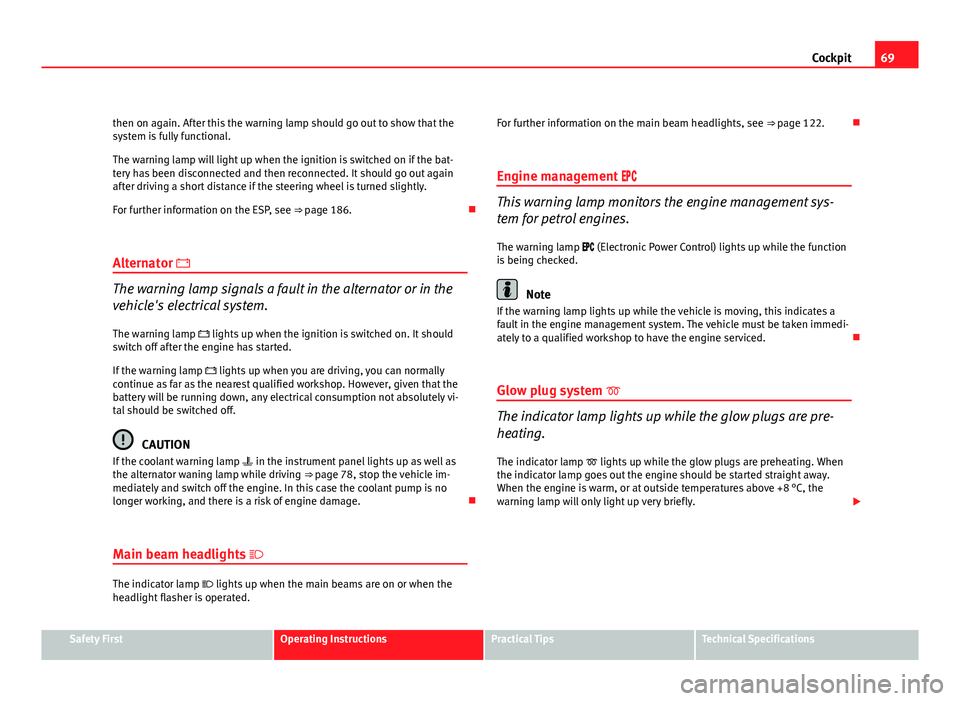
Alternator
The warning lamp signals a fault in the alternator or in the
vehicle's electrical system.
The warning lamp lights up when the ignition is switched on. It should switch off after the engine has started.
If the warning lamp lights up when you are driving, you can normally
continue as far as the nearest qualified workshop. However, given that the
battery will be running down, any electrical consumption not absolutely vi-
tal should be switched off.
CAUTION
If the coolant warning lamp in the instrument panel lights up as well as
the alternator waning lamp while driving ⇒ page 78, stop the vehicle im-
mediately and switch off the engine. In this case the coolant pump is no
longer working, and there is a risk of engine damage.
Main beam headlights
The indicator lamp
lights up when the main beams are on or when the
headlight flasher is operated. For further information on the main beam headlights, see ⇒
page 122.
Engine management
This warning lamp monitors the engine management sys-
tem for petrol engines.
The warning lamp (Electronic Power Control) lights up while the function
is being checked.
Note
If the warning lamp lights up while the vehicle is moving, this indicates a
fault in the engine management system. The vehicle must be taken immedi-
ately to a qualified workshop to have the engine serviced.
Glow plug system
The indicator lamp lights up while the glow plugs are pre-
heating.
The indicator lamp lights up while the glow plugs are preheating. When
the indicator lamp goes out the engine should be started straight away.
When the engine is warm, or at outside temperatures above +8 °C, the
warning lamp will only light up very briefly.
Safety FirstOperating InstructionsPractical TipsTechnical Specifications
Page 84 of 313

82Cockpit
Bulb monitor
The bulb monitor checks whether the lights on the vehicle
are working.
If a defective bulb is detected, or if one of the lights has failed for any rea-
son, the bulb monitor symbol will appear in the display together with an
additional message (which goes out after 5 seconds). For instance, if the
rear left turn signal is not working, the display in the instrument panel will
show the following message:
Left rear turn signal
The message disappears after 5 seconds. Press the CHECK button briefly if
you wish to call up the message again.
If the display indicates that one of the lights is not working, this can have a
number of causes:
● Bulb failure ⇒ page 258.
● A “blown” fuse ⇒ page 256, Changing fuses.
● Faulty electrical wiring.
It is not necessary to have lamps replaced in a specialised workshop, how-
ever the use of Xenon lamps is recommended.
LED lamps
If any of the LED (Light Emitting Diode) functions fail, the complete lamp
should be replaced.
The failure of the lamp is only shown when the LED function goes out com-
pletely. Sometimes, a LED will stop working, without displaying the warning
as the function continues to operate.WARNING
● Bulbs are highly sensitive to pressure. The glass can break when you
touch the bulb, causing injury.
● The high voltage element of gas discharge bulbs* (xenon light) must
be handled correctly. Otherwise, there is a risk of death.
Speed warning* Introduction
The speed warning function can help prevent you exceeding
a particular pre-set maximum speed.
Fig. 56 Display: Speed
warning function
The speed warning function will warn the driver if a pre-set maximum speed
is exceeded. The system gives an warning buzzer signal if the set speed is
Page 106 of 313
104Unlocking and locking
Childproof lock
Childproof locks on rear doors
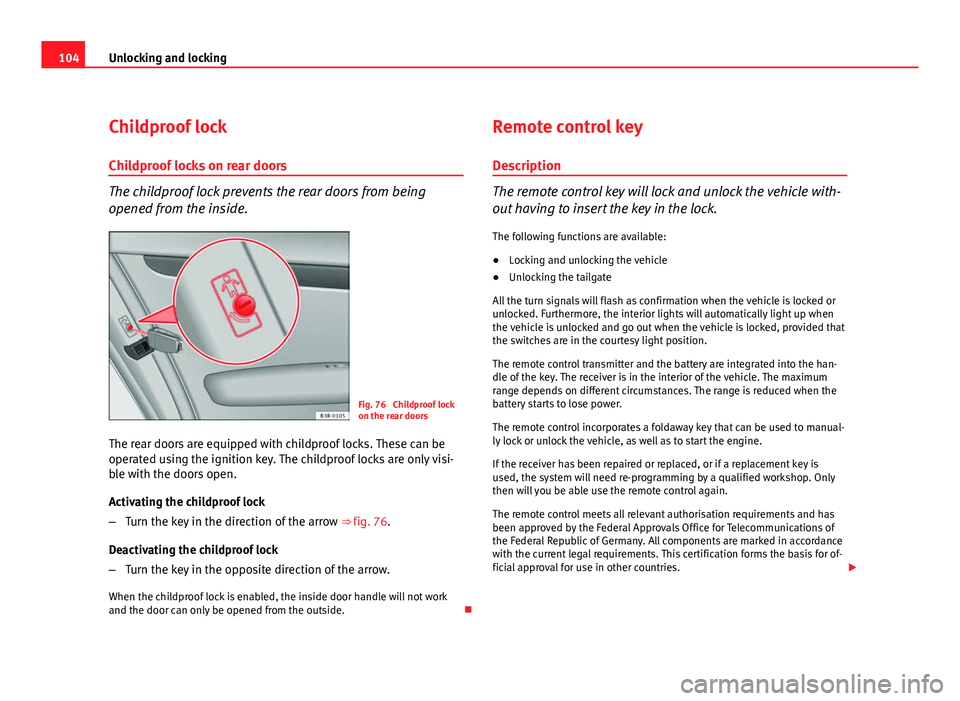
The childproof lock prevents the rear doors from being
opened from the inside.
Fig. 76 Childproof lock
on the rear doors
The rear doors are equipped with childproof locks. These can be
operated using the ignition key. The childproof locks are only visi-
ble with the doors open.
Activating the childproof lock
– Turn the key in the direction of the arrow ⇒ fig. 76.
Deactivating the childproof lock
– Turn the key in the opposite direction of the arrow.
When the childproof lock is enabled, the inside door handle will not work
and the door can only be opened from the outside. Remote control key
Description
The remote control key will lock and unlock the vehicle with-
out having to insert the key in the lock. The following functions are available:
● Locking and unlocking the vehicle
● Unlocking the tailgate
All the turn signals will flash as confirmation when the vehicle is locked or
unlocked. Furthermore, the interior lights will automatically light up when
the vehicle is unlocked and go out when the vehicle is locked, provided that
the switches are in the courtesy light position.
The remote control transmitter and the battery are integrated into the han-
dle of the key. The receiver is in the interior of the vehicle. The maximum
range depends on different circumstances. The range is reduced when the
battery starts to lose power.
The remote control incorporates a foldaway key that can be used to manual-
ly lock or unlock the vehicle, as well as to start the engine.
If the receiver has been repaired or replaced, or if a replacement key is
used, the system will need re-programming by a qualified workshop. Only
then will you be able use the remote control again.
The remote control meets all relevant authorisation requirements and has
been approved by the Federal Approvals Office for Telecommunications of
the Federal Republic of Germany. All components are marked in accordance
with the current legal requirements. This certification forms the basis for of-
ficial approval for use in other countries.
Page 107 of 313
105
Unlocking and locking
Note
● The remote control is automatically disabled when the ignition is switch-
ed on.
● The function of the remote control may be impaired by interference from
other nearby radio signals (e.g. from a mobile phone or TV transmitter) if
these are in the same frequency range.
Locking and unlocking the vehicle
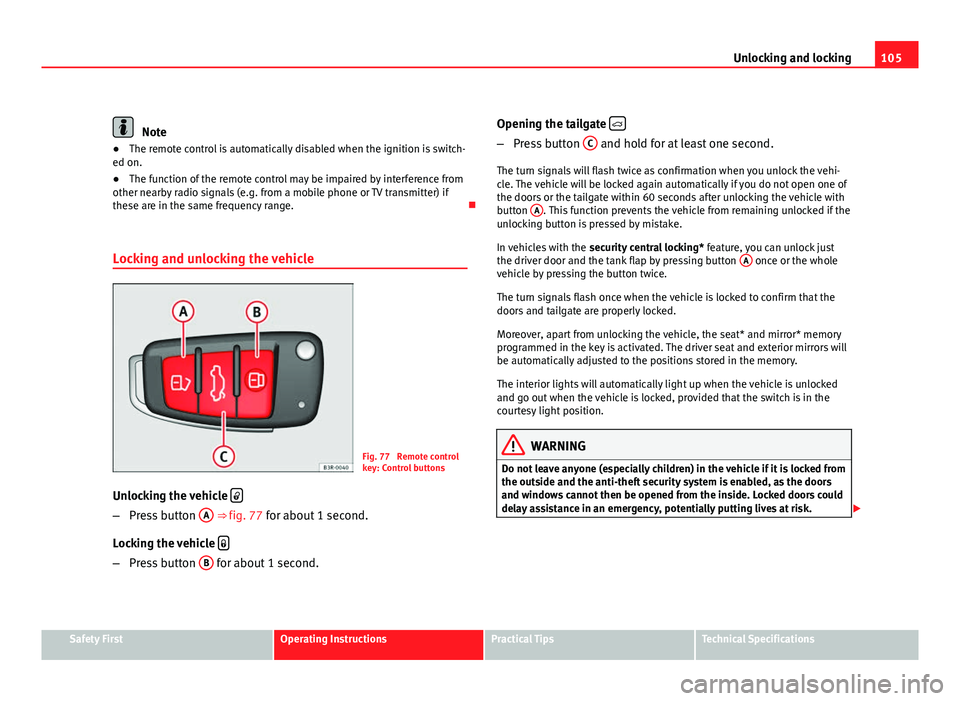
Fig. 77 Remote control
key: Control buttons
Unlocking the vehicle
–
Press button A ⇒ fig. 77 for about 1 second.
Locking the vehicle
–
Press button B for about 1 second. Opening the tailgate
–
Press button C and hold for at least one second.
The turn signals will flash twice as confirmation when you unlock the vehi-
cle. The vehicle will be locked again automatically if you do not open one of
the doors or the tailgate within 60 seconds after unlocking the vehicle with
button A
. This function prevents the vehicle from remaining unlocked if the
unlocking button is pressed by mistake.
In vehicles with the security central locking* feature, you can unlock just
the driver door and the tank flap by pressing button A
once or the whole
vehicle by pressing the button twice.
The turn signals flash once when the vehicle is locked to confirm that the
doors and tailgate are properly locked.
Moreover, apart from unlocking the vehicle, the seat* and mirror* memory
programmed in the key is activated. The driver seat and exterior mirrors will
be automatically adjusted to the positions stored in the memory.
The interior lights will automatically light up when the vehicle is unlocked
and go out when the vehicle is locked, provided that the switch is in the
courtesy light position.
WARNING
Do not leave anyone (especially children) in the vehicle if it is locked from
the outside and the anti-theft security system is enabled, as the doors
and windows cannot then be opened from the inside. Locked doors could
delay assistance in an emergency, potentially putting lives at risk.
Safety FirstOperating InstructionsPractical TipsTechnical Specifications