key Seat Exeo 2012 Owner's Guide
[x] Cancel search | Manufacturer: SEAT, Model Year: 2012, Model line: Exeo, Model: Seat Exeo 2012Pages: 317, PDF Size: 5.29 MB
Page 115 of 317

113
Unlocking and locking
– With the control in position 0, press the control briefly to make
the roof tilt open all the way.
– To open the roof as far as an intermediate setting, press and
hold the control until the roof has moved to the desired posi-
tion.
When you release the switch it will automatically spring back from position 2
to position 1.
The sliding sun blind in the headliner automatically opens when the sunroof
is slid open. If required, it can be closed by hand when the sunroof is
closed.
It is advisable to close the sun blind when the vehicle is left standing in the
sun. It is important to remember to close the sunroof when parking the vehi-
cle or if it suddenly starts raining, especially when the sun blind is closed.
For further information on the automatic close function, see ⇒ page 113.
Closing
Closing
– Turn the control to position 0
⇒ Fig. 81 to close the sunroof
⇒ .
Closing the sunroof from the tilt position
– Pull the specially formed rear end of the control and hold it until
the sunroof has moved down to the desired position.
– Pull the switch briefly to lower the sunroof automatically to the
fully closed position. If required, the sunroof can be stopped in
any position by briefly pulling the control again ⇒
.
WARNING
Take care when closing the sunroof. There is a risk of suffering injury. For
this reason, always take out the ignition key when leaving the vehicle.
Automatic close function
The sunroof can also be closed from outside the vehicle.
– Turn the key in the lock on the driver door and hold it in the lock
position or press the lock button on the remote control until the
sunroof has closed all the way ⇒
.
WARNING
Take care when closing the sunroof. There is a risk of suffering injury.
Solar sunroof*
The solar cells in the sunroof power the air conditioner fan.
The solar sunroof is operated in the same way as the normal sliding/tilting
sunroof.
The interior trim is fixed to the solar sunroof and cannot be opened and
closed separately.
Safety FirstOperating InstructionsPractical TipsTechnical Specifications
Page 116 of 317

114Unlocking and locking
Emergency electrical activation
In an emergency it is possible to close the sunroof electroni-
cally.
The sliding sunroof mechanism is equipped with a safety cut-out. If
the roof should fail to close normally, it can be closed with the
emergency function.
– Turn the control to position 0
⇒ Fig. 81.
– Pull on the control switch until the roof closes.
WARNING
Take care when closing the sunroof. There is a risk of suffering injury. For
this reason, always take out the ignition key when leaving the vehicle.
Page 117 of 317

115
Lights and visibility
Lights and visibility
Lights Lights: switching on and off
Fig. 82 Detailed view of
the dash panel: Light
switch
Switching on the side lights
– Turn the light switch ⇒ Fig. 82 to position .
Switching on dipped or main beam headlights (driving lights)
Dipped beam headlights
– Turn the lights switch to position .
Main beam headlights
– Turn the lights switch to position . –
Press the main beam lever forward ⇒ page 122.
Switching off the lights
– Turn the light switch to position O.
Daytime running lights: In vehicles for countries where daytime running
lights are obligatory and in all vehicles with AFS headlights, daytime run-
ning lights are turned on or off with the ignition. Daytime running lights
have main beam flashers, as usual, but not the dipped beam headlight
function
The dipped beam headlights will only work with the ignition on. The head-
lights are automatically switched to side lights after the ignition has been
switched off.
If the side lights or the dipped beam headlights are turned on, the sym-
bol will come on together with the lights switch.
Note
● If the lights are left on after the key has been taken out of the ignition
lock, a buzzer sounds when the driver door is opened.
● Observe all relevant legal requirements when using the signalling and
lighting systems described here.
● Depending on weather conditions (cold or wet), the front lights, the fog
lights, the tail lights and the turn signals may be temporarily misted. This
has no influence on the useful life of the lighting system. By switching on
the lights, the area through which the beam of light is projected will quickly
be demisted. However, the edges may continue to be misted.
Safety FirstOperating InstructionsPractical TipsTechnical Specifications
Page 118 of 317

116Lights and visibility
Automatic headlight switch* (sensor-controlled)
If you set the light switch to “AUTO”, the dipped headlights
will switch on and off automatically according to the ambi-
ent light level.
Fig. 83 Detailed view of
the dash panel: Light
switch
Turning on dipped beam headlights
– Turn the light switch ⇒ Fig. 83 to the AUTO position.
Turning off dipped beam headlights
– Turn the light switch to position O.
The symbol on the switch lights up when the switch is in the AUTO position.
The dipped beams, side lights, tail lights and number plate lights come on
together when the headlights are switched on automatically.
When you are using the automatic headlights switch, you can also operate
the main beam headlights, however, please note the following: If you ena-
ble the main beam headlights while using the automatic headlights func-
tion during the day (e.g. when driving through a tunnel), but do not disable them again, only the dipped beam headlights will come on the next time
the lights are automatically switched on. To be able to use the main beam
headlights again, you must first pull the main beam lever back to the "off"
position and then push it forward again to "on".
The side lights, headlights, fog lights and rear fog light can still be switched
on manually in the normal way by using lights switch
⇒ page 115.
The interior mirror is fitted with sensors that measure the ambient light. The
dipped beam headlights will be switched on automatically if the available
light drops below the factory preset value (for instance when driving
through a tunnel, etc.). The headlights switch off again automatically when
the light level increases ⇒
.
WARNING
● The automatic dipped beam headlights are only intended to assist
the driver. Automatic dipped beam headlights do not relieve the driver of
his or her responsibility to control them and turn off or turn on the lights
manually according to weather or lighting conditions. The light sensors
are, for example, unable to detect rain and fog - you should therefore al-
ways switch on the dipped beam headlights manually in these condi-
tions and when driving after dark.
● Observe all relevant legal requirements when using the signalling
and lighting systems described here.
Note
● If automatic headlight switching is activated, when the ignition is turned
off the dipped beam headlights are turned off, and when the key is removed
from the ignition the side lights are turned off.
● If you have to attach any type of sticker on the windscreen, do not do so
in front of the sensors. Doing so could prevent the automatic dipped beam
headlight or anti-dazzle function from working correctly or even from work-
ing at all.
Page 120 of 317
118Lights and visibility
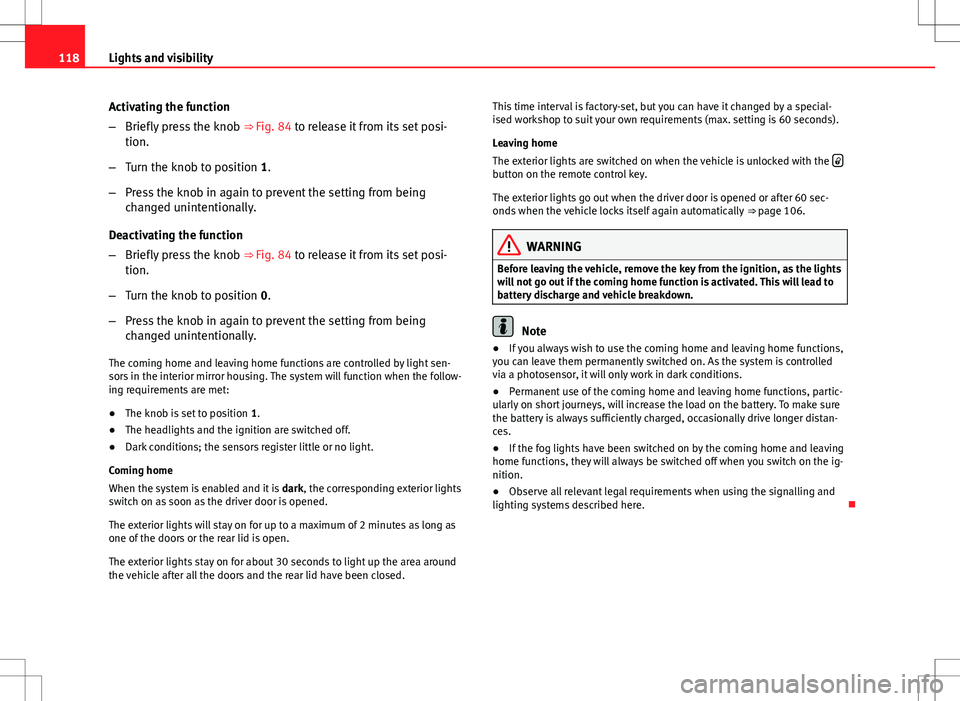
Activating the function
–Briefly press the knob ⇒ Fig. 84 to release it from its set posi-
tion.
– Turn the knob to position 1.
– Press the knob in again to prevent the setting from being
changed unintentionally.
Deactivating the function
– Briefly press the knob ⇒ Fig. 84 to release it from its set posi-
tion.
– Turn the knob to position 0.
– Press the knob in again to prevent the setting from being
changed unintentionally.
The coming home and leaving home functions are controlled by light sen-
sors in the interior mirror housing. The system will function when the follow-
ing requirements are met:
● The knob is set to position 1.
● The headlights and the ignition are switched off.
● Dark conditions; the sensors register little or no light.
Coming home
When the system is enabled and it is dark, the corresponding exterior lights
switch on as soon as the driver door is opened.
The exterior lights will stay on for up to a maximum of 2 minutes as long as
one of the doors or the rear lid is open.
The exterior lights stay on for about 30 seconds to light up the area around
the vehicle after all the doors and the rear lid have been closed. This time interval is factory-set, but you can have it changed by a special-
ised workshop to suit your own requirements (max. setting is 60 seconds).
Leaving home
The exterior lights are switched on when the vehicle is unlocked with the
button on the remote control key.
The exterior lights go out when the driver door is opened or after 60 sec-
onds when the vehicle locks itself again automatically
⇒ page 106.
WARNING
Before leaving the vehicle, remove the key from the ignition, as the lights
will not go out if the coming home function is activated. This will lead to
battery discharge and vehicle breakdown.
Note
● If you always wish to use the coming home and leaving home functions,
you can leave them permanently switched on. As the system is controlled
via a photosensor, it will only work in dark conditions.
● Permanent use of the coming home and leaving home functions, partic-
ularly on short journeys, will increase the load on the battery. To make sure
the battery is always sufficiently charged, occasionally drive longer distan-
ces.
● If the fog lights have been switched on by the coming home and leaving
home functions, they will always be switched off when you switch on the ig-
nition.
● Observe all relevant legal requirements when using the signalling and
lighting systems described here.
Page 126 of 317
124Lights and visibility
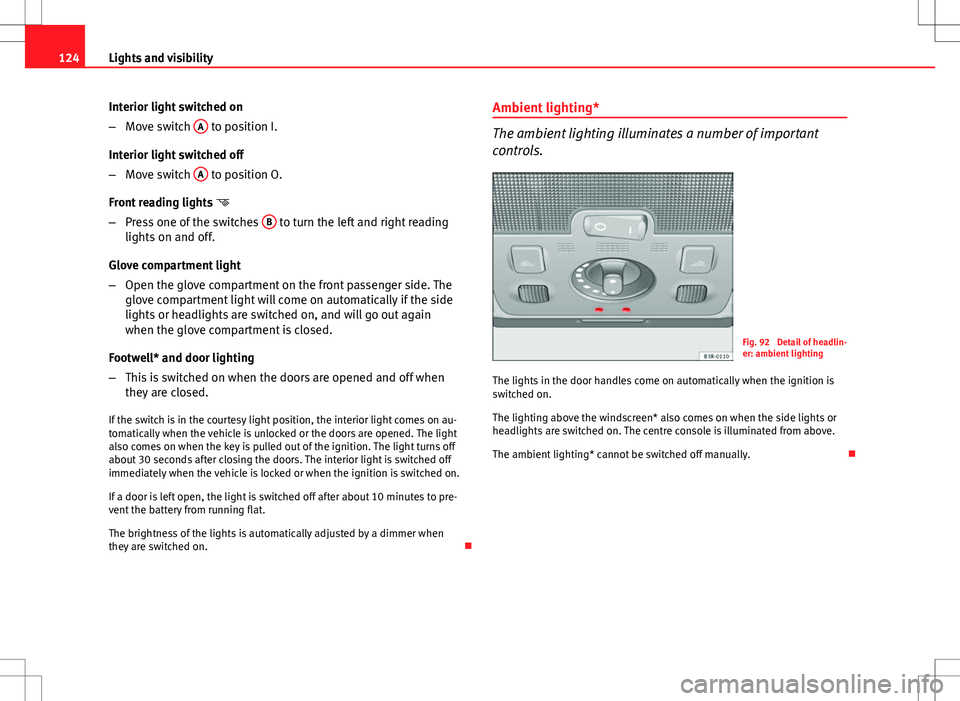
Interior light switched on
–Move switch A
to position I.
Interior light switched off
– Move switch A
to position O.
Front reading lights
– Press one of the switches B
to turn the left and right reading
lights on and off.
Glove compartment light
– Open the glove compartment on the front passenger side. The
glove compartment light will come on automatically if the side
lights or headlights are switched on, and will go out again
when the glove compartment is closed.
Footwell* and door lighting
– This is switched on when the doors are opened and off when
they are closed.
If the switch is in the courtesy light position, the interior light comes on au-
tomatically when the vehicle is unlocked or the doors are opened. The light
also comes on when the key is pulled out of the ignition. The light turns off
about 30 seconds after closing the doors. The interior light is switched off
immediately when the vehicle is locked or when the ignition is switched on.
If a door is left open, the light is switched off after about 10 minutes to pre-
vent the battery from running flat.
The brightness of the lights is automatically adjusted by a dimmer when
they are switched on. Ambient lighting*
The ambient lighting illuminates a number of important
controls.
Fig. 92 Detail of headlin-
er: ambient lighting
The lights in the door handles come on automatically when the ignition is
switched on.
The lighting above the windscreen* also comes on when the side lights or
headlights are switched on. The centre console is illuminated from above.
The ambient lighting* cannot be switched off manually.
Page 138 of 317
136Seats and storage compartments
Controls
Seat adjustment
Backrest adjustment
Lumbar support*
WARNING
● The electrical seat adjustment also works when the ignition is off or
when the key is not in the ignition. To avoid accidental injuries, never
leave children unattended in the vehicle.
● For safety reasons, the seat must only be adjusted when the vehicle
is at a standstill. Failure to do so could result in an accident.
● Be careful when adjusting the seat height. Injuries can be caused if
the seat height is adjusted without due care and attention.
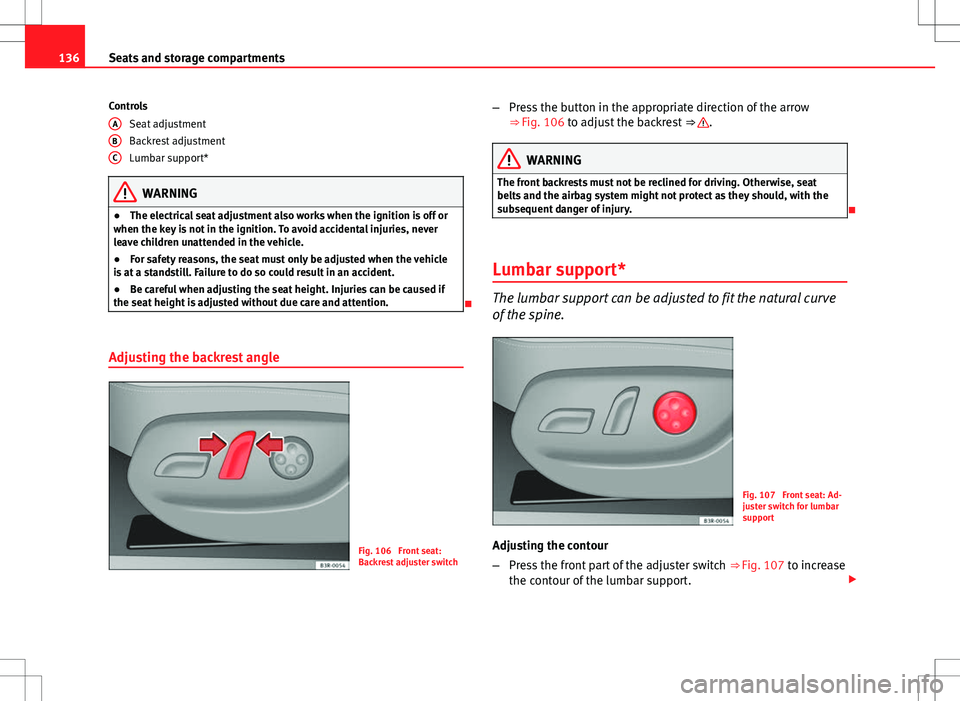
Adjusting the backrest angle
Fig. 106 Front seat:
Backrest adjuster switch
A
BC
–
Press the button in the appropriate direction of the arrow
⇒ Fig. 106 to adjust the backrest ⇒ .
WARNING
The front backrests must not be reclined for driving. Otherwise, seat
belts and the airbag system might not protect as they should, with the
subsequent danger of injury.
Lumbar support*
The lumbar support can be adjusted to fit the natural curve
of the spine.
Fig. 107 Front seat: Ad-
juster switch for lumbar
support
Adjusting the contour
– Press the front part of the adjuster switch ⇒
Fig. 107 to increase
the contour of the lumbar support.
Page 140 of 317
138Seats and storage compartments
system when the vehicle is being driven temporarily by a different driver
whose settings do not need to be stored in the memory.
Note
You can also use the remote control to call up the stored settings
⇒ page 139.
Storing settings
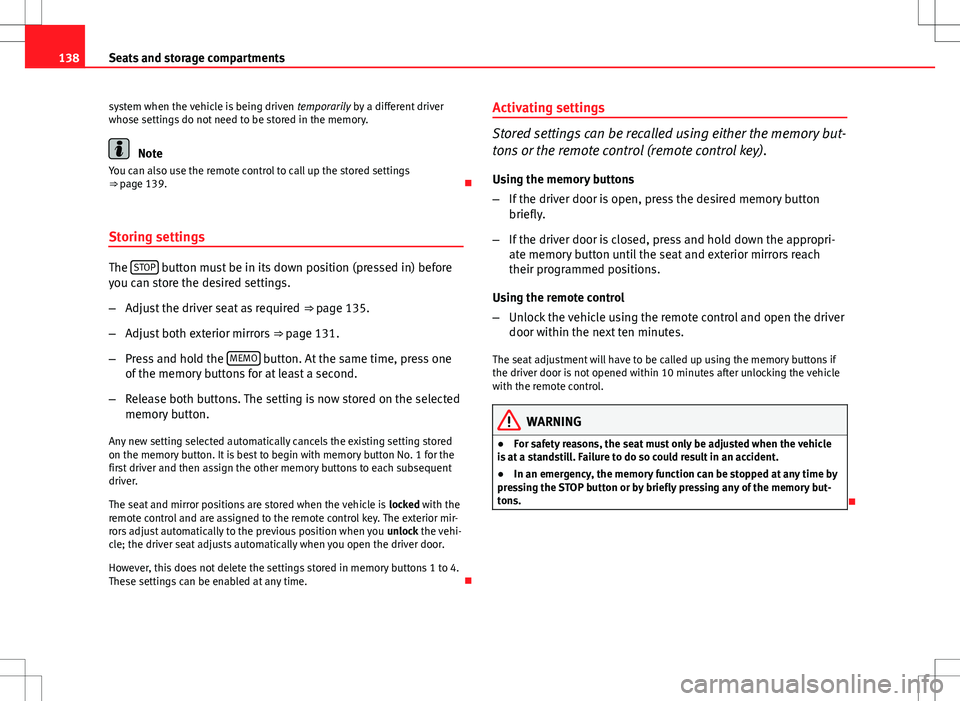
The STOP button must be in its down position (pressed in) before
you can store the desired settings.
– Adjust the driver seat as required ⇒ page 135.
– Adjust both exterior mirrors ⇒ page 131.
– Press and hold the MEMO
button. At the same time, press one
of the memory buttons for at least a second.
– Release both buttons. The setting is now stored on the selected
memory button.
Any new setting selected automatically cancels the existing setting stored
on the memory button. It is best to begin with memory button No. 1 for the
first driver and then assign the other memory buttons to each subsequent
driver.
The seat and mirror positions are stored when the vehicle is locked with the
remote control and are assigned to the remote control key. The exterior mir-
rors adjust automatically to the previous position when you unlock the vehi-
cle; the driver seat adjusts automatically when you open the driver door.
However, this does not delete the settings stored in memory buttons 1 to 4.
These settings can be enabled at any time. Activating settings
Stored settings can be recalled using either the memory but-
tons or the remote control (remote control key).
Using the memory buttons
– If the driver door is open, press the desired memory button
briefly.
– If the driver door is closed, press and hold down the appropri-
ate memory button until the seat and exterior mirrors reach
their programmed positions.
Using the remote control
– Unlock the vehicle using the remote control and open the driver
door within the next ten minutes.
The seat adjustment will have to be called up using the memory buttons if
the driver door is not opened within 10 minutes after unlocking the vehicle
with the remote control.
WARNING
● For safety reasons, the seat must only be adjusted when the vehicle
is at a standstill. Failure to do so could result in an accident.
● In an emergency, the memory function can be stopped at any time by
pressing the STOP button or by briefly pressing any of the memory but-
tons.
Page 141 of 317
139
Seats and storage compartments
Assigning remote control keys
The key must be assigned to a memory button so that the
positions stored in the memory can also be recalled using
the remote control key. Assigning the remote control key to a memory button
– Using the memory button, recall the settings that are to be pro-
grammed onto the key.
– Keeping the memory button pressed down, press the unlock
button on the remote control key within 10 seconds.
– Wait for about 2 seconds before releasing the memory button.
Deleting assignment of the remote control key to the memory
button
– Press and hold the MEMO
button and press the unlock button
on the remote control key within 10 seconds.
– Wait for about 2 seconds before releasing the MEMO
button.
The previous settings are automatically cancelled when the keys are re-as-
signed to different memory buttons. Head restraints
Front head restraints
In combination with properly worn seat belts, the head re-
straints offer effective protection, provided they are properly
adjusted to suit the height of the occupant.
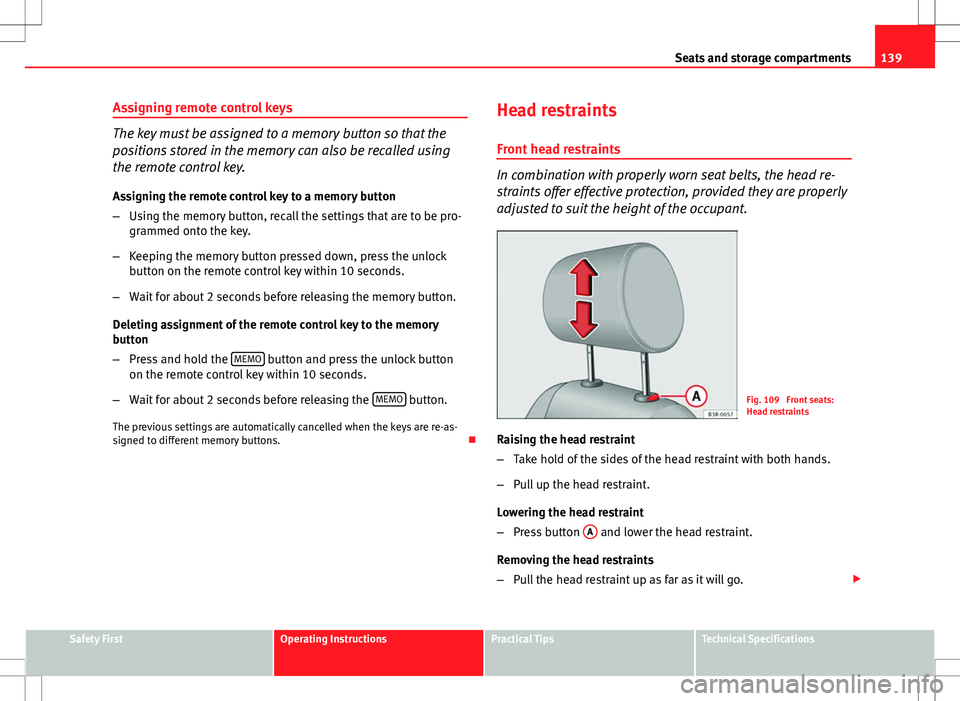
Fig. 109 Front seats:
Head restraints
Raising the head restraint
– Take hold of the sides of the head restraint with both hands.
– Pull up the head restraint.
Lowering the head restraint
– Press button A
and lower the head restraint.
Removing the head restraints
– Pull the head restraint up as far as it will go.
Safety FirstOperating InstructionsPractical TipsTechnical Specifications
Page 162 of 317

160Air conditioning
Note
If the diode on the ECON button continues to light up when the ECON mode
has been switched off (i.e. the air conditioner has been switched on) this is
due to a defect in one of the air conditioner components. If a malfunction
should occur, please contact a specialised workshop.
Air recirculation: automatic activation*
If the outside air is polluted by diesel and petrol emissions,
an air quality sensor in the vehicle will automatically switch
on the air recirculation.
Fig. 129 Button for auto-
matic air recirculation
Activating air recirculation mode
– Press the button
⇒
Fig. 129.
Deactivating air recirculation mode
– Press the
button again or –
Press the AUTO
button or
– Press button
.
The automatic air recirculation mode should normally be left switched on at
all times.
The system is ready to operate approx. 30 seconds after the engine ignition
key has been turned. During this initial period, fresh air is fed into the vehi-
cle.
If the air purity sensor in the air conditioner detects a certain concentration
of fumes in the outside air, the control unit will either pass the incoming air
through the pollution filter or automatically switch on the air recirculation. If
there is a high concentration of pollution in the outside air, the air condi-
tioner automatically switches to air recirculation and the supply of air from
the outside is cut off. As soon as the level of pollution decreases, air is fed
into the vehicle from the outside again.
The automatic air recirculation operates for a maximum period of 12 mi-
nutes. If the windows mist up when the automatic air recirculation is on,
press the
button immediately.
The automatic air recirculation switches itself off under certain circumstan-
ces (for instance if
or is selected). In “ECON” and at temperatures
lower than approx. 8 °C below zero, the automatic air recirculation mode is
limited to 12 seconds.