technical specifications Seat Exeo 2013 Owner's manual
[x] Cancel search | Manufacturer: SEAT, Model Year: 2013, Model line: Exeo, Model: Seat Exeo 2013Pages: 319, PDF Size: 4.81 MB
Page 224 of 319
222Accessories, replacement of parts and modifications
Accessories, replacement of parts and modifications
Accessories and spare parts
Always consult a SEAT dealership before purchasing acces-
sories and parts.
Your vehicle is designed to offer a high standard of active and passive safe-
ty.
Before purchasing accessories and parts, and before making technical
changes to your vehicle, we recommend that you consult your Technical
Service.
SEAT dealerships will be happy to provide you with the latest information
about the use, legal requirements and recommendations from the manufac-
turer regarding accessories and spare parts.
We recommend you use only SEAT Approved Accessories®
and SEAT Ap-
proved Spare Parts ®
. This way, SEAT can guarantee that the product in
question is suitable, reliable and safe. SEAT Technical Services have the
necessary experience and facilities to ensure that parts are correctly and
professionally installed.
Despite a continuous observation of the market, SEAT is not able to assess
the reliability, safety and suitability of parts that SEAT has not approved. For
this reason, SEAT cannot assume responsibility for any non-genuine parts
used, even if these parts have been approved by an official testing agency
or are covered by an official approval certificate.
Any equipment subsequently installed which has a direct effect on the driv-
er's control of the vehicle (e.g. cruise control system or electronically-con-
trolled suspension) must be approved by SEAT and bear the e mark (the Eu-
ropean Union's authorisation symbol). If any
additional electrical components are fitted which do not serve to con-
trol the vehicle itself (e.g. refrigerator box, laptop or ventilator fan), these
must bear the CE mark (European Union manufacturer conformity declara-
tion).
WARNING
Accessories, for example telephone holders or cup holders, should never
be fitted on the covers, or within the working range, of the airbags. Oth-
erwise, there is a danger of injury if the airbag is triggered in an accident.
Technical modifications
Modifications must always be carried out according to our
specifications.
Unauthorised modifications to the electronic components or software in the
vehicle may cause malfunctions. Due to the way the electronic components
are linked together in networks, other indirect systems may be affected by
the faults. This can seriously impair safety, lead to excessive wear of compo-
nents, and also invalidate your vehicle registration documents.
SEAT Technical Services cannot be held liable for any damage caused by
modifications and/or work incorrectly performed.
For this reason, we recommend having all work performed by a SEAT Techni-
cal Service using SEAT Original Spare Parts ®
.
Page 225 of 319
223
Accessories, replacement of parts and modifications
WARNING
Any type of work or modification performed incorrectly on your vehicle
can lead to malfunctions and can cause accidents.
Mobile phones and two-way radios
First consult your Technical Service if you wish to use a mobile telephone or
a two-way radio with a transmitting power output in excess of 10 watts.
Here you will receive information concerning the technical possibilities for
retrofitting this equipment.
Mobile telephones and two-way radios should be only fitted by a special-
ised workshop, for example a SEAT dealership.
WARNING
● Always concentrate primarily on driving. If you are distracted while
driving you could have an accident.
● Never attach the telephone mountings to the surfaces covering the
airbag units or within the range of the airbags. There is a high danger of
injury if the airbag is triggered.
Note
Please observe the operating instructions of your mobile telephone/two-
way radio. Athermic windscreen*
Fig. 166 Location of the
electronic toll collection
system
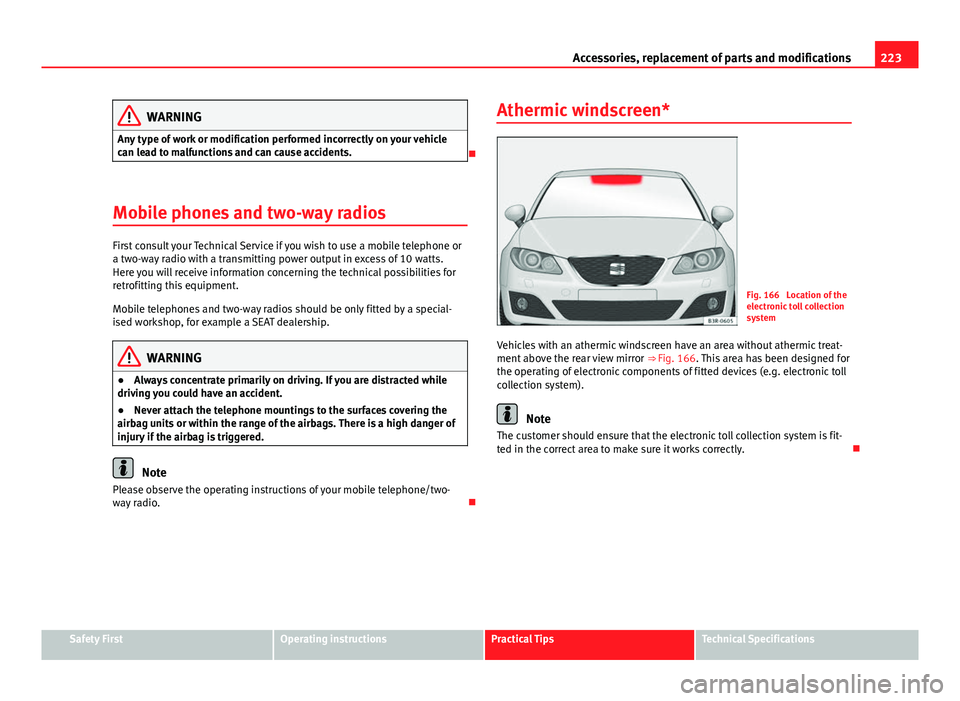
Vehicles with an athermic windscreen have an area without athermic treat-
ment above the rear view mirror ⇒ Fig. 166. This area has been designed for
the operating of electronic components of fitted devices (e.g. electronic toll
collection system).
Note
The customer should ensure that the electronic toll collection system is fit-
ted in the correct area to make sure it works correctly.
Safety FirstOperating instructionsPractical TipsTechnical Specifications
Page 227 of 319
225
Checking and refilling levels
WARNING
● Fuel is highly flammable and can cause serious burns and other inju-
ries.
–Never smoke or use an open flame when filling the fuel tank of the
vehicle, or a spare fuel canister, with fuel. This is an explosion haz-
ard.
– Follow legal requirements for the use of spare fuel canisters.
– For safety reasons we do not recommend carrying a spare fuel can-
ister in the vehicle. The canister could be damaged in an accident and
leak.
● If, in exceptional circumstances, you have to carry a spare fuel canis-
ter, please observe the following points:
–Never fill the spare fuel canister inside the vehicle or on it. An elec-
trostatic charge could build up during filling, causing the fuel fumes
to ignite. This could cause an explosion. Always place the canister on
the ground to fill it.
– Insert the fuel nozzle into the mouth of the canister as far as possi-
ble.
– If the spare fuel canister is made of metal, the filling nozzle must
be in contact with the canister during filling. This helps prevent an
electrostatic charge building up.
– Never spill fuel in the vehicle or in the luggage compartment. Fuel
vapours are explosive. Danger of death.
CAUTION
● Fuel spills should be removed from the paintwork immediately.
● Never run the tank completely dry. An irregular fuel supply could cause
misfiring. As a result, unburnt fuel could enter the catalytic converter and
cause damage.
● When filling the fuel tank after having run it completely dry on a vehicle
with a diesel engine the ignition must be switched on for at least 30 sec-
onds without starting the engine. When you then start the engine it may take longer than normal (up to one minute) for the engine to start firing.
This is due to the fact that the fuel system has to purge itself of air before
starting.
For the sake of the environment
Do not try to put in more fuel after the automatic filler nozzle has switched
off; this may cause the fuel to overflow if it becomes warm.
Petrol Petrol types
The recommended fuel types are listed on a sticker inside
the fuel tank flap.
Only unleaded petrol conforming to standard DIN EN 228 may be used for
vehicles with catalytic converters (EN = “European Standard”).
Fuel types are differentiated by the octane rating, e.g: 91, 95, 98 RON (RON
= “Research Octane Number”, unit for determining the knock resistance of
petrol). You may use petrol with a higher octane number than the one rec-
ommended for your engine. However, this has no advantage in terms of fuel
consumption and engine power.
The correct fuel type for your vehicle is given in the technical table for the
engine, in the Technical Data section.
Safety FirstOperating instructionsPractical TipsTechnical Specifications
Page 229 of 319
227
Checking and refilling levels
Winter driving
Diesel can thicken in winter.
Winter-grade diesel
When using summer-grade diesel fuel, difficulties may be experienced at
sub-zero temperatures because the fuel thickens due to wax separation. For
this reason, winter-grade diesel fuel is available in some countries during
the cold months. It can be used at temperatures as low as -22 °C.
In countries with different climatic conditions the diesel fuel generally sold
has different temperature characteristics. Check with the Technical Services
or filling stations in the country concerned regarding the type of diesel fuels
available.
Filter pre-heater
Your vehicle is fitted with a fuel filter glow plug system, making it well
equipped for operation in winter. This ensures that the fuel system remains
operational to approx. -24 °C, provided you use winter-grade diesel that is
safe to -15 °C.
However, if the fuel has waxed to such an extent that the engine will not
start at temperatures of under -24 °C, simply place the vehicle in a warm
place for a while.
CAUTION
Do not mix fuel additives (thinners or similar products) with diesel fuel. Bonnet
Work in the engine compartment
Extra caution is necessary when working on components in
the engine compartment. Always be aware of the danger of injury and scalding as well as the risk of
accident or even fire when working in the engine compartment (e.g. when
checking and refilling fluids). Always observe the warnings listed below
and follow all general safety precautions. The engine compartment of the
vehicle is a potentially hazardous area ⇒
WARNING
● Switch the ignition off.
● Remove the ignition key.
● Apply the handbrake firmly.
● If your vehicle is equipped with a manual gearbox, place the gear lev-
er in neutral. If you are driving an automatic vehicle, place the selector
lever in position P.
● Wait for the engine to cool down.
● Children should not be allowed to approach the engine compartment.
● Never spill liquids used for vehicle operation on the engine compart-
ment, as these may catch fire (e.g. the antifreeze in coolant).
● Take care not to cause short circuits in the electrical system, especial-
ly when working on the battery.
● Never touch the radiator fan while the engine is hot, as the fan could
start up suddenly.
● Never open the expansion tank when the engine is hot. The cooling
system is under pressure.
Safety FirstOperating instructionsPractical TipsTechnical Specifications
Page 231 of 319

229
Checking and refilling levels
Opening the bonnet
Fig. 169 Release catch
under the bonnet
Before opening the bonnet make sure that the windscreen wiper
arms are not lifted away from the glass. Otherwise the paint may
be damaged.
– Lift the bonnet slightly ⇒
.
– Press the release catch under the bonnet upwards ⇒ Fig. 169.
This will release the arrester hook under the bonnet.
– Open the bonnet.
The bonnet is held in position by a gas-filled strut.
WARNING
Never open the bonnet if you see steam or drips of coolant being re-
leased from the engine compartment. Failure to comply could result in
burns. Wait until no steam or coolant can be seen before opening the
bonnet.
Closing the bonnet
–
To close the bonnet, push it down until it overcomes the spring
pressure.
– Let the bonnet engage in the locking part. Do not force it ⇒
.
WARNING
● For safety reasons the bonnet must always be completely closed
when the vehicle is moving. Therefore, after closing the bonnet, always
check that the locking element is properly engaged. This is the case if
the bonnet is flush with the adjacent body panels.
● Should you notice that the bonnet is not safely secured when the ve-
hicle is moving, stop the vehicle immediately and close the bonnet. Fail-
ure to do so could result in an accident.
Engine oil General notes
The engine comes with a special, multi-grade oil that can be used all year
round.
Because the use of high-quality oil is essential for the correct operation of
the engine and its long useful life, when topping up or changing oil, use on-
ly those oils that comply with VW standards.
The specifications (VW standards) set out in the following page should ap-
pear on the container of the service oil; when the container displays the
specific standards for petrol and diesel engines together, it means that the
oil can be used for both types of engines.
Safety FirstOperating instructionsPractical TipsTechnical Specifications
Page 232 of 319
230Checking and refilling levels
We recommend that the oil change, indicated in the Maintenance Pro-
gramme, be performed by a Technical Service or a specialised workshop.
The correct oil specifications for your engine are listed in the ⇒ page 230,
Oil properties.
Service intervals
Service intervals can be flexible (LongLife service) or fixed (dependent on
time/distance travelled).
If the PR code that appears on the back of the “Maintenance Programme”
booklet is PR QI6, this means that your vehicle has the LongLife service pro-
grammed. If it lists the codes QI1, QI2, QI3, QI4 or QI7, the interval service
is dependent on time/distance travelled.
Flexible service intervals (LongLife service intervals*)
Special oils and processes have been developed which, depending on the
characteristics and individual driving profiles, enable the extension of the
oil change service (LongLife service intervals).
Because this oil is essential for extending the service intervals, it must only
be used observing the following indications:
● Avoid mixing it with oil for fixed service intervals.
● Only in exceptional circumstances, if the engine oil level is too low
⇒ page 231 and LongLife oil is not available, it is permitted to top up
(once) with oil for fixed service intervals (up to a maximum of 0.5 litres).
Fixed service intervals*
If your vehicle does not have the “LongLife service interval” or it has been
disabled (by request), you may use oils for fixed service intervals, which al-
so appear in ⇒ page 230, Oil properties. In this case, your vehicle must be
serviced after a fixed interval of 1 year/15 000 km (10 000 miles)(whatever
comes first) ⇒ Booklet Maintenance Programme. ●
In exceptional circumstances, if the engine oil level is too low
⇒ page 231 and you cannot obtain the oil specified for your vehicle, you
can put in a small quantity of oil conforming to the specification ACEA A2 or
ACEA A3 (petrol engines) or ACEA B3 or ACEA B4 (diesel engines) (up to 0.5
l).
Vehicles with diesel particulate filter*
All Exeo vehicles with a diesel engine have a diesel particulate filter and
must only be filled with VW 507 00 engine oil, which has a low level of soot
formation. Using other types of oil will cause a higher soot concentration
and reduce the life of the DPF. Therefore:
● Avoid mixing this oil with other engine oils.
● Only in exceptional circumstances, if the engine oil level is too low
⇒ page 231 and you cannot obtain the oil specified for your vehicle, you
can use a small quantity of oil (once) conforming to the VW 506 00,
VW 506 01, VW 505 00, VW 505 01 or ACEA B3/ACEA B4 specification. (up
to 0.5 l).
Oil properties
Engine typeSpecificationPetrolVW 502 00/VW 504 00Diesel. Engines with particu-
late filter (DPF) a)VW 507 00
a)
Only use recommended oils, otherwise you may damage the engine.
Oils for LongLife service intervals *Engine typeSpecificationPetrolVW 504 00DieselVW 507 00
Page 233 of 319
231
Checking and refilling levels
Engine oil additives
No type of additive should be mixed with the engine oil. The deterioration
caused by these additives is not covered by the warranty.
Note
Before a long trip, we recommend finding an engine oil that conforms to the
corresponding VW specifications and recommend keeping it in the vehicle.
This way, the correct engine oil will always be available for a top-up if nee-
ded.
Checking the oil level
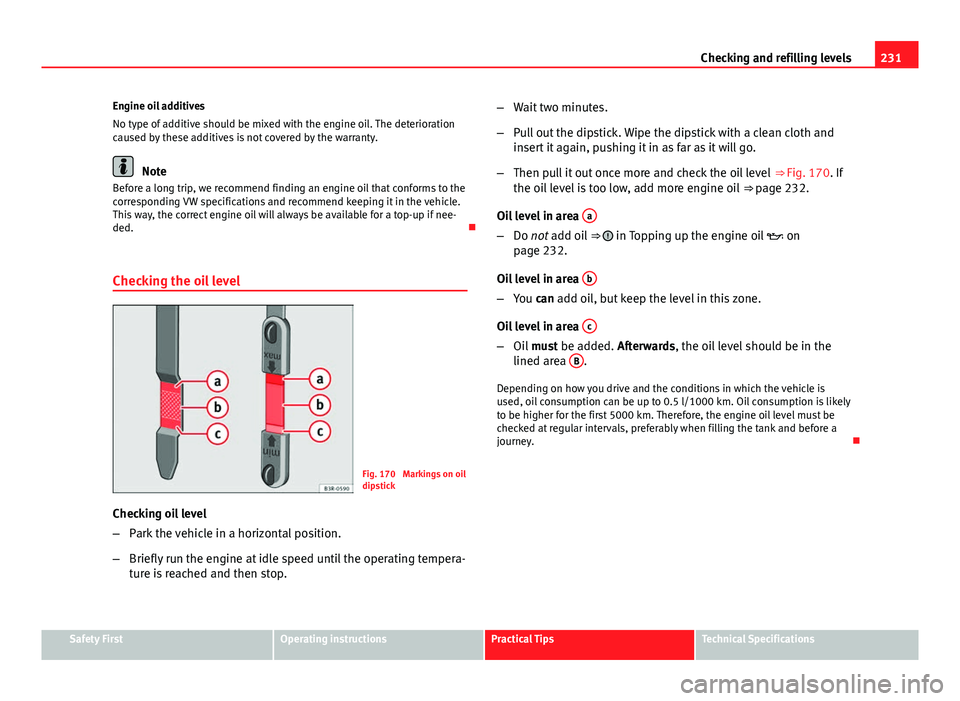
Fig. 170 Markings on oil
dipstick
Checking oil level
– Park the vehicle in a horizontal position.
– Briefly run the engine at idle speed until the operating tempera-
ture is reached and then stop. –
Wait two minutes.
– Pull out the dipstick. Wipe the dipstick with a clean cloth and
insert it again, pushing it in as far as it will go.
– Then pull it out once more and check the oil level ⇒ Fig. 170. If
the oil level is too low, add more engine oil ⇒ page 232.
Oil level in area a
–
Do not add oil ⇒ in Topping up the engine oil on
page 232.
Oil level in area b
–
You can add oil, but keep the level in this zone.
Oil level in area c
–
Oil must be added. Afterwards, the oil level should be in the
lined area B.
Depending on how you drive and the conditions in which the vehicle is
used, oil consumption can be up to 0.5 l/1000 km. Oil consumption is likely
to be higher for the first 5000 km. Therefore, the engine oil level must be
checked at regular intervals, preferably when filling the tank and before a
journey.
Safety FirstOperating instructionsPractical TipsTechnical Specifications
Page 235 of 319
233
Checking and refilling levels
When the coolant is topped up, use a mixture of distilled water and, at
least, 40 % of the G 13 or G 12 plus-plus (TL-VW 774 G) additive (both are
purple) to obtain an optimum anticorrosion protection ⇒
. The mixture of
G 13 with G 12 plus (TL-VW 774 F), G 12 (red) or G 11 (green-blue) engine
coolants will significantly reduce the anticorrosion protection and should,
therefore be avoided ⇒
.
WARNING
If there is not enough anti-freeze in the coolant system, the engine may
fail leading to serious damage. ● Please make sure that the percentage
of additive is correct with respect to the lowest expected ambient tem-
perature in the zone in which the vehicle is to be used. ● When the out-
side temperature is very low, the coolant could freeze and the vehicle
would be immobilised. In this case, the heating would not work either
and inadequately dressed passengers could die of cold.
CAUTION
The original additives should never be mixed with coolants which are not
approved by SEAT. Otherwise, you run the risk of causing severe damage to
the engine and the engine cooling system.
● If the fluid in the expansion tank is not purple but is, for example,
brown, this indicates that the G 13 additive has been mixed with an inade-
quate coolant. The coolant must be changed as soon as possible if this is
the case! This could result in serious faults and engine damage.
For the sake of the environment
Coolants and additives can contaminate the environment. If any fluids are
spilled, they should be collected and correctly disposed of, with respect to
the environment. Checking the coolant level
The coolant level can be checked visually.
Fig. 172 Engine com-
partment: Coolant fluid
deposit
– Switch the ignition off.
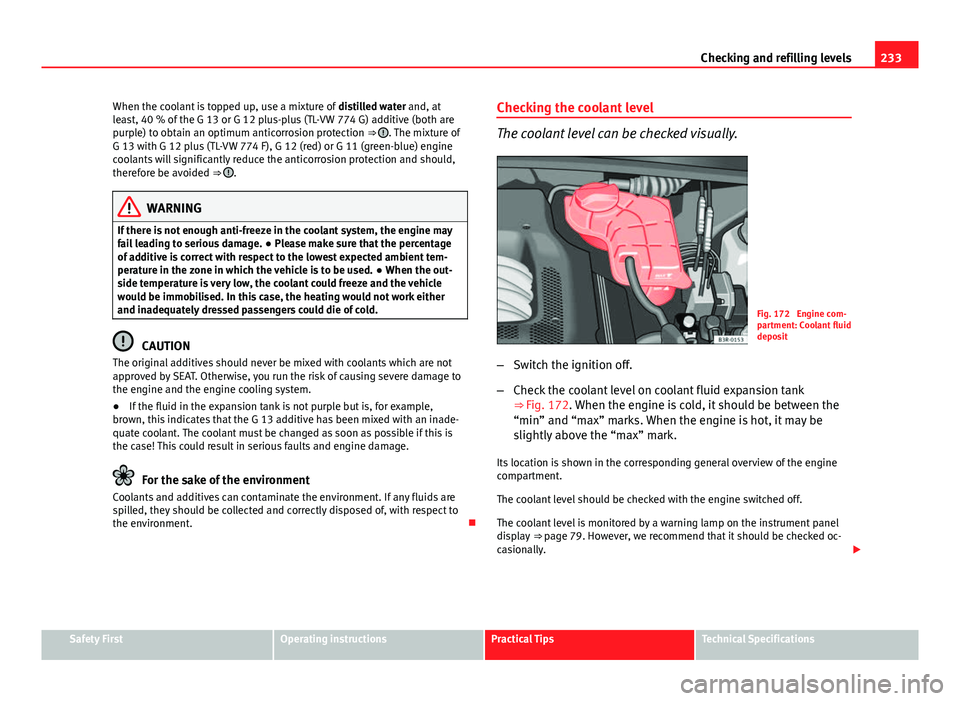
– Check the coolant level on coolant fluid expansion tank
⇒ Fig. 172. When the engine is cold, it should be between the
“min” and “max” marks. When the engine is hot, it may be
slightly above the “max” mark.
Its location is shown in the corresponding general overview of the engine
compartment.
The coolant level should be checked with the engine switched off.
The coolant level is monitored by a warning lamp on the instrument panel
display ⇒ page 79. However, we recommend that it should be checked oc-
casionally.
Safety FirstOperating instructionsPractical TipsTechnical Specifications
Page 237 of 319
235
Checking and refilling levels
WARNING
When working in the engine compartment be aware that the radiator fan
may start running suddenly, leading to the risk of injury.
Washer fluid and windscreen wiper blades Windscreen washer system
Plain water is not sufficient for the windscreen washer sys-
tem.
Fig. 173 In the engine
compartment: Cap of
windscreen washer fluid
reservoir
The container for the windscreen washer contains the cleaning fluid for the
windscreen and the headlight washer system*. The container is located in
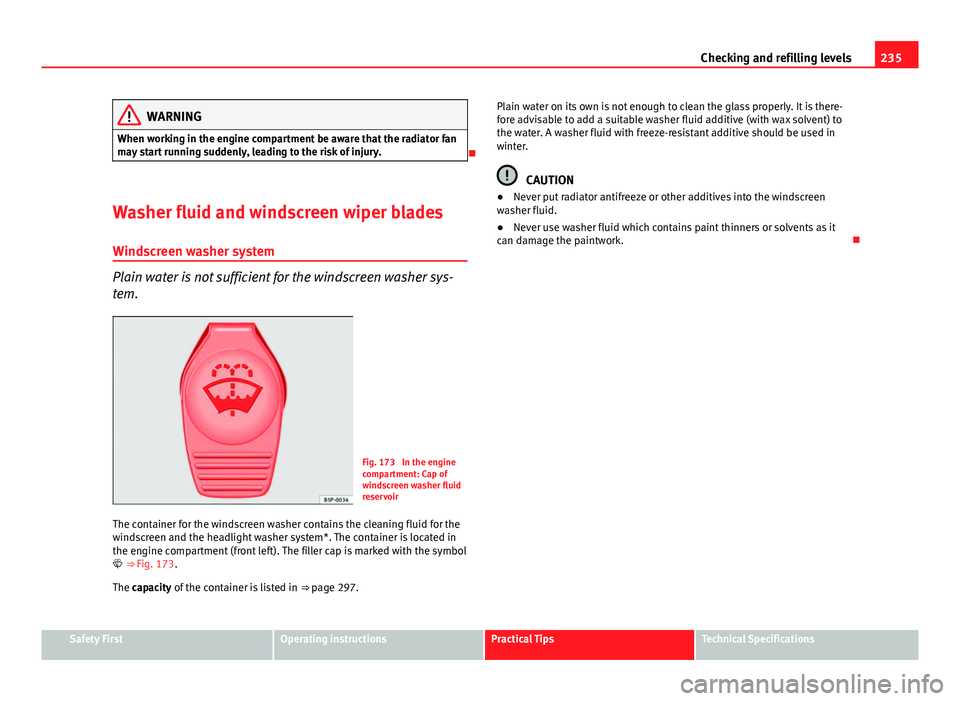
the engine compartment (front left). The filler cap is marked with the symbol
⇒ Fig. 173. The capacity of the container is listed in ⇒ page 297. Plain water on its own is not enough to clean the glass properly. It is there-
fore advisable to add a suitable washer fluid additive (with wax solvent) to
the water. A washer fluid with freeze-resistant additive should be used in
winter.
CAUTION
● Never put radiator antifreeze or other additives into the windscreen
washer fluid.
● Never use washer fluid which contains paint thinners or solvents as it
can damage the paintwork.
Safety FirstOperating instructionsPractical TipsTechnical Specifications
Page 239 of 319
237
Checking and refilling levels
WARNING
Do not drive unless you have good visibility through all windows!
● The ignition must not be switched on while the front wiper arms are
in a raised position. The wipers would return to their park position and
damage the paintwork on the bonnet.
● To prevent smearing on the windscreen, the wiper blades should be
cleaned regularly using a window cleaner solution. If the wiper blades
are very dirty (e.g. insects etc.), they should be cleaned using a sponge
or cloth. Failure to do so could result in an accident.
● For safety reasons, the wiper blades should be changed once or twice
a year.
CAUTION
● Damaged or dirty windscreen wipers could scratch the windscreen.
● Never use fuel, nail varnish remover, paint thinner or similar products to
clean the windows. This could damage the windscreen wiper blades.
● Never move the windscreen wiper or windscreen wiper arm manually.
This could cause damage.
● Do not pull the windscreen wipers forward unless they are in the service
position. Otherwise the bonnet could be damaged. Brake fluid
Checking the brake fluid level
The brake fluid level can be checked visually.
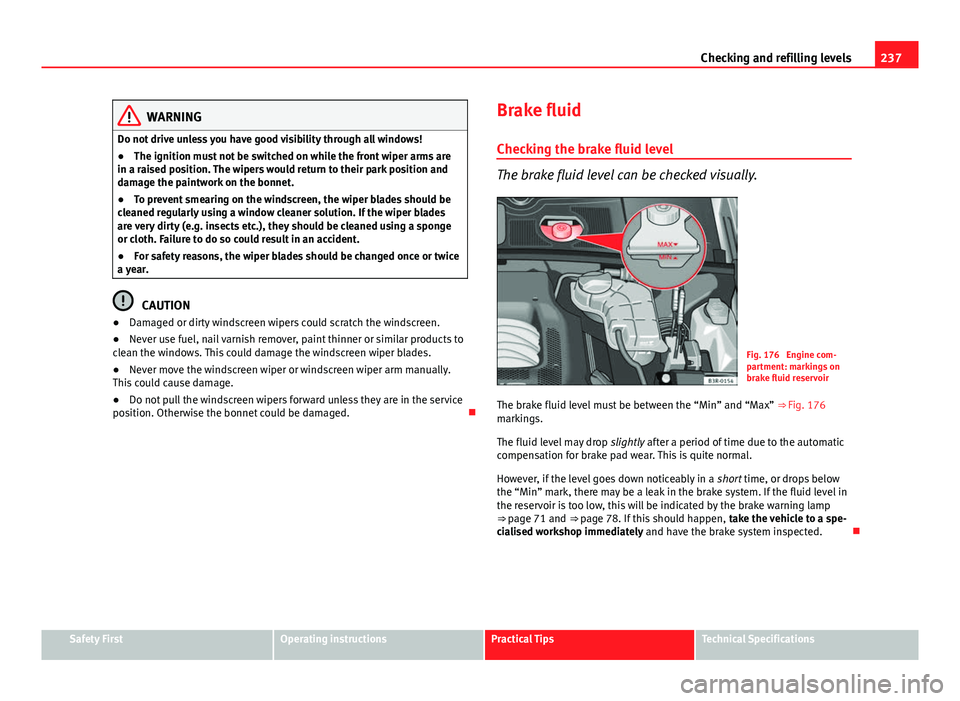
Fig. 176 Engine com-
partment: markings on
brake fluid reservoir
The brake fluid level must be between the “Min” and “Max” ⇒ Fig. 176
markings.
The fluid level may drop slightly after a period of time due to the automatic
compensation for brake pad wear. This is quite normal.
However, if the level goes down noticeably in a short time, or drops below
the “Min” mark, there may be a leak in the brake system. If the fluid level in
the reservoir is too low, this will be indicated by the brake warning lamp
⇒ page 71 and
⇒ page 78. If this should happen,
take the vehicle to a spe-
cialised workshop immediately and have the brake system inspected.
Safety FirstOperating instructionsPractical TipsTechnical Specifications