technical specifications Seat Exeo 2013 Owner's Guide
[x] Cancel search | Manufacturer: SEAT, Model Year: 2013, Model line: Exeo, Model: Seat Exeo 2013Pages: 319, PDF Size: 4.81 MB
Page 65 of 319
63
Cockpit
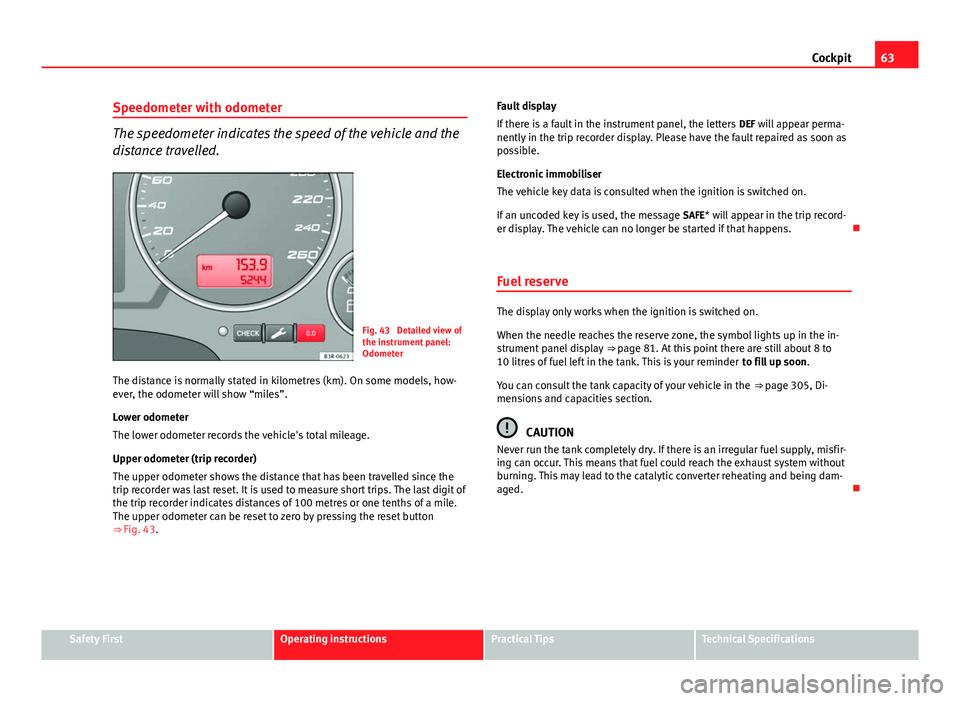
Speedometer with odometer
The speedometer indicates the speed of the vehicle and the
distance travelled.
Fig. 43 Detailed view of
the instrument panel:
Odometer
The distance is normally stated in kilometres (km). On some models, how-
ever, the odometer will show “miles”.
Lower odometer
The lower odometer records the vehicle's total mileage.
Upper odometer (trip recorder)
The upper odometer shows the distance that has been travelled since the
trip recorder was last reset. It is used to measure short trips. The last digit of
the trip recorder indicates distances of 100 metres or one tenths of a mile.
The upper odometer can be reset to zero by pressing the reset button
⇒ Fig. 43. Fault display
If there is a fault in the instrument panel, the letters
DEF will appear perma-
nently in the trip recorder display. Please have the fault repaired as soon as
possible.
Electronic immobiliser
The vehicle key data is consulted when the ignition is switched on.
If an uncoded key is used, the message SAFE* will appear in the trip record-
er display. The vehicle can no longer be started if that happens.
Fuel reserve
The display only works when the ignition is switched on.
When the needle reaches the reserve zone, the symbol lights up in the in-
strument panel display ⇒ page 81. At this point there are still about 8 to
10 litres of fuel left in the tank. This is your reminder to fill up soon.
You can consult the tank capacity of your vehicle in the ⇒ page 305, Di-
mensions and capacities section.
CAUTION
Never run the tank completely dry. If there is an irregular fuel supply, misfir-
ing can occur. This means that fuel could reach the exhaust system without
burning. This may lead to the catalytic converter reheating and being dam-
aged.
Safety FirstOperating instructionsPractical TipsTechnical Specifications
Page 67 of 319
65
Cockpit
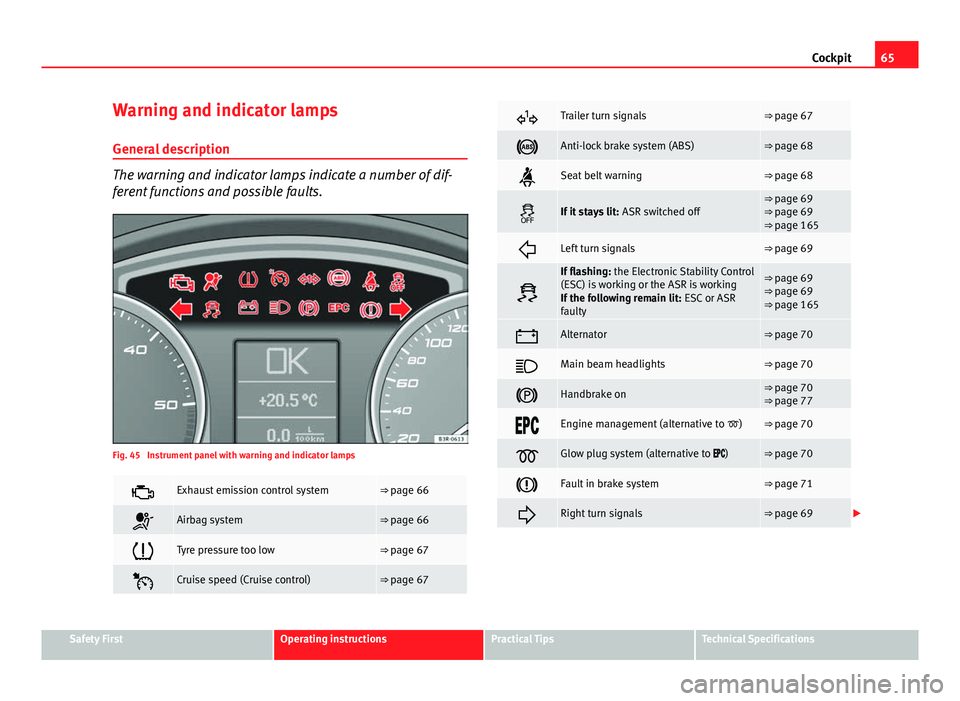
Warning and indicator lamps General description
The warning and indicator lamps indicate a number of dif-
ferent functions and possible faults.
Fig. 45 Instrument panel with warning and indicator lamps
Exhaust emission control system⇒ page 66
Airbag system⇒ page 66
Tyre pressure too low⇒ page 67
Cruise speed (Cruise control)⇒ page 67
Trailer turn signals⇒ page 67
Anti-lock brake system (ABS)⇒ page 68
Seat belt warning⇒ page 68
If it stays lit: ASR switched off⇒ page 69
⇒ page 69
⇒ page 165
Left turn signals⇒ page 69
If flashing: the Electronic Stability Control
(ESC) is working or the ASR is working
If the following remain lit: ESC or ASR
faulty⇒ page 69
⇒ page 69
⇒ page 165
Alternator⇒ page 70
Main beam headlights⇒ page 70
Handbrake on⇒ page 70
⇒ page 77
Engine management (alternative to )⇒ page 70
Glow plug system (alternative to )⇒ page 70
Fault in brake system⇒ page 71
Right turn signals⇒ page 69
Safety FirstOperating instructionsPractical TipsTechnical Specifications
Page 69 of 319
67
Cockpit
Tyre pressure warning lamp*
The tyre pressure should be corrected as soon as possible if
it is too low.
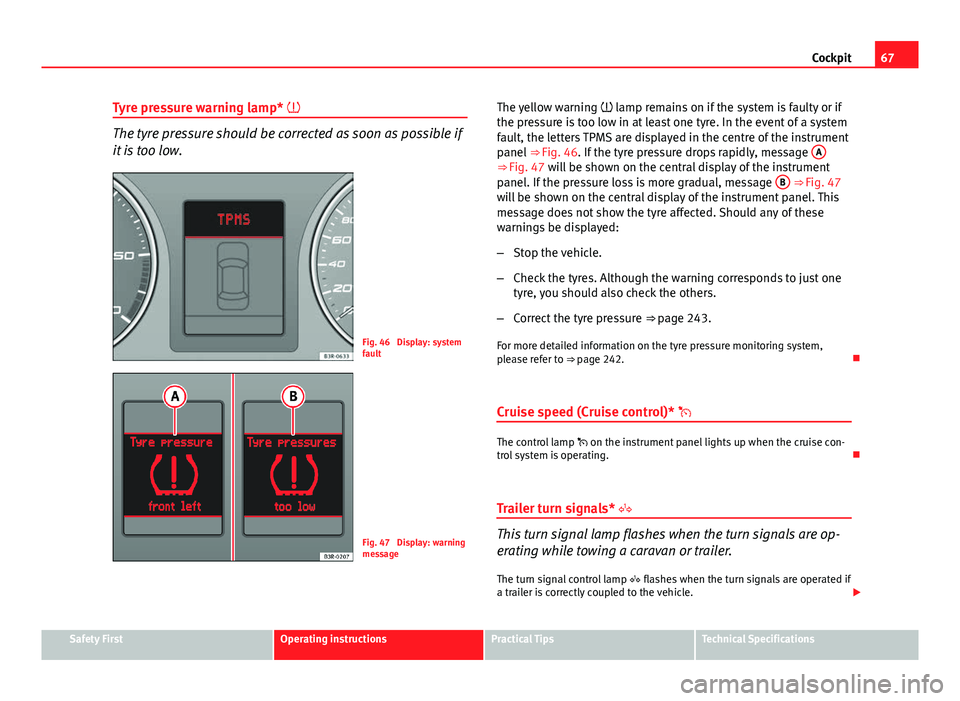
Fig. 46 Display: system
fault
Fig. 47 Display: warning
message The yellow warning
lamp remains on if the system is faulty or if
the pressure is too low in at least one tyre. In the event of a system
fault, the letters TPMS are displayed in the centre of the instrument
panel ⇒ Fig. 46. If the tyre pressure drops rapidly, message A
⇒ Fig. 47 will be shown on the central display of the instrument
panel. If the pressure loss is more gradual, message B ⇒ Fig. 47
will be shown on the central display of the instrument panel. This
message does not show the tyre affected. Should any of these
warnings be displayed:
– Stop the vehicle.
– Check the tyres. Although the warning corresponds to just one
tyre, you should also check the others.
– Correct the tyre pressure ⇒ page 243.
For more detailed information on the tyre pressure monitoring system,
please refer to ⇒ page 242.
Cruise speed (Cruise control)*
The control lamp on the instrument panel lights up when the cruise con-
trol system is operating.
Trailer turn signals*
This turn signal lamp flashes when the turn signals are op-
erating while towing a caravan or trailer. The turn signal control lamp flashes when the turn signals are operated if
a trailer is correctly coupled to the vehicle.
Safety FirstOperating instructionsPractical TipsTechnical Specifications
Page 71 of 319
69
Cockpit
Turn signals and hazard warning lights
Depending on which turn signal is operated, either the left or right turn
signal lamp flashes. Both turn signal lamps will flash when the hazard warn-
ing lights are switched on.
If a turn signal fails, the indicator lamp will start flashing twice as fast as
normal.
This does not apply when towing a trailer. Where a turn signal bulb does not
work, either on the trailer or on the towing vehicle, the turn signal bulb will
not flash. For further information on the turn signals, see ⇒ page 122.
Electronic Stability Control (ESC)* /
There are two control lamps for the electronic stability con-
trol. The lamp provides information concerning the func-
tion and the provides information on the disconnection
status
Both lamps come on together when the ignition is switched on and should
go out after approx. 2 seconds, which is how long the function check lasts.
This programme includes the ABS, EDL and ASR. This also includes the
brake assistance system (BAS), automatic cleaning of the brake discs and
the trailer stability programme (TSP).
The warning lamp has the following functions:
● It flashes whilst driving when the ASR/ESC is activated.
● It will light up continuously if there is a fault in the ESC.
● As the ESC operates in conjunction with the ABS, it will also light up if a
fault should occur in the ABS. If the ESC control lamp
lights up and stays on after the engine is started,
this may mean that the control system has temporarily switched off the ESC.
In this case the ESC can be reactivated by switching the ignition off and
then on again. If the control lamp goes out, this means the system is fully
functional.
The lamp provides information about the disconnection status of the
system:
● It stays lit when the ASR is disconnected when pressing the switch.
Traction control system (ASR)* /
The traction control system prevents the driven wheels from
spinning when the vehicle is accelerating
There are two warning lamps for the traction control system: and . Both
lamps come on together when the ignition is switched on and should go out
after approx. 2 seconds, which is how long the function check lasts.
The lamp has the following function:
● It flashes when the ASR is working if the vehicle is moving.
If the system is deactivated or if it has any fault, the warning lamp will re-
main lit. The warning lamp will also light up if a fault should occur in the
ABS because the ASR operates in conjunction with the ABS. For further in-
formation, see ⇒ page 188.
The lamp provides information about the disconnection status of the
system:
● It stays lit when the ASR is disconnected when pressing the ASR OFF
switch.
By pressing it again, the ASR function is reactivated and the warning lamp
switched off.
Safety FirstOperating instructionsPractical TipsTechnical Specifications
Page 73 of 319
71
Cockpit
When the engine is warm, or at outside temperatures above +8 °C, the
warning lamp will only light up very briefly.
Note
● If the glow plug indicator lamp should start flashing while the vehicle is
moving, this indicates a fault in the engine management system. The en-
gine should be serviced without delay.
● If the indicator lamp fails to light up when the ignition is switched on,
this can mean that the glow plug system is defective. The engine should be
serviced.
Brake system
The warning lamp flashes when the handbrake is applied, or
if the brake fluid level is too low or if there is a fault in the
ABS system. If the control lamp flashes (and the handbrake is not applied), stop the
vehicle and check the brake fluid level ⇒
⇒ page 237.
If a failure should occur in the ABS, the ABS control lamp will light up
together with the brake control lamp ⇒
.
Handbrake on
The control lamp also lights up when the handbrake is applied. In addi-
tion to this, the handbrake warning ⇒ page 77 switches on after driving
for 3 seconds at a speed above 5 km/h.
WARNING
● Before opening the bonnet and checking the brake fluid level, ob-
serve the warning information in ⇒ page 227, Work in the engine com-
partment.
● If the brake warning lamp does not go out, or if it lights up when driv-
ing, the brake fluid level in the reservoir is too low and this may cause an
increased accident risk. Stop the vehicle and do not drive on. Obtain
technical assistance.
● If the brake warning lamp lights up together with the ABS warning
lamp, this can mean that there is a fault in the ABS control function. As a
result, the rear wheels can lock relatively easily when braking. Under cer-
tain circumstances, the rear of the vehicle could suddenly sway from side
to side, with the subsequent danger of skidding. Drive carefully to the
nearest specialised workshop and have the fault repaired.
Safety FirstOperating instructionsPractical TipsTechnical Specifications
Page 75 of 319
73
Cockpit
CD, radio and telephone display*
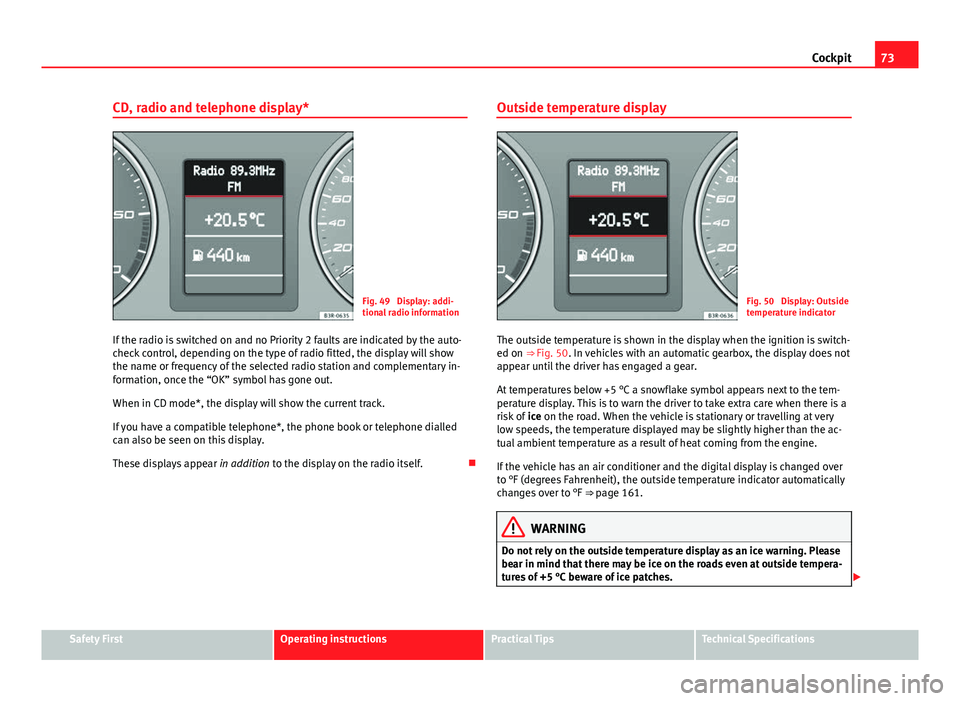
Fig. 49 Display: addi-
tional radio information
If the radio is switched on and no Priority 2 faults are indicated by the auto-
check control, depending on the type of radio fitted, the display will show
the name or frequency of the selected radio station and complementary in-
formation, once the “OK” symbol has gone out.
When in CD mode*, the display will show the current track.
If you have a compatible telephone*, the phone book or telephone dialled
can also be seen on this display.
These displays appear in addition to the display on the radio itself. Outside temperature displayFig. 50 Display: Outside
temperature indicator
The outside temperature is shown in the display when the ignition is switch-
ed on ⇒ Fig. 50. In vehicles with an automatic gearbox, the display does not
appear until the driver has engaged a gear.
At temperatures below +5 °C a snowflake symbol appears next to the tem-
perature display. This is to warn the driver to take extra care when there is a
risk of ice on the road. When the vehicle is stationary or travelling at very
low speeds, the temperature displayed may be slightly higher than the ac-
tual ambient temperature as a result of heat coming from the engine.
If the vehicle has an air conditioner and the digital display is changed over
to °F (degrees Fahrenheit), the outside temperature indicator automatically
changes over to °F ⇒ page 161.
WARNING
Do not rely on the outside temperature display as an ice warning. Please
bear in mind that there may be ice on the roads even at outside tempera-
tures of +5 °C beware of ice patches.
Safety FirstOperating instructionsPractical TipsTechnical Specifications
Page 77 of 319
75
Cockpit
Door and rear lid warning
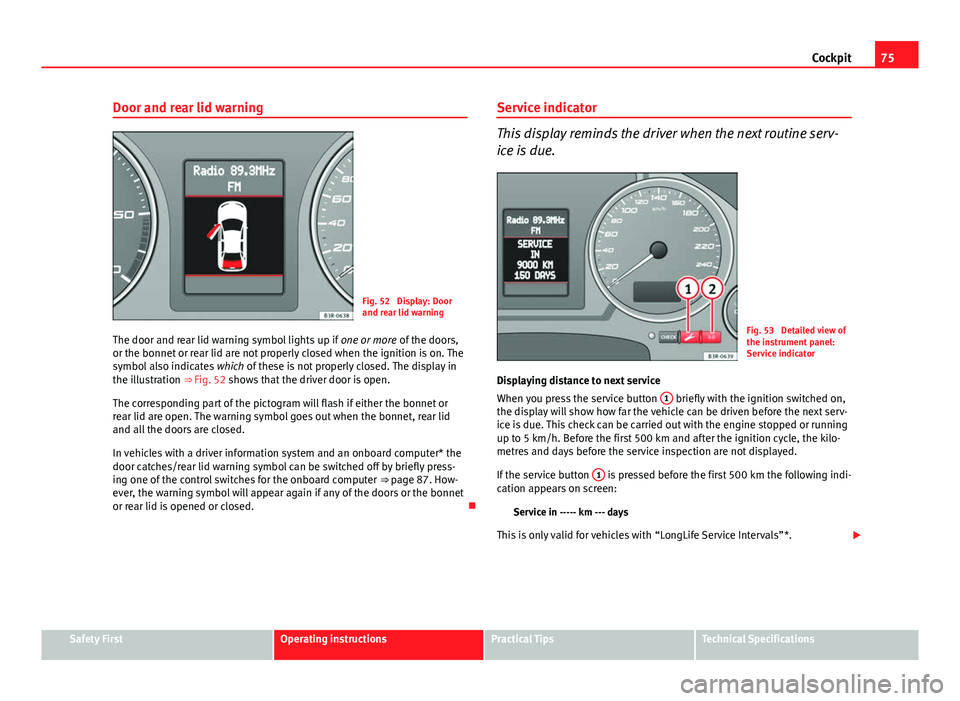
Fig. 52 Display: Door
and rear lid warning
The door and rear lid warning symbol lights up if one or more of the doors,
or the bonnet or rear lid are not properly closed when the ignition is on. The
symbol also indicates which of these is not properly closed. The display in
the illustration ⇒ Fig. 52 shows that the driver door is open.
The corresponding part of the pictogram will flash if either the bonnet or
rear lid are open. The warning symbol goes out when the bonnet, rear lid
and all the doors are closed.
In vehicles with a driver information system and an onboard computer* the
door catches/rear lid warning symbol can be switched off by briefly press-
ing one of the control switches for the onboard computer ⇒ page 87. How-
ever, the warning symbol will appear again if any of the doors or the bonnet
or rear lid is opened or closed. Service indicator
This display reminds the driver when the next routine serv-
ice is due.
Fig. 53 Detailed view of
the instrument panel:
Service indicator
Displaying distance to next service
When you press the service button 1
briefly with the ignition switched on,
the display will show how far the vehicle can be driven before the next serv-
ice is due. This check can be carried out with the engine stopped or running
up to 5 km/h. Before the first 500 km and after the ignition cycle, the kilo-
metres and days before the service inspection are not displayed.
If the service button 1
is pressed before the first 500 km the following indi-
cation appears on screen:
Service in ----- km --- days
This is only valid for vehicles with “LongLife Service Intervals”*.
Safety FirstOperating instructionsPractical TipsTechnical Specifications
Page 79 of 319
77
Cockpit
The red symbol indicates danger, whereas the yellow one represents a
warning. Additional messages for the driver may be shown with the red or
yellow symbols.
Driver messages
Additional messages for the driver are displayed together
with the warning symbols on the instrument panel.
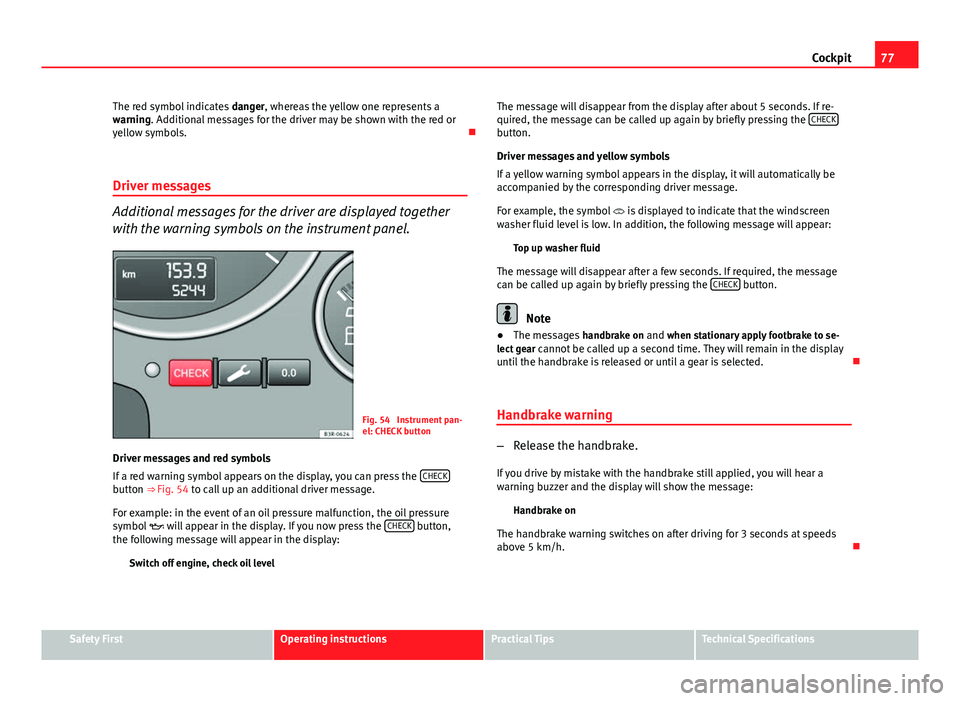
Fig. 54 Instrument pan-
el: CHECK button
Driver messages and red symbols
If a red warning symbol appears on the display, you can press the CHECK
button ⇒ Fig. 54 to call up an additional driver message.
For example: in the event of an oil pressure malfunction, the oil pressure
symbol
will appear in the display. If you now press the CHECK
button,
the following message will appear in the display:
Switch off engine, check oil level The message will disappear from the display after about 5 seconds. If re-
quired, the message can be called up again by briefly pressing the
CHECK
button.
Driver messages and yellow symbols
If a yellow warning symbol appears in the display, it will automatically be
accompanied by the corresponding driver message.
For example, the symbol
is displayed to indicate that the windscreen
washer fluid level is low. In addition, the following message will appear:
Top up washer fluid
The message will disappear after a few seconds. If required, the message
can be called up again by briefly pressing the CHECK
button.
Note
● The messages handbrake on and when stationary apply footbrake to se-
lect gear cannot be called up a second time. They will remain in the display
until the handbrake is released or until a gear is selected.
Handbrake warning
– Release the handbrake.
If you drive by mistake with the handbrake still applied, you will hear a
warning buzzer and the display will show the message: Handbrake on
The handbrake warning switches on after driving for 3 seconds at speeds
above 5 km/h.
Safety FirstOperating instructionsPractical TipsTechnical Specifications
Page 81 of 319
79
Cockpit
WARNING
● Before opening the bonnet and checking the brake fluid level, ob-
serve the warning information in ⇒ page 227, Work in the engine com-
partment.
● If the brake fluid level in the reservoir is too low, this could result in
an accident. Do not drive on! Obtain technical assistance.
● If the brake warning lamp lights up together with the ABS warning
lamp, this can mean that there is a fault in the ABS control function. As a
result, the rear wheels can lock relatively easily when braking. Under cer-
tain circumstances, the rear of the vehicle could suddenly sway from side
to side, with the subsequent danger of skidding. Drive carefully to the
nearest specialised workshop and have the fault repaired.
Fault in the cooling system
Faults in the cooling system must be repaired immediately.
If the symbol flashes in the display, this means that either the
coolant temperature is too high or the coolant level is too low. The
following message will appear in the display together with the
symbol:
Switch off engine and check coolant level
– Stop the vehicle.
– Switch the ignition off.
– Check the coolant level ⇒ page 233.
– Add more coolant if necessary ⇒ page 234.
– Wait for the symbol to go out before driving on. –
Obtain professional assistance if necessary.
If the coolant level is correct, the overheating may be caused by a malfunc-
tion of the radiator fan.
If the alternator warning lamp lights up as well ⇒ page 70, it is possible that
the drive belt has broken.
CAUTION
Do not drive on if the symbol has come on to indicate a fault in the cool-
ing system, otherwise there is a risk of engine damage.
Engine oil pressure too low
If the engine oil pressure is too low the fault must be re-
paired immediately.
If the symbol flashes in the display, the oil pressure is too low.
The following message will appear in the display together with the
symbol:
Switch off engine, check oil level
– Stop the vehicle.
– Switch the ignition off.
– Check the engine oil level ⇒ page 231.
– Obtain professional assistance if necessary.
Engine oil level too low
If the engine oil level is too low, add more oil ⇒ page 232.
Safety FirstOperating instructionsPractical TipsTechnical Specifications
Page 83 of 319
81
Cockpit
Yellow symbols are used to indicate a Priority 2 fault (warning).
Yellow symbols are accompanied by one warning buzzer. The function indi-
cated should be checked as soon as possible. If several Priority 2 faults are
detected at the same time, the symbols are displayed one after the other for
about 2 seconds at a time.
Brake light failure
This warning light will appear on the upper part of the display if any of the
brake lights has failed. A text message in the central part of the display indi-
cates which brake light has failed (left or right).
Fuel level low
When this symbol comes on for the first time, there are about 8 to 10 li-
tres of fuel left in the tank. You should fill up as soon as possible
⇒ page 224.
Engine speed governing
Max. engine speed XXXX rpm
There is a fault in the engine management. In addition, the warning lamp
on the instrument panel will light up. The engine speed will be governed to
the speed displayed in the driver information system. Please ensure that
the engine speed does not exceed the speed shown (for example, when
changing down a gear).
Take the vehicle to a specialised workshop immediately to have the fault re-
paired. Checking the engine oil level
If the symbol lights up, please check the engine oil level as soon as pos-
sible ⇒ page 231. Top up the oil at the next opportunity ⇒ page 232.
Engine oil sensor defective*
If the symbol lights up, take the vehicle to a specialised workshop and
have the oil level sensor checked. Until then it is advisable to check the oil
level every time you fill up with fuel ⇒ page 231.
Diesel particulate filter obstructed
If the symbol lights up, you can contribute towards automatic filter
cleaning by driving in the right manner. To do this, drive about 15 minutes
in 4th or 5th gear (automatic gearbox: S gear range) at a speed of 60 km/h,
with the engine running at approximately 2,000 rpm. The increase in tem-
perature will burn off any soot in the filter. When cleaning is successful, the
symbol switches off.
If the symbol does not turn off, or the three lamps turn on (particulate
filter , emission control system fault and heaters ), take the vehicle
to a specialised workshop to repair the fault.
For further information on the diesel particulate filter, see ⇒ page 196.
WARNING
It is essential that you adjust your speed to suit the weather, road, ter-
rain and traffic conditions. The recommended driving speed must never
lead to the driver disregarding the traffic regulations.
Safety FirstOperating instructionsPractical TipsTechnical Specifications