heater Seat Exeo 2013 Owner's manual
[x] Cancel search | Manufacturer: SEAT, Model Year: 2013, Model line: Exeo, Model: Seat Exeo 2013Pages: 319, PDF Size: 4.81 MB
Page 83 of 319
81
Cockpit
Yellow symbols are used to indicate a Priority 2 fault (warning).
Yellow symbols are accompanied by one warning buzzer. The function indi-
cated should be checked as soon as possible. If several Priority 2 faults are
detected at the same time, the symbols are displayed one after the other for
about 2 seconds at a time.
Brake light failure
This warning light will appear on the upper part of the display if any of the
brake lights has failed. A text message in the central part of the display indi-
cates which brake light has failed (left or right).
Fuel level low
When this symbol comes on for the first time, there are about 8 to 10 li-
tres of fuel left in the tank. You should fill up as soon as possible
⇒ page 224.
Engine speed governing
Max. engine speed XXXX rpm
There is a fault in the engine management. In addition, the warning lamp
on the instrument panel will light up. The engine speed will be governed to
the speed displayed in the driver information system. Please ensure that
the engine speed does not exceed the speed shown (for example, when
changing down a gear).
Take the vehicle to a specialised workshop immediately to have the fault re-
paired. Checking the engine oil level
If the symbol lights up, please check the engine oil level as soon as pos-
sible ⇒ page 231. Top up the oil at the next opportunity ⇒ page 232.
Engine oil sensor defective*
If the symbol lights up, take the vehicle to a specialised workshop and
have the oil level sensor checked. Until then it is advisable to check the oil
level every time you fill up with fuel ⇒ page 231.
Diesel particulate filter obstructed
If the symbol lights up, you can contribute towards automatic filter
cleaning by driving in the right manner. To do this, drive about 15 minutes
in 4th or 5th gear (automatic gearbox: S gear range) at a speed of 60 km/h,
with the engine running at approximately 2,000 rpm. The increase in tem-
perature will burn off any soot in the filter. When cleaning is successful, the
symbol switches off.
If the symbol does not turn off, or the three lamps turn on (particulate
filter , emission control system fault and heaters ), take the vehicle
to a specialised workshop to repair the fault.
For further information on the diesel particulate filter, see ⇒ page 196.
WARNING
It is essential that you adjust your speed to suit the weather, road, ter-
rain and traffic conditions. The recommended driving speed must never
lead to the driver disregarding the traffic regulations.
Safety FirstOperating instructionsPractical TipsTechnical Specifications
Page 128 of 319
126Lights and visibility
Visibility
Heated rear window
The rear window heating clears the rear window of conden-
sation.
Fig. 96 Switch for heat-
ed rear window
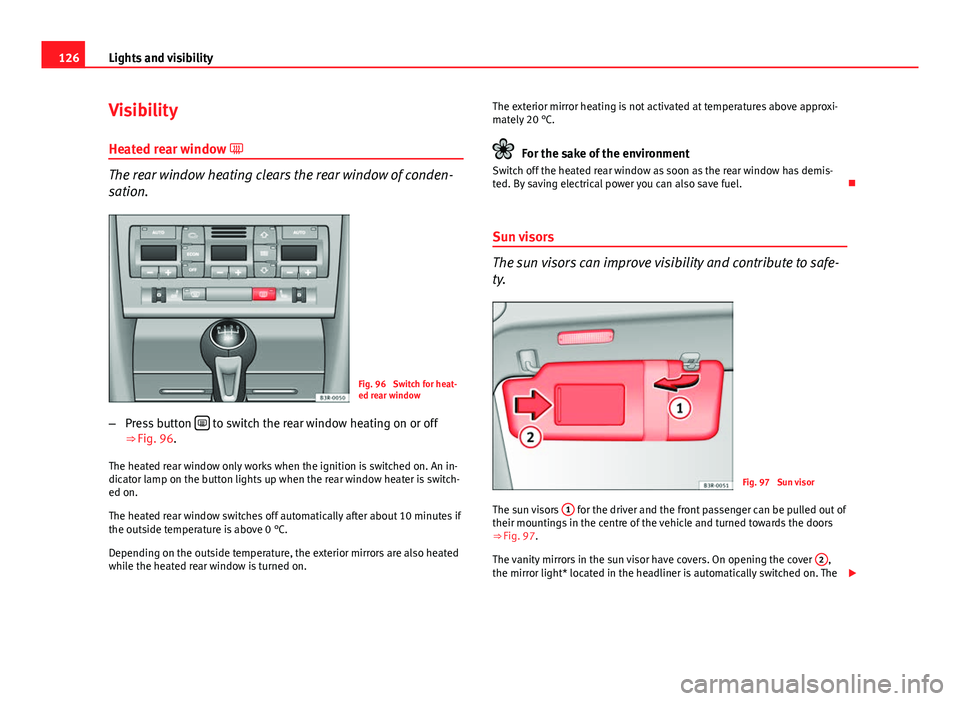
– Press button
to switch the rear window heating on or off
⇒ Fig. 96.
The heated rear window only works when the ignition is switched on. An in-
dicator lamp on the button lights up when the rear window heater is switch-
ed on.
The heated rear window switches off automatically after about 10 minutes if
the outside temperature is above 0 °C.
Depending on the outside temperature, the exterior mirrors are also heated
while the heated rear window is turned on. The exterior mirror heating is not activated at temperatures above approxi-
mately 20 °C.
For the sake of the environment
Switch off the heated rear window as soon as the rear window has demis-
ted. By saving electrical power you can also save fuel.
Sun visors
The sun visors can improve visibility and contribute to safe-
ty.
Fig. 97 Sun visor
The sun visors 1
for the driver and the front passenger can be pulled out of
their mountings in the centre of the vehicle and turned towards the doors
⇒ Fig. 97.
The vanity mirrors in the sun visor have covers. On opening the cover 2
,
the mirror light* located in the headliner is automatically switched on. The
Page 150 of 319
148Seats and storage
WARNING
Never put waste paper in the ashtray, as this could cause a fire.
Rear ashtray
Fig. 122 Rear ashtray
Opening the ashtray
– Lift the lid.
Removing the ashtray
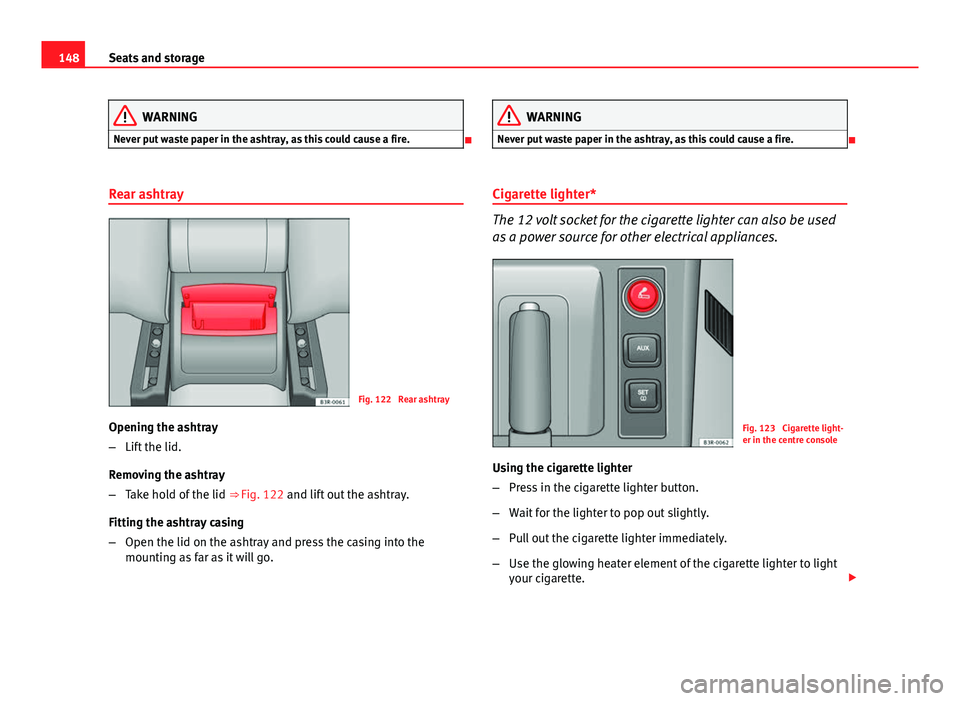
– Take hold of the lid ⇒ Fig. 122 and lift out the ashtray.
Fitting the ashtray casing
– Open the lid on the ashtray and press the casing into the
mounting as far as it will go.
WARNING
Never put waste paper in the ashtray, as this could cause a fire.
Cigarette lighter*
The 12 volt socket for the cigarette lighter can also be used
as a power source for other electrical appliances.
Fig. 123 Cigarette light-
er in the centre console
Using the cigarette lighter
– Press in the cigarette lighter button.
– Wait for the lighter to pop out slightly.
– Pull out the cigarette lighter immediately.
– Use the glowing heater element of the cigarette lighter to light
your cigarette.
Page 161 of 319
159
Air conditioning
Defrosting
The windscreen and side windows are defrosted or demisted
as quickly as possible.
– To enable this mode, press the
⇒
Fig. 129 button.
– To switch off, press the
button again, or select the AUTO but-
ton.
The temperature is regulated automatically. The air output is increased to
maximum and most of the air comes out of outlets 1 and 2 ⇒ page 162.
The air recirculation and ECON modes are switched off when the
button
is pressed.
Air recirculation: manual activation
The air recirculation setting prevents fumes etc. from enter-
ing the interior.
Activating air recirculation mode
– Press button
⇒ Fig. 129 ⇒ .
Deactivating air recirculation mode
– Press the
button again or
– Press the AUTO
button or
– Press button
.
In this setting, the air in the vehicle is constantly recirculated. We recom-
mend using the air recirculation mode in the following circumstances: ●
When driving through a tunnel or in traffic congestions, to prevent ex-
haust gas entering the interior of the vehicle.
WARNING
Do not drive for too long with the air recirculation mode enabled because,
if the compressor is disconnected, the windscreen may mist up because
no fresh air is entering the interior of the vehicle, with the subsequent
risk of accidents.
ECON Mode (economy) ECON
ECON mode helps save fuel.
– To activate, press the ECON
button ⇒ Fig. 129.
– To deactivate, press the ECON
button again or select the AUTObutton.
Air cooling is disconnected in ECON mode. The heating and the blower are
adjusted automatically. “ECON” stands for “Economy”. Disconnecting air
cooling (compressor) reduces fuel consumption.
Please note that the interior temperature must not be lower than the outside
temperature in ECON mode. The blower does not cool or dehumidify the air
in the interior. The windows could therefore mist up.
In diesel vehicles, the auxiliary heater is switched off in ECON mode to save
fuel.
Safety FirstOperating instructionsPractical TipsTechnical Specifications
Page 164 of 319
162Air conditioning
Air outlets
Fig. 131 Dash panel: Location of air outlets
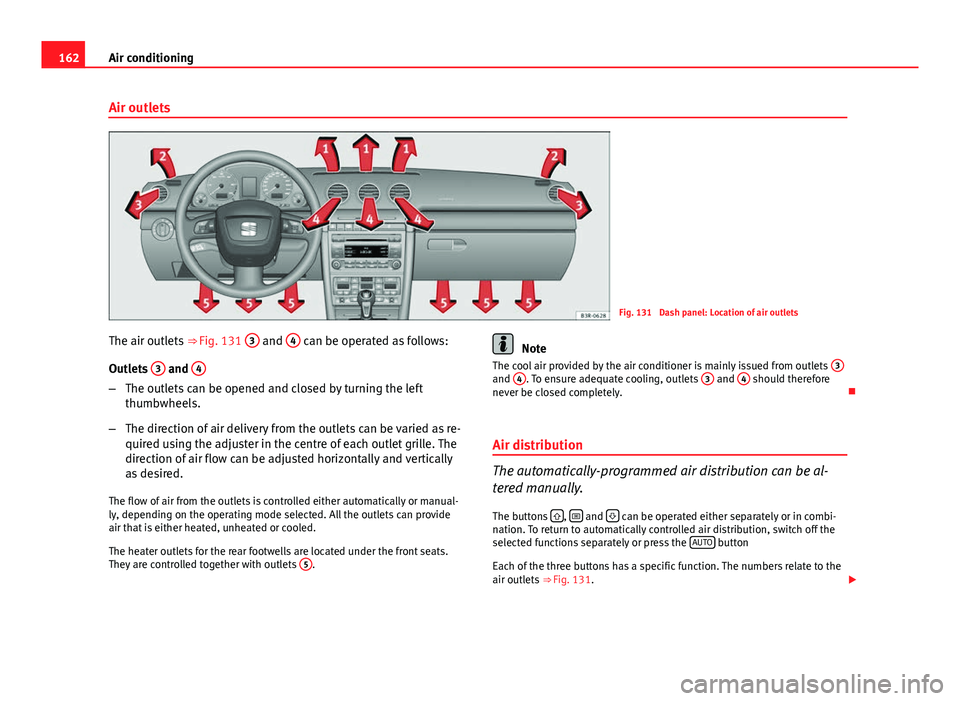
The air outlets ⇒ Fig. 131 3
and 4 can be operated as follows:
Outlets 3
and 4
–
The outlets can be opened and closed by turning the left
thumbwheels.
– The direction of air delivery from the outlets can be varied as re-
quired using the adjuster in the centre of each outlet grille. The
direction of air flow can be adjusted horizontally and vertically
as desired.
The flow of air from the outlets is controlled either automatically or manual-
ly, depending on the operating mode selected. All the outlets can provide
air that is either heated, unheated or cooled.
The heater outlets for the rear footwells are located under the front seats.
They are controlled together with outlets 5
.
Note
The cool air provided by the air conditioner is mainly issued from outlets 3
and 4. To ensure adequate cooling, outlets 3 and 4 should therefore
never be closed completely.
Air distribution
The automatically-programmed air distribution can be al-
tered manually.
The buttons
, and can be operated either separately or in combi-
nation. To return to automatically controlled air distribution, switch off the
selected functions separately or press the AUTO
button
Each of the three buttons has a specific function. The numbers relate to the
air outlets ⇒ Fig. 131.
Page 166 of 319
164Air conditioning
If the air recirculation mode is on when you switch off the engine, the air
conditioner will automatically switch to fresh air ventilation.
Auxiliary heater*
Diesel vehicles are fitted with an auxiliary heater 1)
to raise the temperature
of the interior as quickly as possible. At outdoor temperatures below +5 °C
and with the engine running, the supplementary heating will switch on and
off automatically depending on the temperature of the coolant.
In order to save fuel, the auxiliary heater can be can be switched off by brief-
ly pressing the
button on the air conditioner. Seat heating*
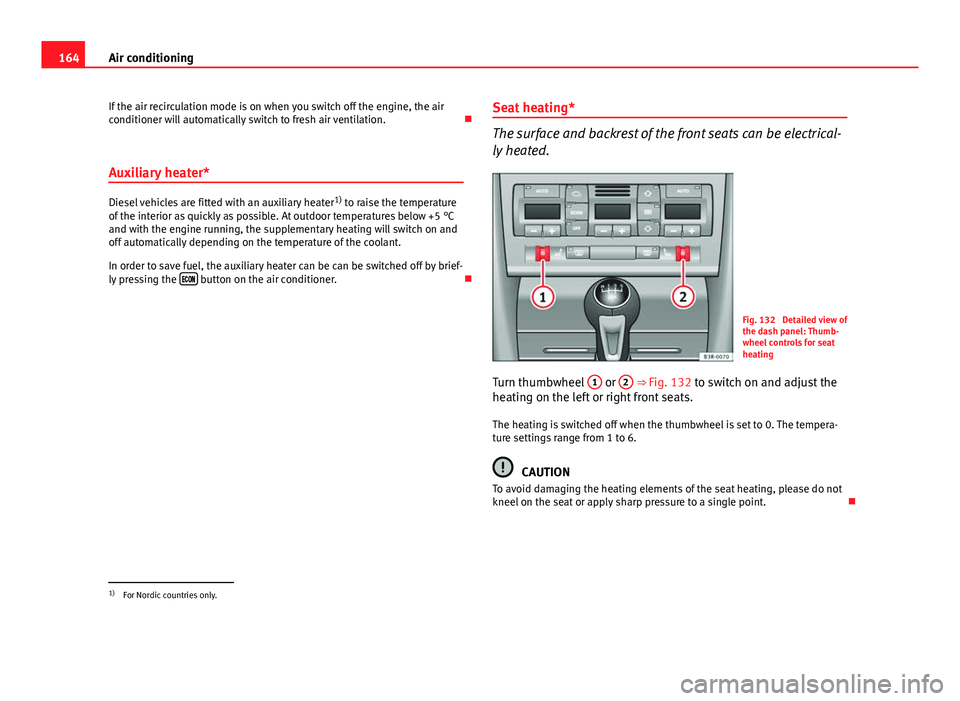
The surface and backrest of the front seats can be electrical-
ly heated.
Fig. 132 Detailed view of
the dash panel: Thumb-
wheel controls for seat
heating
Turn thumbwheel 1
or 2 ⇒ Fig. 132 to switch on and adjust the
heating on the left or right front seats.
The heating is switched off when the thumbwheel is set to 0. The tempera-
ture settings range from 1 to 6.
CAUTION
To avoid damaging the heating elements of the seat heating, please do not
kneel on the seat or apply sharp pressure to a single point.
1)
For Nordic countries only.
Page 199 of 319

197
Driving and the environment
Avoid idling
It is worthwhile switching off the engine when waiting in a traffic jam, at lev-
el crossings or at traffic lights with a long red phase. The fuel saved after
only 30 - 40 seconds is greater than the amount of fuel needed to restart
the engine.
The engine takes a long time to warm up when it is idling. Mechanical wear
and pollutant emissions are also especially high during this initial warm-up
phase. It is therefore best to drive off immediately after starting the engine.
Avoid running the engine at high speed.
Periodic maintenance
Periodic maintenance work guarantees that, before beginning a journey,
you will not consume more than the required amount of fuel. A well-serviced
engine gives you the benefit of improved fuel efficiency as well as maxi-
mum reliability and an enhanced resale value.
A badly serviced engine can consume up to 10% more fuel than necessary.
Avoid short journeys
To reduce the consumption and emission of polluting exhaust gases, the
engine and the exhaust gas filtration systems should reach the optimum
operating temperature.
With the engine cold, fuel consumption is proportionally higher. The engine
does not warm up and fuel consumption does not normalise until having
driven approximately four kilometres (2.5 miles). This is why we recommend
avoiding short trips whenever possible.
Maintain the correct tyre pressures
Bear in mind that keeping the tyres at an adequate pressure saves fuel. If
the tyre pressure is just one bar too low, fuel consumption can increase by
as much as 5%. Due to the greater rolling resistance, under-inflation also
increases tyre wear and impairs handling.
The tyre pressures should always be checked when the tyres are cold.Do not use
winter tyres all year round as they increase fuel consumption by
up to 10%.
Avoid unnecessary weight
Given that every kilo of extra weight will increase the fuel consumption, it is
advisable to always check the luggage compartment to make sure that no
unnecessary loads are being transported.
A roof rack is often left in place for the sake of convenience, even when it is
no longer needed. At a speed of 100-120 km/h (60-75 mph) your vehicle
will use about 12% more fuel as a result of the extra wind resistance caused
by the roof rack even when it is not in use.
Save electricity
The engine activates the alternator, which produces electricity. With the
need for electricity, fuel consumption is also increased. Because of this, al-
ways turn off electrical components when you do not need them. Examples
of components that use a lot of electricity are: the fan at high speeds, the
rear window heating or the seat heaters*.
Note
● If you vehicle has Start-Stop, it is not recommended to switch this func-
tion off.
● It is recommended to close the windows when driving at more than
60 km/h (40 mph)
● Do not drive with your foot resting on the clutch pedal, as the pressure
can make the plate spin, more fuel will be used and it can burn the clutch
plate lining, causing a serious fault.
● Do not hold the vehicle on a hill with the clutch, use the foot brake or
hand brake, using the latter to start. The fuel consumption will be lower and
you will prevent the clutch plate from being damaged.
● On descents, use the engine brake, changing to the gear that is more
suitable for the slope. The fuel consumption will be lower and the brakes
will not suffer.
Safety FirstOperating instructionsPractical TipsTechnical Specifications
Page 229 of 319
227
Checking and refilling levels
Winter driving
Diesel can thicken in winter.
Winter-grade diesel
When using summer-grade diesel fuel, difficulties may be experienced at
sub-zero temperatures because the fuel thickens due to wax separation. For
this reason, winter-grade diesel fuel is available in some countries during
the cold months. It can be used at temperatures as low as -22 °C.
In countries with different climatic conditions the diesel fuel generally sold
has different temperature characteristics. Check with the Technical Services
or filling stations in the country concerned regarding the type of diesel fuels
available.
Filter pre-heater
Your vehicle is fitted with a fuel filter glow plug system, making it well
equipped for operation in winter. This ensures that the fuel system remains
operational to approx. -24 °C, provided you use winter-grade diesel that is
safe to -15 °C.
However, if the fuel has waxed to such an extent that the engine will not
start at temperatures of under -24 °C, simply place the vehicle in a warm
place for a while.
CAUTION
Do not mix fuel additives (thinners or similar products) with diesel fuel. Bonnet
Work in the engine compartment
Extra caution is necessary when working on components in
the engine compartment. Always be aware of the danger of injury and scalding as well as the risk of
accident or even fire when working in the engine compartment (e.g. when
checking and refilling fluids). Always observe the warnings listed below
and follow all general safety precautions. The engine compartment of the
vehicle is a potentially hazardous area ⇒
WARNING
● Switch the ignition off.
● Remove the ignition key.
● Apply the handbrake firmly.
● If your vehicle is equipped with a manual gearbox, place the gear lev-
er in neutral. If you are driving an automatic vehicle, place the selector
lever in position P.
● Wait for the engine to cool down.
● Children should not be allowed to approach the engine compartment.
● Never spill liquids used for vehicle operation on the engine compart-
ment, as these may catch fire (e.g. the antifreeze in coolant).
● Take care not to cause short circuits in the electrical system, especial-
ly when working on the battery.
● Never touch the radiator fan while the engine is hot, as the fan could
start up suddenly.
● Never open the expansion tank when the engine is hot. The cooling
system is under pressure.
Safety FirstOperating instructionsPractical TipsTechnical Specifications
Page 290 of 319
288If and when
–Connect one end of the red jump lead to the positive +
termi-
nal of the vehicle with the flat battery A ⇒ Fig. 231.
– Connect the other end of the red jump lead to the positive ter-
minal +
in the vehicle providing assistance B.
– Connect one end of the black jump lead X
to a suitable ground
terminal, a solid piece of metal in the engine block, or to the en-
gine block ⇒ Fig. 231.
– Connect the other end of the black jump lead X
to a solid met-
al component bolted to the engine block or to the engine block
itself of the vehicle with the flat battery. However, connect it to
a point as far as possible from the battery A
.
4. Position the leads in such a way that they cannot come into contact with any moving parts in the engine compartment.
Starting
5. Start the engine of the vehicle with the boosting battery and let it run at idling speed.
6. Start the engine of the vehicle with the flat battery and wait two or three minutes until the engine is “running”.
Removing the jump leads
7. Before you remove the jump leads, switch off the dipped beam headlights (if they are switched on).
8. Turn on the heater blower and heated rear window in the vehi- cle with the flat battery. This helps minimise voltage peaks
which are generated when the leads are disconnected.
9. When the engine is running, disconnect the leads in reverse or- der to the details given above. Connect the battery clamps so they have good metal-to-metal contact with
the battery terminals.
If the engine fails to start, switch off the starter after about 10 seconds and
try again after about half a minute.
WARNING
● Please note the safety warnings referring to working in the engine
compartment ⇒ page 227.
● The battery providing assistance must have the same voltage as the
flat battery (12V) and approximately the same capacity (see imprint on
battery). Failure to comply could result in an explosion.
● Never use jump leads when one of the batteries is frozen. Danger of
explosion! Even after the battery has thawed, battery acid could leak and
cause chemical burns. If a battery freezes, it should be replaced.
● Keep sparks, flames and lighted cigarettes away from batteries, dan-
ger of explosion. Failure to comply could result in an explosion.
● Observe the instructions provided by the manufacturer of the jump
leads.
● Do not connect the negative cable from the other vehicle directly to
the negative terminal of the flat battery. The gas emitted from the battery
could be ignited by sparks. Danger of explosion.
● Do not attach the negative cable from the other vehicle to parts of the
fuel system or to the brake line.
● The non-insulated parts of the battery clamps must not be allowed to
touch. The jump lead attached to the positive battery terminal must not
touch metal parts of the vehicle, this can cause a short circuit.
● Position the leads in such a way that they cannot come into contact
with any moving parts in the engine compartment.
● Do not lean on the batteries. This could result in chemical burns.
Page 309 of 319
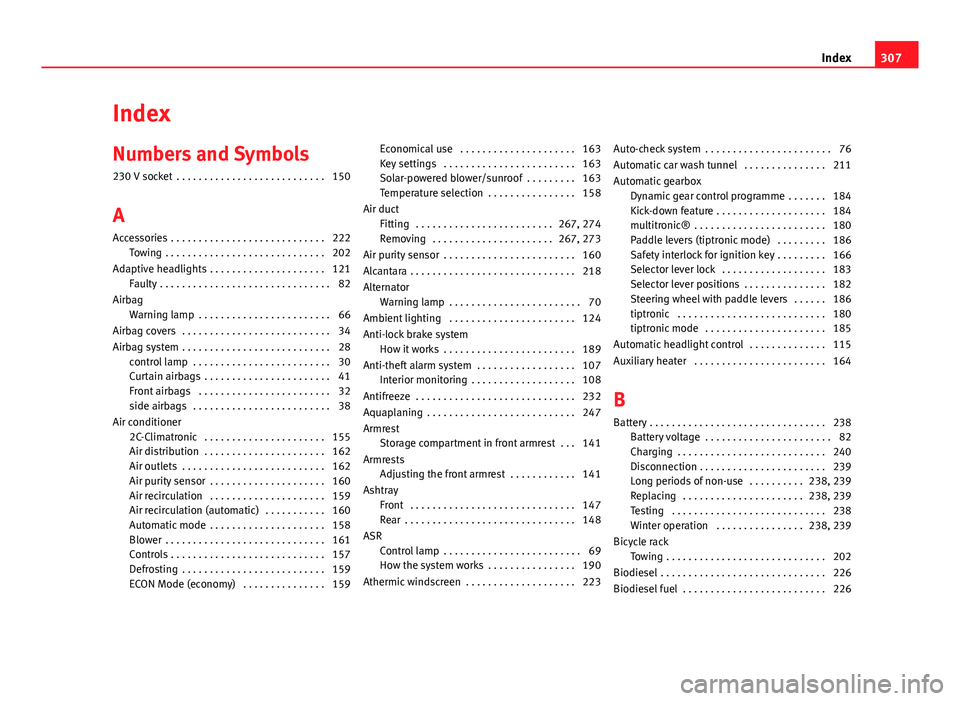
Index
Numbers and Symbols
230 V socket . . . . . . . . . . . . . . . . . . . . . . . . . . . 150
A
Accessories . . . . . . . . . . . . . . . . . . . . . . . . . . . . 222 Towing . . . . . . . . . . . . . . . . . . . . . . . . . . . . . 202
Adaptive headlights . . . . . . . . . . . . . . . . . . . . . 121 Faulty . . . . . . . . . . . . . . . . . . . . . . . . . . . . . . . 82
Airbag Warning lamp . . . . . . . . . . . . . . . . . . . . . . . . 66
Airbag covers . . . . . . . . . . . . . . . . . . . . . . . . . . . 34
Airbag system . . . . . . . . . . . . . . . . . . . . . . . . . . . 28 control lamp . . . . . . . . . . . . . . . . . . . . . . . . . 30
Curtain airbags . . . . . . . . . . . . . . . . . . . . . . . 41
Front airbags . . . . . . . . . . . . . . . . . . . . . . . . 32
side airbags . . . . . . . . . . . . . . . . . . . . . . . . . 38
Air conditioner 2C-Climatronic . . . . . . . . . . . . . . . . . . . . . . 155
Air distribution . . . . . . . . . . . . . . . . . . . . . . 162
Air outlets . . . . . . . . . . . . . . . . . . . . . . . . . . 162
Air purity sensor . . . . . . . . . . . . . . . . . . . . . 160
Air recirculation . . . . . . . . . . . . . . . . . . . . . 159
Air recirculation (automatic) . . . . . . . . . . . 160
Automatic mode . . . . . . . . . . . . . . . . . . . . . 158
Blower . . . . . . . . . . . . . . . . . . . . . . . . . . . . . 161
Controls . . . . . . . . . . . . . . . . . . . . . . . . . . . . 157
Defrosting . . . . . . . . . . . . . . . . . . . . . . . . . . 159
ECON Mode (economy) . . . . . . . . . . . . . . . 159 Economical use . . . . . . . . . . . . . . . . . . . . . 163
Key settings . . . . . . . . . . . . . . . . . . . . . . . . 163
Solar-powered blower/sunroof . . . . . . . . . 163
Temperature selection . . . . . . . . . . . . . . . . 158
Air duct Fitting . . . . . . . . . . . . . . . . . . . . . . . . . 267, 274
Removing . . . . . . . . . . . . . . . . . . . . . . 267, 273
Air purity sensor . . . . . . . . . . . . . . . . . . . . . . . . 160
Alcantara . . . . . . . . . . . . . . . . . . . . . . . . . . . . . . 218
Alternator Warning lamp . . . . . . . . . . . . . . . . . . . . . . . . 70
Ambient lighting . . . . . . . . . . . . . . . . . . . . . . . 124
Anti-lock brake system How it works . . . . . . . . . . . . . . . . . . . . . . . . 189
Anti-theft alarm system . . . . . . . . . . . . . . . . . . 107 Interior monitoring . . . . . . . . . . . . . . . . . . . 108
Antifreeze . . . . . . . . . . . . . . . . . . . . . . . . . . . . . 232
Aquaplaning . . . . . . . . . . . . . . . . . . . . . . . . . . . 247
Armrest Storage compartment in front armrest . . . 141
Armrests Adjusting the front armrest . . . . . . . . . . . . 141
Ashtray Front . . . . . . . . . . . . . . . . . . . . . . . . . . . . . . 147
Rear . . . . . . . . . . . . . . . . . . . . . . . . . . . . . . . 148
ASR Control lamp . . . . . . . . . . . . . . . . . . . . . . . . . 69
How the system works . . . . . . . . . . . . . . . . 190
Athermic windscreen . . . . . . . . . . . . . . . . . . . . 223 Auto-check system . . . . . . . . . . . . . . . . . . . . . . . 76
Automatic car wash tunnel . . . . . . . . . . . . . . . 211
Automatic gearbox
Dynamic gear control programme . . . . . . . 184
Kick-down feature . . . . . . . . . . . . . . . . . . . . 184
multitronic® . . . . . . . . . . . . . . . . . . . . . . . . 180
Paddle levers (tiptronic mode) . . . . . . . . . 186
Safety interlock for ignition key . . . . . . . . . 166
Selector lever lock . . . . . . . . . . . . . . . . . . . 183
Selector lever positions . . . . . . . . . . . . . . . 182
Steering wheel with paddle levers . . . . . . 186
tiptronic . . . . . . . . . . . . . . . . . . . . . . . . . . . 180
tiptronic mode . . . . . . . . . . . . . . . . . . . . . . 185
Automatic headlight control . . . . . . . . . . . . . . 115
Auxiliary heater . . . . . . . . . . . . . . . . . . . . . . . . 164
B
Battery . . . . . . . . . . . . . . . . . . . . . . . . . . . . . . . . 238 Battery voltage . . . . . . . . . . . . . . . . . . . . . . . 82
Charging . . . . . . . . . . . . . . . . . . . . . . . . . . . 240
Disconnection . . . . . . . . . . . . . . . . . . . . . . . 239
Long periods of non-use . . . . . . . . . . 238, 239
Replacing . . . . . . . . . . . . . . . . . . . . . . 238, 239
Testing . . . . . . . . . . . . . . . . . . . . . . . . . . . . 238
Winter operation . . . . . . . . . . . . . . . . 238, 239
Bicycle rack Towing . . . . . . . . . . . . . . . . . . . . . . . . . . . . . 202
Biodiesel . . . . . . . . . . . . . . . . . . . . . . . . . . . . . . 226
Biodiesel fuel . . . . . . . . . . . . . . . . . . . . . . . . . . 226
307
Index