towing Seat Exeo 2013 Owner's manual
[x] Cancel search | Manufacturer: SEAT, Model Year: 2013, Model line: Exeo, Model: Seat Exeo 2013Pages: 319, PDF Size: 4.81 MB
Page 6 of 319
Trailer towing . . . . . . . . . . . . . . . . . . . . . . . . . . . . . . 200
Trailer towing . . . . . . . . . . . . . . . . . . . . . . . . . . . . . 200
Removable towing bracket . . . . . . . . . . . . . . . . . . 203
Vehicle maintenance and cleaning . . . . . . . . . 210
General notes . . . . . . . . . . . . . . . . . . . . . . . . . . . . 210
Care of the vehicle exterior . . . . . . . . . . . . . . . . . . 211
Vehicle interior maintenance . . . . . . . . . . . . . . . . 216
Accessories, replacement of parts and
modifications . . . . . . . . . . . . . . . . . . . . . . . . . . . . . 222
Accessories and spare parts . . . . . . . . . . . . . . . . 222
Technical modifications . . . . . . . . . . . . . . . . . . . . 222
Mobile phones and two-way radios . . . . . . . . . . . 223
Athermic windscreen* . . . . . . . . . . . . . . . . . . . . . 223
Checking and refilling levels . . . . . . . . . . . . . . . 224
Refuelling . . . . . . . . . . . . . . . . . . . . . . . . . . . . . . . 224
Petrol . . . . . . . . . . . . . . . . . . . . . . . . . . . . . . . . . . . 225
Diesel . . . . . . . . . . . . . . . . . . . . . . . . . . . . . . . . . . . 226
Bonnet . . . . . . . . . . . . . . . . . . . . . . . . . . . . . . . . . . 227
Engine oil . . . . . . . . . . . . . . . . . . . . . . . . . . . . . . . . 229
Cooling system . . . . . . . . . . . . . . . . . . . . . . . . . . . 232
Washer fluid and windscreen wiper blades . . . . 235
Brake fluid . . . . . . . . . . . . . . . . . . . . . . . . . . . . . . . 237
Vehicle battery . . . . . . . . . . . . . . . . . . . . . . . . . . . 238
Wheels and tyres . . . . . . . . . . . . . . . . . . . . . . . . . . 242
Wheels . . . . . . . . . . . . . . . . . . . . . . . . . . . . . . . . . . 242
If and when . . . . . . . . . . . . . . . . . . . . . . . . . . . . . . . 252
Tools, tyre repair kit and spare wheel . . . . . . . . . 252
Changing a wheel . . . . . . . . . . . . . . . . . . . . . . . . . 254
Tyre repair* (Tyre-Mobility-System) . . . . . . . . . . . 259
Fuses . . . . . . . . . . . . . . . . . . . . . . . . . . . . . . . . . . . 263
Bulbs . . . . . . . . . . . . . . . . . . . . . . . . . . . . . . . . . . . 265
Changing bulbs. Halogen headlights . . . . . . . . . 266
Changing bulbs. Bi-Xenon AFS headlights . . . . . 272
Changing tail light bulbs (on side panel) . . . . . . 276
Changing tail light bulbs (on rear lid) . . . . . . . . . 281
Side turn signals . . . . . . . . . . . . . . . . . . . . . . . . . . 284 Luggage compartment lights . . . . . . . . . . . . . . . . 285
Registration light . . . . . . . . . . . . . . . . . . . . . . . . . . 285
Sun visor light . . . . . . . . . . . . . . . . . . . . . . . . . . . . 286
Jump-starting . . . . . . . . . . . . . . . . . . . . . . . . . . . . . 286
Towing and tow-starting . . . . . . . . . . . . . . . . . . . . 290
Technical Specifications . . . . . . . . . . . 293
Description of specifications . . . . . . . . . . . . . . . 293
Important information . . . . . . . . . . . . . . . . . . . . . 293
Information on fuel consumption . . . . . . . . . . . . 294
Towing a trailer . . . . . . . . . . . . . . . . . . . . . . . . . . . 296
Wheels . . . . . . . . . . . . . . . . . . . . . . . . . . . . . . . . . . 296
Technical specifications . . . . . . . . . . . . . . . . . . . . 297
Engine specifications . . . . . . . . . . . . . . . . . . . . . . 297
Dimensions and capacities . . . . . . . . . . . . . . . . . 305
Index . . . . . . . . . . . . . . . . . . . . . . . . . . . . . . . . . . . 307
4Table of Contents
Page 69 of 319
67
Cockpit
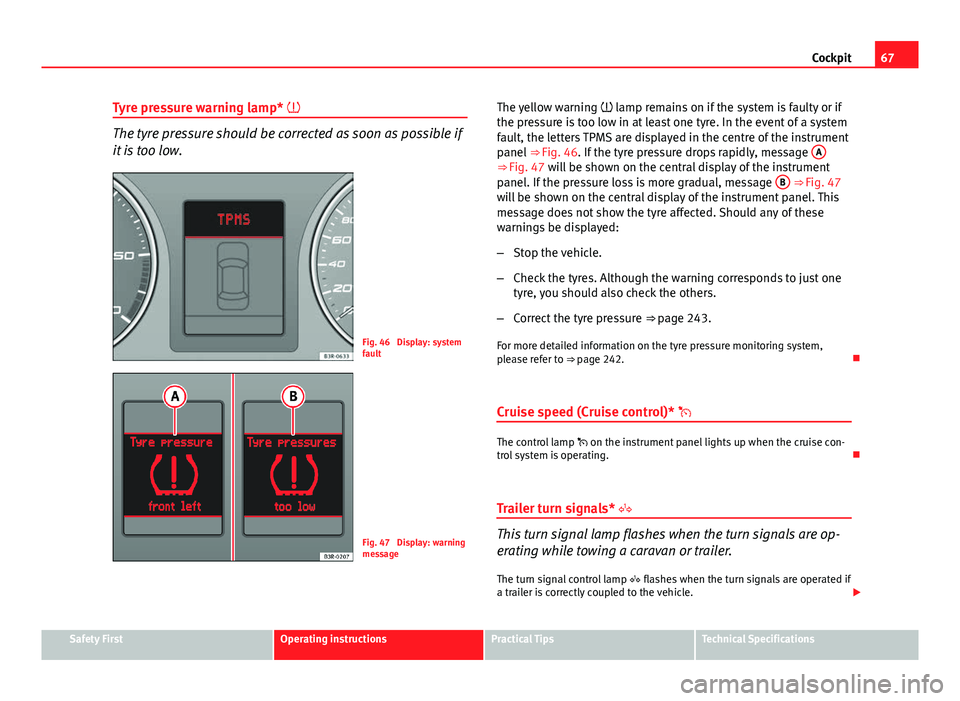
Tyre pressure warning lamp*
The tyre pressure should be corrected as soon as possible if
it is too low.
Fig. 46 Display: system
fault
Fig. 47 Display: warning
message The yellow warning
lamp remains on if the system is faulty or if
the pressure is too low in at least one tyre. In the event of a system
fault, the letters TPMS are displayed in the centre of the instrument
panel ⇒ Fig. 46. If the tyre pressure drops rapidly, message A
⇒ Fig. 47 will be shown on the central display of the instrument
panel. If the pressure loss is more gradual, message B ⇒ Fig. 47
will be shown on the central display of the instrument panel. This
message does not show the tyre affected. Should any of these
warnings be displayed:
– Stop the vehicle.
– Check the tyres. Although the warning corresponds to just one
tyre, you should also check the others.
– Correct the tyre pressure ⇒ page 243.
For more detailed information on the tyre pressure monitoring system,
please refer to ⇒ page 242.
Cruise speed (Cruise control)*
The control lamp on the instrument panel lights up when the cruise con-
trol system is operating.
Trailer turn signals*
This turn signal lamp flashes when the turn signals are op-
erating while towing a caravan or trailer. The turn signal control lamp flashes when the turn signals are operated if
a trailer is correctly coupled to the vehicle.
Safety FirstOperating instructionsPractical TipsTechnical Specifications
Page 71 of 319
69
Cockpit
Turn signals and hazard warning lights
Depending on which turn signal is operated, either the left or right turn
signal lamp flashes. Both turn signal lamps will flash when the hazard warn-
ing lights are switched on.
If a turn signal fails, the indicator lamp will start flashing twice as fast as
normal.
This does not apply when towing a trailer. Where a turn signal bulb does not
work, either on the trailer or on the towing vehicle, the turn signal bulb will
not flash. For further information on the turn signals, see ⇒ page 122.
Electronic Stability Control (ESC)* /
There are two control lamps for the electronic stability con-
trol. The lamp provides information concerning the func-
tion and the provides information on the disconnection
status
Both lamps come on together when the ignition is switched on and should
go out after approx. 2 seconds, which is how long the function check lasts.
This programme includes the ABS, EDL and ASR. This also includes the
brake assistance system (BAS), automatic cleaning of the brake discs and
the trailer stability programme (TSP).
The warning lamp has the following functions:
● It flashes whilst driving when the ASR/ESC is activated.
● It will light up continuously if there is a fault in the ESC.
● As the ESC operates in conjunction with the ABS, it will also light up if a
fault should occur in the ABS. If the ESC control lamp
lights up and stays on after the engine is started,
this may mean that the control system has temporarily switched off the ESC.
In this case the ESC can be reactivated by switching the ignition off and
then on again. If the control lamp goes out, this means the system is fully
functional.
The lamp provides information about the disconnection status of the
system:
● It stays lit when the ASR is disconnected when pressing the switch.
Traction control system (ASR)* /
The traction control system prevents the driven wheels from
spinning when the vehicle is accelerating
There are two warning lamps for the traction control system: and . Both
lamps come on together when the ignition is switched on and should go out
after approx. 2 seconds, which is how long the function check lasts.
The lamp has the following function:
● It flashes when the ASR is working if the vehicle is moving.
If the system is deactivated or if it has any fault, the warning lamp will re-
main lit. The warning lamp will also light up if a fault should occur in the
ABS because the ASR operates in conjunction with the ABS. For further in-
formation, see ⇒ page 188.
The lamp provides information about the disconnection status of the
system:
● It stays lit when the ASR is disconnected when pressing the ASR OFF
switch.
By pressing it again, the ASR function is reactivated and the warning lamp
switched off.
Safety FirstOperating instructionsPractical TipsTechnical Specifications
Page 119 of 319
117
Lights and visibility
● The warning symbol will appear on the instrument panel if a malfunc-
tion occurs ⇒ page 82.
● Observe all relevant legal requirements when using the signalling and
lighting systems described here.
Front fog lights
The light switch can also be used to turn on the front fog
lights.
Switching on the front fog lights
– Do ⇒ Fig. 83 not turn the light switch to the symbol .
– First turn the light switch to the position or .
– Then pull the light switch out to the first stop 1
.
The front fog light symbol next to the switch will light up when the front
fog lights are on.
Rear fog light
The light switch can also be used to turn on the rear fog
light.
– Do ⇒ Fig. 83 not turn the light switch to the symbol .
– First turn the light switch ⇒ Fig. 83 to the position or .
– Then pull out the light switch to the second stop 2
to switch
on the rear fog light. The symbols
and next to the switch will light up when the rear fog light
is switched on.
If you are towing a trailer or caravan equipped with a rear fog light on a vehi-
cle with a factory-fitted towing bracket*, only the rear fog light on the trailer
or caravan will light up.
CAUTION
To avoid dazzling the traffic behind you, the rear fog light should only be
used in accordance with legal regulations.
Coming home / leaving home function*
The coming home and leaving home functions are used to
light up the surroundings in the dark. The front fog lights,
the rear side lights and the number plate light switch on.
Fig. 85 Detailed view of
the dash panel: Coming
home and leaving home
functions
Safety FirstOperating instructionsPractical TipsTechnical Specifications
Page 124 of 319
122Lights and visibility
All four turn signals flash simultaneously when the hazard warning lights
are switched on. The turn signal indicators and the hazard control lamp
indicator flash at the same time. The hazard warning lights also work
when the ignition is switched off.
In an accident in which the airbags are triggered, the hazard warning lights
are switched on automatically.
Note
You should switch on the hazard warning lights to warn other road users,
e.g.
● When reaching the tail end of a traffic jam
● If your vehicle breaks down or there is an emergency
● If your vehicle is being towed away or if you are towing another vehicle Turn signal
and main beam headlight lever
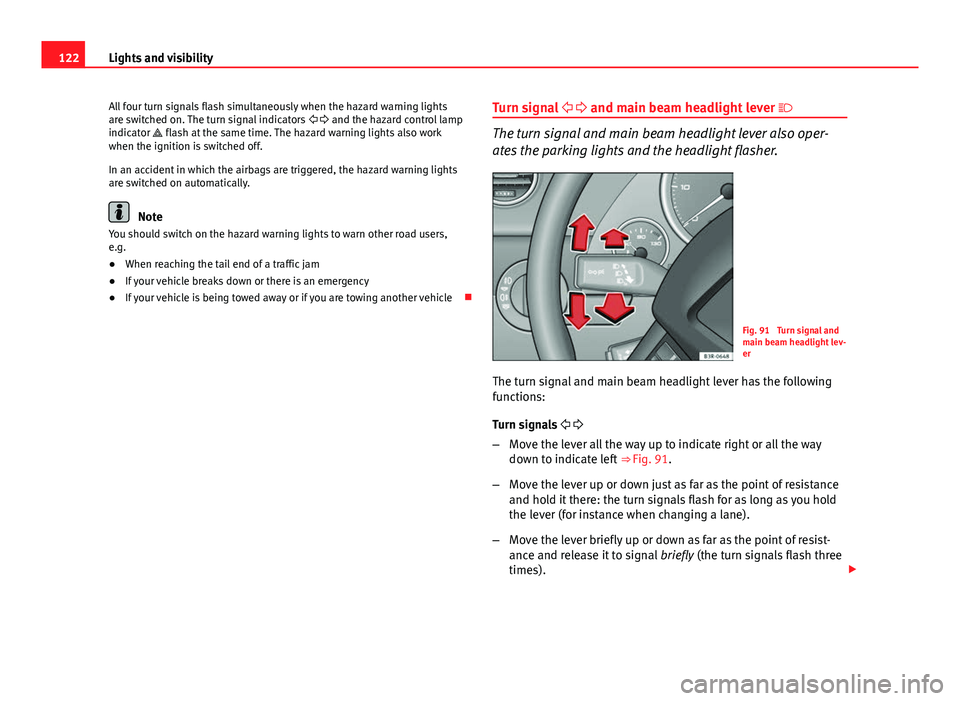
The turn signal and main beam headlight lever also oper-
ates the parking lights and the headlight flasher.
Fig. 91 Turn signal and
main beam headlight lev-
er
The turn signal and main beam headlight lever has the following
functions:
Turn signals
– Move the lever all the way up to indicate right or all the way
down to indicate left ⇒ Fig. 91.
– Move the lever up or down just as far as the point of resistance
and hold it there: the turn signals flash for as long as you hold
the lever (for instance when changing a lane).
– Move the lever briefly up or down as far as the point of resist-
ance and release it to signal briefly (the turn signals flash three
times).
Page 168 of 319
166Driving
The Electronic Stability Control (ESC) contains the electronic differential lock
(EDL) and the traction control system (ASR). The ESC works together with
the ABS. If a fault in the ABS occurs, both warning lamps light up, but if the
ESC fails, only the ESC warning lamp lights up.
The ESC system is started automatically when the engine is started.
The ESC system is always active and cannot be switched off. The ESC switch
only switches the ASR off.
The ASR can be deactivated when wheel spin is desirable.
For example:
● When driving with snow chains.
● When driving in deep snow or on loose surfaces.
● When the vehicle is stuck, to rock it backwards and forwards.
Press the button to switch the ASR back on when you no longer need wheel
spin.
Situations in which the warning lamp lights
●
On switching the ignition on, it lights up for about two seconds to carry
out a function control.
● The warning lamp will start flashing when the vehicle is moving if the
ESC or the ASR is activated.
● It will light up continuously if there is a fault in the ESC.
WARNING
● Do not forget that the Electronic stability control ESC cannot defy the
laws of physics. This should be kept in mind, particularly on slippery and
wet roads and when towing a trailer.
● Always adapt your driving style to suit the condition of the roads and
the traffic situation. The greater safety provided by the ESC should not
encourage you to run any risks.
● Please refer to the corresponding warning notes on ESC in
⇒ page 188, Intelligent technology.
Ignition lock Ignition key positions
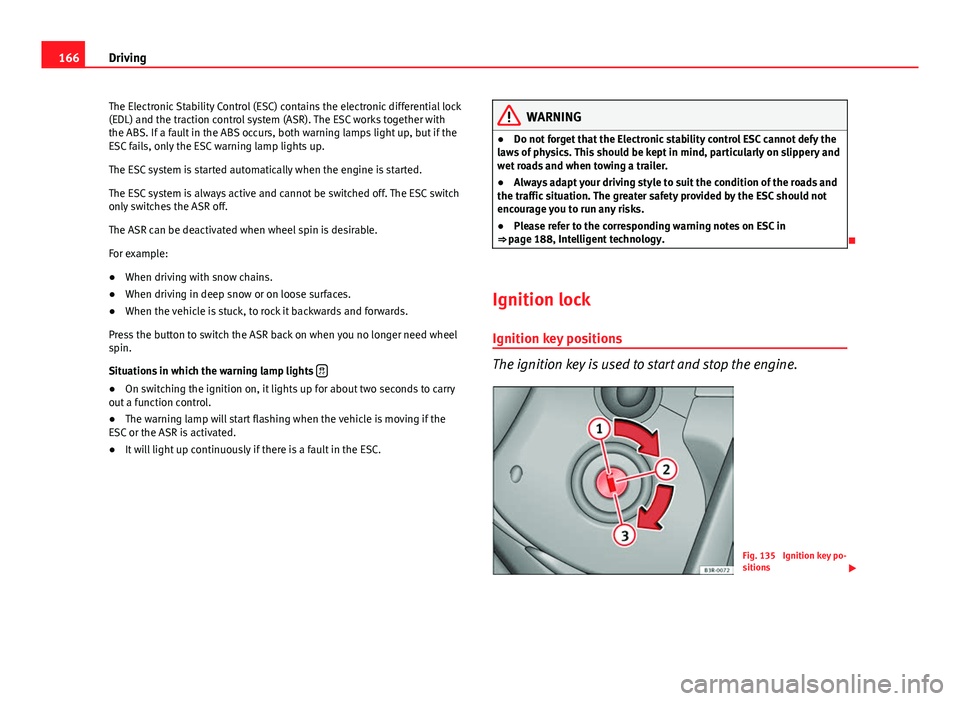
The ignition key is used to start and stop the engine.
Fig. 135 Ignition key po-
sitions
Page 176 of 319
174Driving
Parking aid acoustic system
General notes
Various parking aid systems are available to help you when parking or ma-
noeuvring in tight spaces, depending on the equipment fitted on your vehi-
cle.
The SEAT Parking System gives an acoustic warning if there are any obsta-
cles behind your vehicle ⇒ page 174.
When you are parking, SEAT Parking System Plus warns you acoustically
and optically about obstacles in front of and behind the vehicle
⇒ page 175.
Note
To ensure the acoustic parking aid works properly, the sensors must be kept
clean and free of snow and ice.
SEAT Parking System*
SEAT Parking System is an acoustic parking aid.
Sensors are located in the rear bumper. When the sensors detect an obsta-
cle, you are alerted by audible warnings. The measuring range of the sen-
sors starts at approximately:
RearSide0.60 mCentre1.60 m
The audible warnings sound with increasing frequency as you approach the
obstacle. When the vehicle is less than 0.30 m away from the obstacle, the
warning tone will sound continuously. Do not drive on! The volume of the warning beeps will be gradually reduced after about 4
seconds if the vehicle remains at a constant distance from a detected obsta-
cle (it does not affect the permanent acoustic signal).
The parking aid is switched on automatically when reverse gear is engaged.
You will hear a brief confirmation tone.
WARNING
● The parking aid is not a replacement for driver awareness. The driver
is personally responsible for safe parking and other manoeuvres.
● The sensors have blind spots in which obstacles are not registered.
Always look out for small children and animals because the system will
not always detect them. Always pay attention when reversing to avoid ac-
cidents.
● Always keep a close eye on the area around the vehicle and make full
use of the rear vision mirrors.
CAUTION
Please note that low obstacles detected by the system may no longer be
registered by the sensors as the vehicle moves closer, so the system will not
give any further warning. Certain kinds of obstacles (such as wire fences,
chains, thin painted posts or trailer draw bars, etc) may not always be de-
tected by the system, so take care not to damage the vehicle in such cases.
Note
● Please refer to the notes on towing ⇒ page 176.
Page 178 of 319
176Driving
WARNING
● The parking aid is not a replacement for driver awareness. The driver
is personally responsible for safe parking and other manoeuvres.
● The sensors have blind spots in which obstacles are not registered.
Always look out for small children and animals because the system will
not always detect them. Always pay attention when reversing to avoid ac-
cidents.
● Always keep a close eye on the area around the vehicle and make full
use of the rear vision mirrors.
CAUTION
Please note that low obstacles detected by the system may no longer be
registered by the sensors as the vehicle moves closer, so the system will not
give any further warning. Certain kinds of obstacles (such as wire fences,
chains, thin painted posts or trailer draw bars, etc) may not always be de-
tected by the system, so take care not to damage the vehicle in such cases.
Note
● Please refer to the notes on towing ⇒ page 176.
● There is a slight delay in the picture display.
Towing bracket*
In towing mode, the rear parking aid sensors are not enabled when you se-
lect reverse gear or press the switch . This function may not be guaran-
teed on towing brackets that are not factory fitted. This results in the follow-
ing restrictions:
SEAT Parking System*
There is no distance warning. SEAT Parking System Plus*
There is no rear distance warning. The system will still give a warning when
obstacles are detected while driving forward.
Fault messages*
If you hear a long beep for a few seconds and the LED on the button*
starts flashing when you switch on the parking aid, a system fault has oc-
curred. Please have the fault corrected by a Technical Service or specialised
workshop.
Note
If the fault is not corrected before you switch off the ignition, it will only be
indicated by the flashing LED on the switch * the next time you switch on
the parking aid.
Cruise speed* (Cruise control system)
Introduction
The cruise control system allows you to maintain a constant
speed. Using this system, any speed over 30 km/h can be kept constant, as long as
the engine power allows it. This is subject to power output and braking abil-
ity of the engine. This helps to reduce fatigue, especially on long journeys.
The control lamp on the instrument panel lights up when the cruise con-
trol system is operating.
Page 184 of 319
182Driving
Selector lever positions
This section covers all the selector lever positions.
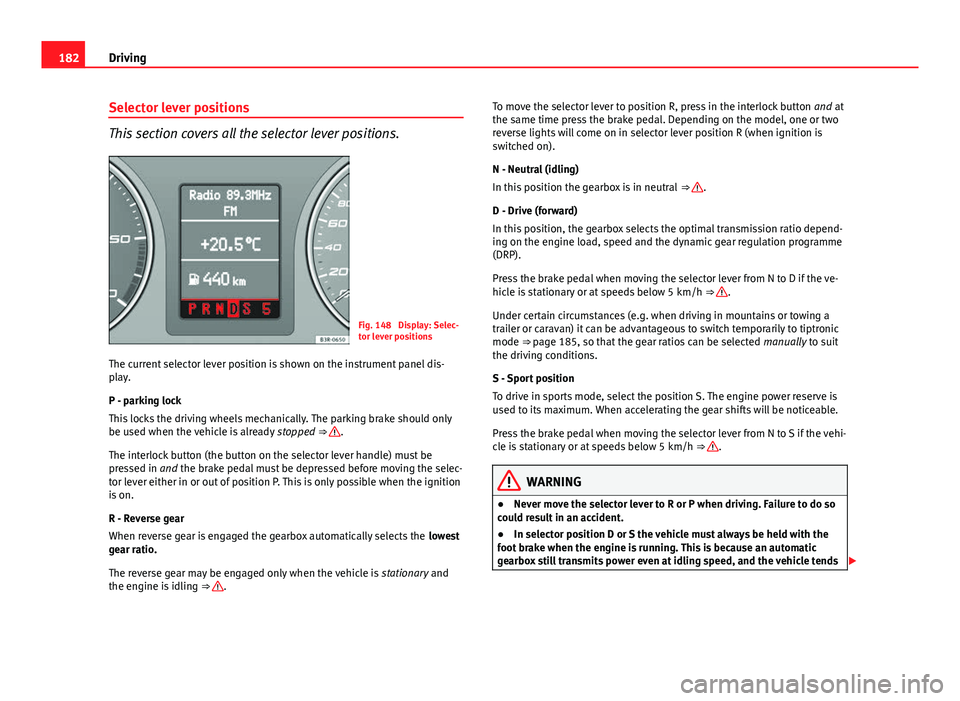
Fig. 148 Display: Selec-
tor lever positions
The current selector lever position is shown on the instrument panel dis-
play.
P - parking lock
This locks the driving wheels mechanically. The parking brake should only
be used when the vehicle is already stopped
⇒
.
The interlock button (the button on the selector lever handle) must be
pressed in and the brake pedal must be depressed before moving the selec-
tor lever either in or out of position P. This is only possible when the ignition
is on.
R - Reverse gear
When reverse gear is engaged the gearbox automatically selects the lowest
gear ratio.
The reverse gear may be engaged only when the vehicle is stationary and
the engine is idling ⇒
. To move the selector lever to position R, press in the interlock button
and at
the same time press the brake pedal. Depending on the model, one or two
reverse lights will come on in selector lever position R (when ignition is
switched on).
N - Neutral (idling)
In this position the gearbox is in neutral ⇒
.
D - Drive (forward)
In this position, the gearbox selects the optimal transmission ratio depend-
ing on the engine load, speed and the dynamic gear regulation programme
(DRP).
Press the brake pedal when moving the selector lever from N to D if the ve-
hicle is stationary or at speeds below 5 km/h ⇒
.
Under certain circumstances (e.g. when driving in mountains or towing a
trailer or caravan) it can be advantageous to switch temporarily to tiptronic
mode ⇒ page 185, so that the gear ratios can be selected manually to suit
the driving conditions.
S - Sport position
To drive in sports mode, select the position S. The engine power reserve is
used to its maximum. When accelerating the gear shifts will be noticeable.
Press the brake pedal when moving the selector lever from N to S if the vehi-
cle is stationary or at speeds below 5 km/h ⇒
.
WARNING
● Never move the selector lever to R or P when driving. Failure to do so
could result in an accident.
● In selector position D or S the vehicle must always be held with the
foot brake when the engine is running. This is because an automatic
gearbox still transmits power even at idling speed, and the vehicle tends
Page 202 of 319
200Trailer towing
Trailer towing
Trailer towing
Technical requirements
The towing bracket must meet certain technical require-
ments.
Your vehicle is intended mainly for transporting passengers and luggage.
However, if suitably equipped, it can also be used to tow a trailer or cara-
van.
If your vehicle has been factory-supplied with a towing bracket, all of the
necessary technical and legal aspects for trailing towing have been taking
into account during manufacturing.
Your vehicle is fitted with a 13-pole socket for the electrical connection be-
tween the trailer and the vehicle. If the trailer has a 7-pole connector you
can use an adapter cable. This can be purchased at a Technical Service.
If a towing bracket is to be fitted after the vehicle is purchased, this must be
done according to the instructions of the towing bracket manufacturer
⇒ page 208.
WARNING
If a towing bracket is retrofitted, the installation should be carried out by
a specialised workshop.
● Particularly in high outdoor temperatures, it is not possible to drive
up long steep gradients without a suitable cooling system. The engine
would heat up.
● Incorrect installation can result in a safety risk!
Notes on towing
There are a number of points which need to be checked be-
fore towing a trailer or caravan.
– Observe the maximum permitted trailer weights ⇒ page 297.
Trailer weight
Never exceed the maximum permitted trailer weight.
If you do not load the trailer up to the maximum permitted trailer weight,
you can then climb correspondingly steeper gradients.
The maximum trailer weights listed are only applicable for altitudes up to
1000 m above sea level. With increasing altitude the engine power and
therefore the vehicle's climbing ability are impaired because of the reduced
air density. The maximum trailer weight has to be reduced accordingly. The
weight of the vehicle and trailer must be reduced by about 10% for every
subsequent 1000 m (or part thereof). This figure refers to the combined
weight of the (loaded) vehicle and (loaded) trailer.
The figures for the drawbar load that appear on the identification plate of
the towing bracket are for certification purposes only. The correct figures for
your specific model, which may be lower than these figures for the towing
bracket, are given in the registration documents and on ⇒ page 290. Also
refer to ⇒ page 297.
Distributing the load
Distribute loads in the trailer so that heavy objects are as near to the axle as
possible. Loads carried in the trailer must be secured to prevent them mov-
ing.