ESP Seat Exeo ST 2010 Owner's Guide
[x] Cancel search | Manufacturer: SEAT, Model Year: 2010, Model line: Exeo ST, Model: Seat Exeo ST 2010Pages: 325, PDF Size: 9.34 MB
Page 134 of 325

Lights and visibility
132
Switching off the anti-dazzle function
–Press button ⇒page 131, fig. 104 . Indicator lamp goes
off.
Switching on the anti-dazzle function
–Press button ⇒page 131, fig. 104 . Indicator lamp turns
on.Anti-dazzle function
The anti-dazzle function is activated every time the ignition is switched on.
The green indicator lamp lights up in the mirror housing.
When the anti-dazzle function is enabled, the interior mirror will darken auto-
matically according to the amount of light it receives. The anti-dazzle function
is disabled if:•the interior lighting is switched on•reverse gear is engaged
Sensors for automatic headlights*
When the light switch is set to the AUTO position, the dipped beam head-
lights are switched on and off automatically according to the ambient light
level with the aid of the sensors located in the interior mirror ⇒page 117.WARNING
Electrolyte fluid can leak from a broken mirror. This fluid can cause irrita-
tion to the skin, eyes and respiratory organs. Wash thoroughly with clean
water should you come into contact with this fluid. Seek medical assist-
ance if needed!
Caution
Electrolyte fluid leaking from a broken mirror can cause damage to plastic
surfaces. Use a sponge or similar to remove the fluid as soon as possible.
Note
•The interior mirror automatic anti-dazzle function* will only work properly
if the sun blind* for the rear window is retracted and if there are no other
objects preventing light from reaching the mirror.•If you have to stick any type of sticker on the windscreen, do not do so in
front of the sensors. Doing so could prevent the automatic headlight or anti-
dazzle function from working correctly or even from working at all.Exterior mirrors
The exterior mirrors are adjusted electrically.
AA
AB
AA
AB
Fig. 105 Detailed view of
the armrest: Adjuster
knob
ExeoST_EN.book Seite 132 Freitag, 3. September 2010 11:41 11
Page 138 of 325

Seats and storage compartments
136Electric adjustment of front seats*Adjusting the seat
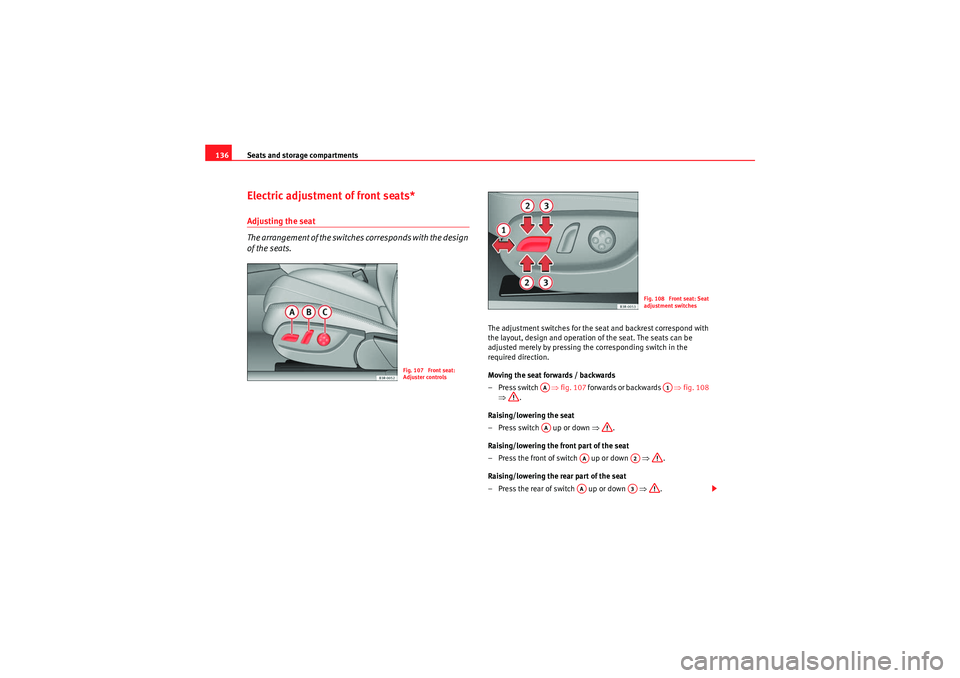
The arrangement of the switches corresponds with the design
of the seats.
The adjustment switches for the seat and backrest correspond with
the layout, design and operation of the seat. The seats can be
adjusted merely by pressing the corresponding switch in the
required direction.
Moving the seat forwards / backwards
–Press switch ⇒ fig. 107 f o r w a r d s o r b a ck w a r d s ⇒ fig. 108
⇒ .
Raising/lowering the seat
– Press switch up or down ⇒.
Raising/lowering the front part of the seat
– Press the front of switch up or down ⇒.
Raising/lowering the rear part of the seat
– Press the rear of switch up or down ⇒.
Fig. 107 Front seat:
Adjuster controls
Fig. 108 Front seat: Seat
adjustment switches
AA
A1
AA
AA
A2
AA
A3
ExeoST_EN.book Seite 136 Freitag, 3. September 2010 11:41 11
Page 140 of 325

Seats and storage compartments
138
Adjusting the contour
– Press the front part of the adjuster switch ⇒page 137, fig. 110
to increase the contour of the lumbar support.
– Press the rear part of the adjuster switch to decrease the contour of the lumbar support.
Adjusting the height
– Press the top part of the adjuster switch to move the contour upwards.
– Press the bottom part of the adjuster switch to move the contour down.The lumbar support provides effective support for the natural curvature of the
spine to give a more relaxed seating position, especially on long journeys.
Driver seat memory*Description
The memory buttons in the driver door can be used to store
and recall up to four different positions for the driver seat and
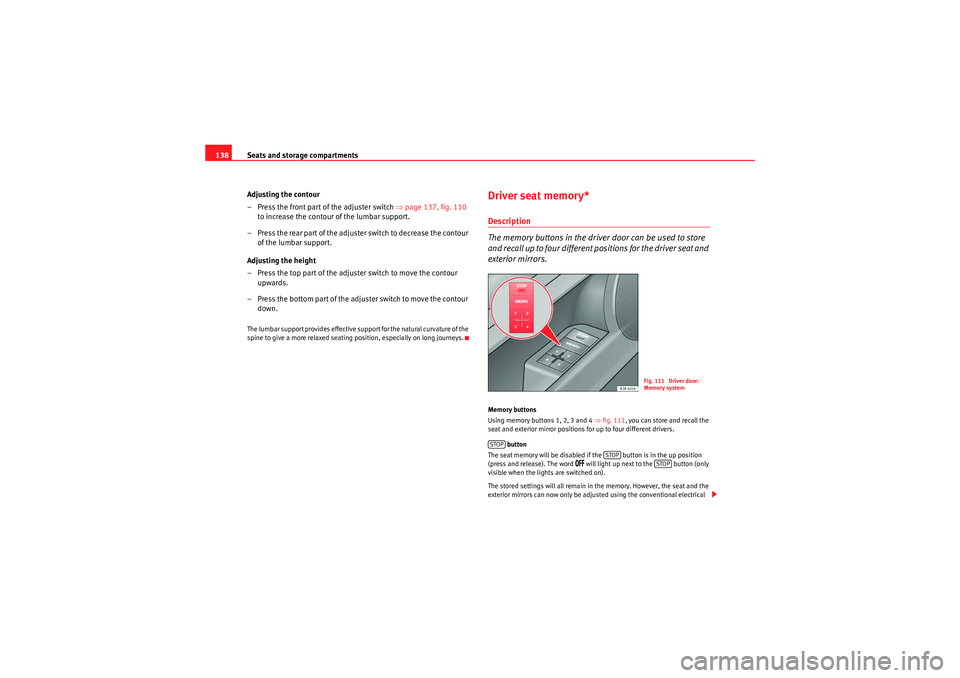
exterior mirrors.Memory buttons
Using memory buttons 1, 2, 3 and 4 ⇒fig. 111 , you can store and recall the
seat and exterior mirror positions for up to four different drivers.
button
The seat memory will be disabled if the button is in the up position
(press and release). The word
�/�&�& will light up next to the button (only
visible when the lights are switched on).
The stored settings will all remain in the memory. However, the seat and the
exterior mirrors can now only be adjusted using the conventional electrical
Fig. 111 Driver door:
Memory system
STOP
STOP
STOP
ExeoST_EN.book Seite 138 Freitag, 3. September 2010 11:41 11
Page 153 of 325

Seats and storage compartments151
Safety First
Operating Instructions
Practical Tips
Technical Specifications
Loading
–Open the tailgate.
– Press the release catch for the ski bag cover ⇒page 150,
fig. 128 -arrow- and swivel the cover downwards.
– Pull down the centre rear armrest.
– From the passenger compartment, press down the release catch for the ski bag cover and pull out the cover.
– Pull out and unfold the ski bag.
– The long items can now be loaded through the luggage compart- ment into the ski bag ⇒.
Securing
– Insert the fastening belt ⇒page 150, fig. 129 of the ski bag
into the centre seat belt buckle .
– Pull the free end of belt to tighten.
Storing
– Close the cover of the load-through hatch in the luggage compartment.
– Carefully fold away the ski bag.
– Close the inside cover of the load-through hatch from the passenger compartment.
WARNING
The ski bag must be secured in place with the fastening belt after it has
been loaded.
Note
Do not fold away the ski bag after use if it is still damp.Roof rack / roof rails*Description
Additional luggage can be carried on the roof rack.Note the following points if you intend to carry loads on the roof:•We recommend using the cross bars from the of SEAT Genuine Accesso-
ries range.•These cross bars form the basic elements of a complete roof rack system.
For safety reasons, however, the corresponding additional fastenings must
be fitted to carry luggage, bicycles, surfboards, skis and boats. All the
components of this system are available from Authorised Service Centres.Caution
Any damage to the vehicle caused by the use of other types of roof rack or
incorrect installation will not be covered by the factory warranty. The roof rack
system must therefore be installed exactly according to the instructions
provided.
AA
AB
AC
ExeoST_EN.book Seite 151 Freitag, 3. September 2010 11:41 11
Page 174 of 325

Driving
172DrivingSteeringAdjusting the steering wheel position
The height and reach of the steering wheel can be freely
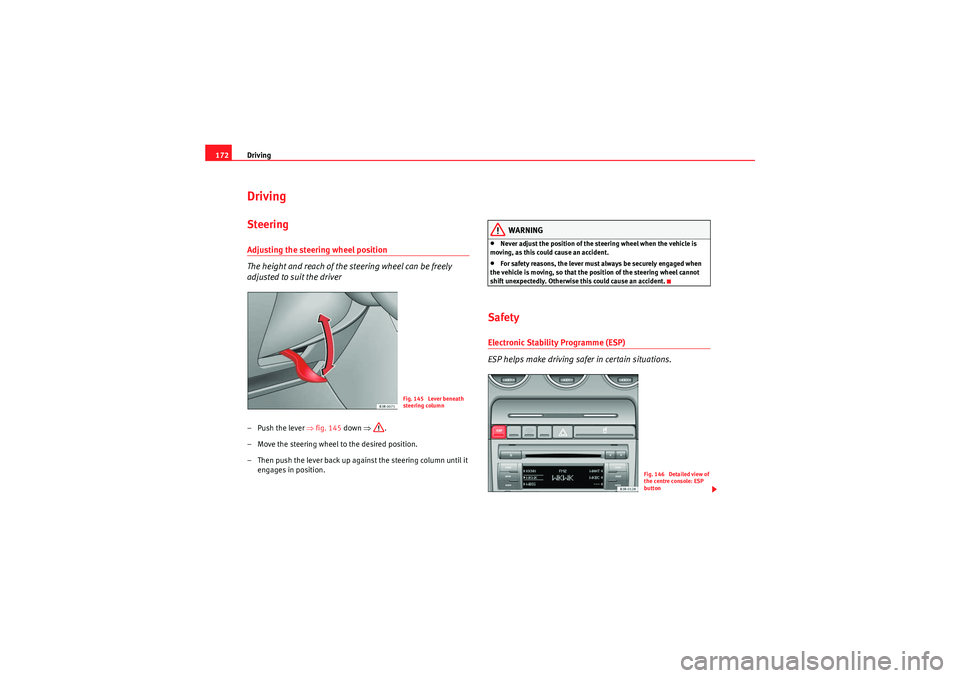
adjusted to suit the driver–Push the lever ⇒ fig. 145 down ⇒.
– Move the steering wheel to the desired position.
– Then push the lever back up against the steering column until it engages in position.
WARNING
•Never adjust the position of the steering wheel when the vehicle is
moving, as this could cause an accident.•For safety reasons, the lever must always be securely engaged when
the vehicle is moving, so that the position of the steering wheel cannot
shift unexpectedly. Otherwise this could cause an accident.
SafetyElectronic Stability Programme (ESP)
ESP helps make driving safer in certain situations.
Fig. 145 Lever beneath
steering column
Fig. 146 Detailed view of
the centre console: ESP
button
ExeoST_EN.book Seite 172 Freitag, 3. September 2010 11:41 11
Page 175 of 325

Driving173
Safety First
Operating Instructions
Practical Tips
Technical Specifications
The Electronic Stability Programme (ESP) contains the electronic differential
lock (EDL) and the traction control system (TCS). The ESP function works
together with the ABS. If a fault in the ABS occurs, both warning lamps light
up, but if the ESP fails, only the ESP warning lamp lights up.
The ESP is started automatically when the engine is started.
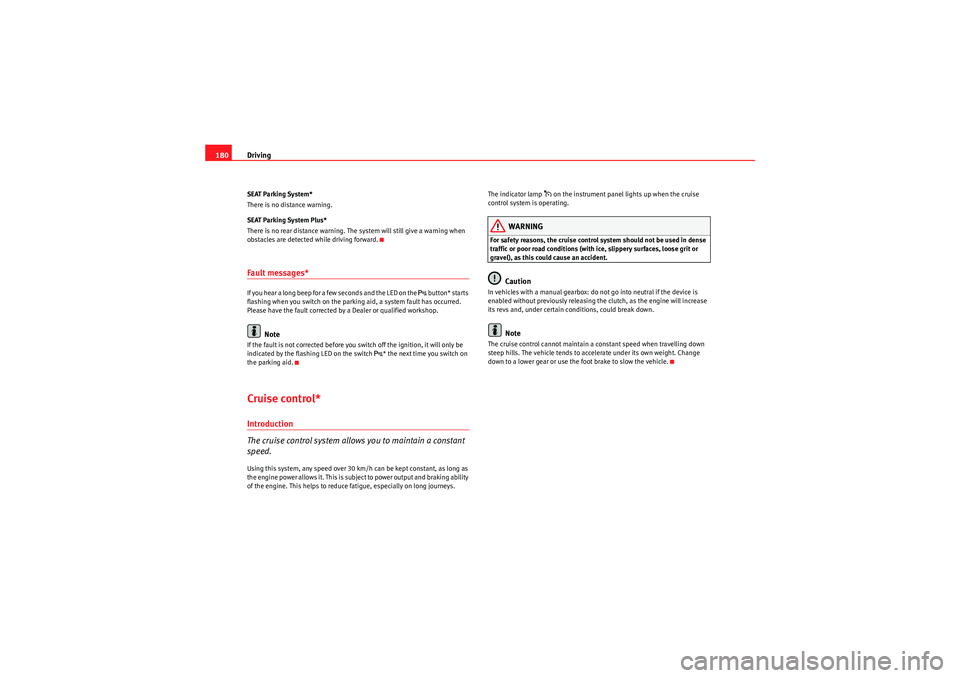
The ESP switch deactivates both TCS and ESP functions. The ESP, in spite of
being deactivated, will always self-connect when necessary if brakes are
being used.
The TCS can be deactivated when in cases where wheel sliding is desirable.
For example:
•When driving with snow chains,•when driving in deep snow or on loose surfaces,•when rocking the vehicle backwards and forwards to free it from mud, for
example.
Next, the button should be pressed to reactivate the TCS.
When does the warning lamp switch on or flash?•On switching the ignition on, it lights up for about two seconds to carry
out a function control.•The warning lamp will start flashing when the vehicle is moving if the ESP
or the TCS is activated.•It will light up continuously if there is a malfunction in the ESP.WARNING
•The Electronic Stability Programme (ESP) cannot defy the laws of
physics. This should be kept in mind, particularly on slippery and wet
roads and when towing a trailer.•Always adapt your driving style to suit the condition of the roads and
the traffic situation. Do not let the extra safety afforded by ESP tempt you
into taking any risks when driving, as this can cause accidents.
•Please refer to the corresponding warning notes on ESP in ⇒page 191,
“Intelligent technology”.
Ignition lockIgnition key positions
The ignition key is used to start and stop the engine.Position
The ignition key is inserted in this position. To engage the steering wheel
lock , take out the key and turn the wheel until you hear the pin engage. You
should always engage the steering lock when you leave the vehicle. This will
help to deter thefts ⇒.
WARNING (continued)
Fig. 147 Ignition key
positions
A1
ExeoST_EN.book Seite 173 Freitag, 3. September 2010 11:41 11
Page 179 of 325

Driving177
Safety First
Operating Instructions
Practical Tips
Technical Specifications
If you drive by mistake with the handbrake still applied, you will hear a
warning buzzer and the display will show the message:
Handbrake on
The handbrake warning switches on after driving for 3 seconds at speeds
above 5 km/h.
The handbrake warning lamp
�H lights up when the handbrake is applied
with the ignition on.
WARNING
Please note that the handbrake should be released all the way. If it is only
partially released, this will cause rear brakes overheating, which can
impair the function of the brake system and could lead to an accident.
Caution
Once the vehicle has come to a standstill, always apply the handbrake firmly
and then, on a manual gearbox, engage a gear, or select P on an automatic.Parking
The following points will ensure there is no risk of the vehicle
rolling away accidentally after it is parked:– Use the foot brake to stop the vehicle.
– Apply the handbrake firmly.
– Switch the engine off.
– On a manual gearbox engage 1st gear or on an automatic move the selector lever to P ⇒ .
When parking on slopes:
Turn the steering wheel so that the, if the vehicle moves, it will do so towards
the curb.
WARNING
•Do not leave anyone (especially children) in the vehicle when it is
locked. Locked doors could delay assistance in an emergency, potentially
putting lives at risk.•Never leave children unsupervised in the vehicle. They could release
e.g. the handbrake or gear lever, moving the vehicle and causing an
accident.
Parking aid acoustic systemGeneral notesVarious systems are available to help you when parking or manoeuvring in
tight spaces, depending on the equipment fitted on your vehicle.
The SEAT Parking System gives an acoustic warning if there are any obstacles
behind your vehicle ⇒page 178.
When you are parking, SEAT Parking System Plus warns you acoustically and
optically about obstacles in front of and behind the vehicle ⇒page 178.
Note
To ensure the acoustic parking aid works properly, the sensors must be kept
clean and free of snow and ice.
ExeoST_EN.book Seite 177 Freitag, 3. September 2010 11:41 11
Page 180 of 325

Driving
178SEAT Parking System*
SEAT Parking System is an acoustic parking aid.Sensors are located in the rear bumper. When the sensors detect an obstacle,
you are alerted by acoustic signals. The measuring range of the sensors starts
at approximately:
The acoustic signals sound with increasing frequency as you approach the
obstacle. When the vehicle is less than 0.30 m away from the obstacle, the
warning tone will sound continuously. Do not drive on!
The volume of the warning beeps will be gradually reduced after about 4
seconds if the vehicle remains at a constant distance from a detected
obstacle (it does not affect the permanent acoustic signal).
The parking aid is switched on automatically when reverse gear is engaged.
You will hear a brief confirmation tone.
WARNING
•The parking aid is not a replacement for driver awareness. The driver is
personally responsible for safe parking and other manoeuvres.•The sensors have blind spots in which obstacles are not registered.
Always look out for small children and animals because the system will not
always detect them. Always pay attention when reversing to avoid acci-
dents.•Always keep a close eye on the area around the vehicle and make full
use of the rear view mirrors.
Caution
Please note that low obstacles detected by the system may no longer be
registered by the sensors as the vehicle moves closer, so the system will not
give any further warning. Certain kinds of obstacles (such as wire fences,
chains, thin painted posts or trailer draw bars, etc) may not always be
detected by the system, so take care not to damage the vehicle in such cases.
Note
•Please refer to the notes on towing ⇒page 179.SEAT Parking System Plus*
SEAT Parking System Plus is an acoustic parking aid.Sensors are located in the front and rear bumpers. When the sensors detect
an obstacle, you are alerted by acoustic signals. The measuring range of the
sensors starts at approximately:
The acoustic signals sound with increasing frequency as you approach the
obstacle. When the vehicle is less than 0.30 m from the obstacle the warning
tone will sound continuously. Stop moving immediately!
The volume of the warning beeps will be gradually reduced after about 4
seconds if the vehicle remains at a constant distance from a detected
obstacle (it does not affect the permanent acoustic signal).
Rear
Side
0.60 m
Centre
1.60 m
Front
Side
0.90 m
Centre
1.20 m
Rear
Side
0.60 m
Centre
1.60 m
ExeoST_EN.book Seite 178 Freitag, 3. September 2010 11:41 11
Page 181 of 325

Driving179
Safety First
Operating Instructions
Practical Tips
Technical Specifications
Activating/DeactivatingActivating
– Engage reverse gear or
– Press the button
on the centre console ⇒fig. 150 or on the
gear selector gate. You will hear a brief confirmation tone and the
LED on the switch will light up.
Deactivating
– Drive forward faster than 10 km/h, or
–Press the
button or
– Switch off the ignition or
– Disengage the reverse gear.
WARNING
•The parking aid is not a replacement for driver awareness. The driver is
personally responsible for safe parking and other manoeuvres.•The sensors have blind spots in which obstacles are not registered.
Always look out for small children and animals because the system will not
always detect them. Always pay attention when reversing to avoid acci-
dents.•Always keep a close eye on the area around the vehicle and make full
use of the rear view mirrors.Caution
Please note that low obstacles detected by the system may no longer be
registered by the sensors as the vehicle moves closer, so the system will not
give any further warning. Certain kinds of obstacles (such as wire fences,
chains, thin painted posts or trailer draw bars, etc) may not always be
detected by the system, so take care not to damage the vehicle in such cases.
Note
•Please refer to the notes on towing ⇒page 179.•There is a slight delay in the picture display.To w i n g b r a c k e t *In towing mode, the rear parking aid sensors are not enabled when you select
reverse gear or press the switch
. This function may not be guaranteed on
towing brackets that are not factory fitted. This results in the following restric-
tions:
Fig. 150 Centre console:
switch for parking aid
ExeoST_EN.book Seite 179 Freitag, 3. September 2010 11:41 11
Page 182 of 325

Driving
180SEAT Parking System*
There is no distance warning.
SEAT Parking System Plus*
There is no rear distance warning. The system will still give a warning when
obstacles are detected while driving forward.Fault messages*If you hear a long beep for a few seconds and the LED on the
button* starts
flashing when you switch on the parking aid, a system fault has occurred.
Please have the fault corrected by a Dealer or qualified workshop.
Note
If the fault is not corrected before you switch off the ignition, it will only be
indicated by the flashing LED on the switch
* the next time you switch on
the parking aid.
Cruise control*Introduction
The cruise control system allows you to maintain a constant
speed.Using this system, any speed over 30 km/h can be kept constant, as long as
the engine power allows it. This is subject to power output and braking ability
of the engine. This helps to reduce fatigue, especially on long journeys. The indicator lamp
on the instrument panel lights up when the cruise
control system is operating.
WARNING
For safety reasons, the cruise control system should not be used in dense
traffic or poor road conditions (with ice, slippery surfaces, loose grit or
gravel), as this could cause an accident.
Caution
In vehicles with a manual gearbox: do not go into neutral if the device is
enabled without previously releasing the clutch, as the engine will increase
its revs and, under certain conditions, could break down.
Note
The cruise control cannot maintain a constant speed when travelling down
steep hills. The vehicle tends to accelerate under its own weight. Change
down to a lower gear or use the foot brake to slow the vehicle.
ExeoST_EN.book Seite 180 Freitag, 3. September 2010 11:41 11