technical specifications Seat Exeo ST 2011 Owner's Guide
[x] Cancel search | Manufacturer: SEAT, Model Year: 2011, Model line: Exeo ST, Model: Seat Exeo ST 2011Pages: 319, PDF Size: 5.12 MB
Page 45 of 319
43
Airbag system
Operation of curtain airbags
Fully inflated airbags reduce the risk of head or chest injury
in a side collision.
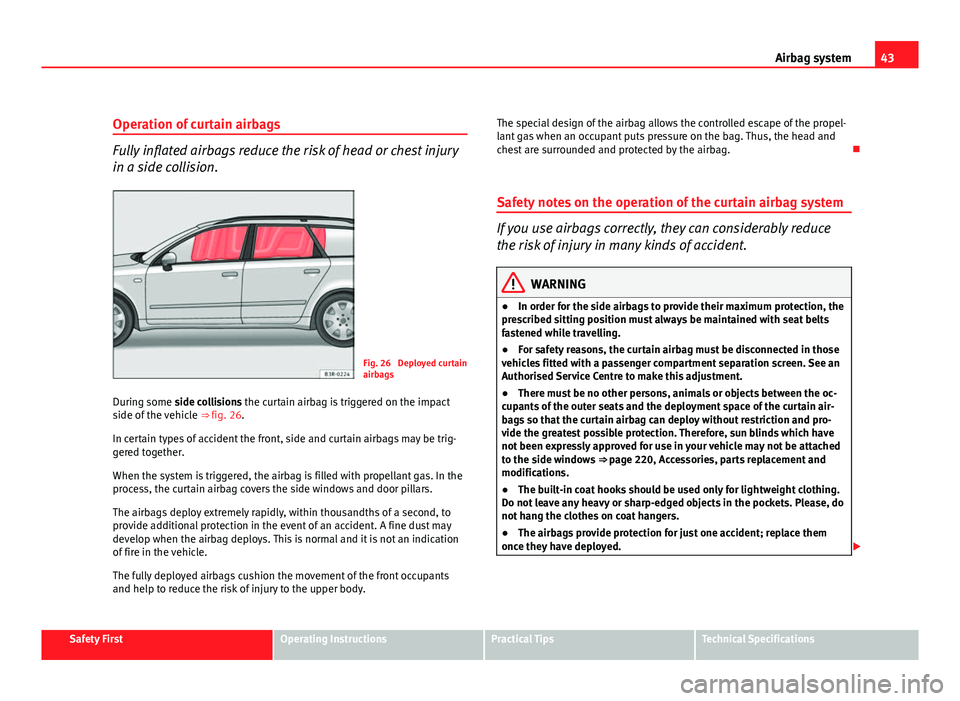
Fig. 26 Deployed curtain
airbags
During some side collisions the curtain airbag is triggered on the impact
side of the vehicle ⇒ fig. 26.
In certain types of accident the front, side and curtain airbags may be trig-
gered together.
When the system is triggered, the airbag is filled with propellant gas. In the
process, the curtain airbag covers the side windows and door pillars.
The airbags deploy extremely rapidly, within thousandths of a second, to
provide additional protection in the event of an accident. A fine dust may
develop when the airbag deploys. This is normal and it is not an indication
of fire in the vehicle.
The fully deployed airbags cushion the movement of the front occupants
and help to reduce the risk of injury to the upper body. The special design of the airbag allows the controlled escape of the propel-
lant gas when an occupant puts pressure on the bag. Thus, the head and
chest are surrounded and protected by the airbag.
Safety notes on the operation of the curtain airbag system
If you use airbags correctly, they can considerably reduce
the risk of injury in many kinds of accident.
WARNING
● In order for the side airbags to provide their maximum protection, the
prescribed sitting position must always be maintained with seat belts
fastened while travelling.
● For safety reasons, the curtain airbag must be disconnected in those
vehicles fitted with a passenger compartment separation screen. See an
Authorised Service Centre to make this adjustment.
● There must be no other persons, animals or objects between the oc-
cupants of the outer seats and the deployment space of the curtain air-
bags so that the curtain airbag can deploy without restriction and pro-
vide the greatest possible protection. Therefore, sun blinds which have
not been expressly approved for use in your vehicle may not be attached
to the side windows ⇒ page 220, Accessories, parts replacement and
modifications.
● The built-in coat hooks should be used only for lightweight clothing.
Do not leave any heavy or sharp-edged objects in the pockets. Please, do
not hang the clothes on coat hangers.
● The airbags provide protection for just one accident; replace them
once they have deployed.
Safety FirstOperating InstructionsPractical TipsTechnical Specifications
Page 47 of 319
45
Airbag system
Deactivating airbags
Front passenger airbag deactivation
If you fit a rear-facing child seat to the front passenger seat,
the front passenger airbag must be de-activated.
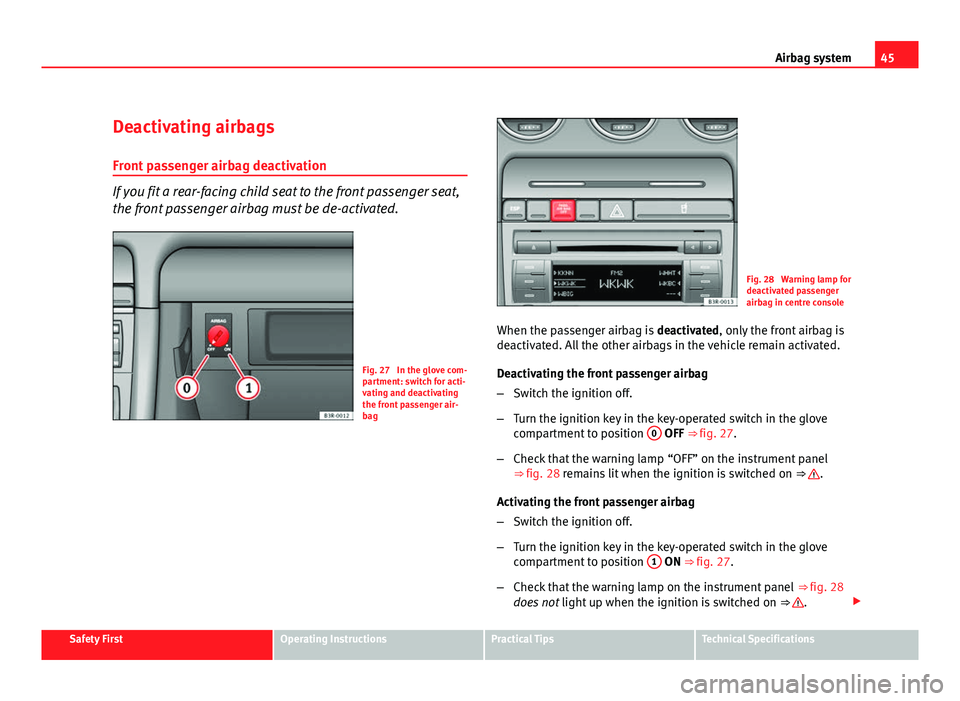
Fig. 27 In the glove com-
partment: switch for acti-
vating and deactivating
the front passenger air-
bag
Fig. 28 Warning lamp for
deactivated passenger
airbag in centre console
When the passenger airbag is deactivated, only the front airbag is
deactivated. All the other airbags in the vehicle remain activated.
Deactivating the front passenger airbag
– Switch the ignition off.
– Turn the ignition key in the key-operated switch in the glove
compartment to position 0
OFF ⇒ fig. 27.
– Check that the warning lamp “OFF” on the instrument panel
⇒ fig. 28 remains lit when the ignition is switched on ⇒
.
Activating the front passenger airbag
– Switch the ignition off.
– Turn the ignition key in the key-operated switch in the glove
compartment to position 1
ON ⇒ fig. 27.
– Check that the warning lamp on the instrument panel ⇒ fig. 28
does not light up when the ignition is switched on ⇒
.
Safety FirstOperating InstructionsPractical TipsTechnical Specifications
Page 49 of 319
47
Child safety
Child safety
Brief introduction Introduction
Statistics show that children are generally safer on the rear
seat than on the front passenger seat.For safety reasons we recommend that children under 12 years of age travel
on the rear seats. Depending on their age, height and weight, children trav-
elling on the rear seat must use a child seat or a seat belt. It is advisable
that children always travel in the rear seats, the rear central position being
the safest seat, since the risk of injuries in a side collision is diminished.
The physical laws involved and the forces acting in a collision apply also to
children. ⇒ page 20, Why wear seat belts?. But unlike adults, children do
not have muscle and bone structures fully developed. This means that chil-
dren are subject to a greater risk of injury.
To reduce this risk, children must always use special child restraint systems
when travelling in the vehicle.
We recommend the use of child safety products from the SEAT Genuine Ac-
cessories Programme, which includes systems for all ages made by Peke 1)
.
These systems have been especially designed and approved, complying
with the ECE-R44. regulation.
Follow the manufacturer's instructions and observe any statutory require-
ments when installing and using child seats. Always read and note
⇒ page 47, Safety notes on using child seats. We recommend you to include the manufacturer's Child Seat instruction
manual together with the on-board documentation.
Safety notes on using child seats
Proper use of child seats substantially reduces the risk of in-
jury in an accident! As the driver, you are responsible for any children you transport in
your vehicle.
– Protect your children by properly using the appropriate child
seats ⇒ page 49.
– Always ensure that the seat belt is properly positioned accord-
ing to the instructions provided by the manufacturer of the child
seat.
– When travelling, do not allow children to distract you from traf-
fic.
– Take breaks regularly during long trips. Take a break at least ev-
ery two hours.
1)
Not for all countries
Safety FirstOperating InstructionsPractical TipsTechnical Specifications
Page 51 of 319
49
Child safety
Child seats
Categorisation of child seats into groups
Use only child seats that are officially approved and suitable
for the child. Child seats are subject to the regulation ECE-R 44. ECE-R stands for: Eco-
nomic Commission for Europe Regulation
The child seats are grouped into 5 categories: Group 0: up to 10 kg
Group 0+: up to 13 kg
Group 1: from 9 to 18 kg
Group 2: from 15 to 25 kg
Group 3: from 22 to 36 kg
Child seats that have been tested and approved under the ECE R44 stand-
ard bear the test mark on the seat (the letter E in a circle with the test num-
ber below it). Group 0 and 0+ child seats
A suitable child seat and a correctly adjusted seat belt can
help you to protect your child.
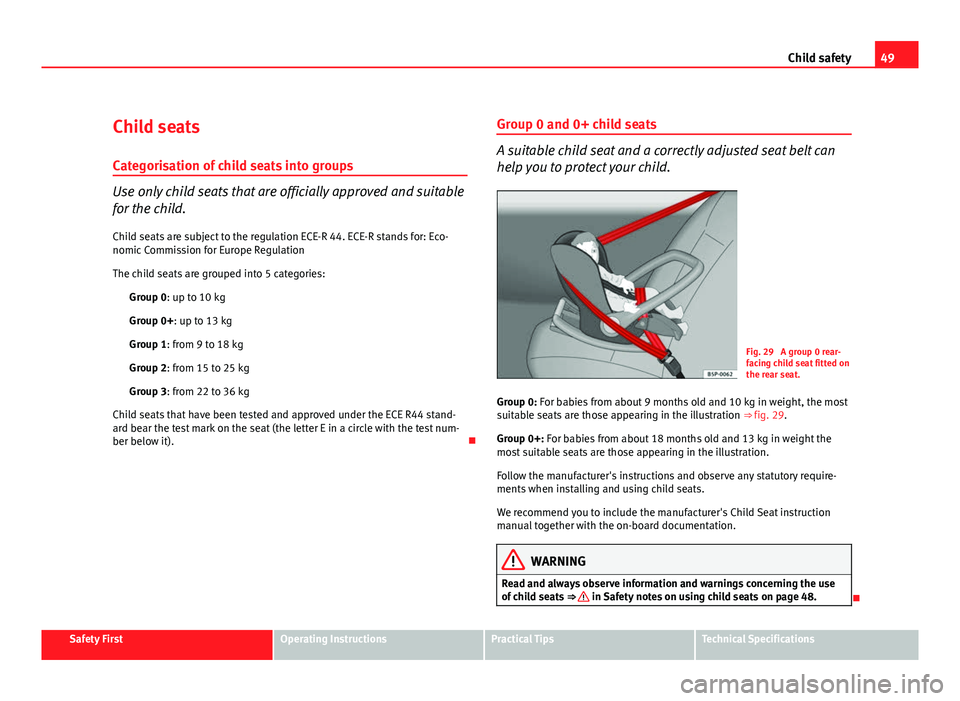
Fig. 29 A group 0 rear-
facing child seat fitted on
the rear seat.
Group 0: For babies from about 9 months old and 10 kg in weight, the most
suitable seats are those appearing in the illustration ⇒ fig. 29.
Group 0+: For babies from about 18 months old and 13 kg in weight the
most suitable seats are those appearing in the illustration.
Follow the manufacturer's instructions and observe any statutory require-
ments when installing and using child seats.
We recommend you to include the manufacturer's Child Seat instruction
manual together with the on-board documentation.
WARNING
Read and always observe information and warnings concerning the use
of child seats ⇒
in Safety notes on using child seats on page 48.
Safety FirstOperating InstructionsPractical TipsTechnical Specifications
Page 53 of 319
51
Child safety
WARNING
● The shoulder part of the seat belt must lie approximately on the cen-
tre of the shoulder, never across the neck or the arm. The seat belt must
lie close to the upper part of the body. The lap belt part must lie across
the pelvis, not across the stomach, and always fit closely. Pull the belt
tight if necessary to take up any slack ⇒ page 24, Seat belts.
● Read and always observe information and warnings concerning the
use of child seats ⇒
in Safety notes on using child seats on page 48.
Safety FirstOperating InstructionsPractical TipsTechnical Specifications
Page 55 of 319
53
Child safety
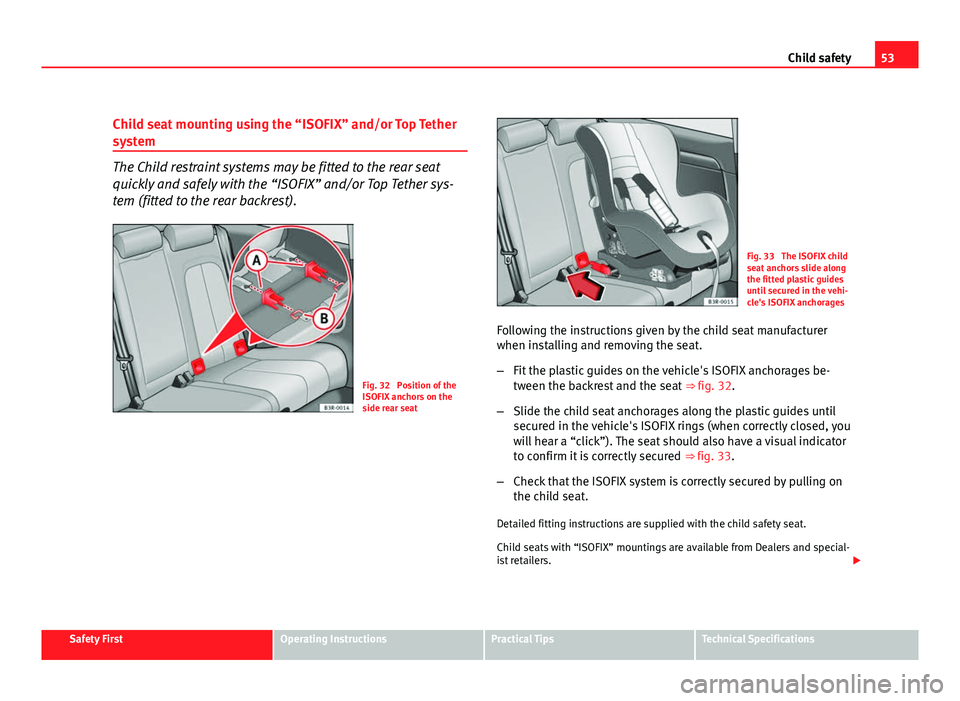
Child seat mounting using the “ISOFIX” and/or Top Tether
system
The Child restraint systems may be fitted to the rear seat
quickly and safely with the “ISOFIX” and/or Top Tether sys-
tem (fitted to the rear backrest).
Fig. 32 Position of the
ISOFIX anchors on the
side rear seat
Fig. 33 The ISOFIX child
seat anchors slide along
the fitted plastic guides
until secured in the vehi-
cle's ISOFIX anchorages
Following the instructions given by the child seat manufacturer
when installing and removing the seat.
– Fit the plastic guides on the vehicle's ISOFIX anchorages be-
tween the backrest and the seat ⇒ fig. 32.
– Slide the child seat anchorages along the plastic guides until
secured in the vehicle's ISOFIX rings (when correctly closed, you
will hear a “click”). The seat should also have a visual indicator
to confirm it is correctly secured ⇒ fig. 33.
– Check that the ISOFIX system is correctly secured by pulling on
the child seat.
Detailed fitting instructions are supplied with the child safety seat.
Child seats with “ISOFIX” mountings are available from Dealers and special-
ist retailers.
Safety FirstOperating InstructionsPractical TipsTechnical Specifications
Page 57 of 319
55
Child safety
Fitting the Top Tether child restraint to the anchoring point
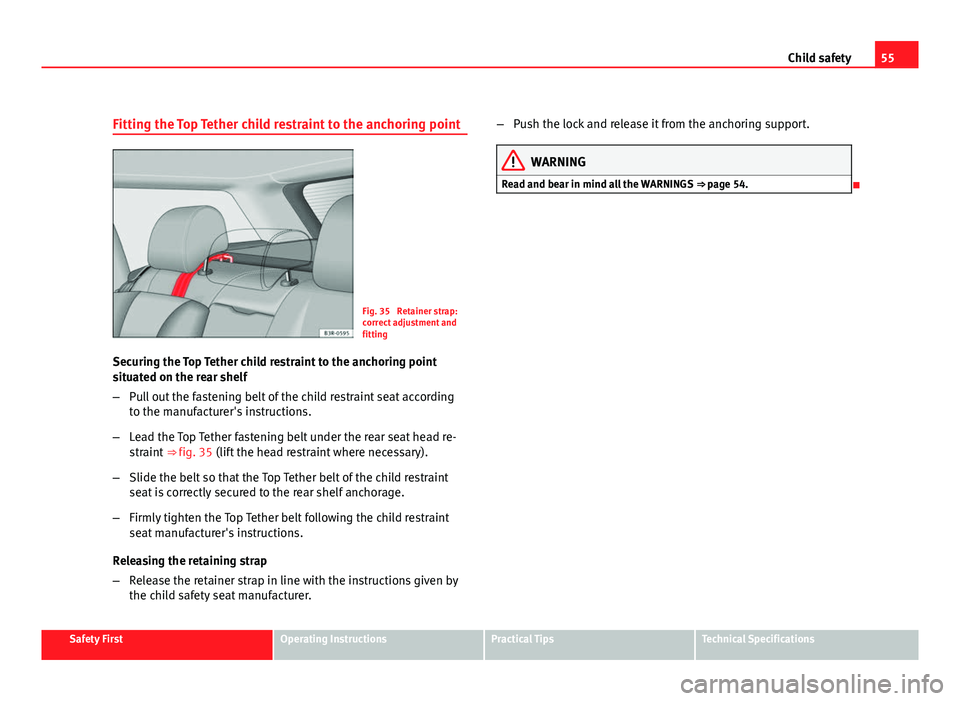
Fig. 35 Retainer strap:
correct adjustment and
fitting
Securing the Top Tether child restraint to the anchoring point
situated on the rear shelf
– Pull out the fastening belt of the child restraint seat according
to the manufacturer's instructions.
– Lead the Top Tether fastening belt under the rear seat head re-
straint ⇒ fig. 35 (lift the head restraint where necessary).
– Slide the belt so that the Top Tether belt of the child restraint
seat is correctly secured to the rear shelf anchorage.
– Firmly tighten the Top Tether belt following the child restraint
seat manufacturer's instructions.
Releasing the retaining strap
– Release the retainer strap in line with the instructions given by
the child safety seat manufacturer. –
Push the lock and release it from the anchoring support.
WARNING
Read and bear in mind all the WARNINGS ⇒ page 54.
Safety FirstOperating InstructionsPractical TipsTechnical Specifications
Page 59 of 319
57
Cockpit
Operating Instructions Cockpit
Overview Dash panel overview
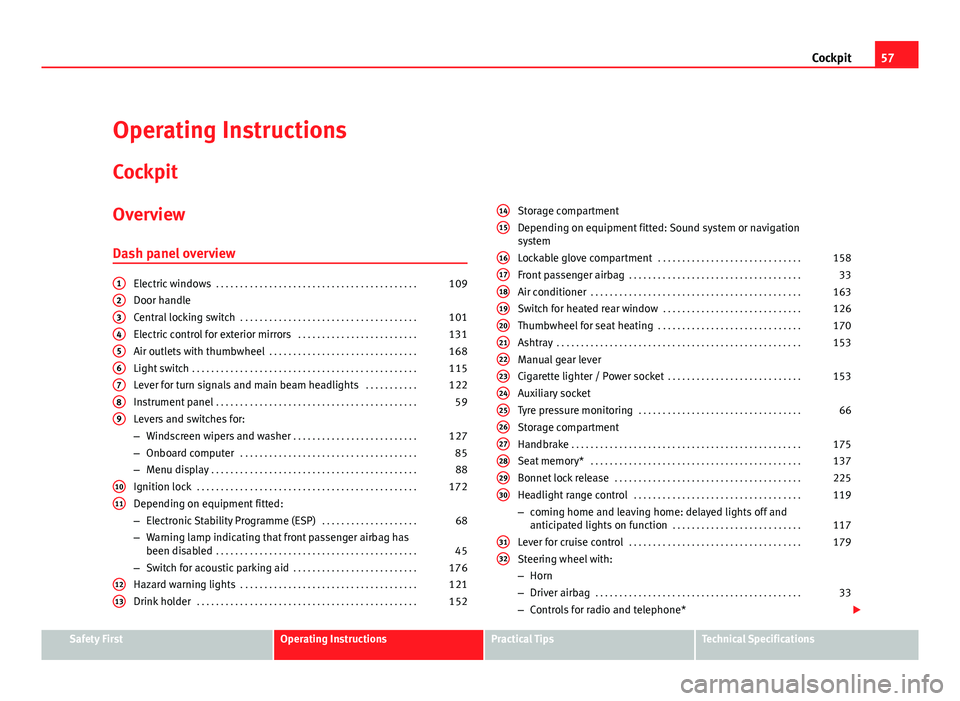
Electric windows . . . . . . . . . . . . . . . . . . . . . . . . . . . . . . . . . . . . . . . . . . 109
Door handle
Central locking switch . . . . . . . . . . . . . . . . . . . . . . . . . . . . . . . . . . . . . 101
Electric control for exterior mirrors . . . . . . . . . . . . . . . . . . . . . . . . .131
Air outlets with thumbwheel . . . . . . . . . . . . . . . . . . . . . . . . . . . . . . . 168
Light switch . . . . . . . . . . . . . . . . . . . . . . . . . . . . . . . . . . . . . . . . . . . . . . . 115
Lever for turn signals and main beam headlights . . . . . . . . . . .122
Instrument panel . . . . . . . . . . . . . . . . . . . . . . . . . . . . . . . . . . . . . . . . . . 59
Levers and switches for:
– Windscreen wipers and washer . . . . . . . . . . . . . . . . . . . . . . . . . . 127
– Onboard computer . . . . . . . . . . . . . . . . . . . . . . . . . . . . . . . . . . . . . 85
– Menu display . . . . . . . . . . . . . . . . . . . . . . . . . . . . . . . . . . . . . . . . . . . 88
Ignition lock . . . . . . . . . . . . . . . . . . . . . . . . . . . . . . . . . . . . . . . . . . . . . . 172
Depending on equipment fitted:
– Electronic Stability Programme (ESP) . . . . . . . . . . . . . . . . . . . .68
– Warning lamp indicating that front passenger airbag has
been disabled . . . . . . . . . . . . . . . . . . . . . . . . . . . . . . . . . . . . . . . . . . 45
– Switch for acoustic parking aid . . . . . . . . . . . . . . . . . . . . . . . . . . 176
Hazard warning lights . . . . . . . . . . . . . . . . . . . . . . . . . . . . . . . . . . . . . 121
Drink holder . . . . . . . . . . . . . . . . . . . . . . . . . . . . . . . . . . . . . . . . . . . . . . 152
123456789
1011
1213
Storage compartment
Depending on equipment fitted: Sound system or navigation
system
Lockable glove compartment
. . . . . . . . . . . . . . . . . . . . . . . . . . . . . . 158
Front passenger airbag . . . . . . . . . . . . . . . . . . . . . . . . . . . . . . . . . . . . 33
Air conditioner . . . . . . . . . . . . . . . . . . . . . . . . . . . . . . . . . . . . . . . . . . . . 163
Switch for heated rear window . . . . . . . . . . . . . . . . . . . . . . . . . . . . . 126
Thumbwheel for seat heating . . . . . . . . . . . . . . . . . . . . . . . . . . . . . . 170
Ashtray . . . . . . . . . . . . . . . . . . . . . . . . . . . . . . . . . . . . . . . . . . . . . . . . . . . 153
Manual gear lever
Cigarette lighter / Power socket . . . . . . . . . . . . . . . . . . . . . . . . . . . . 153
Auxiliary socket
Tyre pressure monitoring . . . . . . . . . . . . . . . . . . . . . . . . . . . . . . . . . . 66
Storage compartment
Handbrake . . . . . . . . . . . . . . . . . . . . . . . . . . . . . . . . . . . . . . . . . . . . . . . . 175
Seat memory* . . . . . . . . . . . . . . . . . . . . . . . . . . . . . . . . . . . . . . . . . . . . 137
Bonnet lock release . . . . . . . . . . . . . . . . . . . . . . . . . . . . . . . . . . . . . . . 225
Headlight range control . . . . . . . . . . . . . . . . . . . . . . . . . . . . . . . . . . . 119
– coming home and leaving home: delayed lights off and
anticipated lights on function . . . . . . . . . . . . . . . . . . . . . . . . . . . 117
Lever for cruise control . . . . . . . . . . . . . . . . . . . . . . . . . . . . . . . . . . . . 179
Steering wheel with:
– Horn
– Driver airbag . . . . . . . . . . . . . . . . . . . . . . . . . . . . . . . . . . . . . . . . . . . 33
– Controls for radio and telephone*
1415
161718192021222324252627282930
3132
Safety FirstOperating InstructionsPractical TipsTechnical Specifications
Page 61 of 319

59
Cockpit
Instruments Instrument panel overview
The instrument panel is the driver's information centre.
Fig. 37 Overview of instrument panel Coolant temperature gauge . . . . . . . . . . . . . . . . . . . . . . . . . . . . . . . . 60
Rev counter incorporating digital clock and date . . . . . . . . . . . .61, 61
Warning and indicator lamps . . . . . . . . . . . . . . . . . . . . . . . . . . . . . . 65
Speedometer (incorporating odometer display) . . . . . . . . . . . . .63
Fuel gauge . . . . . . . . . . . . . . . . . . . . . . . . . . . . . . . . . . . . . . . . . . . . . . . . 63
1
2345
Adjuster buttons for
–
Digital clock and date . . . . . . . . . . . . . . . . . . . . . . . . . . . . . . . . . . . 61
– Instrument lighting . . . . . . . . . . . . . . . . . . . . . . . . . . . . . . . . . . . . . 62
Digital display with
– Service interval display . . . . . . . . . . . . . . . . . . . . . . . . . . . . . . . . . 74
– Driver information system . . . . . . . . . . . . . . . . . . . . . . . . . . . . . . . 71
6
7
Safety FirstOperating InstructionsPractical TipsTechnical Specifications
Page 63 of 319
61
Cockpit
Rev counter
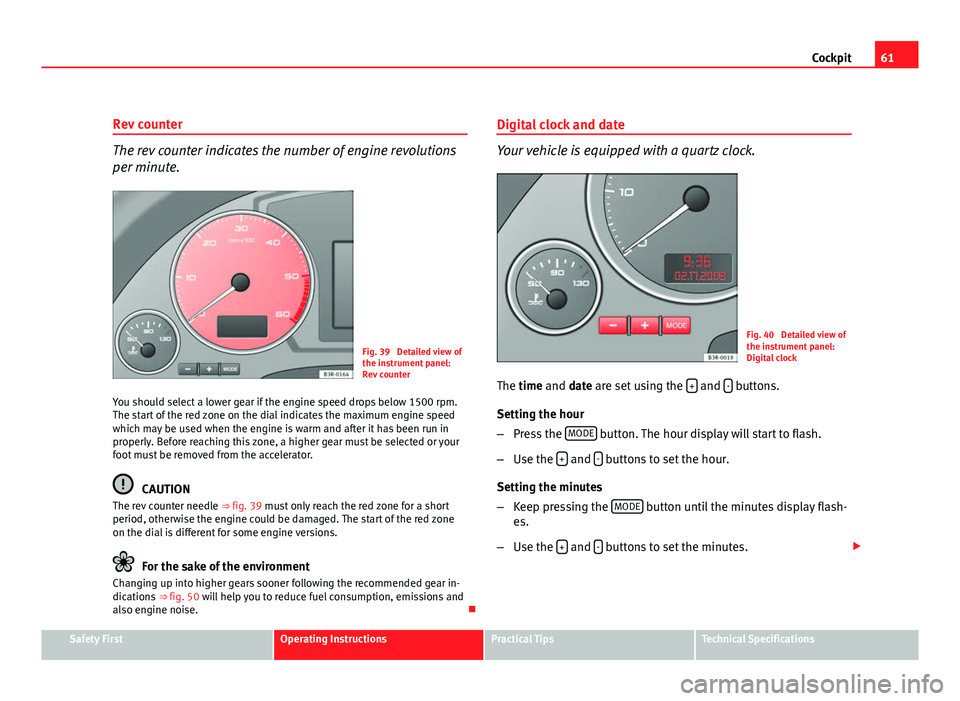
The rev counter indicates the number of engine revolutions
per minute.
Fig. 39 Detailed view of
the instrument panel:
Rev counter
You should select a lower gear if the engine speed drops below 1500 rpm.
The start of the red zone on the dial indicates the maximum engine speed
which may be used when the engine is warm and after it has been run in
properly. Before reaching this zone, a higher gear must be selected or your
foot must be removed from the accelerator.
CAUTION
The rev counter needle ⇒ fig. 39 must only reach the red zone for a short
period, otherwise the engine could be damaged. The start of the red zone
on the dial is different for some engine versions.
For the sake of the environment
Changing up into higher gears sooner following the recommended gear in-
dications ⇒ fig. 50 will help you to reduce fuel consumption, emissions and
also engine noise. Digital clock and date
Your vehicle is equipped with a quartz clock.
Fig. 40 Detailed view of
the instrument panel:
Digital clock
The time and date are set using the +
and - buttons.
Setting the hour
– Press the MODE
button. The hour display will start to flash.
– Use the +
and - buttons to set the hour.
Setting the minutes
– Keep pressing the MODE
button until the minutes display flash-
es.
– Use the +
and - buttons to set the minutes.
Safety FirstOperating InstructionsPractical TipsTechnical Specifications