ESP Seat Exeo ST 2013 User Guide
[x] Cancel search | Manufacturer: SEAT, Model Year: 2013, Model line: Exeo ST, Model: Seat Exeo ST 2013Pages: 327, PDF Size: 5.07 MB
Page 64 of 327
62Cockpit
CHECK button . . . . . . . . . . . . . . . . . . . . . . . . . . . . . . . . . . . . . . . . . . . . . 66
Call-up button for service indicator . . . . . . . . . . . . . . . . . . . . . . . . .77
Reset button for trip recorder . . . . . . . . . . . . . . . . . . . . . . . . . . . . . . 65
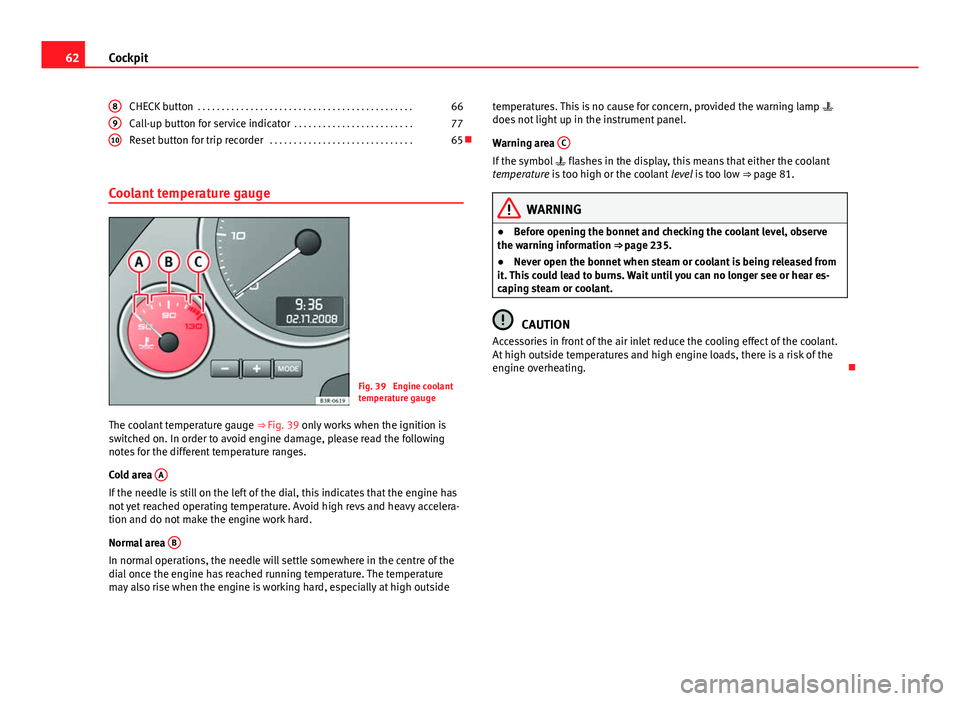
Coolant temperature gauge
Fig. 39 Engine coolant
temperature gauge
The coolant temperature gauge ⇒ Fig. 39 only works when the ignition is
switched on. In order to avoid engine damage, please read the following
notes for the different temperature ranges.
Cold area A
If the needle is still on the left of the dial, this indicates that the engine has
not yet reached operating temperature. Avoid high revs and heavy accelera-
tion and do not make the engine work hard.
Normal area B
In normal operations, the needle will settle somewhere in the centre of the
dial once the engine has reached running temperature. The temperature
may also rise when the engine is working hard, especially at high outside8
910
temperatures. This is no cause for concern, provided the warning lamp
does not light up in the instrument panel.
Warning area C
If the symbol
flashes in the display, this means that either the coolant
temperature is too high or the coolant level is too low ⇒ page 81.
WARNING
● Before opening the bonnet and checking the coolant level, observe
the warning information ⇒ page 235.
● Never open the bonnet when steam or coolant is being released from
it. This could lead to burns. Wait until you can no longer see or hear es-
caping steam or coolant.
CAUTION
Accessories in front of the air inlet reduce the cooling effect of the coolant.
At high outside temperatures and high engine loads, there is a risk of the
engine overheating.
Page 71 of 327
69
Cockpit
Tyre pressure warning lamp*
The tyre pressure should be corrected as soon as possible if
it is too low.
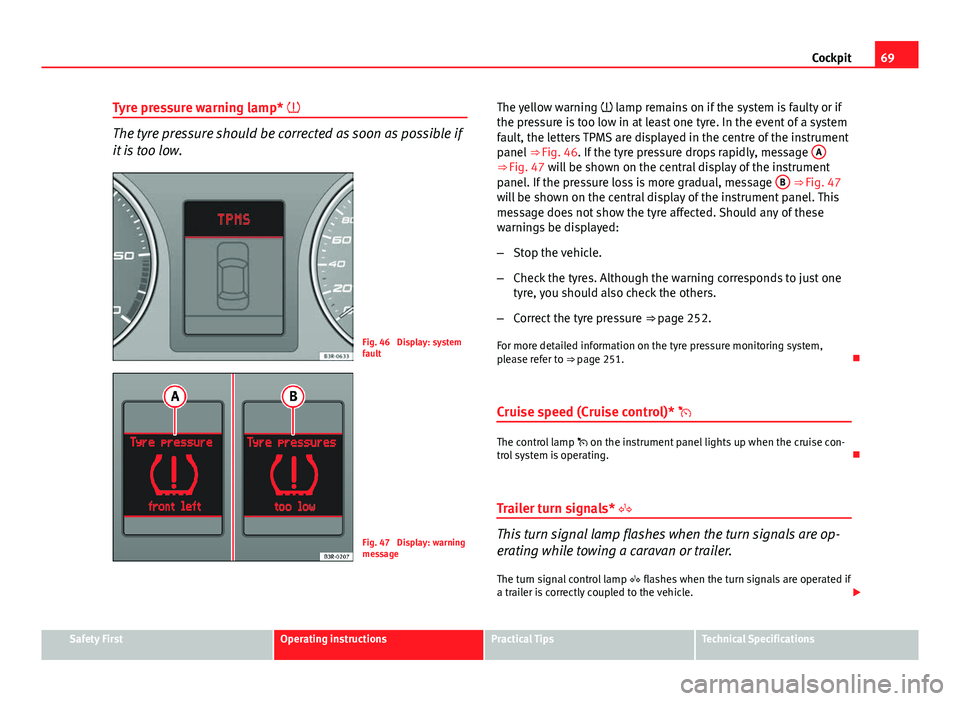
Fig. 46 Display: system
fault
Fig. 47 Display: warning
message The yellow warning
lamp remains on if the system is faulty or if
the pressure is too low in at least one tyre. In the event of a system
fault, the letters TPMS are displayed in the centre of the instrument
panel ⇒ Fig. 46. If the tyre pressure drops rapidly, message A
⇒ Fig. 47 will be shown on the central display of the instrument
panel. If the pressure loss is more gradual, message B ⇒ Fig. 47
will be shown on the central display of the instrument panel. This
message does not show the tyre affected. Should any of these
warnings be displayed:
– Stop the vehicle.
– Check the tyres. Although the warning corresponds to just one
tyre, you should also check the others.
– Correct the tyre pressure ⇒ page 252.
For more detailed information on the tyre pressure monitoring system,
please refer to ⇒ page 251.
Cruise speed (Cruise control)*
The control lamp on the instrument panel lights up when the cruise con-
trol system is operating.
Trailer turn signals*
This turn signal lamp flashes when the turn signals are op-
erating while towing a caravan or trailer. The turn signal control lamp flashes when the turn signals are operated if
a trailer is correctly coupled to the vehicle.
Safety FirstOperating instructionsPractical TipsTechnical Specifications
Page 76 of 327
74Cockpit
Driver information system
General notes
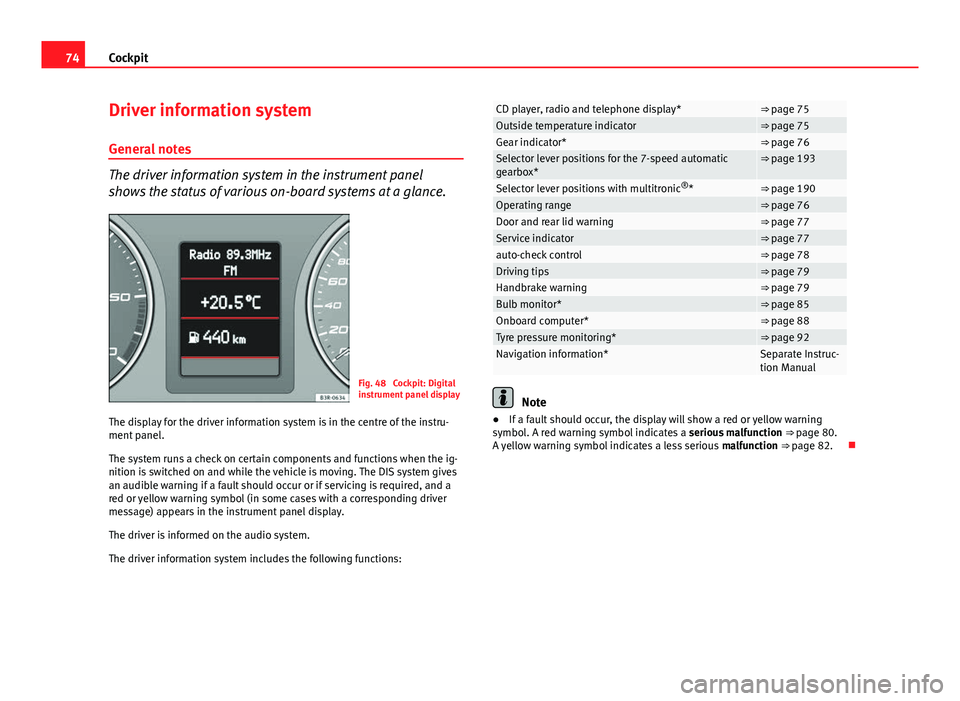
The driver information system in the instrument panel
shows the status of various on-board systems at a glance.
Fig. 48 Cockpit: Digital
instrument panel display
The display for the driver information system is in the centre of the instru-
ment panel.
The system runs a check on certain components and functions when the ig-
nition is switched on and while the vehicle is moving. The DIS system gives
an audible warning if a fault should occur or if servicing is required, and a
red or yellow warning symbol (in some cases with a corresponding driver
message) appears in the instrument panel display.
The driver is informed on the audio system.
The driver information system includes the following functions:
CD player, radio and telephone display*⇒ page 75Outside temperature indicator⇒ page 75Gear indicator*⇒ page 76Selector lever positions for the 7-speed automatic
gearbox*⇒ page 193
Selector lever positions with multitronic ®
*⇒ page 190Operating range⇒ page 76Door and rear lid warning⇒ page 77Service indicator⇒ page 77auto-check control⇒ page 78Driving tips⇒ page 79Handbrake warning⇒ page 79Bulb monitor*⇒ page 85Onboard computer*⇒ page 88Tyre pressure monitoring*⇒ page 92Navigation information*Separate Instruc-
tion Manual
Note
● If a fault should occur, the display will show a red or yellow warning
symbol. A red warning symbol indicates a serious malfunction ⇒ page 80.
A yellow warning symbol indicates a less serious malfunction ⇒ page 82.
Page 79 of 327

77
Cockpit
Door and rear lid warning
Fig. 52 Display: Door
and rear lid warning
The door and rear lid warning symbol lights up if one or more of the doors,
or the bonnet or rear lid are not properly closed when the ignition is on. The
symbol also indicates which of these is not properly closed. The display in
the illustration ⇒ Fig. 52 shows that the driver door is open.
The corresponding part of the pictogram will flash if either the bonnet or
rear lid are open. The warning symbol goes out when the bonnet, rear lid
and all the doors are closed.
In vehicles with a driver information system and an onboard computer* the
door catches/rear lid warning symbol can be switched off by briefly press-
ing one of the control switches for the onboard computer ⇒ page 89. How-
ever, the warning symbol will appear again if any of the doors or the bonnet
or rear lid is opened or closed. Service indicator
This display reminds the driver when the next routine serv-
ice is due.
Fig. 53 Detailed view of
the instrument panel:
Service indicator
Displaying distance to next service
When you press the service button 1
briefly with the ignition switched on,
the display will show how far the vehicle can be driven before the next serv-
ice is due. This check can be carried out with the engine stopped or running
up to 5 km/h. Before the first 500 km and after the ignition cycle, the kilo-
metres and days before the service inspection are not displayed.
If the service button 1
is pressed before the first 500 km the following indi-
cation appears on screen:
Service in ----- km --- days
This is only valid for vehicles with “LongLife Service Intervals”*.
Safety FirstOperating instructionsPractical TipsTechnical Specifications
Page 81 of 327

79
Cockpit
The red symbol indicates danger, whereas the yellow one represents a
warning. Additional messages for the driver may be shown with the red or
yellow symbols.
Driver messages
Additional messages for the driver are displayed together
with the warning symbols on the instrument panel.
Fig. 54 Instrument pan-
el: CHECK button
Driver messages and red symbols
If a red warning symbol appears on the display, you can press the CHECK
button ⇒ Fig. 54 to call up an additional driver message.
For example: in the event of an oil pressure malfunction, the oil pressure
symbol
will appear in the display. If you now press the CHECK
button,
the following message will appear in the display:
Switch off engine, check oil level The message will disappear from the display after about 5 seconds. If re-
quired, the message can be called up again by briefly pressing the
CHECK
button.
Driver messages and yellow symbols
If a yellow warning symbol appears in the display, it will automatically be
accompanied by the corresponding driver message.
For example, the symbol
is displayed to indicate that the windscreen
washer fluid level is low. In addition, the following message will appear:
Top up washer fluid
The message will disappear after a few seconds. If required, the message
can be called up again by briefly pressing the CHECK
button.
Note
● The messages handbrake on and when stationary apply footbrake to se-
lect gear cannot be called up a second time. They will remain in the display
until the handbrake is released or until a gear is selected.
Handbrake warning
– Release the handbrake.
If you drive by mistake with the handbrake still applied, you will hear a
warning buzzer and the display will show the message: Handbrake on
The handbrake warning switches on after driving for 3 seconds at speeds
above 5 km/h.
Safety FirstOperating instructionsPractical TipsTechnical Specifications
Page 95 of 327
93
Cockpit
driven and the tyre pressure will rise accordingly. Therefore, you should only
adjust the tyre pressures when they are cold (i.e. approximately at ambient
temperature).
To ensure that the tyre pressure monitoring system works reliably, you
should check and, if necessary, adjust the tyre pressures at regular intervals
and store the correct pressures (reference values) in the system.
A tyre pressure information label is attached to the inside of the fuel tank
flap.
WARNING
● Never adjust tyre pressure when the tyres are hot. This may damage
or even burst the tyres. Risk of accident!
● An insufficiently inflated tyre flexes a lot more at high speeds and
causes significant heating of the tyre. Under these conditions, the tyre
bead may be released or the tyre may burst. Risk of accident!
For the sake of the environment
Under-inflated tyres lead to increased fuel consumption and tyre wear.
Note
● Responsibility for ensuring that the tyres are correctly inflated remains
with the driver; the system can only provide assistance.
● Pressure can only be adjusted when the tyres are at ambient tempera-
ture. Tyre pressure monitoring display
The tyre pressure should be corrected as soon as possible if
it is too low.
If the symbol appears, the tyre pressure on at least one of the
wheels is too low.
– Stop the vehicle.
– Check the tyre(s).
– Correct the tyre pressure ⇒ page 252.
For more detailed information on the tyre pressure monitoring system,
please refer to ⇒ page 251.
Safety FirstOperating instructionsPractical TipsTechnical Specifications
Page 104 of 327
102Opening and closing
Automatic locking function (Auto Lock)*
The Auto Lock* function automatically locks all doors and the rear lid when
the vehicle exceeds a speed of about 15 km/h.
The vehicle is unlocked again automatically when the ignition key is re-
moved. Alternatively, the driver can also unlock the vehicle using the central
locking switch or by opening one of the doors.
WARNING
Do not leave anyone (especially children) in the vehicle if it is locked from
the outside and the anti-theft security system is enabled, as the doors
and windows cannot then be opened from the inside. Locked doors could
delay assistance in an emergency, potentially putting lives at risk.
Note
● Should the central locking system fail to work, you can still lock and un-
lock the driver door and the rear lid using the key. Locking the doors man-
ually if central locking fails to work ⇒ page 105.
● The anti-theft mechanism and the anti-theft alarm* cannot be enabled if
the central locking is not working.
● Never leave any valuable items in the vehicle unattended. Even a locked
vehicle is not a safe. Unlocking the vehicle with the key
Fig. 71 Turning the key
to enable the open and
close functions
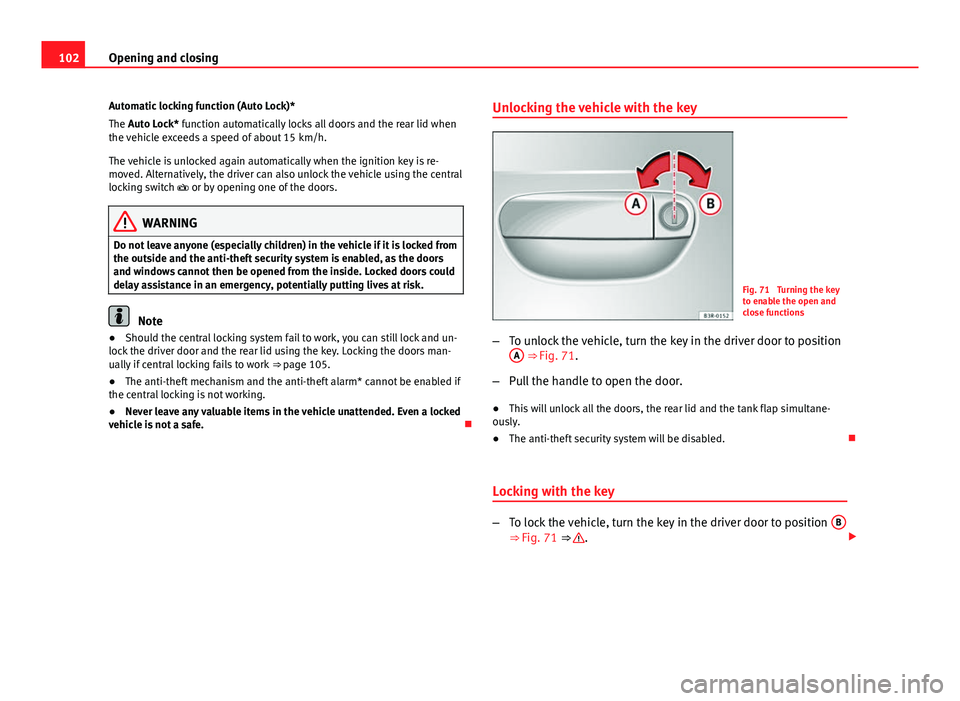
– To unlock the vehicle, turn the key in the driver door to position
A
⇒ Fig. 71.
– Pull the handle to open the door.
● This will unlock all the doors, the rear lid and the tank flap simultane-
ously.
● The anti-theft security system will be disabled.
Locking with the key
– To lock the vehicle, turn the key in the driver door to position B⇒ Fig. 71 ⇒ .
Page 105 of 327
103
Opening and closing
● This will lock all the doors and the rear lid.
● The interior lights are switched off, provided the light switch is in the
courtesy light position.
● The windows and the sunroof* will close as the key is held in the locking
position.
● The anti-theft security system will be enabled immediately.
Locking the vehicle without activating the anti-theft security system
With the anti-theft security system enabled, it is more difficult to break into
the vehicle. If the anti-theft security system has been enabled, the inside
door handles and the central locking switch will not work ⇒
.
If you are leaving passengers in the vehicle while it is parked, it is possible
to lock the vehicle without activating the anti-theft security system.
To do so, turn the key in the driver door twice in quick succession to posi-
tion B
⇒ Fig. 71.
WARNING
Do not leave anyone (especially children) in the vehicle if it is locked from
the outside and the anti-theft security system is enabled, as the doors
and windows cannot then be opened from the inside. Locked doors could
delay assistance in an emergency, potentially putting lives at risk.
CAUTION
If the driver door is locked using the key while open, the vehicle will be au-
tomatically immobilised and the alarm triggered.
Note
● Please note that when the vehicle is locked without activating the anti-
theft mechanism, the anti-theft alarm* remains operative. You should there-
fore switch off the interior monitoring* before locking the vehicle, as other-
wise the alarm* could be triggered unintentionally.
● The driver door cannot be locked using the central locking system when
it is still open. The door must be locked separately after it has been closed.
This helps to prevent you from being locked out of the vehicle.
Central locking switch
The central locking system can be enabled from inside the
vehicle using the central locking switch on the driver door.
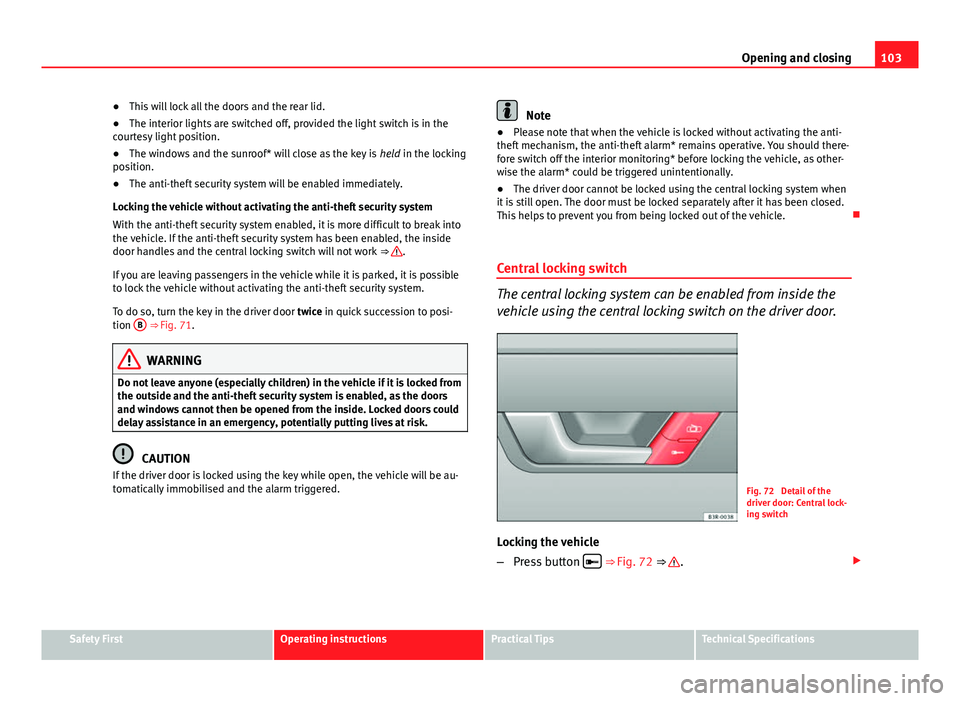
Fig. 72 Detail of the
driver door: Central lock-
ing switch
Locking the vehicle
– Press button
⇒
Fig. 72 ⇒ .
Safety FirstOperating instructionsPractical TipsTechnical Specifications
Page 111 of 327

109
Opening and closing
Unlocking the vehicle
–
Press button A ⇒ Fig. 79 for about 1 second.
Locking the vehicle
–
Press button B for about 1 second.
Opening the rear lid
–
Press button C and hold for at least one second.
The turn signals will flash twice as confirmation when you unlock the vehi-
cle. The vehicle will be locked again automatically if you do not open one of
the doors or the rear lid within 60 seconds after unlocking the vehicle with
button A
. This function prevents the vehicle from remaining unlocked if the
unlocking button is pressed by mistake.
In vehicles with the security central locking* feature, you can unlock just
the driver door and the tank flap by pressing button A
once or the whole
vehicle by pressing the button twice.
The turn signals flash once when the vehicle is locked to confirm that the
doors and rear lid are properly locked.
Moreover, apart from unlocking the vehicle, the seat* and mirror* memory
programmed in the key is activated. The driver seat and exterior mirrors will
be automatically adjusted to the positions stored in the memory.
The interior lights will automatically light up when the vehicle is unlocked
and go out when the vehicle is locked, provided that the switch is in the
courtesy light position.
WARNING
Do not leave anyone (especially children) in the vehicle if it is locked from
the outside and the anti-theft security system is enabled, as the doors
and windows cannot then be opened from the inside. Locked doors could
delay assistance in an emergency, potentially putting lives at risk.
Note
● The remote control should only be used when the doors and the rear lid
are closed.
● The remote control should not be used when the vehicle is out of sight.
● The anti-theft alarm* can be accidentally triggered and the vehicle
locked if you press the locking button
on the remote control inside the
vehicle before inserting the key in the ignition. If this should happen by
mistake, press the unlock button
.
Re-synchronising
Should the remote control fail to lock or unlock the vehicle,
the system must be re-synchronised.
– If the vehicle is locked, use the key to unlock the driver door.
– Press the unlock button
on the remote control.
– Insert the key into the ignition and switch on the ignition.
– Switch off the ignition and remove the key.
– Press the unlock
or the lock button .
Safety FirstOperating instructionsPractical TipsTechnical Specifications
Page 114 of 327
112Opening and closing
WARNING
Do not leave anyone (especially children) in the vehicle if it is locked from
the outside and the anti-theft security system is enabled, as the doors
and windows cannot then be opened from the inside. Locked doors could
delay assistance in an emergency, potentially putting lives at risk.
Electric windows Controls
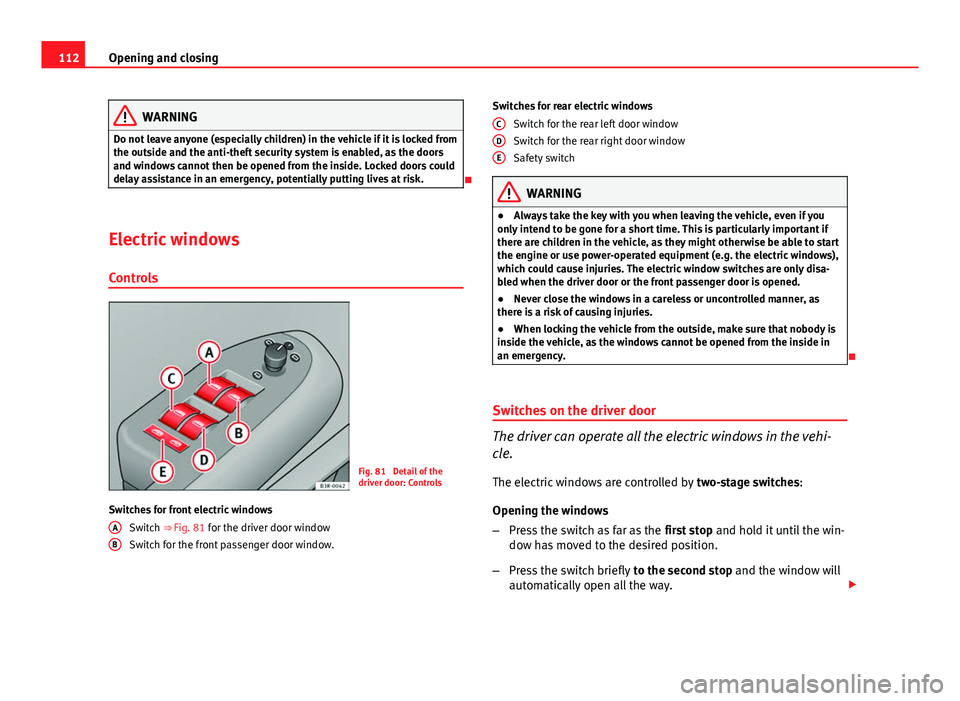
Fig. 81 Detail of the
driver door: Controls
Switches for front electric windows Switch ⇒ Fig. 81 for the driver door window
Switch for the front passenger door window.
A
B
Switches for rear electric windows
Switch for the rear left door window
Switch for the rear right door window
Safety switch
WARNING
● Always take the key with you when leaving the vehicle, even if you
only intend to be gone for a short time. This is particularly important if
there are children in the vehicle, as they might otherwise be able to start
the engine or use power-operated equipment (e.g. the electric windows),
which could cause injuries. The electric window switches are only disa-
bled when the driver door or the front passenger door is opened.
● Never close the windows in a careless or uncontrolled manner, as
there is a risk of causing injuries.
● When locking the vehicle from the outside, make sure that nobody is
inside the vehicle, as the windows cannot be opened from the inside in
an emergency.
Switches on the driver door
The driver can operate all the electric windows in the vehi-
cle. The electric windows are controlled by two-stage switches:
Opening the windows
– Press the switch as far as the first stop and hold it until the win-
dow has moved to the desired position.
– Press the switch briefly to the second stop and the window will
automatically open all the way.
C
DE