window Seat Ibiza 2017 Edition 11.17 Owner's Guide
[x] Cancel search | Manufacturer: SEAT, Model Year: 2017, Model line: Ibiza, Model: Seat Ibiza 2017Pages: 312, PDF Size: 6.51 MB
Page 145 of 312
Opening and closing
Convenience opening and closing Use the convenience opening/closing func-
tion to e
a
sily open/close all the windows and
the sliding/tilting sunroof* from the outside.
Convenience open function
– Press and hold the button on the r
emote
control key until all the windows and the
sliding/tilting sunroof* have reached the
desired position, or
– First unlock the vehicle using the button
on the r
emote control key and then keep
the key in the driver door lock until all the
windows and the sliding/tilting sunroof*
have reached the required position.
Convenience close function
– Press and hold button on the remote
c
ontrol key until all the windows and the
sliding/tilting sunroof* are closed ››› , or
– Keep the key in the driver door in the "lock"
po s
ition u
ntil all the windows and the slid-
ing/tilting sunroof* are closed.
Programming convenience opening in the
Easy Connect*
– Select: button > SETTINGS
fu
nction
b
utton > Opening and closing > Elec-
tric windows > Convenience open-
ing , to choose between all the windows (All
), only the driver’s window ( Driver)
or none (Deactivated ). WARNING
● Tak e c
are when closing the sliding/tilting
sunroof* and windows. There is a risk of suf-
fering injury.
● For safety reasons, you should only use the
remote c
ontrol open and close functions with-
in about 2 metres of the vehicle. To avoid in-
juries, always keep an eye on the windows
and the sliding/tilting sunroof* when press-
ing the button to close them. The windows
stop moving as soon as the button is re-
leased. One-touch opening and closing*
One-touch opening and closing means you
do not
h
av
e to hold down the button.
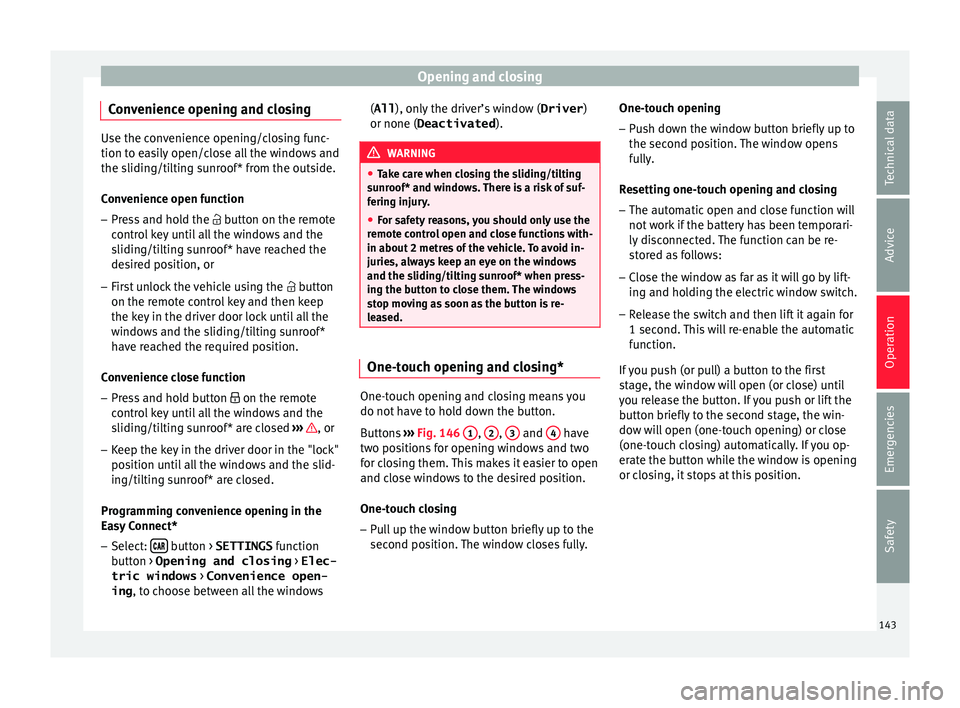
Buttons ›››
Fig. 146 1 ,
2 ,
3 and
4 have
tw o po
s
itions for opening windows and two
for closing them. This makes it easier to open
and close windows to the desired position.
One-touch closing
– Pull up the window button briefly up to the
second pos
ition. The window closes fully. One-touch opening
– Push down the window button briefly up to
the second pos
ition. The window opens
fully.
Resetting one-touch opening and closing
– The automatic open and close function will
not work
if the battery has been temporari-
ly disconnected. The function can be re-
stored as follows:
– Close the window as far as it will go by lift-
ing and hol
ding the electric window switch.
– Release the switch and then lift it again for
1 second. Thi
s will re-enable the automatic
function.
If you push (or pull) a button to the first
stage, the window will open (or close) until
you release the button. If you push or lift the
button briefly to the second stage, the win-
dow will open (one-touch opening) or close
(one-touch closing) automatically. If you op-
erate the button while the window is opening
or closing, it stops at this position.
143
Technical data
Advice
Operation
Emergencies
Safety
Page 147 of 312
Opening and closing
Opening the sunroof
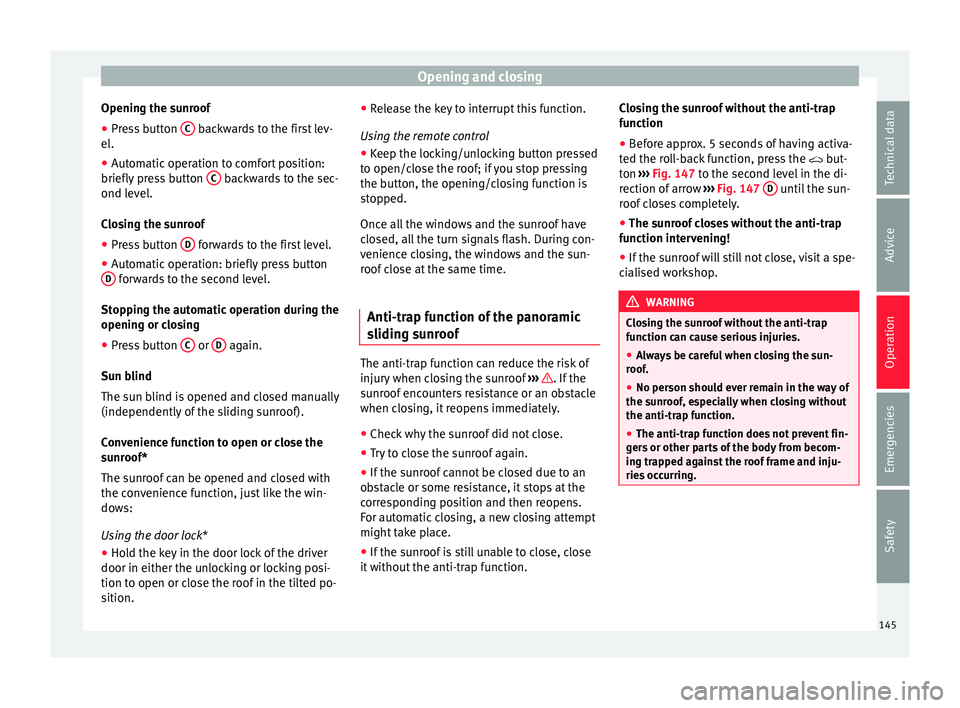
● Press button C backwards to the first lev-
el .
● Aut om
atic operation to comfort position:
briefly pre
ss button C backwards to the sec-
ond l ev
el
.
Closing the sunroof
● Press button D forwards to the first level.
● Automatic operation: briefly press button
D forwards to the second level.
St op
pin
g the automatic operation during the
opening or closing
● Press button C or
D again.
S u
n b
lind
The sun blind is opened and closed manually
(independently of the sliding sunroof).
Convenience function to open or close the
sunroof*
The sunroof can be opened and closed with
the convenience function, just like the win-
dows:
Using the door lock *
● Hold the key in the door lock of the driver
door in either the unloc
king or locking posi-
tion to open or close the roof in the tilted po-
sition. ●
Rele
ase the key to interrupt this function.
Using the remote control ● Keep the locking/unlocking button pressed
to open/clo
se the roof; if you stop pressing
the button, the opening/closing function is
stopped.
Once all the windows and the sunroof have
closed, all the turn signals flash. During con-
venience closing, the windows and the sun-
roof close at the same time.
Anti-trap function of the panoramic
sliding s
unroof The anti-trap function can reduce the risk of
injur
y
when c
losing the sunroof ››› . If the
s u
nr
oof encounters resistance or an obstacle
when closing, it reopens immediately.
● Check why the sunroof did not close.
● Try to close the sunroof again.
● If the sunroof cannot be closed due to an
obs
tacle or some resistance, it stops at the
corresponding position and then reopens.
For automatic closing, a new closing attempt
might take place.
● If the sunroof is still unable to close, close
it without
the anti-trap function. Closing the sunroof without the anti-trap
function
●
B
efore approx. 5 seconds of having activa-
ted the ro
ll-back function, press the but-
ton ››› Fig. 147 to the second level in the di-
rection of arrow ››› Fig. 147 D until the sun-
r oof
c
loses completely.
● The sunroof closes without the anti-trap
function int
ervening!
● If the sunroof will still not close, visit a spe-
ciali
sed workshop. WARNING
Closing the sunroof without the anti-trap
fu nction c
an cause serious injuries.
● Always be careful when closing the sun-
roof.
● No per
son should ever remain in the way of
the sunr
oof, especially when closing without
the anti-trap function.
● The anti-trap function does not prevent fin-
gers
or other parts of the body from becom-
ing trapped against the roof frame and inju-
ries occurring. 145
Technical data
Advice
Operation
Emergencies
Safety
Page 153 of 312
Lights and visibility
headlights in good time when light condi-
tion s
bec
ome poor.
Interior and reading lights Read the additional information carefully
›› ›
page 33
Luggage compartment lighting
The light is activated when the rear lid is
open, even when the ignition and lights are
turned off. For this reason, ensure that the
rear lid is always closed.
Ambient light*
The ambient light lights up the area of the
centre console and the footwell area and, de-
pending on the version, the front door panels
as well.
It will be switched on at full brightness when
the doors are opened and the lights will be
dimmed during driving, when the light selec-
tor is in the , or position.
The brightness of the ambient light* can be
adjusted through the Easy Connect menu, as
can colour, in versions with lighting on the
front door panel (the button and the func-
tion b utt
on
SETTINGS > background
lighting ›››
page 34). Note
If not all the vehicle doors are closed, the in-
terior light s
will be switched off after approx.
10 minutes, providing the ignition key has
been removed and the courtesy light position
selected. This prevents the battery from dis-
charging. Visibility
Heat ed r
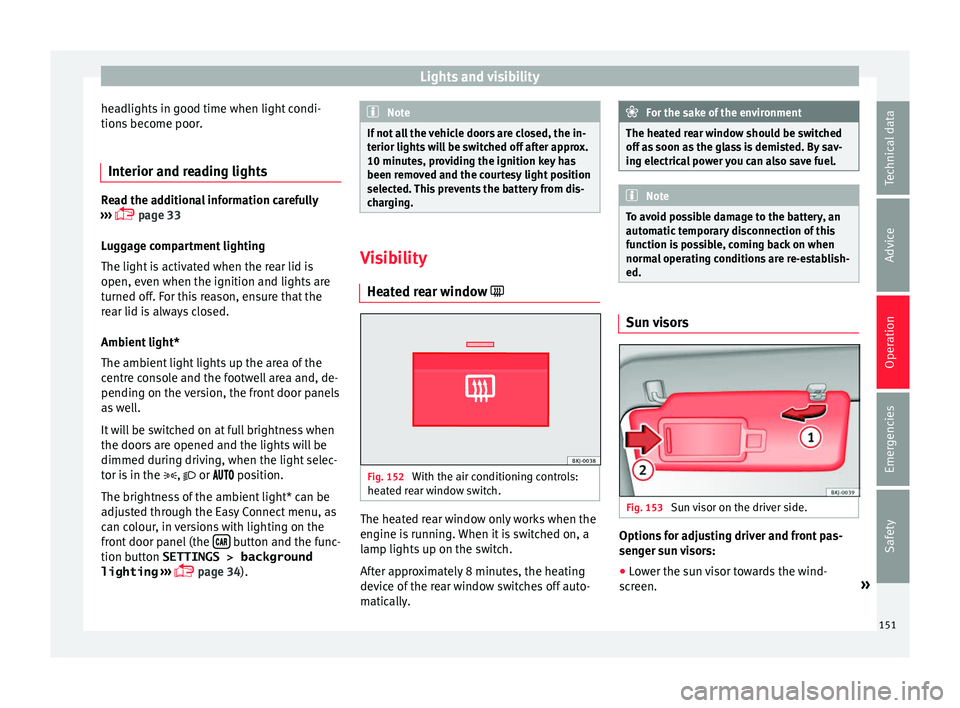
ear window Fig. 152
With the air conditioning controls:
he at
ed r
ear window switch. The heated rear window only works when the
en
gine i
s
running. When it is switched on, a
lamp lights up on the switch.
After approximately 8 minutes, the heating
device of the rear window switches off auto-
matically. For the sake of the environment
The heated rear window should be switched
off a s
soon as the glass is demisted. By sav-
ing electrical power you can also save fuel. Note
To avoid possible damage to the battery, an
autom atic
temporary disconnection of this
function is possible, coming back on when
normal operating conditions are re-establish-
ed. Sun visors
Fig. 153
Sun visor on the driver side. Options for adjusting driver and front pas-
sen
g
er s
un visors:
● Lower the sun visor towards the wind-
sc r
een. »
151
Technical data
Advice
Operation
Emergencies
Safety
Page 154 of 312
Operation
● The s u
n
visor can be pulled out of its
mounting and turned towards the door
››› Fig. 153 1 .
● Swing the sun visor towards the door, lon-
git udin
al
ly backwards.
Vanity mirror
There is a vanity mirror, with a cover 2 , on
the r e
ar of
the sun blind. WARNING
Folded sun blinds can reduce visibility.
● Always store sun blinds and visors in their
hous in
g when not in use. Windscreen wiper and rear win-
do
w w
iper sy
stems
Windscreen wiper and window wiper Read the additional information carefully
› ›
›
page 33 WARNING
● Worn and dir ty
wiper blades reduce visibili-
ty and safety levels while driving.
● In cold conditions you should not use the
wash/w
ipe system unless you have warmed
the windscreen with the heating and ventila-
tion system. The windscreen washer fluid could otherwise freeze on the windscreen and
ob
s
cure your view of the road.
● Always note the corresponding warnings
›››
page 73. WARNING
The rain sensor* may not detect enough rain
t o sw it
ch on the wipers.
● If necessary, switch on the wipers manually
when water on the w
indscreen obstructs visi-
bility. CAUTION
In icy conditions, always check that the wind-
sc r
een wipers and the window wiper are not
frozen. If you switch on the windscreen wip-
ers when the wiper blades are frozen to the
windscreen, you could damage both the wip-
er blades and the wiper motor. Note
● The wiper s
and washers will work only
when the ignition is switched on.
● The heat output of the heated jets* is con-
trol
led automatically when the ignition is
switched on, depending upon the outside
temperature.
● In certain versions of vehicles with alarms,
the winds
creen wiper will only work in inter-
val/rain sensor mode when the ignition is on
and the bonnet closed. ●
When the inter v
al wipe function is on, the
intervals are directly proportional to the
speed. This way, the higher the vehicle speed
the shorter the intervals.
● If you stop the vehicle with the windscreen
wiper in pos
ition 1 or 2, it will automatically
change to a lower position speed. The set
speed will be resumed when the vehicle pulls
away.
● The windscreen will be wiped again after
appro
ximately five seconds once the “auto-
matic wash/wipe system” has been activa-
ted, provided the vehicle is moving (drip func-
tion). If you activate the wipers less than 3
seconds after the drip function, a new wash
sequence will begin without performing the
last wipe. For the “drip” function to work
again, you have to turn the ignition off and
then on again.
● Do not put stickers on the windscreen in
front of
the rain sensor*. This may cause sen-
sor disruption or faults.
● Depending on the version of the model,
when you en
gage reverse gear and with the
headlight wiper activated, this can start a
wipe. Rear view mirrors
Int erior mirr or It is dangerous to drive if you cannot see
c
le
arly through the rear window.
152
Page 155 of 312
Lights and visibility
Interior mirror with automatic anti-dazzle
f u
nction*
The anti-d
azzle function is activated every
time the ignition is switched on.
When the anti-dazzle function is enabled, the
interior rear vision mirror will darken auto-
matically according to the amount of light it
receives. The anti-dazzle function is cancel-
led if reverse gear is engaged. Note
● The autom atic
anti-dazzle function will only
work properly if the sun blind* for the rear
window is retracted and there are no other
objects preventing light from reaching the in-
terior rear vision mirror.
● If you have to stick any type of sticker on
the winds
creen, do not do so in front of the
sensors. Doing so could prevent the anti-daz-
zle function from working well or even from
working at all. Folding in the exterior mirrors man-
ua
l
ly The exterior mirrors of the vehicle may be fol-
ded in. F
or thi
s, pr
ess the mirror housing to-
wards the vehicle. Note
Before washing the vehicle with an automatic
car w a
sh, fold in the exterior mirrors to avoid
damage. Electric exterior mirrors*
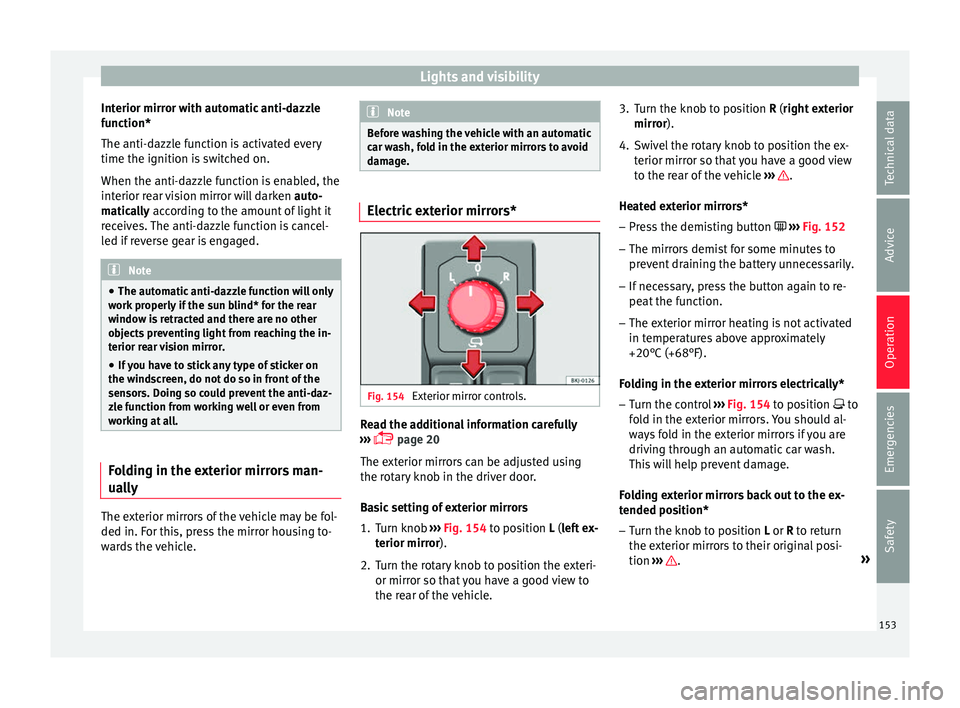
Fig. 154
Exterior mirror controls. Read the additional information carefully
› ›
›
page 20
The exterior mirrors can be adjusted using
the rotary knob in the driver door.
Basic setting of exterior mirrors
1. Turn knob ›››
Fig. 154 to position L (left ex-
terior mirror).
2. Turn the rotary knob to position the exteri- or mirror so that
you have a good view to
the rear of the vehicle. 3. Turn the knob to position R (right ext
erior
mirror).
4. Swivel the rotary knob to position the ex- terior mirror so th
at you have a good view
to the rear of the vehicle ››› .
He at
ed e
xterior mirrors*
– Press the demisting button ›››
Fig. 152
– The mirrors demist for some minutes to
prevent
draining the battery unnecessarily.
– If necessary, press the button again to re-
peat the f
unction.
– The exterior mirror heating is not activated
in temperat
ures above approximately
+20°C (+68°F).
Folding in the exterior mirrors electrically* – Turn the control ›››
Fig. 154 to position to
fold in the exterior mirrors. You should al-
ways fold in the exterior mirrors if you are
driving through an automatic car wash.
This will help prevent damage.
Folding exterior mirrors back out to the ex-
tended position* – Turn the knob to position L or R to ret
urn
the exterior mirrors to their original posi-
tion ››› .
»
153
Technical data
Advice
Operation
Emergencies
Safety
Page 163 of 312
Transport and practical equipment
– Di s
trib
ute the load evenly in the luggage
compartment.
– Place heavy objects as far forward as possi-
ble in the lug
gage compartment
››› Fig. 166.
– Place the heavy objects first.
– Secure heavy objects to the fitted fastening
rings* ›
›› page 162.
– Secure loose loads with a luggage net* or
with non-ela
stic straps secured to the fas-
tening* rings. WARNING
● Loo se lug
gage and other objects in the lug-
gage compartment could cause serious inju-
ries.
● Always stow objects in the luggage com-
partment
and secure them with the fastening
rings*.
● During sudden manoeuvres or accidents,
loose ob
jects can be thrown forward, injuring
vehicle occupants or even third parties. This
increased risk of injury will be further in-
creased if a loose object is struck by an inflat-
ing airbag. If this happens, objects may
shoot outward like a missile. Risk of fatal in-
jury.
● Always keep all objects in the luggage com-
partment
and use appropriate grips to secure
them, particularly in the case of heavy ob-
jects. ●
Never e x
ceed the allowed axle weights or
allowed maximum weight. If said weights are
exceeded, the driving characteristics of the
vehicle may change, leading to accidents, in-
juries and damage to the vehicle.
● Please note that the centre of gravity may
shift when tr
ansporting heavy objects; this
may affect vehicle handling and lead to an ac-
cident. Therefore, it is essential to adjust
your speed and driving style accordingly, to
avoid accidents.
● Never leave your vehicle unattended, espe-
cia
lly when the rear lid is open. Children
could climb into the luggage compartment,
closing the door behind them; they will be
trapped and run the risk of death.
● Never allow children to play in or around
the vehic
le. Close and lock all the doors and
the rear lid when you leave the vehicle. Be-
fore you lock the vehicle, make sure that
there are no adults or children in the vehicle.
● Please observe the notes on the ›››
page 75. CAUTION
Hard objects on the rear shelf could chafe
again s
t the wires of the heating element in
the heated rear window and cause damage. Note
● The tyr e pr
essure must be adjusted accord-
ing to the load. When necessary, check the
tyre pressures on the adhesive label stuck to the back of the front left door frame
›› ›
page 275.
● Air circulation in the vehicle helps reduce
foggin
g of the windows. Used air escapes
through ventilation slits in the side trim of
the luggage compartment. Ensure that the
ventilation slots are never covered.
● Straps for securing the load to the fasten-
ing ring
s* are commercially available from ac-
cessory shops. 161
Technical data
Advice
Operation
Emergencies
Safety
Page 168 of 312
Operation
Check attachments
Onc e the c
r
oss bars and roof carrier system
have been installed, check the bolted con-
nections and attachments after a short jour-
ney and subsequently with a certain
frequency. WARNING
Exceeding the maximum authorised roof load
can r e
sult in accidents and considerable vehi-
cle damage.
● Never exceed the maximum authorised
load on the r
oof and on the axles or the vehi-
cle's maximum authorised weight.
● Never exceed the load capacity of the cross
bars
and the roof carrier system, even if the
maximum authorised roof load has not been
reached.
● Secure heavy items as far forward as possi-
ble and di
stribute the vehicle load uniformly. WARNING
If the load is loose or not secured, it could fall
from the r oof
carrier system or cause acci-
dents and injuries.
● Always use belts or retaining straps that
are suit
able and in a good condition.
● Secure the load properly. Air conditioning
He atin
g,
ventilation and cool-
ing
General notes Read the additional information carefully
›› ›
page 51
Pollution filter
The pollution filter (a combined particulate
filter and active carbon filter) serves as a bar-
rier against impurities in the outside air, in-
cluding dust and pollen.
For the climate control system to work with
maximum efficiency, the pollution filter must
be replaced at the specified intervals in the
Maintenance Programme.
If the filter loses efficiency prematurely due
to use in areas reaching very high pollution
levels, the pollen filter must be changed
more frequently than stated in the Service
Schedule. WARNING
Reduced visibility through the windows in-
cr e
ases the risk of serious accidents.
● Always ensure that all windows are free of
ice and sno
w, and that they are not fogged, so as to maintain good visibility of everything
outs
ide.
● The m
aximum heat output required to de-
fros
t windows as quickly as possible is only
available when the engine has reached its
normal running temperature. Only drive when
you have good visibility.
● Always ensure that you use the heating
syst
em, fresh air system, air conditioner and
the heated rear window to maintain good visi-
bility to the outside.
● Never leave the air recirculation on for a
long period of time. If
the cooling system is
switched off and air recirculation mode
switched on, the windows can mist over very
quickly, considerably limiting visibility.
● Switch air recirculation mode off when it is
not requir
ed. WARNING
Stuffy or used air will increase fatigue and re-
duce driv er c
oncentration possibly resulting
in a serious accident.
● Never leave the fresh air fan turned off or
use the air rec
irculation for long periods of
time; the air in the vehicle interior will not be
refreshed. CAUTION
● If y
ou suspect that the air conditioner is
damaged, switch it off with the A/C button to
166
Page 169 of 312
Air conditioning
prevent further damage and have it checked
by
a s
pecialised workshop.
● Repairs to the air conditioner require spe-
cia
list knowledge and special tools. There-
fore, we recommend you to take the vehicle
to a specialised workshop. Note
● If the humidity and t
emperature outside the
vehicle are high, condensation can drip off
the evaporator in the cooling system and
form a pool underneath the vehicle. This is
normal and does not indicate a leak.
● Keep the air intake slots in front of the
winds
creen free of snow, ice and leaves to en-
sure heating and cooling are not impaired,
and to prevent the windows from misting
over.
● The air from the vents flows through the ve-
hicle int
erior and is extracted by slots in the
luggage compartment designed for this pur- pose. Therefore, you should avoid obstruct-
ing the
se s
lots with any kind of object.
● The air conditioner operates most effective-
ly with the w
indows and the sliding/tilting
sunroof* closed. However, if the temperature
inside the vehicle is excessive because of the
sun, the air inside can be cooled faster by
opening the windows for a short time.
● Do not smoke while air recirculation mode
is on, a
s smoke drawn into the air condition-
ing system leaves residue on the evaporator,
producing a permanent unpleasant odour.
● At low outside temperatures, the compres-
sor switc
hes off automatically and cannot be
switched on even with the AUTO button.
● It is advisable to turn on the air condition-
ing at l
east once a month, to lubricate the
system gaskets and prevent leaks. If a de-
crease in the cooling capacity is detected, a
Technical Service should be consulted to
check the system. ●
To en s
ure correct operation, the grilles on
both sides of the screen must not be obstruc-
ted.
● When the engine is under extreme strain,
switc
h off the compressor for a moment. Economic use of the air conditioning
When the air conditioning is switched on, the
compr
e
ssor consumes engine power and has
influence on fuel consumption. Consider the
following points in order to have the system
operating in the minimum possible time.
● If the vehicle interior has overheated due to
an ex c
essive solar radiation, it is best to
open the windows or doors to allow the hot
air to escape.
● While in motion, the air conditioning
should not
be switched on if the windows or
the sunroof* are open.
167
Technical data
Advice
Operation
Emergencies
Safety
Page 171 of 312
Air conditioning
WARNING
In air recirculation mode, no cold air from the
outs ide ent
ers the vehicle interior. If the air
conditioner is switched off, the windows can
quickly mist over. Therefore, never leave the air recirculation mode switched on for a long
time (risk
of
accident). Note
● Activ atin
g air recirculation automatically
activates the button (to prevent the win-
dows from misting up). If the temperature
regulator is turned to the coldest setting
(blue point), the air recirculation function and
the button are automatically activated. ●
If the f u
nction is not deactivated by press-
ing the button, it will deactivate after approx-
imately 20 minutes. Heating and fresh air
Contr o
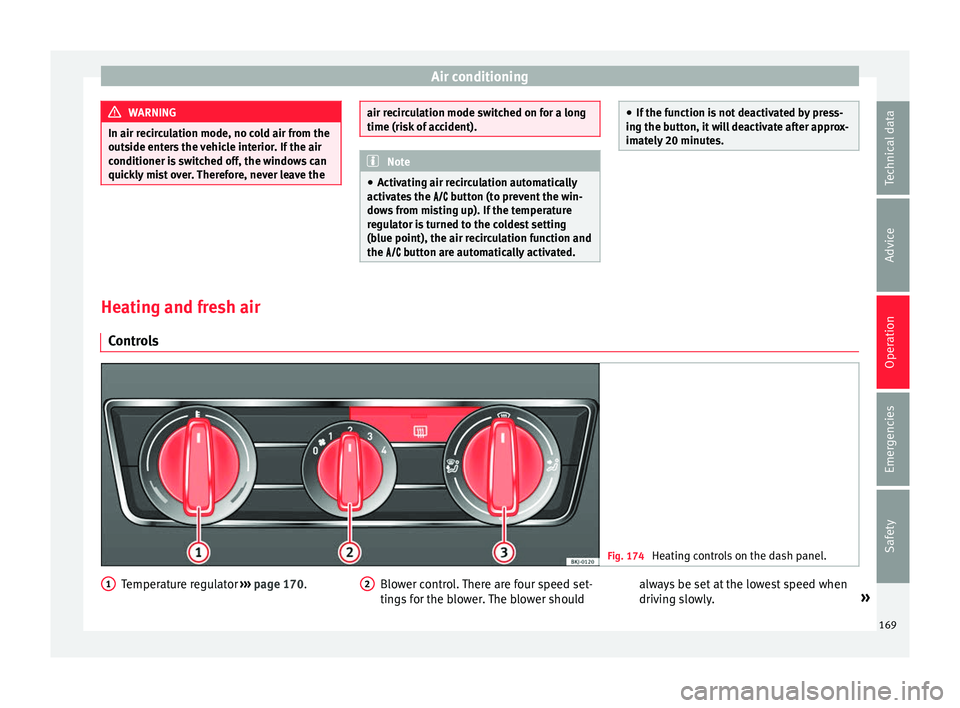
ls Fig. 174
Heating controls on the dash panel. Temperature regulator
››
›
page 170.
1 Blower control. There are four speed set-
tin
g
s
for the blower. The blower should
2 always be set at the lowest speed when
driv
in
g s
lowly. »
169
Technical data
Advice
Operation
Emergencies
Safety
Page 172 of 312
Operation
Air distribution regulator.
He at
ed r
ear window.
Air distribution
Control 3 for setting the flow of air in the re-
quir ed dir
ection.
– Air distribution towards the windscreen
in order to demist.
– Air distribution to upper body.
– Air distribution to footwell
– Air distribution to the windscreen and
the footwell. WARNING
● For y
our safety, the windows should never
be fogged up or covered with snow or ice.
This is essential to ensure good visibility.
Please familiarise yourself with the correct
operation of the heating and ventilation sys-
tem, including the demist/defrost functions
for the windows. Note
● Ple a
se consider the general notes
››› page 166. 3
Functions Ventilating the vehicle interior
The des
ir
ed temperature inside the vehicle
cannot be lower than the ambient tempera-
ture.
● Turn the temperature selector
›››
Fig. 174 1 anti-clockwise.
● Turn blower switch 2 to any of the levels
1-4.
● Set the airflow to the desired direction us-
ing air di s
tribution control 3 .
● Open the relevant air outlets.
Int erior he
atin
g
Maximum heat output, which is needed to
defrost the windows quickly, is only available
when the engine has reached its operating
temperature.
● Turn the temperature selector
›››
Fig. 174 1 clockwise to select the re-
quir ed t
emper
ature.
● Turn blower switch 2 to any of the levels
1-4.
● Set the airflow to the desired direction us-
in g air di
s
tribution control 3 .
● Open the relevant air outlets. Defrosting the windscreen
●
Turn the temperature regulator
› ›
›
Fig. 174 1 clockwise to reach the maxi-
mum t emper
at
ure.
● Turn the blower switch 2 to level 4.
● Turn air distribution control to .
● Close the central outlets.
● Open and turn the side outlets towards the
w indo
w
s.
Keeping the windscreen and the side win-
dows demisted
● Turn the temperature regulator
›››
Fig. 174 1 to the heating zone.
● Turn blower switch 2 to any of the levels
2-3.
● Turn air distribution control to .
● Close the central outlets.
● Open and turn the side outlets towards the
w indo
w
s.
Once the windows are demisted and as a pre-
ventive measure, the control 3 can be set in
po s
ition
greater comfort while preventing
the windows from misting again. Note
Remember that the temperature of the engine
coo l
ant should be optimum to ensure that the
heating system functions correctly (except in
vehicles fitted with additional heating*). 170