steering wheel Seat Ibiza 5D 2013 Owner's Guide
[x] Cancel search | Manufacturer: SEAT, Model Year: 2013, Model line: Ibiza 5D, Model: Seat Ibiza 5D 2013Pages: 294, PDF Size: 4.05 MB
Page 162 of 294
160Driving
WARNING (Continued)
● Never accelerate when moving the selector lever or you may cause an
accident.
● Never move the selector lever to R or P when driving. Risk of accident!
● Before driving down a long, steep slope, it is advisable to reduce
speed and change into a lower gear.
● If you stop the vehicle up hill, always hold the foot brake strongly de-
pressed down to stop it from rolling back.
● Never allow the brake to rub and do not use the brake pedal too often
or for long periods. Constant braking will cause the brakes to overheat
and will considerably reduce the brake effect. This increases the braking
distance and could cause the brake system to fail.
● Never allow the vehicle to roll down a mountain or a slope with the
lever in the N or D position, regardless of whether the engine is running
or not.
CAUTION
● If you stop the vehicle up hills, do not attempt to stop it from rolling
back by depressing the accelerator when a gear has been selected. Other-
wise, the automatic gearbox may overheat causing damage. Pull the hand-
brake up or fully depress the brake pedal to prevent the vehicle from rolling
away.
● If you allow the vehicle to roll when the engine is not running, or with
the selector lever in position N, a lack of lubrication in the automatic gear-
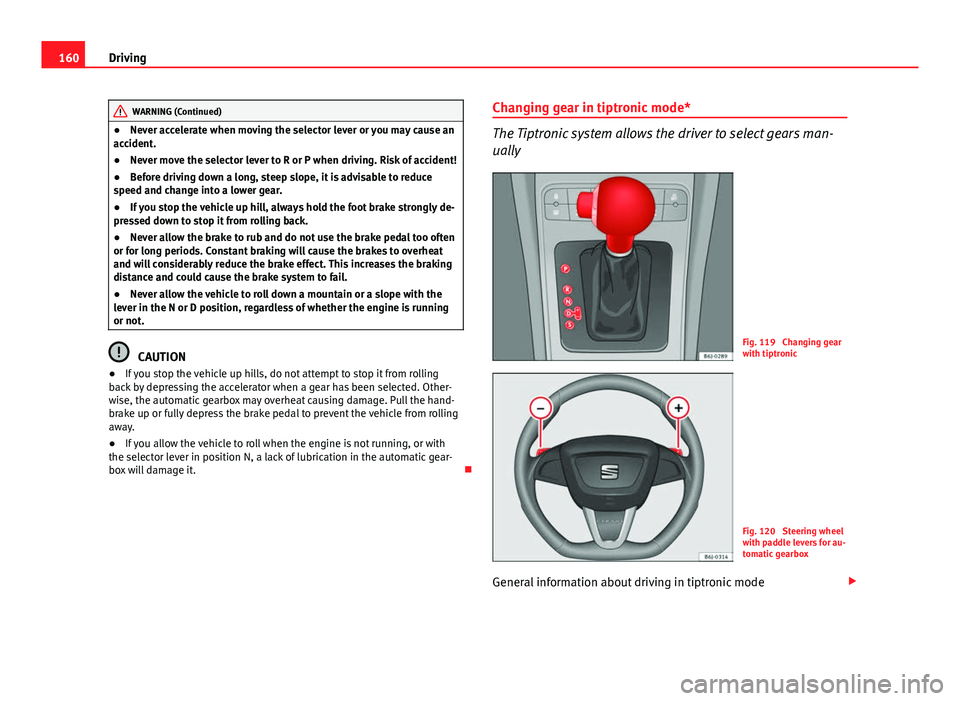
box will damage it. Changing gear in tiptronic mode*
The Tiptronic system allows the driver to select gears man-
ually
Fig. 119 Changing gear
with tiptronic
Fig. 120 Steering wheel
with paddle levers for au-
tomatic gearbox
General information about driving in tiptronic mode
Page 163 of 294
161
Driving
Changing gear in tiptronic mode
– Press the selector lever from position D to the right into the tip-
tronic selector gate.
– Lightly press the selector lever forward + to change up into high
gears.
– Lightly press the selector lever backwards - to change down into
low gears.
Changing gear with the steering wheel paddle levers*
– Press the right paddle lever +
towards the steering wheel to
change up ⇒ Fig. 120.
– Press the left paddle lever -
towards the steering wheel to
change down ⇒ Fig. 120.
Using the paddle levers on the steering wheel, you can access manual driv-
ing mode regardless of the pre-selected driving mode.
General information about driving in tiptronic mode
When accelerating, the automatic gearbox / DSG automatic gearbox goes
into a higher gear a little before the engine reaches its maximum permitted
revolutions.
If a lower gear is selected, the automatic gearbox / DSG automatic gearbox
will only change down when the engine cannot go over its maximum permit-
ted revolutions.
If tiptronic is selected whilst the vehicle is in motion and the automatic
gearbox / DSG automatic gearbox is in third gear and selector lever position
D, tiptronic mode will then also be in third gear. Changing gears in the normal or sport programme using the steering wheel
paddle levers
If the paddle levers
⇒ Fig. 120 are used in the normal or sport programme,
the system switches temporarily to tiptronic mode. To exit “tiptronic” mode
again, press the right paddle lever +
towards the steering wheel for approx-
imately one second. You will also leave tiptronic mode if the paddle levers
are not moved for a certain time.
Note
● The gear paddle levers on the steering wheel can be operated with the
selector lever in any position and with the vehicle in motion.
Selector lever positions
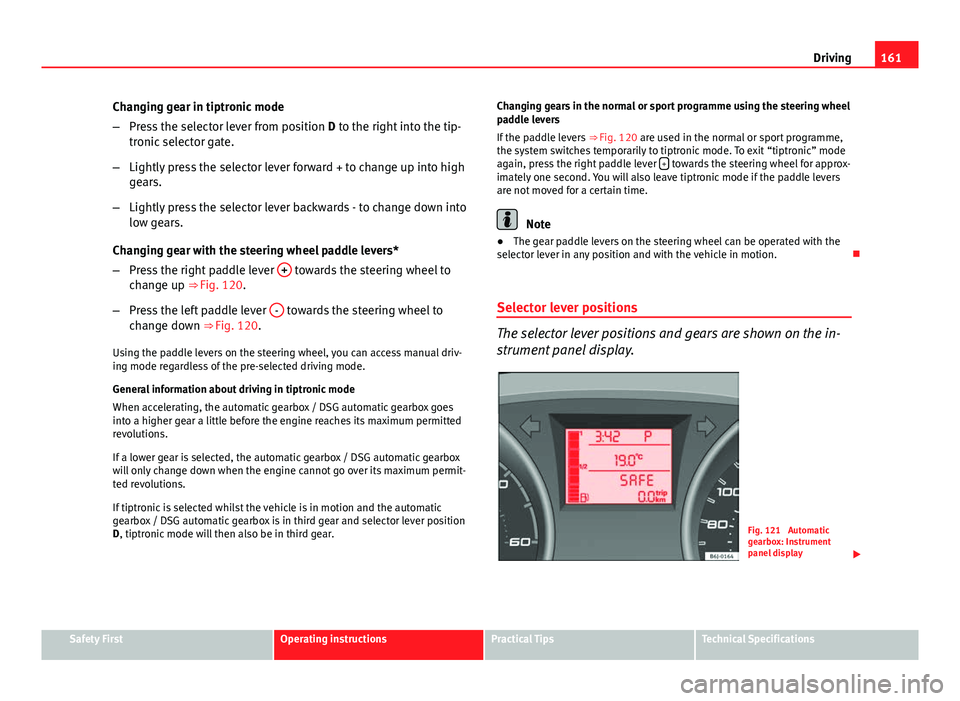
The selector lever positions and gears are shown on the in-
strument panel display.
Fig. 121 Automatic
gearbox: Instrument
panel display
Safety FirstOperating instructionsPractical TipsTechnical Specifications
Page 165 of 294
163
Driving
WARNING
If the vehicle moves with no control, an accident and serious injury may
occur.
● As a driver, you should never leave your vehicle if the engine is run-
ning and a gear range is engaged. If you have to leave your vehicle while
the engine is running, you must always apply the handbrake and engage
the parking lock position P.
● With the engine running and D or R engaged, you must hold the vehi-
cle stopped by pressing the brake pedal. Even while idling, the power
transmission is not fully interrupted and the vehicle could keep moving
forward.
● Never accelerate when moving the selector lever or you may cause an
accident.
● Never move the selector lever to “R” or “P” when driving. Risk of acci-
dent.
● Before driving down a very steep slope, reduce your speed and shift
to first gear.
● Always hold the vehicle on the foot brake if you stop on hills. Other-
wise, the vehicle could roll back.
● Never allow the brake to rub and do not use the brake pedal too often
or for long periods. Constant braking will cause the brakes to overheat
and will considerably reduce the brake effect. This increases the braking
distance and could cause the brake system to fail.
WARNING
Never switch the engine off until the vehicle is stationary. You could lose
control of your vehicle. This could cause an accident and serious injury.
● The airbags and belt tensioners do not work when the ignition is
switched off.
WARNING (Continued)
● The brake servo does not work with the engine off. You need more
force to stop the vehicle.
● Power steering does not work when the engine is not running. That is
why it is much more difficult to turn the steering wheel.
● Never remove the key from the ignition if the vehicle is in motion. The
steering lock could suddenly engage, and you would not be able to steer
the vehicle.
● Never allow the vehicle to roll downhill with the selector lever in “N”,
regardless of whether the engine is running or not.
CAUTION
If you allow the vehicle to move when the engine is switched off or with the
selector lever in position “N”, take your foot off the accelerator and wait un-
til the engine starts idling before returning to position “D”.
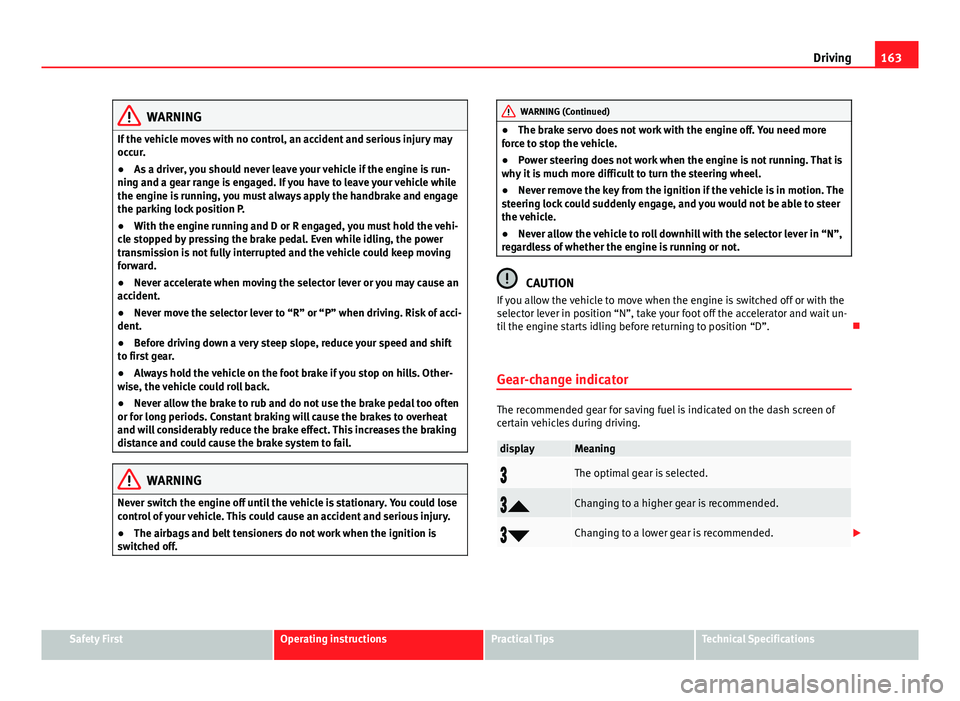
Gear-change indicator
The recommended gear for saving fuel is indicated on the dash screen of
certain vehicles during driving.
displayMeaning
The optimal gear is selected.
Changing to a higher gear is recommended.
Changing to a lower gear is recommended.
Safety FirstOperating instructionsPractical TipsTechnical Specifications
Page 167 of 294
165
Driving
Always apply the handbrake when you leave your vehicle and when
you park.
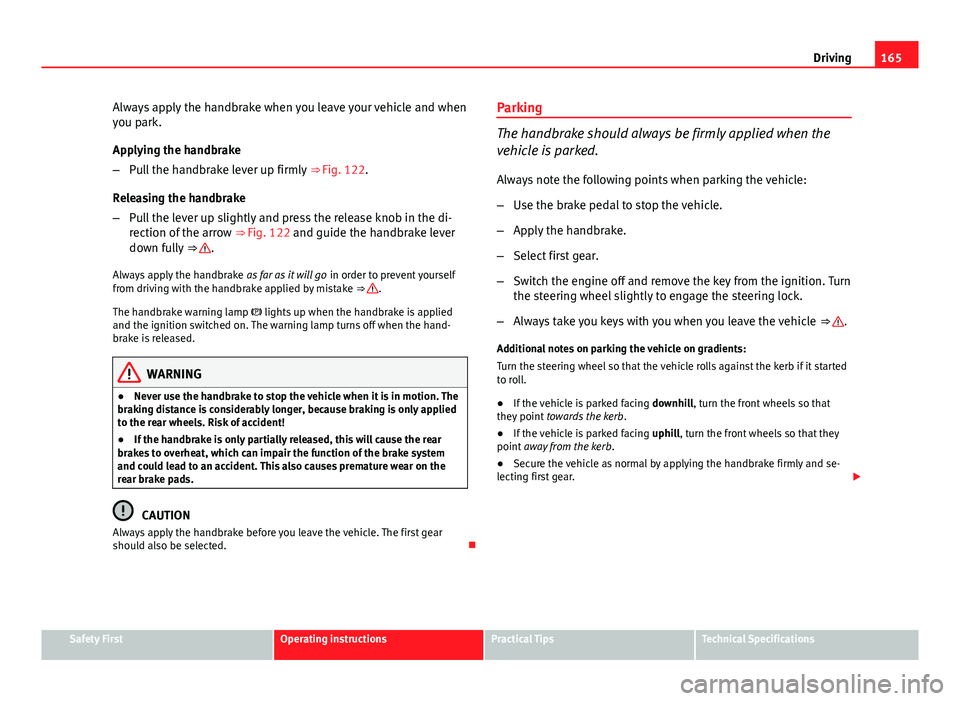
Applying the handbrake
– Pull the handbrake lever up firmly ⇒ Fig. 122.
Releasing the handbrake
– Pull the lever up slightly and press the release knob in the di-
rection of the arrow ⇒ Fig. 122 and guide the handbrake lever
down fully ⇒
.
Always apply the handbrake as far as it will go in order to prevent yourself
from driving with the handbrake applied by mistake ⇒
.
The handbrake warning lamp lights up when the handbrake is applied
and the ignition switched on. The warning lamp turns off when the hand-
brake is released.
WARNING
● Never use the handbrake to stop the vehicle when it is in motion. The
braking distance is considerably longer, because braking is only applied
to the rear wheels. Risk of accident!
● If the handbrake is only partially released, this will cause the rear
brakes to overheat, which can impair the function of the brake system
and could lead to an accident. This also causes premature wear on the
rear brake pads.
CAUTION
Always apply the handbrake before you leave the vehicle. The first gear
should also be selected. Parking
The handbrake should always be firmly applied when the
vehicle is parked.
Always note the following points when parking the vehicle:
–
Use the brake pedal to stop the vehicle.
– Apply the handbrake.
– Select first gear.
– Switch the engine off and remove the key from the ignition. Turn
the steering wheel slightly to engage the steering lock.
– Always take you keys with you when you leave the vehicle ⇒
.
Additional notes on parking the vehicle on gradients:
Turn the steering wheel so that the vehicle rolls against the kerb if it started
to roll.
● If the vehicle is parked facing downhill, turn the front wheels so that
they point towards the kerb .
● If the vehicle is parked facing uphill, turn the front wheels so that they
point away from the kerb .
● Secure the vehicle as normal by applying the handbrake firmly and se-
lecting first gear.
Safety FirstOperating instructionsPractical TipsTechnical Specifications
Page 179 of 294
177
Intelligent technology
Electronic Stability Control (ESC)*
The ESC reduces the risk of skidding by braking the wheels individually.
The system uses the steering wheel angle and road speed to calculate the
changes of direction desired by the driver, and constantly compares them
with the actual behaviour of the vehicle. When irregularities occur, for exam-
ple, if the vehicle begins to skid, the ESC brakes the appropriate wheel au-
tomatically.
The forces acting on the braked wheel bring the vehicle back to a stable
condition. If the vehicle tends to oversteer, the system will act on the front
wheel on the outside of the turn.
WARNING
● Remember that not even the ESC can defy the laws of physics. This
should be kept in mind, particularly on slippery and wet roads and when
towing a trailer.
● Always adapt your driving style to suit the condition of the roads and
the traffic situation. The greater safety provided by the ESC should not
encourage you to run any risks.
CAUTION
● To ensure that the ESC works correctly, all four wheels must be fitted
with the same tyres. Any differences in the rolling radius of the tyres can
cause the system to reduce engine power when this is not desired.
● Any modifications made to the vehicle (for example, to the engine,
brake system, running gear or to the combination of wheels and tyres) may
affect the operation of the ABS, EDL, ESC and ASR. Anti-lock brake system (ABS)
The anti-lock brake system prevents the wheels locking during braking
⇒ page 175
Electronic differential lock (EDL)*
The electronic differential lock helps prevent the loss of trac-
tion caused if one of the driven wheels starts spinning.
EDL helps the vehicle to start moving, accelerate and climb a gradient in
slippery conditions where this may otherwise be difficult or even impossi-
ble.
The system will control the revolutions of the driven wheels using the ABS
sensors (in case of an EDL fault the warning lamp for ABS lights up)
⇒ page 71.
At speeds of up to approximately 80 km/h (50 mph), it is able to balance
out differences in the speed of the driven wheels of approximately 100 rpm
caused by a slippery road surface on one side of the vehicle. It does this by
braking the wheel which has lost traction and distributing more driving
force to the other driven wheel via the differential.
To prevent the disc brake of the braking wheel from overheating, the EDL
cuts out automatically if subjected to excessive loads. The vehicle will con-
tinue to function normally without EDL. For this reason, the driver is not in-
formed that the EDL has been switched off.
The EDL will switch on again automatically when the brake has cooled
down.
Safety FirstOperating instructionsPractical TipsTechnical Specifications
Page 226 of 294
224Checking and refilling levels
Tyre useful life
The useful life of tyres is dependent on tyre pressure, driving
style and fitting.
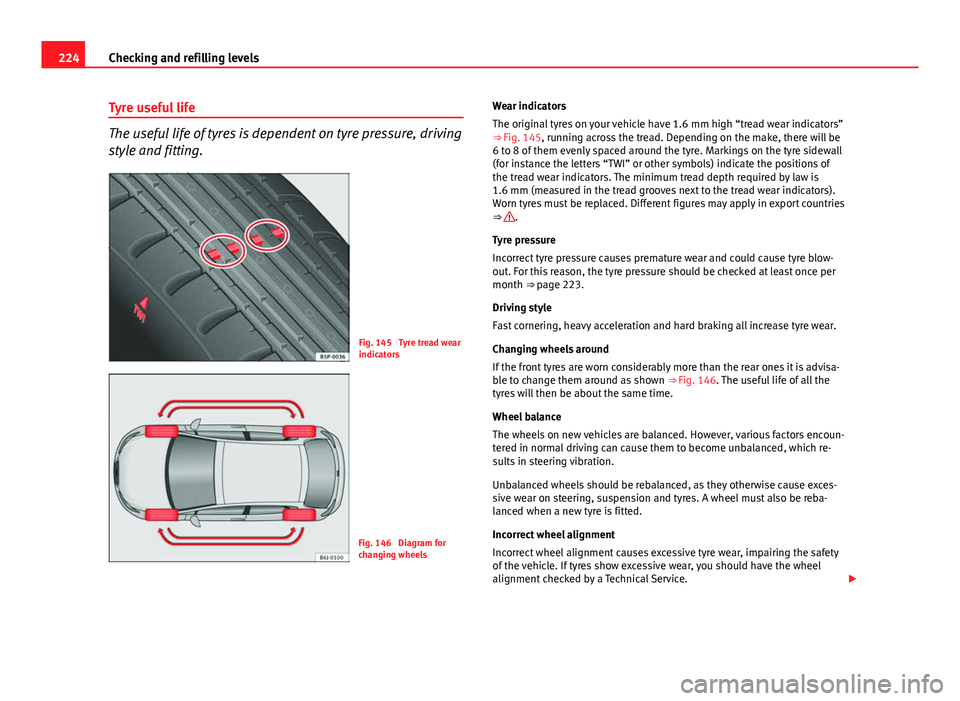
Fig. 145 Tyre tread wear
indicators
Fig. 146 Diagram for
changing wheels Wear indicators
The original tyres on your vehicle have 1.6 mm high “tread wear indicators”
⇒ Fig. 145, running across the tread. Depending on the make, there will be
6 to 8 of them evenly spaced around the tyre. Markings on the tyre sidewall
(for instance the letters “TWI” or other symbols) indicate the positions of
the tread wear indicators. The minimum tread depth required by law is
1.6 mm (measured in the tread grooves next to the tread wear indicators).
Worn tyres must be replaced. Different figures may apply in export countries
⇒
.
Tyre pressure
Incorrect tyre pressure causes premature wear and could cause tyre blow-
out. For this reason, the tyre pressure should be checked at least once per
month ⇒ page 223.
Driving style
Fast cornering, heavy acceleration and hard braking all increase tyre wear.
Changing wheels around
If the front tyres are worn considerably more than the rear ones it is advisa-
ble to change them around as shown ⇒ Fig. 146. The useful life of all the
tyres will then be about the same time.
Wheel balance
The wheels on new vehicles are balanced. However, various factors encoun-
tered in normal driving can cause them to become unbalanced, which re-
sults in steering vibration.
Unbalanced wheels should be rebalanced, as they otherwise cause exces-
sive wear on steering, suspension and tyres. A wheel must also be reba-
lanced when a new tyre is fitted.
Incorrect wheel alignment
Incorrect wheel alignment causes excessive tyre wear, impairing the safety
of the vehicle. If tyres show excessive wear, you should have the wheel
alignment checked by a Technical Service.
Page 262 of 294
260If and when
Do not pull too hard with the towing vehicle and take care to avoid jerking
the tow rope. When towing on an unpaved road, there is always a risk of
overloading and damaging the anchorage points.
The ignition of the vehicle being towed must be switched on to prevent the
steering wheel from locking and also to allow the use of the turn signals,
horn, windscreen wipers and washers.
As the brake servo does not work if the engine is not running, you must ap-
ply considerably more pressure to the brake pedal than you normally would.
As the power assisted steering does not work if the engine is not running,
you will need more strength to steer than you normally would.
Towing vehicles with an automatic gearbox
● Put the selector lever into position “N”.
● Do not drive faster than 50 km/h (31 mph).
● Do not tow further than 50 km.
● If a breakdown vehicle is used, the vehicle must be towed with the front
wheels raised.
Note
● Observe legal requirements when towing or tow-starting.
● Switch on the hazard warning lights of both vehicles. However, observe
any regulations to the contrary.
● For technical reasons, vehicles with an automatic gearbox must not be
tow-started.
● If damage to your vehicle means that there is no lubricant in the gear-
box, you must raise the driven wheels while the vehicle is being towed.
● If the vehicle has to be towed more than 50 km (30 miles), the front
wheels should be raised during towing, and towing should be carried out by
a qualified person. ●
The steering wheel is locked when the vehicle has no electrical power.
The vehicle must then be towed with the front wheels raised. Towing should
be carried out by a qualified person.
● The towline anchorage should always be kept in the vehicle.
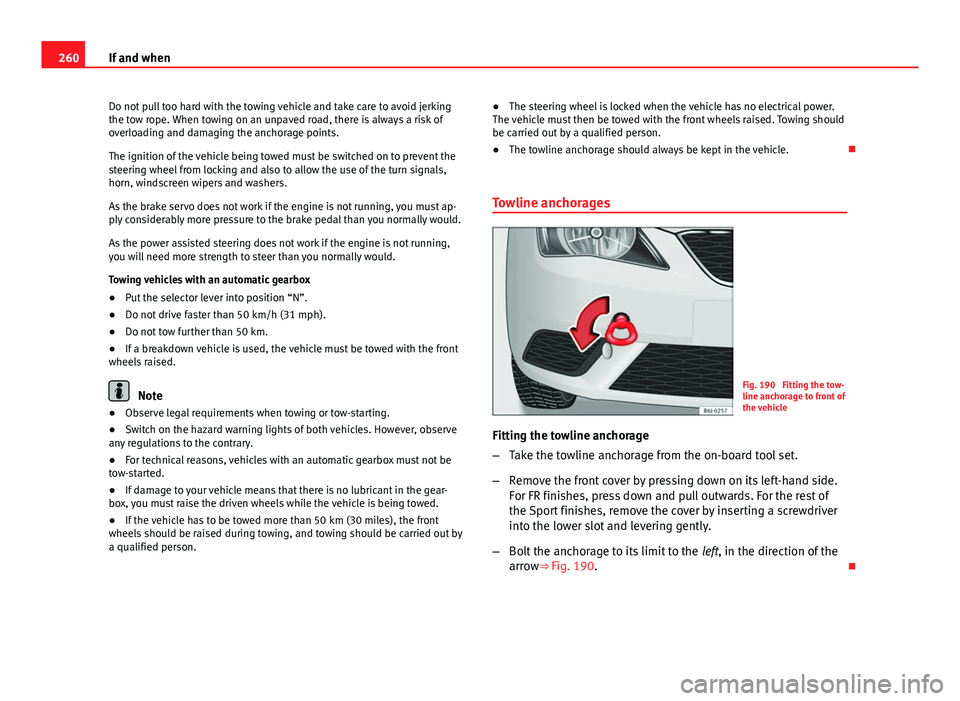
Towline anchoragesFig. 190 Fitting the tow-
line anchorage to front of
the vehicle
Fitting the towline anchorage
– Take the towline anchorage from the on-board tool set.
– Remove the front cover by pressing down on its left-hand side.
For FR finishes, press down and pull outwards. For the rest of
the Sport finishes, remove the cover by inserting a screwdriver
into the lower slot and levering gently.
– Bolt the anchorage to its limit to the left, in the direction of the
arrow⇒ Fig. 190.
Page 291 of 294

Using child seats . . . . . . . . . . . . . . . . . . . . . 43
Using seat belts . . . . . . . . . . . . . . . . . . . . . . 23
Seals . . . . . . . . . . . . . . . . . . . . . . . . . . . . . . . . . 191
Seat adjustment . . . . . . . . . . . . . . . . . . . . 117, 120
Seat belt cleaning . . . . . . . . . . . . . . . . . . . . . . 195
Seat belt control lamp . . . . . . . . . . . . . . . . . . . . 19
Seat belt position Pregnant women . . . . . . . . . . . . . . . . . . . . . 26
Seat belts . . . . . . . . . . . . . . . . . . . . . . . . . . . 26
Seat belt protection . . . . . . . . . . . . . . . . . . . . . . 23
Seat belt release . . . . . . . . . . . . . . . . . . . . . . . . 27
Seat belts . . . . . . . . . . . . . . . . . . . . . . . . . . . . . . 19 Adjustment . . . . . . . . . . . . . . . . . . . . . . . . . . 25
control lamp . . . . . . . . . . . . . . . . . . . . . . . . . 19
Incorrectly fastened . . . . . . . . . . . . . . . . . . . 28
Not worn . . . . . . . . . . . . . . . . . . . . . . . . . . . . 22
Safety notes . . . . . . . . . . . . . . . . . . . . . . . . . 23
Seat belt tensioner control lamp . . . . . . . . . . . . . . . . . . . . . . . . . 31
Seat belt tensioners . . . . . . . . . . . . . . . . . . . . . . 28
Seat heating . . . . . . . . . . . . . . . . . . . . . . . . . . . 121
Security system . . . . . . . . . . . . . . . . . . . . . . . . . 82
Selective opening . . . . . . . . . . . . . . . . . . . . . . . 83
Semiautomatic air conditioning controls . . . . . . . . . . . . . . . . . . . . . . . . . . . . 140
Service interval display . . . . . . . . . . . . . . . . . . . 63
Side airbags . . . . . . . . . . . . . . . . . . . . . . . . . . . . 38 Description . . . . . . . . . . . . . . . . . . . . . . . . . . 38
Operation . . . . . . . . . . . . . . . . . . . . . . . . . . . 39
Safety notes . . . . . . . . . . . . . . . . . . . . . . . . . 39
Side lights . . . . . . . . . . . . . . . . . . . . . . . . . . . . . 101
Single headlight bulb . . . . . . . . . . . . . . . . . . . 241 Sitting position
driver . . . . . . . . . . . . . . . . . . . . . . . . . . . . . . . 10
Sitting position, occupants . . . . . . . . . . . . . . . . 10
Snow chains . . . . . . . . . . . . . . . . . . . . . . . 227, 266
Soot accumulation in the diesel engine particu- late filter
control lamp . . . . . . . . . . . . . . . . . . . . . . . . . 70
Spanner symbol . . . . . . . . . . . . . . . . . . . . . . . . . 64
Spare parts . . . . . . . . . . . . . . . . . . . . . . . . . . . . 196
Spare wheel . . . . . . . . . . . . . . . . . . . . . . . . . . . 229
Speedometer . . . . . . . . . . . . . . . . . . . . . . . . . . . 58
Speed selector lever lock control lamp . . . . . . . . . . . . . . . . . . . . . . . . . 74
Start-Stop Activating and deactivating . . . . . . . . . . . . 155
Function . . . . . . . . . . . . . . . . . . . . . . . . . . . 153
Starting petrol engines . . . . . . . . . . . . . . 150, 151
Starting the engine . . . . . . . . . . . . . . . . . 150, 151 After the fuel tank has been run dry . . . . . 151
Steam jets . . . . . . . . . . . . . . . . . . . . . . . . . . . . . 189
Steering . . . . . . . . . . . . . . . . . . . . . . . . . . . . . . 147 Steering lock . . . . . . . . . . . . . . . . . . . . . . . . 148
Steering column controls Audio Control . . . . . . . . . . . . . . . . . . . . . . . . 78
Steering wheel height adjustment . . . . . . . . . 147
Storage compartment . . . . . . . . . . . . . . . . . . . 135 Front passenger side . . . . . . . . . . . . . . . . . 125
Front right seat . . . . . . . . . . . . . . . . . . . . . . 126
Sun visor Sliding/tilting sunroof . . . . . . . . . . . . . . . . . 99
Sun visors . . . . . . . . . . . . . . . . . . . . . . . . . . . . . 110 Switch
Hazard warning lights . . . . . . . . . . . . . . . . 106
Heated rear window . . . . . . . . . . . . . . . . . . 106
Light switch . . . . . . . . . . . . . . . . . . . . . . . . 101
Switches Electric windows . . . . . . . . . . . . . . . . . . . . . . 96
panoramic/tilting sunroof . . . . . . . . . . . . . . 99
Switching off the engine . . . . . . . . . . . . . . . . . 151
T Tail lights . . . . . . . . . . . . . . . . . . . . . . . . . . . . . 250
Tank Fuel level . . . . . . . . . . . . . . . . . . . . . . . . . . . . 59
Reserve indicator . . . . . . . . . . . . . . . . . . . . . 59
Tank capacity . . . . . . . . . . . . . . . . . . . . . . . . 59
Technical modifications . . . . . . . . . . . . . . . . . . 196
The danger of not using the seat belt . . . . . . . . 22
Tightening torque of wheel bolts . . . . . . . . . . 266
Tilting sunroof . . . . . . . . . . . . . . . . . . . . . . . . . . 99
Tire Mobility System (tyre repair kit) . . . . . . . . 235
Tools . . . . . . . . . . . . . . . . . . . . . . . . . . . . . . . . . 229
Top Tether system . . . . . . . . . . . . . . . . . . . . . . . 50
Tow-starting . . . . . . . . . . . . . . . . . . . . . . . . . . . 259
Towing . . . . . . . . . . . . . . . . . . . . . . . . . . . . . . . . 259
Towing a trailer . . . . . . . . . . . . . . . . . . . . . 184, 265
Towing bracket . . . . . . . . . . . . . . . . . . . . . . . . . 185
Towing bracket, fitting . . . . . . . . . . . . . . . . . . . 198
Towline anchorage . . . . . . . . . . . . . . . . . . . . . . 259
Towline anchorages . . . . . . . . . . . . . . . . . . . . . 260
Tow starting Comments . . . . . . . . . . . . . . . . . . . . . . . . . . 259
289
Index