tow Seat Ibiza 5D 2013 Owner's Guide
[x] Cancel search | Manufacturer: SEAT, Model Year: 2013, Model line: Ibiza 5D, Model: Seat Ibiza 5D 2013Pages: 294, PDF Size: 4.05 MB
Page 150 of 294
148Driving
Safety
Electronic stability control (ESC)*
The ESC helps make driving safer in extreme driving condi-
tions.
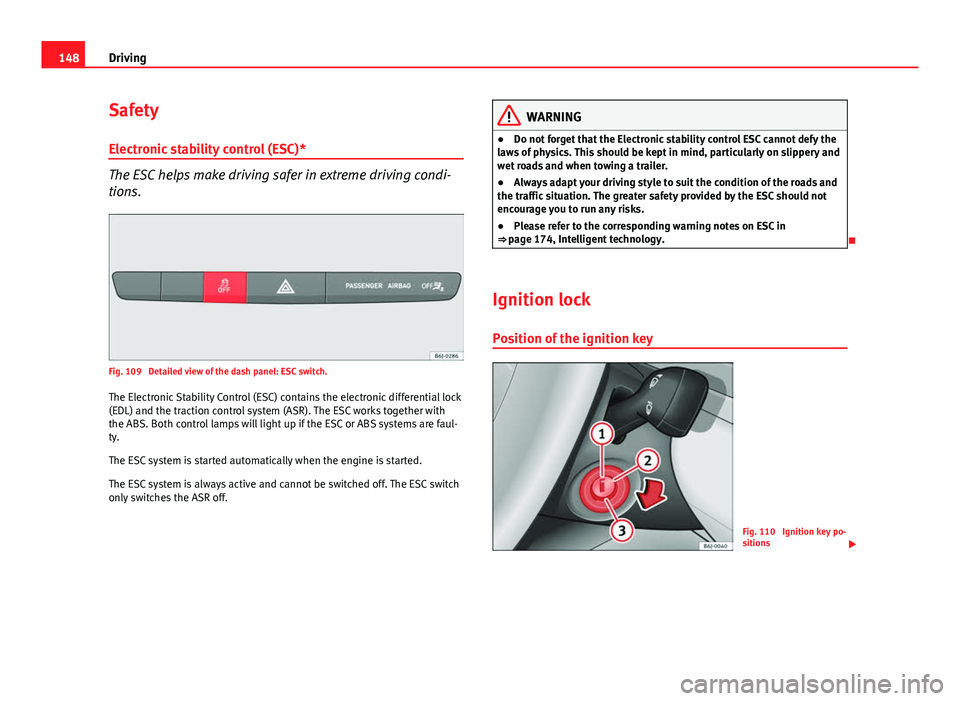
Fig. 109 Detailed view of the dash panel: ESC switch.The Electronic Stability Control (ESC) contains the electronic differential lock
(EDL) and the traction control system (ASR). The ESC works together with
the ABS. Both control lamps will light up if the ESC or ABS systems are faul-
ty.
The ESC system is started automatically when the engine is started.
The ESC system is always active and cannot be switched off. The ESC switch
only switches the ASR off.
WARNING
● Do not forget that the Electronic stability control ESC cannot defy the
laws of physics. This should be kept in mind, particularly on slippery and
wet roads and when towing a trailer.
● Always adapt your driving style to suit the condition of the roads and
the traffic situation. The greater safety provided by the ESC should not
encourage you to run any risks.
● Please refer to the corresponding warning notes on ESC in
⇒ page 174, Intelligent technology.
Ignition lock Position of the ignition key
Fig. 110 Ignition key po-
sitions
Page 152 of 294

150Driving
Starting and stopping the engine
Starting petrol engines
The engine can only be started using a genuine SEAT key
with its correct code.
– Move the gearbox lever to the neutral position and depress the
clutch pedal thoroughly and hold it in this position for the start-
er to turn the engine on.
– Turn the ignition key to the starting ⇒ page 148 position.
– Let go of the ignition key as soon as the engine starts; the start-
er motor must not run on with the engine.
After starting a very hot engine, you may need to slightly press down the ac-
celerator.
When starting a very cold engine, it may be a little noisy for the first few sec-
onds until oil pressure has built up in the hydraulic valve compensators.
This is quite normal, and no cause for concern.
If the engine does not start immediately, switch the starter off after 10 sec-
onds and try again after half a minute. If the engine still does not start, the
fuel pump fuse should be checked ⇒ page 237, Fuses.
WARNING
● Never start or run the engine in unventilated or closed rooms. The ex-
haust gases contain carbon monoxide, an odourless and colourless poi-
sonous gas. Risk of fatal accidents. Carbon monoxide can cause loss of
consciousness. It can also result in death.
● Never leave the vehicle unattended if the engine is running.
● Never use “cold start sprays”, they could explode or cause the engine
to run at high revs. Risk of injury.
CAUTION
● When the engine is cold, you should avoid high engine speeds, driving
at full throttle and over-loading the engine. Risk of engine damage.
● The vehicle should not be pushed or towed more than 50 metres to start
the engine. Unburnt fuel could enter the catalytic converter and damage it.
● Before attempting to push-start or tow a vehicle in order to start it, you
should first try to start it using the battery of another vehicle. Note and fol-
low the instructions in ⇒ page 256, Jump-starting.
For the sake of the environment
Do not warm-up the engine by running the engine with the vehicle station-
ary. Start off immediately, driving gently. This helps the engine reach oper-
ating temperature faster and reduces emissions.
Page 153 of 294
151
Driving
Starting diesel engines
The engine can only be started using a genuine SEAT key
with its correct code. – Move the gearbox lever to the neutral position and depress the
clutch pedal thoroughly and hold it in this position for the start-
er to turn the engine on.
– Turn the ignition key to the starting position.
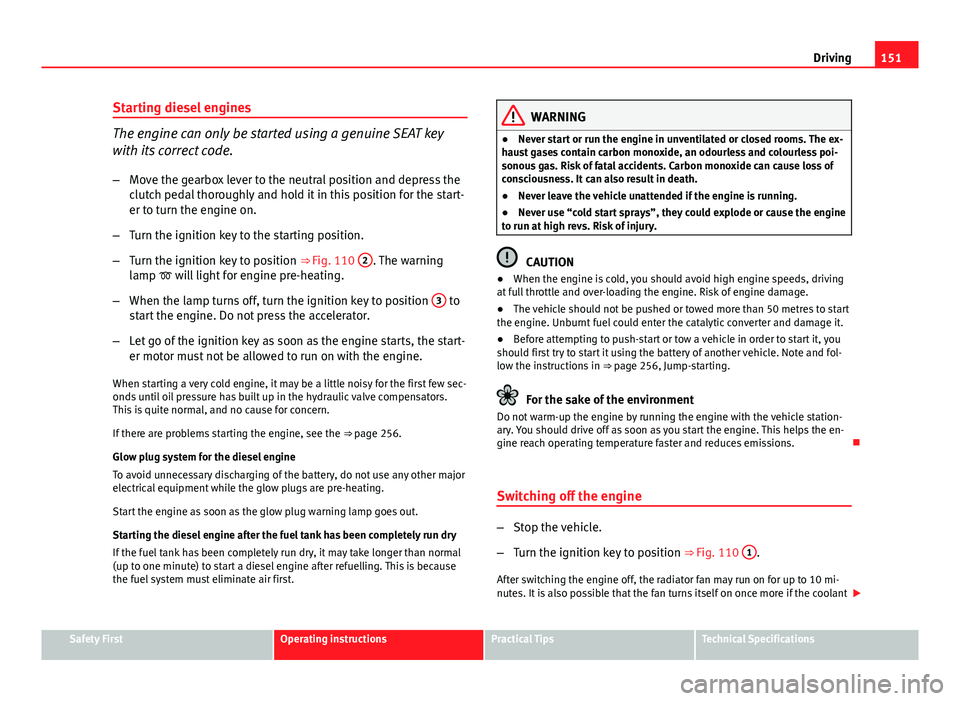
– Turn the ignition key to position ⇒ Fig. 110 2
. The warning
lamp will light for engine pre-heating.
– When the lamp turns off, turn the ignition key to position 3
to
start the engine. Do not press the accelerator.
– Let go of the ignition key as soon as the engine starts, the start-
er motor must not be allowed to run on with the engine.
When starting a very cold engine, it may be a little noisy for the first few sec-
onds until oil pressure has built up in the hydraulic valve compensators.
This is quite normal, and no cause for concern.
If there are problems starting the engine, see the ⇒ page 256.
Glow plug system for the diesel engine
To avoid unnecessary discharging of the battery, do not use any other major
electrical equipment while the glow plugs are pre-heating.
Start the engine as soon as the glow plug warning lamp goes out.
Starting the diesel engine after the fuel tank has been completely run dry
If the fuel tank has been completely run dry, it may take longer than normal
(up to one minute) to start a diesel engine after refuelling. This is because
the fuel system must eliminate air first.
WARNING
● Never start or run the engine in unventilated or closed rooms. The ex-
haust gases contain carbon monoxide, an odourless and colourless poi-
sonous gas. Risk of fatal accidents. Carbon monoxide can cause loss of
consciousness. It can also result in death.
● Never leave the vehicle unattended if the engine is running.
● Never use “cold start sprays”, they could explode or cause the engine
to run at high revs. Risk of injury.
CAUTION
● When the engine is cold, you should avoid high engine speeds, driving
at full throttle and over-loading the engine. Risk of engine damage.
● The vehicle should not be pushed or towed more than 50 metres to start
the engine. Unburnt fuel could enter the catalytic converter and damage it.
● Before attempting to push-start or tow a vehicle in order to start it, you
should first try to start it using the battery of another vehicle. Note and fol-
low the instructions in ⇒ page 256, Jump-starting.
For the sake of the environment
Do not warm-up the engine by running the engine with the vehicle station-
ary. You should drive off as soon as you start the engine. This helps the en-
gine reach operating temperature faster and reduces emissions.
Switching off the engine
– Stop the vehicle.
– Turn the ignition key to position ⇒ Fig. 110 1
.
After switching the engine off, the radiator fan may run on for up to 10 mi-
nutes. It is also possible that the fan turns itself on once more if the coolant
Safety FirstOperating instructionsPractical TipsTechnical Specifications
Page 163 of 294
161
Driving
Changing gear in tiptronic mode
– Press the selector lever from position D to the right into the tip-
tronic selector gate.
– Lightly press the selector lever forward + to change up into high
gears.
– Lightly press the selector lever backwards - to change down into
low gears.
Changing gear with the steering wheel paddle levers*
– Press the right paddle lever +
towards the steering wheel to
change up ⇒ Fig. 120.
– Press the left paddle lever -
towards the steering wheel to
change down ⇒ Fig. 120.
Using the paddle levers on the steering wheel, you can access manual driv-
ing mode regardless of the pre-selected driving mode.
General information about driving in tiptronic mode
When accelerating, the automatic gearbox / DSG automatic gearbox goes
into a higher gear a little before the engine reaches its maximum permitted
revolutions.
If a lower gear is selected, the automatic gearbox / DSG automatic gearbox
will only change down when the engine cannot go over its maximum permit-
ted revolutions.
If tiptronic is selected whilst the vehicle is in motion and the automatic
gearbox / DSG automatic gearbox is in third gear and selector lever position
D, tiptronic mode will then also be in third gear. Changing gears in the normal or sport programme using the steering wheel
paddle levers
If the paddle levers
⇒ Fig. 120 are used in the normal or sport programme,
the system switches temporarily to tiptronic mode. To exit “tiptronic” mode
again, press the right paddle lever +
towards the steering wheel for approx-
imately one second. You will also leave tiptronic mode if the paddle levers
are not moved for a certain time.
Note
● The gear paddle levers on the steering wheel can be operated with the
selector lever in any position and with the vehicle in motion.
Selector lever positions
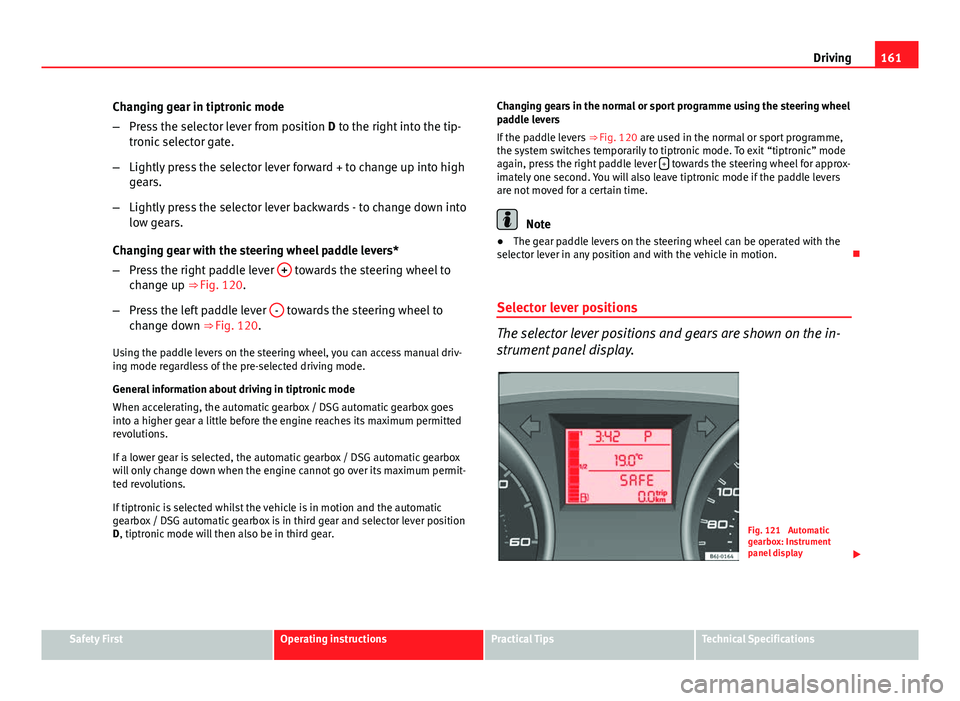
The selector lever positions and gears are shown on the in-
strument panel display.
Fig. 121 Automatic
gearbox: Instrument
panel display
Safety FirstOperating instructionsPractical TipsTechnical Specifications
Page 166 of 294
164Driving
Information regarding the “cleanliness” of the particulate filter
The exhaust system manager detects that the diesel particulate filter is
nearly saturated and contributes to self-cleaning by recommending the opti-
mal gear. For this purpose, it might be necessary to drive momentarily with
a high rpm ⇒ page 70.
WARNING
The gear change indicator is only an auxiliary function and in no case
should be a substitute for careful driving.
● The responsibility of choosing the correct gear depending on the sit-
uation (e.g. overtaking, driving up or down a slope or towing a trailer)
lies with the driver.
For the sake of the environment
Selecting the correct gear can help to save fuel.
Note
The recommended gear display is switched off when the clutch pedal is
pressed.
Kick-down feature
This feature allows maximum acceleration. If you press the accelerator down thoroughly, the gearbox automatically
changes down, depending on speed and engine speed, into a lower gear to
take full advantage of give the vehicle maximum acceleration.
The gearbox does not change gear until the engine reaches the maximum
determined engine speed for the gear.
WARNING
You could lose control of the vehicle if you accelerate on slippery road
surfaces. Risk of serious injury.
● Be particularly careful when using the kick-down features on slippery
road surfaces. With a fast acceleration, the vehicle could lose traction
and skid.
● You should use the kick-down feature only when traffic and weather
conditions allow it to be used safely.
Handbrake Using the handbrake
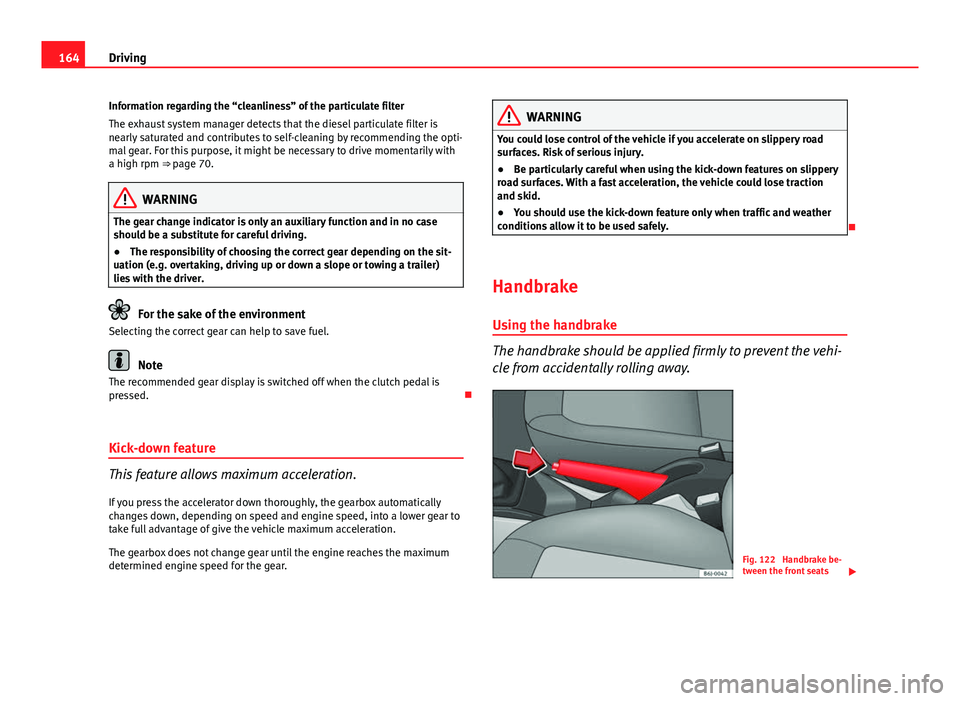
The handbrake should be applied firmly to prevent the vehi-
cle from accidentally rolling away.
Fig. 122 Handbrake be-
tween the front seats
Page 167 of 294
165
Driving
Always apply the handbrake when you leave your vehicle and when
you park.
Applying the handbrake
– Pull the handbrake lever up firmly ⇒ Fig. 122.
Releasing the handbrake
– Pull the lever up slightly and press the release knob in the di-
rection of the arrow ⇒ Fig. 122 and guide the handbrake lever
down fully ⇒
.
Always apply the handbrake as far as it will go in order to prevent yourself
from driving with the handbrake applied by mistake ⇒
.
The handbrake warning lamp lights up when the handbrake is applied
and the ignition switched on. The warning lamp turns off when the hand-
brake is released.
WARNING
● Never use the handbrake to stop the vehicle when it is in motion. The
braking distance is considerably longer, because braking is only applied
to the rear wheels. Risk of accident!
● If the handbrake is only partially released, this will cause the rear
brakes to overheat, which can impair the function of the brake system
and could lead to an accident. This also causes premature wear on the
rear brake pads.
CAUTION
Always apply the handbrake before you leave the vehicle. The first gear
should also be selected. Parking
The handbrake should always be firmly applied when the
vehicle is parked.
Always note the following points when parking the vehicle:
–
Use the brake pedal to stop the vehicle.
– Apply the handbrake.
– Select first gear.
– Switch the engine off and remove the key from the ignition. Turn
the steering wheel slightly to engage the steering lock.
– Always take you keys with you when you leave the vehicle ⇒
.
Additional notes on parking the vehicle on gradients:
Turn the steering wheel so that the vehicle rolls against the kerb if it started
to roll.
● If the vehicle is parked facing downhill, turn the front wheels so that
they point towards the kerb .
● If the vehicle is parked facing uphill, turn the front wheels so that they
point away from the kerb .
● Secure the vehicle as normal by applying the handbrake firmly and se-
lecting first gear.
Safety FirstOperating instructionsPractical TipsTechnical Specifications
Page 169 of 294
167
Driving
The front parking aid is an audible aid that warns against obstacles both
behind and in front of the vehicle ⇒ page 169.
Apart from the acoustic signals, when the vehicle is equipped with a porta-
ble navigator (PND), this visually displays information regarding front and/
or rear areas.
Rear parking aid
The parking aid system will use an audible warning to indi-
cate of the approach of any object towards the rear of the ve-
hicle. Description
The acoustic parking aid system will measure the distance between the rear
of the vehicle and any possible obstacle using four ultrasonic sensors loca-
ted on the rear bumper. The measuring range of the sensors starts approxi-
mately and depending on the nature of the obstacle at a distance of:
● side of the rear bumper: 0.6 m
● middle of the rear bumper: 1.6 m
Activation
The system is activated by engagement of the reverse gear. A brief audible
warning confirms the activation and correct function of the system.
Reverse gear
The distance warning will begin as soon as an obstacle is detected by the
system. The frequency of the bleeps emitted by the system will increase rap-
idly as the vehicle approaches the obstacle. After a distance lower than ap-
proximately 30 cm, a continuous signal sounds (stop signal). The driver
should not reverse any further. Models with a factory-fitted towing bracket: When the vehicle is less than
0.35 m away from the obstacle the warning tone will sound continuously.
The driver should then not reverse any further.
The warning tone volume decreases by 30% 3 seconds after it is triggered
if
the detected obstacle stays at a constant distance from the vehicle .
Provided that it is not in continuous mode, the tone on the parking aid sys-
tem stops when it detects a wall parallel to the vehicle.
Trailer towing
For vehicles factory-fitted with a towing bar, the parking aid system will not
be activated by the engagement of the reverse gear when pulling a trailer,
as the trailer's electric connector will be plugged into the vehicle.
Possible faults
If a continuous beep sounds for some seconds when the reverse gear is en-
gaged, this indicates that there is a fault in the parking aid system. If the
fault continues until the ignition is turned off, the audible warning of the
fault will not be emitted every time the system is reactivated (by engaging
the reverse gear). Thus, the system ready indication will not sound either.
Have the fault repaired by a Technical Service as soon as possible.
If there is no ready signal or no acoustic warning signal, then the parking
aid loudspeaker is faulty and may not warn of obstacles. To ensure that the
system works properly, the sensors must be kept clean and free of ice and
snow.
WARNING
● The sensors have blind spots in which obstacles may not be detected.
● Always look out for small children and animals because the system
will not always detect them. Always pay attention when reversing to
avoid accidents.
● The parking aid is not a replacement for driver awareness. The driver
must take full responsibility for parking and other manoeuvres.
Safety FirstOperating instructionsPractical TipsTechnical Specifications
Page 171 of 294
169
Driving
Front parking aid
The parking aid system will sound an audible warning to in-
dicate of the approach of any object towards the front or
rear of the vehicle.
Description
The acoustic parking aid system measures the distance between the vehicle
and any possible obstacle using 8 ultrasonic sensors (4 of which are loca-
ted on the rear bumper and 4 of which are located on the front bumper).
The measuring range of the sensors starts approximately and depending on
the nature of the obstacle at a distance of:
● side of the front bumper: 0.6 m
● middle of the front bumper: 1.2 m
● side of the rear bumper: 0.6 m
● middle of the rear bumper: 1.6 m
Activation
The system may be activated in the following ways:
● Engage the reverse gear (a brief, sharp acoustic signal confirms activa-
tion and the correct operation of the system) or
● Push the central console button (a brief confirmation signal will
sound and the button’s LED will light up).
Disconnection
The system may be deactivated in the following ways:
● Drive forwards at more than approx. 10 km/h (6 mph) or else
● Press the button, or
● Switch the ignition off Manoeuvres
The distance warning will begin as soon as an obstacle is detected in the
system's field of detection (front and rear). The frequency of the bleeps
emitted by the system will increase rapidly as the vehicle approaches the
obstacle. Two speakers, one in the front and one in the rear, indicate the lo-
cation of the obstacle (either front or rear).
After a distance lower than approximately 30 cm, a continuous signal
sounds (stop signal). At this point the driver should halt the vehicle.
Models with a factory-fitted towing bracket: When the vehicle is less than
0.35 m away from the obstacle the warning tone will sound continuously.
The driver should then not reverse any further.
The warning tone volume decreases by 30% 3 seconds after it is triggered if
the detected obstacle stays at a constant distance from the vehicle.
Provided that it is not in continuous mode, the tone on the parking aid sys-
tem stops when it detects a wall parallel to the vehicle.
Trailer towing
For vehicles factory-fitted with a towing bar, the parking aid system will not
be activated by the engagement of the reverse gear when pulling a trailer,
as the trailer's electric connector will be plugged into the vehicle.
Possible faults
If a continuous, sharp beep sounds for various seconds, there is a fault in
the parking aid system.
If the fault continues until the ignition is turned off, the audible warning of
the fault will not be emitted every time the system is reactivated (by engag-
ing the reverse gear or pressing the button). Thus, the system ready indi-
cation will not sound either. Have the fault repaired by a Technical Service
as soon as possible.
If there is no ready signal or no acoustic warning signal, then the parking
aid loudspeaker is faulty and may not warn of obstacles. To ensure that the
Safety FirstOperating instructionsPractical TipsTechnical Specifications
Page 176 of 294
174Intelligent technology
Practical Tips
Intelligent technology
Brakes Brake servo
The brake servo increases the pressure you apply to the brake pedal. It
works only when the engine is running .
If the brake servo is not functioning due to a malfunction, or if the vehicle
has to be towed, you will have to press the brake pedal considerably harder
to make up for the lack of servo assistance.
WARNING
The braking distance can also be affected by external factors.
● Never let the vehicle coast with the engine switched off. Failure to do
so could result in an accident. The braking distance is increased consid-
erably when the brake servo is not active.
● If the brake servo is not working, for example when the vehicle is be-
ing towed, you will have to press the brake pedal considerably harder
than normal.
Hydraulic Brake Assist (HBA)*
The function (Hydraulic Brake Assist HBA) is only included in
vehicles with ESC.
In an emergency, most drivers brake in time, but not with maximum force.
This results in unnecessarily long braking distances.
This is when the brake assist system comes into action. When pressing the
brake pedal rapidly, the assistant interprets it as an emergency. It then very
quickly builds up the full brake pressure so that the ABS can be activated
more quickly and efficiently, thus reducing the braking distance.
Do not reduce the pressure on the brake pedal. The brake assist system
switches off automatically as soon as you release the brake.
Automatic hazard warning lights activation
The brake lights flash automatically to indicate that the vehicle is braking
suddenly or in an emergency situation. If the emergency braking continues
until the vehicle comes to a standstill, the hazard warning lights will then
come on and the brake lights will remain on permanently from that moment.
The warning lights will automatically switch off when the vehicle begins to
move again or when the "warning" light button is pressed.
Page 178 of 294
176Intelligent technology
The ASR helps the car to start moving, accelerate and climb a gradient in
slippery conditions, where this may otherwise be difficult or even impossi-
ble.
The ASR automatically switches on when the engine is started. If necessary,
it may be turned on or off by briefly pushing the ESC button on the centre
console.
When the ASR is off, the warning lamp is lit. The ASR should normally be
left on. Only in exceptional circumstances, when the slipping of the wheels
is required, can they be disconnected using the ESC button, for example.
● With compact temporary spare wheel.
● When using the snow chains.
● When driving in deep snow or on loose surfaces
● When the vehicle is bogged-down, to free it by rocking.
The ASR should be switched on again as soon as possible.
WARNING
● Remember that not even the ASR can defy the laws of physics. This
should be kept in mind, particularly on slippery and wet roads and when
towing a trailer.
● Always adapt your driving style to suit the condition of the roads and
the traffic situation. The greater safety provided by the ASR should not
encourage you to run any risks.
CAUTION
● To ensure that the ASR works correctly, identical tyres should be fitted
on all four wheels. Any differences in the rolling radius of the tyres can
cause the system to reduce engine power when this is not desired.
● Any modifications made to the vehicle (for example, to the engine,
brake system, running gear or to the combination of wheels and tyres) may
affect the operation of the ABS and ASR. XDS*
Driveshaft differential
When taking a bend, the driveshaft differential mechanism allows the outer
wheel to turn at a higher speed than the inner wheel. In this way, the wheel
that is turning faster (outer wheel) receives less drive torque than the inner
wheel. This may mean that in certain situations the torque delivered to the
inner wheel is too high, causing the wheels to spin. On the other hand, the
outer wheel is receiving a lower drive torque than it could transmit. This
causes an overall loss of lateral grip on the front axle, resulting in under-
steer or “lengthening” of the trajectory.
The XDS system can detect and correct this effect via the sensors and sig-
nals of the ESC.
Via the ESC, the XDS will brake the inside wheel and counter the excess
driving torque of that wheel. This means that the driver's desired trajectory
is much more precise,
The XDS system works in combination with the ESC and is always active,
even when the ASR traction control is disconnected.
Electronic Stability Control (ESC)*
General notes
The Electronic Stability Control increases the vehicle's stabil-
ity on the road. The Electronic Stability Control helps reduce the danger of skidding.
The Electronic Stability Control (ESC) includes the systems ABS, EDL and
ASR