parking brake Seat Ibiza 5D 2015 Owner's manual
[x] Cancel search | Manufacturer: SEAT, Model Year: 2015, Model line: Ibiza 5D, Model: Seat Ibiza 5D 2015Pages: 248, PDF Size: 4.77 MB
Page 37 of 248
The essentials
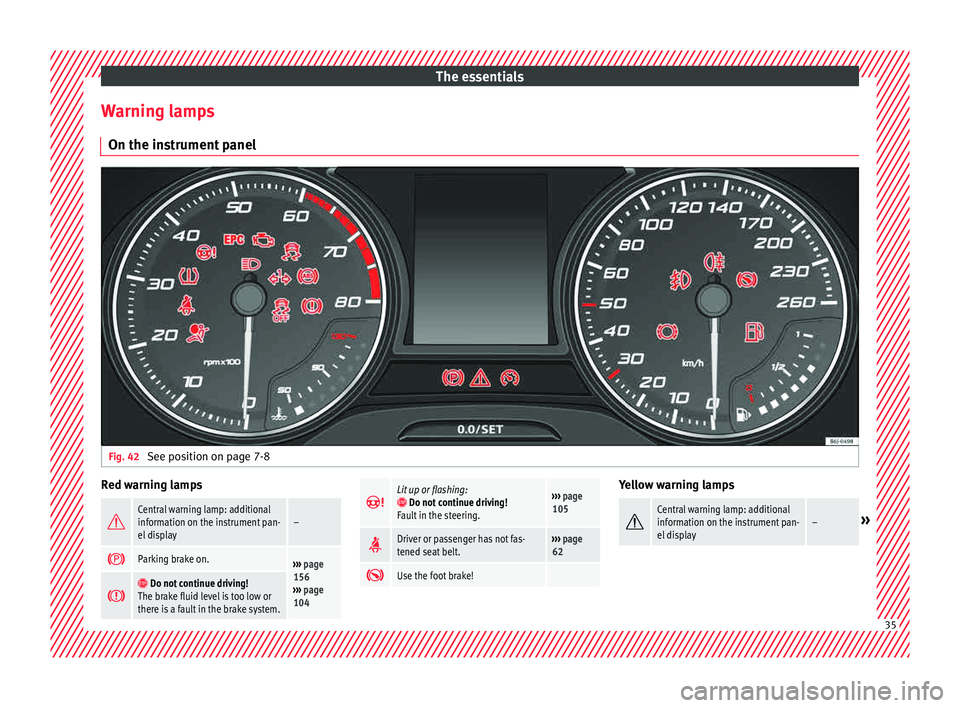
Warning lamps On the in s
trument
panelFig. 42
See position on page 7-8 Red warning lamps
Central warning lamp: additional
information on the instrument pan-
el display–
Parking brake on.›››
page
156
››› page
104
Do not continue driving!
The brake fluid level is too low or
there is a fault in the brake system.
Lit up or flashing: Do not continue driving!
Fault in the steering.››› page
105
Driver or passenger has not fas-
tened seat belt.›››
page
62
Use the foot brake! Yellow warning lamps
Central warning lamp: additional
information on the instrument pan-
el display–»
35
Page 40 of 248
The essentials
● Rel
e
ase the clutch.
››› in Driving with manual gearbox on
page 159
››› page 159 Automatic gearbox*
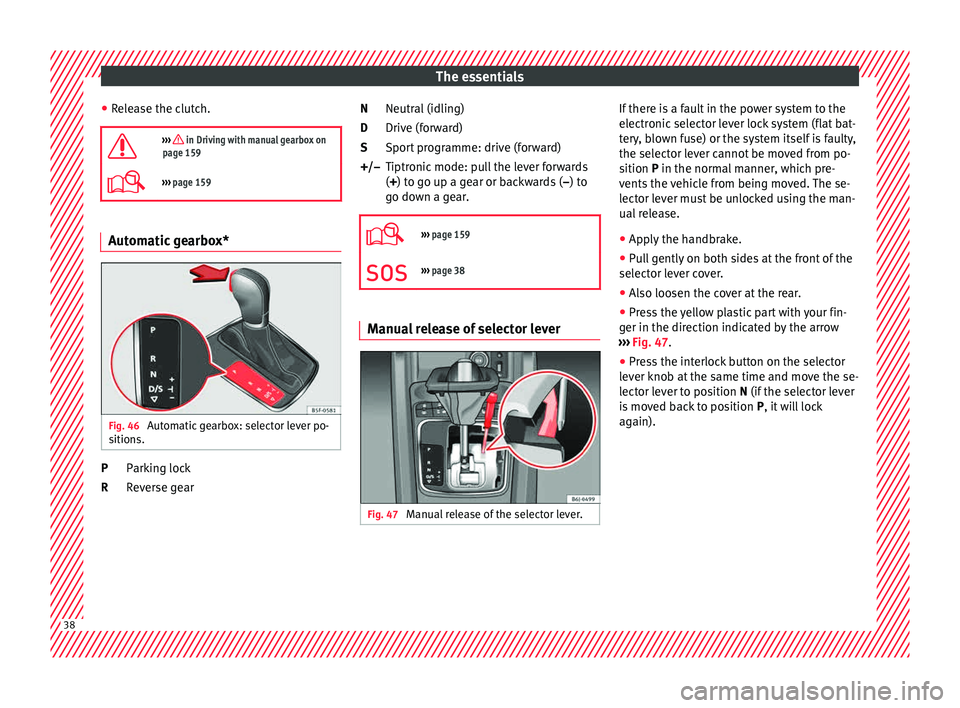
Fig. 46
Automatic gearbox: selector lever po-
s ition
s. Parking lock
R
ev
er
se gear
P
R Neutral (idling)
Drive (for
ward)
Sport programme: drive (forward)
Tiptronic mode: pull the lever forwards
(+) to go up a gear or backwards ( –) to
go down a gear.
››› page 159
››› page 38 Manual release of selector lever
Fig. 47
Manual release of the selector lever. N
D
S
+/–
If there is a fault in the power system to the
el
ectr
onic
selector lever lock system (flat bat-
tery, blown fuse) or the system itself is faulty,
the selector lever cannot be moved from po-
sition P in the normal manner, which pre-
vents the vehicle from being moved. The se-
lector lever must be unlocked using the man-
ual release.
● Apply the handbrake.
● Pull gently on both sides at the front of the
selector l
ever cover.
● Also loosen the cover at the rear.
● Press the yellow plastic part with your fin-
ger in the direction indic
ated by the arrow
››› Fig. 47.
● Press the interlock button on the selector
lever kno
b at the same time and move the se-
lector lever to position N (if the selector lever
is moved back to position P, it will lock
again). 38
Page 158 of 248
Operation
start it using the battery of another vehicle.
Ple
a
se observe and follow the notes on the
››› page 52, How to jump start. For the sake of the environment
Do not warm-up the engine by running the
en gine w ith the
vehicle stationary. You
should drive off as soon as you start the en-
gine. This helps the engine reach operating
temperature faster and reduces emissions. Switching off the engine
–
Stop the vehicle.
– Turn the ignition key to position ››
›
Fig. 168
1 .
Af t
er sw
itching the engine off, the radiator
fan may run on for up to 10 minutes. It is also
possible that the fan turns itself on once
more if the coolant temperature increases
due to the heat accumulated in the engine
compartment or due to its prolonged expo-
sure to solar radiation. WARNING
● Never sw it
ch the engine off until the vehi-
cle is completely stationary.
● The brake servo works only when the en-
gine is ru
nning. With the engine switched off,
more strength is needed to brake. As normal brake operation cannot be performed, risk of
acc
ident
s and serious injury may exist.
● The steering lock can be immediately
block
ed once the key is removed from the ig-
nition. The vehicle cannot be steered. Risk of
accident.
● Power-assisted steering does not work
when the engine is
off, and more strength is
needed to turn the wheel.
● If the key is removed from the ignition lock
the steerin
g lock could be engaged and vehi-
cle steering would not work. CAUTION
When the engine has been running under a
heavy lo
ad for a long period, heat can accu-
mulate in the engine compartment and cause
engine damage. For this reason, idle the en-
gine for approximately 2 minutes before
switching it off. Braking and parking
Br ak
in
g capacity and braking distance The efficiency of the brakes depends directly
on the br
ak
e p
ad wear. This wear depends to
a great extent on the conditions under which
the vehicle is operated and the way the vehi-
cle is driven. If you often drive in town, drive
short distances or have a sporty driving style,
we recommend that you have the thickness of your brake pads checked by technical serv-
ices
more frequently than recommended in
the Maintenance Programme.
If you drive with wet brakes, for example, af-
ter crossing areas of water, on days of heavy
rainfall or even after washing the car, the ef-
fect of the brakes is reduced as the brake
discs are wet or even frozen (in winter): in
this case, the brakes should be “dried” by
pressing the brake pedal several times. WARNING
Longer braking distances and faults in the
brak e sy
stem increase the risk of accidents.
● New brake pads must be run in and do not
have the c
orrect friction during the first
200 km. This reduced braking capacity may
be compensated for by pressing on the brake
pedal a little harder, which also applies when
the brake pads have to be changed further
on.
● If brakes are wet or frozen, or if you are
driving on r
oads which have been salted,
braking power may be lower than normal.
● On steep slopes, if brakes are excessively
used, they w
ill overheat. Before driving down
a long steep slope, it is advisable to reduce
speed and change down into a lower gear or
range (depending on the type of transmis-
sion). Thus, make use of engine braking and
relieve the brakes.
● Never let the brakes “drag” by applying
light pre
ssure. Continuous braking will cause156
Page 159 of 248
Driving
the brakes to overheat and the braking
dis
t
ance will increase. Apply and then release
the brakes alternately.
● Never let the vehicle run with the engine
switc
hed off. The braking distance is in-
creased considerably when the brake servo is
not active.
● If the brake fluid loses its viscosity and is
subj
ected to heavy use, vapour bubbles can
form in the brake system. This reduces the ef-
ficiency of the brakes.
● Non-standard or damaged front spoilers
coul
d restrict the airflow to the brakes and
cause them to overheat. Before purchasing
accessories please observe the relevant in-
structions ››› page 190, Modifications.
● If a brake system circuit fails, the braking
dist
ance will be increased considerably. Con-
tact a specialised workshop immediately and
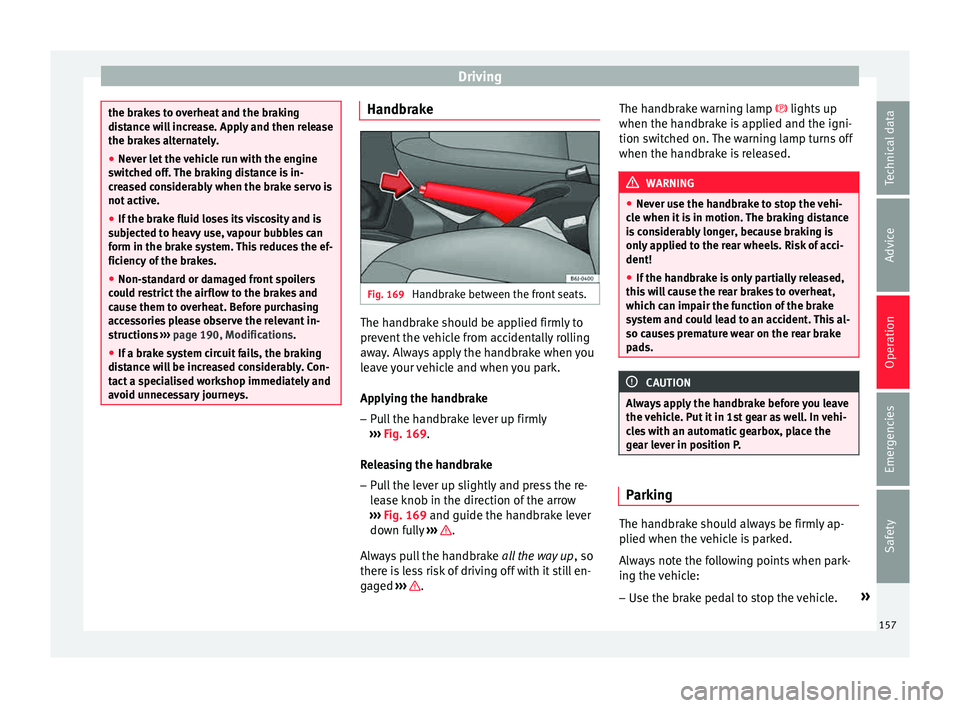
avoid unnecessary journeys. Handbrake
Fig. 169
Handbrake between the front seats. The handbrake should be applied firmly to
pr
ev
ent
the vehicle from accidentally rolling
away. Always apply the handbrake when you
leave your vehicle and when you park.
Applying the handbrake
– Pull the handbrake lever up firmly
›››
Fig. 169.
Releasing the handbrake
– Pull the lever up slightly and press the re-
lea
se knob in the direction of the arrow
››› Fig. 169 and guide the handbrake lever
down fully ››› .
A lw
a
ys pull the handbrake all the way up, so
there is less risk of driving off with it still en-
gaged ››› .The handbrake warning lamp lights
up
when the h andbr
ake is applied and the igni-
tion switched on. The warning lamp turns off
when the handbrake is released. WARNING
● Never u se the h
andbrake to stop the vehi-
cle when it is in motion. The braking distance
is considerably longer, because braking is
only applied to the rear wheels. Risk of acci-
dent!
● If the handbrake is only partially released,
this w
ill cause the rear brakes to overheat,
which can impair the function of the brake
system and could lead to an accident. This al-
so causes premature wear on the rear brake
pads. CAUTION
Always apply the handbrake before you leave
the v ehic
le. Put it in 1st gear as well. In vehi-
cles with an automatic gearbox, place the
gear lever in position P. Parking
The handbrake should always be firmly ap-
p
lied when the
v
ehicle is parked.
Always note the following points when park-
ing the vehicle: – Use the brake pedal to stop the vehicle. »
157
Technical data
Advice
Operation
Emergencies
Safety
Page 160 of 248

Operation
– Ap p
ly
the handbrake.
– Put it in 1st gear.
– Switch the engine off and remove the key
from the ignition. T
urn the steering wheel
slightly to engage the steering lock.
– Always take you keys with you when you
leav
e the vehicle ››› .
Ad dition
a
l notes on parking the vehicle on
gradients:
Turn the steering wheel so that the vehicle
rolls against the kerb if it started to roll.
● If the vehicle is parked facing downhil
l,
turn the front wheels so that they point to-
wards the kerb .
● If the vehicle is parked facing uphill
, turn
the front wheels so that they point away from
the kerb.
● Secure the vehicle as usual by applying the
handbrak
e firmly and putting it in 1st gear. WARNING
● Tak e me
asures to reduce the risk of injury
when you leave your vehicle unattended.
● Never park where the hot exhaust system
coul
d ignite inflammable materials, such as
dry grass, low bushes, spilt fuel etc.
● Never allow vehicle occupants to remain in
the vehic
le when it is locked. They would be
unable to open the vehicle from the inside,
and could become trapped in the vehicle in an emergency. In the event of an emergency,
lock
ed door
s will delay assistance to vehicle
occupants.
● Never leave children alone in the vehicle.
They cou
ld set the vehicle in motion, for ex-
ample, by releasing the handbrake or the
gearbox lever.
● Depending on weather conditions, it may
become extr
emely hot or cold inside the vehi-
cle. This can be fatal. Hill driving assistant*
This function is only included in vehicles with
E
SC.
The hi l
l driving assistant helps the driver to
move off and upward on a hill when the vehi-
cle is stationary.
The system maintains brake pressure for ap-
proximately two seconds after the driver
takes his foot off the brake pedal to prevent
the vehicle from lurching backward when it is
started. During these 2 seconds, the driver
has enough time to release the clutch pedal
and accelerate without the vehicle moving
and without having to use the handbrake,
making start-up easier, more comfortable
and safer.
These are the basic operation conditions:
● being on a ramp or hill/slope, ●
doors c
losed,
● vehicle completely stationary,
● engine running and foot on the brake,
● besides having a gear engaged or being in
neutral f
or manual gear change and with the
selector lever at position S, D or R for an au-
tomatic gearbox.
This system is also active when reversing up-
hill. WARNING
● If y
ou do not start the vehicle immediately
after taking your foot off the brake pedal, the
vehicle may start to roll back under certain
conditions. Depress the brake pedal or use
the hand brake immediately.
● If the engine stalls, depress the brake ped-
al or u
se the hand brake immediately.
● When following a line of traffic uphill, if you
want t
o prevent the vehicle from rolling back
accidentally when starting off, hold the brake
pedal down for a few seconds before starting
off. Note
The Official Service or a specialist workshop
can t el
l you if your vehicle is equipped with
this system. 158
Page 162 of 248
Operation
Selecting the normal programme
– Put the selector lever into position D.
Sel ectin
g the s
port programme
– Put the selector lever into position S.
If y
ou select the normal programme, D, you
will drive in the economy mode, i.e. the pro-
gramme is designed to reduce fuel consump-
tion. The gearbox changes up into a higher
gear as soon as possible and down into a
lower gear as late as possible.
If you select the sport programme, S, you will
drive in a sporty mode, i.e. a programme in
which shifts into high gears are postponed in
order to use the full power of the engine.
Selector lever positions Read the additional information carefully
› ›
›
page 38
Selector lever positions
The selected gear is displayed on the side of
the selector lever and on the instrument pan-
el display. The currently selected gear for the
automatic gearbox will also be shown on the
display. Tiptronic gear indicator
If the autom
atic gearbox is shifted manually,
the selected gears are shown on the screen.
P - parking lock
When the selector lever is in this position,
the driven wheels are locked mechanically.
Position P on the lever must only be selected
if the vehicle is stationary.
To move selector lever from position P, the
locking button on the selector lever handle
must be pressed and the brake pedal de-
pressed at the same time while the ignition is
switched on.
To put the selector lever in position P, simply
press the lock button down and, if necessary,
depress the brake pedal down.
R - Reverse gear
The reverse gear is engaged in this position.
Reverse gear must be engaged only when the
vehicle is stationary and the engine is idling.
To move the selector lever to position R,
press the lock button down and, at the same
time, press the brake pedal down, with the
ignition switched on.
With the selector lever in position R and the
ignition switched on the following occurs:
● Reverse lights light up. ●
The air conditioner autom atically changes
the air recirculation mode.
● The wiper starts if the windscreen washer is
on.
● The parking distance warning system*
switc
hes on.
N - Neutral (idling)
If this position is selected, the gearbox is in
neutral. Power is not transmitted to the
wheels and the engine does not have a brak-
ing function.
Never use the N position to drive down a long
hill. There is no engine braking and the
brakes are subjected to excessive stain.
You could damage the automatic gearbox if
you drive down hills with the gearbox lever in
position N and the engine switched off.
D - Drive (forward)
In this position the gearbox automatically
changes to a lower or higher gear, according
to the engine's requirements, the driving
style and speed. The braking effect of the en-
gine when driving downhill is very limited
when the selector is in this position. The in-
strument panel display shows the selected
gear as well as the selector lever in position
D.
When travelling at speeds lower than 5 km/h
(3 mph) or when the vehicle is stationary,
160
Page 163 of 248
Driving
press the brake pedal to change the selector
l ev
er fr
om position N to position D.
S - Standard driving position (Sport pro-
gramme)
When the selector lever is in position S, it will
automatically change up into a higher gear
later, and change down into a low gear, if
compared with position D. This way, it is pos-
sible to take full advantage of the engine re-
serve power, depending on the engine de-
mand, driving style and speed. The braking
effect of the engine when driving downhill is
very limited. On the instrument panel display
the selected gear is shown as well as the se-
lector lever to position S.
To select gear range S, press the lock button
on the selector lever. WARNING
● As a driv er
, you should never leave your ve-
hicle if the engine is running and a gear range
is engaged. If you have to leave your vehicle
while the engine is running, you must apply
the parking brake and put the selector lever
in position P.
● If the engine is running and if D or R is en-
gaged,
you will need to hold the car on the
foot brake. The car will creep forward as the
power transmission is not fully interrupted
even when the engine is idling.
● Never accelerate when moving the selector
lever or
you may cause an accident. ●
Never mo v
e the selector lever to R or P
when driving. Risk of accident!
● Before driving down a long, steep slope, it
is a
dvisable to reduce speed and change into
a lower gear.
● If you stop the vehicle up hill, always hold
the foot br
ake strongly depressed down to
stop it from rolling back.
● Never allow the brake to rub and do not use
the brake ped
al too often or for long periods.
Constant braking will cause the brakes to
overheat and will considerably reduce the
brake effect. This increases the braking dis-
tance and could cause the brake system to
fail.
● Never allow the car to roll down a gradient
with the ge
ar in neutral N, or in selector lever
position D, even if the engine is not running.
● If the vehicle moves with no control, an ac-
cident and seriou
s injury may occur. WARNING
Never switch the engine off until the vehicle
is s
tationary. You could lose control of your
vehicle. This could cause an accident and se-
rious injury.
● The airbags and belt tensioners do not
work when the ignition i
s switched off.
● The brake servo does not work with the en-
gine off. Y
ou need more force to stop the vehi-
cle. ●
Po w
er steering does not work when the en-
gine is not running. That is why it is much
more difficult to turn the steering wheel.
● Never remove the key from the ignition if
the vehic
le is in motion. The steering lock
could suddenly engage, and you would not be
able to steer the vehicle. CAUTION
If you allow the vehicle to move when the en-
gine i s sw
itched off or with the selector lever
in position “N”, take your foot off the acceler-
ator and wait until the engine starts idling
before returning to position “D”. Selector lever lock
Fig. 170
Automatic gearbox The selector lever lock in position P or N pre-
v
ents
g
ears from being engaged inadvertent-
ly, which would cause the vehicle to move. »
161
Technical data
Advice
Operation
Emergencies
Safety
Page 184 of 248
Operation
–
If the v
ehicle is heavily loaded at the
rear.
– When the vehicle approaches objects
that are not on the ground surface or are
jutting out from it. These objects may al-
so be outside the camera's angle of vi-
sion when reversing. Note
● It is
important to take great care and pay
special attention if you are not yet familiar
with the system.
● Rear assist will not be available if the vehi-
cle's
rear lid is open. Instructions for use
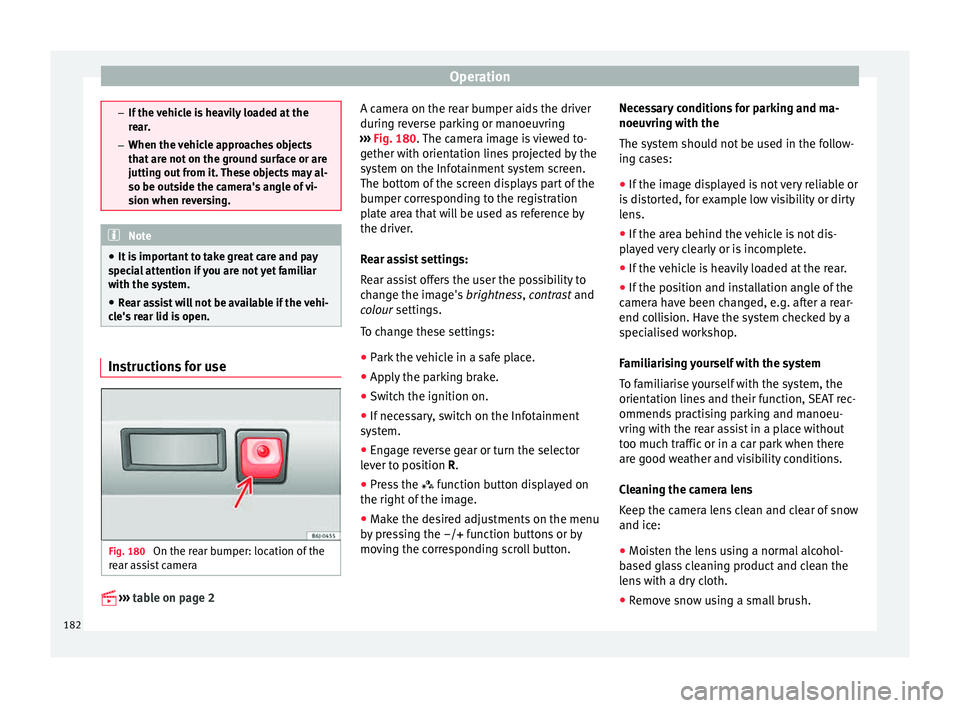
Fig. 180
On the rear bumper: location of the
r e
ar a
ssist camera
››
›
table on page 2 A camera on the rear bumper aids the driver
during r
ev
erse parking or manoeuvring
››› Fig. 180. The camera image is viewed to-
gether with orientation lines projected by the
system on the Infotainment system screen.
The bottom of the screen displays part of the
bumper corresponding to the registration
plate area that will be used as reference by
the driver.
Rear assist settings:
Rear assist offers the user the possibility to
change the image's brightness, contrast and
colour settings.
To change these settings:
● Park the vehicle in a safe place.
● Apply the parking brake.
● Switch the ignition on.
● If necessary, switch on the Infotainment
syst
em.
● Engage reverse gear or turn the selector
lever t
o position R.
● Press the function b
utton displayed on
the right of the image.
● Make the desired adjustments on the menu
by pr
essing the –/+ function buttons or by
moving the corresponding scroll button. Necessary conditions for parking and ma-
noeuvring w
ith the
The system should not be used in the follow-
ing cases:
● If the image displayed is not very reliable or
is di
storted, for example low visibility or dirty
lens.
● If the area behind the vehicle is not dis-
pla
yed very clearly or is incomplete.
● If the vehicle is heavily loaded at the rear.
● If the position and installation angle of the
camera h
ave been changed, e.g. after a rear-
end collision. Have the system checked by a
specialised workshop.
Familiarising yourself with the system
To familiarise yourself with the system, the
orientation lines and their function, SEAT rec-
ommends practising parking and manoeu-
vring with the rear assist in a place without
too much traffic or in a car park when there
are good weather and visibility conditions.
Cleaning the camera lens
Keep the camera lens clean and clear of snow
and ice:
● Moisten the lens using a normal alcohol-
based gl
ass cleaning product and clean the
lens with a dry cloth.
● Remove snow using a small brush.
182
Page 186 of 248
Operation
Parking manoeuvre
● Place the vehicle in front of the parking
s p
ac
e and engage reverse gear (manual
gearbox) or move the selector to the R posi-
tion (automatic gearbox).
● Reverse slowly, and turn the steering wheel
so that the s
ide orientation lines lead to-
wards the parking space.
● Guide the vehicle into the parking space so
that the s
ide orientation lines run parallel to
it.
Cruise speed* (cruise control -
GRA)
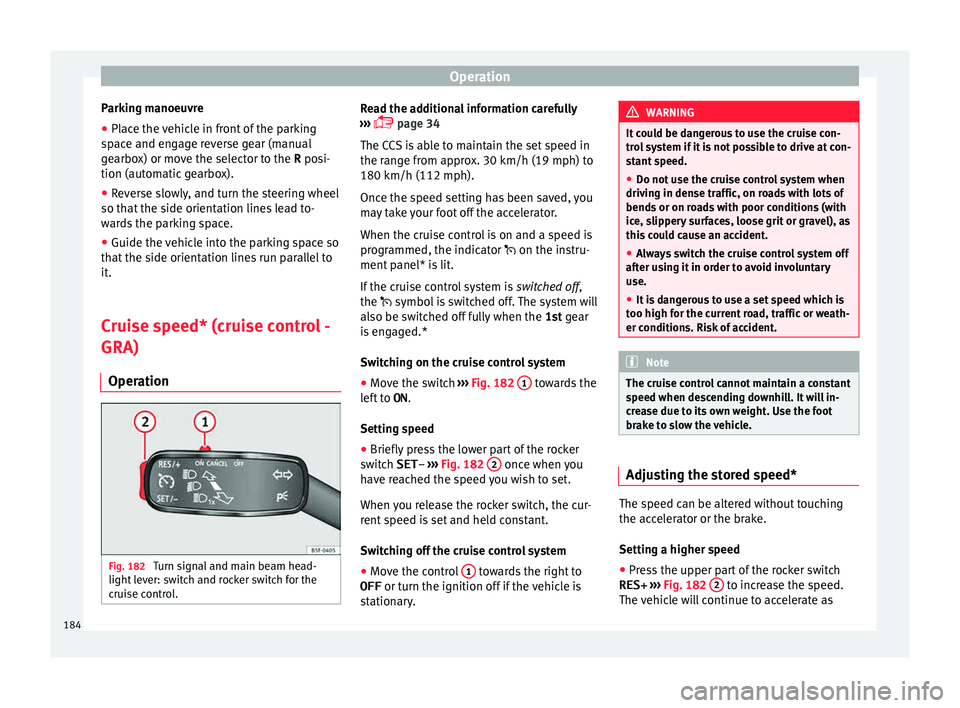
Operation Fig. 182
Turn signal and main beam head-
light l
ev
er: switch and rocker switch for the
cruise control. Read the additional information carefully
› ›
›
page 34
The CCS is able to maintain the set speed in
the range from approx. 30 km/h (19 mph) to
180 km/h (112 mph).
Once the speed setting has been saved, you
may take your foot off the accelerator.
When the cruise control is on and a speed is
programmed, the indicator on the instru-
ment panel* is lit.
If the cruise control system is switched off,
the symbol is switched off. The system will
also be switched off fully when the 1st gear
is engaged.*
Switching on the cruise control system
● Move the switch ›››
Fig. 182 1 towards the
l ef
t
to ON.
Setting speed
● Briefly press the lower part of the rocker
switc
h SET– ››› Fig. 182 2 once when you
h av
e r
eached the speed you wish to set.
When you release the rocker switch, the cur-
rent speed is set and held constant.
Switching off the cruise control system
● Move the control 1 towards the right to
OFF or t
urn the ignition off if
the vehicle is
stationary. WARNING
It could be dangerous to use the cruise con-
tro l
system if it is not possible to drive at con-
stant speed.
● Do not use the cruise control system when
driving in den
se traffic, on roads with lots of
bends or on roads with poor conditions (with
ice, slippery surfaces, loose grit or gravel), as
this could cause an accident.
● Always switch the cruise control system off
after u
sing it in order to avoid involuntary
use.
● It is dangerous to use a set speed which is
too high for the c
urrent road, traffic or weath-
er conditions. Risk of accident. Note
The cruise control cannot maintain a constant
speed when de s
cending downhill. It will in-
crease due to its own weight. Use the foot
brake to slow the vehicle. Adjusting the stored speed*
The speed can be altered without touching
the ac
c
el
erator or the brake.
Setting a higher speed
● Press the upper part of the rocker switch
RES+ ›››
Fig. 182 2 to increase the speed.
The v
ehic
le will continue to accelerate as
184
Page 237 of 248
Index
Index
A
ABS . . . . . . . . . . . . . . . . . . . . . . . . . . . . . . . . . . . .
171
c ontr
ol lamp . . . . . . . . . . . . . . . . . . . . . . . . . . . 102
Accessories . . . . . . . . . . . . . . . . . . . . . . . . . . . . . . 190
Additional electrical appliances (efficiency pro- gramme) . . . . . . . . . . . . . . . . . . . . . . . . . . . . . . . 31
Adjusting front head restraints . . . . . . . . . . . . . . . . . . . . . 133
lights . . . . . . . . . . . . . . . . . . . . . . . . . . . . . . . . . 125
rear head restraints . . . . . . . . . . . . . . . . . . . . . . 60
Adjusting the front seats adjusting the lumbar support . . . . . . . . . . . . . 132
Adjusting the head restraints front head restraints . . . . . . . . . . . . . . . . . . . . . 133
rear head restraints . . . . . . . . . . . . . . . . . . . . . . 60
Adjusting the seat . . . . . . . . . . . . . . . . . . . . . . . . 132
Adjustment CAR menu . . . . . . . . . . . . . . . . . . . . . . . . . . . . . 107
front head restraints . . . . . . . . . . . . . . . . . . . . . . 60
seats . . . . . . . . . . . . . . . . . . . . . . . . . . . . . . . . . . 57
AFS headlight bulbs . . . . . . . . . . . . . . . . . . . . . . . . 87
Airbag covers . . . . . . . . . . . . . . . . . . . . . . . . . . . . . 14
Airbag system . . . . . . . . . . . . . . . . . . . . . . . . . . 14, 66 activation . . . . . . . . . . . . . . . . . . . . . . . . . . . . . . 68
control lamp . . . . . . . . . . . . . . . . . . . . . . . . . . . . 68
deactivation of front airbag . . . . . . . . . . . . . . . . 70
description . . . . . . . . . . . . . . . . . . . . . . . . . . . . . 67
front airbags . . . . . . . . . . . . . . . . . . . . . . . . . 14, 69
functioning . . . . . . . . . . . . . . . . . . . . . . . . . . . . . 68
head-protection airbags . . . . . . . . . . . . . . . . . . 15
side airbags . . . . . . . . . . . . . . . . . . . . . . . . . . . . 15
Air conditioning . . . . . . . . . . . . . . . . . . . . . . 39, 148 Climatronic . . . . . . . . . . . . . . . . . . . . . . . . . . . . 150
controls . . . . . . . . . . . . . . . . . . . . . . . . . . . . . . . 148 General notes . . . . . . . . . . . . . . . . . . . . . . . . . . 144
manual air c
onditioning . . . . . . . . . . . . . . . . . . . 40
Air outlets . . . . . . . . . . . . . . . . . . . . . . . . . . . . . . . 146
Air recirculation air conditioning . . . . . . . . . . . . . . . . . . . . . . . . 149
heating and fresh air . . . . . . . . . . . . . . . . . . . . 147
Alarm system . . . . . . . . . . . . . . . . . . . . . . . . . . . . 118 Switching off . . . . . . . . . . . . . . . . . . . . . . . . . . . 119
Alloy wheel rims . . . . . . . . . . . . . . . . . . . . . . . . . . 196
Alternator warning lamp . . . . . . . . . . . . . . . . . . . . . . . . . . 106
Ambient lighting . . . . . . . . . . . . . . . . . . . . . . . . . 128
Anti-freeze . . . . . . . . . . . . . . . . . . . . . . . . . . . . . . . 42
Anti-lock brake system . . . . . . . . . . . . 103, 169, 171 control lamp . . . . . . . . . . . . . . . . . . . . . . . . . . . 102
Anti-puncture kit . . . . . . . . . . . . . . . . . . . . 46, 76, 77 check after 10 minutes . . . . . . . . . . . . . . . . . . . . 78
Anti-theft alarm system . . . . . . . . . . . . . . . . . . . . 118 Switching off . . . . . . . . . . . . . . . . . . . . . . . . . . . 119
Aquaplaning . . . . . . . . . . . . . . . . . . . . . . . . . . . . . 214
Aspects to note before setting off . . . . . . . . . . . . . 56
ASR . . . . . . . . . . . . . . . . . . . . . . . . . . . . . . . . . . . . 172 control lamp . . . . . . . . . . . . . . . . . . . . . . . . . . . 103
Assistance systems parking aid . . . . . . . . . . . . . . . . . . . . . . . 176, 177
Assistance Systems tiredness detection . . . . . . . . . . . . . . . . . . . . . 175
Assisted starting . . . . . . . . . . . . . . . . . . . . . . . . . . 52
Audible warning signal seat belt not fastened . . . . . . . . . . . . . . . . . . . . 62
warning and indication lamps . . . . . . . . . . . . . 100
Automatic car wash tunnel . . . . . . . . . . . . . . . . . 192
Automatic gearbox . . . . . . . . . . . . . . . . . . . . . . . . 159 driving programmes . . . . . . . . . . . . . . . . . . . . . 159
Driving tips . . . . . . . . . . . . . . . . . . . . . . . . . . . . 163
kick-down device . . . . . . . . . . . . . . . . . . . . . . . 164
manual release of selector lever . . . . . . . . . . . . 38 selecting gears with Tiptronic . . . . . . . . . . . . . 162
selector l
ever lock . . . . . . . . . . . . . . . . . . . . . . . 161
selector lever positions . . . . . . . . . . . . . . . . . . 160
tiptronic . . . . . . . . . . . . . . . . . . . . . . . . . . . . . . . 159
Automatic lighting . . . . . . . . . . . . . . . . . . . . . . . . 124
AUX-IN . . . . . . . . . . . . . . . . . . . . . . . . . . . . . . . . . . 112
B Back seat folding down and raising the back seat back- rest . . . . . . . . . . . . . . . . . . . . . . . . . . . . . . . . . 135
Ball coupling . . . . . . . . . . . . . . . . . . . . . . . . . . . . . 188
Battery . . . . . . . . . . . . . . . . . . . . . . . . . . . . . . . . . . 117
Before setting off . . . . . . . . . . . . . . . . . . . . . . . . . . 56
Belt pretensioners . . . . . . . . . . . . . . . . . . . . . . . . . 65
Biodiesel . . . . . . . . . . . . . . . . . . . . . . . . . . . . . . . . 201
Bonnet . . . . . . . . . . . . . . . . . . . . . . . . . 10, 201, 204 closing . . . . . . . . . . . . . . . . . . . . . . . . . . . . . . . . 203
opening . . . . . . . . . . . . . . . . . . . . . . . . . . . . . . . 203
Boot hatch . . . . . . . . . . . . . . . . . . . . . . . . . . . . . . 120
Boot lid . . . . . . . . . . . . . . . . . . . . . . . . . . . . . . . . . 120
Brake assist . . . . . . . . . . . . . . . . . . . . . . . . . . . . . 103
Brake fluid . . . . . . . . . . . . . . . . . . . . . . . . . . 43, 208 Changing . . . . . . . . . . . . . . . . . . . . . . . . . . . . . . 208
Brake pads . . . . . . . . . . . . . . . . . . . . . . . . . 156, 165
Brakes . . . . . . . . . . . . . . . . . . . . . . . . . . . . . . . . . . 208 brake fluid . . . . . . . . . . . . . . . . . . . . . . . . . . . . . 208
new Brake pads . . . . . . . . . . . . . . . . . . . . . . . . 156
warning lamp . . . . . . . . . . . . . . . . . . . . . . . . . . 104
Brake servo . . . . . . . . . . . . . . . . . . . . . . . . . 156, 173
Braking brake assist . . . . . . . . . . . . . . . . . . . . . . . . . . . . 103
Braking distance . . . . . . . . . . . . . . . . . . . . . . . . . 156
Bulbs changing a bulb . . . . . . . . . . . . . . . . . . . . . . . . . 83
Buzzer . . . . . . . . . . . . . . . . . . . . . . . . . . . . . . . . . . 126
235