checking oil Seat Ibiza SC 2011 User Guide
[x] Cancel search | Manufacturer: SEAT, Model Year: 2011, Model line: Ibiza SC, Model: Seat Ibiza SC 2011Pages: 278, PDF Size: 3.92 MB
Page 205 of 278
203
Checking and refilling levels
Changing windscreen wiper blades
If the windscreen wiper blades are in perfect condition, you
will benefit from an improved visibility. Damaged wiper
blades should be replaced immediately.
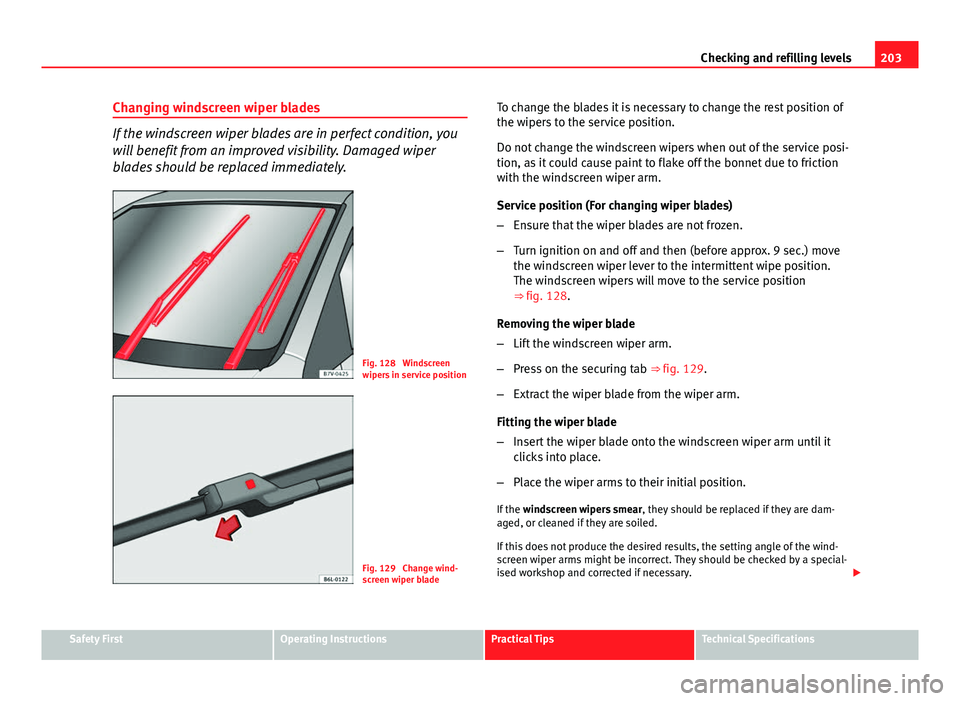
Fig. 128 Windscreen
wipers in service position
Fig. 129 Change wind-
screen wiper blade To change the blades it is necessary to change the rest position of
the wipers to the service position.
Do not change the windscreen wipers when out of the service posi-
tion, as it could cause paint to flake off the bonnet due to friction
with the windscreen wiper arm.
Service position (For changing wiper blades)
–
Ensure that the wiper blades are not frozen.
– Turn ignition on and off and then (before approx. 9 sec.) move
the windscreen wiper lever to the intermittent wipe position.
The windscreen wipers will move to the service position
⇒ fig. 128.
Removing the wiper blade
– Lift the windscreen wiper arm.
– Press on the securing tab ⇒ fig. 129.
– Extract the wiper blade from the wiper arm.
Fitting the wiper blade
– Insert the wiper blade onto the windscreen wiper arm until it
clicks into place.
– Place the wiper arms to their initial position.
If the windscreen wipers smear , they should be replaced if they are dam-
aged, or cleaned if they are soiled.
If this does not produce the desired results, the setting angle of the wind-
screen wiper arms might be incorrect. They should be checked by a special-
ised workshop and corrected if necessary.
Safety FirstOperating InstructionsPractical TipsTechnical Specifications
Page 207 of 278
205
Checking and refilling levels
Removing the wiper blade
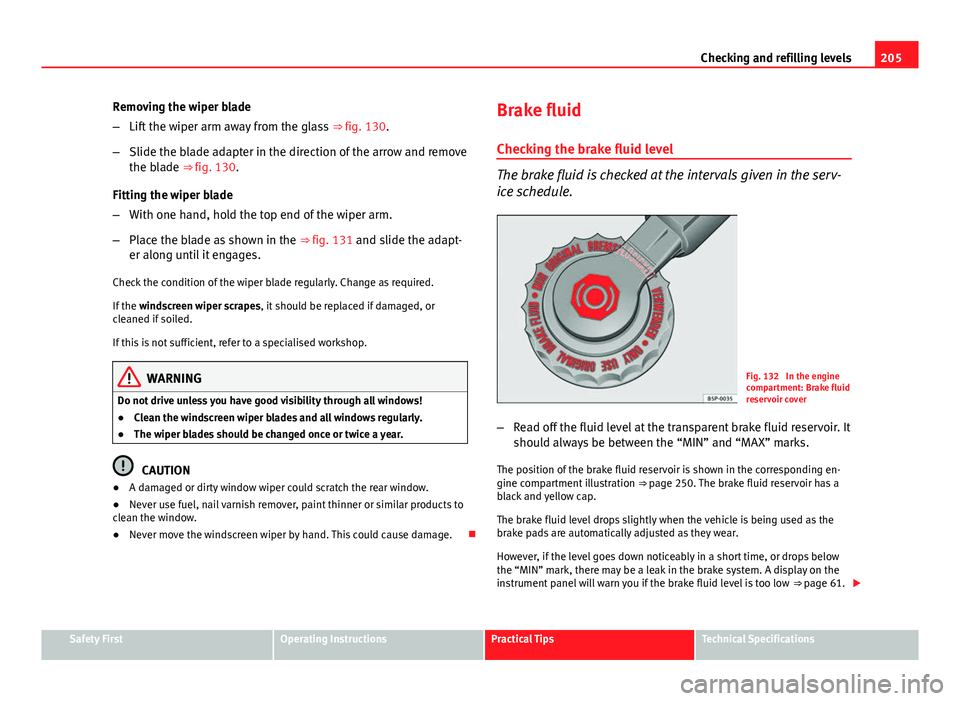
– Lift the wiper arm away from the glass ⇒ fig. 130.
– Slide the blade adapter in the direction of the arrow and remove
the blade ⇒ fig. 130.
Fitting the wiper blade
– With one hand, hold the top end of the wiper arm.
– Place the blade as shown in the ⇒ fig. 131 and slide the adapt-
er along until it engages.
Check the condition of the wiper blade regularly. Change as required.
If the windscreen wiper scrapes, it should be replaced if damaged, or
cleaned if soiled.
If this is not sufficient, refer to a specialised workshop.
WARNING
Do not drive unless you have good visibility through all windows!
● Clean the windscreen wiper blades and all windows regularly.
● The wiper blades should be changed once or twice a year.
CAUTION
● A damaged or dirty window wiper could scratch the rear window.
● Never use fuel, nail varnish remover, paint thinner or similar products to
clean the window.
● Never move the windscreen wiper by hand. This could cause damage. Brake fluid
Checking the brake fluid level
The brake fluid is checked at the intervals given in the serv-
ice schedule.
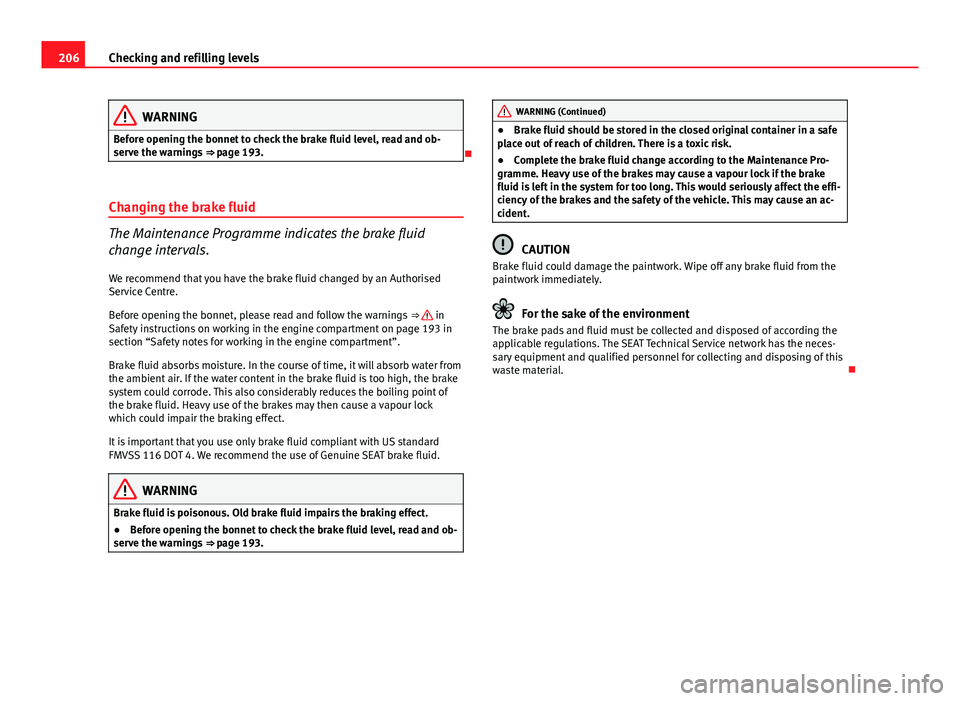
Fig. 132 In the engine
compartment: Brake fluid
reservoir cover
– Read off the fluid level at the transparent brake fluid reservoir. It
should always be between the “MIN” and “MAX” marks.
The position of the brake fluid reservoir is shown in the corresponding en-
gine compartment illustration ⇒ page 250. The brake fluid reservoir has a
black and yellow cap.
The brake fluid level drops slightly when the vehicle is being used as the
brake pads are automatically adjusted as they wear.
However, if the level goes down noticeably in a short time, or drops below
the “MIN” mark, there may be a leak in the brake system. A display on the
instrument panel will warn you if the brake fluid level is too low ⇒ page 61.
Safety FirstOperating InstructionsPractical TipsTechnical Specifications
Page 208 of 278
206Checking and refilling levels
WARNING
Before opening the bonnet to check the brake fluid level, read and ob-
serve the warnings ⇒ page 193.
Changing the brake fluid
The Maintenance Programme indicates the brake fluid
change intervals. We recommend that you have the brake fluid changed by an Authorised
Service Centre.
Before opening the bonnet, please read and follow the warnings ⇒
in
Safety instructions on working in the engine compartment on page 193 in
section “Safety notes for working in the engine compartment”.
Brake fluid absorbs moisture. In the course of time, it will absorb water from
the ambient air. If the water content in the brake fluid is too high, the brake
system could corrode. This also considerably reduces the boiling point of
the brake fluid. Heavy use of the brakes may then cause a vapour lock
which could impair the braking effect.
It is important that you use only brake fluid compliant with US standard
FMVSS 116 DOT 4. We recommend the use of Genuine SEAT brake fluid.
WARNING
Brake fluid is poisonous. Old brake fluid impairs the braking effect.
● Before opening the bonnet to check the brake fluid level, read and ob-
serve the warnings ⇒ page 193.
WARNING (Continued)
● Brake fluid should be stored in the closed original container in a safe
place out of reach of children. There is a toxic risk.
● Complete the brake fluid change according to the Maintenance Pro-
gramme. Heavy use of the brakes may cause a vapour lock if the brake
fluid is left in the system for too long. This would seriously affect the effi-
ciency of the brakes and the safety of the vehicle. This may cause an ac-
cident.
CAUTION
Brake fluid could damage the paintwork. Wipe off any brake fluid from the
paintwork immediately.
For the sake of the environment
The brake pads and fluid must be collected and disposed of according the
applicable regulations. The SEAT Technical Service network has the neces-
sary equipment and qualified personnel for collecting and disposing of this
waste material.
Page 211 of 278
209
Checking and refilling levels
WARNING
● We recommend you use only maintenance-free or cycle free leak-proof
batteries which comply with standards T 825 06 and VW 7 50 73. This
standard applies as of 2001.
● Before starting any work on the batteries, you must read and observe
the warnings ⇒
in Warnings on handling the battery on page 207.
For the sake of the environment
Batteries contain toxic substances such as sulphuric acid and lead. They
must be disposed of appropriately and must not be disposed of with ordi-
nary household waste.
Wheels
General notes
Avoiding damage
– If you have to drive over a kerb or similar obstacle, drive very
slowly and at a right angle.
– Keep grease, oil and fuel off the tyres.
– Inspect the tyres regularly for damage (cuts, cracks or blisters,
etc.). Remove any foreign objects embedded in the treads.
Storing tyres
– When you remove the tyres, mark them in order to maintain the
same direction of rotation when they are installed again. –
When removed, the wheels and/or tyres should be stored in a
cool, dry and preferably dark location.
– Store tyres in a vertical position if they are not fitted on wheel
rims.
New tyres
New tyres must be run in ⇒ page 166.
The tread depth of new tyres may vary, according to the type and make of
tyre and the tread pattern.
Concealed damage
Damage to tyres and rims is often not readily visible. If you notice unusual
vibrations or the vehicle pulling to one side, this may indicate that one of
the tyres is damaged. The tyres should be checked immediately by an Au-
thorised Service Centre.
Tyres with directional tread pattern
An arrow on the tyre sidewall indicates the direction of rotation on tyres with
directional tread. Always observe the direction of rotation indicated when
fitting the wheel. This guarantees optimum grip and helps to avoid aqua-
planing, excessive noise and wear.
WARNING
● New tyres do not have maximum grip during the first 500 km. Drive
particularly carefully to avoid possible accidents.
● Never drive with damaged tyres. This may cause an accident.
● If you notice unusual vibrations or if the vehicle pulls to one side
when driving, stop the vehicle immediately and check the tyres for dam-
age.
Safety FirstOperating InstructionsPractical TipsTechnical Specifications
Page 213 of 278
211
Checking and refilling levels
Wear indicators
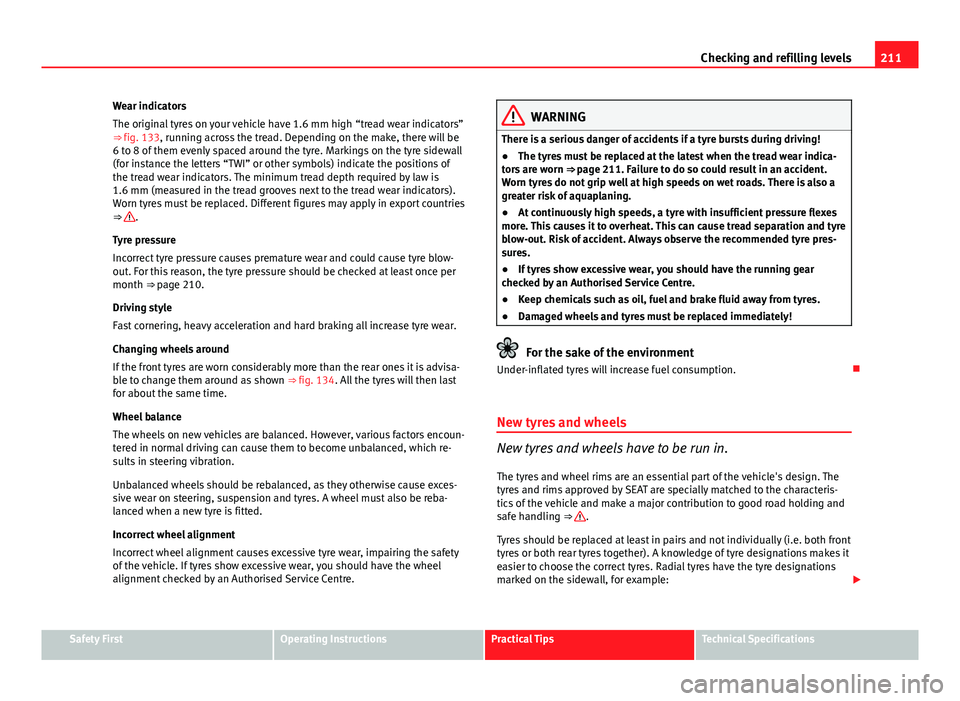
The original tyres on your vehicle have 1.6 mm high “tread wear indicators”
⇒ fig. 133, running across the tread. Depending on the make, there will be
6 to 8 of them evenly spaced around the tyre. Markings on the tyre sidewall
(for instance the letters “TWI” or other symbols) indicate the positions of
the tread wear indicators. The minimum tread depth required by law is
1.6 mm (measured in the tread grooves next to the tread wear indicators).
Worn tyres must be replaced. Different figures may apply in export countries
⇒
.
Tyre pressure
Incorrect tyre pressure causes premature wear and could cause tyre blow-
out. For this reason, the tyre pressure should be checked at least once per
month ⇒ page 210.
Driving style
Fast cornering, heavy acceleration and hard braking all increase tyre wear.
Changing wheels around
If the front tyres are worn considerably more than the rear ones it is advisa-
ble to change them around as shown ⇒ fig. 134. All the tyres will then last
for about the same time.
Wheel balance
The wheels on new vehicles are balanced. However, various factors encoun-
tered in normal driving can cause them to become unbalanced, which re-
sults in steering vibration.
Unbalanced wheels should be rebalanced, as they otherwise cause exces-
sive wear on steering, suspension and tyres. A wheel must also be reba-
lanced when a new tyre is fitted.
Incorrect wheel alignment
Incorrect wheel alignment causes excessive tyre wear, impairing the safety
of the vehicle. If tyres show excessive wear, you should have the wheel
alignment checked by an Authorised Service Centre.
WARNING
There is a serious danger of accidents if a tyre bursts during driving!
● The tyres must be replaced at the latest when the tread wear indica-
tors are worn ⇒ page 211. Failure to do so could result in an accident.
Worn tyres do not grip well at high speeds on wet roads. There is also a
greater risk of aquaplaning.
● At continuously high speeds, a tyre with insufficient pressure flexes
more. This causes it to overheat. This can cause tread separation and tyre
blow-out. Risk of accident. Always observe the recommended tyre pres-
sures.
● If tyres show excessive wear, you should have the running gear
checked by an Authorised Service Centre.
● Keep chemicals such as oil, fuel and brake fluid away from tyres.
● Damaged wheels and tyres must be replaced immediately!
For the sake of the environment
Under-inflated tyres will increase fuel consumption.
New tyres and wheels
New tyres and wheels have to be run in.
The tyres and wheel rims are an essential part of the vehicle's design. The
tyres and rims approved by SEAT are specially matched to the characteris-
tics of the vehicle and make a major contribution to good road holding and
safe handling ⇒
.
Tyres should be replaced at least in pairs and not individually (i.e. both front
tyres or both rear tyres together). A knowledge of tyre designations makes it
easier to choose the correct tyres. Radial tyres have the tyre designations
marked on the sidewall, for example:
Safety FirstOperating InstructionsPractical TipsTechnical Specifications
Page 215 of 278
213
Checking and refilling levels
Wheel bolts
Wheel bolts must be tightened to the correct torque.
The design of wheel bolts is matched to the rims. If different wheel rims are
fitted, the correct wheel bolts with the right length and correctly shaped
bolt heads must be used. This ensures that wheels are fitted securely and
that the brake system functions correctly.
In certain circumstances, you should not use wheel bolts from a different
vehicle, even if it is the same model ⇒ page 183.
WARNING
If the wheel bolts are not tightened correctly, the wheel could become
loose while driving. Risk of accident.
● The wheel bolts must be clean and turn easily. Never apply grease or
oil to them.
● Use only wheel bolts which belong to the wheel.
● If the prescribed torque of the wheel bolts is too low, they could loos-
en whilst the vehicle is in motion. Risk of accident! If the tightening tor-
que is too high, the wheel bolts and threads can be damaged.
CAUTION
The prescribed torque for wheel bolts for steel and alloy wheels is 120 Nm. Winter tyres
Winter tyres will improve the vehicles handling on snow and
ice.
In winter conditions winter tyres will considerably improve the vehicle's han-
dling. The design of summer tyres (width, rubber compound, tread pattern)
gives less grip on ice and snow.
Winter tyres must be inflated to a pressure 0.2 bar higher than the pres-
sures specified for summer tyres (see sticker on tank flap).
Winter tyres must be fitted on all four wheels.
Information on permitted winter tyre sizes can be found in the vehicle's reg-
istration documents. Use only radial winter tyres. All tyre sizes listed in the
vehicle documentation also apply to winter tyres.
Winter tyres lose their effectiveness when the tread is worn down to a depth
of 4 mm.
The speed rating code ⇒ page 211, New tyres and wheels determines the
following speed limits for winter tyres: ⇒
max. 160 km/h
max. 180 km/h
max. 190 km/h
max. 210 km/h
In some countries, vehicles which can exceed the speed rating of the fitted
tyre must have an appropriate sticker in the driver's field of view. These
stickers are available from your Authorised Service Centre. The legal require-
ments of each country must be followed.
Do not have winter tyres fitted for unnecessarily long periods. Vehicles with
summer tyres handle better when the roads are free of snow and ice.
Q
S
T
H
Safety FirstOperating InstructionsPractical TipsTechnical Specifications
Page 252 of 278
250Technical specifications
Technical specifications
Checking fluid levels
From time to time, the levels of the different fluids in the ve-
hicle must be checked. Never fill with incorrect fluids, other-
wise serious damage to the engine may be caused.
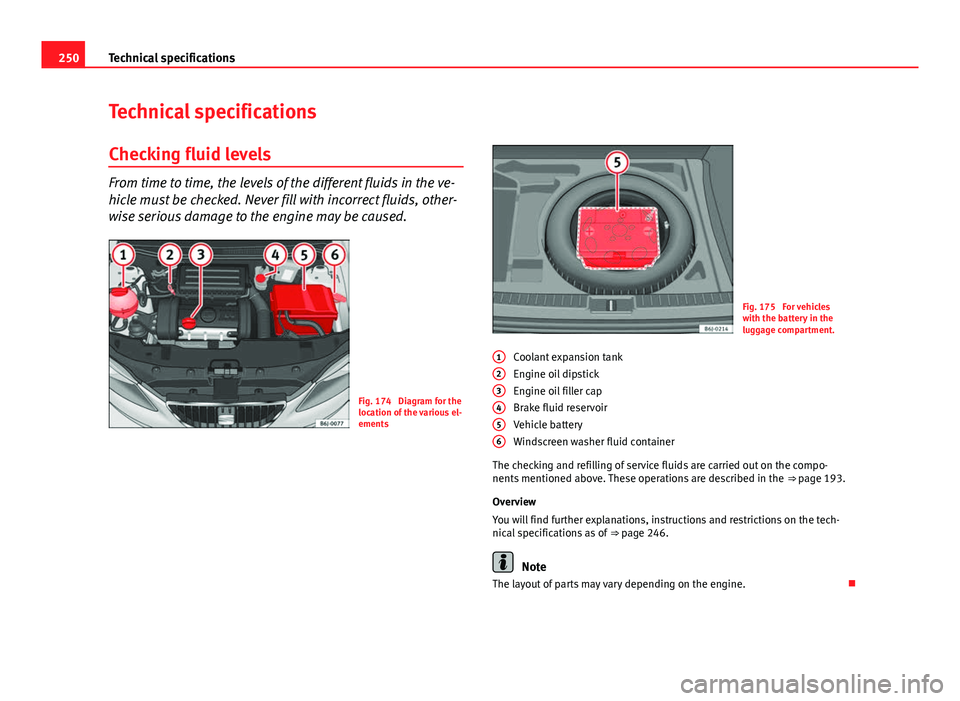
Fig. 174 Diagram for the
location of the various el-
ements
Fig. 175 For vehicles
with the battery in the
luggage compartment.
Coolant expansion tank
Engine oil dipstick
Engine oil filler cap
Brake fluid reservoir
Vehicle battery
Windscreen washer fluid container
The checking and refilling of service fluids are carried out on the compo-
nents mentioned above. These operations are described in the ⇒ page 193.
Overview
You will find further explanations, instructions and restrictions on the tech-
nical specifications as of ⇒ page 246.
Note
The layout of parts may vary depending on the engine.
1
23456
Page 270 of 278
Central lock buttonLocking . . . . . . . . . . . . . . . . . . . . . . . . . . . . . 80
Unlocking . . . . . . . . . . . . . . . . . . . . . . . . . . . 80
Central locking . . . . . . . . . . . . . . . . . . . . . . . . . . 77 Automatic speed dependent locking andunlocking system* . . . . . . . . . . . . . . . . . . 79
Locking system for involuntary unlocking . 79
Selective unlocking system* . . . . . . . . . . . . 78
Unlocking system* . . . . . . . . . . . . . . . . . . . . 79
Cetane number . . . . . . . . . . . . . . . . . . . . . . . . . 192
Changing bulbs interior light and reading light . . . . . . . . . 239
Changing bulbs on tail lights . . . . . . . . . 237, 238
Changing gear see Manual gearbox . . . . . . . . . . . . . . . . . . 144
Changing gear in tiptronic mode . . . . . . . . . . 149
Changing single headlight bulbs Turn signal bulb . . . . . . . . . . . . . . . . . . . . . 228
Changing the AFS headlight bulbs Xenon lights . . . . . . . . . . . . . . . . . . . . . . . . 234
Changing the bulbs AFS headlight bulbs . . . . . . . . . . . . . . . . . . 234
fog light bulbs . . . . . . . . . . . . . . . . . . . . . . 235
luggage compartment light . . . . . . . . . . . . 240
number plate light . . . . . . . . . . . . . . . . . . . 239
Side turn signal lights . . . . . . . . . . . . . . . . 238
Changing the main headlight bulb turn signal lights . . . . . . . . . . . . . . . . . . . . 232
Changing the main headlight bulbs turn signal lights . . . . . . . . . . . . . . . . . . . . 234
Changing the single headlight bulbs Dipped/main beam . . . . . . . . . . . . . . . . . . 229
Side light . . . . . . . . . . . . . . . . . . . . . . . . . . 229 Changing windscreen wiper blades . . . . . . . . 203
Chassis number . . . . . . . . . . . . . . . . . . . . . . . . 247
Checking . . . . . . . . . . . . . . . . . . . . . . . . . . . . . . 208
Checking battery electrolyte level . . . . . . . . . . 208
Checking engine oil level . . . . . . . . . . . . . . . . . 197
Child safety . . . . . . . . . . . . . . . . . . . . . . . . . . . . . 42
Child seat . . . . . . . . . . . . . . . . . . . . . . . . . . . . . . 44
Categorisation in groups . . . . . . . . . . . . . . . 44
Group 1 . . . . . . . . . . . . . . . . . . . . . . . . . . . . . 45
Group 2 . . . . . . . . . . . . . . . . . . . . . . . . . . . . . 45
Group 3 . . . . . . . . . . . . . . . . . . . . . . . . . . . . . 45
Groups 0 and 0+ . . . . . . . . . . . . . . . . . . . . . . 44
ISOFIX system . . . . . . . . . . . . . . . . . . . . . . . . 47
Safety notes . . . . . . . . . . . . . . . . . . . . . . . . . 42
Securing . . . . . . . . . . . . . . . . . . . . . . . . . . . . 47
Child seats on the front passenger seat . . . . . . . . . . . . . 30
Top Tether system . . . . . . . . . . . . . . . . . . . . 48
Cigarette lighter . . . . . . . . . . . . . . . . . . . . . . . . 121
Cleaning alloy wheel rims . . . . . . . . . . . . . . . . 179
Cleaning chrome . . . . . . . . . . . . . . . . . . . . . . . 178
Cleaning engine compartment . . . . . . . . . . . . 180
Cleaning steel wheel rims . . . . . . . . . . . . . . . . 179
Cleaning windows . . . . . . . . . . . . . . . . . . . . . . 177
Climatronic automatic mode . . . . . . . . . . . . . . . . . . . . . 132
controls . . . . . . . . . . . . . . . . . . . . . . . . . . . . 131
General notes . . . . . . . . . . . . . . . . . . . . . . . 133
manual mode . . . . . . . . . . . . . . . . . . . . . . . 132
Clock . . . . . . . . . . . . . . . . . . . . . . . . . . . . . . . . . . 56
Cloth seat covers cleaning . . . . . . . . . . . . . . . . 181
Cockpit . . . . . . . . . . . . . . . . . . . . . . . . . . . . . . . . 51 Coming Home function . . . . . . . . . . . . . . . . . . . 97
Compartment for on-board documentation . . 117
Control
Exterior mirrors . . . . . . . . . . . . . . . . . . . . . . 108
Control lamps . . . . . . . . . . . . . . . . . . . . . . . . . . . 61
Control lighting . . . . . . . . . . . . . . . . . . . . . . . . . . 51
Controls Electric windows . . . . . . . . . . . . . . . . . . . . . . 89
Convenience closing Sliding/tilting sunroof . . . . . . . . . . . . . . . . . 92
Windows . . . . . . . . . . . . . . . . . . . . . . . . . . . . 91
Convenience opening Windows . . . . . . . . . . . . . . . . . . . . . . . . . . . . 91
Coolant . . . . . . . . . . . . . . . . . . . . . . . . . . . . . . . 200
Coolant level . . . . . . . . . . . . . . . . . . . . . . . . . . . 200 Warning lamp . . . . . . . . . . . . . . . . . . . . . . . . 72
Coolant loss . . . . . . . . . . . . . . . . . . . . . . . . . . . 200
Coolant temperature Safety instructions . . . . . . . . . . . . . . . . . . . . 72
Correct adjustment of front head restraints . . . 13
Correct sitting position Front passenger . . . . . . . . . . . . . . . . . . . . . . 12
Incorrect sitting position . . . . . . . . . . . . . . . 14
Cruise control Control lamp . . . . . . . . . . . . . . . . . . . . . . . . . 69
Cruise control system . . . . . . . . . . . . . . . . . . . . 157
Cruise speed . . . . . . . . . . . . . . . . . . . . . . . . . . . 157 Control lamp . . . . . . . . . . . . . . . . . . . . . . . . . 69
268 Index
Page 271 of 278
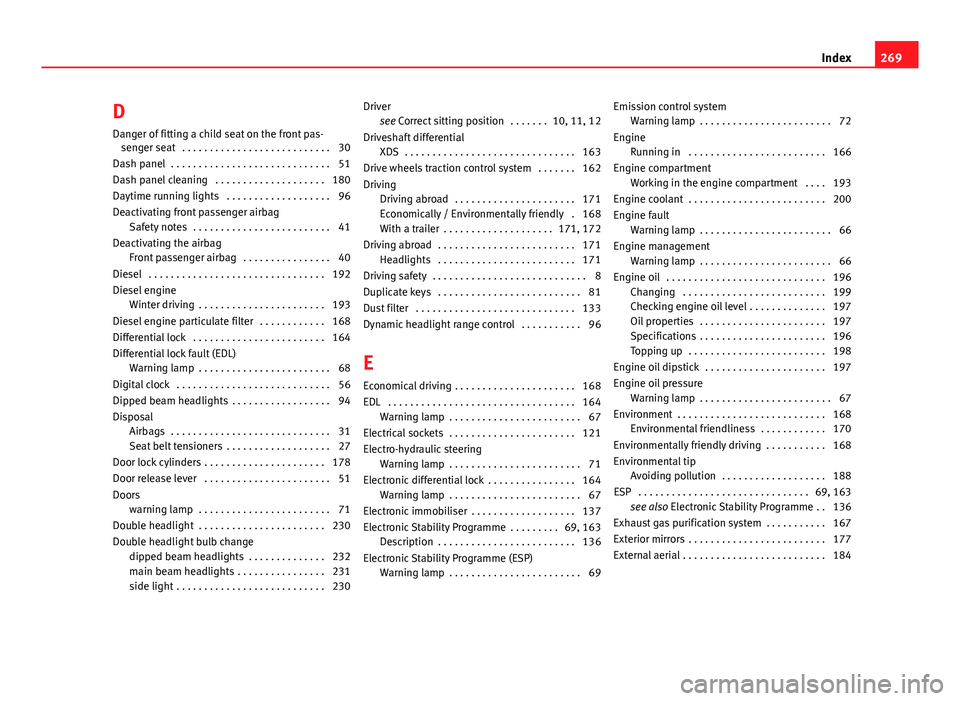
D
Danger of fitting a child seat on the front pas- senger seat . . . . . . . . . . . . . . . . . . . . . . . . . . . 30
Dash panel . . . . . . . . . . . . . . . . . . . . . . . . . . . . . 51
Dash panel cleaning . . . . . . . . . . . . . . . . . . . . 180
Daytime running lights . . . . . . . . . . . . . . . . . . . 96
Deactivating front passenger airbag Safety notes . . . . . . . . . . . . . . . . . . . . . . . . . 41
Deactivating the airbag Front passenger airbag . . . . . . . . . . . . . . . . 40
Diesel . . . . . . . . . . . . . . . . . . . . . . . . . . . . . . . . 192
Diesel engine Winter driving . . . . . . . . . . . . . . . . . . . . . . . 193
Diesel engine particulate filter . . . . . . . . . . . . 168
Differential lock . . . . . . . . . . . . . . . . . . . . . . . . 164
Differential lock fault (EDL) Warning lamp . . . . . . . . . . . . . . . . . . . . . . . . 68
Digital clock . . . . . . . . . . . . . . . . . . . . . . . . . . . . 56
Dipped beam headlights . . . . . . . . . . . . . . . . . . 94
Disposal Airbags . . . . . . . . . . . . . . . . . . . . . . . . . . . . . 31
Seat belt tensioners . . . . . . . . . . . . . . . . . . . 27
Door lock cylinders . . . . . . . . . . . . . . . . . . . . . . 178
Door release lever . . . . . . . . . . . . . . . . . . . . . . . 51
Doors warning lamp . . . . . . . . . . . . . . . . . . . . . . . . 71
Double headlight . . . . . . . . . . . . . . . . . . . . . . . 230
Double headlight bulb change dipped beam headlights . . . . . . . . . . . . . . 232
main beam headlights . . . . . . . . . . . . . . . . 231
side light . . . . . . . . . . . . . . . . . . . . . . . . . . . 230 Driver
see Correct sitting position . . . . . . . 10, 11, 12
Driveshaft differential XDS . . . . . . . . . . . . . . . . . . . . . . . . . . . . . . . 163
Drive wheels traction control system . . . . . . . 162
Driving Driving abroad . . . . . . . . . . . . . . . . . . . . . . 171
Economically / Environmentally friendly . 168
With a trailer . . . . . . . . . . . . . . . . . . . . 171, 172
Driving abroad . . . . . . . . . . . . . . . . . . . . . . . . . 171 Headlights . . . . . . . . . . . . . . . . . . . . . . . . . 171
Driving safety . . . . . . . . . . . . . . . . . . . . . . . . . . . . 8
Duplicate keys . . . . . . . . . . . . . . . . . . . . . . . . . . 81
Dust filter . . . . . . . . . . . . . . . . . . . . . . . . . . . . . 133
Dynamic headlight range control . . . . . . . . . . . 96
E
Economical driving . . . . . . . . . . . . . . . . . . . . . . 168
EDL . . . . . . . . . . . . . . . . . . . . . . . . . . . . . . . . . . 164 Warning lamp . . . . . . . . . . . . . . . . . . . . . . . . 67
Electrical sockets . . . . . . . . . . . . . . . . . . . . . . . 121
Electro-hydraulic steering Warning lamp . . . . . . . . . . . . . . . . . . . . . . . . 71
Electronic differential lock . . . . . . . . . . . . . . . . 164 Warning lamp . . . . . . . . . . . . . . . . . . . . . . . . 67
Electronic immobiliser . . . . . . . . . . . . . . . . . . . 137
Electronic Stability Programme . . . . . . . . . 69, 163 Description . . . . . . . . . . . . . . . . . . . . . . . . . 136
Electronic Stability Programme (ESP) Warning lamp . . . . . . . . . . . . . . . . . . . . . . . . 69 Emission control system
Warning lamp . . . . . . . . . . . . . . . . . . . . . . . . 72
Engine Running in . . . . . . . . . . . . . . . . . . . . . . . . . 166
Engine compartment Working in the engine compartment . . . . 193
Engine coolant . . . . . . . . . . . . . . . . . . . . . . . . . 200
Engine fault Warning lamp . . . . . . . . . . . . . . . . . . . . . . . . 66
Engine management Warning lamp . . . . . . . . . . . . . . . . . . . . . . . . 66
Engine oil . . . . . . . . . . . . . . . . . . . . . . . . . . . . . 196 Changing . . . . . . . . . . . . . . . . . . . . . . . . . . 199
Checking engine oil level . . . . . . . . . . . . . . 197
Oil properties . . . . . . . . . . . . . . . . . . . . . . . 197
Specifications . . . . . . . . . . . . . . . . . . . . . . . 196
Topping up . . . . . . . . . . . . . . . . . . . . . . . . . 198
Engine oil dipstick . . . . . . . . . . . . . . . . . . . . . . 197
Engine oil pressure Warning lamp . . . . . . . . . . . . . . . . . . . . . . . . 67
Environment . . . . . . . . . . . . . . . . . . . . . . . . . . . 168 Environmental friendliness . . . . . . . . . . . . 170
Environmentally friendly driving . . . . . . . . . . . 168
Environmental tip Avoiding pollution . . . . . . . . . . . . . . . . . . . 188
ESP . . . . . . . . . . . . . . . . . . . . . . . . . . . . . . . 69, 163 see also Electronic Stability Programme . . 136
Exhaust gas purification system . . . . . . . . . . . 167
Exterior mirrors . . . . . . . . . . . . . . . . . . . . . . . . . 177
External aerial . . . . . . . . . . . . . . . . . . . . . . . . . . 184
269
Index