coolant level Seat Ibiza SC 2012 Owner's manual
[x] Cancel search | Manufacturer: SEAT, Model Year: 2012, Model line: Ibiza SC, Model: Seat Ibiza SC 2012Pages: 280, PDF Size: 3.67 MB
Page 6 of 280
Accessories, replacement of parts and
modifications . . . . . . . . . . . . . . . . . . . . . . . . . . . . . 183
Accessories and spare parts . . . . . . . . . . . . . . . . 183
Technical modifications . . . . . . . . . . . . . . . . . . . . 183
Roof aerial* . . . . . . . . . . . . . . . . . . . . . . . . . . . . . . 184
Mobile telephones and two-way radios . . . . . . . . 184
Fitting a towing bracket* . . . . . . . . . . . . . . . . . . . 185
Checking and refilling levels . . . . . . . . . . . . . . . 187
Refuelling . . . . . . . . . . . . . . . . . . . . . . . . . . . . . . . 187
LPG system* . . . . . . . . . . . . . . . . . . . . . . . . . . . . . 189
Petrol . . . . . . . . . . . . . . . . . . . . . . . . . . . . . . . . . . . 192
Diesel . . . . . . . . . . . . . . . . . . . . . . . . . . . . . . . . . . . 192
Working in the engine compartment . . . . . . . . . . 193
Engine oil . . . . . . . . . . . . . . . . . . . . . . . . . . . . . . . . 196
Coolant . . . . . . . . . . . . . . . . . . . . . . . . . . . . . . . . . 200
Washer fluid and windscreen wiper blades . . . . 202
Brake fluid . . . . . . . . . . . . . . . . . . . . . . . . . . . . . . . 206
Vehicle battery . . . . . . . . . . . . . . . . . . . . . . . . . . . 207
Wheels . . . . . . . . . . . . . . . . . . . . . . . . . . . . . . . . . . 209
If and when . . . . . . . . . . . . . . . . . . . . . . . . . . . . . . . 216
Vehicle tools, spare wheel . . . . . . . . . . . . . . . . . . 216
Wheel change . . . . . . . . . . . . . . . . . . . . . . . . . . . . 217
Tyre repair kit (Tyre-Mobility-System)* . . . . . . . . . 222
Fuses . . . . . . . . . . . . . . . . . . . . . . . . . . . . . . . . . . . 224
Bulb change . . . . . . . . . . . . . . . . . . . . . . . . . . . . . 227
Single headlight bulb change . . . . . . . . . . . . . . . 229
Double headlight bulb change . . . . . . . . . . . . . . . 231
Changing the bulbs of AFS headlights . . . . . . . . 235
Changing the fog light bulbs . . . . . . . . . . . . . . . . 236
Changing the rear, side and interior light bulbs . 237
Jump-starting . . . . . . . . . . . . . . . . . . . . . . . . . . . . . 241
Towing and tow-starting . . . . . . . . . . . . . . . . . . . . 244 Technical Specifications
. . . . . . . . . . . 247
Description of specifications . . . . . . . . . . . . . . . 247
Important information . . . . . . . . . . . . . . . . . . . . . 247
Information on fuel consumption . . . . . . . . . . . . 249
Towing a trailer . . . . . . . . . . . . . . . . . . . . . . . . . . . 249
Wheels . . . . . . . . . . . . . . . . . . . . . . . . . . . . . . . . . . 250
Technical specifications . . . . . . . . . . . . . . . . . . . . 251
Checking fluid levels . . . . . . . . . . . . . . . . . . . . . . . 251
Petrol engine 1.2 44 kW (60 PS) . . . . . . . . . . . . . 252
Petrol engine 1.2 51 kW (70 PS) . . . . . . . . . . . . . 253
Petrol engine 1.2 TSI 63 kW (85 PS) . . . . . . . . . . 254
Petrol engine/LPG 1.6 60 kW (81 PS) . . . . . . . . . 255
Petrol engine 1.4 63 kW (85 PS) . . . . . . . . . . . . . 256
Petrol engine 1.2 TSI 77 kW (105 PS) . . . . . . . . . 257
Petrol engine 1.2 TSI 77 kW (105 PS) Start-Stop 258
Petrol engine 1.6 77 kW (105 PS) . . . . . . . . . . . . 259
Petrol engine 1.4 110 kW (150 PS) . . . . . . . . . . . 260
Petrol engine 1.4 132 kW (180 PS) - Cupra . . . . . 261
Diesel engine 1.2 TDI CR 55 kW (75 PS) DPF
Start-Stop Ecomotive . . . . . . . . . . . . . . . . . . . . . . 262
Diesel engine 1.2 TDI CR 55 kW (75 PS) DPF . . . . 263
Diesel engine 1.6 TDI CR 66 kW (90 PS) DPF . . . . 264
Diesel engine 1.6 TDI CR 77 kW (105 PS) with/
without DPF . . . . . . . . . . . . . . . . . . . . . . . . . . . . . . 265
Diesel engine 2.0 TDI CR 105 kW (143 PS) DPF . 266
Dimensions and capacities . . . . . . . . . . . . . . . . . 267
Index . . . . . . . . . . . . . . . . . . . . . . . . . . . . . . . . . . . 269
4Table of Contents
Page 66 of 280
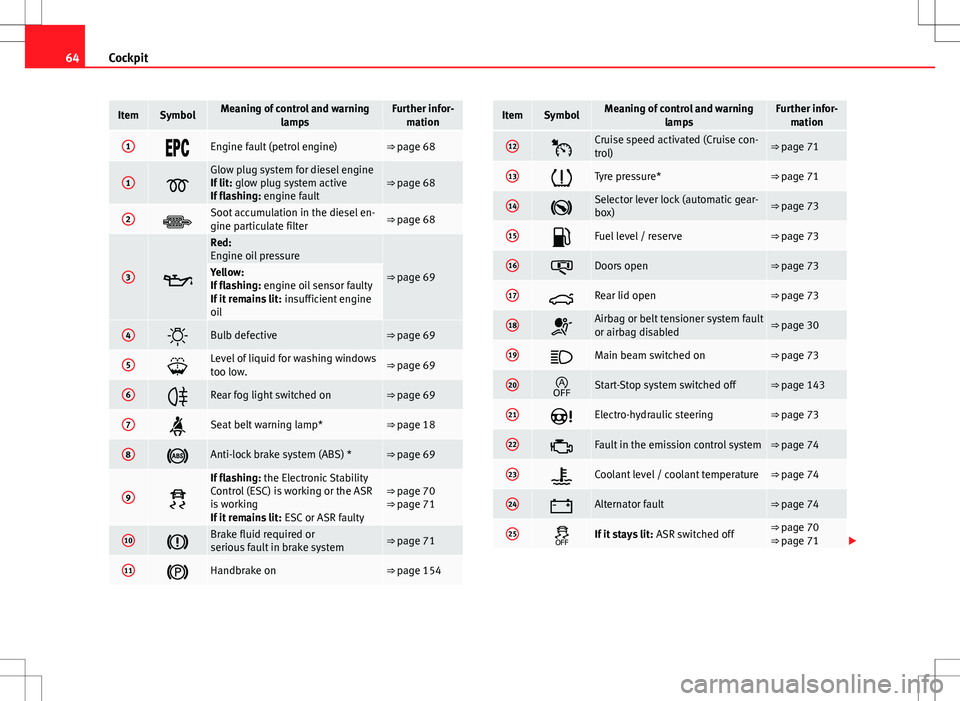
64Cockpit
ItemSymbolMeaning of control and warning
lampsFurther infor-mation
1Engine fault (petrol engine)⇒ page 68
1
Glow plug system for diesel engine
If lit: glow plug system active
If flashing: engine fault⇒ page 68
2Soot accumulation in the diesel en-
gine particulate filter⇒ page 68
3
Red:
Engine oil pressure
⇒ page 69Yellow:
If flashing: engine oil sensor faulty
If it remains lit: insufficient engine
oil
4Bulb defective⇒ page 69
5Level of liquid for washing windows
too low.⇒ page 69
6Rear fog light switched on⇒ page 69
7Seat belt warning lamp*⇒ page 18
8Anti-lock brake system (ABS) *⇒ page 69
9
If flashing: the Electronic Stability
Control (ESC) is working or the ASR
is working
If it remains lit: ESC or ASR faulty⇒ page 70
⇒ page 71
10Brake fluid required or
serious fault in brake system⇒ page 71
11Handbrake on⇒ page 154
ItemSymbolMeaning of control and warning
lampsFurther infor-mation
12Cruise speed activated (Cruise con-
trol)⇒ page 71
13Tyre pressure*⇒ page 71
14Selector lever lock (automatic gear-
box)⇒ page 73
15Fuel level / reserve⇒ page 73
16Doors open⇒ page 73
17Rear lid open⇒ page 73
18Airbag or belt tensioner system fault
or airbag disabled⇒ page 30
19Main beam switched on⇒ page 73
20Start-Stop system switched off⇒ page 143
21Electro-hydraulic steering⇒ page 73
22Fault in the emission control system⇒ page 74
23Coolant level / coolant temperature⇒ page 74
24Alternator fault⇒ page 74
25If it stays lit: ASR switched off⇒ page 70
⇒ page 71
Page 69 of 280
67
Cockpit
If several priority 1 faults are detected at the same time, the symbols will be
displayed one after the other for about 2 seconds at a time and will contin-
ue until the fault is corrected.
No menus will be shown in the display for the duration of a priority 1 warn-
ing message.
Examples of priority 1 warning messages (red)
● Brake system symbol with the warning message STOP BRAKE FLUID
INSTRUCTION MANUAL or STOP BRAKE FAULT INSTRUCTION MANUAL .
● Coolant symbol with the warning message STOP SEE COOLANT IN-
STRUCTION MANUAL.
● Engine oil pressure symbol with the warning message STOP ENGINE
OIL PRESSURE LOW! INSTRUCTION MANUAL .
Warning messages, Priority 2 (yellow)
If one of these faults occurs, the warning lamp lights up, and is accompa-
nied by one audible warning. Check the corresponding function as soon as
possible although the vehicle may be used without risk.
If several priority 2 warning messages are detected at the same time, the
symbols are displayed one after the other for about 2 seconds at a time. Af-
ter a set time, the information text will disappear and the symbol will be
shown as a reminder at the side of the display.
Priority 2 warning messages will not be shown until all Priority 1 warning
messages have been dealt with!
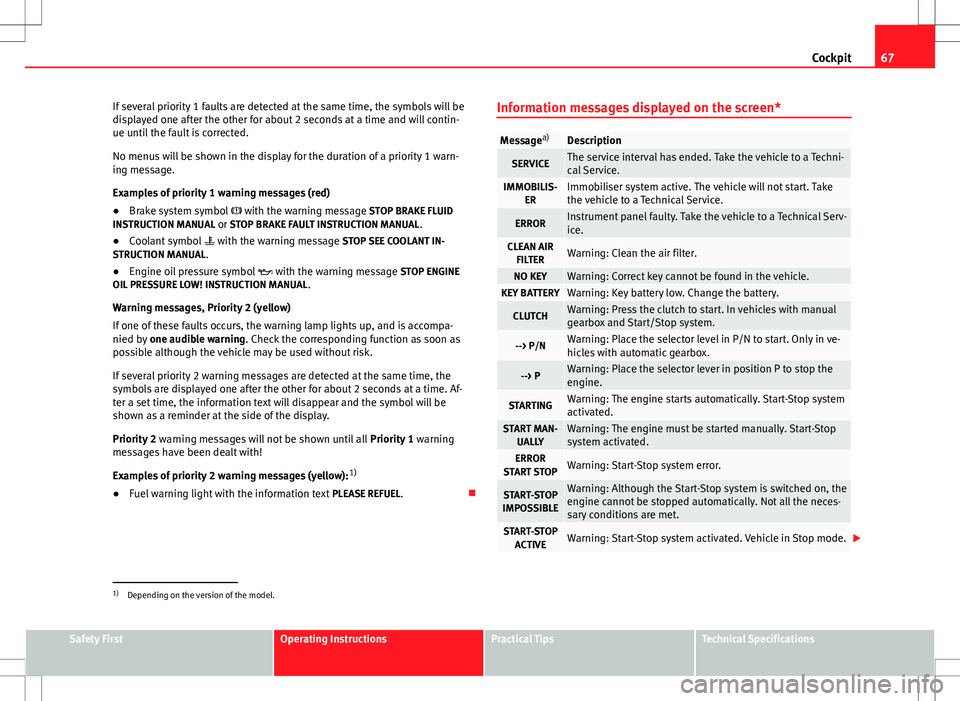
Examples of priority 2 warning messages (yellow): 1)
● Fuel warning light with the information text PLEASE REFUEL. Information messages displayed on the screen*
Message
a)Description
SERVICEThe service interval has ended. Take the vehicle to a Techni-
cal Service.
IMMOBILIS-
ERImmobiliser system active. The vehicle will not start. Take
the vehicle to a Technical Service.
ERRORInstrument panel faulty. Take the vehicle to a Technical Serv-
ice.
CLEAN AIRFILTERWarning: Clean the air filter.
NO KEYWarning: Correct key cannot be found in the vehicle.KEY BATTERYWarning: Key battery low. Change the battery.
CLUTCHWarning: Press the clutch to start. In vehicles with manual
gearbox and Start/Stop system.
--> P/NWarning: Place the selector level in P/N to start. Only in ve-
hicles with automatic gearbox.
--> PWarning: Place the selector lever in position P to stop the
engine.
STARTINGWarning: The engine starts automatically. Start-Stop system
activated.
START MAN- UALLYWarning: The engine must be started manually. Start-Stop
system activated.
ERROR
START STOPWarning: Start-Stop system error.
START-STOP
IMPOSSIBLEWarning: Although the Start-Stop system is switched on, the
engine cannot be stopped automatically. Not all the neces-
sary conditions are met.
START-STOP ACTIVEWarning: Start-Stop system activated. Vehicle in Stop mode.
1)
Depending on the version of the model.
Safety FirstOperating InstructionsPractical TipsTechnical Specifications
Page 76 of 280
74Cockpit
Emission control system*
This warning lamp monitors the exhaust system.
Control lamp flashes:
When there is misfiring that can damage the catalytic converter. Reduce
speed and drive carefully to the nearest specialised workshop to have the
engine checked.
Control lamp is lit:
If a fault has developed during driving which has reduced the quality of the
exhaust gas (e.g. lambda probe fault). Reduce speed and drive carefully to
the nearest specialised workshop to have the engine checked.
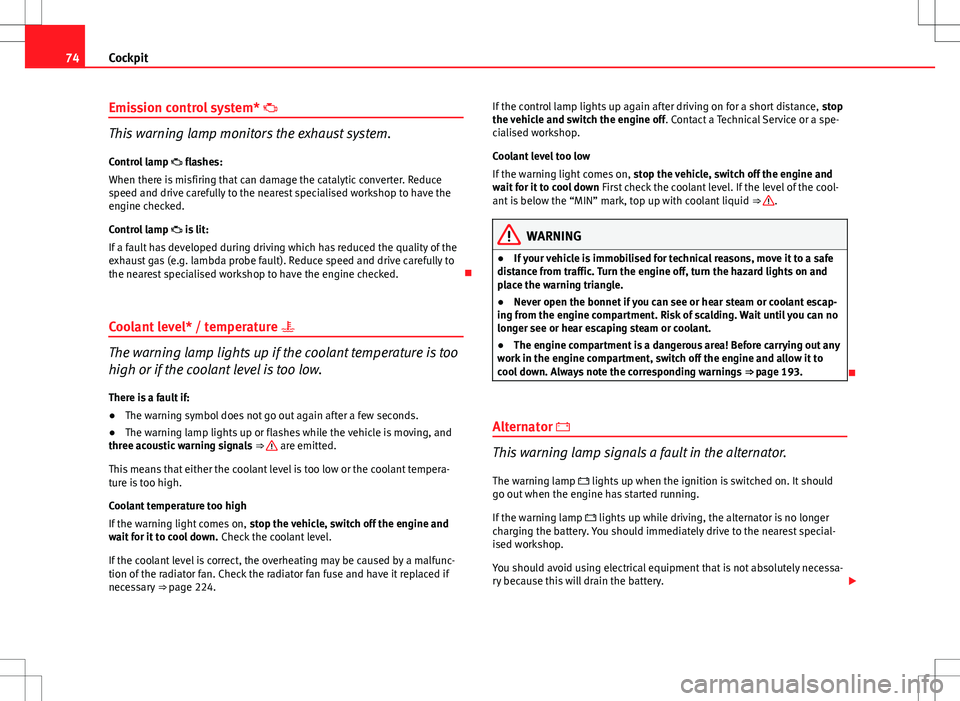
Coolant level* / temperature
The warning lamp lights up if the coolant temperature is too
high or if the coolant level is too low.
There is a fault if:
● The warning symbol does not go out again after a few seconds.
● The warning lamp lights up or flashes while the vehicle is moving, and
three acoustic warning signals ⇒
are emitted.
This means that either the coolant level is too low or the coolant tempera-
ture is too high.
Coolant temperature too high
If the warning light comes on, stop the vehicle, switch off the engine and
wait for it to cool down. Check the coolant level.
If the coolant level is correct, the overheating may be caused by a malfunc-
tion of the radiator fan. Check the radiator fan fuse and have it replaced if
necessary ⇒ page 224. If the control lamp lights up again after driving on for a short distance,
stop
the vehicle and switch the engine off . Contact a Technical Service or a spe-
cialised workshop.
Coolant level too low
If the warning light comes on, stop the vehicle, switch off the engine and
wait for it to cool down First check the coolant level. If the level of the cool-
ant is below the “MIN” mark, top up with coolant liquid ⇒
.
WARNING
● If your vehicle is immobilised for technical reasons, move it to a safe
distance from traffic. Turn the engine off, turn the hazard lights on and
place the warning triangle.
● Never open the bonnet if you can see or hear steam or coolant escap-
ing from the engine compartment. Risk of scalding. Wait until you can no
longer see or hear escaping steam or coolant.
● The engine compartment is a dangerous area! Before carrying out any
work in the engine compartment, switch off the engine and allow it to
cool down. Always note the corresponding warnings ⇒ page 193.
Alternator
This warning lamp signals a fault in the alternator.
The warning lamp lights up when the ignition is switched on. It should
go out when the engine has started running.
If the warning lamp lights up while driving, the alternator is no longer
charging the battery. You should immediately drive to the nearest special-
ised workshop.
You should avoid using electrical equipment that is not absolutely necessa-
ry because this will drain the battery.
Page 195 of 280
193
Checking and refilling levels
Winter driving
Diesel can thicken in winter.
Winter-grade diesel
When using “summer-grade diesel fuel”, difficulties may be experienced at
temperatures below 0°C because the fuel thickens due to wax separation.
Therefore, “winter-grade diesel fuel” is available in some countries during
the cold months. It can be used at temperatures as low as -22°C.
In countries with different climatic conditions the diesel fuel generally sold
has different temperature characteristics. Check with the Technical Services
or filling stations in the country concerned regarding the type of diesel fuels
available.
Filter pre-heater
Your vehicle is fitted with a fuel filter glow plug system, making it well
equipped for operation in winter. This ensures that the fuel system remains
operational to approx. -24°C, provided you use winter-grade diesel which is
safe to -15°C.
However, if the fuel has waxed to such an extent that the engine will not
start at temperatures of under -24°C, simply place the vehicle in a warm
place for a while.
CAUTION
Do not mix fuel additives (thinners or similar products) with diesel fuel. Working in the engine compartment
Safety instructions on working in the engine compartment
Any work carried out in the engine compartment or on the
engine must be carried out cautiously.
Before starting any work on the engine or in the engine compart-
ment:
1. Switch off the engine and remove the key from the ignition.
2. Apply the handbrake.
3. Move the gear lever to neutral or the selector lever to position P.
4. Wait for the engine to cool down.
5. Keep children away from the vehicle.
6. Raise the bonnet ⇒ page 195.
You should not do any work in the engine compartment unless you know ex-
actly how to carry out the jobs and have the correct tools! Have the work car-
ried out by a specialised workshop if you are uncertain.
All service fluids and consumables, e.g. coolant, engine oil, spark plugs
and batteries, are under constant development. SEAT provides a constant
flow of information to the Technical Services concerning modifications. For
this reason, we recommend you to have service fluids and consumables re-
placed by a Technical Service. Please observe the relevant instructions
⇒ page 183. The engine compartment of the vehicle is a hazardous area
⇒
.
Safety FirstOperating InstructionsPractical TipsTechnical Specifications
Page 196 of 280
194Checking and refilling levels
WARNING
All work on the engine or in the engine compartment, e.g. checking and
refilling fluids, involves the danger of injury and scalding as well as the
risk of accident or fire.
● Never open the bonnet if you see steam, smoke or coolant escaping
from the engine compartment. Otherwise, there is a risk of sustaining
burns. Wait until no more steam or coolant is emitted, then allow the en-
gine to cool before carefully opening the bonnet.
● Switch off the engine and remove the key from the ignition.
● Apply the handbrake and move the gear lever to neutral or selector
lever to position P.
● Keep children away from the vehicle.
● Never touch hot engine parts. There is a risk of burns.
● Never spill liquids on a hot engine or on a hot exhaust gas system.
This is a fire hazard.
● Avoid causing short-circuits in the electrical system, particularly at
the points where the jump leads are attached ⇒ page 242. The battery
could explode.
● Never touch the radiator fan. It is temperature controlled and could
start automatically, even when the engine has been switched off and the
key removed from the ignition!
● Do not unscrew the cap on the coolant expansion tank when the en-
gine is hot. If the coolant is hot, the cooling system will be pressurised!
● Protect face, hands and arms by covering the cap with a large, thick
cloth to protect against escaping coolant and steam.
● Always make sure you have not left any objects, such as cleaning
cloths and tools, in the engine compartment.
● If you have to work underneath the vehicle, you must use suitable
stands additionally to support the vehicle, there is a risk of accident!. A
hydraulic jack is insufficient for securing the vehicle and there is a risk of
injury.WARNING (Continued)
● If any work has to be performed when the engine is started or with
the engine running, there is an additional, potentially fatal, safety risk
from the rotating parts, such as the drive belts, alternator, radiator fan,
etc., and from the high-voltage ignition system. You should also observe
the following points:
–Never touch the electrical wiring of the ignition system.
– Ensure that jewellery, loose clothing and long hair do not get trap-
ped in rotating engine parts. Danger of death. Before starting any
work remove jewellery, tie back and cover hair, and wear tight-fitting
clothes.
– Never accelerate with a gear engaged without taking the necessary
precautions. The vehicle could move, even if the handbrake is ap-
plied. Danger of death.
● If work has to be carried out on the fuel system or on electrical com-
ponents, you must observe the following safety notes in addition to the
above warnings:
–Always disconnect the battery from the on-board network. The ve-
hicle must be unlocked when this is done, otherwise the alarm will be
triggered.
– Do not smoke.
– Never work near naked flames.
– Always have a fire extinguisher on hand.
CAUTION
When topping up service fluids, make sure not to mistake them. Using the
wrong fluids could cause serious malfunctions and engine damage!
Page 197 of 280
195
Checking and refilling levels
For the sake of the environment
Service fluids leaks are harmful to the environment. For this reason you
should make regular checks on the ground underneath your vehicle. If you
find spots of oil or other fluids, have your vehicle inspected in a specialised
workshop.
Opening the bonnet
The bonnet is released from inside the vehicle.
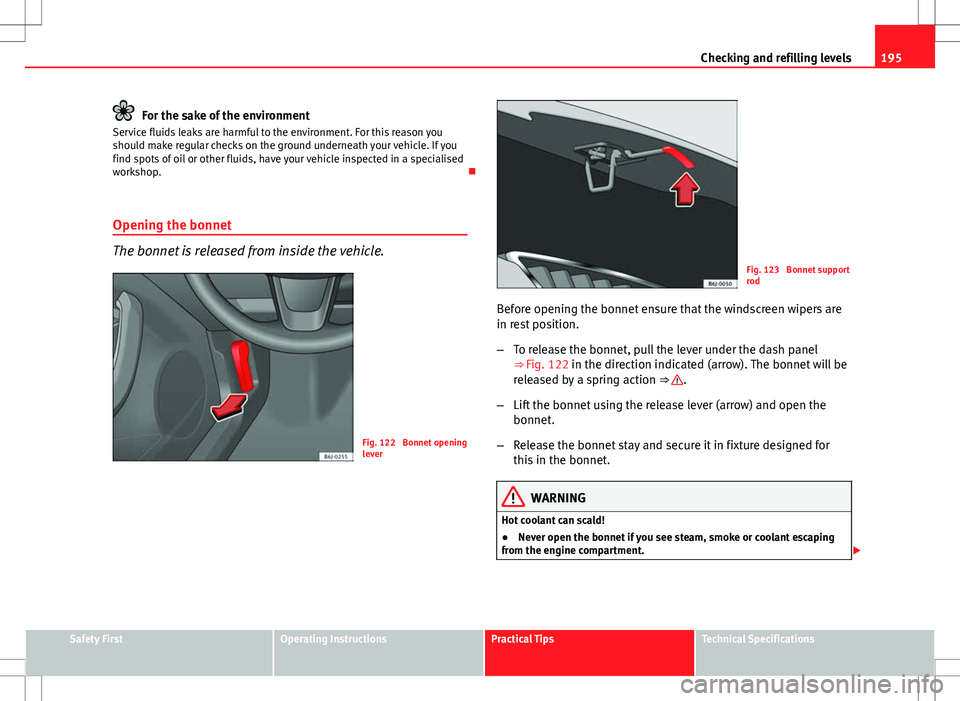
Fig. 122 Bonnet opening
lever
Fig. 123 Bonnet support
rod
Before opening the bonnet ensure that the windscreen wipers are
in rest position.
– To release the bonnet, pull the lever under the dash panel
⇒ Fig. 122 in the direction indicated (arrow). The bonnet will be
released by a spring action ⇒
.
– Lift the bonnet using the release lever (arrow) and open the
bonnet.
– Release the bonnet stay and secure it in fixture designed for
this in the bonnet.
WARNING
Hot coolant can scald!
● Never open the bonnet if you see steam, smoke or coolant escaping
from the engine compartment.
Safety FirstOperating InstructionsPractical TipsTechnical Specifications
Page 198 of 280
196Checking and refilling levels
WARNING (Continued)
● Wait until no more steam, smoke or coolant is emitted from the bon-
net, then carefully open the bonnet.
● When working in the engine compartment, always observe the safety
warnings ⇒ page 193.
Closing the bonnet
– Slightly raise the bonnet
– Release the bonnet stay and replace it in its support.
– At a height of about 30 cm let it fall so it is locked.
If the bonnet does not close, do not press downwards. Open it once more
and let it fall as before.
WARNING
If the bonnet is not closed properly, it could open while you are driving
and completely obscure your view of the road. Risk of accident.
● After closing the bonnet, always check that it is properly secured. The
bonnet must be flush with the surrounding body panels.
● If you notice that the bonnet latch is not secured when the vehicle is
moving, stop the vehicle immediately and close the bonnet properly.
Risk of accident.
Engine oil
General notes
The engine comes with a special, multi-grade oil that can be used all year
round.
Because the use of high-quality oil is essential for the correct operation of
the engine and its long useful life, when topping up or changing oil, use on-
ly those oils that comply with VW standards.
The specifications (VW standards) set out in the following page should ap-
pear on the container of the service oil; when the container displays the
specific standards for petrol and diesel engines together, it means that the
oil can be used for both types of engines.
We recommend that the oil change, indicated in the Maintenance Pro-
gramme, be performed by a Technical Service or a specialised workshop.
The correct oil specifications for your engine are listed in ⇒ page 197, Oil
properties.
Service intervals
Service intervals can be flexible (LongLife service) or fixed (dependent on
time/distance travelled).
If the PR code that appears on the back of the “Maintenance Programme”
booklet is QG1, this means that your vehicle has the LongLife service pro-
grammed. If it has the codes QG0 or QG2 the interval service is dependent
on time/distance travelled.
Flexible service intervals (LongLife service intervals*)
Special oils and processes have been developed which, depending on the
characteristics and individual driving profiles, enable the extension of the
oil change service (LongLife service intervals).
Page 202 of 280
200Checking and refilling levels
WARNING
Only change the engine oil yourself if you have the specialist knowledge
required!
● Before opening the bonnet, read and observe the warnings
⇒ page 193, Safety instructions on working in the engine compartment.
● Wait for the engine to cool down. Hot oil may cause burn injuries.
● Wear eye protection to avoid injuries, such as acid burns, caused by
splashes of oil.
● When removing the oil drain plug with your fingers, keep your arm
horizontal to help prevent oil from running down your arm.
● Wash your skin thoroughly if it comes into contact with engine oil.
● Engine oil is poisonous! Used oil must be stored in a safe place out of
the reach of children.
CAUTION
No additives should be used with engine oil. This could result in engine
damage. Any damage caused by the use of such additives would not be
covered by the factory warranty.
For the sake of the environment
● Because of the disposal problems, the necessary special tools and spe-
cialist knowledge required, we recommend that you have the engine oil and
filter changed by a Technical Service.
● Never pour oil down drains or into the ground.
● Use a suitable container when draining the used oil. It must be large
enough to hold all the engine oil. Coolant
Engine coolant specifications
The engine cooling system is supplied from the factory with a specially trea-
ted mixture of water and, at least, 40 % of the additive G 13 (TL-VW 774 J).
The engine coolant additive is recognisable by its purple colour. This mix-
ture of water and additive gives the necessary frost protection down to
-25°C (-13°F) and protects the light alloy parts of the cooling system against
corrosion. It also prevents scaling and considerably raises the boiling point
of the coolant.
To protect the engine cooling system, the percentage of additive must al-
ways be at least 40 %, even in warm climates where anti-freeze protection is
not required.
If greater frost protection is required in very cold climates, the proportion of
additive can be increased. However, the percentage of additive should not
exceed 60 %, as this would reduce the frost protection and, in turn, de-
crease the cooling capacity.
When the coolant is topped up, use a mixture of distilled water and, at
least, 40 % of the G 13 or G 12 plus-plus (TL-VW 774 G) additive (both are
purple) to obtain an optimum anticorrosion protection ⇒
. The mixture of
G 13 with G 12 plus (TL-VW 774 F), G 12 (red) or G 11 (green-blue) engine
coolants will significantly reduce the anticorrosion protection and should,
therefore be avoided ⇒
.
Page 203 of 280
201
Checking and refilling levels
WARNING
If there is not enough anti-freeze in the coolant system, the engine may
fail leading to serious damage.
● Please make sure that the percentage of additive is correct with re-
spect to the lowest expected ambient temperature in the zone in which
the vehicle is to be used.
● When the outside temperature is very low, the coolant could freeze
and the vehicle would be immobilised. In this case, the heating would
not work either and inadequately dressed passengers could die of cold.
CAUTION
The original additives should never be mixed with coolants which are not
approved by SEAT. Otherwise, you run the risk of causing severe damage to
the engine and the engine cooling system.
● If the fluid in the expansion tank is not purple but is, for example,
brown, this indicates that the G 13 additive has been mixed with an inade-
quate coolant. The coolant must be changed as soon as possible if this is
the case! This could result in serious faults and engine damage.
For the sake of the environment
Coolants and additives can contaminate the environment. If any fluids are
spilled, they should be collected and correctly disposed of, with respect to
the environment. Checking the coolant level and topping up
The correct coolant level is important for fault-free function-
ing of the engine cooling system.
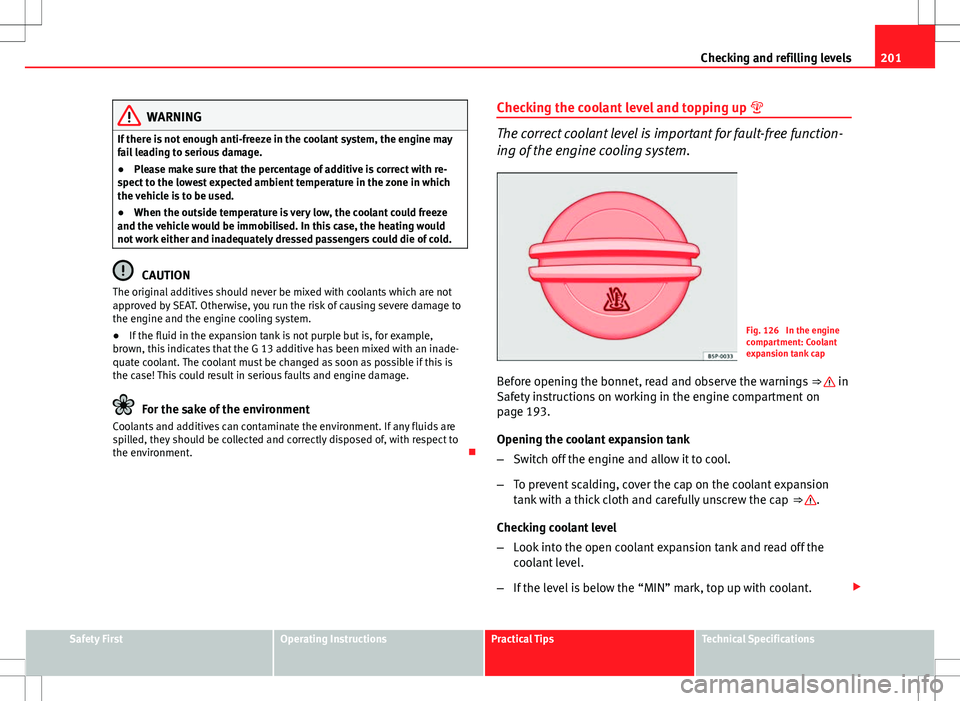
Fig. 126 In the engine
compartment: Coolant
expansion tank cap
Before opening the bonnet, read and observe the warnings ⇒
in
Safety instructions on working in the engine compartment on
page 193.
Opening the coolant expansion tank
– Switch off the engine and allow it to cool.
– To prevent scalding, cover the cap on the coolant expansion
tank with a thick cloth and carefully unscrew the cap ⇒
.
Checking coolant level
– Look into the open coolant expansion tank and read off the
coolant level.
– If the level is below the “MIN” mark, top up with coolant.
Safety FirstOperating InstructionsPractical TipsTechnical Specifications