technical data Seat Ibiza SC 2015 Workshop Manual
[x] Cancel search | Manufacturer: SEAT, Model Year: 2015, Model line: Ibiza SC, Model: Seat Ibiza SC 2015Pages: 248, PDF Size: 4.77 MB
Page 153 of 248
Air conditioning
Climatronic description
C oo
lin
g only works if the following conditions
are met:
● The engine is running
● the outside temperature is above +2°C
(+36°F);
● A/C
18
› ››
Fig. 167
sw
itched on.
Starting the Climatronic
The corresponding function will be switched
on when a button is pressed, turning on the
air conditioniNG if it was switched off, with
the exception of button 17
› ›
› Fig. 167
(recir-
culation)
Switching off the Climatronic
● Turn control 10 to the left until the seg-
ments of
c
olumn 9
› ›
› Fig. 167 switch off.
● After 1 second has elapsed, turn the control
again t
o switch off the display.
In order to ensure engines subject to heavy
loads are cooled, the air conditioning com-
pressor is switched off in the event of high
coolant temperatures.
Recommended setting for all seasons of the
year
● Set the required temperature. We recom-
mend +22 °C (72°F).
● Pre
ss the AUTO button
13
› ›
› Fig. 167
.●
Adjust
vents 3 and 4 ››› page 146 so that
the air flow is directed slightly upwards.
Change between degrees Centigrade and de-
grees Fahrenheit
Keep the AUTO and
A/C
› ››
Fig. 167
b
uttons
held down for 2 seconds at the same time.
The data is displayed on the screen in the
units required. Note
● A v i
sit to the specialised service once a
year is recommended to clean the Climatronic
system.
● The interior temperature sensor 11 ›››
Fig. 167 is at
the bottom. Do not cover it
with stickers or the like, as this could have a
negative effect on Climatronic operations. Automatic mode
Automatic mode is used to maintain a con-
s
t
ant
temperature and demist the windows
inside the vehicle.
Switching on automatic mode
● Set the interior temperature between +16°C
(+64°F) and +29°C (+84°F).
● Adjus
t vents 3 and 4 ›››
page 146 so that
the air flow is directed slightly upwards. ●
Pres
s the AUTO button
13
› ››
Fig. 167
and
AUTO di
splayed on the screen.
Automatic mode is switched off by pressing
the air distribution buttons or increasing or
decreasing the blower speed. However, the
temperature remains regulated.
Adjusting the temperature ●
When you switch on the ignition, control 1 ›››
Fig. 167 can be u sed t
o set the required in-
terior temperature.
It is possible to select interior temperatures
from +16°C (+64°F) to +29°C (+84°F). In this
range the temperature is regulated automati-
cally. If a temperature below +16°C (+64°F) is
selected, “LO” is displayed on the screen. If a
temperature above +29°C (+84°F) is selected,
“HI” is displayed on the screen. At both ex-
tremes, Climatronic works at maximum cool-
ing or heating power, respectively. The tem-
perature is not regulated.
In the event of prolonged, irregular distribu-
tion of the air flow from the outlets (particu-
larly the footwells) and significant differen-
ces in temperature, e.g. on leaving the vehi-
cle, sensitive people may catch cold.
151
Technical data
Advice
Operation
Emergencies
Safety
Page 155 of 248
Driving
could be engaged and vehicle steering would
not w
ork. Note
The ignition of the vehicle being towed must
be sw itc
hed on to prevent the steering wheel
from locking and also to allow the use of the
turn signals, horn, windscreen wipers and
washers. Information relating to different vehi-
c
l
e pr
ocesses. In order to make the vehicle more difficult to
s
t
e
al, you should always lock the steering be-
fore leaving the vehicle.
Mechanical steering lock
The steering column is locked when the key
is removed from the ignition lock and the ve-
hicle is stationary.
Activating the steering lock
● Park the vehicle ›››
page 156.
● Remove the ignition key.
● Turn the steering wheel slightly until the
steerin
g lock has engaged. Deactivating the steering lock
●
Turn the steering wheel slightly to release
the lock.
● Inser
t the key in the ignition lock.
● Hold the steering wheel in this position
and switc
h on the ignition.
Electromechanical steering
In vehicles with electromechanical steering,
the assisted steering function automatically
adjusts according to vehicle speed, steering
wheel torque and wheel orientation. The
power steering only works when the engine
is running.
You should take into account that you will
need considerably more power than normal
to steer the vehicle if the power steering is
not working correctly or at all.
Power-assisted steering
Power-assisted steering helps the driver in
critical situations. In counter-steering, it as-
sists by applying additional torque ››› .
WARNING
Power-assisted steering, together with the
ESC, help s
the driver to control vehicle steer-
ing in critical situations. However, the driver
is ultimately responsible for steering the ve-
hicle at all times. Power-assisted steering
does not remove this responsibility. Starting and stopping the en-
gine
Ignition k ey
po
sitions Fig. 168
Ignition key positions. Read the additional information carefully
› ›
›
page 20
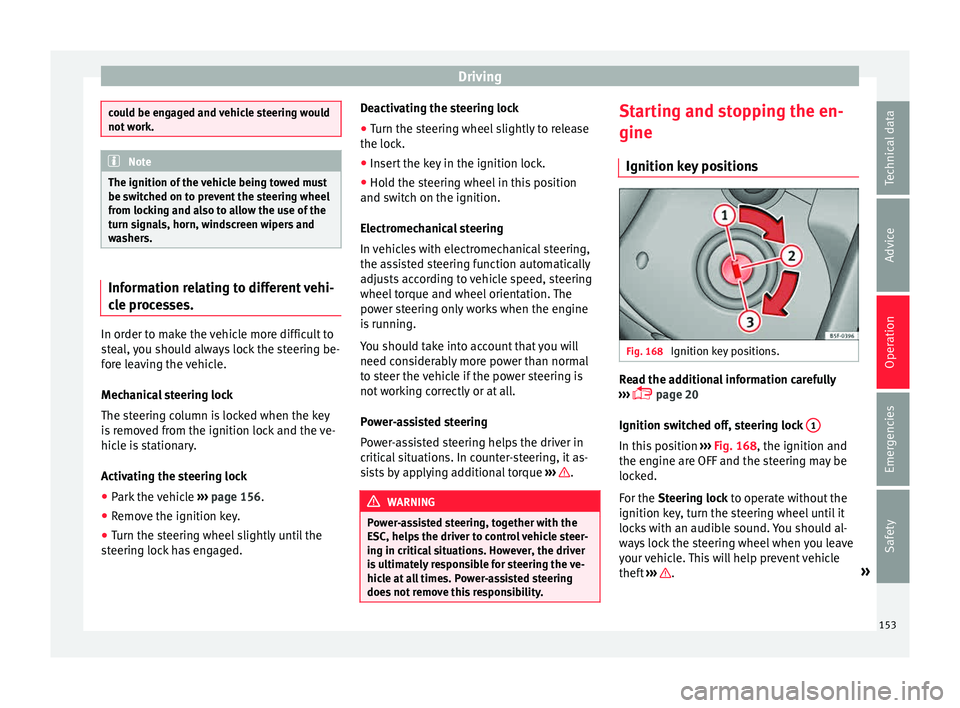
Ignition switched off, steering lock 1 In this position
››
›
Fig. 168, the ignition and
the engine are OFF and the steering may be
locked.
For the Steering lock to operate without the
ignition key, turn the steering wheel until it
locks with an audible sound. You should al-
ways lock the steering wheel when you leave
your vehicle. This will help prevent vehicle
theft ››› .
»
153
Technical data
Advice
Operation
Emergencies
Safety
Page 157 of 248
Driving
WARNING
● Never s t
art or run the engine in unventila-
ted or closed rooms. The exhaust gases con-
tain carbon monoxide, an odourless and col-
ourless poisonous gas. Risk of fatal acci-
dents. Carbon monoxide can cause loss of
consciousness and result in death.
● Never leave the vehicle unattended if the
engine is
running.
● Never use “cold start sprays”, they could
explode or c
ause the engine to run at high
revs. Risk of injury. CAUTION
● When the engine i s
cold, you should avoid
high engine speeds, driving at full throttle
and over-loading the engine. Risk of engine
damage.
● The vehicle should not be pushed or towed
more than 50 metr
es to start the engine. Un-
burnt fuel could enter the catalytic converter
and damage it.
● Before attempting to push-start or tow a ve-
hicle in or
der to start it, you should first try to
start it using the battery of another vehicle.
Please observe and follow the notes on the
››› page 52, How to jump start. For the sake of the environment
Do not warm-up the engine by running the
engine w ith the
vehicle stationary. Start off
immediately, driving gently. This helps the engine reach operating temperature faster
and reduc
e
s emissions. Starting diesel engines
The engine can only be started using a genu-
ine S
EA
T key with its correct code.
– Move the gearbox lever to the neutral posi-
tion and depres
s the clutch pedal thor-
oughly and hold it in this position for the
starter to turn the engine on.
– Turn the ignition key to position ›››
Fig. 168
2 . The warning lamp
wi
l l light for en-
gine pre-heating.
– When the lamp turns off, turn the ignition
key t
o position 3 to start the engine. Do
not pr
e
ss the accelerator.
– Release the ignition key as soon as the en-
gine star
ts. The starter motor should not
turn at the same time.
When starting a cold engine, it may be a little
noisy for the first few seconds until oil pres-
sure has built up in the hydraulic valve com-
pensators. This is quite normal, and no cause
for concern.
If there are problems starting the engine, see
the ›››
page 52. Glow plug system for the diesel engine
To avoid u
nnecessary discharging of the bat-
tery, do not use any other major electrical
equipment while the glow plugs are pre-heat-
ing.
Start the engine as soon as the glow plug
warning lamp goes out.
Starting a diesel engine after the fuel tank
has been completely run dry
If the fuel tank has been completely run dry,
it may take longer than normal (up to one mi-
nute) to start a diesel engine after refuelling.
This is because the fuel system must elimi-
nate air first. WARNING
Observe the safety warnings ›››
in Starting
petro l
engines on page 155. CAUTION
● When the engine i s
cold, you should avoid
high engine speeds, driving at full throttle
and over-loading the engine. Risk of engine
damage.
● The vehicle should not be pushed or towed
more than 50 metr
es to start the engine. Un-
burnt fuel could enter the catalytic converter
and damage it.
● Before attempting to push-start or tow a ve-
hicle in or
der to start it, you should first try to » 155
Technical data
Advice
Operation
Emergencies
Safety
Page 159 of 248
Driving
the brakes to overheat and the braking
dis
t
ance will increase. Apply and then release
the brakes alternately.
● Never let the vehicle run with the engine
switc
hed off. The braking distance is in-
creased considerably when the brake servo is
not active.
● If the brake fluid loses its viscosity and is
subj
ected to heavy use, vapour bubbles can
form in the brake system. This reduces the ef-
ficiency of the brakes.
● Non-standard or damaged front spoilers
coul
d restrict the airflow to the brakes and
cause them to overheat. Before purchasing
accessories please observe the relevant in-
structions ››› page 190, Modifications.
● If a brake system circuit fails, the braking
dist
ance will be increased considerably. Con-
tact a specialised workshop immediately and
avoid unnecessary journeys. Handbrake
Fig. 169
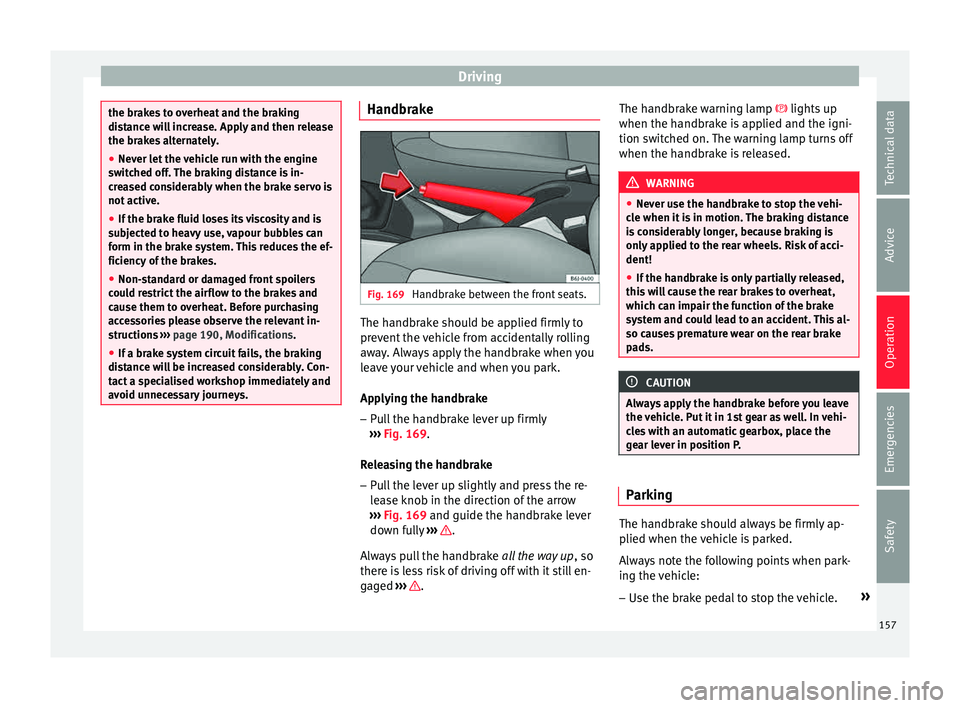
Handbrake between the front seats. The handbrake should be applied firmly to
pr
ev
ent
the vehicle from accidentally rolling
away. Always apply the handbrake when you
leave your vehicle and when you park.
Applying the handbrake
– Pull the handbrake lever up firmly
›››
Fig. 169.
Releasing the handbrake
– Pull the lever up slightly and press the re-
lea
se knob in the direction of the arrow
››› Fig. 169 and guide the handbrake lever
down fully ››› .
A lw
a
ys pull the handbrake all the way up, so
there is less risk of driving off with it still en-
gaged ››› .The handbrake warning lamp lights
up
when the h andbr
ake is applied and the igni-
tion switched on. The warning lamp turns off
when the handbrake is released. WARNING
● Never u se the h
andbrake to stop the vehi-
cle when it is in motion. The braking distance
is considerably longer, because braking is
only applied to the rear wheels. Risk of acci-
dent!
● If the handbrake is only partially released,
this w
ill cause the rear brakes to overheat,
which can impair the function of the brake
system and could lead to an accident. This al-
so causes premature wear on the rear brake
pads. CAUTION
Always apply the handbrake before you leave
the v ehic
le. Put it in 1st gear as well. In vehi-
cles with an automatic gearbox, place the
gear lever in position P. Parking
The handbrake should always be firmly ap-
p
lied when the
v
ehicle is parked.
Always note the following points when park-
ing the vehicle: – Use the brake pedal to stop the vehicle. »
157
Technical data
Advice
Operation
Emergencies
Safety
Page 161 of 248
Driving
Manual gearbox Driv in
g w
ith manual gearboxRead the additional information carefully
›› ›
page 37
Certain versions of the model may include a
6-speed manual gearbox, and its diagram is
shown on the gearbox lever.
The reverse gear can only be engaged when
the car is stationary. When the engine is run-
ning and before engaging this gear, wait
about 6 seconds with the clutch pressed
down thoroughly in order to protect the gear-
box.
The reverse lights switch on when the reverse
gear is selected and the ignition is on. WARNING
● When the engine i s
running, the vehicle
will start to move as soon as a gear is engag-
ed and the clutch released.
● Never select the reverse gear when the ve-
hicle i
s in motion. Risk of accident. Note
● Do not r e
st your hand on the gear lever
while driving. The pressure of your hand
could cause premature wear on the selector
forks in the gearbox. ●
When ch an
ging gear, you should always
depress the clutch fully to avoid unnecessary
wear and damage.
● Do not “slip” the clutch to hold the vehicle
on a hill
. This causes premature wear and
damage to the clutch.
● Do not leave your foot on the clutch pedal;
although the pre
ssure may seem insignifi-
cant, it can cause the premature wear of the
clutch plate. Use the foot rest when you do
not need to change gear. Gear-change indicator
3 V
alid for vehicles: with a manual gearbox
The r
ecommended gear for saving fuel is in-
dicated on the dash screen of certain vehi-
cles during driving.
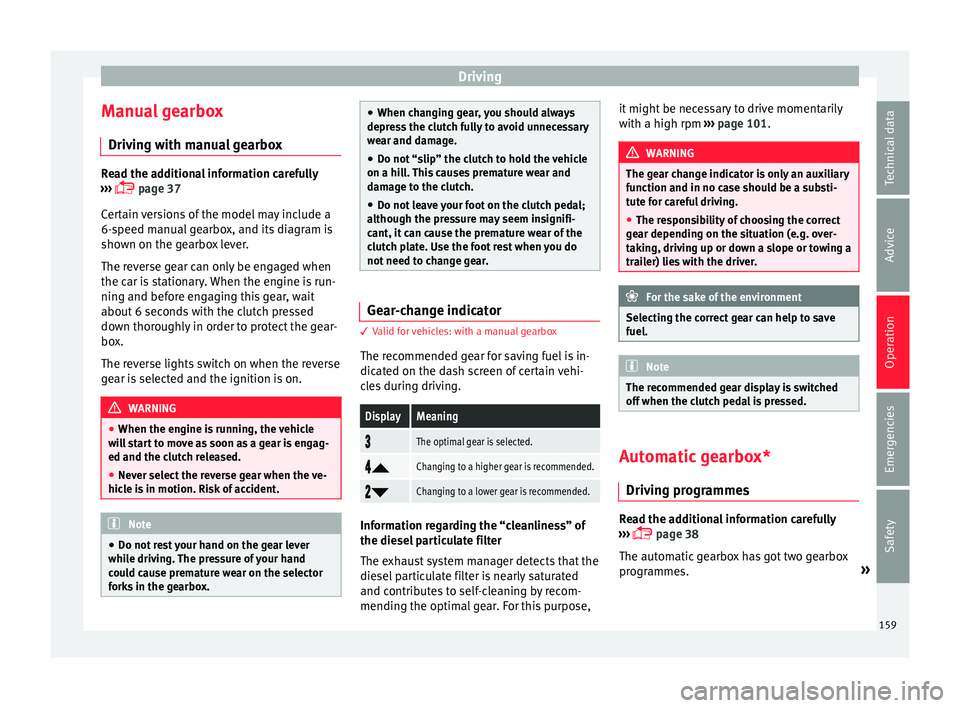
DisplayMeaning
The optimal gear is selected.
Changing to a higher gear is recommended.
Changing to a lower gear is recommended.
Information regarding the “cleanliness” of
the die
sel
p
articulate filter
The exhaust system manager detects that the
diesel particulate filter is nearly saturated
and contributes to self-cleaning by recom-
mending the optimal gear. For this purpose, it might be necessary to drive momentarily
with a high rpm
››
› page 101. WARNING
The gear change indicator is only an auxiliary
fu nction and in no c
ase should be a substi-
tute for careful driving.
● The responsibility of choosing the correct
gear dependin
g on the situation (e.g. over-
taking, driving up or down a slope or towing a
trailer) lies with the driver. For the sake of the environment
Selecting the correct gear can help to save
fuel . Note
The recommended gear display is switched
off when the c lut
ch pedal is pressed. Automatic gearbox*
Driv ing pr
ogrammes Read the additional information carefully
› ›
›
page 38
The automatic gearbox has got two gearbox
programmes. »
159
Technical data
Advice
Operation
Emergencies
Safety
Page 163 of 248
Driving
press the brake pedal to change the selector
l ev
er fr
om position N to position D.
S - Standard driving position (Sport pro-
gramme)
When the selector lever is in position S, it will
automatically change up into a higher gear
later, and change down into a low gear, if
compared with position D. This way, it is pos-
sible to take full advantage of the engine re-
serve power, depending on the engine de-
mand, driving style and speed. The braking
effect of the engine when driving downhill is
very limited. On the instrument panel display
the selected gear is shown as well as the se-
lector lever to position S.
To select gear range S, press the lock button
on the selector lever. WARNING
● As a driv er
, you should never leave your ve-
hicle if the engine is running and a gear range
is engaged. If you have to leave your vehicle
while the engine is running, you must apply
the parking brake and put the selector lever
in position P.
● If the engine is running and if D or R is en-
gaged,
you will need to hold the car on the
foot brake. The car will creep forward as the
power transmission is not fully interrupted
even when the engine is idling.
● Never accelerate when moving the selector
lever or
you may cause an accident. ●
Never mo v
e the selector lever to R or P
when driving. Risk of accident!
● Before driving down a long, steep slope, it
is a
dvisable to reduce speed and change into
a lower gear.
● If you stop the vehicle up hill, always hold
the foot br
ake strongly depressed down to
stop it from rolling back.
● Never allow the brake to rub and do not use
the brake ped
al too often or for long periods.
Constant braking will cause the brakes to
overheat and will considerably reduce the
brake effect. This increases the braking dis-
tance and could cause the brake system to
fail.
● Never allow the car to roll down a gradient
with the ge
ar in neutral N, or in selector lever
position D, even if the engine is not running.
● If the vehicle moves with no control, an ac-
cident and seriou
s injury may occur. WARNING
Never switch the engine off until the vehicle
is s
tationary. You could lose control of your
vehicle. This could cause an accident and se-
rious injury.
● The airbags and belt tensioners do not
work when the ignition i
s switched off.
● The brake servo does not work with the en-
gine off. Y
ou need more force to stop the vehi-
cle. ●
Po w
er steering does not work when the en-
gine is not running. That is why it is much
more difficult to turn the steering wheel.
● Never remove the key from the ignition if
the vehic
le is in motion. The steering lock
could suddenly engage, and you would not be
able to steer the vehicle. CAUTION
If you allow the vehicle to move when the en-
gine i s sw
itched off or with the selector lever
in position “N”, take your foot off the acceler-
ator and wait until the engine starts idling
before returning to position “D”. Selector lever lock
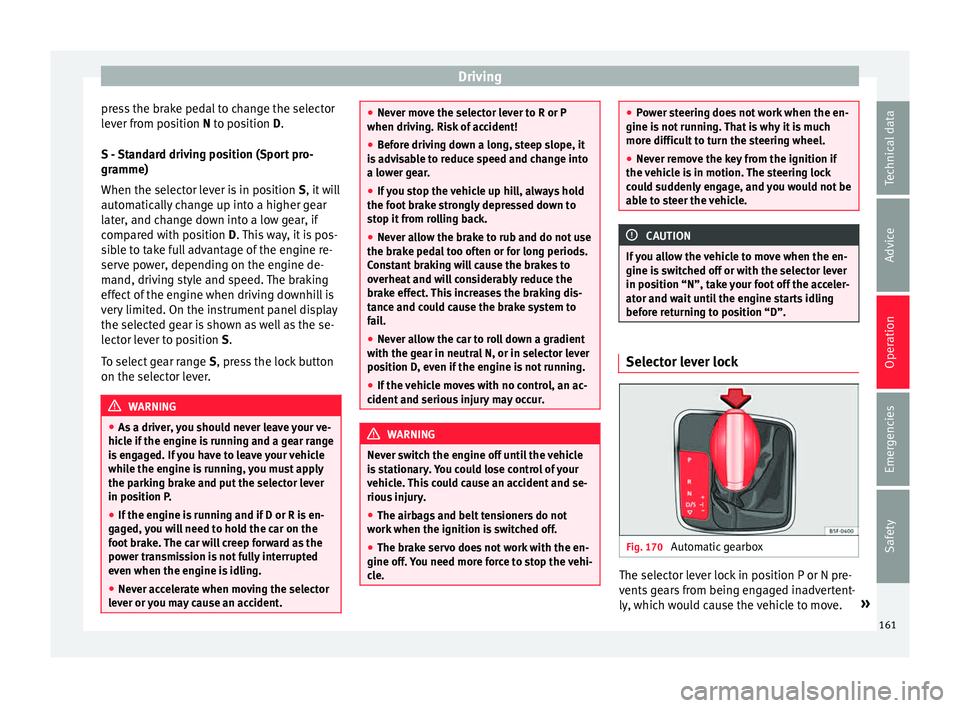
Fig. 170
Automatic gearbox The selector lever lock in position P or N pre-
v
ents
g
ears from being engaged inadvertent-
ly, which would cause the vehicle to move. »
161
Technical data
Advice
Operation
Emergencies
Safety
Page 165 of 248
Driving
If “tiptronic” is selected whilst the vehicle is
in motion and the aut om
atic
gearbox / DSG
automatic gearbox is in third gear and selec-
tor lever position D, “tiptronic” mode will
then also be in third gear.
Changing gears in the normal or sport pro-
gramme using the steering wheel paddle lev-
ers
If the paddle levers ››› Fig. 172 are used in
the normal or sport programme, the system
switches temporarily to “tiptronic” mode. To
exit “Tiptronic” mode again, press the right
paddle lever + towards the steering wheel
f or ap
pr
oximately one second. You will also
leave “tiptronic” mode if the paddle levers
are not moved for a certain time. Note
● The ge ar p
addle levers on the steering
wheel can be operated with the selector lever
in any position and with the vehicle in mo-
tion. Driving tips
The gearbox changes gear ratios automatical-
ly
a
s
the vehicle moves.
Starting
– Start the engine with the selector lever in
position
P or N. Driving
– Press and hold the brake pedal.
– Holding down the lock button (button on
the selector l
ever), select R or D.
– Release the lever and wait a little for the
gearbo
x to engage the gear (a slight move-
ment can be felt).
– Release the brake and press the accelerator
›››
in Selector lever positions on
p ag
e 161
.
Stopping briefly – If stopping for a short time, keep the vehi-
cle s
tationary by pressing the foot brake
hard to prevent the vehicle moving back-
wards on a slope or “creeping” forwards,
e.g. at traffic lights. The selector lever does
not need to be put into the positions P or N
for this.
– Do not press the accelerator.
Parkin
g
– Press and hold the brake pedal until the ve-
hicle c
omes to a standstill ››› in Selector
l ev
er po
sitions on page 161.
– Apply the handbrake.
– By pressing the lock button down, move
the selector l
ever to P and release the lock
button. Driving up and down hills
–
Press the selector lever from position “D”
to the right int
o the tiptronic selector gate.
– Lightly press the selector lever back to
chan
ge down.
Holding the car on a hill
– The brake must be always pressed down to
prevent
the vehicle from “rolling back-
wards” ››› in Selector lever positions on
p ag
e 161
. Do not try to prevent the vehicle
from “rolling backwards” by increasing the
engine speed while a range of gears is se-
lected.
Starting the vehicle up hills
– Apply the handbrake.
– With a selected gear, accelerate slowly and
at the same time, r
elease the handbrake.
The steeper the slope, the lower the needed
gear. This increases the braking effect of the
engine. For example, when driving down a
very steep slope in third gear. If the engine
brake effect is not enough, the vehicle will
speed up. The automatic gearbox automati-
cally changes up to prevent the engine over-
revving. Use the foot brake to reduce speed
and change into 3rd gear using Tiptronic*
››› in Selector lever positions on page 161.
Y our
v
ehicle has an automatic interlock
which prevents the selector lever from being »
163
Technical data
Advice
Operation
Emergencies
Safety
Page 167 of 248
Driving
Run-in and economical driving R u
nnin
g in a new engine The engine needs to be run in over the first
1,500 km.
Up t
o 1000 k
ilometres
– Do not drive at speeds of more than 2/3
the maximum s
peed.
– Do not accelerate hard.
– Avoid high engine revolutions.
– Do not tow a trailer.
From 1000 t o 1500 k
ilometres (600 to 900
miles)
– Speeds can be gradual
ly increased to the
maximum road speed or maximum permis-
sible engine speed (rpm).
During its first few hours of running, the in-
ternal friction in the engine is greater than
later on, when all the moving parts have bed-
ded in. For the sake of the environment
If the engine is run in gently, its life will be in-
cr e
ased and its oil consumption reduced. Tyre and brake pad run-in
New tyres should be run-in carefully for the
firs
t
500 km (300 miles). New brake pads
should be run-in carefully for the first
200 km.
During the first 200 km, you can compensate
for the reduced braking effect by applying
more pressure to the brake pedal. In case of
a sharp braking, the braking distance will be
longer with new brake pads than with brake
pads which have been run-in. WARNING
● At fir s
t, new tyres do not give maximum
grip, and require running-in. This may cause
an accident. Drive particularly carefully in the
first 500 km.
● New brake pads must be “run in” and do
not hav
e the correct friction properties during
the first 200 km. However, the reduced brak-
ing capacity may be compensated by press-
ing on the brake pedal a little harder. Environmental compatibility
Environmental protection is a top priority in
the de
s
ign, c
hoice of materials and manufac-
ture of your new SEAT. Constructive measures to encourage recy-
cling
● Joints
and connections designed for easy
dismantlin
g
● Modular construction to facilitate disman-
tling
● Incr
eased use of single-grade materials.
● Plastic parts and elastomers are marked in
accor
dance with ISO 1043, ISO 11469 and
ISO 1629.
Choice of materials
● Use of recycled materials.
● Use of compatible plastics in the same part
if its c
omponents are not easily separated.
● Use of recycled materials and/or materials
originating fr
om renewable sources.
● Reduction of volatile components, includ-
ing odour, in p
lastic materials.
● Use of CFC-free coolants.
Ban on heavy
metals, with the exceptions
dictated by law (Annex II of ELV Directive
2000/53/EC): cadmium, lead, mercury, hexa-
valent chromium.
Manufacturing methods
● Reduction of the quantity of thinner in the
protectiv
e wax for cavities.
● Use of plastic film as protection during ve-
hicle tr
ansport. »
165
Technical data
Advice
Operation
Emergencies
Safety
Page 169 of 248
Driving
must perform a cleaning cycle, as indicated
in ››
›
page 101. WARNING
● The diesel en
gine particulate filter may
reach extremely high temperatures; the vehi-
cle should be parked so that the exhaust pipe
does not come into contact with flammable
materials underneath the vehicle. Otherwise
there is a risk of fire. CAUTION
● Your v
ehicle is not designed to use biodie-
sel fuel. Never, under any circumstances re-
fuel with biodiesel. The use of biodiesel fuel
could damage the engine and the fuel sys-
tem. The addition of biodiesel to diesel by
the diesel producer in accordance with stand-
ard EN 590 is authorised and will not cause
damage to the engine or the fuel system.
● Using diesel fuel with a high sulphur con-
tent m
ay significantly reduce the useful life of
the diesel particulate filter. Your Technical
Service will be able to tell you which coun-
tries have diesel with a high sulphur content. Ecological and environmentally-
friendly
driv
in
gFuel consumption, environmental pollution
and w
e
ar t
o the engine, brakes and tyres de-
pends in large part on your driving style. By
adopting an economical driving style and an- ticipating the traffic situation ahead, you can
eas
ily reduce fuel consumption by 10-15%.
Some tips on how to help you reduce pollu-
tion while saving money are listed below.
Active cylinder management (ACT ®
)
Depending on the equipment, the vehicle
may have active cylinder management
(ACT ®
).
The active cylinder management (ACT ®
) may
automatically deactivate some of the engine
cylinders if the driving situation does not re-
quire too much power. When it is switched
off, no fuel is injected into these cylinders,
hence total fuel consumption may be re-
duced. The number of active cylinders can be
seen on the instrument panel display
››› page 30.
Drive anticipating the traffic situation
A vehicle uses most fuel when accelerating.
When you anticipate situations, you have to
brake less often and, thus, accelerate less. If
it is possible, let the vehicle roll with a gear
engaged, for example, if you see a red light
ahead. The braking effect achieved in this
way helps to reduce the wear of brakes and
tyres; emissions and fuel consumption are
reduced to zero (disconnection due to iner-
tia). Change gear early to save energy
An effective w
ay of saving fuel is to change
up quickly through the gears. Running the
engine at high rpm in the lower gears uses
an unnecessary amount of fuel.
Manual gearbox: shift up from first to second
gear as soon as possible. We recommend
that, whenever possible, you change to a
higher gear upon reaching 2000 rpm. Follow
the “recommended gear” indication that ap-
pears on the instrument panel ››› page 159.
Avoid driving at high speed
We advise you not to drive at the top speed
permitted by the vehicle. Fuel consumption,
exhaust emissions and noise levels all in-
crease very rapidly at higher speeds. Driving
at moderate speeds will help to save fuel.
Avoid idling
It is worthwhile switching off the engine
when waiting in a traffic jam, at level cross-
ings or at traffic lights with a long red phase.
The fuel saved after only 30 - 40 seconds is
greater than the amount of fuel needed to re-
start the engine.
The engine takes a long time to warm up
when it is idling. Mechanical wear and pollu-
tant emissions are also especially high dur-
ing this initial warm-up phase. It is therefore
best to drive off immediately after starting »
167
Technical data
Advice
Operation
Emergencies
Safety
Page 171 of 248
Driver assistance systems
● In some c ou
ntrie
s, it is possible that your
car model is not sold, and therefore some
spare parts are not available or the technical
services may only be able to carry out limited
repairs.
SEAT importers and distributors will gladly
provide information about the technical prep-
aration that your vehicle requires and also
about necessary maintenance and repair
possibilities.
Adhesive strips for headlights
In countries where vehicles drive on the other
side of the road to your home country, the
asymmetric dipped beam may dazzle drivers
of oncoming vehicles.
To prevent dazzling, you must apply stickers
to certain parts of the headlight lenses. Fur-
ther information is available at any Technical
Service.
In vehicles with adaptive headlights, the ro-
tation system must previously be disconnec-
ted. To do this, please go to a specialised
workshop. Driver assistance systems
Br ak
in
g and stability systems
Connecting/disconnecting ESC and
ASR The ESC is switched on automatically when
the engine i
s
started, and only works when
the engine is running and includes the ABS,
EDS and ASR systems.
The ASR and ESC function should only be
switched off in situations in which traction is
insufficient, among others:
● When driving in deep snow or on surfaces
that ar
e not very firm.
● To “free” the vehicle if it gets stuck.
Then switc
h the ASR and ESC function back
on.
Depending on finishes and versions, it is
possible either to disconnect only the ASR or
else activate ESC Sport mode.
ESC in “Sport” mode
Sport mode can be connected via the Easy
Connect ›››
page 107 system menu. The abili-
ty of the ESC to stabilise the vehicle is limi-
ted; the traction control system (ASR) be-
comes disabled ››› .The control lamp
lights up
. F
or vehicles
with a driver information system*, the driver
will be shown the electronic stability
control (ESC) option: sport.
Warning! Limited stability.
Disable ESC “Sport” mode
Through the Easy Connect system menu
››› page 107. The warning lamp will switch
off. For vehicles with a driver information sys-
tem*, the driver will be shown the elec-
tronic stability control (ESC)
option: on.
Disable ASR
The Easy Connect system is used to switch off
the ASR ››› page 107. The traction control sys-
tem will be disabled.
The control lamp lights up. For vehicles
with a driver information system* the driver
will be informed that ASR is disabled.
Activate ASR
The Easy Connect system ››› page 107 is used
to switch on the ASR. The traction control sys-
tem will be enabled.
The control lamp switches off. For vehicles
with a driver information system* the driver
will be informed that ASR is enabled.
● Activate or deactivate the ASR or ESC func-
tion in the Ea sy
Connect system by means of »
169
Technical data
Advice
Operation
Emergencies
Safety