brake light Seat Ibiza ST 2012 User Guide
[x] Cancel search | Manufacturer: SEAT, Model Year: 2012, Model line: Ibiza ST, Model: Seat Ibiza ST 2012Pages: 282, PDF Size: 3.77 MB
Page 76 of 282
74Cockpit
Tyre pressure adjustment
Following the modification to tyre pressure or changing one or more wheels,
the button ⇒ Fig. 40 must be kept pressed while the ignition is on until an
audible warning is heard.
If the wheels are under excessive load (for example, driving with a trailer or
heavy load), the tyre pressure must be increased to the recommended value
for a full load (see the sticker on the inside of the fuel flap). If the tyre moni-
tor system button is pressed down, the new tyre pressures are confirmed.
The tyre pressure control lamp lights up
If the tyre pressure of a wheel is much lower than the value set by the driver,
then the tyre pressure control lamp ⇒
will light up.
WARNING
● When the tyre pressure control lamp lights up, reduce speed immedi-
ately and avoid any sudden manoeuvre or braking. Stop when possible,
and check the tyre pressure and status.
● The driver is responsible for maintaining correct tyre pressures. For
this reason, tyre pressure must be regularly checked.
● Under certain circumstances (for example, when driving in a sports-
like manner, in winter conditions or on a dirt track) the tyre control lamp
may light up or function incorrectly.
Note
If the battery is disconnected, the yellow warning lamp lights up after
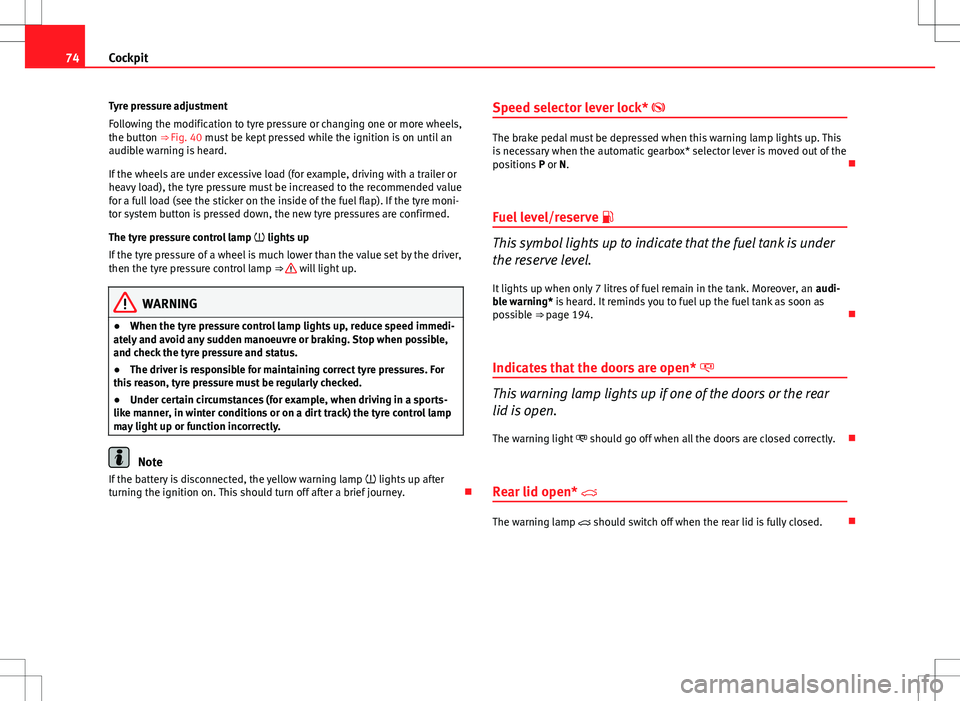
turning the ignition on. This should turn off after a brief journey. Speed selector lever lock*
The brake pedal must be depressed when this warning lamp lights up. This
is necessary when the automatic gearbox* selector lever is moved out of the
positions
P or N.
Fuel level/reserve
This symbol lights up to indicate that the fuel tank is under
the reserve level.
It lights up when only 7 litres of fuel remain in the tank. Moreover, an audi-
ble warning* is heard. It reminds you to fuel up the fuel tank as soon as
possible ⇒ page 194.
Indicates that the doors are open*
This warning lamp lights up if one of the doors or the rear
lid is open. The warning light should go off when all the doors are closed correctly.
Rear lid open*
The warning lamp should switch off when the rear lid is fully closed.
Page 107 of 282
105
Lights and visibility
For the sake of the environment
The heated rear window should be switched off as soon as the glass is dem-
isted. By saving electrical power you can also save fuel.
Note
To avoid possible damage to the battery, an automatic temporary discon-
nection of this function is possible, coming back on when normal operating
conditions are re-established.
Hazard warning lights
The hazard warning lights are used to draw the attention of
other road users to your vehicle in emergencies.
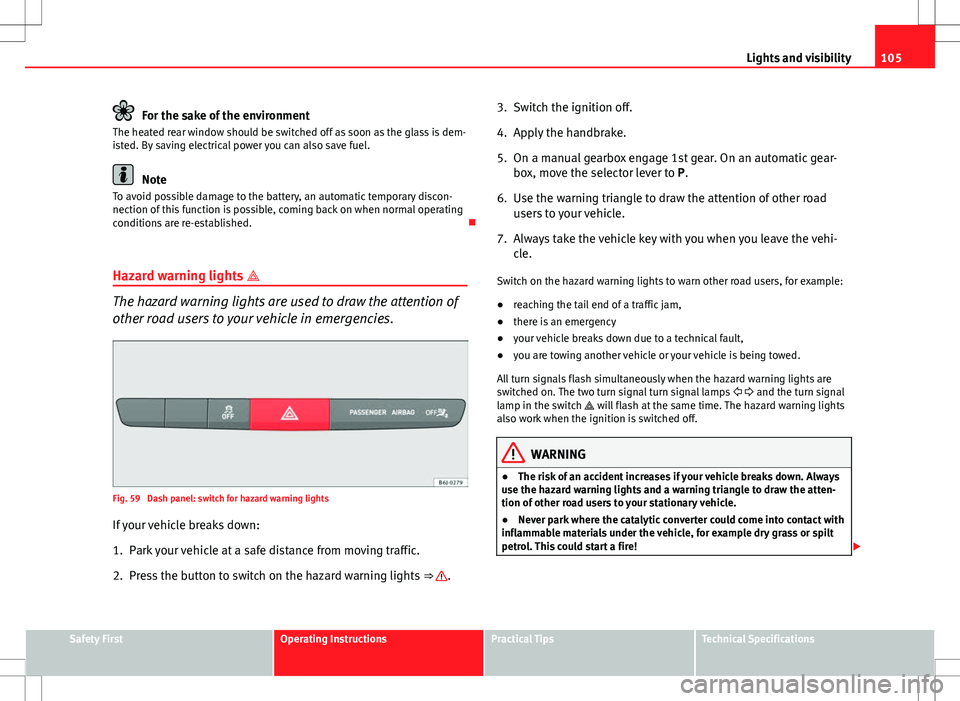
Fig. 59 Dash panel: switch for hazard warning lights
If your vehicle breaks down:
1. Park your vehicle at a safe distance from moving traffic.
2. Press the button to switch on the hazard warning lights ⇒
.3. Switch the ignition off.
4. Apply the handbrake.
5. On a manual gearbox engage 1st gear. On an automatic gear-
box, move the selector lever to P.
6. Use the warning triangle to draw the attention of other road users to your vehicle.
7. Always take the vehicle key with you when you leave the vehi- cle.
Switch on the hazard warning lights to warn other road users, for example:
● reaching the tail end of a traffic jam,
● there is an emergency
● your vehicle breaks down due to a technical fault,
● you are towing another vehicle or your vehicle is being towed.
All turn signals flash simultaneously when the hazard warning lights are
switched on. The two turn signal turn signal lamps and the turn signal
lamp in the switch will flash at the same time. The hazard warning lights
also work when the ignition is switched off.
WARNING
● The risk of an accident increases if your vehicle breaks down. Always
use the hazard warning lights and a warning triangle to draw the atten-
tion of other road users to your stationary vehicle.
● Never park where the catalytic converter could come into contact with
inflammable materials under the vehicle, for example dry grass or spilt
petrol. This could start a fire!
Safety FirstOperating InstructionsPractical TipsTechnical Specifications
Page 127 of 282
125
Seats and storage compartments
Rear drink holder*
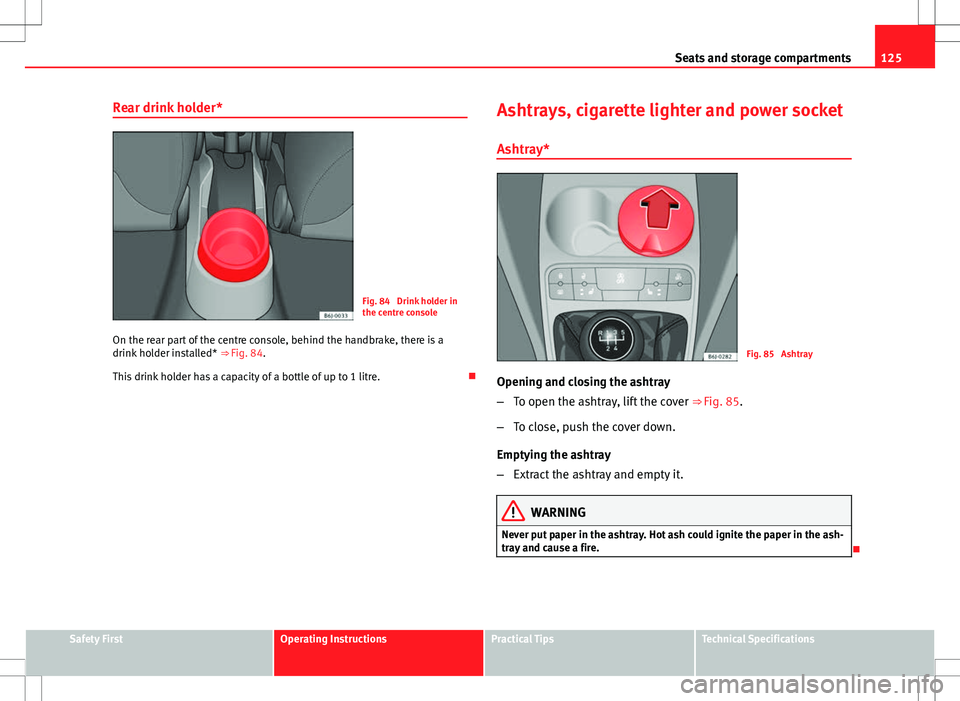
Fig. 84 Drink holder in
the centre console
On the rear part of the centre console, behind the handbrake, there is a
drink holder installed* ⇒ Fig. 84.
This drink holder has a capacity of a bottle of up to 1 litre. Ashtrays, cigarette lighter and power socket
Ashtray*
Fig. 85 Ashtray
Opening and closing the ashtray
– To open the ashtray, lift the cover ⇒ Fig. 85.
– To close, push the cover down.
Emptying the ashtray
– Extract the ashtray and empty it.
WARNING
Never put paper in the ashtray. Hot ash could ignite the paper in the ash-
tray and cause a fire.
Safety FirstOperating InstructionsPractical TipsTechnical Specifications
Page 151 of 282

149
Driving
temperature increases due to the heat accumulated in the engine compart-
ment or due to its prolonged exposure to solar radiation.
WARNING
● Never switch the engine off until the vehicle is completely stationary.
● The brake servo works only when the engine is running. With the en-
gine switched off, more strength is needed to brake. As normal brake op-
eration cannot be performed, risk of accidents and serious injury may ex-
ist.
● The steering lock can be immediately blocked once the key is re-
moved from the ignition. The vehicle cannot be steered. Risk of accident.
CAUTION
When the engine has been running under a heavy load for a long period,
heat can accumulate in the engine compartment and cause engine damage.
For this reason, you should idle the engine for approx. 2 minutes before you
switch it off. Driving with LPG*Fig. 108 Centre console:
gas system control
switch.
Your SEAT vehicle has a bivalent engine able to run on either LPG or petrol.
The LPG tank ⇒ page 196, Refuelling with LPG is in the spare wheel well
⇒
.
It is possible to change from LPG to petrol while the engine is running, even
if the vehicle is moving, by pressing the button located on the centre
console ⇒ Fig. 108.
Starting the engine
The engine is always started with petrol, even when LPG was being used
when it was switched off.
Automatic switch from petrol to LPG
When the engine is turned on and the following conditions are met, the sys-
tem will automatically switch from petrol mode to LPG mode, the notifica-
tion changed to GAS mode is displayed and the green warning lamp on the
instrument panel lights up:
Safety FirstOperating InstructionsPractical TipsTechnical Specifications
Page 157 of 282
155
Driving
The selector lever lock is released as follows:
– Switch the ignition on.
– Hold the brake pedal pressed down and at the same time, hold
the selector lever lock on the left of the selector lever also
pressed down.
The warning lamp on the instrument panel lights up when the brake ped-
al should be applied. This is essential when the selector lever is taken from
the P or N positions.
The selector lever lock only works if the vehicle is stationary or driving at
speeds up to 5 km/h (3 mph). At higher speeds the selector lever lock is
automatically unlocked in the N position.
The selector lever lock is not engaged if the selector lever is moved quickly
through position N (e.g. when shifting from R to D). This makes it possible,
for instance, to “rock” the vehicle backwards and forwards if it is stuck in
snow or mud. The selector lever lock engages automatically if the brake
pedal is not depressed and the lever is in position N for more than about
1second. Driving a car with an automatic gearbox
The gearbox changes gear ratios automatically as the vehi-
cle moves.
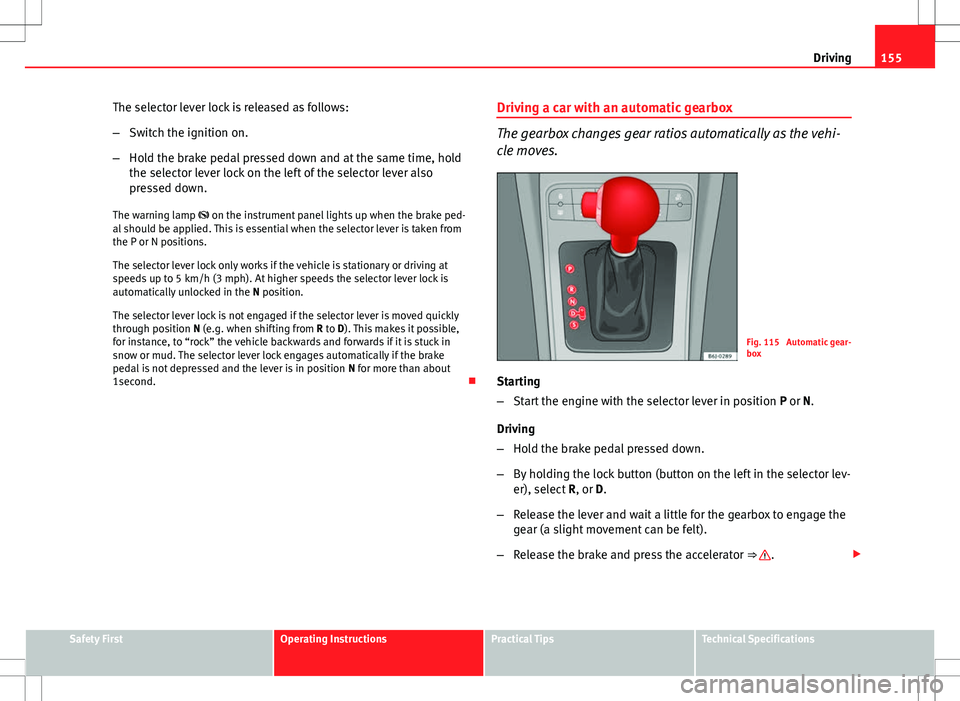
Fig. 115 Automatic gear-
box
Starting
– Start the engine with the selector lever in position P or N.
Driving
– Hold the brake pedal pressed down.
– By holding the lock button (button on the left in the selector lev-
er), select R, or D.
– Release the lever and wait a little for the gearbox to engage the
gear (a slight movement can be felt).
– Release the brake and press the accelerator ⇒
.
Safety FirstOperating InstructionsPractical TipsTechnical Specifications
Page 158 of 282

156Driving
Stopping briefly
–If stopping for a short time, keep the vehicle stationary by
pressing the foot brake hard to prevent the vehicle moving
backwards on a slope or “creeping” forwards, e.g. at traffic
lights. The selector lever does not need to be put into the posi-
tions P or N.
– Do not press the accelerator.
Parking
– Press and hold the brake pedal until the vehicle comes to a
standstill ⇒
.
– Apply the handbrake.
– By pressing the lock button down, move the selector lever to P
and release the lock button.
Driving up and down hills
– Press the selector lever from position “D” to the right into the
tiptronic selector gate.
– Lightly press the selector lever back to change down.
Holding the car on a hill
– The brake must be always pressed down to prevent the vehicle
from “rolling backwards” ⇒
. Do not try to prevent the vehicle
from rolling backwards by increasing the engine speed while a
range of gears is selected.
Starting the vehicle up hills
– Apply the handbrake. –
With a selected gear, accelerate slowly and at the same time,
release the handbrake.
The steeper the slope, the lower the needed gear. This increases the brak-
ing effect of the engine. For example, when driving down a very steep slope
in third gear. If the engine brake effect is not enough, the vehicle will speed
up. The automatic gearbox automatically changes up to prevent the engine
over-revving. Use the foot brake to reduce speed and change into third gear
again using Tiptronic* ⇒
.
Your vehicle has an automatic interlock which prevents the selector lever
from being put into a position for driving forwards or in reverse from posi-
tions P or N if the brake pedal is not depressed.
The ignition key cannot be removed unless the selector lever is in position
P.
Control lamp “Pressing brake pedal”
When the warning lamp next to the selector lever lights up, press the brake
pedal. This is necessary when the automatic gearbox selector lever is
moved out of positions P or N. At the same time, a text message or the in-
structions to perform necessary operations may appear on the instrument
panel.
WARNING
● As a driver, you should never leave your vehicle if the engine is run-
ning and a gear is engaged. If you have to leave your vehicle while the
engine is running, you must apply the parking brake and put the selector
lever in position P.
● If the engine is running and D or R are engaged, you will need to hold
vehicle stopped by depressing the brake pedal. The vehicle would keep
on creeping forward as the power transmission is not fully interrupted
even when the engine is idling.
Page 161 of 282
159
Driving
Selector lever positions
The selected gear is displayed on the side of the selector lever and on the
instrument panel display. The currently selected gear for the automatic
gearbox will also be shown on the display.
Tiptronic gear indicator
If the automatic gearbox is shifted manually, the selected gears are shown
on the screen.
P - parking lock
When the selector lever is in this position, the driven wheels are locked me-
chanically.
Position P on the lever must only be selected if the vehicle is stationary.
To move selector lever from position P, the locking button on the selector
lever handle must be pressed and the brake pedal depressed at the same
time while the ignition is switched on.
To put the selector lever in position P, simply press the lock button down
and, if necessary, depress the brake pedal down.
R - Reverse gear
The reverse gear is engaged in this position.
Reverse gear must be engaged only when the vehicle is stationary and the
engine is idling.
To move the selector lever to position R, press the lock button down and, at
the same time, press the brake pedal down, with the ignition switched on.
With the selector lever in position R and the ignition switched on the follow-
ing occurs:
● Reverse lights light up.
● The air conditioner automatically changes the air recirculation mode. ●
The wiper starts if the windscreen washer is on.
● The parking distance warning system switches on.*
N - Neutral (idling)
If this position is selected, the gearbox is in neutral. Power is not transmit-
ted to the wheels and the engine does not have a braking function.
Never use the N position to drive down a hill. The engine does not function
as a brake and the brakes are subjected to excessive stain.
You could damage the automatic gearbox if you drive down hills with the
gearbox lever in position N and the engine switched off.
D - Drive (forward)
In this position the gearbox automatically changes to a lower or higher gear,
according to the engine's requirements, the driving style and speed. The
braking effect of the engine when driving downhill is very limited when the
selector is in this position. The instrument panel display shows the selected
gear as well as the selector lever in position D.
If position N has been selected and you wish to select D, you must press the
foot brake if the vehicle is stationary, or travelling at under 5 km/h (3 mph).
S - Standard driving position (Sport programme)
When the selector lever is in position S, it will automatically change up into
a higher gear later, and change down into a low gear, if compared with posi-
tion D. This way, it is possible to take full advantage of the engine reserve
power, depending on the engine demand, driving style and speed. The
braking effect of the engine when driving downhill is very limited. On the
instrument panel display the selected gear is shown as well as the selector
lever to position S.
To select gear range S, press the lock button on the selector lever.
Safety FirstOperating InstructionsPractical TipsTechnical Specifications
Page 163 of 282
161
Driving
WARNING
You could lose control of the vehicle if you accelerate on slippery road
surfaces. Risk of serious injury.
● Be particularly careful when using the kickdown features on slippery
road surfaces. With a fast acceleration, the vehicle could lose traction
and skid.
● You should use the kickdown feature only when traffic and weather
conditions allow it to be used safely.
Handbrake Using the handbrake
The handbrake should be applied firmly to prevent the vehi-
cle from accidentally rolling away.
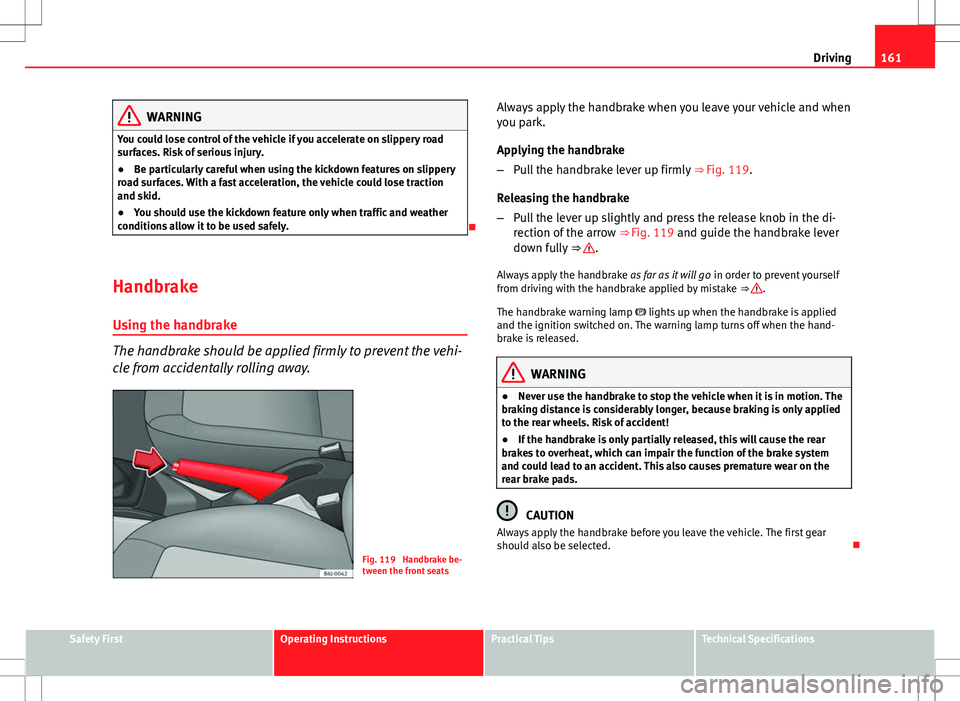
Fig. 119 Handbrake be-
tween the front seats Always apply the handbrake when you leave your vehicle and when
you park.
Applying the handbrake
–
Pull the handbrake lever up firmly ⇒ Fig. 119.
Releasing the handbrake
– Pull the lever up slightly and press the release knob in the di-
rection of the arrow ⇒ Fig. 119 and guide the handbrake lever
down fully ⇒
.
Always apply the handbrake as far as it will go in order to prevent yourself
from driving with the handbrake applied by mistake ⇒
.
The handbrake warning lamp lights up when the handbrake is applied
and the ignition switched on. The warning lamp turns off when the hand-
brake is released.
WARNING
● Never use the handbrake to stop the vehicle when it is in motion. The
braking distance is considerably longer, because braking is only applied
to the rear wheels. Risk of accident!
● If the handbrake is only partially released, this will cause the rear
brakes to overheat, which can impair the function of the brake system
and could lead to an accident. This also causes premature wear on the
rear brake pads.
CAUTION
Always apply the handbrake before you leave the vehicle. The first gear
should also be selected.
Safety FirstOperating InstructionsPractical TipsTechnical Specifications
Page 164 of 282
162Driving
Parking
The handbrake should always be firmly applied when the
vehicle is parked.
Always note the following points when parking the vehicle:
–Use the brake pedal to stop the vehicle.
– Apply the handbrake.
– Select first gear.
– Switch the engine off and remove the key from the ignition. Turn
the steering wheel slightly to engage the steering lock.
– Always take you keys with you when you leave the vehicle ⇒
.
Additional notes on parking the vehicle on gradients:
Turn the steering wheel so that the vehicle rolls against the kerb if it started
to roll.
● If the vehicle is parked facing downhill, turn the front wheels so that
they point towards the kerb .
● If the vehicle is parked facing uphill, turn the front wheels so that they
point away from the kerb .
● Secure the vehicle as normal by applying the handbrake firmly and se-
lecting first gear.
WARNING
● Take measures to reduce the risk of injury when you leave your vehi-
cle unattended.
● Never park where the hot exhaust system could ignite inflammable
materials, such as dry grass, low bushes, spilt fuel etc.
● Never allow vehicle occupants to remain in the vehicle when it is
locked. They would be unable to open the vehicle from the inside, and
could become trapped in the vehicle in an emergency. In the event of an
emergency, locked doors will delay assistance to vehicle occupants.
● Never leave children alone in the vehicle. They could set the vehicle
in motion, for example, by releasing the handbrake or the gearbox lever.
● Depending on weather conditions, it may become extremely hot or
cold inside the vehicle. This can be fatal.
Hill-start assist*
This function is only included in vehicles with ESC. This device helps when starting uphill.
These are the basic operation conditions: doors closed, brake pedal press-
ed down and vehicle in neutral. The system gets activated on engaging
gear.
After removing your foot from the brake pedal, the braking force is main-
tained for a few seconds to prevent the vehicle from moving backward when
putting into gear. This short space of time is enough to start the vehicle
with ease.
This system also works when reversing uphill.
Page 168 of 282
166Driving
Adjusting set speed*
The speed can be altered without touching the accelerator or
the brake.
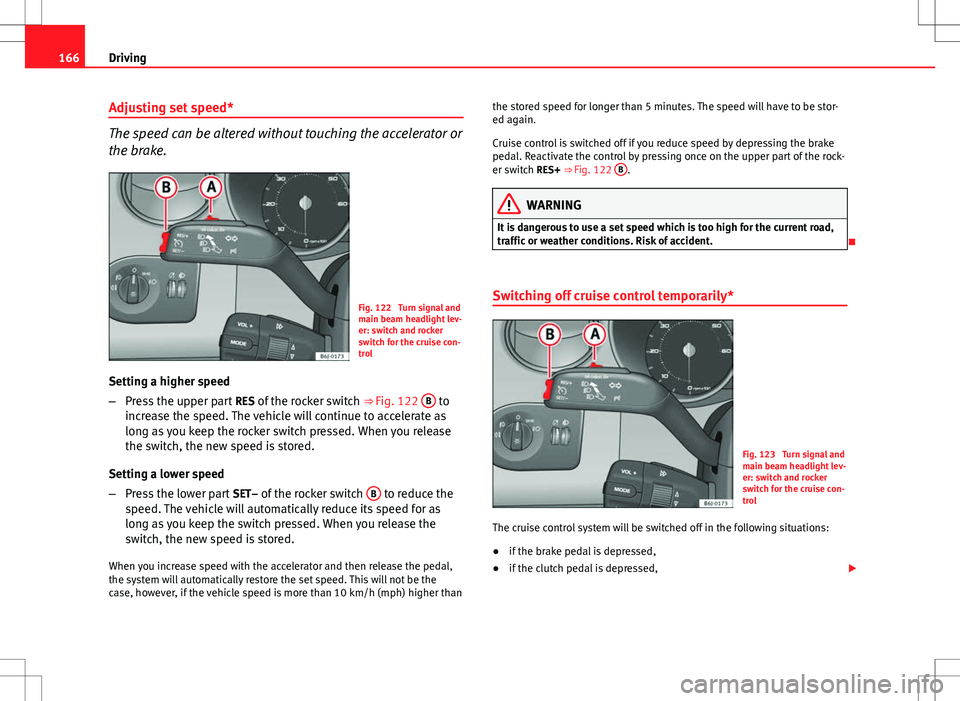
Fig. 122 Turn signal and
main beam headlight lev-
er: switch and rocker
switch for the cruise con-
trol
Setting a higher speed
– Press the upper part RES of the rocker switch ⇒ Fig. 122 B
to
increase the speed. The vehicle will continue to accelerate as
long as you keep the rocker switch pressed. When you release
the switch, the new speed is stored.
Setting a lower speed
– Press the lower part SET– of the rocker switch B
to reduce the
speed. The vehicle will automatically reduce its speed for as
long as you keep the switch pressed. When you release the
switch, the new speed is stored.
When you increase speed with the accelerator and then release the pedal,
the system will automatically restore the set speed. This will not be the
case, however, if the vehicle speed is more than 10 km/h (mph) higher than the stored speed for longer than 5 minutes. The speed will have to be stor-
ed again.
Cruise control is switched off if you reduce speed by depressing the brake
pedal. Reactivate the control by pressing once on the upper part of the rock-
er switch RES+ ⇒ Fig. 122
B
.
WARNING
It is dangerous to use a set speed which is too high for the current road,
traffic or weather conditions. Risk of accident.
Switching off cruise control temporarily*
Fig. 123 Turn signal and
main beam headlight lev-
er: switch and rocker
switch for the cruise con-
trol
The cruise control system will be switched off in the following situations:
● if the brake pedal is depressed,
● if the clutch pedal is depressed,