change wheel Seat Ibiza ST 2012 Owner's manual
[x] Cancel search | Manufacturer: SEAT, Model Year: 2012, Model line: Ibiza ST, Model: Seat Ibiza ST 2012Pages: 282, PDF Size: 3.77 MB
Page 6 of 282
Accessories, replacement of parts and
modifications . . . . . . . . . . . . . . . . . . . . . . . . . . . . . 190
Accessories and spare parts . . . . . . . . . . . . . . . . 190
Technical modifications . . . . . . . . . . . . . . . . . . . . 190
Roof aerial* . . . . . . . . . . . . . . . . . . . . . . . . . . . . . . 191
Mobile telephones and two-way radios . . . . . . . . 191
Fitting a towing bracket* . . . . . . . . . . . . . . . . . . . 192
Checking and refilling levels . . . . . . . . . . . . . . . 194
Refuelling . . . . . . . . . . . . . . . . . . . . . . . . . . . . . . . 194
LPG system* . . . . . . . . . . . . . . . . . . . . . . . . . . . . . 196
Petrol . . . . . . . . . . . . . . . . . . . . . . . . . . . . . . . . . . . 199
Diesel . . . . . . . . . . . . . . . . . . . . . . . . . . . . . . . . . . . 199
Working in the engine compartment . . . . . . . . . . 200
Engine oil . . . . . . . . . . . . . . . . . . . . . . . . . . . . . . . . 203
Coolant . . . . . . . . . . . . . . . . . . . . . . . . . . . . . . . . . 207
Washer fluid and windscreen wiper blades . . . . 209
Brake fluid . . . . . . . . . . . . . . . . . . . . . . . . . . . . . . . 213
Vehicle battery . . . . . . . . . . . . . . . . . . . . . . . . . . . 214
Wheels . . . . . . . . . . . . . . . . . . . . . . . . . . . . . . . . . . 216
If and when . . . . . . . . . . . . . . . . . . . . . . . . . . . . . . . 223
Vehicle tools, spare wheel . . . . . . . . . . . . . . . . . . 223
Wheel change . . . . . . . . . . . . . . . . . . . . . . . . . . . . 224
Tyre repair kit (Tyre-Mobility-System)* . . . . . . . . . 229
Fuses . . . . . . . . . . . . . . . . . . . . . . . . . . . . . . . . . . . 231
Bulb change . . . . . . . . . . . . . . . . . . . . . . . . . . . . . 234
Single headlight bulb change . . . . . . . . . . . . . . . 236
Double headlight bulb change . . . . . . . . . . . . . . . 238
Changing the bulbs of AFS headlights . . . . . . . . 242
Changing the fog light bulbs . . . . . . . . . . . . . . . . 243
Changing the rear lights (on the wing) . . . . . . . . 244
Changing the rear lights (on the rear lid) . . . . . . 245
Side turn signal bulbs . . . . . . . . . . . . . . . . . . . . . . 246
Number plate light . . . . . . . . . . . . . . . . . . . . . . . . 247
Interior light and front reading lights . . . . . . . . . 247
Additional brake lights* . . . . . . . . . . . . . . . . . . . . 248
Luggage compartment light . . . . . . . . . . . . . . . . . 248 Jump-starting . . . . . . . . . . . . . . . . . . . . . . . . . . . . . 248
Towing and tow-starting . . . . . . . . . . . . . . . . . . . . 252
Technical Specifications . . . . . . . . . . . 255
Description of specifications . . . . . . . . . . . . . . . 255
Important information . . . . . . . . . . . . . . . . . . . . . 255
Information on fuel consumption . . . . . . . . . . . . 257
Towing a trailer . . . . . . . . . . . . . . . . . . . . . . . . . . . 257
Wheels . . . . . . . . . . . . . . . . . . . . . . . . . . . . . . . . . . 258
Technical specifications . . . . . . . . . . . . . . . . . . . . 259
Checking fluid levels . . . . . . . . . . . . . . . . . . . . . . . 259
Petrol engine 1.2 51 kW (70 PS) . . . . . . . . . . . . . 260
Petrol engine 1.2 TSI 63 kW (85 PS) . . . . . . . . . . 261
Petrol engine 1.4 63 kW (85 PS) . . . . . . . . . . . . . 262
Petrol engine 1.2 TSI 77 kW (105 PS) . . . . . . . . . 263
Petrol engine 1.2 TSI 77 kW (105 PS) Start-Stop 264
Petrol engine 1.4 TSI 110 kW (150 PS) automatic . .265
Diesel engine 1.2 TDI CR 55 kW (75 PS) DPF
Start-Stop Ecomotive . . . . . . . . . . . . . . . . . . . . . . 266
Diesel engine 1.2 TDI CR 55 kW (75 PS) DPF . . . . 267
Diesel engine 1.6 TDI CR 66 kW (90 PS) DPF . . . . 268
Diesel engine 1.6 TDI CR 77 kW (105 PS) with/
without DPF . . . . . . . . . . . . . . . . . . . . . . . . . . . . . . 269
Dimensions and capacities . . . . . . . . . . . . . . . . . 270
Index . . . . . . . . . . . . . . . . . . . . . . . . . . . . . . . . . . . 271
4Table of Contents
Page 60 of 282
58Cockpit
Rev counter
The rev counter displays the engine speed in revolutions per
minute.
The start of the red zone ⇒ Fig. 30 1
indicates the maximum engine speed
operating at service temperature. However, it is advisable to change up into
a higher gear, move the selector lever to D or lift your foot off the accelerator
before the needle reaches the red zone.
CAUTION
To prevent possible engine malfunctions, the rev counter needle should not
reach the red zone. The start of the red zone on the dial is different for some
engine versions.
For the sake of the environment
Changing up into higher gears sooner, following the recommended gear in-
dications ⇒ Fig. 33 will help you to reduce fuel consumption, emissions and
also engine noise.
Speedometer
The speedometer is equipped with a digital odometer and a trip recorder, in
addition to a service intervals display.
During the running-in period, the instructions shown on ⇒ page 173
should be followed. LPG system*
LPG gauge
Fig. 31 Instrument pan-
el: gas gauge.
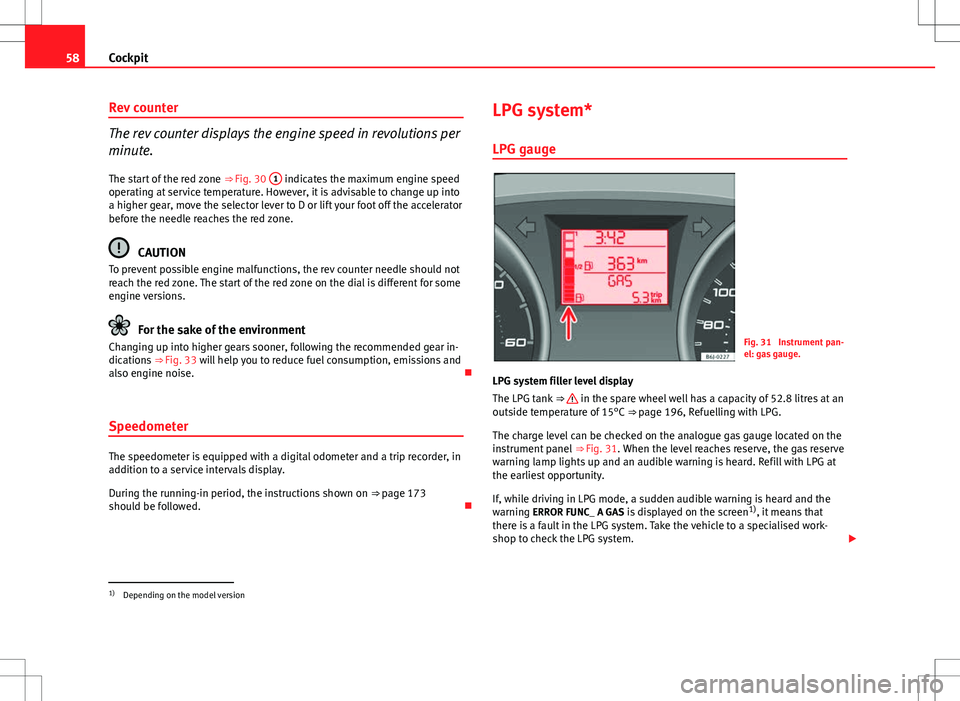
LPG system filler level display
The LPG tank ⇒
in the spare wheel well has a capacity of 52.8 litres at an
outside temperature of 15°C ⇒ page 196, Refuelling with LPG.
The charge level can be checked on the analogue gas gauge located on the
instrument panel ⇒ Fig. 31. When the level reaches reserve, the gas reserve
warning lamp lights up and an audible warning is heard. Refill with LPG at
the earliest opportunity.
If, while driving in LPG mode, a sudden audible warning is heard and the
warning ERROR FUNC_ A GAS is displayed on the screen 1)
, it means that
there is a fault in the LPG system. Take the vehicle to a specialised work-
shop to check the LPG system.
1)
Depending on the model version
Page 75 of 282
73
Cockpit
Brake system*
This warning lamp lights up if the brake fluid level is too low
or if there is a fault in the system.
This warning lamp lights up if
● the brake fluid level is too low ⇒ page 213.
● there is a fault in the brake system.
This warning lamp can light up together with the ABS system warning lamp.
WARNING
● If the brake warning lamp does not go out, or if it lights up when driv-
ing, the brake fluid level ⇒ page 213, Brake fluid in the reservoir is too
low. Risk of accident. Stop the vehicle and do not drive on. Obtain techni-
cal assistance.
● If the brake warning lamp lights up together with the ABS warning
lamp , the control function of the ABS could be out of action. This could
cause the rear wheels to lock quickly when you brake. This could cause
the rear to break away. Risk of skidding. Stop the vehicle and seek tech-
nical assistance.
Cruise speed (Cruise control)*
The warning lamp comes on when the cruise control system
is switched on.
The warning lamp lights up when the cruise control system is switched
on. For further information on the cruise control system, see ⇒ page 164.Tyre pressure*
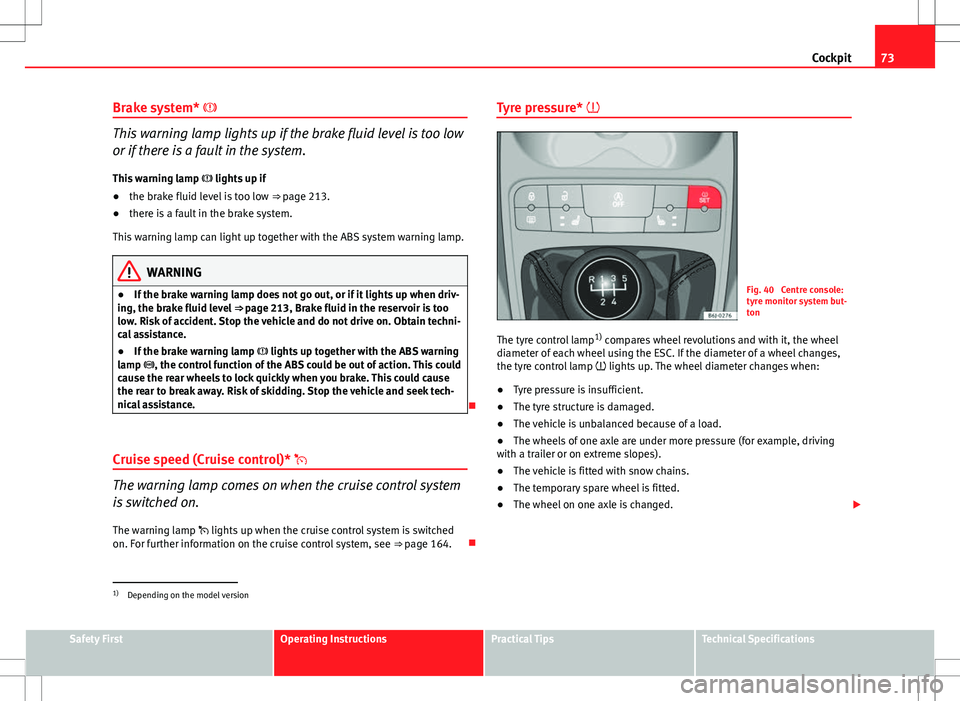
Fig. 40 Centre console:
tyre monitor system but-
ton
The tyre control lamp 1)
compares wheel revolutions and with it, the wheel
diameter of each wheel using the ESC. If the diameter of a wheel changes,
the tyre control lamp lights up. The wheel diameter changes when:
● Tyre pressure is insufficient.
● The tyre structure is damaged.
● The vehicle is unbalanced because of a load.
● The wheels of one axle are under more pressure (for example, driving
with a trailer or on extreme slopes).
● The vehicle is fitted with snow chains.
● The temporary spare wheel is fitted.
● The wheel on one axle is changed.
1)
Depending on the model version
Safety FirstOperating InstructionsPractical TipsTechnical Specifications
Page 108 of 282
106Lights and visibility
Note
● The battery will run down if the hazard warning lights are left on for a
long time, even if the ignition is switched off.
● The use of the hazard warning lights described here is subject to the rel-
evant statutory requirements.
Turn signal and main beam headlight lever
The turn signal and main beam lever also operates the park-
ing lights and the headlight flasher.
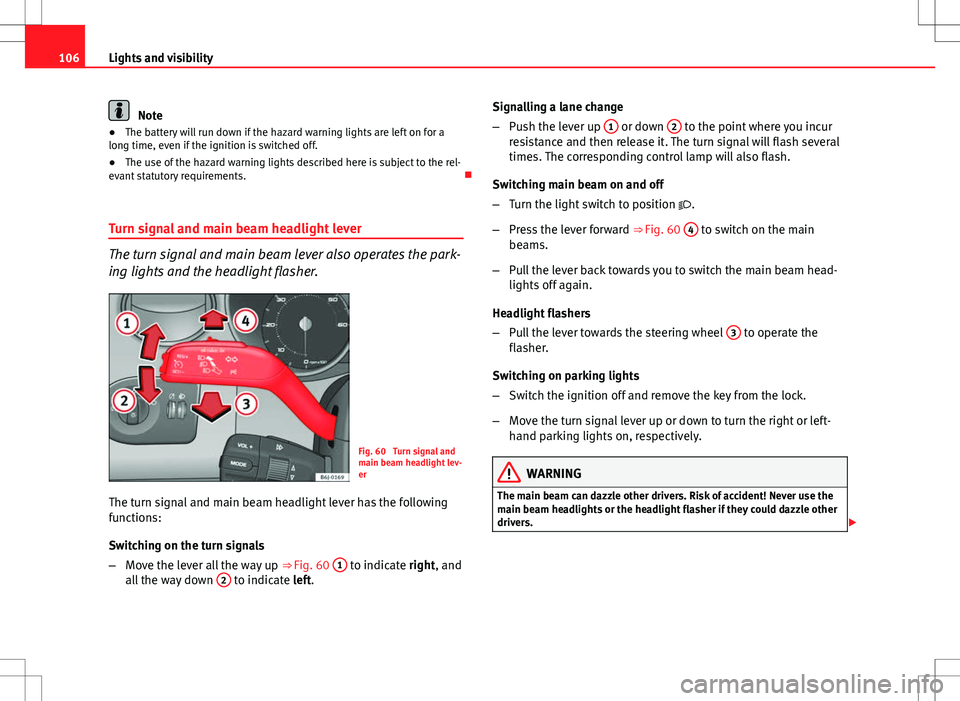
Fig. 60 Turn signal and
main beam headlight lev-
er
The turn signal and main beam headlight lever has the following
functions:
Switching on the turn signals
– Move the lever all the way up ⇒
Fig. 60 1
to indicate right, and
all the way down 2 to indicate left. Signalling a lane change
–
Push the lever up 1
or down 2 to the point where you incur
resistance and then release it. The turn signal will flash several
times. The corresponding control lamp will also flash.
Switching main beam on and off
– Turn the light switch to position .
– Press the lever forward ⇒ Fig. 60 4
to switch on the main
beams.
– Pull the lever back towards you to switch the main beam head-
lights off again.
Headlight flashers
– Pull the lever towards the steering wheel 3
to operate the
flasher.
Switching on parking lights
– Switch the ignition off and remove the key from the lock.
– Move the turn signal lever up or down to turn the right or left-
hand parking lights on, respectively.
WARNING
The main beam can dazzle other drivers. Risk of accident! Never use the
main beam headlights or the headlight flasher if they could dazzle other
drivers.
Page 151 of 282

149
Driving
temperature increases due to the heat accumulated in the engine compart-
ment or due to its prolonged exposure to solar radiation.
WARNING
● Never switch the engine off until the vehicle is completely stationary.
● The brake servo works only when the engine is running. With the en-
gine switched off, more strength is needed to brake. As normal brake op-
eration cannot be performed, risk of accidents and serious injury may ex-
ist.
● The steering lock can be immediately blocked once the key is re-
moved from the ignition. The vehicle cannot be steered. Risk of accident.
CAUTION
When the engine has been running under a heavy load for a long period,
heat can accumulate in the engine compartment and cause engine damage.
For this reason, you should idle the engine for approx. 2 minutes before you
switch it off. Driving with LPG*Fig. 108 Centre console:
gas system control
switch.
Your SEAT vehicle has a bivalent engine able to run on either LPG or petrol.
The LPG tank ⇒ page 196, Refuelling with LPG is in the spare wheel well
⇒
.
It is possible to change from LPG to petrol while the engine is running, even
if the vehicle is moving, by pressing the button located on the centre
console ⇒ Fig. 108.
Starting the engine
The engine is always started with petrol, even when LPG was being used
when it was switched off.
Automatic switch from petrol to LPG
When the engine is turned on and the following conditions are met, the sys-
tem will automatically switch from petrol mode to LPG mode, the notifica-
tion changed to GAS mode is displayed and the green warning lamp on the
instrument panel lights up:
Safety FirstOperating InstructionsPractical TipsTechnical Specifications
Page 159 of 282

157
Driving
WARNING (Continued)
● Never accelerate when moving the selector lever or you may cause an
accident.
● Never move the selector lever to R or P when driving. Risk of accident!
● Before driving down a long, steep slope, it is advisable to reduce
speed and change into a lower gear.
● If you stop the vehicle up hill, always hold the foot brake strongly de-
pressed down to stop it from rolling back.
● Never allow the brake to rub and do not use the brake pedal too often
or for long periods. Constant braking will cause the brakes to overheat
and will considerably reduce the brake effect. This increases the braking
distance and could cause the brake system to fail.
● Never allow the vehicle to roll down a mountain or a slope with the
lever in the N or D position, regardless of whether the engine is running
or not.
CAUTION
● If you stop the vehicle up hills, do not attempt to stop it from rolling
back by depressing the accelerator when a gear has been selected. Other-
wise, the automatic gearbox may overheat causing damage. Pull the hand-
brake up or fully depress the brake pedal to prevent the vehicle from rolling
away.
● If you allow the vehicle to roll when the engine is not running, or with
the selector lever in position N, a lack of lubrication in the automatic gear-
box will damage it. Changing gear in tiptronic mode*
The tiptronic system allows the driver to select gears man-
ually
Fig. 116 Changing gear
with tiptronic
Fig. 117 Steering wheel
with paddle levers for au-
tomatic gearbox
General information about driving in tiptronic mode
Safety FirstOperating InstructionsPractical TipsTechnical Specifications
Page 160 of 282
158Driving
Changing gear in tiptronic mode
–Press the selector lever from position D to the right into the tip-
tronic selector gate.
– Lightly press the selector lever forward + to change up into high
gears.
– Lightly press the selector lever backwards - to change down into
low gears.
Changing gear with the steering wheel paddle levers*
– Press the right paddle lever +
towards the steering wheel to
change up. ⇒ Fig. 117.
– Press the left paddle lever –
towards the steering wheel to
change down. ⇒ Fig. 117.
Using the paddle levers on the steering wheel, you can access manual driv-
ing mode regardless of the pre-selected driving mode.
General information about driving in tiptronic mode
When accelerating, the automatic gearbox / DSG automatic gearbox goes
into a higher gear a little before the engine reaches its maximum permitted
revolutions.
If a lower gear is selected, the automatic gearbox / DSG automatic gearbox
will only change down when the engine cannot go over its maximum permit-
ted revolutions.
If tiptronic is selected whilst the vehicle is in motion and the automatic
gearbox / DSG automatic gearbox is in third gear and selector lever position
D, tiptronic mode will then also be in third gear. Changing gears in the normal or sport programme using the steering wheel
paddle levers
If the paddle levers
⇒ Fig. 117 are used in the normal or sport programme,
the system switches temporarily to tiptronic mode. To exit “tiptronic” mode
again, press the right paddle lever +
towards the steering wheel for approx-
imately one second. You will also leave tiptronic mode if the paddle levers
are not moved for a certain time.
Note
● The gear paddle levers on the steering wheel can be operated with the
selector lever in any position and with the vehicle in motion.
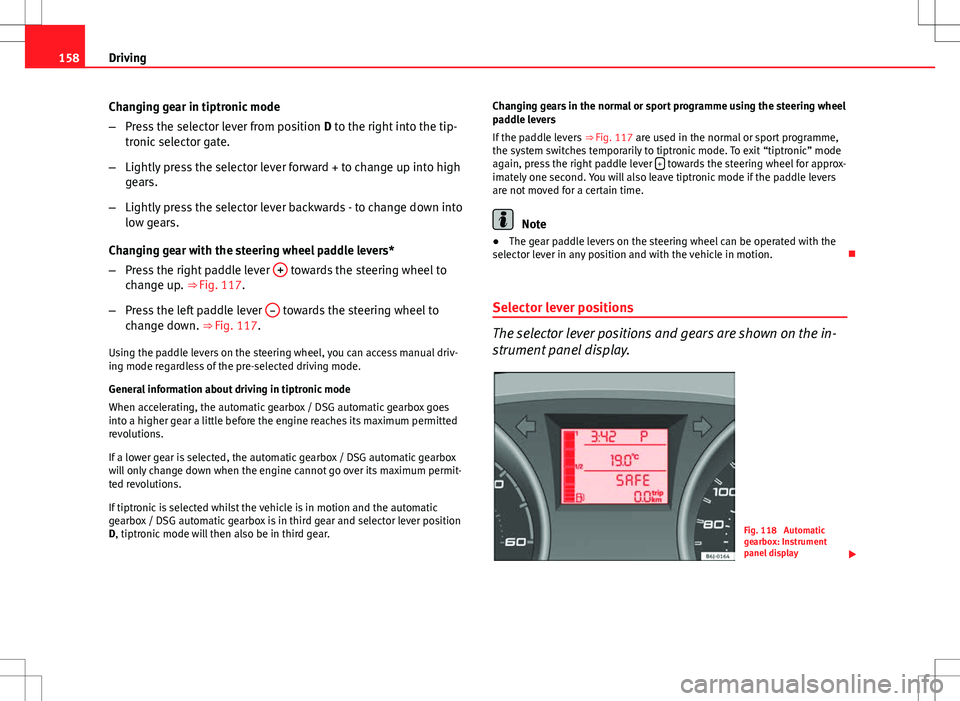
Selector lever positions
The selector lever positions and gears are shown on the in-
strument panel display.
Fig. 118 Automatic
gearbox: Instrument
panel display
Page 161 of 282
159
Driving
Selector lever positions
The selected gear is displayed on the side of the selector lever and on the
instrument panel display. The currently selected gear for the automatic
gearbox will also be shown on the display.
Tiptronic gear indicator
If the automatic gearbox is shifted manually, the selected gears are shown
on the screen.
P - parking lock
When the selector lever is in this position, the driven wheels are locked me-
chanically.
Position P on the lever must only be selected if the vehicle is stationary.
To move selector lever from position P, the locking button on the selector
lever handle must be pressed and the brake pedal depressed at the same
time while the ignition is switched on.
To put the selector lever in position P, simply press the lock button down
and, if necessary, depress the brake pedal down.
R - Reverse gear
The reverse gear is engaged in this position.
Reverse gear must be engaged only when the vehicle is stationary and the
engine is idling.
To move the selector lever to position R, press the lock button down and, at
the same time, press the brake pedal down, with the ignition switched on.
With the selector lever in position R and the ignition switched on the follow-
ing occurs:
● Reverse lights light up.
● The air conditioner automatically changes the air recirculation mode. ●
The wiper starts if the windscreen washer is on.
● The parking distance warning system switches on.*
N - Neutral (idling)
If this position is selected, the gearbox is in neutral. Power is not transmit-
ted to the wheels and the engine does not have a braking function.
Never use the N position to drive down a hill. The engine does not function
as a brake and the brakes are subjected to excessive stain.
You could damage the automatic gearbox if you drive down hills with the
gearbox lever in position N and the engine switched off.
D - Drive (forward)
In this position the gearbox automatically changes to a lower or higher gear,
according to the engine's requirements, the driving style and speed. The
braking effect of the engine when driving downhill is very limited when the
selector is in this position. The instrument panel display shows the selected
gear as well as the selector lever in position D.
If position N has been selected and you wish to select D, you must press the
foot brake if the vehicle is stationary, or travelling at under 5 km/h (3 mph).
S - Standard driving position (Sport programme)
When the selector lever is in position S, it will automatically change up into
a higher gear later, and change down into a low gear, if compared with posi-
tion D. This way, it is possible to take full advantage of the engine reserve
power, depending on the engine demand, driving style and speed. The
braking effect of the engine when driving downhill is very limited. On the
instrument panel display the selected gear is shown as well as the selector
lever to position S.
To select gear range S, press the lock button on the selector lever.
Safety FirstOperating InstructionsPractical TipsTechnical Specifications
Page 162 of 282
160Driving
WARNING
If the vehicle moves with no control, an accident and serious injury may
occur.
● As a driver, you should never leave your vehicle if the engine is run-
ning and a gear is engaged. If you have to leave your vehicle while the
engine is running, you must always apply the handbrake and engage the
parking lock position P.
● If the engine is running and if D or R are engaged, you will need to
hold the vehicle stopped by depressing footbrake down. The vehicle
would creep forward as the power transmission is not fully interrupted
even when the engine is idling.
● Never accelerate when moving the selector lever or you may cause an
accident.
● Never move the selector lever to “R” or “P” when driving. Risk of acci-
dent.
● Before driving down a very steep slope, reduce your speed and shift
to first gear.
● Always hold the vehicle on the foot brake if you stop on hills. Other-
wise, the vehicle could roll back.
● Never allow the brake to rub and do not use the brake pedal too often
or for long periods. Constant braking will cause the brakes to overheat
and will considerably reduce the brake effect. This increases the braking
distance and could cause the brake system to fail.
WARNING
Never switch the engine off until the vehicle is stationary. You could lose
control of your vehicle. This could cause an accident and serious injury.
● The airbags and belt tensioners do not work when the ignition is
switched off.
WARNING (Continued)
● The brake servo does not work with the engine off. You need more
force to stop the vehicle.
● Power steering does not work when the engine is not running. That is
why it is much more difficult to turn the steering wheel.
● Never remove the key from the ignition if the vehicle is in motion. The
steering lock could suddenly engage, and you would not be able to steer
the vehicle.
● Never allow the vehicle to roll downhill with the selector lever in “N”,
regardless of whether the engine is running or not.
CAUTION
If you allow the vehicle to move when the engine is switched off or with the
selector lever in position “N”, take your foot off the accelerator and wait un-
til the engine starts idling before returning to position “D”.
Kickdown feature
This feature allows maximum acceleration. If you press the accelerator down thoroughly, the gearbox automatically
changes down, depending on speed and engine speed, into a lower gear to
take full advantage of give the vehicle maximum acceleration.
The gearbox does not change gear until the engine reaches the maximum
determined engine speed for the gear.
Page 173 of 282
171
Intelligent technology
Electronic Stability Control (ESC)*
The ESC reduces the risk of skidding by braking the wheels individually.
The system uses the steering wheel angle and road speed to calculate the
changes of direction desired by the driver, and constantly compares them
with the actual behaviour of the vehicle. When irregularities occur, for exam-
ple, if the vehicle begins to skid, the ESC brakes the appropriate wheel au-
tomatically.
The forces acting on the braked wheel bring the vehicle back to a stable
condition. If the vehicle tends to oversteer, the system will act on the front
wheel on the outside of the turn.
WARNING
● Remember that not even the ESC can defy the laws of physics. This
should be kept in mind, particularly on slippery and wet roads and when
towing a trailer.
● Always adapt your driving style to suit the condition of the roads and
the traffic situation. The greater safety provided by the ESC should not
encourage you to run any risks.
CAUTION
● To ensure that the ESC works correctly, all four wheels must be fitted
with the same tyres. Any differences in the rolling radius of the tyres can
cause the system to reduce engine power when this is not desired.
● Any modifications made to the vehicle (for example, to the engine,
brake system, running gear or to the combination of wheels and tyres) may
affect the operation of the ABS, EDL, ESC and ASR. Anti-lock brake system (ABS)
The anti-lock brake system prevents the wheels locking during braking
⇒ page 169.
Electronic differential lock (EDL)*
The electronic differential lock helps prevent the loss of trac-
tion caused if one of the driven wheels starts spinning.
EDL helps the vehicle to start moving, accelerate and climb a gradient in
slippery conditions where this may otherwise be difficult or even impossi-
ble.
The system will control the revolutions of the driven wheels using the ABS
sensors (in case of an EDL fault the warning lamp for ABS lights up)
⇒ page 71.
At speeds of up to approximately 80 km/h (50 mph), it is able to balance
out differences in the speed of the driven wheels of approximately 100 rpm
caused by a slippery road surface on one side of the vehicle. It does this by
braking the wheel which has lost traction and distributing more driving
force to the other driven wheel via the differential.
To prevent the disc brake of the braking wheel from overheating, the EDL
cuts out automatically if subjected to excessive loads. The vehicle will con-
tinue to function normally without EDL. For this reason, the driver is not in-
formed that the EDL has been switched off.
The EDL will switch on again automatically when the brake has cooled
down.
Safety FirstOperating InstructionsPractical TipsTechnical Specifications