warning lights Seat Ibiza ST 2012 Owner's manual
[x] Cancel search | Manufacturer: SEAT, Model Year: 2012, Model line: Ibiza ST, Model: Seat Ibiza ST 2012Pages: 282, PDF Size: 3.77 MB
Page 5 of 282
Table of Contents
Manual structure . . . . . . . . . . . . . . . . . . . . 5
Content . . . . . . . . . . . . . . . . . . . . . . . . . . . . . . . . 6
Safety First . . . . . . . . . . . . . . . . . . . . . . . . . . . . 7
Safe driving . . . . . . . . . . . . . . . . . . . . . . . . . . . . . . . 7
Brief introduction . . . . . . . . . . . . . . . . . . . . . . . . . 7
Proper sitting position for occupants . . . . . . . . . 10
Pedal area . . . . . . . . . . . . . . . . . . . . . . . . . . . . . . . 16
Storing objects . . . . . . . . . . . . . . . . . . . . . . . . . . . 16
Seat belts . . . . . . . . . . . . . . . . . . . . . . . . . . . . . . . . . 19
Brief introduction . . . . . . . . . . . . . . . . . . . . . . . . . 19
Why wear seat belts? . . . . . . . . . . . . . . . . . . . . . . 21
Seat belts . . . . . . . . . . . . . . . . . . . . . . . . . . . . . . . 25
Belt tensioners* . . . . . . . . . . . . . . . . . . . . . . . . . . 28
Airbag system . . . . . . . . . . . . . . . . . . . . . . . . . . . . . 30
Brief introduction . . . . . . . . . . . . . . . . . . . . . . . . . 30
Front airbags . . . . . . . . . . . . . . . . . . . . . . . . . . . . . 34
Side airbags . . . . . . . . . . . . . . . . . . . . . . . . . . . . . 38
Deactivating airbags* . . . . . . . . . . . . . . . . . . . . . . 41
Child safety . . . . . . . . . . . . . . . . . . . . . . . . . . . . . . . 43
Brief introduction . . . . . . . . . . . . . . . . . . . . . . . . . 43
Child seats . . . . . . . . . . . . . . . . . . . . . . . . . . . . . . . 45
Securing child seats . . . . . . . . . . . . . . . . . . . . . . . 48
Operating Instructions . . . . . . . . . . . . . 55
Cockpit . . . . . . . . . . . . . . . . . . . . . . . . . . . . . . . . . . . 55
Overview . . . . . . . . . . . . . . . . . . . . . . . . . . . . . . . . 55
Instruments . . . . . . . . . . . . . . . . . . . . . . . . . . . . . . 57 LPG system* . . . . . . . . . . . . . . . . . . . . . . . . . . . . . 58
Digital instrument panel display . . . . . . . . . . . . . 59
Warning lamps . . . . . . . . . . . . . . . . . . . . . . . . . . . 65
Steering column controls* . . . . . . . . . . . . . . . . . 78
General information . . . . . . . . . . . . . . . . . . . . . . . 78
Audio Control . . . . . . . . . . . . . . . . . . . . . . . . . . . . . 79
Audio + Telephone Control . . . . . . . . . . . . . . . . . . 80
Opening and closing . . . . . . . . . . . . . . . . . . . . . . 82
Central locking . . . . . . . . . . . . . . . . . . . . . . . . . . . 82
Keys . . . . . . . . . . . . . . . . . . . . . . . . . . . . . . . . . . . . 87
Radio frequency remote control* . . . . . . . . . . . . . 88
Anti-theft alarm system* . . . . . . . . . . . . . . . . . . . 90
Rear lid . . . . . . . . . . . . . . . . . . . . . . . . . . . . . . . . . . 93
Windows . . . . . . . . . . . . . . . . . . . . . . . . . . . . . . . . 95
Panoramic tilting sunroof* . . . . . . . . . . . . . . . . . . 98
Lights and visibility . . . . . . . . . . . . . . . . . . . . . . . . 100
Lights . . . . . . . . . . . . . . . . . . . . . . . . . . . . . . . . . . . 100
Interior lights . . . . . . . . . . . . . . . . . . . . . . . . . . . . . 107
Visibility . . . . . . . . . . . . . . . . . . . . . . . . . . . . . . . . . 108
Windscreen wipers . . . . . . . . . . . . . . . . . . . . . . . . 109
Rear view mirrors . . . . . . . . . . . . . . . . . . . . . . . . . . 112
Seats and storage compartments . . . . . . . . . . 115
The importance of correct seat adjustment . . . . . 115
Head restraints . . . . . . . . . . . . . . . . . . . . . . . . . . . 116
Front seats . . . . . . . . . . . . . . . . . . . . . . . . . . . . . . . 118
Rear seats . . . . . . . . . . . . . . . . . . . . . . . . . . . . . . . 120
Storage compartment . . . . . . . . . . . . . . . . . . . . . . 122
Ashtrays, cigarette lighter and power socket . . . 125
First-aid kit, warning triangle, fire extinguisher . 128
Luggage compartment . . . . . . . . . . . . . . . . . . . . . 129
Roof rack* . . . . . . . . . . . . . . . . . . . . . . . . . . . . . . . 132
Air conditioning . . . . . . . . . . . . . . . . . . . . . . . . . . . 134
Heating . . . . . . . . . . . . . . . . . . . . . . . . . . . . . . . . . 134
Air conditioning* . . . . . . . . . . . . . . . . . . . . . . . . . . 137 Climatronic . . . . . . . . . . . . . . . . . . . . . . . . . . . . . . 140
General notes . . . . . . . . . . . . . . . . . . . . . . . . . . . . 142
Driving . . . . . . . . . . . . . . . . . . . . . . . . . . . . . . . . . . . . 144
Steering . . . . . . . . . . . . . . . . . . . . . . . . . . . . . . . . . 144
Safety . . . . . . . . . . . . . . . . . . . . . . . . . . . . . . . . . . . 145
Ignition lock . . . . . . . . . . . . . . . . . . . . . . . . . . . . . . 145
Starting and stopping the engine . . . . . . . . . . . . 147
Start-Stop function* . . . . . . . . . . . . . . . . . . . . . . . 150
Manual gearbox . . . . . . . . . . . . . . . . . . . . . . . . . . 153
Automatic gearbox* . . . . . . . . . . . . . . . . . . . . . . . 154
Handbrake . . . . . . . . . . . . . . . . . . . . . . . . . . . . . . . 161
Acoustic parking aid system* . . . . . . . . . . . . . . . 163
Cruise speed* (Cruise control system) . . . . . . . . 164
Practical Tips . . . . . . . . . . . . . . . . . . . . . . . . . 168
Intelligent technology . . . . . . . . . . . . . . . . . . . . . 168
Brakes . . . . . . . . . . . . . . . . . . . . . . . . . . . . . . . . . . 168
Anti-lock brake system and traction control ABS 169
Electronic Stability Control (ESC)* . . . . . . . . . . . . 170
Driving and the environment . . . . . . . . . . . . . . . 173
Running-in . . . . . . . . . . . . . . . . . . . . . . . . . . . . . . . 173
Exhaust gas purification system . . . . . . . . . . . . . 174
Economical and environmentally friendly driving 176
Driving abroad . . . . . . . . . . . . . . . . . . . . . . . . . . . . 178
Trailer towing . . . . . . . . . . . . . . . . . . . . . . . . . . . . . 178
Vehicle maintenance and cleaning . . . . . . . . . 181
General notes . . . . . . . . . . . . . . . . . . . . . . . . . . . . 181
Care of the vehicle exterior . . . . . . . . . . . . . . . . . . 182
Vehicle interior maintenance . . . . . . . . . . . . . . . . 187
3
Table of Contents
Page 10 of 282
8Safe driving
you and your passengers can achieve the greatest possible benefit from the
safety equipment fitted. This manual includes important warnings that you
and your passengers should note in order to reduce the risk of injury.
Safety is everyone's business!
Before setting off
The driver is always responsible for the safety of the passen-
gers and the safe operation of the vehicle.
For your own safety and the safety of your passengers, always note
the following points before every trip:
– Make sure that the vehicle's lights and turn signals are working
properly.
– Check tyre pressure.
– Ensure that all windows provide a clear and good view of the
surroundings.
– Secure all baggage. ⇒ page 16.
– Make sure that no objects can interfere with the pedals.
– Adjust front seat, head restraint and rear vision mirrors properly
according to your size.
– Ensure that the passenger in the central rear seat always has
the head restraint in the correct position for use.
– Instruct passengers to adjust the head restraints according to
their height. –
Protect children with appropriate child seats and properly ap-
plied seat belts ⇒ page 43.
– Assume the correct sitting position. Instruct your passengers al-
so to assume a proper sitting position. ⇒ page 10.
– Fasten your seat belt securely. Instruct your passengers also to
fasten their seat belts properly. ⇒ page 19.
What affects driving safety?
Driving safety is largely determined by your driving style
and the personal behaviour of all vehicle occupants.
As a driver, you are responsible for yourself and your passengers.
When your concentration or driving safety is affected by any cir-
cumstance, you endanger yourself as well as others on the road
⇒
, for this reason:
– Always pay attention to traffic and do not get distracted by pas-
sengers or telephone calls.
– Never drive when your driving ability is impaired (e.g. by medi-
cation, alcohol, drugs).
– Observe traffic laws and speed limits.
– Always reduce your speed as appropriate for road, traffic and
weather conditions.
– When travelling long distances, take breaks regularly - at least
every two hours.
– If possible, avoid driving when you are tired or stressed.
Page 22 of 282
20Seat belts
Seat belt warning lamp*
The control lamp acts as a reminder to the driver to fasten
the seat belt.
Before starting the vehicle:
– Fasten your seat belt securely.
– Instruct your passengers to fasten their seat belts properly be-
fore driving off.
– Protect children by using a child seat according to the child's
height and weight.
The control lamp in the instrument panel lights up 1)
if the driver or pas-
senger seat belt is not fastened 1)
when the ignition is switched on. More-
over, an audible warning 1)
is heard on exceeding 25 km/h (15 mph). This
acoustic signal stops when the seat belt is fastened.
The warning lamp* is switched off if the driver seat belt is fastened while
the ignition is switched on.
1)
Depending on the model version
Page 34 of 282
32Airbag system
Monitoring of airbag and belt tensioner system
Both the airbag and belt tensioner systems operation is constantly moni-
tored electronically. The control lamp will light up for a few seconds every
time the ignition is switched on (self-diagnosis).
The system must be checked when the control lamp :
● does not light up when the ignition is switched on
● turns off after 4 seconds after the ignition is switched on
● turns off and then lights up again after the ignition is switched on
● lights up or flashes while the vehicle is moving
In the event of a malfunction, the warning lamp remains on continuously.
Have the airbag system inspected immediately by a specialised workshop.
If any of the airbags are disabled by a Technical Service, the warning lamp
lights for several seconds more after the verification and will turn off if there
is no fault.
WARNING
● If there is a malfunction, the airbag and belt tensioner system cannot
properly perform its protective function.
● If a malfunction occurred, have the system checked immediately by a
specialised workshop. Otherwise, in the event of an accident, the airbag
system and belt tensioners may not be triggered, or may not be triggered
correctly.
Repairs, maintenance and disposal of airbags
The parts of the airbag system are installed in various places in your vehi-
cle. If work is carried out on the airbag system or parts have to be removed
and fitted on the system when performing other repair work, parts of the air- bag system may be damaged. In the event of an accident this could cause
the airbag to inflate incorrectly or not inflate at all.
The relevant safety requirements must be observed when the vehicle or
components of the airbag are
scrapped. Specialised workshops and vehicle
disposal centres are familiar with these requirements.
WARNING
● If repairs are not carried out by a professional, or if the airbags are
used incorrectly, the risk of severe or fatal injuries is increased. The air-
bags may fail to inflate, or could inflate in the wrong circumstances.
● Do not cover or stick anything on the steering wheel hub or the sur-
face of the airbag unit on the passenger side of the dash panel, and do
not obstruct or modify them in any way.
● It is important not to attach any objects such as cup holders or tele-
phone mountings to the surfaces covering the airbag units.
● To clean the steering wheel or dash panel, you may use only a dry or a
water-moistened cloth. Never clean the dash panel and the airbag mod-
ule surface with cleaners containing solvents. Solvents cause the surface
to become porous. If the airbag triggered, plastic parts could become de-
tached and cause injuries.
● Never attempt to repair, adjust, remove or install parts of the airbag
system.
● Any work on the airbag system or removal and installation of the air-
bag components for other repairs (such as repairs to the steering wheel)
should be performed only by a specialised workshop. Specialised work-
shops have the necessary tools, repair information and qualified person-
nel.
● We strongly recommend you to go to a specialised workshop for all
work on the airbag system.
● Never attempt to alter the front bumper or the body.
● The airbags provide protection for just one accident; replace them
once they have deployed.
Page 57 of 282
55
Cockpit
Operating Instructions Cockpit
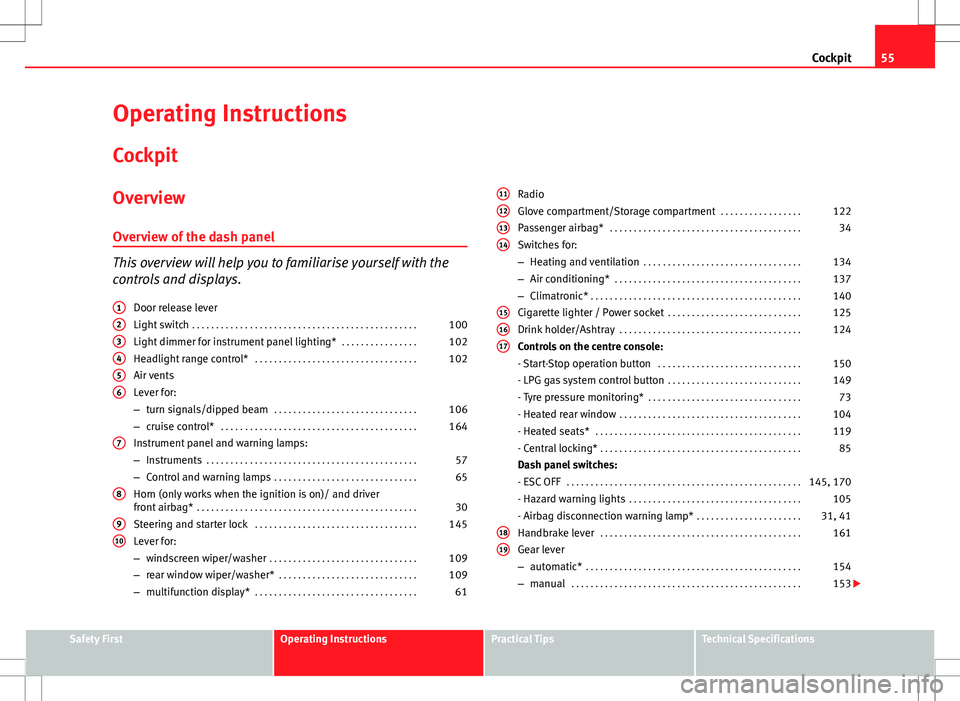
Overview Overview of the dash panel
This overview will help you to familiarise yourself with the
controls and displays. Door release lever
Light switch . . . . . . . . . . . . . . . . . . . . . . . . . . . . . . . . . . . . . . . . . . . . . . . 100
Light dimmer for instrument panel lighting* . . . . . . . . . . . . . . . .102
Headlight range control* . . . . . . . . . . . . . . . . . . . . . . . . . . . . . . . . . . 102
Air vents
Lever for:
– turn signals/dipped beam . . . . . . . . . . . . . . . . . . . . . . . . . . . . . . 106
– cruise control* . . . . . . . . . . . . . . . . . . . . . . . . . . . . . . . . . . . . . . . . . 164
Instrument panel and warning lamps:
– Instruments . . . . . . . . . . . . . . . . . . . . . . . . . . . . . . . . . . . . . . . . . . . . 57
– Control and warning lamps . . . . . . . . . . . . . . . . . . . . . . . . . . . . . . 65
Horn (only works when the ignition is on)/ and driver
front airbag* . . . . . . . . . . . . . . . . . . . . . . . . . . . . . . . . . . . . . . . . . . . . . . 30
Steering and starter lock . . . . . . . . . . . . . . . . . . . . . . . . . . . . . . . . . . 145
Lever for:
– windscreen wiper/washer . . . . . . . . . . . . . . . . . . . . . . . . . . . . . . . 109
– rear window wiper/washer* . . . . . . . . . . . . . . . . . . . . . . . . . . . . . 109
– multifunction display* . . . . . . . . . . . . . . . . . . . . . . . . . . . . . . . . . . 61
1
23456
7
8
910
Radio
Glove compartment/Storage compartment
. . . . . . . . . . . . . . . . .122
Passenger airbag* . . . . . . . . . . . . . . . . . . . . . . . . . . . . . . . . . . . . . . . . 34
Switches for:
– Heating and ventilation . . . . . . . . . . . . . . . . . . . . . . . . . . . . . . . . . 134
– Air conditioning* . . . . . . . . . . . . . . . . . . . . . . . . . . . . . . . . . . . . . . . 137
– Climatronic* . . . . . . . . . . . . . . . . . . . . . . . . . . . . . . . . . . . . . . . . . . . . 140
Cigarette lighter / Power socket . . . . . . . . . . . . . . . . . . . . . . . . . . . . 125
Drink holder/Ashtray . . . . . . . . . . . . . . . . . . . . . . . . . . . . . . . . . . . . . . 124
Controls on the centre console:
- Start-Stop operation button . . . . . . . . . . . . . . . . . . . . . . . . . . . . . . 150
- LPG gas system control button . . . . . . . . . . . . . . . . . . . . . . . . . . . . 149
- Tyre pressure monitoring* . . . . . . . . . . . . . . . . . . . . . . . . . . . . . . . . 73
- Heated rear window . . . . . . . . . . . . . . . . . . . . . . . . . . . . . . . . . . . . . . 104
- Heated seats* . . . . . . . . . . . . . . . . . . . . . . . . . . . . . . . . . . . . . . . . . . . 119
- Central locking* . . . . . . . . . . . . . . . . . . . . . . . . . . . . . . . . . . . . . . . . . . 85
Dash panel switches:
- ESC OFF . . . . . . . . . . . . . . . . . . . . . . . . . . . . . . . . . . . . . . . . . . . . . . . . . 145, 170
- Hazard warning lights . . . . . . . . . . . . . . . . . . . . . . . . . . . . . . . . . . . . 105
- Airbag disconnection warning lamp* . . . . . . . . . . . . . . . . . . . . . .31, 41
Handbrake lever . . . . . . . . . . . . . . . . . . . . . . . . . . . . . . . . . . . . . . . . . . 161
Gear lever
– automatic* . . . . . . . . . . . . . . . . . . . . . . . . . . . . . . . . . . . . . . . . . . . . . 154
– manual . . . . . . . . . . . . . . . . . . . . . . . . . . . . . . . . . . . . . . . . . . . . . . . . 153
11121314
151617
1819
Safety FirstOperating InstructionsPractical TipsTechnical Specifications
Page 60 of 282
58Cockpit
Rev counter
The rev counter displays the engine speed in revolutions per
minute.
The start of the red zone ⇒ Fig. 30 1
indicates the maximum engine speed
operating at service temperature. However, it is advisable to change up into
a higher gear, move the selector lever to D or lift your foot off the accelerator
before the needle reaches the red zone.
CAUTION
To prevent possible engine malfunctions, the rev counter needle should not
reach the red zone. The start of the red zone on the dial is different for some
engine versions.
For the sake of the environment
Changing up into higher gears sooner, following the recommended gear in-
dications ⇒ Fig. 33 will help you to reduce fuel consumption, emissions and
also engine noise.
Speedometer
The speedometer is equipped with a digital odometer and a trip recorder, in
addition to a service intervals display.
During the running-in period, the instructions shown on ⇒ page 173
should be followed. LPG system*
LPG gauge
Fig. 31 Instrument pan-
el: gas gauge.
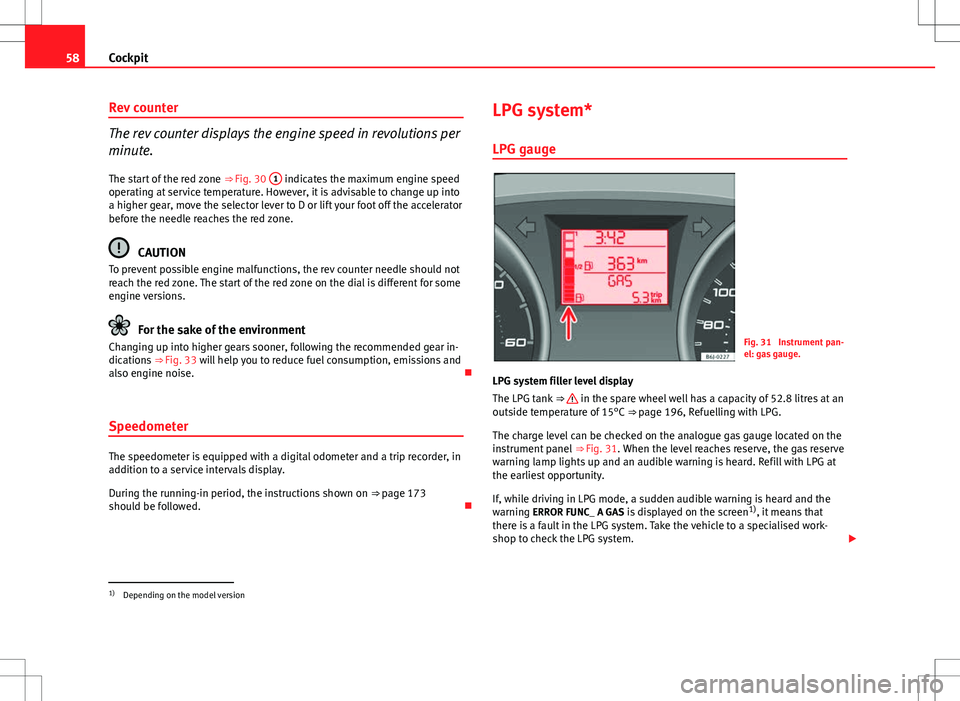
LPG system filler level display
The LPG tank ⇒
in the spare wheel well has a capacity of 52.8 litres at an
outside temperature of 15°C ⇒ page 196, Refuelling with LPG.
The charge level can be checked on the analogue gas gauge located on the
instrument panel ⇒ Fig. 31. When the level reaches reserve, the gas reserve
warning lamp lights up and an audible warning is heard. Refill with LPG at
the earliest opportunity.
If, while driving in LPG mode, a sudden audible warning is heard and the
warning ERROR FUNC_ A GAS is displayed on the screen 1)
, it means that
there is a fault in the LPG system. Take the vehicle to a specialised work-
shop to check the LPG system.
1)
Depending on the model version
Page 70 of 282
68Cockpit
WARNING
● Failure to observe control lamps and warning messages can result in
serious personal injury or damage to your vehicle.
● The risk of an accident increases if your vehicle breaks down. Use a
warning triangle to draw the attention of other road users in order to pre-
vent danger to third parties.
● The engine compartment is a dangerous area! Before you open the
bonnet to work on the engine or in the engine compartment, you must
switch the engine off and allow it to cool to reduce the risk of scalding or
other injuries. Read and observe the relevant warnings ⇒ page 200.
Note
● The appropriate control lamp for a fault will light up in vehicles without
warning or information messages in the display.
● In vehicles with warning or information texts on the screen, the appro-
priate control lamp for a fault will light up and a warning or information
message will also appear on the screen.
Warning symbols
There are red warning symbols (priority 1) and yellow warning sym-
bols (priority 2) Warning messages, Priority 1 (red)
If one of these faults occurs, the warning lamp will flash or light up and will
be accompanied by three audible warnings. This is a danger warning. Stop
the vehicle and switch off the engine. Check the fault and correct it. Obtain
professional assistance if necessary. If several priority 1 faults are detected at the same time, the symbols will be
displayed one after the other for about 2 seconds at a time and will contin-
ue until the fault is corrected.
No menus will be shown in the display for the duration of a priority 1 warn-
ing message.
Examples of priority 1 warning messages (red)
●
Brake system symbol with the warning message STOP BRAKE FLUID
INSTRUCTION MANUAL or STOP BRAKE FAULT INSTRUCTION MANUAL .
● Coolant symbol with the warning message STOP SEE COOLANT IN-
STRUCTION MANUAL.
● Engine oil pressure symbol with the warning message STOP ENGINE
OIL PRESSURE LOW! INSTRUCTION MANUAL .
Warning messages, Priority 2 (yellow)
If one of these faults occurs, the warning lamp lights up, and is accompa-
nied by one audible warning. Check the corresponding function as soon as
possible although the vehicle may be used without risk.
If several priority 2 warning messages are detected at the same time, the
symbols are displayed one after the other for about 2 seconds at a time. Af-
ter a set time, the information text will disappear and the symbol will be
shown as a reminder at the side of the display.
Priority 2 warning messages will not be shown until all Priority 1 warning
messages have been dealt with!
Examples of priority 2 warning messages (yellow): 1)
● Fuel warning light with the information text PLEASE REFUEL.
1)
Depending on the version of the model.
Page 71 of 282
69
Cockpit
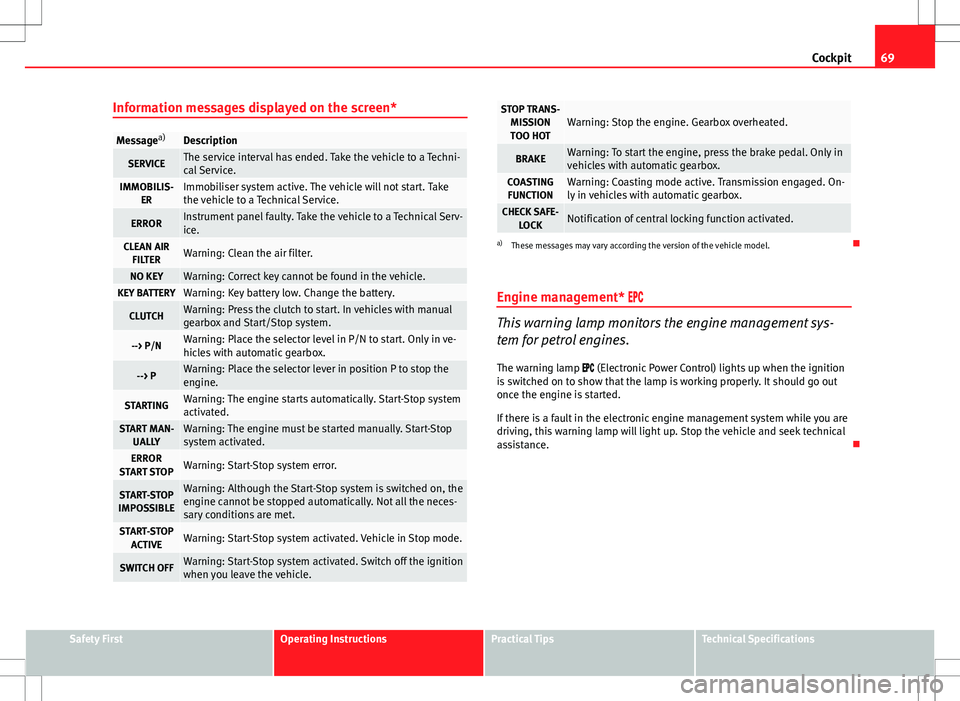
Information messages displayed on the screen*
Message a)Description
SERVICEThe service interval has ended. Take the vehicle to a Techni-
cal Service.
IMMOBILIS-
ERImmobiliser system active. The vehicle will not start. Take
the vehicle to a Technical Service.
ERRORInstrument panel faulty. Take the vehicle to a Technical Serv-
ice.
CLEAN AIRFILTERWarning: Clean the air filter.
NO KEYWarning: Correct key cannot be found in the vehicle.KEY BATTERYWarning: Key battery low. Change the battery.
CLUTCHWarning: Press the clutch to start. In vehicles with manual
gearbox and Start/Stop system.
--> P/NWarning: Place the selector level in P/N to start. Only in ve-
hicles with automatic gearbox.
--> PWarning: Place the selector lever in position P to stop the
engine.
STARTINGWarning: The engine starts automatically. Start-Stop system
activated.
START MAN- UALLYWarning: The engine must be started manually. Start-Stop
system activated.
ERROR
START STOPWarning: Start-Stop system error.
START-STOP
IMPOSSIBLEWarning: Although the Start-Stop system is switched on, the
engine cannot be stopped automatically. Not all the neces-
sary conditions are met.
START-STOP ACTIVEWarning: Start-Stop system activated. Vehicle in Stop mode.
SWITCH OFFWarning: Start-Stop system activated. Switch off the ignition
when you leave the vehicle.
STOP TRANS-MISSIONTOO HOTWarning: Stop the engine. Gearbox overheated.
BRAKEWarning: To start the engine, press the brake pedal. Only in
vehicles with automatic gearbox.
COASTING FUNCTIONWarning: Coasting mode active. Transmission engaged. On-
ly in vehicles with automatic gearbox.
CHECK SAFE- LOCKNotification of central locking function activated.
a)These messages may vary according the version of the vehicle model.
Engine management*
This warning lamp monitors the engine management sys-
tem for petrol engines.
The warning lamp (Electronic Power Control) lights up when the ignition
is switched on to show that the lamp is working properly. It should go out
once the engine is started.
If there is a fault in the electronic engine management system while you are
driving, this warning lamp will light up. Stop the vehicle and seek technical
assistance.
Safety FirstOperating InstructionsPractical TipsTechnical Specifications
Page 72 of 282
70Cockpit
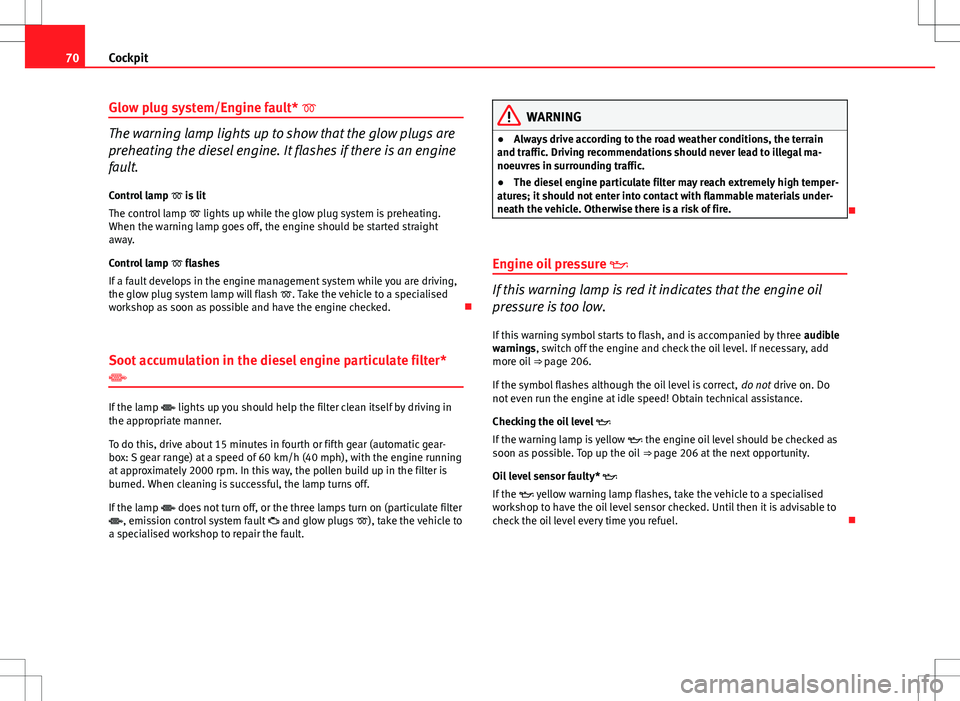
Glow plug system/Engine fault*
The warning lamp lights up to show that the glow plugs are
preheating the diesel engine. It flashes if there is an engine
fault.
Control lamp is lit
The control lamp lights up while the glow plug system is preheating.
When the warning lamp goes off, the engine should be started straight
away.
Control lamp flashes
If a fault develops in the engine management system while you are driving,
the glow plug system lamp will flash . Take the vehicle to a specialised
workshop as soon as possible and have the engine checked.
Soot accumulation in the diesel engine particulate filter*
If the lamp lights up you should help the filter clean itself by driving in
the appropriate manner.
To do this, drive about 15 minutes in fourth or fifth gear (automatic gear-
box: S gear range) at a speed of 60 km/h (40 mph), with the engine running
at approximately 2000 rpm. In this way, the pollen build up in the filter is
burned. When cleaning is successful, the lamp turns off.
If the lamp does not turn off, or the three lamps turn on (particulate filter
, emission control system fault and glow plugs ), take the vehicle to
a specialised workshop to repair the fault.
WARNING
● Always drive according to the road weather conditions, the terrain
and traffic. Driving recommendations should never lead to illegal ma-
noeuvres in surrounding traffic.
● The diesel engine particulate filter may reach extremely high temper-
atures; it should not enter into contact with flammable materials under-
neath the vehicle. Otherwise there is a risk of fire.
Engine oil pressure
If this warning lamp is red it indicates that the engine oil
pressure is too low.
If this warning symbol starts to flash, and is accompanied by three audible
warnings, switch off the engine and check the oil level. If necessary, add
more oil ⇒ page 206.
If the symbol flashes although the oil level is correct, do not drive on. Do
not even run the engine at idle speed! Obtain technical assistance.
Checking the oil level
If the warning lamp is yellow the engine oil level should be checked as
soon as possible. Top up the oil ⇒ page 206 at the next opportunity.
Oil level sensor faulty*
If the yellow warning lamp flashes, take the vehicle to a specialised
workshop to have the oil level sensor checked. Until then it is advisable to
check the oil level every time you refuel.
Page 73 of 282
71
Cockpit
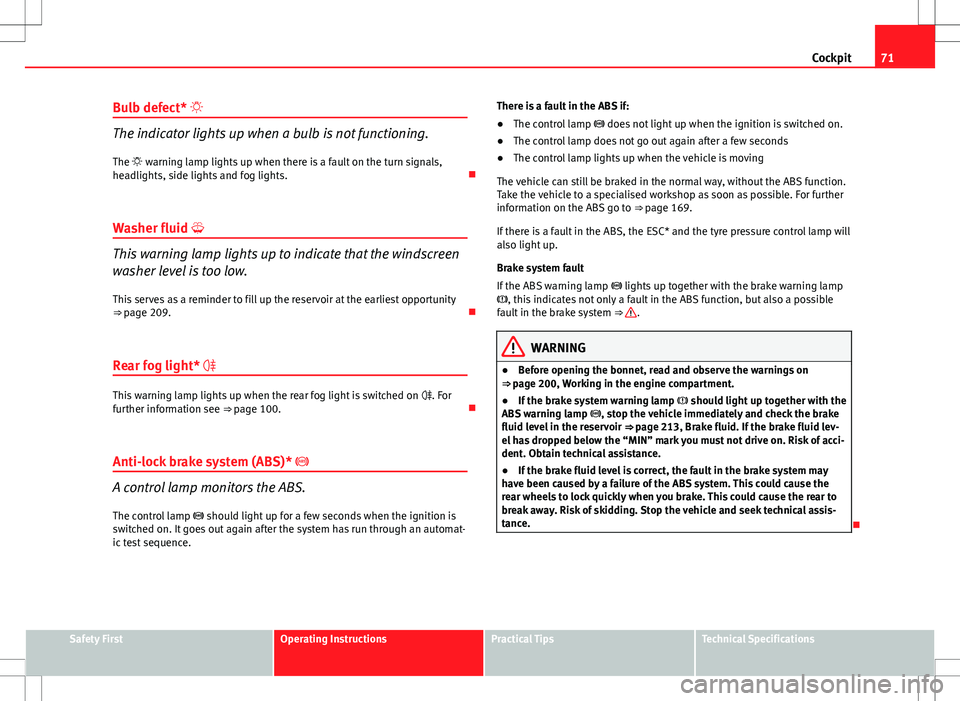
Bulb defect*
The indicator lights up when a bulb is not functioning. The warning lamp lights up when there is a fault on the turn signals,
headlights, side lights and fog lights.
Washer fluid
This warning lamp lights up to indicate that the windscreen
washer level is too low. This serves as a reminder to fill up the reservoir at the earliest opportunity
⇒ page 209.
Rear fog light*
This warning lamp lights up when the rear fog light is switched on . For
further information see ⇒ page 100.
Anti-lock brake system (ABS)*
A control lamp monitors the ABS.
The control lamp should light up for a few seconds when the ignition is
switched on. It goes out again after the system has run through an automat-
ic test sequence. There is a fault in the ABS if:
●
The control lamp does not light up when the ignition is switched on.
● The control lamp does not go out again after a few seconds
● The control lamp lights up when the vehicle is moving
The vehicle can still be braked in the normal way, without the ABS function.
Take the vehicle to a specialised workshop as soon as possible. For further
information on the ABS go to ⇒ page 169.
If there is a fault in the ABS, the ESC* and the tyre pressure control lamp will
also light up.
Brake system fault
If the ABS warning lamp lights up together with the brake warning lamp
, this indicates not only a fault in the ABS function, but also a possible
fault in the brake system ⇒
.
WARNING
● Before opening the bonnet, read and observe the warnings on
⇒ page 200, Working in the engine compartment.
● If the brake system warning lamp should light up together with the
ABS warning lamp , stop the vehicle immediately and check the brake
fluid level in the reservoir ⇒ page 213, Brake fluid. If the brake fluid lev-
el has dropped below the “MIN” mark you must not drive on. Risk of acci-
dent. Obtain technical assistance.
● If the brake fluid level is correct, the fault in the brake system may
have been caused by a failure of the ABS system. This could cause the
rear wheels to lock quickly when you brake. This could cause the rear to
break away. Risk of skidding. Stop the vehicle and seek technical assis-
tance.
Safety FirstOperating InstructionsPractical TipsTechnical Specifications