wheel torque Seat Ibiza ST 2015 Owner's manual
[x] Cancel search | Manufacturer: SEAT, Model Year: 2015, Model line: Ibiza ST, Model: Seat Ibiza ST 2015Pages: 248, PDF Size: 4.77 MB
Page 50 of 248
The essentials
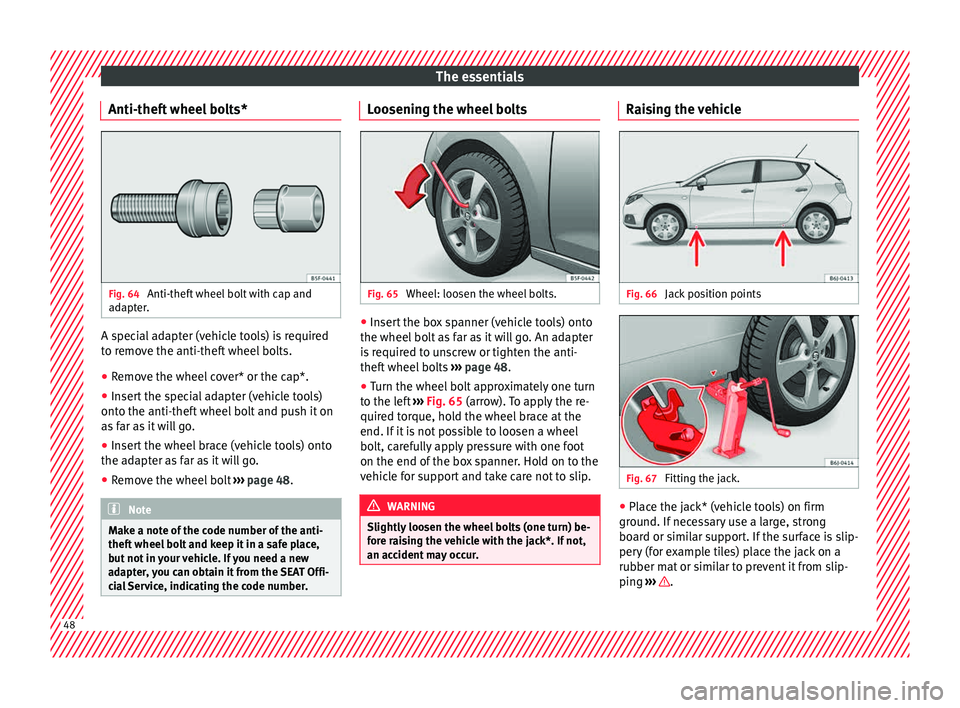
Anti-theft wheel bolts* Fig. 64
Anti-theft wheel bolt with cap and
a d
apt
er. A special adapter (vehicle tools) is required
t
o r
emo
ve the anti-theft wheel bolts.
● Remove the wheel cover* or the cap*.
● Insert the special adapter (vehicle tools)
onto the anti-theft
wheel bolt and push it on
as far as it will go.
● Insert the wheel brace (vehicle tools) onto
the adapt
er as far as it will go.
● Remove the wheel bolt ›››
page 48 . Note
Make a note of the code number of the anti-
theft wheel
bolt and keep it in a safe place,
but not in your vehicle. If you need a new
adapter, you can obtain it from the SEAT Offi-
cial Service, indicating the code number. Loosening the wheel bolts
Fig. 65
Wheel: loosen the wheel bolts. ●
Insert the box spanner (vehicle tools) onto
the wheel bo
lt
as far as it will go. An adapter
is required to unscrew or tighten the anti-
theft wheel bolts ››› page 48.
● Turn the wheel bolt approximately one turn
to the lef
t ››› Fig. 65 (arrow). To apply the re-
quired torque, hold the wheel brace at the
end. If it is not possible to loosen a wheel
bolt, carefully apply pressure with one foot
on the end of the box spanner. Hold on to the
vehicle for support and take care not to slip. WARNING
Slightly loosen the wheel bolts (one turn) be-
for e r
aising the vehicle with the jack*. If not,
an accident may occur. Raising the vehicle
Fig. 66
Jack position points Fig. 67
Fitting the jack. ●
Place the jack* (vehicle tools) on firm
gr ou
nd. If
necessary use a large, strong
board or similar support. If the surface is slip-
pery (for example tiles) place the jack on a
rubber mat or similar to prevent it from slip-
ping ››› .
48
Page 52 of 248
The essentials
Subsequent work ●
Alloy wheels: repl ace the wheel bolt caps.
● Plate wheels: repl
ace the wheel hubcap.
● Return all tools to their proper storing loca-
tion.
● If the replaced wheel does not fit in the
spar
e wheel housing, store it safely in the
luggage compartment ›››
page 139.
● Check the tyre pressure of the newly moun-
ted tyr
e as soon as possible.
● In vehicles fitted with a tyre pressure indi-
cat or
, adjust the pressure and store it in
memory ›››
page 104.
● Have the tightening torque of the wheel
bolts c
hecked as soon as possible with a tor-
que wrench (it should be 120 Nm). Mean-
while, drive carefully.
● Have the flat tyre replaced as quickly as
poss
ible.
Snow chains Use Snow chains should only be used on the
fr
on
t
wheels.
● Check that they are correctly seated after
driving f
or a few yards; correct the position if necessary, in accordance with the manufac-
turer's
fitting instructions.
● Keep your speed below 50 km/h.
● If there is a danger of being trapped de-
spite h
aving mounted the chains, it is best to
disable the driving wheels (ASR) in the ESC
››› page 170.
Snow chains will improve braking ability as
well as traction in winter conditions.
For technical reasons snow chains may only
be used with the following wheel rim/tyre
combination.
175/70R14
185/60R15Chains with links not exceeding 15 mm
(including the chain closure)
215/45R16Chains with links not exceeding 9 mm
(including the chain closure)
215/40R17Chains with links not exceeding 7 mm
(including the chain closure) Remove wheel covers and any integral trim
rin
g bef
or
e fitting snow chains.
Remove the chains when roads are free of
snow. Driving characteristics worsen, and the
wheels become damaged quickly and may
even be rendered unusable. WARNING
Snow chains should be correctly tightened in
acc or
dance with the manufacturer's instruc- tions. This will prevent the chains coming in-
to c
ont
act with the wheel housing.50
Page 154 of 248
Operation
Air recirculation Air recirculation prevents unpleasant smells,
e.g. when p
a
ssing through a tunnel or in
queuing traffic, from entering the interior.
Switching on air recirculation mode
● Press button
17
››› Fig. 167 and the
symbol is displayed on the screen.
Switching off air recirculation mode
● Press button
17
› ›
› Fig. 167
and the
symbol disappears from the screen. WARNING
Read and observe the safety warnings ›››
in
Genera l
notes on page 144. Note
If air recirculation mode remains on for 15 mi-
nute s, the
symbol will start to flash on
the screen to indicate prolonged air recircula-
tion. If air recirculation is not switched off,
the symbol will continue to flash for about 5
minutes. Blower selection
Climatronic automatically regulates blower
s
peed ac
c
ording to the interior temperature. It is possible, however, to set the blower
speed to s
uit requirements.
● Turn control 10
› ››
Fig. 167
c
ounter-clock-
wise (to lower the speed) or clockwise (to in-
crease the speed).
Climatronic will switch off when the blower
switches off. WARNING
Read and observe the safety warnings ›››
in
Genera l
notes on page 144. Windscreen defrost
Switching on windscreen defrosting
●
Press the button
12
› ›
›
Fig. 167.
Switching off windscreen defrosting
● Press button
12
› ›
›
Fig. 167 several
times or press the AUTO button.
The t emper
at
ure is regulated automatically.
The air output is increased from vents 1 and
2 ›››
page 146. Driving
Ad dr
e
ss
Introduction The power steering is not hydraulic but elec-
tromec
h
anical. The advantage of this steer-
ing is that it foes not need flexible hydraulic
pipes, hydraulic oil, pump, filter or other
parts. The electromechanical system saves
fuel. Whereas a hydraulic system needs con-
tinuous oil pressure, electromechanical
steering only needs power when it is used.
In vehicles with electromechanical steering,
the assisted steering function automatically
adjusts according to vehicle speed, steering
wheel torque and wheel orientation. The
power steering only works when the engine
is running. WARNING
If the power steering does not work, you will
need much mor e s
trength to turn the wheel.
This has a considerable effect on vehicle
safety.
● The power steering only works when the
engine is
running.
● Never allow the vehicle to move when the
engine is
switched off.
● Never remove the key from the ignition
while the
vehicle is moving. The steering lock152
Page 155 of 248
Driving
could be engaged and vehicle steering would
not w
ork. Note
The ignition of the vehicle being towed must
be sw itc
hed on to prevent the steering wheel
from locking and also to allow the use of the
turn signals, horn, windscreen wipers and
washers. Information relating to different vehi-
c
l
e pr
ocesses. In order to make the vehicle more difficult to
s
t
e
al, you should always lock the steering be-
fore leaving the vehicle.
Mechanical steering lock
The steering column is locked when the key
is removed from the ignition lock and the ve-
hicle is stationary.
Activating the steering lock
● Park the vehicle ›››
page 156.
● Remove the ignition key.
● Turn the steering wheel slightly until the
steerin
g lock has engaged. Deactivating the steering lock
●
Turn the steering wheel slightly to release
the lock.
● Inser
t the key in the ignition lock.
● Hold the steering wheel in this position
and switc
h on the ignition.
Electromechanical steering
In vehicles with electromechanical steering,
the assisted steering function automatically
adjusts according to vehicle speed, steering
wheel torque and wheel orientation. The
power steering only works when the engine
is running.
You should take into account that you will
need considerably more power than normal
to steer the vehicle if the power steering is
not working correctly or at all.
Power-assisted steering
Power-assisted steering helps the driver in
critical situations. In counter-steering, it as-
sists by applying additional torque ››› .
WARNING
Power-assisted steering, together with the
ESC, help s
the driver to control vehicle steer-
ing in critical situations. However, the driver
is ultimately responsible for steering the ve-
hicle at all times. Power-assisted steering
does not remove this responsibility. Starting and stopping the en-
gine
Ignition k ey
po
sitions Fig. 168
Ignition key positions. Read the additional information carefully
› ›
›
page 20
Ignition switched off, steering lock 1 In this position
››
›
Fig. 168, the ignition and
the engine are OFF and the steering may be
locked.
For the Steering lock to operate without the
ignition key, turn the steering wheel until it
locks with an audible sound. You should al-
ways lock the steering wheel when you leave
your vehicle. This will help prevent vehicle
theft ››› .
»
153
Technical data
Advice
Operation
Emergencies
Safety
Page 175 of 248
Driver assistance systems
Electronic differential lock (XDS)* When taking a curve, the driveshaft differen-
tial
mec
hanism allows the outer wheel to turn
at a higher speed than the inner wheel. In
this way, the wheel that is turning faster (out-
er wheel) receives less drive torque than the
inner wheel. This may mean that in certain
situations the torque delivered to the inner
wheel is too high, causing the wheels to
spin. On the other hand, the outer wheel is
receiving a lower drive torque than it could
transmit. This causes an overall loss of lateral
grip on the front axle, resulting in understeer
or “lengthening” of the trajectory.
The XDS system can detect and correct this
effect via the sensors and signals of the ESC.
Via the ESC, the XDS will brake the inside
wheel and counter the excess driving torque
of that wheel. This means that the driver's
desired trajectory is much more precise.
The XDS system works in combination with
the ESC and is always active, even when ASR
traction control is disconnected or the ESC is
in Sport mode.
Brake servo The brake servo increases the pressure you
ap
p
ly
to the brake pedal. It works only when
the engine is running . If the brake servo is not functioning, e.g. due
to a malf
unction, or if the vehicle is being
towed, you will have to press the brake pedal
considerably harder to make up for the lack
of servo assistance. WARNING
The braking distance can also be affected by
ext ern
al factors.
● Never let the vehicle coast with the engine
switc
hed off. Failure to follow this instruction
could result in an accident. The braking dis-
tance is increased considerably when the
brake servo is not active.
● If the brake servo is not working, for exam-
ple when the
vehicle is being towed, you will
have to press the brake pedal considerably
harder than normal. Start-Stop System*
D e
s
cription and operation The Start-Stop function stops the engine
when the
v
ehic
le is stopped and starts it au-
tomatically when required.
Vehicles with a manual gearbox
– When the vehicle is stopped, put it into
neutral and r
elease the clutch pedal. The
engine will switch off. The warning lamp will appear on the instrument panel dis-
pla
y.
– When the clutch pedal is pressed the en-
gine wil
l start up again. The warning lamp
will switch off.
Vehicles with an automatic gearbox – Use the foot brake to bring the vehicle to a
stop and k
eep the brake pedal pressed
down with your foot. The engine will switch
off. The warning lamp will appear in the
display.
– When you take your foot off the brake pedal
the engine wi
ll start up again. The warning
lamp will switch off.
Start-Stop function conditions
● The driver seat belt must be buckled.
● The bonnet must be closed.
● The engine must be at operating tempera-
ture.
● The s
teering wheel must be straight.
● The vehicle must be on flat ground.
● The vehicle must not be in reverse.
● A trailer must not be connected.
● The temperature of the interior must be
within the comf
ort limits (A/C button should
be sel ect
ed).
● The w
indscreen de-mist function must be
off. »
173
Technical data
Advice
Operation
Emergencies
Safety
Page 217 of 248
Wheels
for your model. Failure to do so could impair
vehic
l
e handling. Risk of accident.
● Avoid running the vehicle on tyres that are
more than 6
years old. If you have no alterna-
tive, you should drive slowly and with extra
care at all times.
● Never use old tyres or those with an un-
known “his
tory of use”.
● If wheel trims are retrofitted, you must en-
sure th
at the flow of air to the brakes is not
restricted. This could cause the brake system
to overheat.
● All four wheels must be fitted with radial
tyre
s of the same type, size (rolling circumfer-
ence) and the same tread pattern. For the sake of the environment
Old tyres must be disposed of according to
the la w
s in the country concerned. Note
● For t ec
hnical reasons, it is not generally
possible to use the wheels from other vehi-
cles. This can also apply to wheels of the
same model. The use of wheels or tyres
which have not been approved by SEAT for
use with your model may invalidate the vehi-
cle's type approval for use on public roads.
● If the spare tyre is not the same as the
tyre
s that are mounted on the vehicle (e.g.
winter tyres) you should only use the spare
tyre for a short period of time and drive with extra care. Refit the normal road wheel as
soon as
po
ssible. Wheel bolts
The design of wheel bolts is matched to the
rims. If diff
er
ent wheel rims are fitted, the
correct wheel bolts with the right length and
correctly shaped bolt heads must be used.
This ensures that wheels are fitted securely
and that the brake system functions correctly.
In certain circumstances, you should not use
wheel bolts from a different vehicle, even if it
is the same model ››› page 190. WARNING
If the wheel bolts are not tightened correctly,
the wheel c ou
ld become loose while driving.
Risk of accident.
● The wheel bolts must be clean and turn
eas
ily. Never apply grease or oil to them.
● Use only wheel bolts which belong to the
wheel.
● If the pr
escribed torque of the wheel bolts
is t
oo low, they could loosen whilst the vehi-
cle is in motion. Risk of accident! If the tight-
ening torque is too high, the wheel bolts and
threads can be damaged. CAUTION
The prescribed tightening torque for wheel
bolt s
for steel and alloy wheels is 120 Nm. Winter service
Wint er ty
res In winter conditions winter tyres will consid-
erab
ly
improve the vehicle's handling. The
design of summer tyres (width, rubber com-
pound, tread pattern) gives less grip on ice
and snow.
Winter tyres must be inflated to a pressure of
0.2 bar (2.9 psi/20 kPa) higher than the pres-
sures specified for summer tyres (see sticker
on fuel tank flap).
Winter tyres must be fitted on all four wheels.
Information on permitted winter tyre sizes
can be found in the vehicle's registration
documentation. Use only radial winter tyres.
All tyre sizes listed in the vehicle documenta-
tion also apply to winter tyres.
Winter tyres lose their effectiveness when the
tread is worn down to a depth of 4 mm.
The speed rating code ›››
page 214, New
tyres and wheels determines the following
speed limits for winter tyres: ››› max. 160 km/h (99 mph)
»
Q
215
Technical data
Advice
Operation
Emergencies
Safety
Page 221 of 248
Technical specifications
Special versions, optional equipment fittings
or r etr
o-fittin
g accessories will increase the
weight of the vehicle ››› .
WARNING
● Ple a
se note that the centre of gravity may
shift when transporting heavy objects; this
may affect vehicle handling and lead to an ac-
cident. Always adjust your speed and driving
style to suit road conditions and require-
ments.
● Never exceed the gross axle weight rating
or the gros
s vehicle weight rating. If the per-
missible axle load or the permissible total
weight is exceeded, the driving characteris-
tics of the vehicle may change, leading to ac-
cidents, injuries and damage to the vehicle. Driving with a trailer
Tr
ai
ler weights Trailer weight
The tr
ai
l
er weights and drawbar loads ap-
proved are selected in intensive trials accord-
ing to precisely defined criteria. The ap-
proved trailer weights are valid for vehicles in
the EU for maximum speeds of 80 km/h (50
mph) (in certain circumstances up to 100
km/h (62 mph)). The figures may be different
in other countries. All data in the official vehi- cle documentation takes precedence over
these dat
a at all times ››› .
Dr a
wb
ar loads
The maximum permitted drawbar load on the
ball joint of the towing bracket must not ex-
ceed 75 kg.
In the interest of road safety, we recommend
that you always tow approaching the maxi-
mum drawbar load. The response of the trail-
er on the road will be poor, if the drawbar
load is too small.
If the maximum permissible drawbar load
cannot be met (e.g. with small, empty and
light-weight single axle trailers or tandem
axle trailers with a wheelbase of less than 1
metre), a minimum of 4% of the actual trailer
weight is legally required for the drawbar
load. WARNING
● For s af
ety reasons, you should not drive at
speeds above 80 km/h (50 mph) when towing
a trailer. This also applies in countries where
higher speeds are permitted.
● Never exceed the maximum trailer weights
or the drawb
ar load. If the permissible axle
load or the permissible total weight is excee-
ded, the driving characteristics of the vehicle
may change, leading to accidents, injuries
and damage to the vehicle. Wheels
Ty
r
e pressure, snow chains, wheel
bolts Tyre pressures
The stic
k
er with the tyre pressure values can
be found on the inside of the fuel tank flap.
The tyre pressure values given there are for
cold tyres. Do not reduce the slightly raised
pressures of warm tyres ››› .
The pre s
sure for winter tyres is 0.2 bar higher
than that of summer tyres (2.9 psi / 20 kPa).
Snow chains
Snow chains may be fitted only to the front
wheels, and only for the following tyres:
175/70R14
185/60R15Chains with links not exceeding 15 mm
(including the chain closure)
215/45R16Chains with links not exceeding 9 mm
(including the chain closure)
215/40R17Chains with links not exceeding 7 mm
(including the chain closure) Wheel bolts
Af
t
er the wheel
s have been changed, the
tightening torque of the wheel bolts should
be checked as soon as possible with a torque
wrench ››› . The tightening torque for steel
and al lo
y
wheels is 120 Nm. »
219
Technical data
Advice
Operation
Emergencies
Safety
Page 222 of 248
Technical data
WARNING
● Check the ty
re pressure at least once per
month. Checking the tyre pressure is very im-
portant. If the tyre pressure is too high or too
low, there is an increased danger of accidents
- particularly at high speeds.
● If the tightening torque of the wheel bolts
is t
oo low, they could loosen while the vehi-
cle is in motion. Risk of accident! If the tight-
ening torque is too high, the wheel bolts and
threads can be damaged. Note
We recommend that you ask your Technical
Serv ic
e for information about appropriate
wheel, tyre and snow chain size. 220
Page 245 of 248
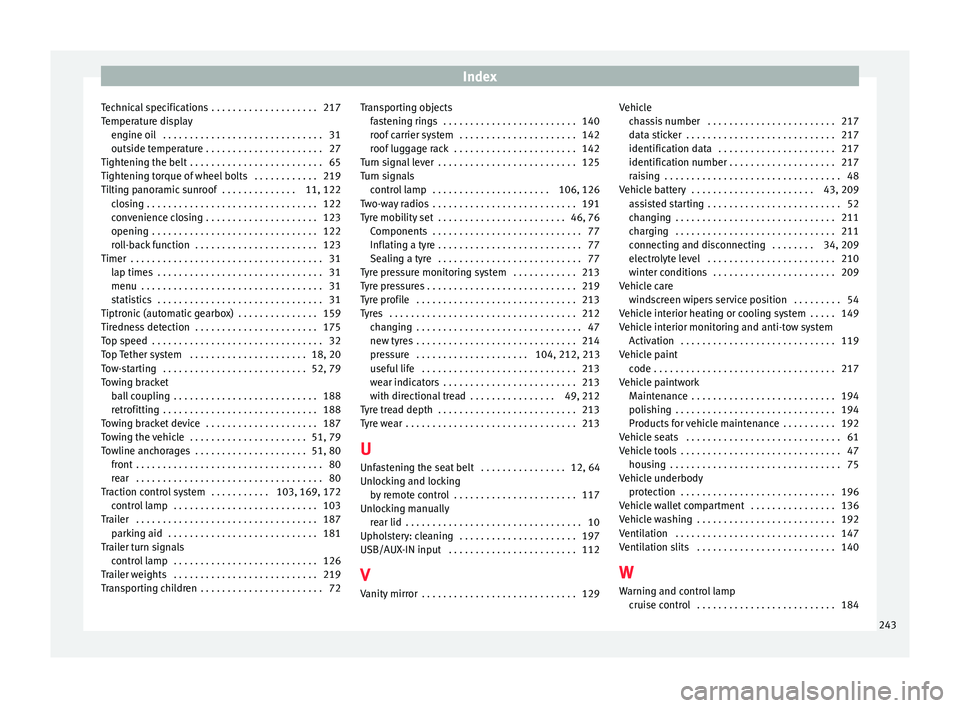
Index
Technical specifications . . . . . . . . . . . . . . . . . . . . 217
T emper
at
ure display
engine oil . . . . . . . . . . . . . . . . . . . . . . . . . . . . . . 31
outside temperature . . . . . . . . . . . . . . . . . . . . . . 27
Tightening the belt . . . . . . . . . . . . . . . . . . . . . . . . . 65
Tightening torque of wheel bolts . . . . . . . . . . . . 219
Tilting panoramic sunroof . . . . . . . . . . . . . . 11, 122 closing . . . . . . . . . . . . . . . . . . . . . . . . . . . . . . . . 122
convenience closing . . . . . . . . . . . . . . . . . . . . . 123
opening . . . . . . . . . . . . . . . . . . . . . . . . . . . . . . . 122
roll-back function . . . . . . . . . . . . . . . . . . . . . . . 123
Timer . . . . . . . . . . . . . . . . . . . . . . . . . . . . . . . . . . . . 31 lap times . . . . . . . . . . . . . . . . . . . . . . . . . . . . . . . 31
menu . . . . . . . . . . . . . . . . . . . . . . . . . . . . . . . . . . 31
statistics . . . . . . . . . . . . . . . . . . . . . . . . . . . . . . . 31
Tiptronic (automatic gearbox) . . . . . . . . . . . . . . . 159
Tiredness detection . . . . . . . . . . . . . . . . . . . . . . . 175
Top speed . . . . . . . . . . . . . . . . . . . . . . . . . . . . . . . . 32
Top Tether system . . . . . . . . . . . . . . . . . . . . . . 18, 20
Tow-starting . . . . . . . . . . . . . . . . . . . . . . . . . . . 52, 79
Towing bracket ball coupling . . . . . . . . . . . . . . . . . . . . . . . . . . . 188
retrofitting . . . . . . . . . . . . . . . . . . . . . . . . . . . . . 188
Towing bracket device . . . . . . . . . . . . . . . . . . . . . 187
Towing the vehicle . . . . . . . . . . . . . . . . . . . . . . 51, 79
Towline anchorages . . . . . . . . . . . . . . . . . . . . . 51, 80 front . . . . . . . . . . . . . . . . . . . . . . . . . . . . . . . . . . . 80
rear . . . . . . . . . . . . . . . . . . . . . . . . . . . . . . . . . . . 80
Traction control system . . . . . . . . . . . 103, 169, 172 control lamp . . . . . . . . . . . . . . . . . . . . . . . . . . . 103
Trailer . . . . . . . . . . . . . . . . . . . . . . . . . . . . . . . . . . 187 parking aid . . . . . . . . . . . . . . . . . . . . . . . . . . . . 181
Trailer turn signals control lamp . . . . . . . . . . . . . . . . . . . . . . . . . . . 126
Trailer weights . . . . . . . . . . . . . . . . . . . . . . . . . . . 219
Transporting children . . . . . . . . . . . . . . . . . . . . . . . 72 Transporting objects
fas tening rings . . . . . . . . . . . . . . . . . . . . . . . . . 140
roof carrier system . . . . . . . . . . . . . . . . . . . . . . 142
roof luggage rack . . . . . . . . . . . . . . . . . . . . . . . 142
Turn signal lever . . . . . . . . . . . . . . . . . . . . . . . . . . 125
Turn signals control lamp . . . . . . . . . . . . . . . . . . . . . . 106, 126
Two-way radios . . . . . . . . . . . . . . . . . . . . . . . . . . . 191
Tyre mobility set . . . . . . . . . . . . . . . . . . . . . . . . 46, 76 Components . . . . . . . . . . . . . . . . . . . . . . . . . . . . 77
Inflating a tyre . . . . . . . . . . . . . . . . . . . . . . . . . . . 77
Sealing a tyre . . . . . . . . . . . . . . . . . . . . . . . . . . . 77
Tyre pressure monitoring system . . . . . . . . . . . . 213
Tyre pressures . . . . . . . . . . . . . . . . . . . . . . . . . . . . 219
Tyre profile . . . . . . . . . . . . . . . . . . . . . . . . . . . . . . 213
Tyres . . . . . . . . . . . . . . . . . . . . . . . . . . . . . . . . . . . 212 changing . . . . . . . . . . . . . . . . . . . . . . . . . . . . . . . 47
new tyres . . . . . . . . . . . . . . . . . . . . . . . . . . . . . . 214
pressure . . . . . . . . . . . . . . . . . . . . . 104, 212, 213
useful life . . . . . . . . . . . . . . . . . . . . . . . . . . . . . 213
wear indicators . . . . . . . . . . . . . . . . . . . . . . . . . 213
with directional tread . . . . . . . . . . . . . . . . 49, 212
Tyre tread depth . . . . . . . . . . . . . . . . . . . . . . . . . . 213
Tyre wear . . . . . . . . . . . . . . . . . . . . . . . . . . . . . . . . 213
U Unfastening the seat belt . . . . . . . . . . . . . . . . 12, 64
Unlocking and locking by remote control . . . . . . . . . . . . . . . . . . . . . . . 117
Unlocking manually rear lid . . . . . . . . . . . . . . . . . . . . . . . . . . . . . . . . . 10
Upholstery: cleaning . . . . . . . . . . . . . . . . . . . . . . 197
USB/AUX-IN input . . . . . . . . . . . . . . . . . . . . . . . . 112
V Vanity mirror . . . . . . . . . . . . . . . . . . . . . . . . . . . . . 129 Vehicle
cha ssis number . . . . . . . . . . . . . . . . . . . . . . . . 217
data sticker . . . . . . . . . . . . . . . . . . . . . . . . . . . . 217
identification data . . . . . . . . . . . . . . . . . . . . . . 217
identification number . . . . . . . . . . . . . . . . . . . . 217
raising . . . . . . . . . . . . . . . . . . . . . . . . . . . . . . . . . 48
Vehicle battery . . . . . . . . . . . . . . . . . . . . . . . 43, 209 assisted starting . . . . . . . . . . . . . . . . . . . . . . . . . 52
changing . . . . . . . . . . . . . . . . . . . . . . . . . . . . . . 211
charging . . . . . . . . . . . . . . . . . . . . . . . . . . . . . . 211
connecting and disconnecting . . . . . . . . 34, 209
electrolyte level . . . . . . . . . . . . . . . . . . . . . . . . 210
winter conditions . . . . . . . . . . . . . . . . . . . . . . . 209
Vehicle care windscreen wipers service position . . . . . . . . . 54
Vehicle interior heating or cooling system . . . . . 149
Vehicle interior monitoring and anti-tow system Activation . . . . . . . . . . . . . . . . . . . . . . . . . . . . . 119
Vehicle paint code . . . . . . . . . . . . . . . . . . . . . . . . . . . . . . . . . . 217
Vehicle paintwork Maintenance . . . . . . . . . . . . . . . . . . . . . . . . . . . 194
polishing . . . . . . . . . . . . . . . . . . . . . . . . . . . . . . 194
Products for vehicle maintenance . . . . . . . . . . 192
Vehicle seats . . . . . . . . . . . . . . . . . . . . . . . . . . . . . 61
Vehicle tools . . . . . . . . . . . . . . . . . . . . . . . . . . . . . . 47 housing . . . . . . . . . . . . . . . . . . . . . . . . . . . . . . . . 75
Vehicle underbody protection . . . . . . . . . . . . . . . . . . . . . . . . . . . . . 196
Vehicle wallet compartment . . . . . . . . . . . . . . . . 136
Vehicle washing . . . . . . . . . . . . . . . . . . . . . . . . . . 192
Ventilation . . . . . . . . . . . . . . . . . . . . . . . . . . . . . . 147
Ventilation slits . . . . . . . . . . . . . . . . . . . . . . . . . . 140
W Warning and control lamp cruise control . . . . . . . . . . . . . . . . . . . . . . . . . . 184
243
Page 246 of 248
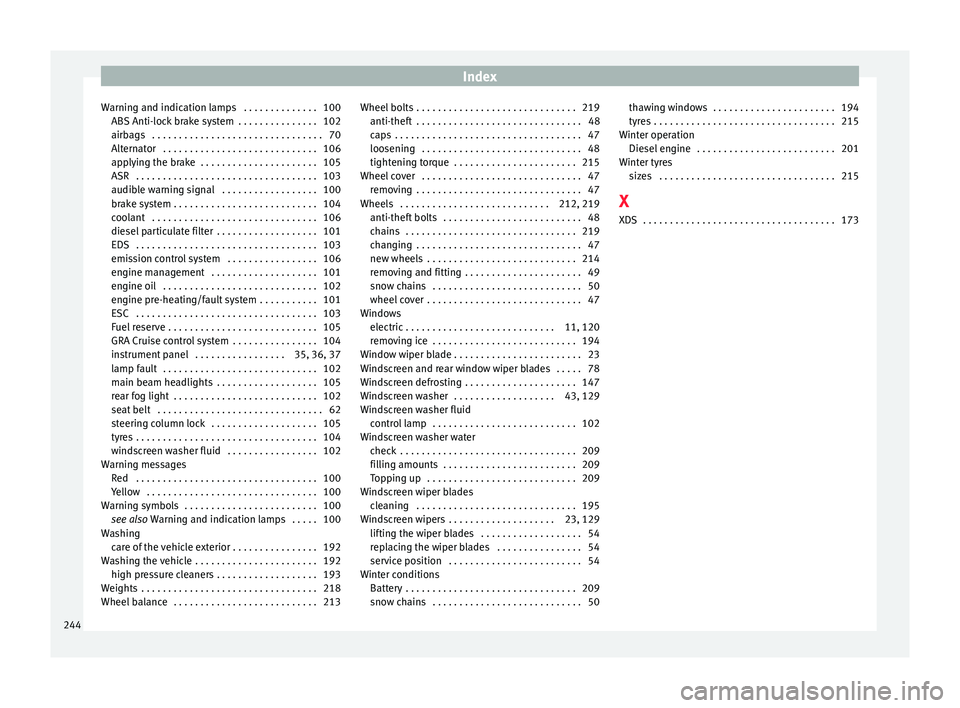
Index
Warning and indication lamps . . . . . . . . . . . . . . 100 ABS Anti-loc
k
brake system . . . . . . . . . . . . . . . 102
airbags . . . . . . . . . . . . . . . . . . . . . . . . . . . . . . . . 70
Alternator . . . . . . . . . . . . . . . . . . . . . . . . . . . . . 106
applying the brake . . . . . . . . . . . . . . . . . . . . . . 105
ASR . . . . . . . . . . . . . . . . . . . . . . . . . . . . . . . . . . 103
audible warning signal . . . . . . . . . . . . . . . . . . 100
brake system . . . . . . . . . . . . . . . . . . . . . . . . . . . 104
coolant . . . . . . . . . . . . . . . . . . . . . . . . . . . . . . . 106
diesel particulate filter . . . . . . . . . . . . . . . . . . . 101
EDS . . . . . . . . . . . . . . . . . . . . . . . . . . . . . . . . . . 103
emission control system . . . . . . . . . . . . . . . . . 106
engine management . . . . . . . . . . . . . . . . . . . . 101
engine oil . . . . . . . . . . . . . . . . . . . . . . . . . . . . . 102
engine pre-heating/fault system . . . . . . . . . . . 101
ESC . . . . . . . . . . . . . . . . . . . . . . . . . . . . . . . . . . 103
Fuel reserve . . . . . . . . . . . . . . . . . . . . . . . . . . . . 105
GRA Cruise control system . . . . . . . . . . . . . . . . 104
instrument panel . . . . . . . . . . . . . . . . . 35, 36, 37
lamp fault . . . . . . . . . . . . . . . . . . . . . . . . . . . . . 102
main beam headlights . . . . . . . . . . . . . . . . . . . 105
rear fog light . . . . . . . . . . . . . . . . . . . . . . . . . . . 102
seat belt . . . . . . . . . . . . . . . . . . . . . . . . . . . . . . . 62
steering column lock . . . . . . . . . . . . . . . . . . . . 105
tyres . . . . . . . . . . . . . . . . . . . . . . . . . . . . . . . . . . 104
windscreen washer fluid . . . . . . . . . . . . . . . . . 102
Warning messages Red . . . . . . . . . . . . . . . . . . . . . . . . . . . . . . . . . . 100
Yellow . . . . . . . . . . . . . . . . . . . . . . . . . . . . . . . . 100
Warning symbols . . . . . . . . . . . . . . . . . . . . . . . . . 100 see also Warning and indication lamps . . . . . 100
Washing care of the vehicle exterior . . . . . . . . . . . . . . . . 192
Washing the vehicle . . . . . . . . . . . . . . . . . . . . . . . 192 high pressure cleaners . . . . . . . . . . . . . . . . . . . 193
Weights . . . . . . . . . . . . . . . . . . . . . . . . . . . . . . . . . 218
Wheel balance . . . . . . . . . . . . . . . . . . . . . . . . . . . 213 Wheel bolts . . . . . . . . . . . . . . . . . . . . . . . . . . . . . . 219
anti-theft . . . . . . . . . . . . . . . . . . . . . . . . . . . . . . . 48
caps . . . . . . . . . . . . . . . . . . . . . . . . . . . . . . . . . . . 47
loosening . . . . . . . . . . . . . . . . . . . . . . . . . . . . . . 48
tightening torque . . . . . . . . . . . . . . . . . . . . . . . 215
Wheel cover . . . . . . . . . . . . . . . . . . . . . . . . . . . . . . 47 removing . . . . . . . . . . . . . . . . . . . . . . . . . . . . . . . 47
Wheels . . . . . . . . . . . . . . . . . . . . . . . . . . . . 212, 219 anti-theft bolts . . . . . . . . . . . . . . . . . . . . . . . . . . 48
chains . . . . . . . . . . . . . . . . . . . . . . . . . . . . . . . . 219
changing . . . . . . . . . . . . . . . . . . . . . . . . . . . . . . . 47
new wheels . . . . . . . . . . . . . . . . . . . . . . . . . . . . 214
removing and fitting . . . . . . . . . . . . . . . . . . . . . . 49
snow chains . . . . . . . . . . . . . . . . . . . . . . . . . . . . 50
wheel cover . . . . . . . . . . . . . . . . . . . . . . . . . . . . . 47
Windows electric . . . . . . . . . . . . . . . . . . . . . . . . . . . . 11, 120
removing ice . . . . . . . . . . . . . . . . . . . . . . . . . . . 194
Window wiper blade . . . . . . . . . . . . . . . . . . . . . . . . 23
Windscreen and rear window wiper blades . . . . . 78
Windscreen defrosting . . . . . . . . . . . . . . . . . . . . . 147
Windscreen washer . . . . . . . . . . . . . . . . . . . 43, 129
Windscreen washer fluid control lamp . . . . . . . . . . . . . . . . . . . . . . . . . . . 102
Windscreen washer water check . . . . . . . . . . . . . . . . . . . . . . . . . . . . . . . . . 209
filling amounts . . . . . . . . . . . . . . . . . . . . . . . . . 209
Topping up . . . . . . . . . . . . . . . . . . . . . . . . . . . . 209
Windscreen wiper blades cleaning . . . . . . . . . . . . . . . . . . . . . . . . . . . . . . 195
Windscreen wipers . . . . . . . . . . . . . . . . . . . . 23, 129 lifting the wiper blades . . . . . . . . . . . . . . . . . . . 54
replacing the wiper blades . . . . . . . . . . . . . . . . 54
service position . . . . . . . . . . . . . . . . . . . . . . . . . 54
Winter conditions Battery . . . . . . . . . . . . . . . . . . . . . . . . . . . . . . . . 209
snow chains . . . . . . . . . . . . . . . . . . . . . . . . . . . . 50 thawing windows . . . . . . . . . . . . . . . . . . . . . . . 194
tyre
s . . . . . . . . . . . . . . . . . . . . . . . . . . . . . . . . . . 215
Winter operation Diesel engine . . . . . . . . . . . . . . . . . . . . . . . . . . 201
Winter tyres sizes . . . . . . . . . . . . . . . . . . . . . . . . . . . . . . . . . 215
X XDS . . . . . . . . . . . . . . . . . . . . . . . . . . . . . . . . . . . . 173
244