tyre pressure Seat Ibiza ST 2016 User Guide
[x] Cancel search | Manufacturer: SEAT, Model Year: 2016, Model line: Ibiza ST, Model: Seat Ibiza ST 2016Pages: 252, PDF Size: 5.56 MB
Page 161 of 252
Driving
How the ABS works
If one of
the wheel s
turns too slowly in rela-
tion to the vehicle's speed, and is close to
locking, the system will reduce the braking
pressure to this wheel. The driver is made
aware of this control process by a pulsating
of the brake pedal and audible noise. This is
a deliberate warning to the driver that one or
more of the wheels is tending to lock and the
ABS control function has intervened. In this
situation it is important to keep the brake
pedal fully depressed so the ABS can regu-
late the brake application. Do not “pump”.
If you brake hard on a slippery road surface,
the best possible control is retained as the
wheels do not lock.
However, ABS will not necessarily guarantee
shorter braking distances in all conditions.
Braking distance could even be further if you
brake on gravel or on fresh snow on a slip-
pery surface.
Control lamp
The control lamp lights up for a few sec-
onds when the ignition is switched on. It
goes out again after the system has run
through an automatic test sequence.
There is a fault in the ABS if:
● The control lamp does not light
up when
the ignition is switched on. ●
The control
lamp does not go out again af-
ter a few seconds.
● The control lamp lights up when the vehicle
is mov
ing.
The vehicle can still be braked in the normal
way, without the ABS function. Take the vehi-
cle to a specialised workshop as soon as
possible.
If there is a fault in the ABS, the ESC* and the
tyre pressure control lamp will also light up.
Brake system fault
If the ABS warning lamp lights up together
with the brake warning lamp , there is a
fault in the ABS function and in the brake
system ››› .
WARNING
● The anti-lock br ak
e system cannot defy the
laws of physics. Slippery and wet roads are
dangerous even with ABS! If you notice that
the ABS is working (to counteract locked
wheels under braking), you should reduce
speed immediately to suit the road and traffic
conditions. Do not let the extra safety fea-
tures tempt you into taking any risks when
driving.
● The effectiveness of ABS is also determined
by the tyr
es fitted ››› page 213.
● If the running gear or brake system is modi-
fied, the effectivenes
s of the ABS could be se-
verely limited. WARNING
● Befor e openin
g the bonnet, read and ob-
serve the warnings ››› page 201, Working in
the engine compartment.
● If the brake system warning lamp should
light up t
ogether with the ABS warning lamp
, stop the vehicle immediately and check
the brake fluid level in the reservoir
››› page 209, Brake fluid. If the brake fluid
level has dropped below the “MIN” mark you
must not drive on. Risk of accident. Obtain
technical assistance.
● If the brake fluid level is correct, the fault in
the brake sys
tem may have been caused by a
failure of the ABS system. This could cause
the rear wheels to lock quickly when you
brake. This could cause the rear to break
away. Risk of skidding. Stop the vehicle and
seek technical assistance. Electronic differential lock (XDS)*
When taking a curve, the driveshaft differen-
ti
al
mec h
anism allows the outer wheel to turn
at a higher speed than the inner wheel. In
this way, the wheel that is turning faster (out-
er wheel) receives less drive torque than the
inner wheel. This may mean that in certain
situations the torque delivered to the inner
wheel is too high, causing the wheels to
spin. On the other hand, the outer wheel is
receiving a lower drive torque than it could
transmit. This causes an overall loss of lateral »
159
Technical data
Advice
Operation
Emergencies
Safety
Page 169 of 252
Driving
Run-in and economical driving R u
nnin g in a new en
gineThe engine needs to be run in over the first
1,500 km.
Up to 1000 k
i
lometres
– Do not drive at speeds of more than 2/3
the maximum speed.
– Do not
accelerate hard.
– Avoid high engine revolutions.
– Do not tow a trailer.
From 1000 to 1500 k i
lometres (600 to 900
miles)
– Speeds can be graduall
y increased to the
maximum road speed or maximum permis-
sible engine speed (rpm).
During its first few hours of running, the in-
ternal friction in the engine is greater than
later on, when all the moving parts have bed-
ded in. For the sake of the environment
If the engine is run in gently, its life will be in-
cre a
sed and its oil consumption reduced. Tyre and brake pad run-in
New tyres should be run-in carefully for the
first
500
km (300 miles). New brake pads
should be run-in carefully for the first
200 km.
During the first 200 km, you can compensate
for the reduced braking effect by applying
more pressure to the brake pedal. In case of
a sharp braking, the braking distance will be
longer with new brake pads than with brake
pads which have been run-in. WARNING
● At firs t, new ty
res do not give maximum
grip, and require running-in. This may cause
an accident. Drive particularly carefully in the
first 500 km.
● New brake pads must be “run in” and do
not have the c
orrect friction properties during
the first 200 km. However, the reduced brak-
ing capacity may be compensated by press-
ing on the brake pedal a little harder. Environmental compatibility
Environmental protection is a top priority in
the de
s
ign, c hoic
e of materials and manufac-
ture of your new SEAT. Constructive measures to encourage recy-
cling
● Joints and c
onnections designed for easy
dismantling
● Modu
lar construction to facilitate disman-
tling
● Incre
ased use of single-grade materials.
● Plastic parts and elastomers are marked in
accord
ance with ISO 1043, ISO 11469 and
ISO 1629.
Choice of materials
● Use of recycled materials.
● Use of compatible plastics in the same part
if its components
are not easily separated.
● Use of recycled materials and/or materials
originating from r
enewable sources.
● Reduction of volatile components, includ-
ing odour, in pl
astic materials.
● Use of CFC-free coolants.
Ban on heavy met
als, with the exceptions
dictated by law (Annex II of ELV Directive
2000/53/EC): cadmium, lead, mercury, hexa-
valent chromium.
Manufacturing methods
● Reduction of the quantity of thinner in the
protective w
ax for cavities.
● Use of plastic film as protection during ve-
hicle tran
sport. »
167
Technical data
Advice
Operation
Emergencies
Safety
Page 171 of 252
Driving
Avoid short journeys
T o r
educ e the c
onsumption and emission of
polluting exhaust gases, the engine and the
exhaust gas filtration systems should reach
the optimum operating temperature.
With the engine cold, fuel consumption is
proportionally higher. The engine does not
warm up and fuel consumption does not nor-
malise until having driven approximately four
kilometres (2.5 miles). This is why we recom-
mend avoiding short trips whenever possi-
ble.
Maintain the correct tyre pressures
Bear in mind that keeping the tyres at an ad-
equate pressure saves fuel. If the tyre pres-
sure is just one bar (14.5 psi/100 kPa) too
low, fuel consumption can increase by as
much as 5%. Due to the greater rolling resist-
ance, under-inflation also increases tyre wear
wear and impairs handling.
The tyre pressures should always be checked
when the tyres are cold.
Do not use winter tyres all year round as they
increase fuel consumption by up to 10%.
Avoid unnecessary weight
Given that every kilo of extra weight will in-
crease the fuel consumption, it is advisable
to always check the luggage compartment to
make sure that no unnecessary loads are be-
ing transported. A roof rack is often left in place for the sake
of conv
enience, even when it is no longer
needed. At a speed of 100 km/h (62 mph)
and 120 km/h (75 mph) your vehicle will use
about 12% more fuel as a result of the extra
wind resistance caused by the roof rack even
when it is not in use.
Save electricity
The engine activates the alternator, which
produces electricity. With the need for elec-
tricity, fuel consumption also increases. Be-
cause of this, always turn off electrical devi-
ces when you do not need them. Examples of
devices that use a lot of electricity are: the
blower at high speeds, the rear window heat-
ing or the seat heaters*. Note
● If y our
vehicle has Start-Stop, it is not rec-
ommended that you switch this function off.
● It is recommended that you close the win-
do
ws when driving at more than 60 km/h
(37 mph)
● Do not drive with your foot resting on the
clutch pe
dal, as the pressure can make the
plate spin, more fuel will be used and it can
burn the clutch plate lining, causing a serious
fault.
● Do not hold the car on a hill with the clutch,
use the foot br
ake or hand brake, using the
latter to start. The fuel consumption will be lower and you will prevent the clutch plate
from being d
am
aged.
● On descents, use the engine brake, chang-
ing to the ge
ar that is more suitable for the
slope. Fuel consumption will be “zero” and
the brakes will not suffer. Engine management and ex-
haus
t
gas purification system
Introduction WARNING
● Becau se of
the high temperatures which
can occur in the exhaust purification system
(catalytic converter or diesel particulate fil-
ter), do not park the vehicle where the ex-
haust can come into contact with flammable
materials under the car (e.g. on grass or at
the forest edge). Fire hazard!
● Do not apply wax underneath the vehicle
around the are
a of the exhaust system: Fire
hazard! Note
While the control lamps , , or re-
main lit, ther e m
ay be engine problems, fuel
consumption may increase and the engine
may lose power. 169
Technical data
Advice
Operation
Emergencies
Safety
Page 189 of 252
Towing bracket device and trailer
Tyre pressure
Set ty
re pr
essure to the maximum permissi-
ble pressure shown on the sticker on the in-
side of the fuel tank flap. Set the tyre pres-
sure of the trailer tyres in accordance with the
trailer manufacturer's recommendations.
Exterior mirrors
Check whether you can see enough of the
road behind the trailer with the standard rear
vision mirrors. If this is not the case, you
should have additional exterior mirrors fitted.
Both exterior mirrors should be mounted on
hinged extension brackets. Adjust the mirrors
to give sufficient vision to the rear. WARNING
Never transport people in a trailer. This could
res u
lt in fatal accidents. Note
● Tow in
g a trailer places additional demands
on the vehicle. We recommend additional
services between the normal inspection inter-
vals if the vehicle is used frequently for tow-
ing a trailer.
● Find out whether special regulations apply
to tow
ing a trailer in your country. Ball coupling of towing bracket*
The ball coupling is provided with instruc-
tions on fittin
g and r
emoving the ball cou-
pling of the towing bracket. WARNING
The towing bracket ball coupling must be
stor ed sec
urely in the luggage compartment
to prevent them being flung through the vehi-
cle and causing injury. Note
● By l a
w, the ball coupling must be removed
if a trailer is not being towed if it obscures
the number plate. Driving tips
Driving with a trailer always requires extra
c
ar
e.
W eight
distribution
The weight distribution of a loaded trailer
with an unladen vehicle is very unfavourable.
However, if this cannot be avoided, drive ex-
tra slowly to allow for the unbalanced weight
distribution. Speed
The stabi
lity of the vehicle and trailer is re-
duced with increasing speed. For this reason,
it is advisable not to drive at the maximum
permissible speed in an unfavourable road,
weather or wind conditions. This applies es-
pecially when driving downhill.
You should always reduce speed immediately
if the trailer shows the slightest sign of snak-
ing. Never try to stop the “snaking” by in-
creasing speed.
Always brake in due course. If the trailer has
an overrun brake, apply the brakes gently at
first and then, firmly. This will prevent the
jerking that can be caused by locking of trail-
er wheels. Select a low gear in due course
before going down a steep downhill. This en-
ables you to use the engine braking to slow
down the vehicle.
Reheating
At very high temperatures and during pro-
longed slopes, driving with a low gear and
high engine speed; always monitor whether
the excessive coolant temperature gauge is
activated ››› page 207.
187
Technical data
Advice
Operation
Emergencies
Safety
Page 195 of 252
Care and maintenance
– Rin se the
vehic
le thoroughly with water.
– Dry the vehicle surface gently with a cha-
mois le
ather.
– In cold temperature, dry the rubber seals
and their surf
aces to prevent them from
freezing. Apply silicone spray to the rubber
seals.
After washing the vehicle – After washing, avoid sudden and sharp
braking. “Dr
y” the brakes by braking sever-
al times. WARNING
● Wash y
our vehicle with the ignition switch-
ed off.
● Protect your hands and arms from cuts on
sharp metal
edges when cleaning the under-
body, the inside of the wheel housings etc.
Risk of injury.
● Water, ice and salt on the brake system can
reduce brak
ing effectiveness. Risk of acci-
dent. CAUTION
● Never remo v
e dirt, mud or dust if the vehi-
cle surface is dry. Never use a dry cloth or
sponge for cleaning purposes. This could
scratch the paintwork or glass on your vehi-
cle. ●
Washin g the
vehicle in low temperatures:
when washing the vehicle with a hose, do not
direct water into the lock cylinders or the
gaps around the doors, rear lid, or sunroof.
Risk of freezing. For the sake of the environment
To protect the environment, the vehicle
shou ld be w a
shed only in specially provided
wash bays, to prevent toxic, oil-laden waste
water from entering the sewer system. In
some places, washing vehicles outside wash
bays is prohibited. Note
Do not wash the vehicle in direct sunlight. Washing the vehicle with a high pres-
s
ur
e c l
eaner Be particularly careful when using a high
pr
e
ss
ure cleaner!
– Always observe the instructions for the
high-press
ure cleaner, particularly those
concerning the pressure and the spraying
distance.
– Increase the spraying distance for soft ma-
terials
and painted bumpers. –
Do not use a high pre
ssure cleaner to re-
move ice or snow from windows
››› page 194.
– Never use concentrated jet nozzles (“rotat-
ing jets”) ››
› .
– After washing, avoid sudden and sharp
br ak
ing. “Dr
y” the brakes by braking sever-
al times ››› page 152. WARNING
● Never wa sh ty
res with a concentrated jet
(“rotating nozzle”). Even at large spraying
distances and short cleaning times, damage
can occur to the tyres. This may cause an ac-
cident.
● Water, ice and salt on the brake system can
reduce brak
ing effectiveness. Risk of acci-
dent. CAUTION
● Do not use w at
er hotter than +60 °C
(+140 °F). This could damage the vehicle.
● To avoid damage to the vehicle, keep a suf-
ficient dis
tance from sensitive materials such
as flexible hoses, plastic, soundproofing ma-
terial, etc. This also applies to bumpers pain-
ted in the colour of the bodywork. The closer
the nozzle is to the surface, the greater the
wear on the material. 193
Technical data
Advice
Operation
Emergencies
Safety
Page 215 of 252
Wheels
Wheels
Wheel s
and ty r
es
General notes Avoiding damage
– If you have to drive over a kerb or similar
obs t
acle, drive very slowly and at a right
angle.
– Keep grease, oil and fuel off the tyres.
– Inspect the tyres regularly for damage
(cuts, cr ac
ks or blisters, etc.). Remove any
foreign objects embedded in the treads.
Storing tyres
– When you remove the tyres, mark them in
order to maint
ain the same direction of ro-
tation when they are installed again.
– When removed, the wheels and/or tyres
should be st
ored in a cool, dry and prefera-
bly dark location.
– Store tyres in a vertical position, if they are
not fitted on wheel rims.
New ty
res
New tyres must be run in ›››
page 167.
The tread depth of new tyres may vary, ac-
cording to the type and make of tyre and the
tread pattern. Concealed damage
Damage to ty
res and rims is often not readily
visible. If you notice unusual vibrations or the
vehicle pulling to one side, this may indicate
that one of the tyres is damaged. They
should be checked immediately by a Techni-
cal Service.
Tyres with directional tread pattern
An arrow on the tyre sidewall indicates the di-
rection of rotation on tyres with directional
tread. Always observe the direction of rota-
tion indicated when fitting the wheel. This
guarantees optimum grip and helps to avoid
aquaplaning, excessive noise and wear. WARNING
● New tyre s
do not have maximum grip dur-
ing the first 500 km. Drive particularly care-
fully to avoid possible accidents.
● Never drive with damaged tyres. This may
cause an acc
ident.
● If you notice unusual vibrations or if the ve-
hicle pu
lls to one side when driving, stop the
vehicle immediately and check the tyres for
damage. Tyre pressure monitoring system
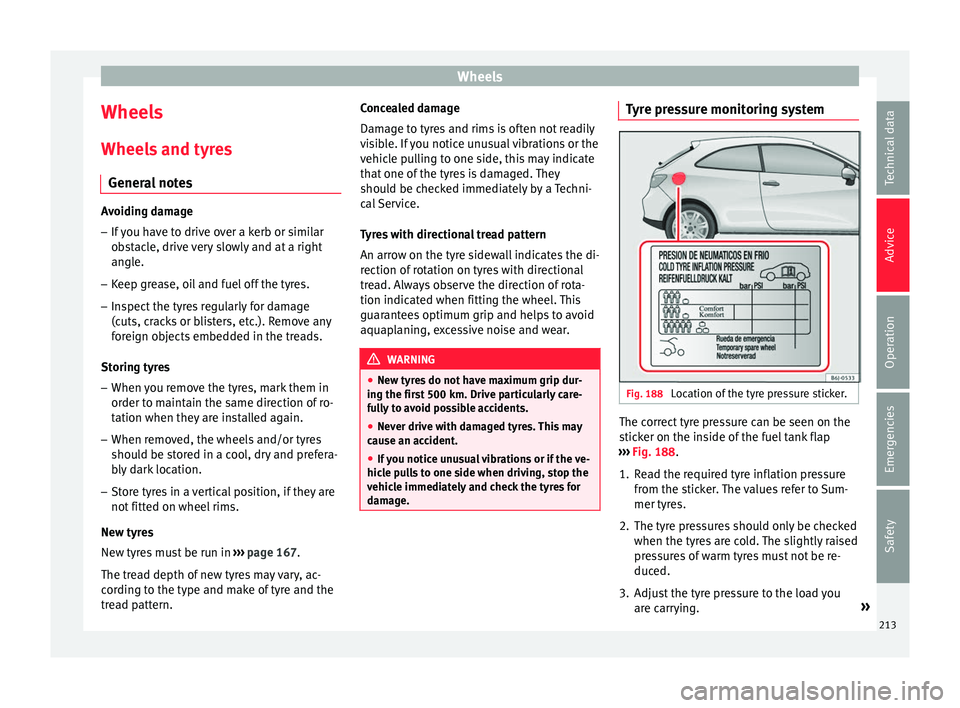
Fig. 188
Location of the tyre pressure sticker. The correct tyre pressure can be seen on the
s
tic
ker on the in
side of the fuel tank flap
››› Fig. 188.
1. Read the required tyre inflation pressure from the stick
er. The values refer to Sum-
mer tyres.
2. The tyre pressures should only be checked when the tyres
are cold. The slightly raised
pressures of warm tyres must not be re-
duced.
3. Adjust the tyre pressure to the load you are carry
ing. »
213
Technical data
Advice
Operation
Emergencies
Safety
Page 216 of 252
Advice
Tyre pressure
The c orr
ect ty
re pressure is especially impor-
tant at high speeds. The pressure should
therefore be checked at least once a month
and before starting a journey.
Depending on the vehicle, tyre pressure can
be adjusted to medium load to improve driv-
ing comfort (“comfort” tyre pressure). When
driving with comfort tyre pressure fuel con-
sumption may increase slightly. WARNING
A tyre can easily burst if the pressure is too
low, c au
sing an accident!
● At continuously high speeds, a tyre with in-
sufficient pr
essure flexes more. In this way it
becomes too hot, and this can cause tread
separation and tyre blow-out. Always observe
the recommended tyre pressures.
● If the tyre pressure is too low or too high,
the tyres
will wear prematurely and the vehi-
cle will not handle well. Risk of accident! For the sake of the environment
Under-inflated tyres will increase fuel con-
sumption. Tyre useful life
Fig. 189
Tyre tread wear indicators. Fig. 190
Diagram for changing wheels The useful life of tyres is dependent on tyre
pr
e
ss
ure, driving style and fitting.
Wear indicators
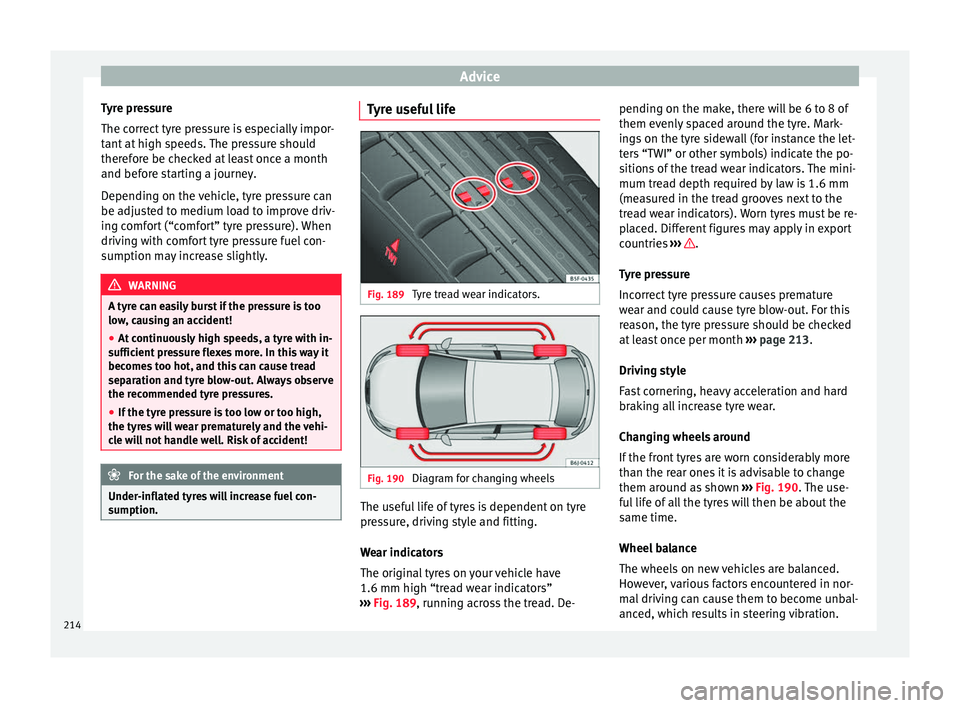
The original tyres on your vehicle have
1.6 mm high “tread wear indicators”
››› Fig. 189, running across the tread. De- pending on the make, there will be 6 to 8 of
them evenly s
paced around the tyre. Mark-
ings on the tyre sidewall (for instance the let-
ters “TWI” or other symbols) indicate the po-
sitions of the tread wear indicators. The mini-
mum tread depth required by law is 1.6 mm
(measured in the tread grooves next to the
tread wear indicators). Worn tyres must be re-
placed. Different figures may apply in export
countries ››› .
T y
re pr
essure
Incorrect tyre pressure causes premature
wear and could cause tyre blow-out. For this
reason, the tyre pressure should be checked
at least once per month ››› page 213.
Driving style
Fast cornering, heavy acceleration and hard
braking all increase tyre wear.
Changing wheels around
If the front tyres are worn considerably more
than the rear ones it is advisable to change
them around as shown ››› Fig. 190. The use-
ful life of all the tyres will then be about the
same time.
Wheel balance
The wheels on new vehicles are balanced.
However, various factors encountered in nor-
mal driving can cause them to become unbal-
anced, which results in steering vibration.
214
Page 217 of 252
Wheels
Unbalanced wheels should be rebalanced, as
they other
wi
se cause excessive wear on
steering, suspension and tyres. A wheel must
also be rebalanced when a new tyre is fitted.
Incorrect wheel alignment
Incorrect running gear alignment causes ex-
cessive tyre wear, impairing the safety of the
vehicle. If tyres show excessive wear, you
should have the wheel alignment checked by
a Technical Service. WARNING
There is a serious danger of accidents if a tyre
burs t
s during driving!
● The tyres must be replaced at the latest
when the tread w
ear indicators are worn
››› page 214. Failure to follow this instruction
could result in an accident. Worn tyres do not
grip well at high speeds on wet roads. There
is also a greater risk of “aquaplaning”.
● At continuously high speeds, a tyre with in-
sufficient pr
essure flexes more. This causes it
to overheat. This can cause tread separation
and tyre blow-out. Risk of accident. Always
observe the recommended tyre pressures.
● If tyres show excessive wear, you should
have the runnin
g gear checked by a Technical
Service.
● Keep chemicals such as oil, fuel and brake
fluid away
from tyres.
● Damaged wheels and tyres must be re-
placed immedi
ately! For the sake of the environment
Under-inflated tyres will increase fuel con-
sumption. New tyres and wheels
New tyres and wheels have to be run in.
The tyre
s
and wheel rims are an essential
part of the vehicle's design. Those approved
by SEAT are specially matched to the charac-
teristics of the vehicle and make a major con-
tribution to good road-holding and safe han-
dling ››› .
T y
re
s should be replaced at least in pairs and
not individually (i.e. both front tyres or both
rear tyres together). A knowledge of tyre des-
ignations makes it easier to choose the cor-
rect tyres. Radial tyres have the tyre designa-
tions marked on the sidewall, for example:
195/65 R15 91T
This contains the following information:
Tyre width in mm
Height/width ratio in %
Tyre construction: Radial
Rim diameter in inches
Load rating code
Speed rating
195
65
R
15
91
T The tyres could also have the following infor-
mation:
● A direction of r
otation symbol
● “Reinforced” denotes heavy-duty tyres.
The manufacturin
g date is also indicated on
the tyre sidewall (possibly only on the inner
side of the wheel).
“DOT ... 1103 ...” means, for example, that
the tyre was produced in the 11th week of
2003.
We recommend that work on tyres and
wheels be carried out by a Technical Service.
They are familiar with the procedure and
have the necessary special tools and spare
parts as well as the proper facilities for dis-
posing of the old tyres.
Any technical service has full information on
the technical requirements when installing or
changing tyres, wheels or wheel trims. WARNING
● We rec ommend th
at you use only wheels
and tyres which have been approved by SEAT
for your model. Failure to do so could impair
vehicle handling. Risk of accident.
● Avoid running the vehicle on tyres that are
more than 6 y
ears old. If you have no alterna-
tive, you should drive slowly and with extra
care at all times. » 215
Technical data
Advice
Operation
Emergencies
Safety
Page 218 of 252
Advice
●
Never use o l
d tyres or those with an un-
known “history of use”.
● If wheel trims are retrofitted, you must en-
sure that
the flow of air to the brakes is not
restricted. This could cause the brake system
to overheat.
● All four wheels must be fitted with radial
tyres
of the same type, size (rolling circumfer-
ence) and the same tread pattern. For the sake of the environment
Old tyres must be disposed of according to
the l aws
in the country concerned. Note
● A SEA T
Service Centre should be consulted
to find out whether wheels or tyres of differ-
ent sizes to those originally fitted by SEAT
can be fitted, and to find out about the com-
binations allowed between the front axle
(axle 1) and the rear axle (axle 2).
● For technical reasons, it is not generally
possib
le to use the wheels from other vehi-
cles. This can also apply to wheels of the
same model. The use of wheels or tyres
which have not been approved by SEAT for
use with your model may invalidate the vehi-
cle's type approval for use on public roads.
● If the spare tyre is not the same as the
tyres
that are mounted on the vehicle (e.g.
winter tyres) you should only use the spare
tyre for a short period of time and drive with extra care. Refit the normal road wheel as
soon as po
s
sible. Wheel bolts
The design of wheel bolts is matched to the
rims. If differ
ent
wheel rims are fitted, the
correct wheel bolts with the right length and
correctly shaped bolt heads must be used.
This ensures that wheels are fitted securely
and that the brake system functions correctly.
In certain circumstances, you should not use
wheel bolts from a different vehicle, even if it
is the same model ››› page 190. WARNING
If the wheel bolts are not tightened correctly,
the wheel cou l
d become loose while driving.
Risk of accident.
● The wheel bolts must be clean and turn
easi
ly. Never apply grease or oil to them.
● Use only wheel bolts which belong to the
wheel.
● If the pre
scribed torque of the wheel bolts
is too lo
w, they could loosen whilst the vehi-
cle is in motion. Risk of accident! If the tight-
ening torque is too high, the wheel bolts and
threads can be damaged. CAUTION
The prescribed tightening torque for wheel
bolts f
or steel and alloy wheels is 120 Nm. Tyre pressure
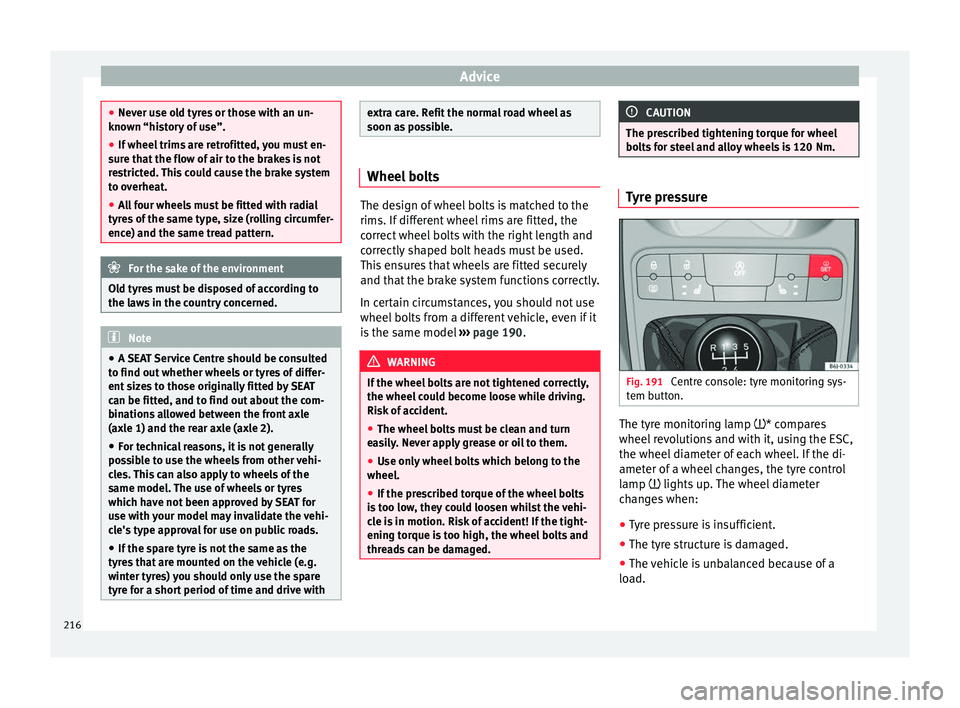
Fig. 191
Centre console: tyre monitoring sys-
t em b
utton. The tyre monitoring lamp * c
omp
are
s
wheel revolutions and with it, using the ESC,
the wheel diameter of each wheel. If the di-
ameter of a wheel changes, the tyre control
lamp lights up. The wheel diameter
changes when:
● Tyre pressure is insufficient.
● The tyre structure is damaged.
● The vehicle is unbalanced because of a
load.
216
Page 219 of 252
Wheels
● The wheel s
of one ax
le are under more
pressure (for example, driving with a trailer or
on steep slopes).
● The vehicle is fitted with snow chains.
● The temporary spare wheel is fitted.
● The wheel on one axle is changed.
Tyre pr
essure adjustment
On adjusting tyre pressure or changing one
or more wheels, the ››› Fig. 191 button must
be kept pressed down, with the ignition on,
until an acoustic signal is heard.
Store the new tyre pressure in the Easy Con-
nect system with the button and the func-
tion b utt
on Set
up
› ›
›
p
age 24.
If
the wheels are under excessive load (for ex-
ample, driving with a trailer or heavy load),
the tyre pressure must be increased to the
recommended value for a full load (see the
sticker on the inside of the fuel flap). If the
tyre monitor system button is pressed down,
the new tyre pressures are confirmed.
The tyre pressure control lamp lights up
If the tyre pressure of a wheel is much lower
than the value set by the driver, then the tyre
pressure control lamp ››› will light up.
WARNING
● When the tyre pr e
ssure control lamp lights
up, reduce speed immediately and avoid any sudden turning or braking manoeuvre. Stop
when poss
ib
le, and check the tyre pressure
and status.
● The driver is responsible for maintaining
correct ty
re pressures. For this reason, tyre
pressure must be regularly checked.
● Under certain circumstances (e.g. when
driving in a spor
ty manner, in winter condi-
tions or on a dirt track) the tyre control lamp
may light up belatedly or may function incor-
rectly. Note
If the battery is disconnected, the yellow
warning l amp
lights up after turning the
ignition on. This should turn off after a brief
journey. Winter service
W int
er ty r
es In winter conditions winter tyres will consid-
er
ab
ly impr
ove the vehicle's handling. The
design of summer tyres (width, rubber com-
pound, tread pattern) gives less grip on ice
and snow.
Winter tyres must be inflated to a pressure of
0.2 bar (2.9 psi/20 kPa) higher than the pres-
sures specified for summer tyres (see sticker
on fuel tank flap). Winter tyres must be fitted on all four wheels.
Information on permitted
winter tyre sizes
can be found in the vehicle's registration
documentation. Use only radial winter tyres.
All tyre sizes listed in the vehicle documenta-
tion also apply to winter tyres.
Winter tyres lose their effectiveness when the
tread is worn down to a depth of 4 mm.
The speed rating code ››› page 215, New
tyres and wheels determines the following
speed limits for winter tyres: ››› max. 160 km/h (99 mph)
m
ax. 180 km/h (112 mph)
m ax. 190 km/h (118 mph)
m ax. 210 km/h (130 mph)
In some c
ountries, vehicles which can exceed
the speed rating of the fitted tyre must have
an appropriate sticker in the driver's field of
view. These stickers are available from your
technical service. The legal requirements of
each country must be followed.
Do not have winter tyres fitted for unnecessa-
rily long periods. Vehicles with summer tyres
handle better when the roads are free of
snow and ice.
If you have a flat tyre, please refer to the
notes on the spare wheel ››› page 215, New
tyres and wheels . »
Q
S
T
H
217
Technical data
Advice
Operation
Emergencies
Safety