key Seat Ibiza ST 2016 Owner's manual
[x] Cancel search | Manufacturer: SEAT, Model Year: 2016, Model line: Ibiza ST, Model: Seat Ibiza ST 2016Pages: 252, PDF Size: 5.56 MB
Page 5 of 252
Table of Contents
Table of Contents
The e s
senti a
ls . . . . . . . . . . . . . . . . . . . . . . . . 5
Exterior view . . . . . . . . . . . . . . . . . . . . . . . . . . . . 5
Exterior view . . . . . . . . . . . . . . . . . . . . . . . . . . . . 6
Interior view (left-hand drive) . . . . . . . . . . . . . . 7
Interior view (right-hand drive) . . . . . . . . . . . . . 8
How it works . . . . . . . . . . . . . . . . . . . . . . . . . . . . 9
Opening and closing . . . . . . . . . . . . . . . . . . . . . 9
Before driving . . . . . . . . . . . . . . . . . . . . . . . . . . . 12
Airbags . . . . . . . . . . . . . . . . . . . . . . . . . . . . . . . . 14
Child seats . . . . . . . . . . . . . . . . . . . . . . . . . . . . . 16
Starting the vehicle . . . . . . . . . . . . . . . . . . . . . . 21
Lights and visibility . . . . . . . . . . . . . . . . . . . . . . 21
Easy Connect . . . . . . . . . . . . . . . . . . . . . . . . . . . 24
Driver information system . . . . . . . . . . . . . . . . . 25
Journey data . . . . . . . . . . . . . . . . . . . . . . . . . . . . 29
Cruise control . . . . . . . . . . . . . . . . . . . . . . . . . . . 34
Warning lamps . . . . . . . . . . . . . . . . . . . . . . . . . . 35
Gearbox lever . . . . . . . . . . . . . . . . . . . . . . . . . . . 37
Air conditioning . . . . . . . . . . . . . . . . . . . . . . . . . 39
Fluid Level control . . . . . . . . . . . . . . . . . . . . . . . 40
Emergencies . . . . . . . . . . . . . . . . . . . . . . . . . . . . 44
Fuses . . . . . . . . . . . . . . . . . . . . . . . . . . . . . . . . . . 44
Bulbs . . . . . . . . . . . . . . . . . . . . . . . . . . . . . . . . . . 45
Action in the event of a puncture . . . . . . . . . . . 45
Changing a wheel . . . . . . . . . . . . . . . . . . . . . . . 47
Snow chains . . . . . . . . . . . . . . . . . . . . . . . . . . . . 50
Emergency towing of the vehicle . . . . . . . . . . . 51
How to jump start . . . . . . . . . . . . . . . . . . . . . . . . 52
Changing the windscreen wiper blades . . . . . . 54
Safety . . . . . . . . . . . . . . . . . . . . . . . . . . . . . . . . 56
Safe driving . . . . . . . . . . . . . . . . . . . . . . . . . . . . 56
Safety first! . . . . . . . . . . . . . . . . . . . . . . . . . . . . . 56
Advice about driving . . . . . . . . . . . . . . . . . . . . . 56 Correct position for passengers . . . . . . . . . . . . 57
Pedal area . . . . . . . . . . . . . . . . . . . . . . . . . . . . . . 61
Seat belts
. . . . . . . . . . . . . . . . . . . . . . . . . . . . . . 61
Why wear a seat belt? . . . . . . . . . . . . . . . . . . . . 61
How to properly adjust your seatbelt . . . . . . . . 64
Belt pretensioners* . . . . . . . . . . . . . . . . . . . . . . 65
Airbag system . . . . . . . . . . . . . . . . . . . . . . . . . . 66
Brief introduction . . . . . . . . . . . . . . . . . . . . . . . . 66
Airbag safety instructions . . . . . . . . . . . . . . . . . 69
Deactivating airbags . . . . . . . . . . . . . . . . . . . . . 70
Transporting children safely . . . . . . . . . . . . . . . 72
Safety for children . . . . . . . . . . . . . . . . . . . . . . . 72
Child seats . . . . . . . . . . . . . . . . . . . . . . . . . . . . . 73
Emergencies . . . . . . . . . . . . . . . . . . . . . . . . . . 75
Self-help . . . . . . . . . . . . . . . . . . . . . . . . . . . . . . . 75
Emergency equipment . . . . . . . . . . . . . . . . . . . . 75
Tyre repair . . . . . . . . . . . . . . . . . . . . . . . . . . . . . . 76
Changing the windscreen wiper blades . . . . . . 78
Towing or tow-starting . . . . . . . . . . . . . . . . . . . . 79
Fuses and bulbs . . . . . . . . . . . . . . . . . . . . . . . . . 81
Fuses . . . . . . . . . . . . . . . . . . . . . . . . . . . . . . . . . . 81
Changing bulbs . . . . . . . . . . . . . . . . . . . . . . . . . 83
Single headlight bulb change . . . . . . . . . . . . . . 84
Double headlight bulb change . . . . . . . . . . . . . 85
Changing the AFS headlight bulbs . . . . . . . . . . 87
Changing the fog light bulbs . . . . . . . . . . . . . . . 88
Changing the tail light bulbs . . . . . . . . . . . . . . . 89
Changing the side and interior bulbs . . . . . . . . 91
Operation . . . . . . . . . . . . . . . . . . . . . . . . . . . . . 95
Controls and displays . . . . . . . . . . . . . . . . . . . . 95
General instrument panel . . . . . . . . . . . . . . . . . 94
Instruments and warning/control lamps . . . . . 96
Instruments . . . . . . . . . . . . . . . . . . . . . . . . . . . . 96
Warning and control lamps . . . . . . . . . . . . . . . . 100
Introduction to the Easy Connect system* . . . . 101
System settings (CAR)* . . . . . . . . . . . . . . . . . . . 101 Communications and multimedia
. . . . . . . . . . . 103
Steering wheel controls* . . . . . . . . . . . . . . . . . . 103
Multimedia . . . . . . . . . . . . . . . . . . . . . . . . . . . . . 107
Opening and closing . . . . . . . . . . . . . . . . . . . . . 107
Central locking system . . . . . . . . . . . . . . . . . . . . 107
Keys . . . . . . . . . . . . . . . . . . . . . . . . . . . . . . . . . . . 111
Radio frequency remote control* . . . . . . . . . . . 112
Anti-theft alarm* . . . . . . . . . . . . . . . . . . . . . . . . 113
Boot hatch . . . . . . . . . . . . . . . . . . . . . . . . . . . . . 115
Electric windows . . . . . . . . . . . . . . . . . . . . . . . . . 115
Tilting panoramic roof* . . . . . . . . . . . . . . . . . . . 117
Lights and visibility . . . . . . . . . . . . . . . . . . . . . . 118
Lights . . . . . . . . . . . . . . . . . . . . . . . . . . . . . . . . . 118
Interior lights . . . . . . . . . . . . . . . . . . . . . . . . . . . 123
Visibility . . . . . . . . . . . . . . . . . . . . . . . . . . . . . . . 124
Windscreen wiper and rear window wiper sys-
tems . . . . . . . . . . . . . . . . . . . . . . . . . . . . . . . . . . 125
Re
ar view mirrors . . . . . . . . . . . . . . . . . . . . . . . . 126
Seats and head restraints . . . . . . . . . . . . . . . . . 128
Adjusting the seat and head restraints . . . . . . 128
Seat functions . . . . . . . . . . . . . . . . . . . . . . . . . . 130
Transport and practical equipment . . . . . . . . . 131
Practical equipment . . . . . . . . . . . . . . . . . . . . . . 131
Luggage compartment . . . . . . . . . . . . . . . . . . . . 135
Roof rack/roof luggage rack* . . . . . . . . . . . . . . 138
Air conditioning . . . . . . . . . . . . . . . . . . . . . . . . . 140
Heating, ventilation and cooling . . . . . . . . . . . . 140
Heating and fresh air . . . . . . . . . . . . . . . . . . . . . 142
Air conditioning* . . . . . . . . . . . . . . . . . . . . . . . . 144
Climatronic* . . . . . . . . . . . . . . . . . . . . . . . . . . . . 146
Driving . . . . . . . . . . . . . . . . . . . . . . . . . . . . . . . . 148
Address . . . . . . . . . . . . . . . . . . . . . . . . . . . . . . . . 148
Starting and stopping the engine . . . . . . . . . . . 150
Braking and parking . . . . . . . . . . . . . . . . . . . . . 152
Braking and stability systems . . . . . . . . . . . . . . 155
Manual gearbox . . . . . . . . . . . . . . . . . . . . . . . . . 161
Automatic gearbox* . . . . . . . . . . . . . . . . . . . . . . 161
Run-in and economical driving . . . . . . . . . . . . . 167 3
Page 11 of 252
The essentials
How it works
Openin g and c
los
ing
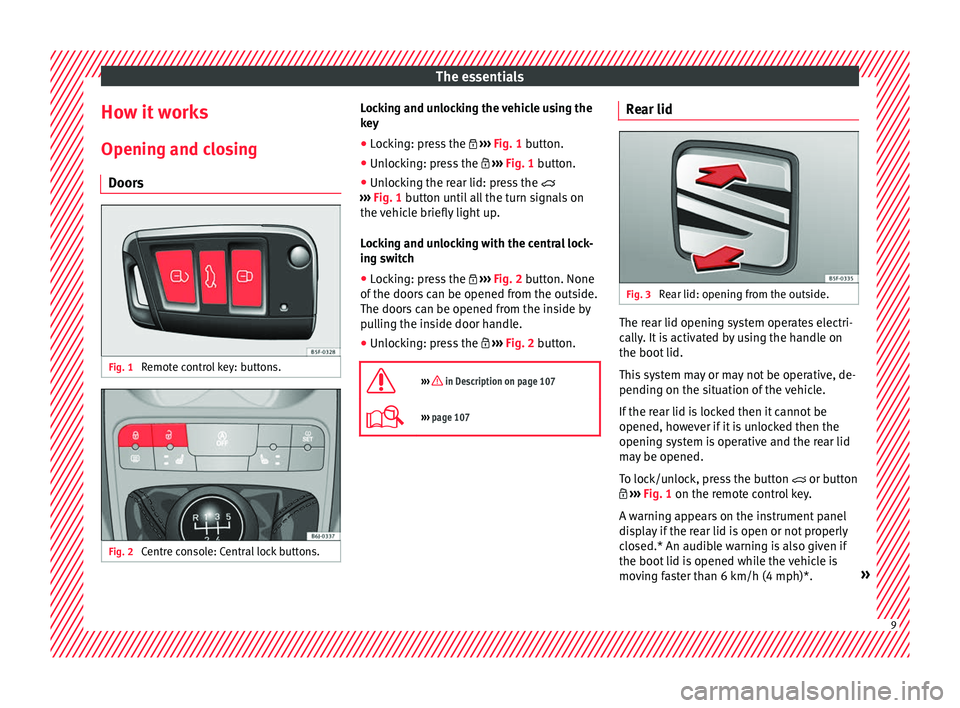
Doors Fig. 1
Remote control key: buttons. Fig. 2
Centre console: Central lock buttons. Locking and unlocking the vehicle using the
k
ey
● Loc k
ing: press the ››› Fig. 1
button.
● Unlocking: press the ››› Fig. 1
button.
● Unlocking the rear lid: press the
››› Fig. 1
button until all the turn signals on
the vehicle briefly light up.
Locking and unlocking with the central lock-
ing switch
● Locking: press the ››› Fig. 2
button. None
of the doors can be opened from the outside.
The doors can be opened from the inside by
pulling the inside door handle.
● Unlocking: press the ››› Fig. 2
button.
››› in Description on page 107
››› page 107 Rear lid
Fig. 3
Rear lid: opening from the outside. The rear lid opening system operates electri-
c
al
ly. It
is activated by using the handle on
the boot lid.
This system may or may not be operative, de-
pending on the situation of the vehicle.
If the rear lid is locked then it cannot be
opened, however if it is unlocked then the
opening system is operative and the rear lid
may be opened.
To lock/unlock, press the button or button
››› Fig. 1 on the remote control key.
A warning appears on the instrument panel
display if the rear lid is open or not properly
closed.* An audible warning is also given if
the boot lid is opened while the vehicle is
moving faster than 6 km/h (4 mph)*. » 9
Page 12 of 252
The essentials
● Openin g the r
ear lid: P
ull on the release
lever and lift it up ››› Fig. 3. The rear lid opens
automatically.
● Closing the rear lid: Hold it by one of the
handles
on the interior lining and close it by
pushing gently.
››› in Opening and closing on
page 115
››› page 10 Unlocking the rear lid manually
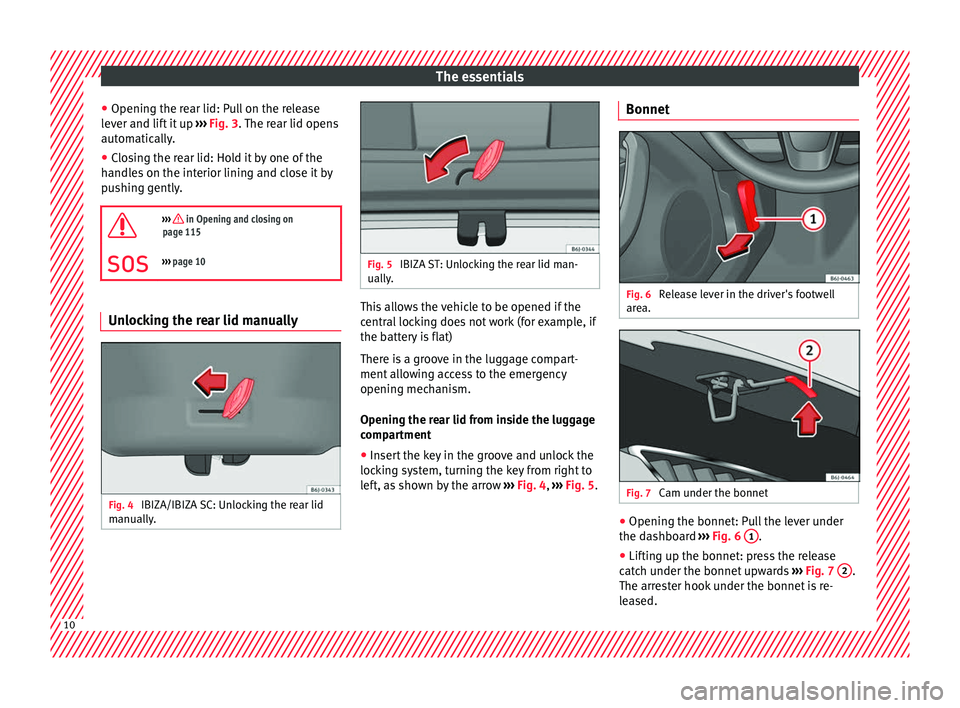
Fig. 4
IBIZA/IBIZA SC: Unlocking the rear lid
m anual
ly. Fig. 5
IBIZA ST: Unlocking the rear lid man-
ually. This allows the vehicle to be opened if the
c
entr
al loc
king does not work (for example, if
the battery is flat)
There is a groove in the luggage compart-
ment allowing access to the emergency
opening mechanism.
Opening the rear lid from inside the luggage
compartment
● Insert the key in the groove and unlock the
locking sy
stem, turning the key from right to
left, as shown by the arrow ››› Fig. 4, ››› Fig. 5. Bonnet
Fig. 6
Release lever in the driver's footwell
ar e
a. Fig. 7
Cam under the bonnet ●
Opening the bonnet: Pull the lever under
the d a
shbo ar
d ››› Fig. 6 1 .
● Lifting up the bonnet: press the release
c at
ch u
nder the bonnet upwards ››› Fig. 7 2 .
The arr e
st
er hook under the bonnet is re-
leased. 10
Page 14 of 252
The essentials
Operation of the panoramic sunroof Fig. 10
Emergency operation of the panoram-
ic/ti ltin
g su
nroof. In case of a breakdown, the sunroof may be
c
lo
sed m anual
ly.
● Remove the plastic cover by inserting a
screwdriv
er into the rear section.
● Insert an Allen key (4 mm) into the opening
as far a
s possible and close the sunroof. Before driving
Manually
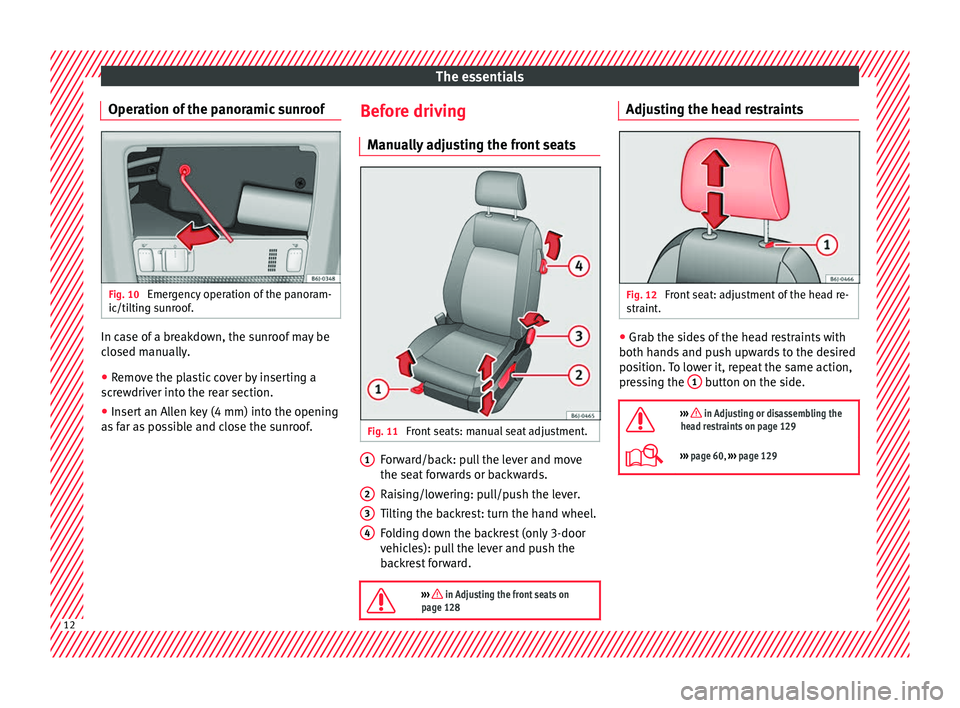
adjusting the front seats Fig. 11
Front seats: manual seat adjustment. Forward/back: pull the lever and move
the se
at
for
wards or backwards.
Raising/lowering: pull/push the lever.
Tilting the backrest: turn the hand wheel.
Folding down the backrest (only 3-door
vehicles): pull the lever and push the
backrest forward.
››› in Adjusting the front seats on
page 128 1
2
3
4 Adjusting the head restraints
Fig. 12
Front seat: adjustment of the head re-
s tr
aint . ●
Grab the sides of the head restraints with
both h and
s and p
ush upwards to the desired
position. To lower it, repeat the same action,
pressing the 1 button on the side.
››› in Adjusting or disassembling the
head restraints on page 129
››› page 60, ››› page 129 12
Page 17 of 252
The essentials
and chest in the event of a severe frontal col-
li s
ion.
The s pec
ial design of the airbag allows the
controlled escape of the propellant gas when
an occupant puts pressure on the bag. Thus,
the head and chest are surrounded and pro-
tected by the airbag. After the collision, the
airbag deflates sufficiently to allow visibility.
››› page 69 Deactivating the front passenger front
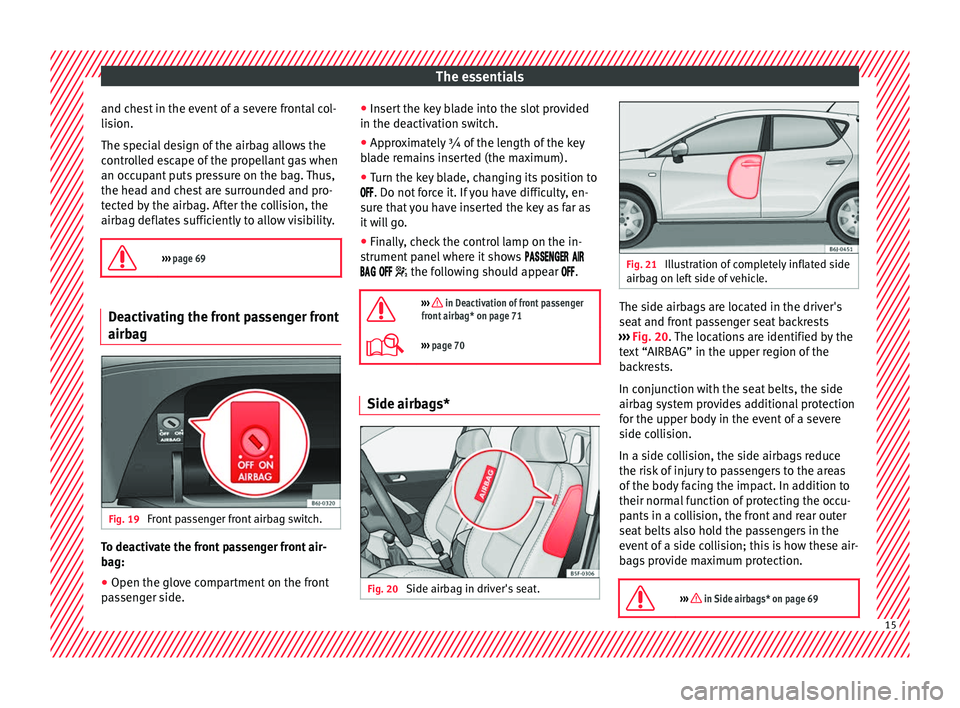
airb
ag Fig. 19
Front passenger front airbag switch. To deactivate the front passenger front air-
b
ag:
● Open the glo ve c
ompartment on the front
passen
ger side. ●
Insert the k
ey blade into the slot provided
in the deactivation switch.
● Approximately ¾ of the length of the key
blade r
emains inserted (the maximum).
● Turn the key blade, changing its position to
. Do not forc
e it. If you have difficulty, en-
sure that you have inserted the key as far as
it will go.
● Finally, check the control lamp on the in-
strument panel
where it shows
the following should appear .
››› in Deactivation of front passenger
front airbag* on page 71
››› page 70 Side airbags*
Fig. 20
Side airbag in driver's seat. Fig. 21
Illustration of completely inflated side
airbag on lef t
side of vehicle. The side airbags are located in the driver's
se
at
and fr ont
passenger seat backrests
››› Fig. 20. The locations are identified by the
text “AIRBAG” in the upper region of the
backrests.
In conjunction with the seat belts, the side
airbag system provides additional protection
for the upper body in the event of a severe
side collision.
In a side collision, the side airbags reduce
the risk of injury to passengers to the areas
of the body facing the impact. In addition to
their normal function of protecting the occu-
pants in a collision, the front and rear outer
seat belts also hold the passengers in the
event of a side collision; this is how these air-
bags provide maximum protection.
››› in Side airbags* on page 69 15
Page 23 of 252
The essentials
● Pu
sh the loc k
and release it from the an-
choring support.
››› in Safety instructions on page 73 Starting the vehicle
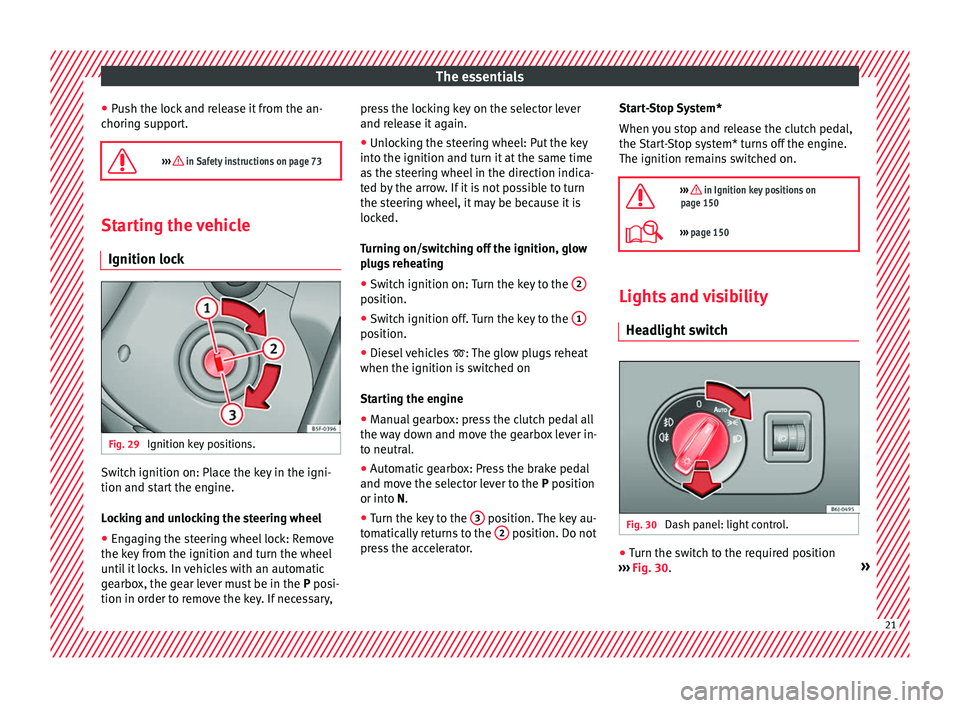
Ignition lock Fig. 29
Ignition key positions. Switch ignition on: Place the key in the igni-
tion and s
t
ar t
the engine.
Locking and unlocking the steering wheel
● Engaging the steering wheel lock: Remove
the key from the ignition and t
urn the wheel
until it locks. In vehicles with an automatic
gearbox, the gear lever must be in the P posi-
tion in order to remove the key. If necessary, press the locking key on the selector lever
and relea
se it again.
● Unlocking the steering wheel: Put the key
into the ignition and turn it at
the same time
as the steering wheel in the direction indica-
ted by the arrow. If it is not possible to turn
the steering wheel, it may be because it is
locked.
Turning on/switching off the ignition, glow
plugs reheating
● Switch ignition on: Turn the key to the 2 position.
●
Switch ignition off. Turn the key to the 1 position.
●
Diesel vehicles : The glo
w plug
s reheat
when the ignition is switched on
Starting the engine
● Manual gearbox: press the clutch pedal all
the way do
wn and move the gearbox lever in-
to neutral.
● Automatic gearbox: Press the brake pedal
and move the select
or lever to the P position
or into N.
● Turn the key to the 3 position. The key au-
t om
atic al
ly returns to the 2 position. Do not
pr e
ss
the accelerator. Start-Stop System*
When you st
op and release the clutch pedal,
the Start-Stop system* turns off the engine.
The ignition remains switched on.
››› in Ignition key positions on
page 150
››› page 150 Lights and visibility
He a
dlight sw
itch Fig. 30
Dash panel: light control. ●
Turn the switch to the required position
› ›
›
Fig. 30
. » 21
Page 25 of 252
The essentials
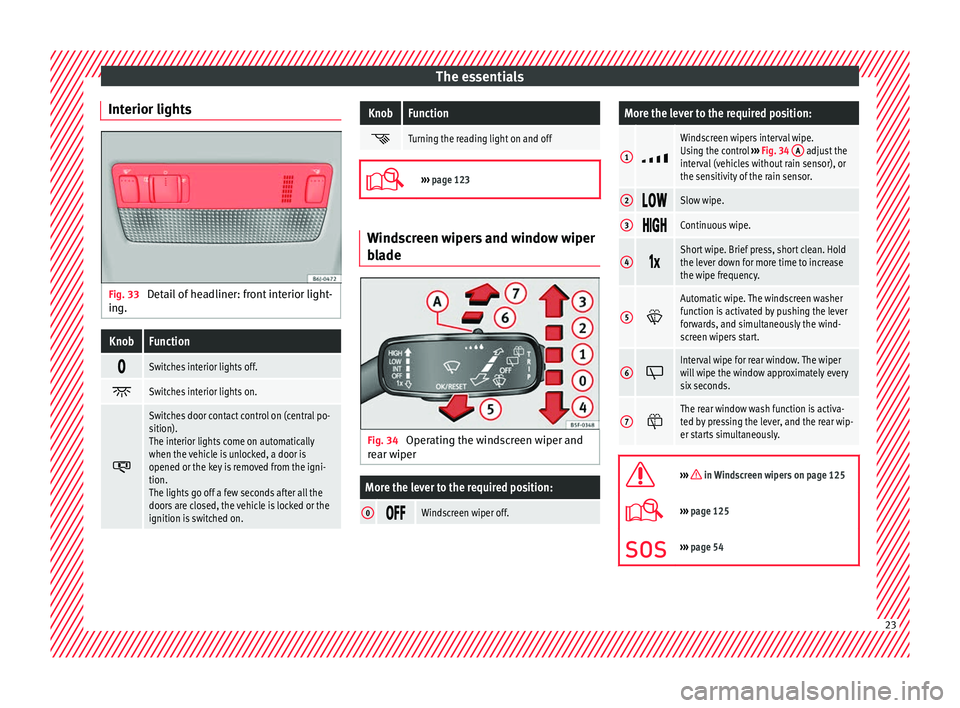
Interior lights Fig. 33
Detail of headliner: front interior light-
in g.KnobFunction
Switches interior lights off.
Switches interior lights on.
Switches door contact control on (central po-
sition).
The interior lights come on automatically
when the vehicle is unlocked, a door is
opened or the key is removed from the igni-
tion.
The lights go off a few seconds after all the
doors are closed, the vehicle is locked or the
ignition is switched on.
KnobFunction
Turning the reading light on and off
›››
page 123 Windscreen wipers and window wiper
bla
de Fig. 34
Operating the windscreen wiper and
r e
ar w iper
More the lever to the required position:
0 Windscreen wiper off.
More the lever to the required position:
1
Windscreen wipers interval wipe.
Using the control
››› Fig. 34 A adjust the
interval (vehicles without rain sensor), or
the sensitivity of the rain sensor.
2 Slow wipe.
3
Continuous wipe.
4
Short wipe. Brief press, short clean. Hold
the lever down for more time to increase
the wipe frequency.
5
Automatic wipe. The windscreen washer
function is activated by pushing the lever
forwards, and simultaneously the wind-
screen wipers start.
6
Interval wipe for rear window. The wiper
will wipe the window approximately every
six seconds.
7
The rear window wash function is activa-
ted by pressing the lever, and the rear wip-
er starts simultaneously.
››› in Windscreen wipers on page 125
›››
page 125
››› page 54 23
Page 31 of 252
The essentialsIllustra-
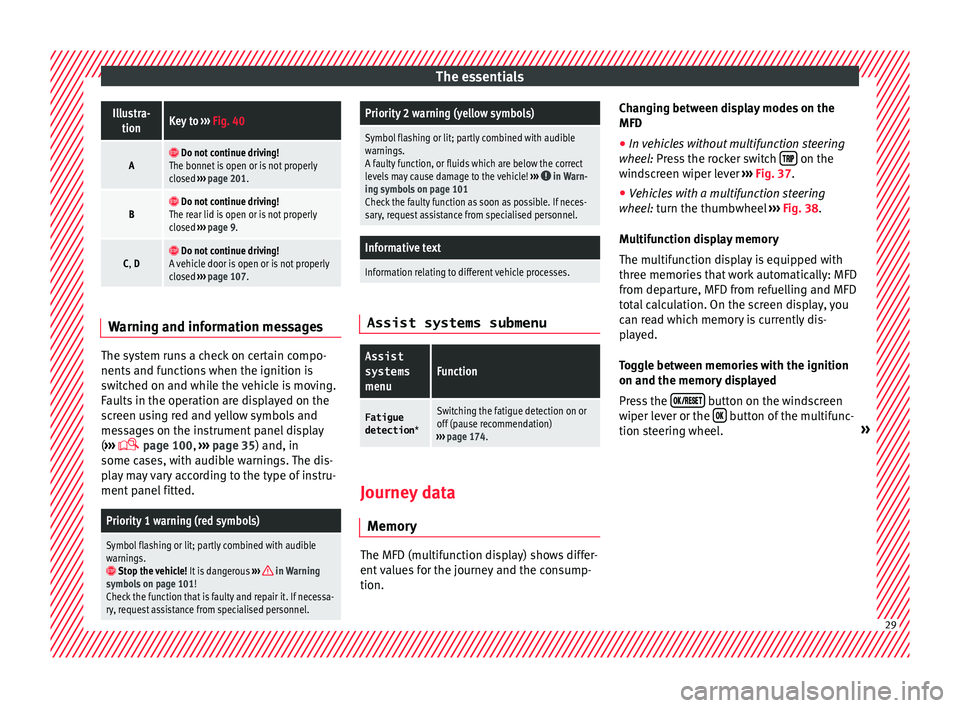
tionKey to ››› Fig. 40
A Do not continue driving!
The bonnet is open or is not properly
closed ››› page 201.
B Do not continue driving!
The rear lid is open or is not properly
closed ››› page 9.
C, D Do not continue driving!
A vehicle door is open or is not properly
closed ››› page 107. Warning and information messages
The system runs a check on certain compo-
nents
and f
unction
s when the ignition is
switched on and while the vehicle is moving.
Faults in the operation are displayed on the
screen using red and yellow symbols and
messages on the instrument panel display
( ›››
page 100,
››› page 35) and, in
some cases, with audible warnings. The dis-
play may vary according to the type of instru-
ment panel fitted.
Priority 1 warning (red symbols)
Symbol flashing or lit; partly combined with audible
warnings.
Stop the vehicle! It is dangerous ››› in Warning
symbols on page 101!
Check the function that is faulty and repair it. If necessa-
ry, request assistance from specialised personnel.
Priority 2 warning (yellow symbols)
Symbol flashing or lit; partly combined with audible
warnings.
A faulty function, or fluids which are below the correct
levels may cause damage to the vehicle! ›››
in Warn-
ing symbols on page 101
Check the faulty function as soon as possible. If neces-
sary, request assistance from specialised personnel.
Informative text
Information relating to different vehicle processes. Assist systems submenu
Assist
systems
menuFunction
Fatigue
detection *Switching the fatigue detection on or
off (pause recommendation)
››› page 174. Journey data
M emor y The MFD (multifunction display) shows differ-
ent
v alue
s for the journey and the consump-
tion. Changing between display modes on the
MFD
● In vehicles without multifunction steering
wheel: Pr
ess the rocker switch on the
w ind
sc
reen wiper lever ››› Fig. 37.
● Vehicles with a multifunction steering
wheel: t
urn the thumbwheel ››› Fig. 38.
Multifunction display memory
The multifunction display is equipped with
three memories that work automatically: MFD
from departure, MFD from refuelling and MFD
total calculation. On the screen display, you
can read which memory is currently dis-
played.
Toggle between memories with the ignition
on and the memory displayed
Press the button on the windscreen
w iper l
ever or the button of the multifunc-
tion s t
eerin g wheel
. » 29
Page 36 of 252
The essentials
Reading a service notification
W ith the ignition sw
itc
hed on, the engine off
and the vehicle at a standstill, the current
service notification can be read:
Press and hold the button 4 for more than 5
sec ond
s t
o consult the service message.
When the service date has passed , a minus
sign is displayed in front of the number of kil-
ometres or days.
Vehicles with text messages : the following
message is displayed: Service --- km
(miles) or --- days ago .
The time can also be set via the key and
Set up function button in the Easy Connect
sy s
tem
›
›› page 101.
Resetting service interval display
If the service was not carried out by a SEAT
dealership, the display can be reset as fol-
lows: ● Switch off the ignition, press and hold but-
ton ›››
Fig. 121
4 .
● Switch ignition back on.
● Release THE 4
› ›
›
Fig. 121
b
utton and
press it again for the next 20 seconds. Note
● The servic e me
ssage disappears after a few
seconds, when the engine is started or when OK/RESET
is pressed on the windscreen wiper
lever , or OK on the multifunction steering
wheel.
● In v ehic
les with the LongLife system in
which the batter
y has been disconnected for
a long period of time, it is not possible to cal-
culate the date of the next service. Therefore
the service interval display may not be cor-
rect. In this case, bear in mind the maximum
service intervals permitted in the ››› Book-
let Maintenance Programme. Cruise control
Oper atin
g the c rui
se control system
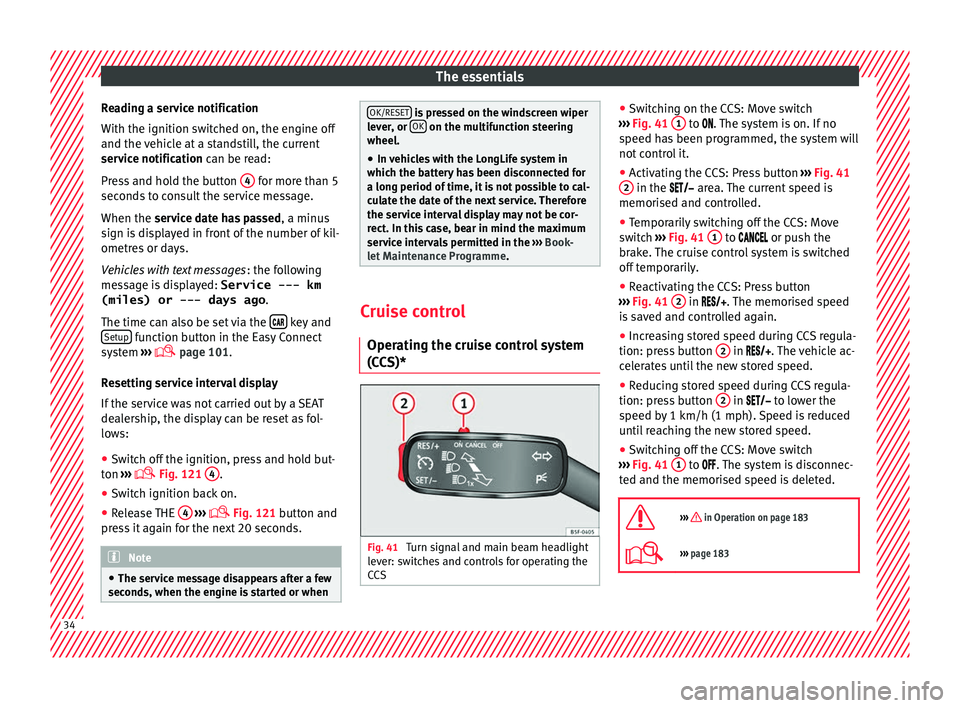
(CCS)* Fig. 41
Turn signal and main beam headlight
l ev
er: sw it
ches and controls for operating the
CCS ●
Sw it
chin
g on the CCS: Move switch
››› Fig. 41 1 to .
The system is on. If no
s peed h a
s been programmed, the system will
not control it.
● Activating the CCS: Press button ››› Fig. 41
2 in the ar
e
a. The c
urrent speed is
memorised and controlled.
● Temporarily switching off the CCS: Move
switch ›
›› Fig. 41 1 to
or push the
br ak e.
The cruise control system is switched
off temporarily.
● Reactivating the CCS: Press button
››› Fig. 41
2 in
. The memorised speed
i s
saved and controlled again.
● Increasing stored speed during CCS regula-
tion: press
button 2 in
. The vehicle ac-
c el
erates until the new stored speed.
● Reducing stored speed during CCS regula-
tion: press
button 2 in t
o lower the
s peed b y
1 km/h (1 mph). Speed is reduced
until reaching the new stored speed.
● Switching off the CCS: Move switch
››› Fig. 41
1 to .
The system is disconnec-
t ed and the memori sed s
peed is deleted.
››› in Operation on page 183
››› page 183 34
Page 69 of 252
Airbag system
airbag. In this case, the inflating airbag may
inflict c
ritic al
or fatal injuries on the occu-
pant. This also applies to children.
Always maintain the greatest possible dis-
tance between yourself and the front airbag.
This way, the front airbags can completely
deploy when triggered, providing their maxi-
mum protection.
The most important factors that will trigger
an airbag are: the type of accident, the angle
of collision and the speed of the vehicle.
Whether or not the airbags are triggered de-
pends primarily on the vehicle deceleration
rate resulting from the collision and detected
by the control unit. If the vehicle deceleration
occurring during the collision and measured
by the control unit remains below the speci-
fied reference values, the front, side and/or
curtain airbags will not be triggered. Take in-
to account that the visible damage in a vehi-
cle involved in an accident, no matter how
serious, is not a determining factor for the
airbags to have been triggered. WARNING
● Wearin g the se
at belt incorrectly or assum-
ing an incorrect sitting position can lead to
critical or fatal injuries.
● All vehicle occupants, including children,
who are not properly
belted can sustain criti-
cal or fatal injuries if the airbag is triggered.
Children up to 12 years old should always travel on the rear seat. Never transport chil-
dren in the v
ehic
le if they are not restrained
or the restraint system is not appropriate for
their age, size or weight.
● If you are not wearing a seat belt, or if you
lean for
ward or to the side while travelling or
assume an incorrect sitting position, there is
a substantially increased risk of injury. This
increased risk of injury will be further in-
creased if you are struck by an inflating air-
bag.
● To reduce the risk of injury from an inflating
airbag, alwa
ys wear the seat belt properly.
● Always adjust the front seats properly. Description of airbag system
The airbag system mainly comprises (as per
v
ehic
le equipment):
● an el
ectronic control and monitoring sys-
tem (contro
l unit)
● frontal airbags for driver and passenger,
● side airbags,
● curtain airbags,
● a control lamp on the dash panel
›
›› page 68.
● key-operated switch for front passenger air-
bag,
● a contro
l lamp for disabling/enabling the
front pa
ssenger airbag. The airbag system operation is monitored
electronical
ly. The airbag control lamp will il-
luminate for a few seconds every time the ig-
nition is switched on (self-diagnosis).
There is a fault in the system if the control
lamp :
● does not light up when the ignition is
switched on ›
›› page 68,
● turns off after 4 seconds after the ignition
is swit
ched on
● turns off and then lights up again after the
ignition is swit
ched on
● illuminates or flashes while the vehicle is
moving.
The airb
ag system is not triggered if:
● the ignition is switched off
● there is a minor frontal collision
● there is a minor side collision
● there is a rear-end collision
● the vehicle turns over. WARNING
● The seat belt s
and airbags can only provide
maximum protection if the occupants are
seated correctly ››› page 57, Correct position
for passengers.
● If a fault has occurred in the airbag system,
have the sys
tem checked immediately by a
specialised workshop. Otherwise, during a » 67
Technical data
Advice
Operation
Emergencies
Safety