manual radio set Seat Leon 5D 2005 RADIO-NAVIGATION MFD2
[x] Cancel search | Manufacturer: SEAT, Model Year: 2005, Model line: Leon 5D, Model: Seat Leon 5D 2005Pages: 50, PDF Size: 2.89 MB
Page 6 of 50
Quick Reference Guide5
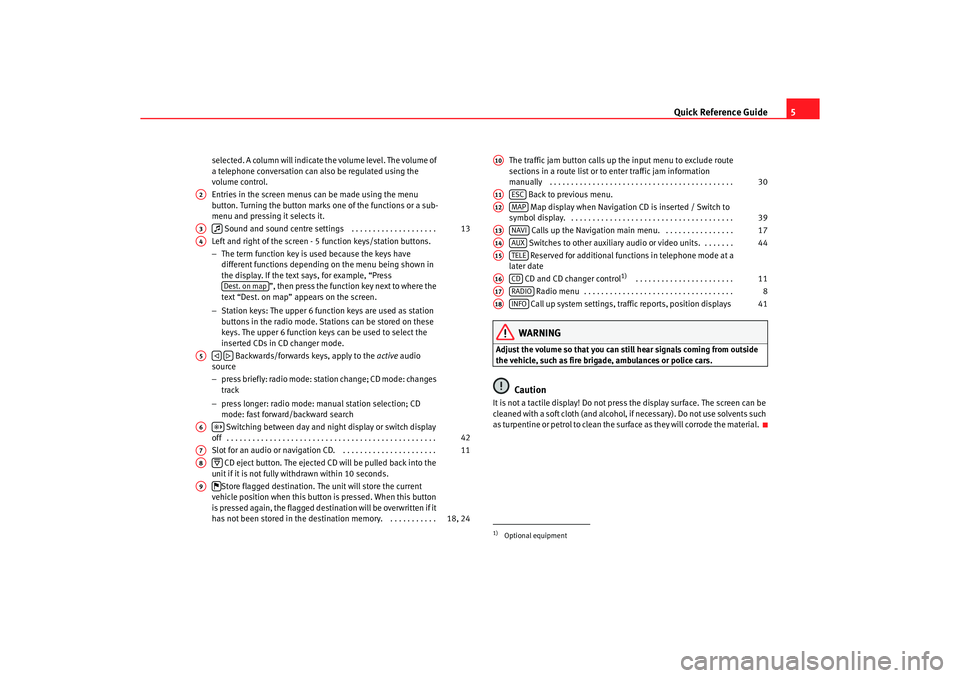
selected. A column will indicate the volume level. The volume o f
a telephone conversation can also be regulated using the
volume control.
Entries in the screen menus can be made using the menu
button. Turning the button marks one of the function s or a sub-
menu and pressing it selects it.
Sound and sound centre settings . . . . . . . . . . . . . . . . . . . .
Left and right of the screen - 5 function keys/station butt ons.
− The term function key is used because the keys have
different functions depending on the menu being shown in
the display. If the text says, for example, “Press ”, then press the function key next to where the
text “Dest. on map” appears on the screen.
− Station keys: The upper 6 function keys are used as station
buttons in the radio mode. Stations can be stored on th ese
keys. The upper 6 function keys can be used to se lect the
inserted CDs in CD changer mode.
Backwards/forwards keys, apply to the active audio
source
− press briefly: radio mode: station change; CD mode: c hanges
track
− press longer: radio mode: manual station selection; CD
mode: fast forward/backward search
Switching between day and night display or switc h display
off . . . . . . . . . . . . . . . . . . . . . . . . . . . . . . . . . . . . . . . . . . . . . . . . .
Slot for an audio or navigation CD. . . . . . . . . . . . . . . . . . . . . . .
CD eject button. The ejected CD will be pulled back i nto the
unit if it is not fully withdrawn within 10 second s.
Store flagged destination. The unit will store the current
vehicle position when this button is pressed. When th is button
is pressed again, the flagged destination will be overwri tten if it
has not been stored in the destin ation memory. . . . . . . . . . . . The traffic jam button calls up the input menu to exclude route
sections in a route list or to enter traffic jam info rmation
manually . . . . . . . . . . . . . . . . . . . . . . . . . . . . . . . . . . . . . . . . . . .
Back to previous menu.
Map display when Navigation CD is inserted / Switch to
symbol display. . . . . . . . . . . . . . . . . . . . . . . . . . . . . . . . . . . . . . .
Calls up the Navigation main menu. . . . . . . . . . . . . . . . .
Switches to other auxiliary audio or video units. . . . . . . .
Reserved for additional functions in telephone mode at a
later date
CD and CD changer control
1)
. . . . . . . . . . . . . . . . . . . . . . .
Radio menu . . . . . . . . . . . . . . . . . . . . . . . . . . . . . . . . . . .
Call up system settings, traffic reports, position displays
WARNING
Adjust the volume so that you can still hear signals c oming from outside
the vehicle, such as fire brigade, ambulances or polic e cars.
Caution
It is not a tactile display! Do not press the display surface. The screen can be
cleaned with a soft cloth (and alcohol, if necessary). Do not use solvents such
as turpentine or petrol to clean the surface as they will c orrode the material.
A2A3
13
A4
Dest. on map
A5
A6
42
A7
11
A8
A9
18, 24
1)Optional equipmentA10
30
A11
ESC
A12
MAP
39
A13
NAVI
17
A14
AUX
44
A15
TELE
A16
CD
11
A17
RADIO
8
A18
INFO
41
radionaving Seite 5 Mittwo
ch, 30. März 2005 12:26 12
Page 9 of 50
Radio / CD / Sound
8Radio / CD / SoundRadio Overview
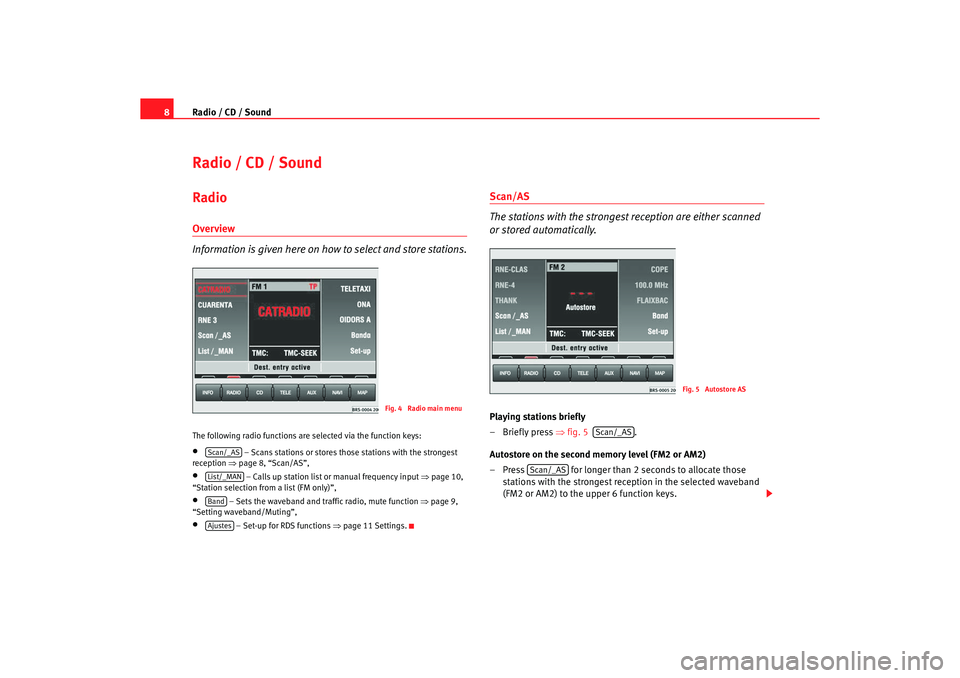
Information is given here on how to select and store stations.The following radio functions are selected via the function k eys:•
– Scans stations or stores those stations with the strongest
reception ⇒
page 8, “Scan/AS”,
•
– Calls up station list or manual frequency input ⇒
page 10,
“Station selection from a list (FM only)”,
•
– Sets the waveband and traf fic radio, mute function
⇒
page 9,
“Setting waveband/Muting”,
•
– Set-up for RDS functions ⇒page 11 Settings.
Scan/AS
The stations with the strongest reception are either scanned
or stored automatically.Playing stations briefly
– Briefly press ⇒
fig. 5 .
Autostore on the second memory level (FM2 or AM2)
– Press for longer than 2 seconds to allocate tho se
stations with the strongest reception in the selected waveban d
(FM2 or AM2) to the upper 6 function keys.
Fig. 4 Radio main menu
Scan/_ASList/_MANBandAjustes
Fig. 5 Autostore AS
Scan/_AS
Scan/_AS
radionaving Seite 8 Mittwo ch, 30. März 2005 12:26 12
Page 11 of 50
Radio / CD / Sound
10Station selection from a list (FM only)
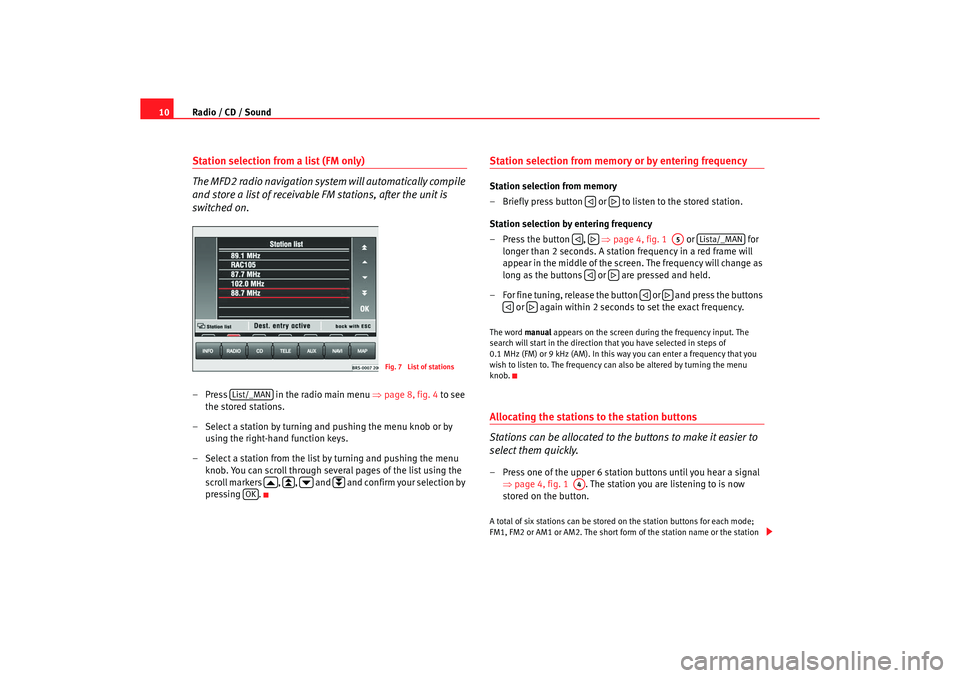
The MFD2 radio navigation system will automatically compile
and store a list of receivable FM stations, after the unit is
switched on.– Press in the radio main menu ⇒ page 8, fig. 4
to see
the stored stations.
– Select a station by turning and pushing the menu knob or by
using the right-hand function keys.
– Select a station from the list by turning and pushing the me nu
knob. You can scroll through several pages of the list u sing the
scroll markers , , and and confirm your selec tion by
pressing .
Station selection from memory or by entering frequencyStation selection from memory
– Briefly press button or to listen to the stored station.
Station selection by entering frequency
– Press the button , ⇒
page 4, fig. 1 or for
longer than 2 seconds. A station frequency in a red frame will
appear in the middle of the screen. The frequency will change as
long as the buttons or are pressed and held.
– For fine tuning, release the button or and press th e buttons
or again within 2 seconds to set the exact frequency.The word manual appears on the screen during the frequency input. Th e
search will start in the direction that you have select ed in steps of
0.1 MHz (FM) or 9 kHz (AM). In this way you can enter a f requency that you
wish to listen to. The frequency can also be altered b y turning the menu
knob.Allocating the stations to the station buttons
Stations can be allocated to the buttons to make it easier to
select them quickly.– Press one of the upper 6 station buttons until you hear a signal
⇒ page 4, fig. 1 . The station you are listening to is now
stored on the button.A total of six stations can be stored on the station bu ttons for each mode;
FM1, FM2 or AM1 or AM2. The short form of the stati on name or the station
Fig. 7 List of stations
List/_MAN
OK
A5
Lista/_MAN
A4
radionaving Seite 10 Mittwoch, 30. März 2005 12:26 12
Page 18 of 50
Navigation17
A variety of different information on th e route can be called up during active
route guidance. The scroll function can be used to page th rough lists shown
on the screen, either line by line or page by page.
If the display “ Off Road
” appears on the screen, it means you are locate d on
a non-digitalised street, (e.g. on a fa rm track). The GPS satellites will not be
able to reach your antenna when you are in a tunnel or underground garage,
meaning that the unit orientates itself via the wheel sensors. If you try to carry
out a route calculation in this situation you may hear the announcement:
“You are located on a non-digitalised street”. Drive on until the display “Off
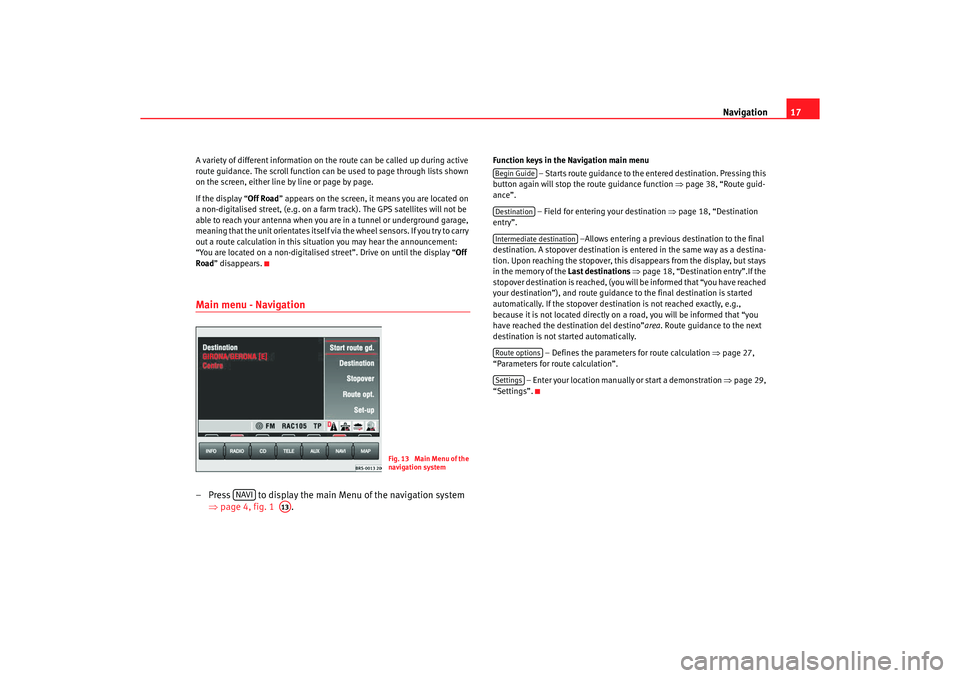
Road ” disappears.Main menu - Navigation– Press to display the main Menu of the navigation sy stem
⇒ page 4, fig. 1 .
Function keys in the Navigation main menu
– Starts route guidance to the entered destinatio n. Pressing this
button again will stop the route guidance function ⇒ page 38, “Route guid-
ance”.
– Field for entering your destination ⇒
page 18, “Destination
entry”.
–Allows entering a previous destination to the fina l
destination. A stopover destination is entered in the sa me way as a destina-
tion. Upon reaching the stopover, this disappears fr om the display, but stays
in the memory of the Last destinations
⇒ page 18, “Destination entry”.If the
stopover destination is reached, (you will be informed that “you have reached
your destination”), and route guidance to the fina l destination is started
automatically. If the stopover destin ation is not reached exactly, e.g.,
because it is not located directly on a road, you will be informed that “you
have reached the destination del destino” area. Route guidance to the next
destination is not started automatically.
– Defines the parameters for route calculation
⇒page 27,
“Parameters for route calculation”.
– Enter your location manually or start a demonstration ⇒
page 29,
“Settings”.
Fig. 13 Main Menu of the
navigation system
NAVI
A13
Begin GuideDestinationIntermediate destinationRoute optionsSettings
radionaving Seite 17 Mittwoch, 30. März 2005 12 :26 12
Page 30 of 50
Navigation29
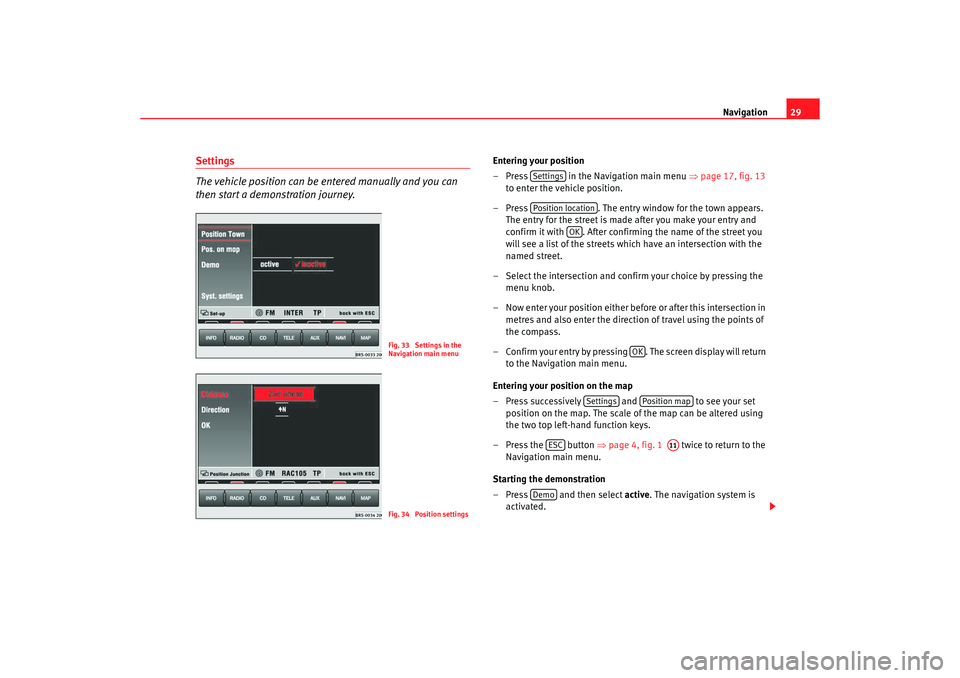
Settings
The vehicle position can be entered manually and you can
then start a demonstration journey.
Entering your position
– Press in the Navigation main menu ⇒
page 17, fig. 13
to enter the vehicle position.
– Press . The entry window for the town appears.
The entry for the street is made after you make your en try and
confirm it with . After confirming the name of the street y ou
will see a list of the streets which have an intersection w ith the
named street.
– Select the intersection and confirm your choice by press ing the
menu knob.
– Now enter your position either before or after this intersec tion in
metres and also enter the directio n of travel using the points of
the compass.
– Confirm your entry by pressing . The screen disp lay will return
to the Navigation main menu.
Entering your position on the map
– Press successively and to see your set
position on the map. The scale of the map can be altered us ing
the two top left-hand function keys.
– Press the button ⇒
page 4, fig. 1 twice to return to the
Navigation main menu.
Starting the demonstration
– Press and then select active. The navigation system is
activated.
Fig. 33 Settings in the
Navigation main menuFig. 34 Position settings
SettingsPosition location
OK
OK
Settings
Position map
ESC
A11
Demo
radionaving Seite 29 Mittwoch, 30. März 2005 12 :26 12
Page 44 of 50
Information and system settings43
– You can set the screen brightness to be adjusted to suit the light
conditions when the headlights are switched on.
•
auto : When turning on the head lights,the display wi ll automatically
change from day to night.
•
manual : With ⇒
page 4, fig. 1 you may switch between the day
and night displays.
and – Sets the screen settings for the day and
night display.
– If the system does not have the correct time, you may a djust the clock
by turning and pressing the menu button s. The data for the arrival time is
oriented towards this time if the route guidance function i s active.Note
The language can only be changed if the navigation CD has been inserted.Day/Night
A13
Contrast day
Contrast night
Hour
radionaving Seite 43 Mittwoch, 30. März 2005 12:26 12