display Seat Leon 5D 2006 Maintenance programme
[x] Cancel search | Manufacturer: SEAT, Model Year: 2006, Model line: Leon 5D, Model: Seat Leon 5D 2006Pages: 292, PDF Size: 8.86 MB
Page 5 of 292
Contents3
ContentsThe structure of this manual
. . . . .
Content
. . . . . . . . . . . . . . . . . . . . . . . . . . . . . . . .
Safety First
. . . . . . . . . . . . . . . . . . . . . . . . . . .
Safe driving
. . . . . . . . . . . . . . . . . . . . . . . . . . . . . .
Brief introduction . . . . . . . . . . . . . . . . . . . . . . . .
Proper sitting position for occupants . . . . . . . . .
Pedal area . . . . . . . . . . . . . . . . . . . . . . . . . . . . . .
Stowing luggage . . . . . . . . . . . . . . . . . . . . . . . . .
Seat belts
. . . . . . . . . . . . . . . . . . . . . . . . . . . . . . . .
Introduction . . . . . . . . . . . . . . . . . . . . . . . . . . . . .
Why wear seat belts? . . . . . . . . . . . . . . . . . . . . . .
Seat belts . . . . . . . . . . . . . . . . . . . . . . . . . . . . . . .
Belt tension devices . . . . . . . . . . . . . . . . . . . . . .
Airbag system
. . . . . . . . . . . . . . . . . . . . . . . . . . . .
Brief introduction . . . . . . . . . . . . . . . . . . . . . . . .
Front airbags . . . . . . . . . . . . . . . . . . . . . . . . . . . .
Side airbags* . . . . . . . . . . . . . . . . . . . . . . . . . . . .
Curtain airbags . . . . . . . . . . . . . . . . . . . . . . . . . .
Deactivating airbags* . . . . . . . . . . . . . . . . . . . . .
Child safety
. . . . . . . . . . . . . . . . . . . . . . . . . . . . . .
Brief introduction . . . . . . . . . . . . . . . . . . . . . . . .
Child seats . . . . . . . . . . . . . . . . . . . . . . . . . . . . . .
Securing child seats . . . . . . . . . . . . . . . . . . . . . .
Operating instructions
. . . . . . . . . . . .
Cockpit
. . . . . . . . . . . . . . . . . . . . . . . . . . . . . . . . . . .
Overview . . . . . . . . . . . . . . . . . . . . . . . . . . . . . . .
Instruments . . . . . . . . . . . . . . . . . . . . . . . . . . . . .
Digital display in the instrument panel . . . . . . .
Instrument panel menus . . . . . . . . . . . . . . . . . . .
Warning lamps . . . . . . . . . . . . . . . . . . . . . . . . . . .
Steering wheel controls
. . . . . . . . . . . . . . . . . . .
Using these instructions . . . . . . . . . . . . . . . . . . .
Audio system . . . . . . . . . . . . . . . . . . . . . . . . . . . .
Radio navigation system . . . . . . . . . . . . . . . . . . .
Steering wheel lighting controls . . . . . . . . . . . .
Unlocking and locking
. . . . . . . . . . . . . . . . . . . .
Central locking . . . . . . . . . . . . . . . . . . . . . . . . . . .
Keys . . . . . . . . . . . . . . . . . . . . . . . . . . . . . . . . . . .
Radio frequency remote control . . . . . . . . . . . . .
Anti-theft alarm system* . . . . . . . . . . . . . . . . . . .
Tailgate . . . . . . . . . . . . . . . . . . . . . . . . . . . . . . . . .
Windows . . . . . . . . . . . . . . . . . . . . . . . . . . . . . . .
Sliding/tilting roof* . . . . . . . . . . . . . . . . . . . . . . .
Lights and visibility
. . . . . . . . . . . . . . . . . . . . . . .
Lights . . . . . . . . . . . . . . . . . . . . . . . . . . . . . . . . . .
Interior lights . . . . . . . . . . . . . . . . . . . . . . . . . . . .
Visibility . . . . . . . . . . . . . . . . . . . . . . . . . . . . . . . .
Windscreen wipers . . . . . . . . . . . . . . . . . . . . . . .
Mirrors . . . . . . . . . . . . . . . . . . . . . . . . . . . . . . . . .
Seats and stowage
. . . . . . . . . . . . . . . . . . . . . . .
The importance of correct seat adjustment . . . .
Head restraints . . . . . . . . . . . . . . . . . . . . . . . . . .
Front seats . . . . . . . . . . . . . . . . . . . . . . . . . . . . . .
Rear seat bench . . . . . . . . . . . . . . . . . . . . . . . . . .
Stowage compartments . . . . . . . . . . . . . . . . . . . Ashtrays*, cigarette lighter* and electrical
sockets . . . . . . . . . . . . . . . . . . . . . . . . . . . . . . . . .
First-aid kit, warning triangle, fire extinguisher
Luggage compartment . . . . . . . . . . . . . . . . . . . .
Heating, Ventilation and Air conditioning
. .
Heating and ventilation . . . . . . . . . . . . . . . . . . .
Climatic* . . . . . . . . . . . . . . . . . . . . . . . . . . . . . . .
2C-Climatronic* . . . . . . . . . . . . . . . . . . . . . . . . . .
General notes . . . . . . . . . . . . . . . . . . . . . . . . . . .
Driving
. . . . . . . . . . . . . . . . . . . . . . . . . . . . . . . . . . .
Steering . . . . . . . . . . . . . . . . . . . . . . . . . . . . . . . .
Safety . . . . . . . . . . . . . . . . . . . . . . . . . . . . . . . . . .
Ignition lock . . . . . . . . . . . . . . . . . . . . . . . . . . . . .
Starting and stopping the engine . . . . . . . . . . .
Manual gearbox . . . . . . . . . . . . . . . . . . . . . . . . . .
Automatic gearbox* / DSG automatic gearbox*
Handbrake . . . . . . . . . . . . . . . . . . . . . . . . . . . . . .
Acoustic parking aid system* . . . . . . . . . . . . . . .
Cruise control system (CCS)* . . . . . . . . . . . . . . .
Tips and Maintenance
. . . . . . . . . . . . .
Intelligent technology
. . . . . . . . . . . . . . . . . . . . .
Brakes . . . . . . . . . . . . . . . . . . . . . . . . . . . . . . . . .
Anti-lock brake system and traction control M-ABS
(ABS and TCS) . . . . . . . . . . . . . . . . . . . . . . . . . . .
Electronic stabilisation program (ESP)* . . . . . . .
Driving and the environment
. . . . . . . . . . . . . .
Running-in . . . . . . . . . . . . . . . . . . . . . . . . . . . . . .
Exhaust gasses purification system . . . . . . . . . .
Driving abroad . . . . . . . . . . . . . . . . . . . . . . . . . . .
5
6
7
7
7
10
16
16
19
19
21
24
28
30
30
34
37
41
44
46
46
48
50 55
55
55
56
59
65
72
84
84
84
88
92
93
93
99
100
102
104
106
108
111
111
117
118
119
123
126
126
127
129
130
131 134
137
138
140
140
142
145
149
150
150
151
152
153
156
157
162
163
165
169
169
169
170
171
173
173
174
175
leon_ingles Seite 3 Donnerstag, 24. August 2006 1:56 13
Page 22 of 292
Seat belts
20The warning lamp in the combi-instrument lights up
1) if the driver seat belt
is not fastened when the ignition is switched on. In addition, an acoustic
signal is given for a few seconds and a text is displayed on the combi-instru-
ment asking you to
1) fasten your seat belt .
The warning lamp* does not go out until the driver seat belt is fastened
while the ignition is switched on.
1)Depending on the model version
leon_ingles Seite 20 Donner stag, 24. August 2006 1:56 13
Page 34 of 292
Airbag system
32Monitoring of airbag and belt tension device system
The functionality of the airbag and belt tension device system is constantly
monitored electronically. Each time th e ignition is switched on, the warning
lamp
lights for several seconds and the display in the instrument panel*
shows AIRBAG / TENSIONER .
The system must be checked when the warning lamp
:
•
does not come on when the ignition is switched on,
•
does not go out about 4 seconds after the ignition is switched on,
•
goes out and then comes on again after the ignition is switched on,
•
or if it comes on or flickers while the car is moving.
In the event of a malfunction, the warning lamp remains on continuously. In
addition, depending on the malfunctio n, a fault message appears in the
display of the combi-instrument for approx. 10 seconds and a short acoustic
signal is given. In this event, you should have a qualified workshop check the
system immediately.
If any of the airbags are deactivated by the Authorised Service Centre, the
indicator lights for several seconds more after the veri fication and will turn off
if there is no fault.
WARNING
•
If there is a malfunction, the air bag and belt tension device system
cannot properly perform its protective function.
•
If a malfunction should occur, have the system checked immediately by
a qualified workshop. Otherwise there is a risk that, in the event of an acci-
dent, the airbag system and belt tension devices may not be triggered, or
may not be triggered correctly.
Repair, care and disposal of the airbagsThe parts of the airbag system are installed in various places in your vehicle.
If you work on the airbag system or remove and install parts of the system
when performing other repair work, parts of the airbag system may be
damaged. The consequence may be that, in the event of an accident, the
airbag inflates incorrectly or does not inflate at all.
The relevant safety requirements must be observed when the vehicle or
components of the airbag are scrapped . The specialist workshops and the
Vehicle disposal centres are familiar with these requirements.
WARNING
•
If repairs are not carried out by a professional, or if the airbags are used
incorrectly, the risk of severe or fatal injuries is increased. The airbags may
fail to inflate, or could inflate in the wrong circumstances.
•
Do not cover or stick anything on the steering wheel hub or the soft
plastic surface of the airbag unit on the passenger side of the dashboard,
and do not obstruct or modify them in any way.
•
It is important not to attach any objects such as cup holders or tele-
phone mountings to the surfaces covering the airbag units.
•
To clean the steering wheel or dash panel, you may use only a dry cloth
or one moistened with water. Never clean the dash panel and surface of the
airbag module with cleansers containing solvents. Solvents cause the
surface to become porous. If the airbag inflates, disintegrating plastic
parts can cause substantial injuries.
•
Never attempt to repair, adjust, remove or install parts of the airbag
system.
•
Any work on the airbag system or re moval and installation of the airbag
components for other repairs (such as repairs to the steering wheel) should
be performed only by a qualified workshop. Qualified workshops have the
necessary tools, repair information and qualified personnel.
leon_ingles Seite 32 Donner stag, 24. August 2006 1:56 13
Page 57 of 292
Cockpit55
Safety First
Operating instructions
Tips and Maintenance
Te c h n i c a l D a t a
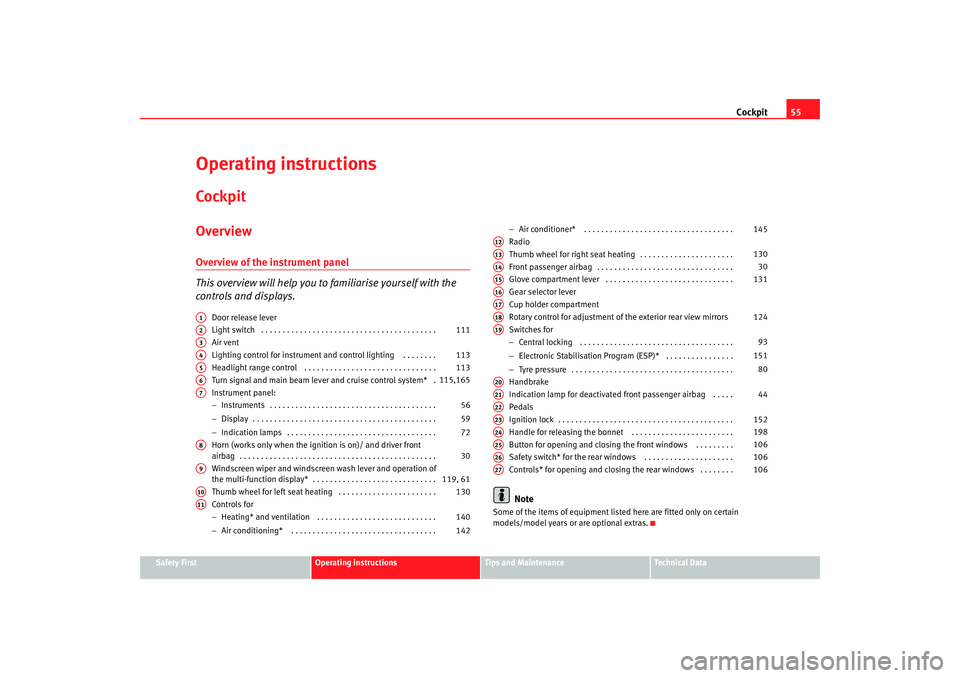
Operating instructionsCockpitOverviewOverview of the instrument panel
This overview will help you to familiarise yourself with the
controls and displays.
Door release lever
Light switch . . . . . . . . . . . . . . . . . . . . . . . . . . . . . . . . . . . . . . . . .
Air vent
Lighting control for instrument and control lighting . . . . . . . .
Headlight range control . . . . . . . . . . . . . . . . . . . . . . . . . . . . . . .
Turn signal and main beam lever and cruise control system* .
Instrument panel:
− Instruments . . . . . . . . . . . . . . . . . . . . . . . . . . . . . . . . . . . . . . .
− Display . . . . . . . . . . . . . . . . . . . . . . . . . . . . . . . . . . . . . . . . . . .
− Indication lamps . . . . . . . . . . . . . . . . . . . . . . . . . . . . . . . . . . .
Horn (works only when the igni tion is on)/ and driver front
airbag . . . . . . . . . . . . . . . . . . . . . . . . . . . . . . . . . . . . . . . . . . . . . .
Windscreen wiper and windscreen wash lever and operation of
the multi-function display* . . . . . . . . . . . . . . . . . . . . . . . . . . . . .
Thumb wheel for left seat heating . . . . . . . . . . . . . . . . . . . . . . .
Controls for
− Heating* and ventilation . . . . . . . . . . . . . . . . . . . . . . . . . . . .
− Air conditioning* . . . . . . . . . . . . . . . . . . . . . . . . . . . . . . . . . . −
Air conditioner* . . . . . . . . . . . . . . . . . . . . . . . . . . . . . . . . . . .
Radio
Thumb wheel for right seat heating . . . . . . . . . . . . . . . . . . . . . .
Front passenger airbag . . . . . . . . . . . . . . . . . . . . . . . . . . . . . . . .
Glove compartment lever . . . . . . . . . . . . . . . . . . . . . . . . . . . . . .
Gear selector lever
Cup holder compartment
Rotary control for adjustment of the exterior rear view mirrors
Switches for
− Central locking . . . . . . . . . . . . . . . . . . . . . . . . . . . . . . . . . . . .
− Electronic Stabilisation Program (ESP)* . . . . . . . . . . . . . . . .
− Tyre pressure . . . . . . . . . . . . . . . . . . . . . . . . . . . . . . . . . . . . . .
Handbrake
Indication lamp for deactivated front passenger airbag . . . . .
Pedals
Ignition lock . . . . . . . . . . . . . . . . . . . . . . . . . . . . . . . . . . . . . . . . .
Handle for releasing the bonnet . . . . . . . . . . . . . . . . . . . . . . . .
Button for opening and closing the front windows . . . . . . . . .
Safety switch* for the rear windows . . . . . . . . . . . . . . . . . . . . .
Controls* for opening and closing the rear windows . . . . . . . .
Note
Some of the items of equipment listed here are fitted only on certain
models/model years or are optional extras.
A1A2
111
A3A4
113
A5
113
A6
115,165
A7
56
59
72
A8
30
A9
119, 61
A10
130
A11
140
142 145
A12A13
130
A14
30
A15
131
A16A17A18
124
A19
93
151 80
A20A21
44
A22A23
152
A24
198
A25
106
A26
106
A27
106
leon_ingles Seite 55 Donner stag, 24. August 2006 1:56 13
Page 58 of 292
Cockpit
56InstrumentsInstrument overview
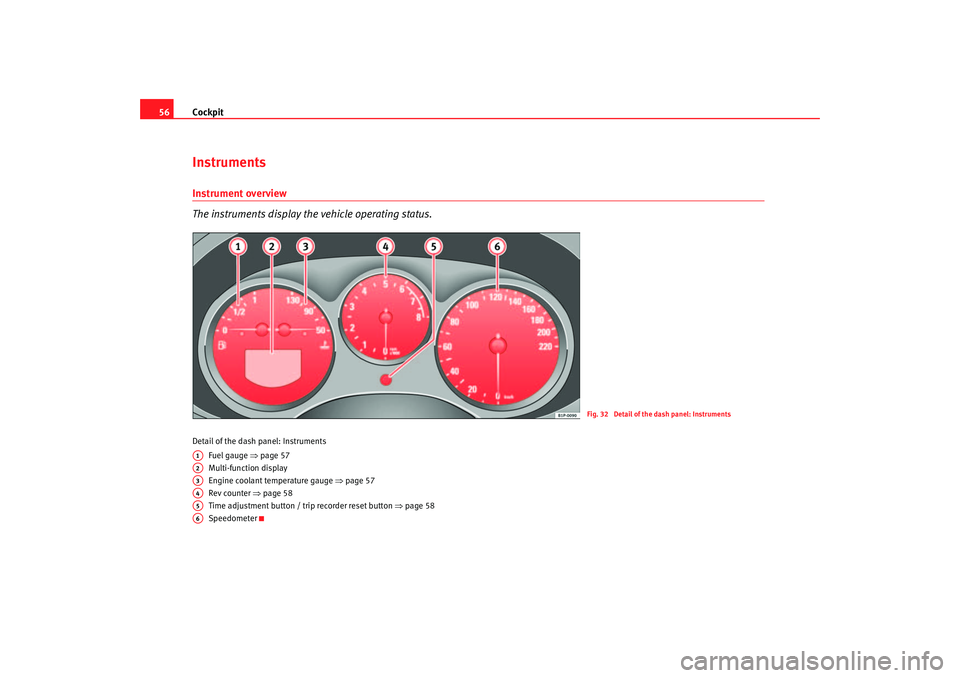
The instruments display the vehicle operating status.Detail of the dash panel: Instruments
Fuel gauge ⇒ page 57
Multi-function display
Engine coolant temperature gauge ⇒page 57
Rev counter ⇒ page 58
Time adjustment button / tr ip recorder reset button ⇒page 58
Speedometer
Fig. 32 Detail of the dash panel: Instruments
A1A2A3A4A5A6
leon_ingles Seite 56 Donner stag, 24. August 2006 1:56 13
Page 59 of 292
Cockpit57
Safety First
Operating instructions
Tips and Maintenance
Te c h n i c a l D a t a
Fuel gauge
and reserve indicator
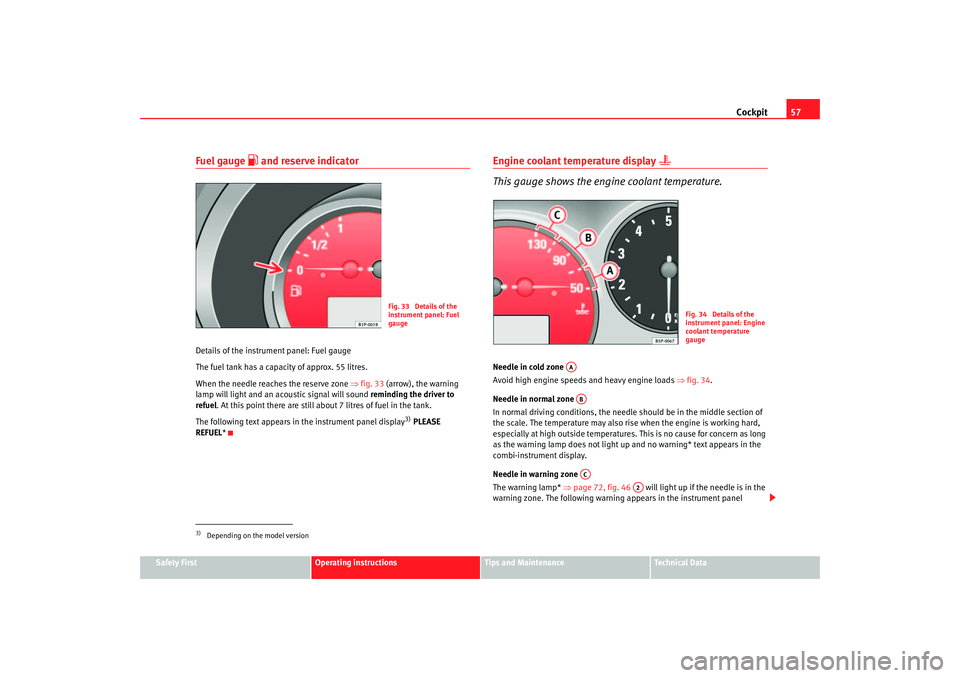
Details of the instrument panel: Fuel gauge
The fuel tank has a capacity of approx. 55 litres.
When the needle reaches the reserve zone ⇒fig. 33 (arrow), the warning
lamp will light and an acoustic signal will sound reminding the driver to
refuel . At this point there are still about 7 litres of fuel in the tank.
The following text appears in the instrument panel display
3) PLEASE
REFUEL *
Engine coolant temperature display
This gauge shows the engine coolant temperature.
Needle in cold zone
Avoid high engine speeds and heavy engine loads ⇒fig. 34.
Needle in normal zone
In normal driving conditions, the needle should be in the middle section of
the scale. The temperature may also rise when the engine is working hard,
especially at high outside temperatures. This is no cause for concern as long
as the warning lamp does not light up and no warning* text appears in the
combi-instrument display.
Needle in warning zone
The warning lamp* ⇒page 72, fig. 46 will light up if the needle is in the
warning zone. The following warning appears in the instrument panel
3)Depending on the model version
Fig. 33 Details of the
instrument panel: Fuel
gauge
Fig. 34 Details of the
instrument panel: Engine
coolant temperature
gauge
AAABAC
A2
leon_ingles Seite 57 Donnerstag, 24. August 2006 1:56 13
Page 60 of 292
Cockpit
58display
4). Stop the car and switch off the engine. Check the coolant level
⇒ page 205 ⇒ .
Even if the coolant level is correct do not continue driving. You should obtain
technical assistance.WARNING
When working in the engine compartment, always bear in mind the safety
warnings ⇒ page 198.
Caution
Accessories in front of the air inlet reduce the cooling effect of the coolant. At
high outside temperatures and high engine loads, there is a risk of the
engine overheating.Rev counter
The rev. counter displays the engine speed in revolutions per
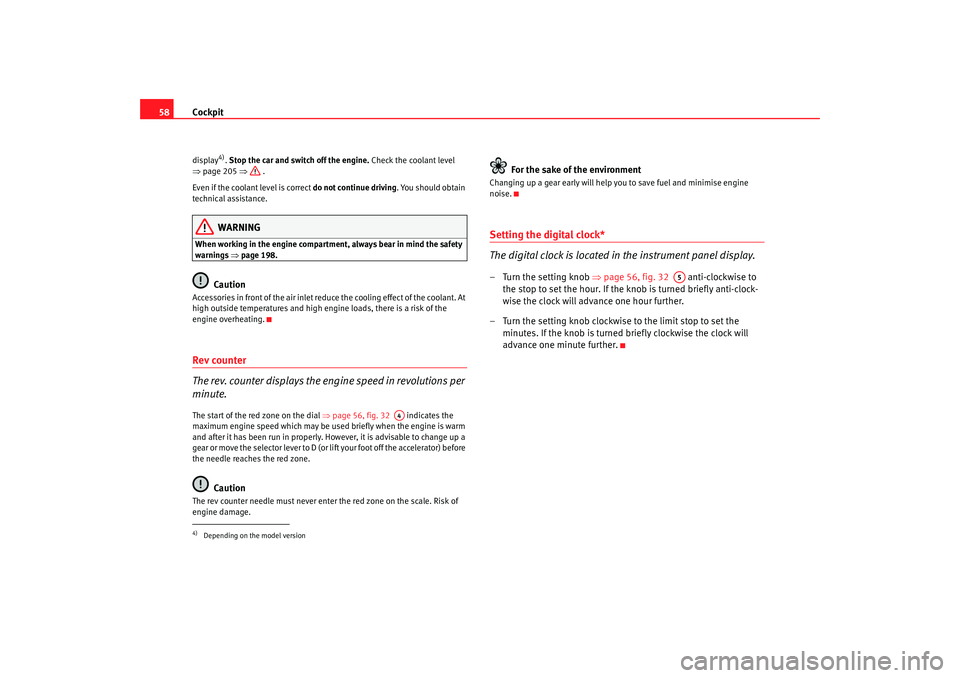
minute.The start of the red zone on the dial ⇒page 56, fig. 32 indicates the
maximum engine speed which may be used briefly when the engine is warm
and after it has been run in properly. However, it is advisable to change up a
gear or move the selector lever to D (or l ift your foot off the accelerator) before
the needle reaches the red zone.
Caution
The rev counter needle must never enter the red zone on the scale. Risk of
engine damage.
For the sake of the environment
Changing up a gear early will help you to save fuel and minimise engine
noise.Setting the digital clock*
The digital clock is located in the instrument panel display.– Turn the setting knob ⇒page 56, fig. 32 anti-clockwise to
the stop to set the hour. If the kn ob is turned briefly anti-clock-
wise the clock will advance one hour further.
– Turn the setting knob clockwise to the limit stop to set the minutes. If the knob is turned briefly clockwise the clock will
advance one minute further.
4)Depending on the model version
A4
A5
leon_ingles Seite 58 Donner stag, 24. August 2006 1:56 13
Page 61 of 292
Cockpit59
Safety First
Operating instructions
Tips and Maintenance
Te c h n i c a l D a t a
Digital display in the instrument panelDisplay (without warning or information texts)
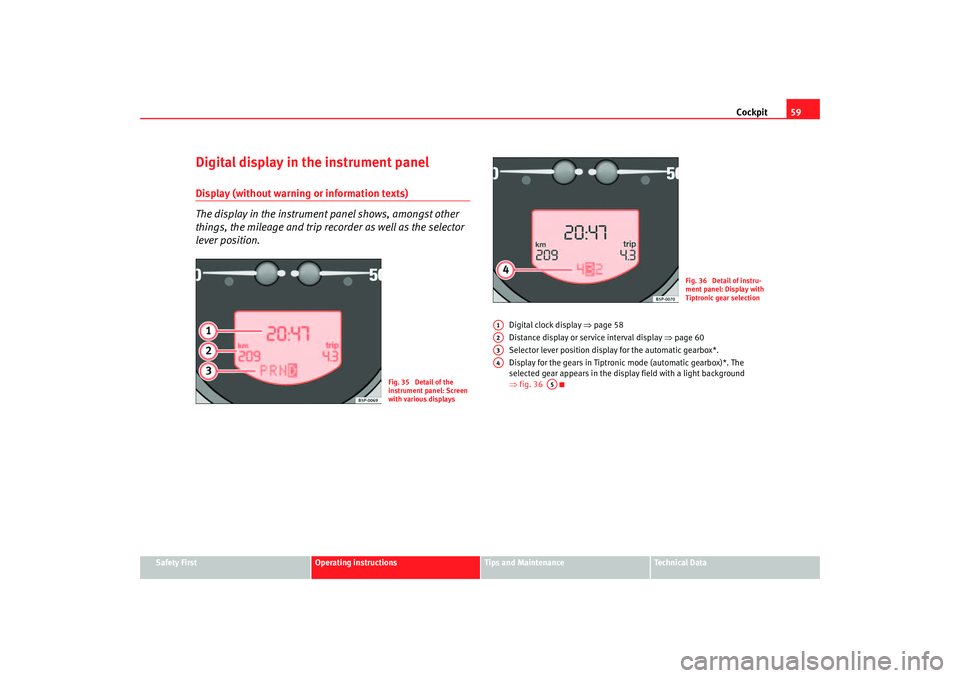
The display in the instrument panel shows, amongst other
things, the mileage and trip recorder as well as the selector
lever position.
Digital clock display ⇒page 58
Distance display or service interval display ⇒page 60
Selector lever position display for the automatic gearbox*.
Display for the gears in Tiptronic mode (automatic gearbox)*. The
selected gear appears in the display field with a light background
⇒ fig. 36
Fig. 35 Detail of the
instrument panel: Screen
with various displays
Fig. 36 Detail of instru-
ment panel: Display with
Tiptronic gear selection
A1A2A3A4
A5
leon_ingles Seite 59 Donner stag, 24. August 2006 1:56 13
Page 62 of 292
Cockpit
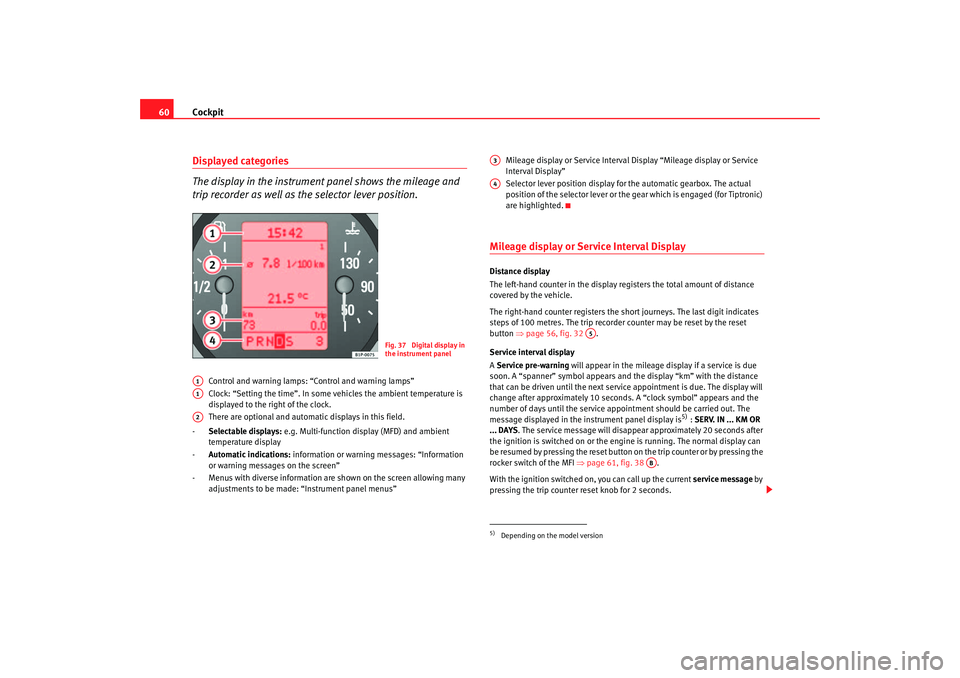
60Displayed categories
The display in the instrument panel shows the mileage and
trip recorder as well as the selector lever position.
Control and warning lamps: “Control and warning lamps”
Clock: “Setting the time”. In some vehicles the ambient temperature is
displayed to the right of the clock.
There are optional and automatic displays in this field.
- Selectable displays: e.g. Multi-function display (MFD) and ambient
temperature display
- Automatic indications: information or warning messages: “Information
or warning messages on the screen”
- Menus with diverse information are shown on the screen allowing many adjustments to be made: “Instrument panel menus” Mileage display or Service Interval Display “Mileage display or Service
Interval Display”
Selector lever position display for the automatic gearbox. The actual
position of the selector lever or the gear which is engaged (for Tiptronic)
are highlighted.
Mileage display or Service Interval DisplayDistance display
The left-hand counter in the display registers the total amount of distance
covered by the vehicle.
The right-hand counter regi
sters the short journeys. The last digit indicates
steps of 100 metres. The trip recorder counter may be reset by the reset
button ⇒page 56, fig. 32 .
Service interval display
A Service pre-warning will appear in the mileage display if a service is due
soon. A “spanner” symbol appears and the display “km” with the distance
that can be driven until the next service appointment is due. The display will
change after approximately 10 seconds. A “clock symbol” appears and the
number of days until the service appointment should be carried out. The
message displayed in the instrument panel display is
5) : SERV. IN ... KM OR
... DAYS . The service message will disappear approximately 20 seconds after
the ignition is switched on or the en gine is running. The normal display can
be resumed by pressing the reset button on the trip counter or by pressing the
rocker switch of the MFI ⇒page 61, fig. 38 .
With the ignition switched on, you can call up the current service message by
pressing the trip counter reset knob for 2 seconds.
Fig. 37 Digital display in
the instrument panel
A1A1A2
5)Depending on the model versionA3A4
A5
AB
leon_ingles Seite 60 Donner stag, 24. August 2006 1:56 13
Page 63 of 292
Cockpit61
Safety First
Operating instructions
Tips and Maintenance
Te c h n i c a l D a t a
An
overdue service is indicated by a minus sign in front of the mileage or day
information.
Display with multi-function display (MFD)*
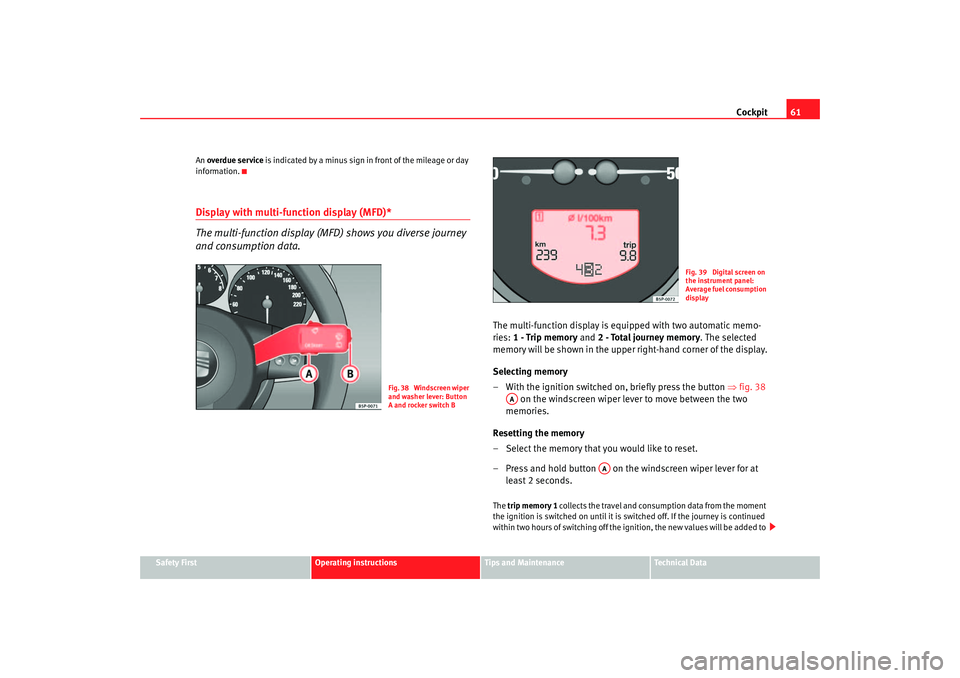
The multi-function display (M FD) shows you diverse journey
and consumption data.
The multi-function display is equipped with two automatic memo-
ries: 1 - Trip memory and 2 - Total journey memory . The selected
memory will be shown in the upper right-hand corner of the display.
Selecting memory
– With the ignition switched on, briefly press the button ⇒fig. 38
on the windscreen wiper lever to move between the two
memories.
Resetting the memory
– Select the memory that you would like to reset.
– Press and hold button on the windscreen wiper lever for at least 2 seconds.The trip memory 1 collects the travel and cons umption data from the moment
the ignition is switched on until it is switched off. If the journey is continued
within two hours of switching off the ignition, the new values will be added to
Fig. 38 Windscreen wiper
and washer lever: Button
A and rocker switch B
Fig. 39 Digital screen on
the instrument panel:
Average fuel consumption
display
AA
AA
leon_ingles Seite 61 Donner stag, 24. August 2006 1:56 13