navigation Seat Leon 5D 2006 RADIO-NAVIGATION 300 MP3
[x] Cancel search | Manufacturer: SEAT, Model Year: 2006, Model line: Leon 5D, Model: Seat Leon 5D 2006Pages: 64, PDF Size: 2.62 MB
Page 38 of 64
Navigation35
WARNING
•
Please observe the laws of road traffic legislation when following the
recommendations made by your navigation system.
•
The destination guide is subject to constant changes despite the infor-
mation about one-way streets, pedestrian zones etc. stored on the naviga-
tion CD. Information on traffic lights, stop and right of way signs, parking
and stopping restrictions as well as lane constrictions is not included in
the navigation system. Traffic signs and legislation always have priority
over the recommendations made by the system.
•
Adjust your speed to suit road traffi c conditions and also weather and
visibility conditions. Do not follow the instructions of the navigation
system exclusively.
The navigation CDInserting the navigation CD
– Press the button ⇒page 3, fig. 1 to eject any CD in the
CD slot.
– Remove the CD and insert the navigation CD with the written side facing up.
– Push the CD into the slot until the radio navigation system pulls it in. The program stored on the navigation CD is loaded. Do not
remove the navigation CD before the loading process is finished.After the destination guide has begun, the navigation CD may be ejected to
listen to, for example, an audio CD ⇒page 56, “The destination guide
without the navigation CD”.
WARNING
Note also, the instructions and wa rning messages of the CD mode
⇒ page 20, “Important information on operating the CD player”.
Note
•
Note that a soiled or damaged navigation CD may negatively effect the
functions of the navigation system.
•
The extent to which small villages, streets and house numbers are
contained on the CD depends on the CD version.
•
You will need a new navigation CD for every country that you travel to.
•
The content of the CD is constantly being updated. You will receive infor-
mation on new updates at your next SEAT Official Service.
•
The navigation functions are limited if no navigation CD is inserted
⇒ page 56, “The destination guide without the navigation CD”.
General notesYou can continue to listen to the radio or CD whilst you are being guided to
your destination. Further informat ion can be found in the chapter ⇒page 56,
“The destination guide without the navigation CD”.
When entering an address (town, street), only those letters or symbols which
make up a logical entry will be presented. A list of possible names will be
shown. Do not forget to enter the blank space in names made up of more than
one word, such as Milton Keynes.
The route will be recalculated if you leave or disregard the route that was orig-
inally calculated. This process takes only a few seconds.
A10
RNS MP3_ingles Seite 35 Mittwoch, 10. Mai 2006 7:52 19
Page 39 of 64
Navigation
36The last audio instruction can be repeated by pushing the button. The
volume of a navigation recommendation can be changed whilst it is being
made.
If the display Off Road appears on the screen, it means you are on a route not
recorded on the CD, e.g. on a dirt road. The GPS satellites will not be able to
reach your antenna when you are in a tunnel or underground garage,
meaning that the unit orientates itself via the wheel sensors. If you try to carry
out a route calculation in t his situation you may hear an announcement indi-
cating that you are located on a street for which no digital record exists. Drive
on until the display Off Road disappears.
INFO
RNS MP3_ingles Seite 36 Mittwoch, 10. Mai 2006 7:52 19
Page 40 of 64
Navigation37
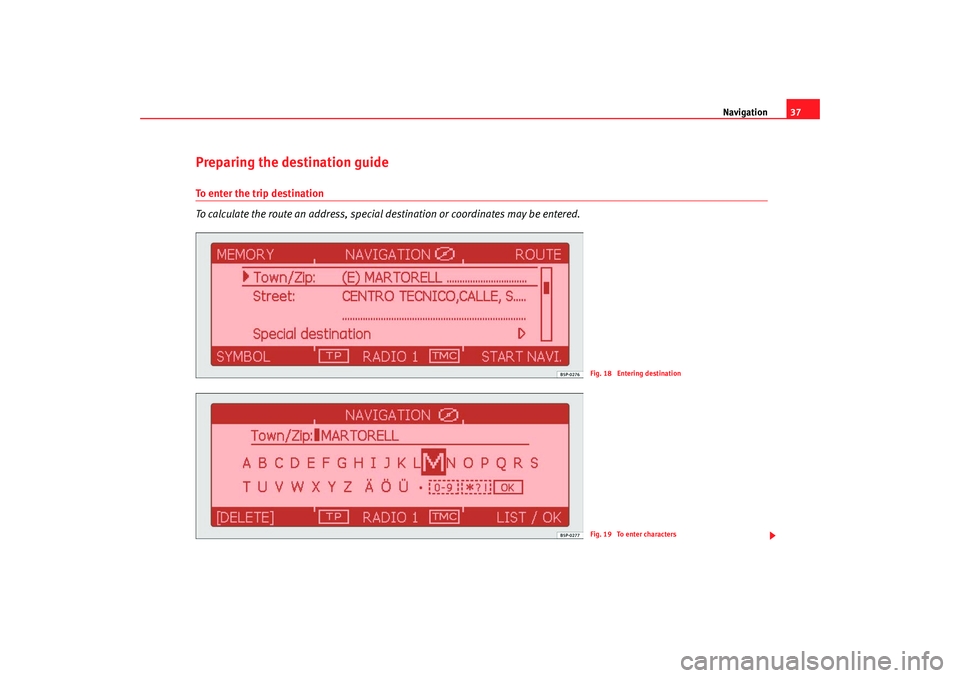
Preparing the destination guideTo enter the trip destination
To calculate the route an address, special destination or coordinates may be entered.
Fig. 18 Entering destinationFig. 19 To enter characters
RNS MP3_ingles Seite 37 Mittwoch, 10. Mai 2006 7:52 19
Page 41 of 64
Navigation
38
If the menu Route planning menu is displayed instead of the
previous menu, then the option Route with intermediate
destination must be deactivated in the menu ⇒page 42.
Pressing a menu with information on the actual location
of the vehicle can be accessed ⇒page 38, “Navigation menu func-
tion buttons”.
To access the navigation menu and enter a destination
– Press the button. The main NAVIGATION menu appears
⇒ page 37, fig. 18 .
– Select how you would like to enter the destination and press the menu button ( ⇒page 38, “Methods of entering a destination”).
– To enter a new address, select the country in the list after pushing the Countr y . The previously used address is erased and
a town and post code are entered To w n / P C.
– Press the menus button to access the selection screen ⇒page 37, fig. 19 . To enter characters, proceed as follows:
To enter characters
– After selecting an entry (in the example To w n / P C) select charac-
ters by rotating the menu button. Pressing the button, the
selected characters will form part of the name ⇒page 37,
fig. 19. Invalid characters will be displayed, so that only place
names found in the destination country or in the indicated town
included in the navigation CD can be entered.
– Select to enter a number (for example, the post code).
– Select to enter special characters. – The entry on the upper line following
To w n / P C alters with each
character entered. If the entry co rresponds to a searched name or
is similar, press or the function key to access the
list where the entry may be entered by rotating the menu button
and confirm by pushing.
If the destination address has already been entered, then the information
only needs to be altered to the new destination. For example, only the entry
To w n / P C needs to be altered if the new destination corresponds to another
country.
Methods of entering a destination
Using the options Countr y, To w n / P C , Street and Junction the destination
address may be indicated. Following country selection, the previous entries,
for example special destinations, are limited to the corresponding countries.
Special destination - To enter real locations such as petrol stations or hospi-
tals as a destination ⇒page 44, “Special destination”.
Begin Guide – Starts destination guide to the entered destination
⇒ page 50, “Destination guide”.
Position – To enter the longitude and latitude of the destination.
This menu is also used to display points of interest close to the destination;
these may be directly selected. Nearby destinations are those that have been
memorized by activating the option Show as nearby destination ⇒ page 45,
“To record or select a final destination, intermediate destinations, destina-
tions with a flag or current position”.
To record a trip destination
⇒ page 45, “To record or select a final destination, intermediate destina-
tions, destinations with a flag or current position”
Navigation menu function buttons
– Displays the destination memory ⇒ page 45, “Destination
memory”.
ROUTE
SYMBOLS
NAV
0-9*?!
OK
LIST / OK
MEMORY
RNS MP3_ingles Seite 38 Mittwoch, 10. Mai 2006 7:52 19
Page 42 of 64
Navigation39
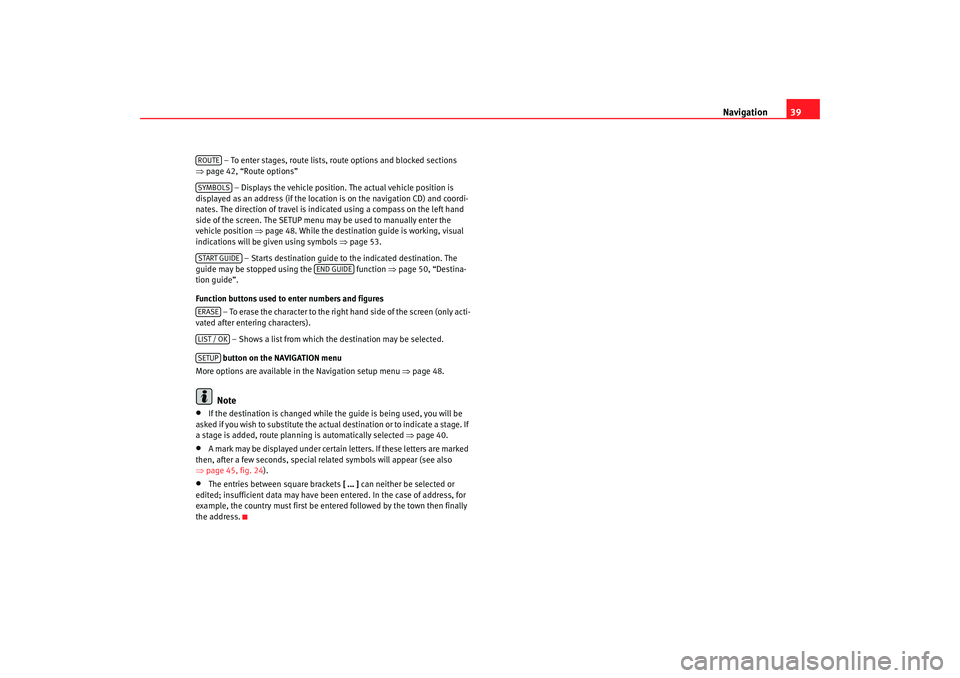
– To enter stages, route lists, route options and blocked sections
⇒ page 42, “Route options”
– Displays the vehicle position. The actual vehicle position is
displayed as an address (if the location is on the navigation CD) and coordi-
nates. The direction of travel is indicated using a compass on the left hand
side of the screen. The SETUP menu may be used to manually enter the
vehicle position ⇒page 48. While the destination guide is working, visual
indications will be given using symbols ⇒page 53.
– Starts destination guide to the indicated destination. The
guide may be stopped using the function ⇒page 50, “Destina-
tion guide”.
Function buttons used to enter numbers and figures
– To erase the character to the right hand side of the screen (only acti-
vated after entering characters).
– Shows a list from which the destination may be selected.
button on the NAVIGATION menu
More options are available in the Navigation setup menu ⇒page 48.Note
•
If the destination is changed while the guide is being used, you will be
asked if you wish to substitute the actual destination or to indicate a stage. If
a stage is added, route planning is automatically selected ⇒ page 40.
•
A mark may be displayed under certain letters. If these letters are marked
then, after a few seconds, special related symbols will appear (see also
⇒ page 45, fig. 24 ).
•
The entries between square brackets [ ... ] can neither be selected or
edited; insufficient data may have been entered. In the case of address, for
example, the country must first be entered followed by the town then finally
the address.ROUTESYMBOLSSTART GUIDE
END GUIDE
ERASELIST / OKSETUP
RNS MP3_ingles Seite 39 Mittwoch, 10. Mai 2006 7:52 19
Page 43 of 64
Navigation
40Route planning
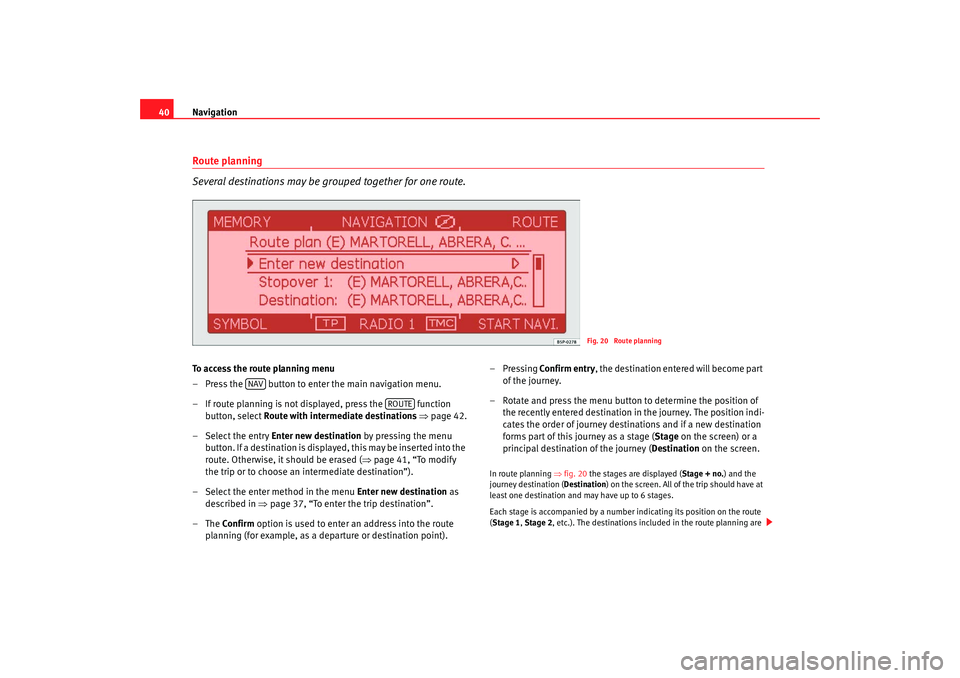
Several destinations may be grouped together for one route.To access the route planning menu
– Press the button to enter the main navigation menu.
– If route planning is not displayed, press the function
button, select Route with intermediate destinations ⇒ page 42.
– Select the entry Enter new destination by pressing the menu button. If a destination is displayed, this may be inserted into the
route. Otherwise, it should be erased ( ⇒page 41, “To modify
the trip or to choose an intermediate destination”).
– Select the enter method in the menu Enter new destination as
described in ⇒page 37, “To enter the trip destination”.
–The Confirm option is used to enter an address into the route
planning (for example, as a departure or destination point). –Pressing
Confirm entry , the destination entered will become part
of the journey.
– Rotate and press the menu button to determine the position of the recently entered destination in the journey. The position indi-
cates the order of journey destinations and if a new destination
forms part of this journey as a stage ( Stage on the screen) or a
principal destination of the journey ( Destination on the screen.
In route planning ⇒fig. 20 the stages are displayed ( Stage + no.) and the
journey destination ( Destination) on the screen. All of the trip should have at
least one destination and may have up to 6 stages.
Each stage is accompanied by a number indicating its position on the route
( Stage 1, Stage 2, etc.). The destinations included in the route planning are
Fig. 20 Route planning
NAV
ROUTE
RNS MP3_ingles Seite 40 Mittwoch, 10. Mai 2006 7:52 19
Page 44 of 64
Navigation41
displayed from up to down, for example, first the stages Stage 1, Stage 2
down to the final destination ( Destination).
A menu bar on the right hand side (see also ⇒page 6, “Handling the
menus”) indicates that not all of the journey stages or the menu options are
visible. Turn the menu button to verify stages.
While the destination guide is active, it is possible to add stages to a journey
(up to six stages)
Menu options Route planning
Pressing Enter new destination new destinations may be added to the trip.
Destination and Stage refer to the final destination and the stages respec-
tively. These entries may be modified.
Pushing Begin destination guide the trip is begun.
To modify the trip or to choose an intermediate destination
Following the selection of a destination from the route planning by rotating
and pressing the menu button, the following options are available:
Change – To change, for example, the name of the street.
Move – To change the order of the destinations. If an intermediate destina-
tion is moved to the end of a trip, it is automatically converted to the final
destination and the previous final destination becomes an intermediate
destination.
Erase – To erase the destination from the trip.
Begin guide – To begin the guide to this destination. The intermediate desti-
nations are not taken into account. If the required destination is an interme-
diate destination, the trip is resumed when the destination is reached
⇒ page 50, “Destination guide”.
To record a trip
⇒ page 45, “To record or select a final destination, intermediate destina-
tions, destinations with a flag or current position”
RNS MP3_ingles Seite 41 Mittwoch, 10. Mai 2006 7:52 19
Page 45 of 64
Navigation
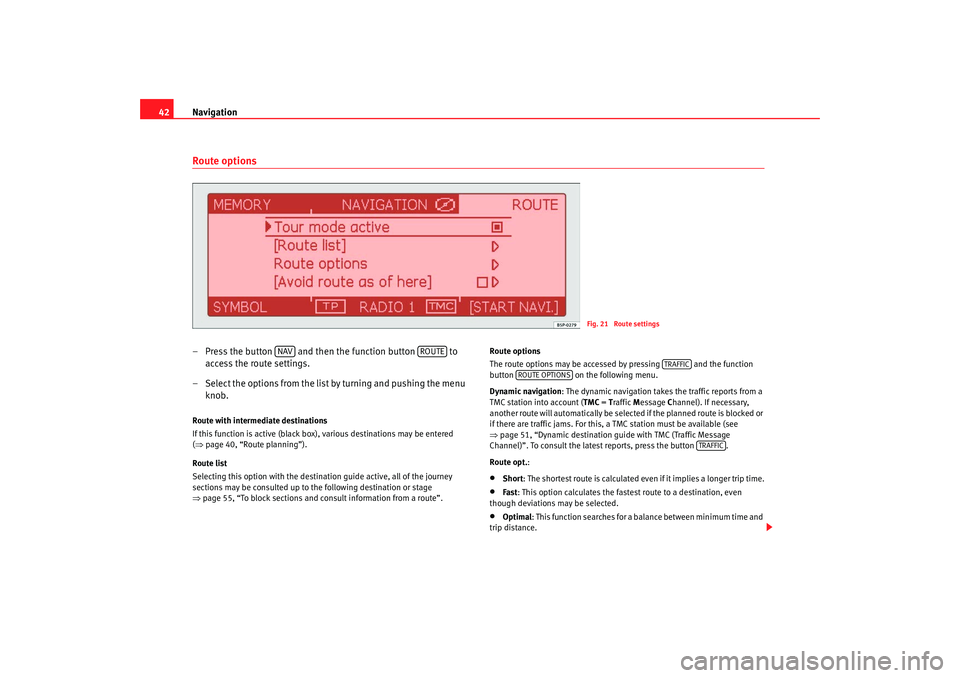
42Route options– Press the button and then the function button to
access the route settings.
– Select the options from the list by turning and pushing the menu knob.Route with intermediate destinations
If this function is active (black box), various destinations may be entered
(⇒ page 40, “Route planning”).
Route list
Selecting this option with the destination guide active, all of the journey
sections may be consulted up to the following destination or stage
⇒ page 55, “To block sections and consult information from a route”. Route options
The route options may be accessed by pressing and the function
button
on the following menu.
Dynamic navigation : The dynamic navigation takes the traffic reports from a
TMC station into account ( TMC = Traffic Message Channel). If necessary,
another route will automatically be selected if the planned route is blocked or
if there are traffic jams. For this, a TMC station must be available (see
⇒ page 51, “Dynamic destination guide with TMC (Traffic Message
Channel)”. To consult the latest reports, press the button .
Route opt.:
•
Short: The shortest route is calculated even if it implies a longer trip time.
•
Fast : This option calculates the fastest route to a destination, even
though deviations may be selected.
•
Optimal : This function searches for a balance between minimum time and
trip distance.
Fig. 21 Route settings
NAV
ROUTE
TRAFFIC
ROUTE OPTIONS
TRAFFIC
RNS MP3_ingles Seite 42 Mittwoch, 10. Mai 2006 7:52 19
Page 46 of 64
Navigation43
Route options can be altered whilst the destination guide function is active.
The changed parameters will be used as a basis for the calculation of the
remaining journey.
Highway , Ferry , To l l or Tunnel : Establishes if the sect ion of a route includes
highways, a ferry, toll roads or tunnels. These options will, however, be used
for route planning if there is no other logical route to the destination (e.g. an
island is to be used without using a ferry) (“ No”).
To avoid a route from a point
During the destination guide, this option may be used to manually block a
section of the route on the menu which follows ⇒page 55, “To block
sections and consult information from a route”.
Note
•
The dynamic route guide option will only function if you are receiving at
least one TMC radio station. During the destination guide, the TMC station
must be selected if the sound source is the radio.
•
The quality of the dynamic destinatio n guide depends on the information
contained in the traffic announcements. The stations and / or traffic informa-
tion providers are responsible for the quality of the information given.
•
In some cases, in order to avoid a traffic jam using the TMC instructions,
no benefit is noticeable if traffic is heavy on the alternative route.
To select a destination using its geographical position
A destination can be entered using the exact coordinates for
longitude and latitude.– Press the button.
–Press Position if you want to enter your destination using coordi-
nates. – Use the menu button to enter
the degrees, minutes and seconds
of the location.
If the coordinates entered do not correspond to the information on the navi-
gation CD, the destination guide cannot begin. Use the following data to esti-
mate the position of your location:
For latitude, 1° corresponds to approximately 111 km, 1 arc minute approxi-
mately 1.85 km and 0.1 hundredth of an arc minute approximately 3 m
For longitude, 1° corresponds to approximately 69 km, 1 arc minute approxi-
mately 1.15 km and 0.1 hundredth of an arc minute approximately 3 m
Note
If you set the longitude higher than 180° or lower than 0°, the E will be
replaced by a W (western longitude). Latitudes can be set from 90°N via 0° to
90°S and back only.
NAV
RNS MP3_ingles Seite 43 Mittwoch, 10. Mai 2006 7:52 19
Page 47 of 64
Navigation
44Special destination
Special destinations are, for example, petrol stations or hospitalsTo enter a special destination
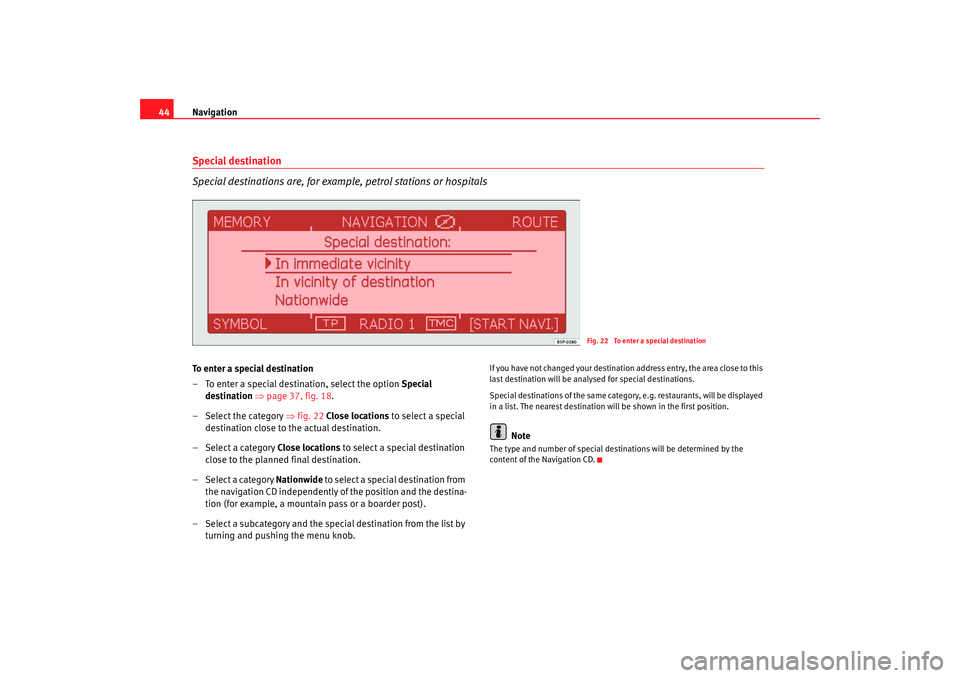
– To enter a special destination, select the option Special
destination ⇒page 37, fig. 18 .
– Select the category ⇒fig. 22 Close locations to select a special
destination close to the actual destination.
– Select a category Close locations to select a special destination
close to the planned final destination.
–Select a category Nationwide to select a special destination from the navigation CD independently of the position and the destina-
tion (for example, a mountain pass or a boarder post).
– Select a subcategory and the special destination from the list by turning and pushing the menu knob.
If you have not changed your destination address entry, the area close to this
last destination will be analysed for special destinations.
Special destinations of th e same category, e.g. restaurants, will be displayed
in a list. The nearest destination will be shown in the first position.
Note
The type and number of special destinations will be determined by the
content of the Navigation CD.
Fig. 22 To enter a special destination
RNS MP3_ingles Seite 44 Mittwoch, 10. Mai 2006 7:52 19