CD player Seat Leon 5D 2006 RADIO-NAVIGATION 300 MP3
[x] Cancel search | Manufacturer: SEAT, Model Year: 2006, Model line: Leon 5D, Model: Seat Leon 5D 2006Pages: 64, PDF Size: 2.62 MB
Page 4 of 64
Contents1
ContentsGeneral information
. . . . . . . . . . . . . . . .
Quick Reference Guide
. . . . . . . . . . . .
Controls
. . . . . . . . . . . . . . . . . . . . . . . . . . . . . . . . . .
Switching on and off
. . . . . . . . . . . . . . . . . . . . . .
Handling the menus
. . . . . . . . . . . . . . . . . . . . . .
System adjustments, sound and volume
. . .
Radio/CD and CD charger / MP3
CD
. . . . . . . . . . . . . . . . . . . . . . . . . . . . . . . . . . . . . .
Radio
. . . . . . . . . . . . . . . . . . . . . . . . . . . . . . . . . . . .
CD and charger
. . . . . . . . . . . . . . . . . . . . . . . . . . .
MP3 CD
. . . . . . . . . . . . . . . . . . . . . . . . . . . . . . . . . .
Important information on
operating the CD player
. . . . . . . . . . .
Safety precautions for equipment fitted with
lasers
. . . . . . . . . . . . . . . . . . . . . . . . . . . . . . . . . . . .
Tips on CD mode
. . . . . . . . . . . . . . . . . . . . . . . . .
Tips on cleaning CDs
. . . . . . . . . . . . . . . . . . . . . .
Apple* iPod connection
. . . . . . . . . . .
General information
. . . . . . . . . . . . . . . . . . . . . .
Apple iPod® connector
. . . . . . . . . . . . . . . . . . .
Turning the iPod® on and off
. . . . . . . . . . . . . .
Control of the iPod® through the sound
system
. . . . . . . . . . . . . . . . . . . . . . . . . . . . . . . . . . .
USB* Connection
. . . . . . . . . . . . . . . . . . .
Connecting a memory stick / MP3 player
. . .
Authorised memory devices and radios
. . . .
Playing music files with the radio
. . . . . . . . . .
Navigation
. . . . . . . . . . . . . . . . . . . . . . . . . . . .
Overview
. . . . . . . . . . . . . . . . . . . . . . . . . . . . . . . . .
Preparing the destination guide
. . . . . . . . . . .
Destination memory
. . . . . . . . . . . . . . . . . . . . . .
Other settings
. . . . . . . . . . . . . . . . . . . . . . . . . . . .
Destination guide
. . . . . . . . . . . . . . . . . . . . . . . .
Index
. . . . . . . . . . . . . . . . . . . . . . . . . . . . . . . . . .
2
3
3
5
6
8
11
11
16
17
20
20
20
20
22
22
23 26
26
28
28
30
32
34
34
37
45
48
50
57
RNS MP3_ingles Seite 1 Mittwoch, 10. Mai 2006 7:52 19
Page 20 of 64
Radio/CD and CD charger / MP3 CD17
Note
You might not be able to play CDs with copy protection or CD-Rs and CD-
RWs.Listening to an audio CDListening to a CD
–Press the ⇒page 3, fig. 1 button. If an audio CD is already
in the player, the last played track will be selected. Otherwise the
following will appear briefly on the screen: No Audio CD.
– Insert a CD. The play function will start automatically.
Playing the previous or next track
– Press the button or .
Reverse/ Fast Forward
– Press and hold button or .
Begin random track select function ( function)
– Press The CD player will then play the CD tracks in random order. Press the button again to switch off the function.
Begin the track search ( function)
– Press All of the songs on the CD will be played for 10 seconds. To select the title being played, press once more.
Ejecting CDs
–Press ⇒page 3, fig. 1 .
If the equipment cannot play the inserted CD, the message Error appears on
the screen.
Audio and navigation CD
It is possible to listen to an audio CD in the player while using the destination
guide ⇒page 56, “The destination guide without the navigation CD”
WARNING
Note also, the instructions and wa rning messages of the CD mode
⇒ page 20.
Note
•
Uneven road surfaces and strong vibrations may cause the CD to jump.
The CD play function should be switched off in this case.
•
You might not be able to play CDs with copy protection or CD-Rs and CD-
RWs.
MP3 CDNotes concerning MP3 filesMP3 CD requirements•
The CD should be set to the ISO 9660 standard.
•
The group name and album as well as the title being played can be
displayed if this information is available in the form of ID3 labels (version
ID3v1 or ID3v2, 4 Kb max). The maximum name extension, album and group
is 32 letters long. If no ID3 labels are ava ilable, the name of the file is shown
(32 characters max).
•
The equipment can not read play lists.
CD
MIX
MIX
MIX
SCAN
SCAN
SCAN
A10
RNS MP3_ingles Seite 17 Mittwoch, 10. Mai 2006 7:52 19
Page 21 of 64
Radio/CD and CD charger / MP3 CD
18MP3 formats•
The system plays the MP3 formats-MPEG1, MPEG2 and MPEG2.5 Layer 3.
•
Data rate: 32, 40, 48, 56, 64, 80, 96, 112, 128, 160, 192, 224, 256 or
320 kbit/s (fixed or variable).
•
Sample rate. 32, 44,1 or 48 kHz. In the case of files with a variable data rate, the indicated duration may not
be precise.
WARNING
Note also, the instructions and warning messages of the CD mode
⇒
page 20, “Important information on operating the CD player”.
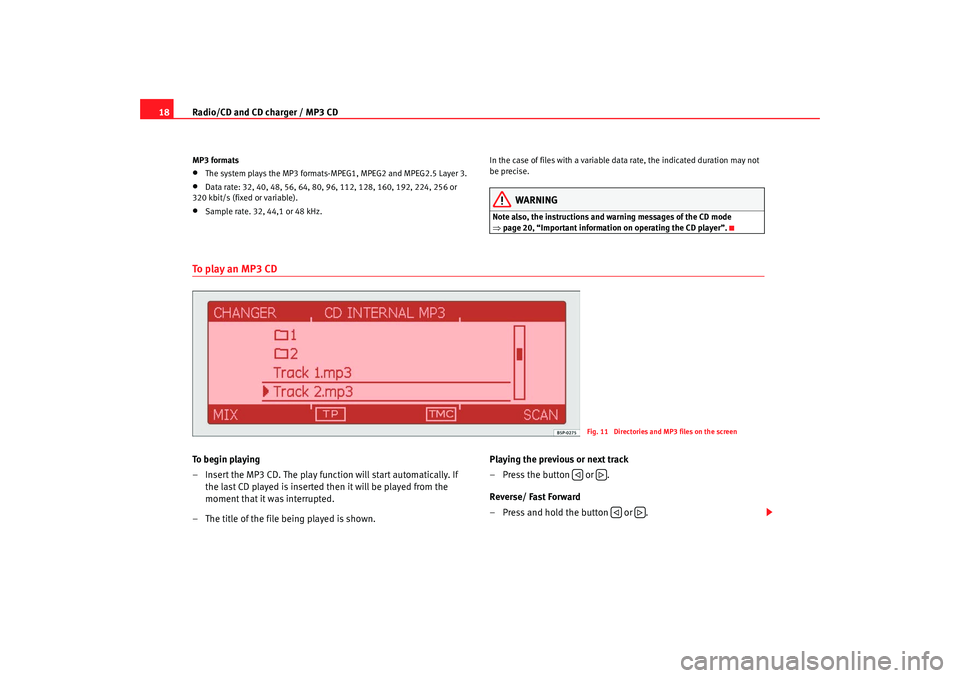
To p l a y a n M P 3 C DTo b e g i n p l a y i n g
– Insert the MP3 CD. The play function will start automatically. If
the last CD played is inserted then it will be played from the
moment that it was interrupted.
– The title of the file being played is shown. Playing the previous or next track
– Press the button or .
Reverse/ Fast Forward
– Press and hold the button or .
Fig. 11 Directories and MP3 files on the screen
RNS MP3_ingles Seite 18 Mittwoch, 10. Mai 2006 7:52 19
Page 22 of 64
Radio/CD and CD charger / MP3 CD19
To access a subdirectory or the main directory
– To access an upper directory, rotate the menu button or press the button .
– To access a superior directory or the main directory press the button as many times as necessary or select the entry Back
from the subdirectory displayed on the screen.
To play all the CD titles from an MP3 CD
– Select the option Play all from the main menu using the menu
button.
– Press the menu button. In the box to the right of the entry a point appears. The tracks on the CD will be played.
To play all the titles from one directory
– Select the desired directory.
– Play a title from this directory by pressing on the menu button.
– Select the option Play this directory pressing the menu button.
– Press the menu button. In the box close to the entry a point appears. Only the titles in this directory are played as well as
those of any .
To begin random track selection ( function)
– Press The CD player will then play the MP3 tracks in random order. Press the button again to switch off the function.
To begin the track search ( function)
– Press All of the MP3 files on the CD will be played for 10 seconds. To select the title being played, press once more. To eject the MP3 CD
– Press button
⇒page 3, fig. 1 . The ejected CD will be
pulled back into the unit if it is not fully withdrawn within 10
seconds.
MP3 system settings
– Press in CD mode
– Activate or deactivate the function
MP3: display ID3 pressing
the menu button.
Note
If the equipment cannot play the inserted MP3 CD, the message Error appears
on the screen.
MIX
MIX
MIX
SCAN
SCAN
SCAN
A10
SETUP
RNS MP3_ingles Seite 19 Mittwoch, 10. Mai 2006 7:52 19
Page 23 of 64
Important information on operating the CD player
20Important information on operating the CD playerSafety precautions for equipment fitted with lasers Laser devices are classified by DIN IEC 76 (CO) 6/ VDE 0837 into safety
classes 1 to 4.
SEAT CD players correspond to safety class 1.
The lasers used in class 1 units are low energy lasers, or are shielded in such
a manner that they present no danger when used correctly.
WARNING
The CD player is a class 1 laser product. If it is opened, or is faulty or
damaged, there is a risk of invisible laser beams escaping from the unit.
The CD player contains no parts that have to be serviced. For safety
reasons, any repair work that needs to be done must, therefore, be carried
out by an Authorised Seat Service Centre.
Caution
•
If the CD player develops a mechanical fault, Error is displayed on the
status line with Player fault. See supplier. in the centre of the screen. Please
ask your SEAT dealership for further information ⇒.
•
Only use standard 12 cm CDs, given that 8 cm and non-standard shaped
CDs (“Shape CD”) may damage the player mechanism.
•
Slide the CD with the printed side up into the CD slot up to the point where
it is drawn in automatically. Handle CDs by the edges and avoid leaving finger
marks. Clean the CDs as indicated in ⇒page 20, “Tips on cleaning CDs”
•
Do not stick labels to the CDs; these may be detached and damage the
player mechanism.
Note
•
You might not be able to play CDs with copy protection or CD-Rs and CD-
RWs.
•
Note the laws in vigour in your country concerning copyright.
Tips on CD modeIn order to guarantee an optimum sound quality from CDS and from MP3 files,
ensure that disks are not damaged, scratched or soiled.
Note that a soiled or damaged navigation CD may effect the functions of the
navigation system.
Please do not stick any labels onto the CDs.
Keep the CDs in a disk carrier or in its box.
Never expose CDs to direct sunlight!Tips on cleaning CDsUse a soft, lint–free cloth to clean CDs. Wipe the disc in a straight line from
the centre outwards. Stubborn soiling can be removed with a commercial CD
cleaner or isopropyl alcohol.
RNS MP3_ingles Seite 20 Mittwoch, 10. Mai 2006 7:52 19
Page 24 of 64
Important information on operating the CD player21
Caution
Never use fluids such as petrol, paint thinner or record cleaner, as these can
damage the surface of the CD!
RNS MP3_ingles Seite 21 Mittwoch, 10. Mai 2006 7:52 19
Page 25 of 64
Apple* iPod connection
22Apple* iPod connection General informationiPod
® by Apple
The iPod
®4)
is a portable MP3 player by Apple Computer Inc with several
models on the market.
These instructions describe the use of the iPod
® adaptor and its control
through the car radio
5) or the navigator
5). Read them carefully and keep
them handy for future reference.
Consult the manufacturer's instructions for information on the iPod
®
From here on, any instructions for the iPod
®, refer to the compatible author-
ised models of iPod
® of 3rd, fth and 5th generation
•
iPod
® with 20 GB capacity
•
iPod
® with 30 GB capacity
•
iPod
® with 40 GB capacity
•
iPod
® with 60 GB capacity
•
iPod
® mini
•
iPod
® nano
•
iPod
® photo with 60 GB capacity
•
iPod
® video with 30 GB capacity
•
iPod
® video with 60 GB capacity
•
iPod
® Special Edition the iPod
® shuffle and the iPod
® photo with 30 GB cannot be used, nor
devices by other brands.
Authorised and compatible radio equipment and radio navigator systems
Connecting the iPod
® directly into the radio equipment or navigation system
enables reproduction of stored music through the vehicle loudspeakers
Compatible music formats
The following formats are compatible:
•
AAC (from 8 to 320 Kbit/s)
•
AAC protected (from iTunes
® Music Store, M4A, M4B, M4P)
•
AIFF
•
Apple Lossless
•
Audible (formats 2, 3 and 4)
•
MP3 (from 8 to 320 Kbit/s)
•
MP3 VBR
•
WAV
Frequency range: between 20 and 20,000 Hz
Possible functions
The following functions are available through the sound system controls
•
Direct playback selection up to 6 playlists
•
Playback of all tracks on iPod
®
•
Random playback function
•
SCAN function (10 seconds of each track)
•
Change one playlist for another
•
Forward and rewind in track
4)iPod
® is a registered trademark of Apple Computer, Inc.
5)Optional equipment
RNS MP3_ingles Seite 22 Mittwoch, 10. Mai 2006 7:52 19
Page 31 of 64
USB* Connection
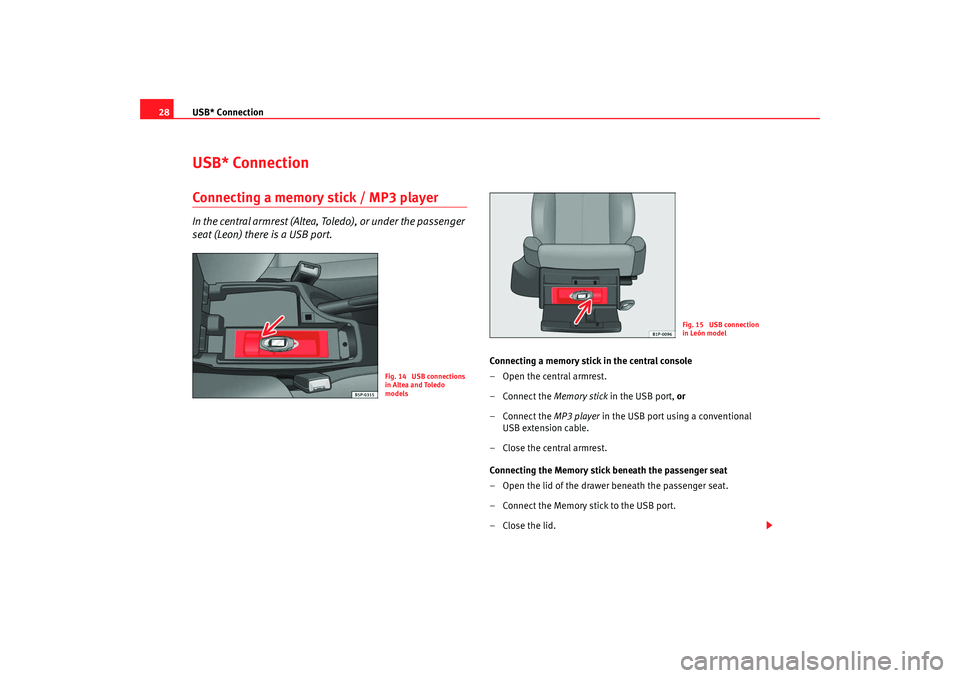
28USB* ConnectionConnecting a memory stick / MP3 playerIn the central armrest (Altea, Toledo), or under the passenger
seat (Leon) there is a USB port.
Connecting a memory stick in the central console
–Open the central armrest.
–Connect the Memory stick in the USB port, or
–Connect the MP3 player in the USB port using a conventional
USB extension cable.
– Close the central armrest.
Connecting the Memory stick beneath the passenger seat
– Open the lid of the drawer beneath the passenger seat.
– Connect the Memory stick to the USB port.
– Close the lid.
Fig. 14 USB connections
in Altea and Toledo
models
Fig. 15 USB connection
in León model
RNS MP3_ingles Seite 28 Mittwoch, 10. Mai 2006 7:52 19
Page 32 of 64
USB* Connection29
Disconnecting the memory stick
– Change the input device, for example from CD to radio FM.
– Then disconnect the memory stick or the extension cable from the USB port ⇒.
Once the device is connected the songs stored can be played using the car
radio fitted.
WARNING
Please keep your attention on driving as a priority!•
Adjust the volume so that external noise can be heard at all times, such
as police, fire and emergency services sirens.
•
Never remove the memory stick or MP3 player when driving.Caution
•
The temperature range of the Memory stick and MP3 is limited and is
norma lly betw
een 0° and 40° C. Th
erefore, do not leave it in the vehicle for
long.
•
Never connect the MP3 player directly into the USB port, as it may be
damaged. Always use an extension cable.
•
Never disconnect the device while USB port (CD) is selected as source.
The device may be damaged.
•
The USB port is only for connectiing a memory stick or MP3 player. Hard
disks or USB hubs etc. cannot be connected
•
The maximum voltage of the the memory stick or MP3 should not exceed
2.5 watts (500mA/5V)
•
Never insert metal objects into th e USB port, as it may shortcircuit.
Note
•
The memory stick, the MP3 player or the USB extension cable are not
standard equipment for your vehicle.
•
If the USB port does not detect the memory stick after 15 seconds, discon-
nect it and reconnect it.
•
In some cases the MP3 must be activated to make the connection with the
USB port. Consult the instructions of your MP3 player.
RNS MP3_ingles Seite 29 Mittwoch, 10. Mai 2006 7:52 19
Page 33 of 64
USB* Connection
30Authorised memory devices and radios
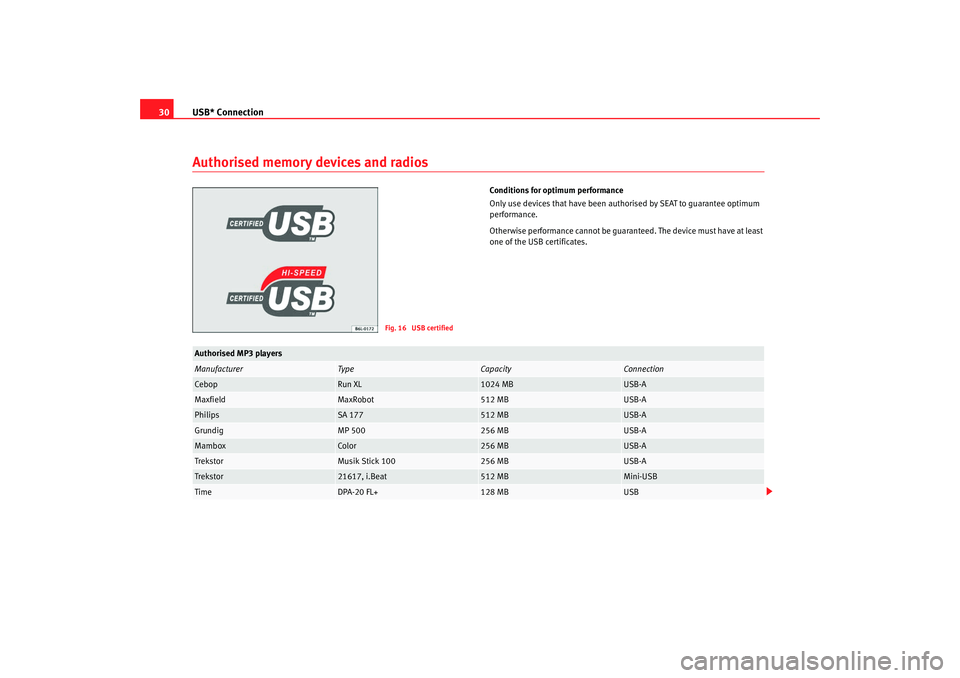
Conditions for optimum performance
Only use devices that have been authorised by SEAT to guarantee optimum
performance.
Otherwise performance cannot be guaranteed. The device must have at least
one of the USB certificates.
Fig. 16 USB certified
Authorised MP3 playersManufacturer
Ty pe
Capacity
Connection
Cebop
Run XL
1024 MB
USB-A
Maxfield
MaxRobot
512 MB
USB-A
Philips
SA 177
512 MB
USB-A
Grundig
MP 500
256 MB
USB-A
Mambox
Color
256 MB
USB-A
Trekstor
Musik Stick 100
256 MB
USB-A
Trekstor
21617, i.Beat
512 MB
Mini-USB
Time
DPA-20 FL+
128 MB
USB
RNS MP3_ingles Seite 30 Mittwoch, 10. Mai 2006 7:52 19