warning lights Seat Leon 5D 2007 User Guide
[x] Cancel search | Manufacturer: SEAT, Model Year: 2007, Model line: Leon 5D, Model: Seat Leon 5D 2007Pages: 302, PDF Size: 9.14 MB
Page 81 of 302

Cockpit79
Safety First
Operating instructions
Tips and Maintenance
Te c h n i c a l D a t a
Differential lock fault (EDL)*
EDL operates along with the ABS in vehicles equipped with an
Electronic Stabilisation Program (ESP)*A malfunction in the EDL is indicated by the ABS warning lamp
. Please
take the vehicle to a qualified workshop as soon as possible. For further infor-
mation on the EDL ⇒page 174.
Traction control system (TCS)*
The traction control system prevents the driven wheels from
spinning when the vehicle is acceleratingThe warning lamp lights up when the ignition is switched on and should turn
out after about 2 seconds.
When the TCS is operating while driving, the warning lamp flashes. If the
system is deactivated or if there is any fault in the same, the warning lamp will
remain lit.
It will also come on if a fault should occur in the ABS because the TCS oper-
ates in conjunction with the ABS. For further information see ⇒page 171.Soot accumulation in the dies el engine particulate filter*
If the indicator lights
you may help the filter clear itself by driving in the
appropriate manner.
To do this, drive about 15 minutes in 4th or 5th gear (automatic gearbox: S
gear range) at a speed of 60 km/h, with the engine running at approximately
2000 rpm. In this way, the pollen buil d up in the filter is burned. When
cleaning is successful, the indicator turns off. If the indicator
is not deactivated, bring the vehicle to a specialised work-
shop to repair the fault ⇒page 179.
WARNING
•
Always drive according to the road weather conditions, the terrain and
traffic. Driving recommendations should never lead to illegal maneouvers
in surrounding traffic.
•
The diesel engine particulate filter may reach extremely high tempera-
tures; it should not enter into contact with flammable materials under-
neath the vehicle. Failure to comply could result in fire.
Alternator
This warning lamp signals a fault in the alternator.
The warning lamp
lights up when the ignition is switched on. It should go
out when the engine has started running.
If the warning lamp lights up while driving, th e alternator is no longer
charging the battery. You should immediately drive to the nearest qualified
workshop.
You should avoid using electrical equipment that is not absolutely necessary
because this will drain the battery.
If the indicator flashes the voltage is insufficient for normal vehicle
operation.
leon ingles.book Seite 79 Dienstag, 11. September 2007 1:47 13
Page 82 of 302

Cockpit
80Tyre pressure*
The tyre monitor
15) compares wheel revolutions and with this information,
the diameter of each wheel using the ESP sensors. If the diameter of a wheel
changes, the tyre monitor indicator lights . The wheel diameter changes
when:
•
Tyre pressure is insufficient.
•
The tyre structure is damaged.
•
The vehicle is unbalanced because of a load.
•
The wheels of one axle are under more pressure (for example, driving with
a trailer or on extreme slopes).
•
The vehicle is fitted with snow chains.
•
The emergency wheel is fitted.
•
The wheel on one axle is changed. Tyre pressure adjustment
Following the modification to tyre pressure or changing one or more wheels,
the button
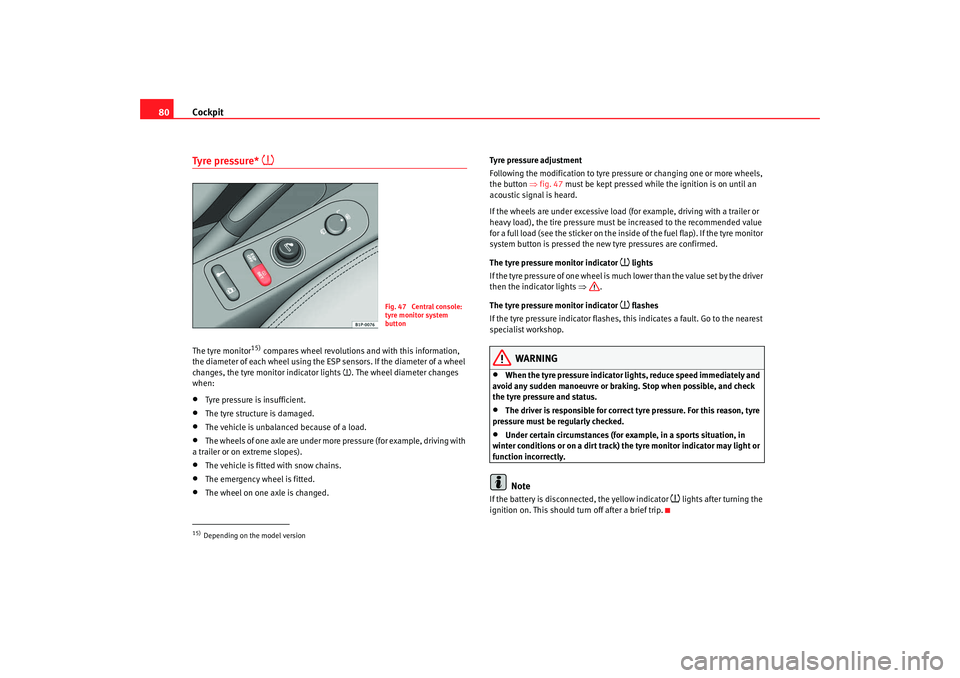
⇒fig. 47 must be kept pressed while the ignition is on until an
acoustic signal is heard.
If the wheels are under excessive load (for example, driving with a trailer or
heavy load), the tire pressure must be increased to the recommended value
for a full load (see the sticker on the inside of the fuel flap). If the tyre monitor
system button is pressed the new tyre pressures are confirmed.
The tyre pressure monitor indicator
lights
If the tyre pressure of one wheel is much lower than the value set by the driver
then the indicator lights ⇒.
The tyre pressure monitor indicator flashes
If the tyre pressure indicator flashes, this indicates a fault. Go to the nearest
specialist workshop.
WARNING
•
When the tyre pressure indicator lights, reduce speed immediately and
avoid any sudden manoeuvre or braking. Stop when possible, and check
the tyre pressure and status.
•
The driver is responsible for correct tyre pressure. For this reason, tyre
pressure must be regularly checked.
•
Under certain circumstances (for example, in a sports situation, in
winter conditions or on a dirt track) the tyre monitor indicator may light or
function incorrectly.Note
If the battery is disconnected, the yellow indicator
lights after turning the
ignition on. This should turn off after a brief trip.
15)Depending on the model version
Fig. 47 Central console:
tyre monitor system
button
leon ingles.book Seite 80 Dienstag, 11. September 2007 1:47 13
Page 83 of 302

Cockpit81
Safety First
Operating instructions
Tips and Maintenance
Te c h n i c a l D a t a
Engine management
This warning lamp monitors th e engine management system
for petrol engines.
The warning lamp
(Electronic Power Control) lights up when the ignition
is switched on to show that the lamp is working properly. It should go out
when the engine has started running.
If a fault develops in the electronic engine management system while you are
driving, this warning lamp will light up. Take the vehicle to an Authorised
Service Centre as soon as possible and have the engine checked.
Glow plug system / Engine fault
The warning lamp lights up to show that the glow plugs are
preheating. It flashes if there is an engine fault.
Warning lamp
is lit
The warning lamp lights up while the glow plugs are preheating. When the
warning lamp goes off, the engine should be started straight away.
Warning lamp
flashes
If a fault develops in the engine management system while you are driving,
the glow plug lamp will flash
. Take the vehicle to an Authorised Service
Centre as soon as possible and have the engine checked.
Emission control system*
This warning lamp monitors the exhaust system.
Warning lamp
flashes:
When there is misfiring that can damage the catalytic converter. Reduce
speed and drive carefully to the nearest qualified workshop to have the
engine checked.
The instrument panel displays shows the following message
16): EXHAUST
GAS SEE WORKSHOP .
Warning lamp
is lit:
If a fault has developed during driving which has reduced the quality of the
exhaust gas (e.g. lambda probe fault). Reduce speed and drive carefully to
the nearest qualified workshop to have the engine checked.
The following information text displayed in the instrument panel display :
EXHAUST GAS SEE WORKSHOP .
Electronic stabilisation programme (ESP)*
This warning lamp monitors the electronic stabilisation
programme.
This programme includes the ABS, EDL and TCS.
The warning lamp
has the following functions:
•
It will light for about 2 seconds when the ignition is switched on while a
test of the function is carried out.
•
It flashes when the ESP is activated when driving.
•
It will light up continuously if there is a malfunction in the ESP.
16)Depending on the model version
leon ingles.book Seite 81 Dienstag, 11. September 2007 1:47 13
Page 84 of 302

Cockpit
82•
It will light up continuously if the ESP is switched off.
•
It will also come on if a fault should occur in the ABS because the ESP
operates in conjunction with the ABS.
If the ESP warning lamp
lights up and stays on after the engine is started,
this may mean that the control system has temporarily switched off the ESP.
In this case the ESP can be reactivated by switching the ignition off and then
on again. If the warning lamp goes out, this means the system is fully
functional.
Operating the foot brake
The footbrake must be depressed when this warning lamp lights up. This is
necessary when the automatic gearbox* selector lever is moved out of the
positions P or N.Power steering system*
For vehicles with power steering, the level of steering assistance depends on
the vehicle's speed and on the steering angle.
The warning lamp should light up for a few seconds when the ignition is
switched on. It should go out when the engine has started running.
If the battery is disconnected, the indicator remains lit, even with the engine
running. The warning light only goes off after a distance of approx. 50 m.
There is a fault in the electromechanica l steering system if the lamp does not
go out or lights up whilst the vehicle is in motion. The indicator may appear
in two different colours to indicate fault s. If it lights yellow, this indicates a
minor fault. If it lights red, seek wo rkshop assistance immediately, if no
assistance is available stop driving. Stop the vehicle and seek technical
assistance. The power steering does not work if the battery is flat or if the engine is off (for example, for towing). You should take into account that you
will need considerably more power than normal to steer the vehicle if the
steering assistance is reduced
or has failed completely.
Brake pad wear indicator*
As the brake pad wear indicator only monitors the front brake pads, it is advis-
able to have the rear brake pads inspected at the same time.
The instrument panel displays shows the following message
17): CHECK
BRAKE PADS .
WARNING
Have the brake pads inspected immediately by a qualified dealership if the
warning display
lights up.
Indicator for open doors or tailgate
This indicator lights if one of th e doors or the tailgate is open.The warning light
should go off when all the doors are closed correctly.
The system also works when the ignition is switched off. It should go off
about 15 seconds after the vehicle is locked.
17)Depending on the model version
leon ingles.book Seite 82 Dienstag, 11. September 2007 1:47 13
Page 99 of 302

Unlocking and locking97
Safety First
Operating instructions
Tips and Maintenance
Te c h n i c a l D a t a
Central locking button
The vehicle can be locked and unlocked from the inside using
the central locking button.Locking the vehicle
– Press the button ⇒ .
Unlocking the doors
– Press the button .The central locking button is still operative when the ignition is switched off.
Except, if the "safe" security system is activated.
Please note the following when you use the central locking button to lock your
vehicle:•
It will not be possible to open the doors or the tailgate from the outside
(this may offer extra safety, for instance when stopped at traffic lights).
•
The driver or front passenger door cannot be locked if it is open. This
prevents you from locking yourself out of the vehicle.
•
Repeated operation of the central locking will deactivate the central
locking button for 30 seconds. Once this time has passed, the button may be
used once more.
•
There is a danger that the key may remain inside the vehicle, if the vehicle
is locked using the central locking button when the driver's door is closed
and, for example, the passenger door op en. If this door is closed, then the
keys will remain inside the vehicle.
•
All doors may be locked separately from inside the car. Do this by pulling
the door release lever once.
WARNING
•
If the vehicle is locked, children and disabled people may be trapped
inside.
•
The central locking button is not operative in the following cases.
•
When the vehicle is locked from th e outside (using the remote or the
key).
•
While the ignition is not activated after unlocking the door lock cylinder
with the key.Note
•
Vehicle locked, button amber colour.
•
Vehicle unlocked, button red.
Fig. 59 Detail of the
centre console: central
locking system button
leon ingles.book Seite 97 Dienstag, 11. September 2007 1:47 13
Page 107 of 302

Unlocking and locking105
Safety First
Operating instructions
Tips and Maintenance
Te c h n i c a l D a t a
WARNING
•
Always close the tailgate properly. Risk of accident or injury.
•
The tailgate must not be opened when the reverse or rear fog lights are
lit. This may damage the lighting units.
•
Do not close the tailgate by pushin g it down with your hand on the
window. The glass could shatter. Risk of injury!
•
Ensure the tailgate is locked after closing. If not, it may open unexpect-
edly while driving.
•
Never allow children to play in or ar ound the vehicle. A locked vehicle
can be subjected to extremely high and low temperatures, depending on
the time of year. This could cause serious injuries/illness. It could even
have fatal consequences. Close and lock both the tailgate and all the other
doors when you are not using the vehicle.
•
Never close the tailgate without observing and ensuring it is clear, to do
otherwise could cause serious injury to you and others. Make sure that no
one is in the path of the tailgate.
•
Never drive with the tailgate open or half-closed, exhaust gasses may
penetrate into the interior of th e vehicle. Danger of poisoning!
•
If only the boot is opened then do not leave the key inside. The vehicle
may not be opened if the key is left inside.
Emergency opening
This allows the vehicle to be opened if the central locking
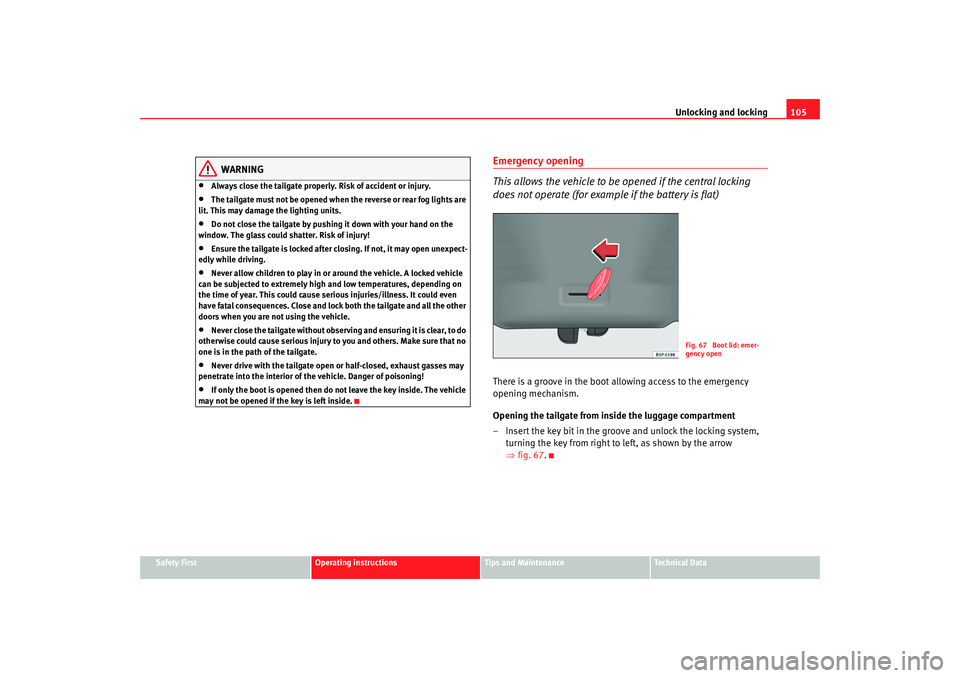
does not operate (for example if the battery is flat)There is a groove in the boot allowing access to the emergency
opening mechanism.
Opening the tailgate from inside the luggage compartment
– Insert the key bit in the groove and unlock the locking system, turning the key from right to left, as shown by the arrow
⇒fig. 67 .
Fig. 67 Boot lid: emer-
gency open
leon ingles.book Seite 105 Dienst ag, 11. September 2007 1:47 13
Page 114 of 302

Lights and visibility
112Lights and visibilityLightsSwitching lights on and off
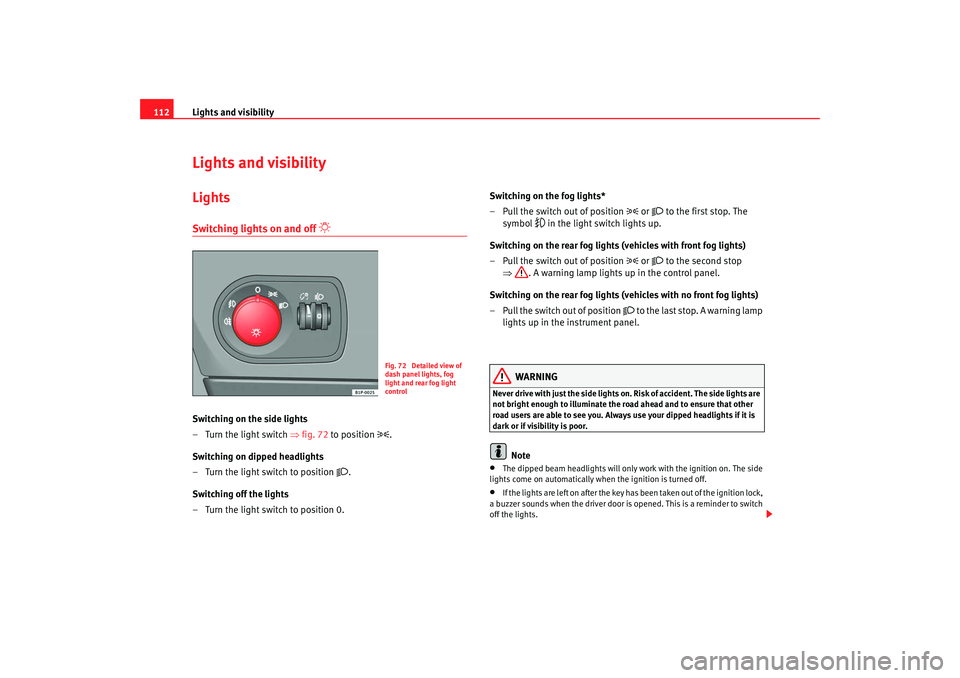
Switching on the side lights
– Turn the light switch ⇒fig. 72 to position
.
Switching on dipped headlights
– Turn the light switch to position
.
Switching off the lights
– Turn the light switch to position 0. Switching on the fog lights*
– Pull the switch out of position
or
to the first stop. The
symbol
in the light switch lights up.
Switching on the rear fog lights (vehicles with front fog lights)
– Pull the switch out of position
or
to the second stop
⇒ . A warning lamp lights up in the control panel.
Switching on the rear fog lights (vehicles with no front fog lights)
– Pull the switch out of position
to the last stop. A warning lamp
lights up in the instrument panel.
WARNING
Never drive with just the side lights on . Risk of accident. The side lights are
not bright enough to illuminate the road ahead and to ensure that other
road users are able to see you. Always use your dipped headlights if it is
dark or if visibility is poor.
Note
•
The dipped beam headlights will only work with the ignition on. The side
lights come on automatically when the ignition is turned off.
•
If the lights are left on after the key has been taken out of the ignition lock,
a buzzer sounds when the driver door is opened. This is a reminder to switch
off the lights.
Fig. 72 Detailed view of
dash panel lights, fog
light and rear fog light
control
leon ingles.book Seite 112 Dienst ag, 11. September 2007 1:47 13
Page 115 of 302

Lights and visibility113
Safety First
Operating instructions
Tips and Maintenance
Te c h n i c a l D a t a
•
If the coming home* feature is activated, the acoustic signal for the
dipped beam headlights will not sound, it will sound if the position lights are
activated.
•
The rear fog light is so bright that it can dazzle drivers behind you. You
should use the rear fog light only when visibility is very poor.
•
If you are towing a trailer equipped with a rear fog light on a vehicle with
a factory-fitted towing bracket, the rear fog light on the car will automatically
be switched off.
•
The use of the lighting described here is subject to the relevant statutory
requirements.
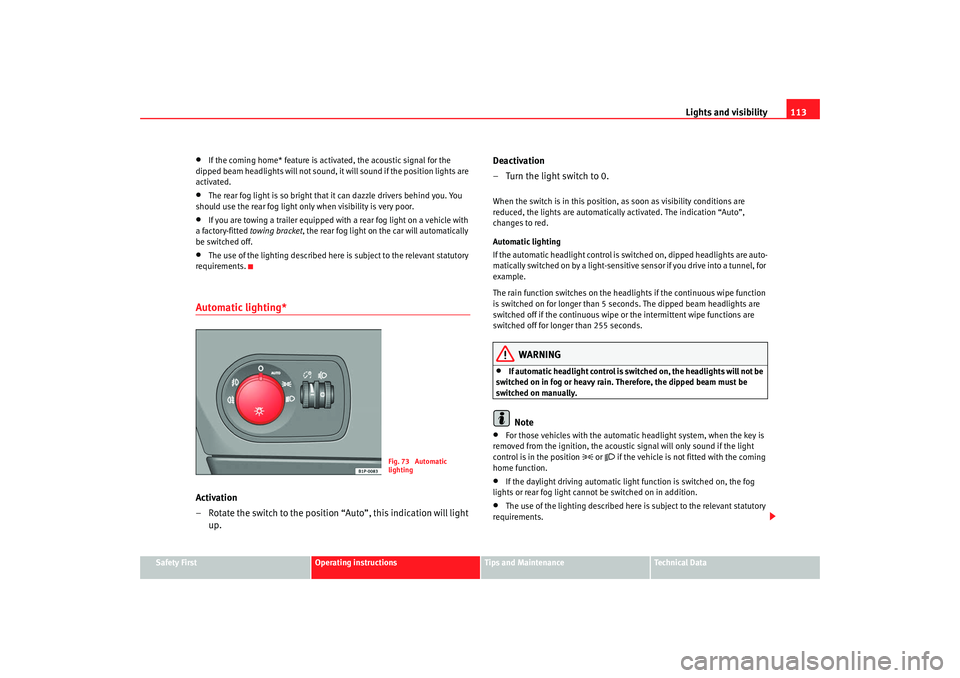
Automatic lighting*Activation
– Rotate the switch to the position “Auto”, this indication will light up. Deactivation
– Turn the light switch to 0.
When the switch is in this position, as soon as visibility conditions are
reduced, the lights are automaticall
y activated. The indication “Auto”,
changes to red.
Automatic lighting
If the automatic headlight control is switched on, dipped headlights are auto-
matically switched on by a light-sensitive sensor if you drive into a tunnel, for
example.
The rain function switches on the headlights if the continuous wipe function
is switched on for longer than 5 sec onds. The dipped beam headlights are
switched off if the continuous wipe or the intermittent wipe functions are
switched off for longer than 255 seconds.
WARNING
•
If automatic headlight control is switched on, the headlights will not be
switched on in fog or heavy rain. Therefore, the dipped beam must be
switched on manually.Note
•
For those vehicles with the automatic headlight system, when the key is
removed from the ignition, the acoustic signal will only sound if the light
control is in the position
or if the vehicle is not fitted with the coming
home function.
•
If the daylight driving automatic light function is switched on, the fog
lights or rear fog light cannot be switched on in addition.
•
The use of the lighting described here is subject to the relevant statutory
requirements.
Fig. 73 Automatic
lighting
leon ingles.book Seite 113 Dienst ag, 11. September 2007 1:47 13
Page 118 of 302

Lights and visibility
116
NoteThe system operates from a speed of about 10 km/h.Hazard warning lights
The hazard warning lights are used to draw the attention of
other road users to your vehicle in emergencies.
If your vehicle breaks down:
1. Park your vehicle at a safe distance from moving traffic.
2. Press the button to switch on the hazard warning lights ⇒.
3. Switch the engine off.
4. Apply the handbrake. 5. On a manual gearbox engage 1st gear, and for an automatic
move the selector lever to P.
6. Use the warning triangle to draw the attention of other road users
to your vehicle.
7. Always take the vehicle key with you when you leave the vehicle.
You should switch on the hazard warning lights to warn other road users, for
instance when:•
reaching the tail end of a traffic jam
•
there is an emergency
•
your vehicle breaks down due to a technical defect
•
you are towing another vehicle or your vehicle is being towed.
All turn signals flash simultaneously when the hazard warning lights are
switched on. That is that the two turn signal indicator lamps
and the
indicator lamp in the switch
will flash at the same time. The hazard
warning lights also work when the ignition is switched off.
Turning on the emergency indicators
The emergency indicators turn on auto matically when braking sharply at a
speed of over 60km/h, or if the ABS works for a prolonged period, in order to
alert the vehicles behind. If you accele rate, or continue at over 40km/h, the
emergency indicators turn off automatically.
WARNING
•
The risk of an accident increases if your vehicle breaks down. Always
use the hazard warning lights and a warning triangle to draw the attention
of other road users to your stationary vehicle.
•
Never park where the catalytic convert er could come into contact with
inflammable materials under the vehicle, for example dry grass or spilt
petrol. This could start a fire!
Fig. 76 Instrument panel:
switch for hazard warning
lights
leon ingles.book Seite 116 Dienst ag, 11. September 2007 1:47 13
Page 119 of 302

Lights and visibility117
Safety First
Operating instructions
Tips and Maintenance
Te c h n i c a l D a t a
Note
•
The battery will run down if the hazard warning lights are left on for a long
time, even if the ignition is switched off.
•
The use of the hazard warning lights d escribed here is subject to the rele-
vant statutory requirements.
Indicator and main beam headlight lever
The turn signal and main beam lever also operates the
parking lights and the headlight flasher.The turn signal and main beam headlight lever has the following
functions: Switching on the turn signals
– Move the lever all the way up
⇒fig. 77 to indicate right, and
all the way down to indicate left.
Signalling a lane change
– Push the lever up or down to the point where you incur resistance and then release the lever. The turn signal will flash
several times. The corresponding warning lamp will also flash.
Switching main beam on and off
– Turn the light switch to position
.
– Press the lever forward ⇒fig. 77 to switch on the main
beams.
– Pull the lever back towards you to switch the main beam head- lights off again.
Headlight flasher
– Pull the lever towards the steering wheel to operate the flasher.
Switching on parking lights
– Switch off the ignition and remove the key from the lock.
– Move the lever up or down to turn on the right or left-hand parking lights respectively.
Fig. 77 Turn signal and
main beam headlight
lever
A1
A2A1
A2A3
A4
leon ingles.book Seite 117 Dienst ag, 11. September 2007 1:47 13