navigation system Seat Leon 5D 2007 RADIO-NAVIGATION MFD2
[x] Cancel search | Manufacturer: SEAT, Model Year: 2007, Model line: Leon 5D, Model: Seat Leon 5D 2007Pages: 63, PDF Size: 2.89 MB
Page 2 of 63
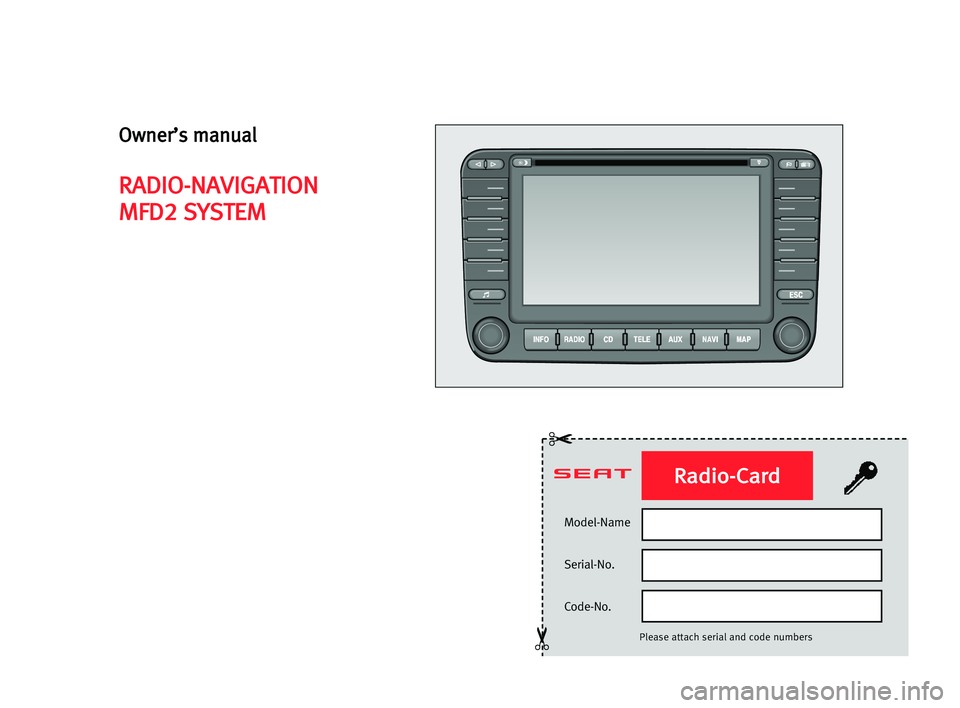
Model-Name
Serial-No.
Code-No.
Please attach serial and code numbers
✂
✂
Radio-Card
Owner’s manual
RADIO-NAVIGATION
MFD2 SYSTEM
Page 4 of 63
Contents1
ContentsGeneral information
. . . . . . . . . . . . . . . .
Introduction
. . . . . . . . . . . . . . . . . . . . . . . . . .
Quick Reference Guide
. . . . . . . . . . . .
Controls
. . . . . . . . . . . . . . . . . . . . . . . . . . . . . . . . . .
Display elements on the screen
. . . . . . . . . . . .
Switching on and off
. . . . . . . . . . . . . . . . . . . . . .
Radio / CD / Sound
. . . . . . . . . . . . . . . . .
Radio
. . . . . . . . . . . . . . . . . . . . . . . . . . . . . . . . . . . .
CD
. . . . . . . . . . . . . . . . . . . . . . . . . . . . . . . . . . . . . . .
Sound, sound focus and volume
. . . . . . . . . . .
Apple* iPod connection
. . . . . . . . . . .
General information
. . . . . . . . . . . . . . . . . . . . . .
Apple iPod® connector
. . . . . . . . . . . . . . . . . . .
Turning the iPod® on and off
. . . . . . . . . . . . . .
Control of the iPod® through the sound
system
. . . . . . . . . . . . . . . . . . . . . . . . . . . . . . . . . . .
USB* Connection
. . . . . . . . . . . . . . . . . . .
Connecting a memory stick / MP3 player
. . .
Authorised memory devices and radios
. . . .
Playing music files with the radio
. . . . . . . . . .
Navigation
. . . . . . . . . . . . . . . . . . . . . . . . . . . .
Overview
. . . . . . . . . . . . . . . . . . . . . . . . . . . . . . . . .
Destination entry
. . . . . . . . . . . . . . . . . . . . . . . . .
Destination memory
. . . . . . . . . . . . . . . . . . . . . .
Parameters for route calculation
. . . . . . . . . . .
Map and symbol displays
. . . . . . . . . . . . . . . . .
Destination guide
. . . . . . . . . . . . . . . . . . . . . . . .
Information and system settingsInformation
. . . . . . . . . . . . . . . . . . . . . . . . . . . . . .
System settings
. . . . . . . . . . . . . . . . . . . . . . . . . .
External units
. . . . . . . . . . . . . . . . . . . . . . . .
Calling up external units
. . . . . . . . . . . . . . . . . .
Index
. . . . . . . . . . . . . . . . . . . . . . . . . . . . . . . . . .
2
3
4
4
6
6
8
8
12
14
15
15
16
19
19 21
21
23
25
27
27
30
36
39
44
50
53
53
54
56
56
57
MFD2 ingles Seite 1 Mo
ntag, 15. Mai 2006 9:19 09
Page 5 of 63
General information
2General informationThis manual contains important information, tips, suggestions and warnings
on using the MFD2 radio navigation system. The other publications in the
vehicle wallet contain further information which you should be aware of for
your own safety and for the safety of your passengers.
Ensure that the complete vehicle wallet is always in the vehicle. This is espe-
cially important when you lend or sell the vehicle to others.
This manual describes the vehicle equipment at the time of publication.
Some of the equipment described here will not be available until a later date,
or is available only in certain markets.
Illustrations are intended as a general guide, and may vary from the equip-
ment fitted in your vehicle in some details.
Directions and positions (e.g. right, left, front, rear) are always relative to the
direction of travel of the vehicle unless otherwise stated.
Some sections of this booklet do not apply to all vehicles. If this is the case,
a text at the start of the section indicates to which vehicles it applies, e. g.
“Applies to vehicles with: CD changer”.
The equipment marked with an asterisk * comes in series only in determined
model versions, is optional in some mo dels, or is only offered in specific
countries.
® Registered trademarks are marked ®. However, the absence of this
symbol does not constitute a waiver of the rights concerning any propri-
etary name.
The section is continued on the following page.
Indicates the end of a section .WARNING
Texts with this symbol contain safety information. They warn you of serious
dangers, possibly involving accident or injury.
Caution
Texts with this symbol draw your attention to a possible risk of damage to
your vehicle.
For the sake of the environment
Texts with this symbol refer to points re levant to the protection of the environ-
ment.
Note
Texts with this symbol contain addition al information of a more general
nature. In certain countries there may be different units of measurement than
the ones used in this manual. For example, miles and gallons may be used
instead of kilometres and litres.
MFD2 ingles Seite 2 Mo ntag, 15. Mai 2006 9:19 09
Page 8 of 63
Quick Reference Guide5
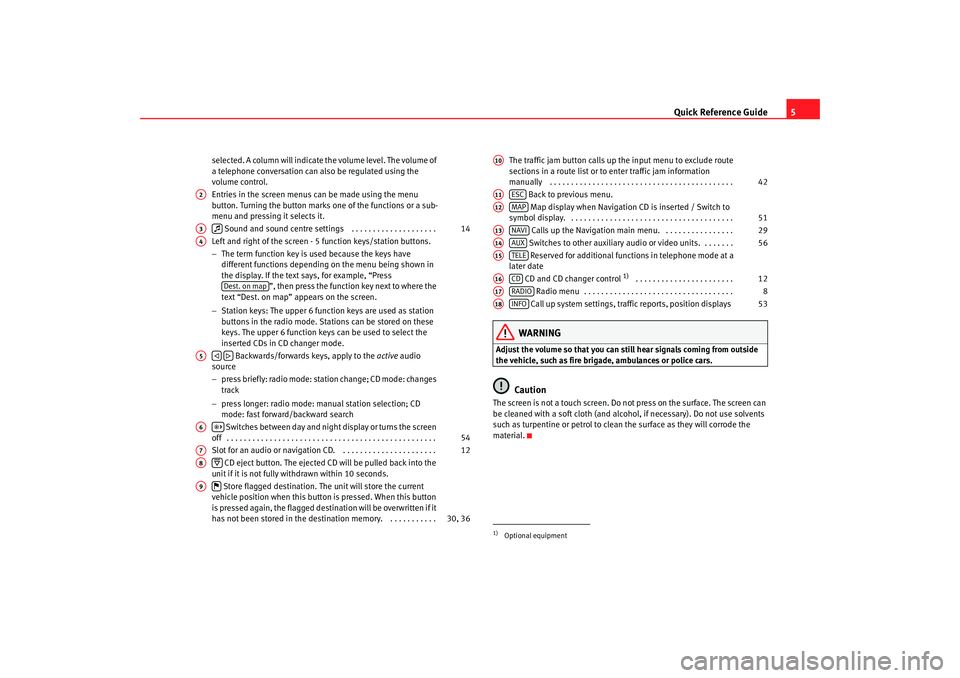
selected. A column will indicate the volume level. The volume of
a telephone conversation can also be regulated using the
volume control.
Entries in the screen menus can be made using the menu
button. Turning the button marks one of the functions or a sub-
menu and pressing it selects it.
Sound and sound centre settings . . . . . . . . . . . . . . . . . . . .
Left and right of the screen - 5 function keys/station buttons.
− The term function key is used because the keys have
different functions depending on the menu being shown in
the display. If the text says, for example, “Press ”, then press the function key next to where the
text “Dest. on map” appears on the screen.
− Station keys: The upper 6 function keys are used as station
buttons in the radio mode. Stations can be stored on these
keys. The upper 6 function keys can be used to select the
inserted CDs in CD changer mode.
Backwards/forwards keys, apply to the active audio
source
− press briefly: radio mode: station change; CD mode: changes
track
− press longer: radio mode: manual station selection; CD
mode: fast forward/backward search
Switches between day and night display or turns the screen
off . . . . . . . . . . . . . . . . . . . . . . . . . . . . . . . . . . . . . . . . . . . . . . . . .
Slot for an audio or navigation CD. . . . . . . . . . . . . . . . . . . . . . .
CD eject button. The ejected CD will be pulled back into the
unit if it is not fully withdrawn within 10 seconds.
Store flagged destination. The unit will store the current
vehicle position when this button is pressed. When this button
is pressed again, the flagged destination will be overwritten if it
has not been stored in the destin ation memory. . . . . . . . . . . . The traffic jam button calls up the input menu to exclude route
sections in a route list or to enter traffic jam information
manually . . . . . . . . . . . . . . . . . . . . . . . . . . . . . . . . . . . . . . . . . . .
Back to previous menu.
Map display when Navigation CD is inserted / Switch to
symbol display. . . . . . . . . . . . . . . . . . . . . . . . . . . . . . . . . . . . . . .
Calls up the Navigation main menu. . . . . . . . . . . . . . . . .
Switches to other auxiliary audio or video units. . . . . . . . Reserved for additional functions in telephone mode at a
later date
CD and CD changer control
1) . . . . . . . . . . . . . . . . . . . . . . .
Radio menu . . . . . . . . . . . . . . . . . . . . . . . . . . . . . . . . . . .
Call up system settings, traffic reports, position displays
WARNING
Adjust the volume so that you can still hear signals coming from outside
the vehicle, such as fire brigade, ambulances or police cars.
Caution
The screen is not a touch screen. Do not press on the surface. The screen can
be cleaned with a soft cloth (and alcohol, if necessary). Do not use solvents
such as turpentine or petrol to clean the surface as they will corrode the
material.
A2A3
14
A4
Dest. on map
A5
A6
54
A7
12
A8
A9
30, 36
1)Optional equipmentA10
42
A11
ESC
A12
MAP
51
A13
NAVI
29
A14
AUX
56
A15
TELE
A16
CD
12
A17
RADIO
8
A18
INFO
53
MFD2 ingles Seite 5 Mo ntag, 15. Mai 2006 9:19 09
Page 10 of 63
Quick Reference Guide7
Switching on/off
– Press the left button ⇒page 4, fig. 1 .
– Press the left button again, to switch the unit off.
Entering the safety code
– The safety code can be found on the unit card.
– Enter the characters by turning and pressing the menu knob ⇒page 6, fig. 3 .
– Press if you wish to correct a digit.
– Once the safety code as entere d corresponds to the code given
on the unit card, press .
The last menu used and also the last audio source used before switching off
will be selected automatically when the unit is switched on again. The MFD2
radio navigation system will be switched off if the ignition is turned off. The
unit can be switched on again using the left button when the ignition is
switched off. It will be switched off automatically after an hour to stop the
vehicle battery from running down.
If no CD has been introduced into the unit, upon entering the safety code and
pressing the following message may appear: No CD inserted. Insert a CD-
ROM for SEAT Dynamic Navigation MFD2.
If you do not wish to use the navigation system immediately, you can still
select a different audio source by pressing the appropriate button.
Unit card
The code number is printed on a unit card together with the serial number.
This card can be found at the front of the vehicle wallet.
The unit card must be kept in a safe place - under no circumstances in the
vehicle! Only then will the unit be useless to thieves.
Note
If an incorrect code is entered two times in a row, the system is locked for an
hour. After this time has passed you may enter the security code.
A1
OK
OK
MFD2 ingles Seite 7 Mo ntag, 15. Mai 2006 9:19 09
Page 13 of 63
Radio / CD / Sound
10volume level for the traffic announcement can be lowered by pressing the
button .Station selection from a list (FM only)
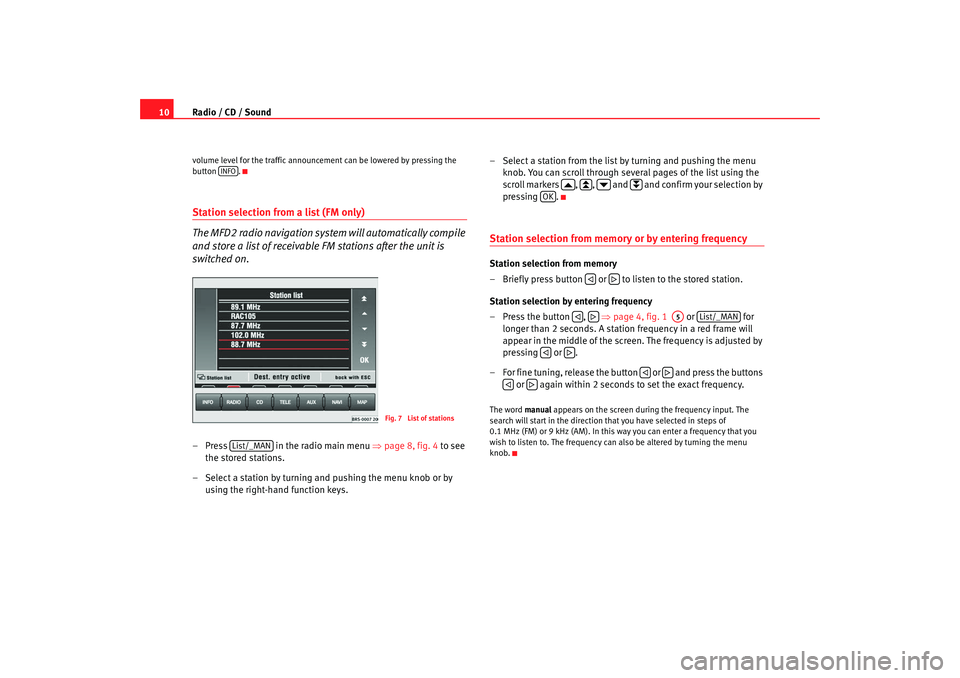
The MFD2 radio navigation system will automatically compile
and store a list of receivable FM stations after the unit is
switched on.– Press in the radio main menu ⇒ page 8, fig. 4 to see
the stored stations.
– Select a station by turning and pushing the menu knob or by using the right-hand function keys. – Select a station from the list by turning and pushing the menu
knob. You can scroll through several pages of the list using the
scroll markers , , and and confirm your selection by
pressing .
Station selection from memory or by entering frequencyStation selection from memory
– Briefly press button or to listen to the stored station.
Station selection by entering frequency
– Press the button , ⇒page 4, fig. 1 or for
longer than 2 seconds. A station frequency in a red frame will
appear in the middle of the screen. The frequency is adjusted by
pressing or .
– For fine tuning, release the button or and press the buttons or again within 2 seconds to set the exact frequency.The word manual appears on the screen during the frequency input. The
search will start in the direction that you have selected in steps of
0.1 MHz (FM) or 9 kHz (AM). In this way you can enter a frequency that you
wish to listen to. The frequency can also be altered by turning the menu
knob.
INFO
Fig. 7 List of stations
List/_MAN
OK
A5
List/_MAN
MFD2 ingles Seite 10 Montag, 15. Mai 2006 9:19 09
Page 16 of 63
Radio / CD / Sound13
Caution
•
Only 12 cm standard CDs should be used, avoid 8 cm "single" CDs. Only
round CDs should be inserted in the CD slot. “Special shape CDs” can not be
played and they will damage the CD player.
•
Slide the CD with the printed side up into the CD slot up to the point where
it is drawn in automatically. Hold the CD at the sides. Avoid leaving finger-
prints on the CD. Clean CDs with a dry, lint-free cloth. When doing this, wipe
the CD from the centre outwards. Do not clean the CDs using alcohol or
solvents. Do not place the CDs near heat sources or in the direct sunlight. Do
not write on the CDs and do not attach stickers to them.Note
•
The upper 6 function keys are only active if a CD changer has been
connected.
•
CD-R and CD-RW formats can also be played, depending on the quality of
the blanks.
•
If the text CD ? is displayed in the small marking above the /
button, the CD inserted in the CD drive cannot be read and may be
damaged.
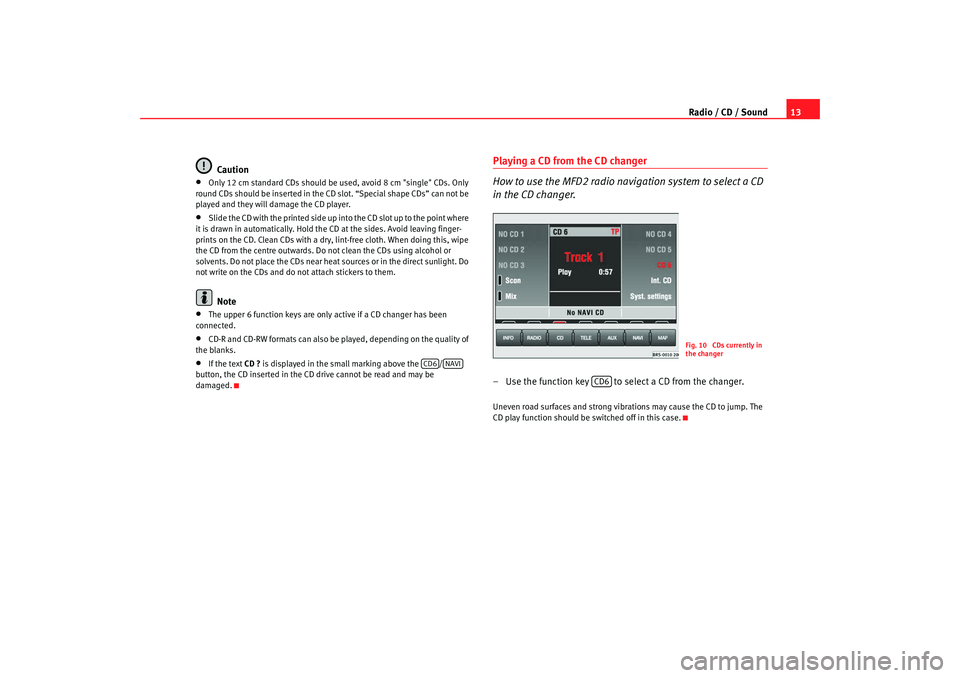
Playing a CD from the CD changer
How to use the MFD2 radio navigation system to select a CD
in the CD changer.– Use the function key to select a CD from the changer.Uneven road surfaces and strong vibrations may cause the CD to jump. The
CD play function should be switched off in this case.
CD6
NAVI
Fig. 10 CDs currently in
the changer
CD6
MFD2 ingles Seite 13 Montag, 15. Mai 2006 9:19 09
Page 17 of 63
Radio / CD / Sound
14Sound, sound focus and volumeThis section describes how the sound character and the
volume of different sound sour ces can be set individually.
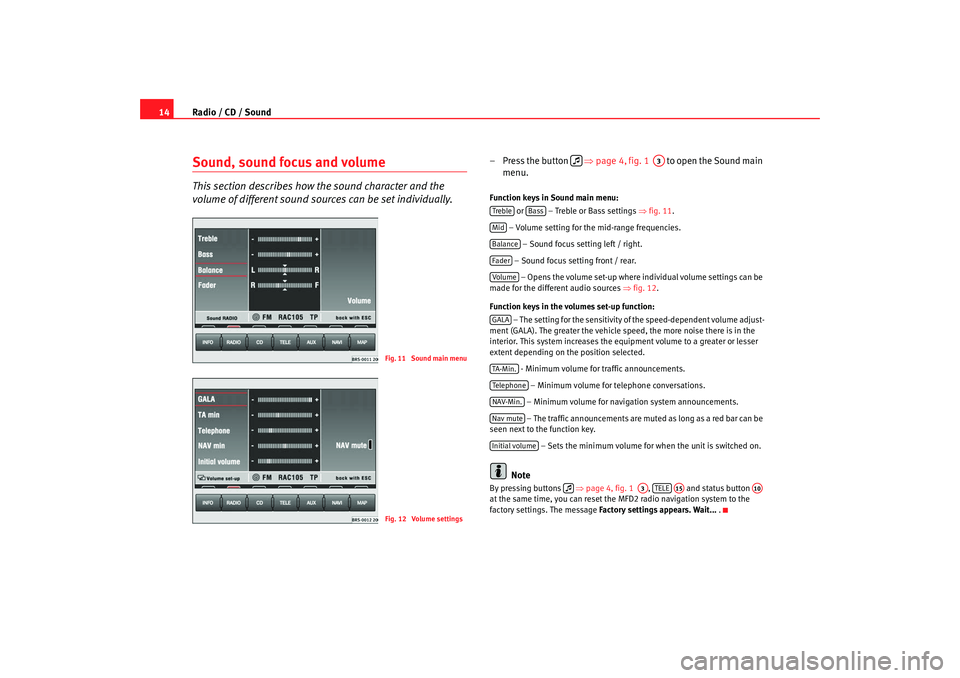
– Press the button ⇒page 4, fig. 1 to open the Sound main
menu.Function keys in Sound main menu:
or – Treble or Bass settings ⇒fig. 11.
– Volume setting for the mid-range frequencies. – Sound focus setting left / right.
– Sound focus setting front / rear. – Opens the volume set-up where individual volume settings can be
made for the different audio sources ⇒fig. 12 .
Function keys in the volumes set-up function: – The setting for the sensitivity of the speed-dependent volume adjust-
ment (GALA). The greater the vehicle speed, the more noise there is in the
interior. This system increases the equipment volume to a greater or lesser
extent depending on the position selected.
- Minimum volume for traffic announcements.
– Minimum volume for telephone conversations.
– Minimum volume for navigation system announcements. – The traffic announcements are mu ted as long as a red bar can be
seen next to the function key.
– Sets the minimum volume for when the unit is switched on.
Note
By pressing buttons ⇒page 4, fig. 1 , and status button
at the same time, you can reset the MFD2 radio navigation system to the
factory settings. The message Factory settings appears. Wait... .
Fig. 11 Sound main menuFig. 12 Volume settings
A3
Treble
Bass
MidBalanceFaderVolum eGALATA -M in .Tel ep h on eNAV-Min.Nav muteInitial volume
A3
TELE
A15
A10
MFD2 ingles Seite 14 Montag, 15. Mai 2006 9:19 09
Page 18 of 63
Apple* iPod connection15
Apple* iPod connection General informationiPod
® by Apple
The iPod
®3)
is a portable MP3 player by Apple Computer Inc with several
models on the market.
These instructions describe the use of the iPod
® adaptor and its control
through the car radio
4) or the navigator
4). Read them carefully and keep
them handy for future reference.
Consult the manufacturer's instruct ions for information on the iPod
®
From here on, any instructions for the iPod
®, refer to the compatible author-
ised models of iPod
® of 3rd, 4th and 5th generation
•
iPod
® with 20 GB capacity
•
iPod
® with 30 GB capacity
•
iPod
® with 40 GB capacity
•
iPod
® with 60 GB capacity
•
iPod
® mini
•
iPod
® nano
•
iPod
® photo with 60 GB capacity
•
iPod
® video with 30 GB capacity
•
iPod
® video with 60 GB capacity
•
iPod
® Special Edition the iPod
® shuffle and the iPod
® photo with 30 GB cannot be used, nor
devices by other brands.
Authorised and compatible radio equipment and radio navigator systems
Connecting the iPod
® directly into the radio equipment or navigation system
enables reproduction of stored music through the vehicle loudspeakers
Compatible music formats
The following formats are compatible:
•
AAC (from 8 to 320 Kbit/s)
•
AAC protected (from iTunes
® Music Store, M4A, M4B, M4P)
•
AIFF
•
Apple Lossless
•
Audible (formats 2, 3 and 4)
•
MP3 (from 8 to 320 Kbit/s)
•
MP3 VBR
•
WAV
Frequency range: between 20 and 20,000 Hz
Possible functions
The following functions are available through the sound system controls
•
Direct playback selection up to 6 playlists
•
Playback of all tracks on iPod
®
•
Random playback function
•
SCAN function (10 seconds of each track)
•
Change one playlist for another
•
Forward and rewind in track
3)iPod
® is a registered trademark of Apple Computer, Inc.
4)Optional equipment
MFD2 ingles Seite 15 Montag, 15. Mai 2006 9:19 09
Page 22 of 63
Apple* iPod connection19
Turning the iPod
® on and off
Turning On
The iPod
® t u r n s o n a u t o m a t i c a l l y i f i t i s in the adaptor when the sound system
is switched on. The battery will also charge when the iPod
® is in the adaptor.
Turning Off
Depending on the sound system, the iPod
® will turn itself off some minutes
after the sound system is turned off.
Note
Starting the car when the iPod
® is on will momentarily interrupt playback.
Playback will begin again at the point where it was interrupted.
Control of the iPod
® through the sound
system
Music playback through the sound system
Once the iPod
® is attached to the connector, the sound
system detects it as CD changer.
Control is through the sound system controls. The iPod
® is used like a CD
changer. Choosing and playing songs, fast forward and rewind and random
playback are described in the radio or navigation system manual of your
vehicle.
Playing songs from the playlists
Songs can be stored in playlists on the iPod
®. The playlists are ordered by
number and alphabetically in the iPod
® hard disk. The first five playlists stored on your iPod
® can be chosen directly by using
the function keys to on the sound system. The existing playlists will be
assigned by numerical / alphabetical order to the keys to . If, for
example, the function key of the sound system is pressed, the songs on
the second playlist will be played. If an empty or non-existant playlist is
selected, the next play list will be selected.
To make use of the playlists in the vehicle as easy as possible, we recommend
editing a maximum of five playlists in the iPod
®. If you want to play songs
from a playlist that cannot be selected directly by the function keys to ,
we recommend renaming the list using the “iTunes” computer programme so
that it is among the first six on the iPod
® hard disk.
Remember that some versions of iTun es contain predetermined playlists (on-
the-go, my favourites). These folders also count in the total of six that the
vehicle sound system can play. Ensure that they are ordered and arranged
conveniently.
Pressing the key will enable all the songs on the iPod to be played.
Consult the iPod
® manufacturer's instruction manual to learn how to select
and store songs and create playlists.
Play all recorded songs
If the function key of the sound system is pressed, all the songs on the
iPod
® will be played.
Selecting songs manually on the iPod
®
The iPod
® also allows songs to be selected directly Select the song on the
iPod
® and attach it to the connector. The sound system will play the selected
song.
When the song finishes, all the remaining songs in the same group on the
iPod® will be played (by artist, genre, album, playlist...)
1
5
1
5
2
1
5
6CD 6
MFD2 ingles Seite 19 Montag, 15. Mai 2006 9:19 09