Seat Leon 5D 2008 Manual PDF
Manufacturer: SEAT, Model Year: 2008, Model line: Leon 5D, Model: Seat Leon 5D 2008Pages: 293, PDF Size: 8.67 MB
Page 71 of 293
Cockpit
70The warning and information texts may be viewed in this menu. If there is no
warning or information message, the option Vehicle status is not displayed.
If there are several messages, each one is shown for a few seconds.
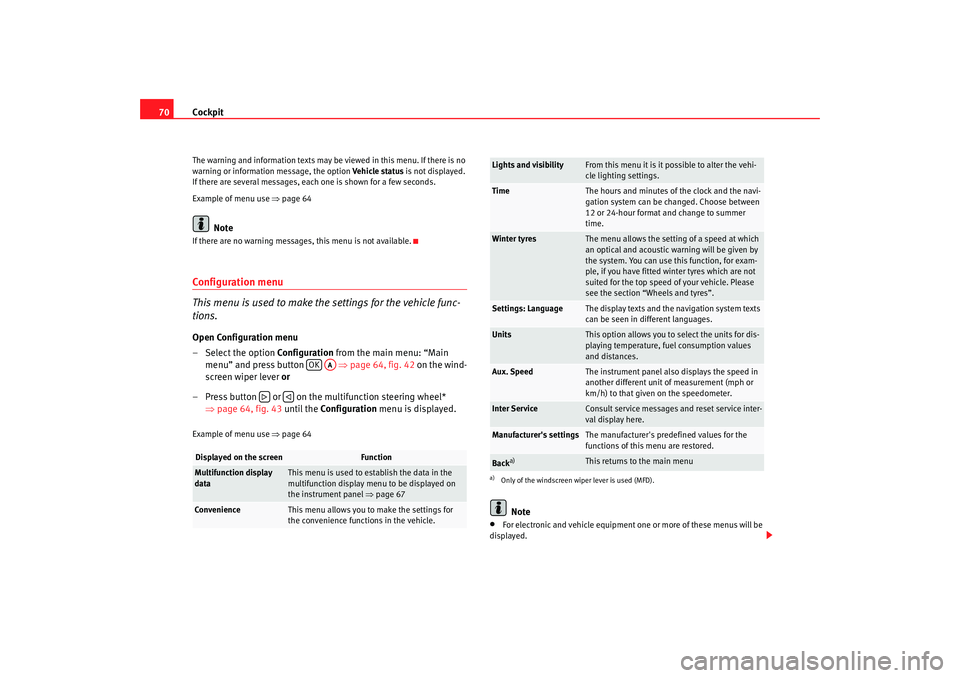
Example of menu use ⇒page 64
Note
If there are no warning messages, this menu is not available.Configuration menu
This menu is used to make the settings for the vehicle func-
tions.Open Configuration menu
– Select the option Configuration from the main menu: “Main
menu” and press button ⇒page 64, fig. 42 on the wind-
screen wiper lever or
– Press button or on the multifunction steering wheel* ⇒page 64, fig. 43 until the Configuration menu is displayed.Example of menu use ⇒page 64
Note
•
For electronic and vehicle equipment on e or more of these menus will be
displayed.
Displayed on the screen
Function
Multifunction display
data
This menu is used to establish the data in the
multifunction display menu to be displayed on
the instrument panel ⇒page 67
Convenience
This menu allows you to make the settings for
the convenience functions in the vehicle.
OK
AA
Lights and visibility
From this menu it is it possible to alter the vehi-
cle lighting settings.
Time
The hours and minutes of the clock and the navi-
gation system can be changed. Choose between
12 or 24-hour format and change to summer
time.
Winter tyres
The menu allows the setting of a speed at which
an optical and acoustic wa rning will be given by
the system. You can use this function, for exam-
ple, if you have fitted winter tyres which are not
suited for the top speed of your vehicle. Please
see the section “Wheels and tyres”.
Settings: Language
The display texts and the navigation system texts
can be seen in different languages.
Units
This option allows you to select the units for dis-
playing temperature, fuel consumption values
and distances.
Aux. Speed
The instrument panel also displays the speed in
another different unit of measurement (mph or
km/h) to that given on the speedometer.
Inter Service
Consult service messages and reset service inter-
val display here.
Manufacturer's settings
The manufacturer's predefined values for the
functions of this menu are restored.
Back
a)
This returns to the main menu
a)Only of the windscreen wiper lever is used (MFD).
leon_ingles Seite 70 Montag, 26. Januar 2009 4:29 16
Page 72 of 293

Cockpit71
Safety First
Operating instructions
Practical tips
Te c h n i c a l D a t a
•
SEAT dealers are able to programme other functions or change the
existing functions depending upon the vehicle equipment.
•
The Configuration menu is only accessible when the vehicle is at a
standstill.
Convenience menu
From this menu it is it possible to alter the vehicle conven-
ience settings.Open menu Convenience
– Choose the option Configuration from the main menu and press the button ⇒page 64, fig. 42 on the windscreen wiper
lever.
– Press button or on the multifunction steering wheel* ⇒page 64, fig. 43 until the Configuration menu is displayed.
– Choose the option Convenience from the main menu and press
the button on the windscreen wiper lever.Example of menu use ⇒page 64
Note
For electronic and vehicle equipment on e or more of these menus will be
displayed.
OK
AA
AA
Displayed on the
screen
Function
Open door
One door: Individual unlocking activated.
Auto. locking: the doors are automatically locked
when the vehicle is travelling at more than approx
15 km/h.
Auto unlock: the doors are unlocked when the key
is removed from the ignition.
Elec. window control
Opening and closing electric windows: this deter-
mines whether to open or close all the windows
when the vehicle is unlocked or locked. The open
function can also be activa ted for the driver's door
only.
Wing mirror adjust.
If synchronised adjustment is selected, when the
driver's side wing mirror is adjusted, the passen-
ger wing mirror is also moved.
Manufacturer's set-
tings
The manufacturer's predefined values for the func-
tions of this menu are restored.
Back
This returns to the Configuration menu
leon_ingles Seite 71 Montag, 26. Januar 2009 4:29 16
Page 73 of 293
Cockpit
72Lights and visibility menu
From this menu it is it possible to alter the vehicle lighting
settings.Open Lights and visibility Menu
– Select the option Configuration from the main menu: “Main
menu” and press button ⇒ page 64 on the windscreen
wiper lever. or
– Press button or on the multifunction steering wheel* ⇒page 64, fig. 43 until the Configuration menu is displayed.
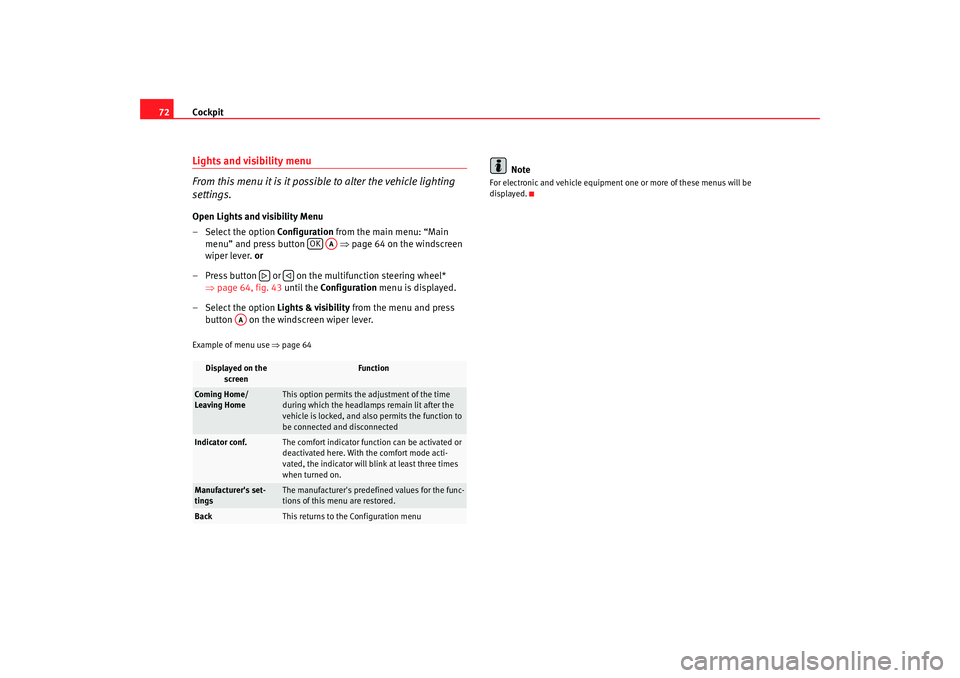
– Select the option Lights & visibility from the menu and press button on the windscreen wiper lever.Example of menu use ⇒page 64
Note
For electronic and vehicle equipment one or more of these menus will be
displayed.
Displayed on the
screen
Function
Coming Home/
Leaving Home
This option permits the adjustment of the time
during which the headlamps remain lit after the
vehicle is locked, and also permits the function to
be connected and disconnected
Indicator conf.
The comfort indicator function can be activated or
deactivated here. With the comfort mode acti-
vated, the indicator will blink at least three times
when turned on.
Manufacturer's set-
tings
The manufacturer's predefined values for the func-
tions of this menu are restored.
Back
This returns to th e Configuration menu
OK
AA
AA
leon_ingles Seite 72 Montag, 26. Januar 2009 4:29 16
Page 74 of 293

Cockpit73
Safety First
Operating instructions
Practical tips
Te c h n i c a l D a t a
Warning lampsOverview of the warning lamps
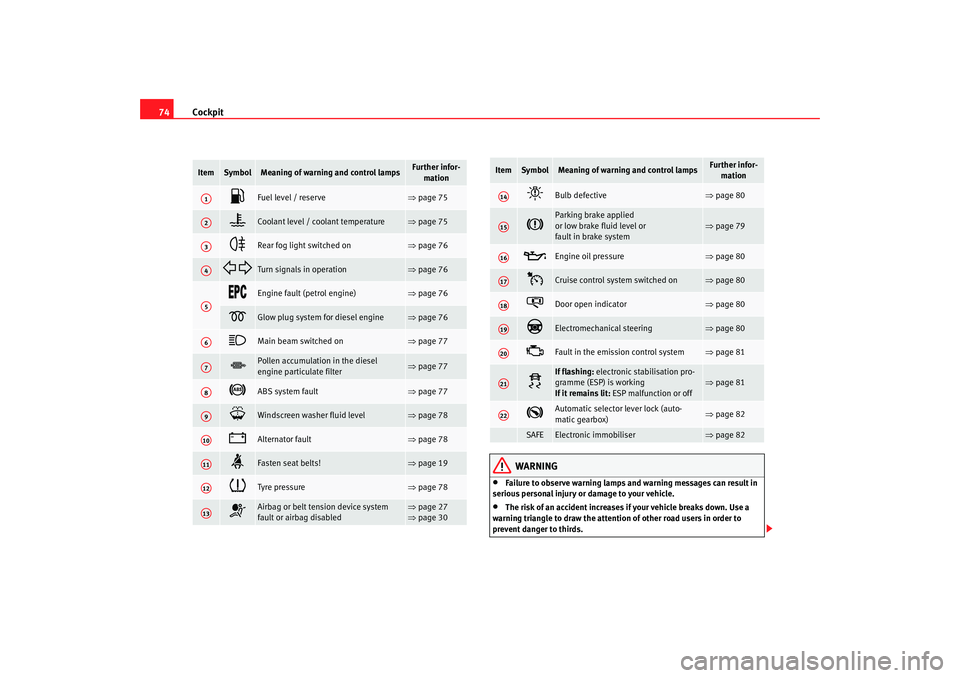
The warning lamps indicate a number of different functions and possible faults.
Fig. 47 Instrument panel with warning lamps. Some of
the items of equipment listed here are fitted only on
certain models/model years or are optional extras.
leon_ingles Seite 73 Montag, 26. Januar 2009 4:29 16
Page 75 of 293
Cockpit
74
WARNING
•
Failure to observe warning lamps and warning messages can result in
serious personal injury or damage to your vehicle.
•
The risk of an accident increases if your vehicle breaks down. Use a
warning triangle to draw the attention of other road users in order to
prevent danger to thirds.
Item
Symbol
Meaning of warning and control lamps
Further infor- mation
Fuel level / reserve
⇒page 75
Coolant level / coolant temperature
⇒page 75
Rear fog light switched on
⇒page 76
Turn signals in operation
⇒page 76
Engine fault (petrol engine)
⇒page 76
Glow plug system for diesel engine
⇒page 76
Main beam switched on
⇒page 77
Pollen accumulation in the diesel
engine particulate filter
⇒page 77
ABS system fault
⇒page 77
Windscreen washer fluid level
⇒page 78
Alternator fault
⇒page 78
Fasten seat belts!
⇒page 19
Tyre pressure
⇒page 78
Airbag or belt tension device system
fault or airbag disabled
⇒page 27
⇒ page 30
A1A2A3A4A5A6A7A8A9A10A11A12A13
Bulb defective
⇒page 80
Parking brake applied
or low brake fluid level or
fault in brake system
⇒page 79
Engine oil pressure
⇒page 80
Cruise control system switched on
⇒page 80
Door open indicator
⇒page 80
Electromechanical steering
⇒page 80
Fault in the emission control system
⇒page 81
If flashing: electronic stabilisation pro-
gramme (ESP) is working
If it remains lit: ESP malfunction or off
⇒page 81
Automatic selector lever lock (auto-
matic gearbox)
⇒page 82
SAFE
Electronic immobiliser
⇒page 82
Item
Symbol
Meaning of warning and control lamps
Further infor-
mation
A14A15A16A17A18A19A20A21A22
leon_ingles Seite 74 Montag, 26. Januar 2009 4:29 16
Page 76 of 293

Cockpit75
Safety First
Operating instructions
Practical tips
Te c h n i c a l D a t a
•
The engine compartment is a dangerous area! Before you open the
bonnet to work on the engine or in the engine compartment, you must
switch the engine off and allo w it to cool to reduce the risk of scalding or
other kind of injuries. Read and observe the relevant warnings
⇒ page 205.Note
•
The appropriate warning lamp for a fault will light up in vehicles without
warning or information texts in the display.
•
In vehicles with warning or information texts on the screen, the appro-
priate warning lamp for a fault will ligh t up and a warning or information text
will also appear on the screen.
Fuel level / reserve
This symbol lights up to indicate that the fuel tank under the
reserve level.It lights up when only 7 litres of fuel remain in the tank. Also, an audible
warning is given. It reminds you to fuel up the fuel tank as soon as possible
⇒ page 202.
The instrument panel displ ays the following message
8): PLEASE REFUEL! .
Coolant Level* / temperature
The warning lamp lights up if the coolant temperature is too
high or if the coolant level is too low.There is a fault if:•
The warning symbol does not go out again after a few seconds.
•
The warning lamp lights up or flashes while the vehicle is moving, while
three acoustic warning signals ⇒ are emitted.
This means that either the coolant level is too low or the coolant temperature
is too high.
Coolant temperature too high
The instrument panel disp lays the following message
9): CHECK COOLANT
INSTRUCTIONS MANUAL ⇒ page 212.
First look at the coolant temperature gauge. The coolant temperature is too
high if the needle is over the warning area on the dial. Stop the vehicle,
switch the engine off and wait for it to cool down. Check the coolant level.
If the coolant level is correct, the over heating may be caused by a malfunction
of the radiator fan. Check the radiator fan fuse and have it replaced if neces-
sary ⇒page 239.
If the warning lamp lights up again after driving on for a short distance, stop
the vehicle and switch the engine off . Contact an Authorised Service Centre
or a qualified workshop.
Coolant level too low
The instrument panel disp lays the following message10): STOP CHECK
COOLANT INSTRUCTIONS MANUAL .
8)Depending on the version of the model.WARNING (continued)
9)Depending on the version of the model.10)Depending on the version of the model.
leon_ingles Seite 75 Montag, 26. Januar 2009 4:29 16
Page 77 of 293
Cockpit
76First look at the coolant temperature gauge. If the needle is in the normal
range, top up with coolant at the earliest opportunity ⇒ .
WARNING
•
If your vehicle is immobilised for any technical reasons, move it to a
safe distance from traffic. Turn the engine off, turn the hazard lights on and
place the warning triangle.
•
Never open the bonnet if you can see or hear steam or coolant escaping
from the engine compartment. Risk of scalding. Wait until you can no
longer see or hear escaping steam or coolant.
•
The engine compartment is a dangerous area! Before carrying out any
work in the engine compartment, swit ch off the engine and allow it to cool
down. Always note the corresponding warnings ⇒page 205.
Rear fog light
This warning lamp lights up when the rear fog light is switched on
. Further
information ⇒page 109.
Tu r n si g nal s
The warning lamp flashes when the indicators are in opera-
tion.Depending on which indicator is operating, either the left
or right
indi-
cator lamp flashes. Both warning lamps will flash at the same time when the
hazard warning lights are switched on.
If any of both indicators fails, the warning lamp will start flashing twice faster
than normal. Further information on the indicators
⇒page 116.
Engine management*
This warning lamp monitors the engine management system
for petrol engines.
The warning lamp
(Electronic Power Control) lights up when the ignition
is switched on to show that the lamp is working properly. It should go out
once the engine is started.
If there is a fault in the electronic engine management system while you are
driving, this warning lamp will light up. Stop the vehicle and seek technical
assistance.
Glow plug system / Engine fault
The warning lamp lights up to show that the glow plugs are
preheating. It flashes if there is an engine fault.
Warning lamp
is lit
The warning lamp lights up while the glow plugs are preheating. When the
warning lamp goes off, the engine should be started straight away.
Warning lamp
flashes
If a fault develops in the engine management system while you are driving,
the glow plug lamp will flash
. Take the vehicle to an Authorised Service
Centre as soon as possible and have the engine checked.
leon_ingles Seite 76 Montag, 26. Januar 2009 4:29 16
Page 78 of 293
Cockpit77
Safety First
Operating instructions
Practical tips
Te c h n i c a l D a t a
Main beam headlights
This warning lamp lights up when the main beams are on.The warning lamp
is switched on once main beams are on or once the
headlight flasher is operating.
Further information ⇒page 116.
Soot accumulation in the diesel engine particulate filter
If the indicator lights
you may help the filter clear itself by driving in the
appropriate manner.
To do this, drive about 15 minutes in 4th or 5th gear (automatic gearbox: S
gear range) at a speed of 60 km/h, with the engine running at approximately
2000 rpm. In this way, the pollen buil d up in the filter is burned. When
cleaning is successful, the indicator turns off.
If the indicator
is not deactivated, bring the vehicle to a specialised work-
shop to repair the fault.
WARNING
•
Always drive according to the road weather conditions, the terrain and
traffic. Driving recommendations should never lead to illegal manoeuvres
in surrounding traffic.
•
The diesel engine particulate filter may reach extremely high tempera-
tures; it should not enter into contact with flammable materials under-
neath the vehicle. Failure to comply could result in fire.
Anti-lock brake system (ABS)
A warning lamp system monitors the ABS.
The warning lamp
should light up for a few seconds when the ignition is
switched on. It goes out again after th e system has run through an automatic
test sequence.
There is a fault in the ABS if:
•
The warning lamp
does not light up when the ignition is switched on.
•
The warning lamp does not go out again after a few seconds.
•
The warning lamp lights up when the vehicle is moving.
The vehicle can still be braked in the normal way (except that the ABS control
function will not function). Please take the vehicle to a qualified workshop as
soon as possible. For further information on the ABS see the ⇒page 175.
If a fault occurs in the ABS, the ESP* warning lamp will also light up.
Brake system fault
If the ABS warning lamp
lights up together with the brake warning lamp
, this indicates not only a fault in the ABS function, but also a possible fault
in the brake system ⇒.
WARNING
•
Before opening the bonnet, read and observe the warnings on
⇒ page 205, “Working in the engine compartment”.
•
If the brake warning lamp
should light up together with the ABS
warning lamp
, stop the vehicle immediately and check the brake fluid
level in the reservoir ⇒page 217, “Brake fluid”. If the fluid level has
dropped below the “MIN” mark you must not drive on. Risk of accident.
Obtain technical assistance.
•
If the brake fluid level is correct, the fault in the brake system may have
been caused by a failure of the ABS system. This could cause the rear
leon_ingles Seite 77 Montag, 26. Januar 2009 4:29 16
Page 79 of 293

Cockpit
78wheels to lock quickly when you brake. This could cause the rear to break
away. Risk of skidding. Stop the vehicle and seek technical assistance.Washer fluid
This warning lamp lights up to indicate that the windscreen
washer level is too low.This serves as a reminder to fill up the reservoir at the earliest opportunity
⇒ page 214.
The following message is shown on the instrument panel display*
11): REFILL
WINDSCREEN WASHER FLUID .
Alternator
This warning lamp signals a fault in the alternator.
The warning lamp
lights up when the ignition is switched on. It should go
out when the engine has started running.
If the warning lamp lights up while driving, the alternator is no longer
charging the battery. You should immediately drive to the nearest qualified
workshop.
You should avoid using electrical equipm ent that is not absolutely necessary
because this will drain the battery.
Tyre pressure*
The tyre pressure control system controls the tyre speed and
the frequency spectrum of each tyre.The tyre monitor
12) compares wheel revolutions and with this information,
the diameter of each wheel using the ESP sensors. If the diameter of a wheel
changes, the tyre monitor indicator lights . The wheel diameter changes
when:
•
Tyre pressure is insufficient.
•
The tyre structure is damaged.
•
The vehicle is unbalanc ed because of a load.
•
The wheels of one axle are under more pressure (for example, driving with
a trailer or on extreme slopes).
•
The vehicle is fitted with snow chains.
•
The emergency wheel is fitted.
11)Depending on the version of the model.WARNING (continued)
12)Depending on the model version
Fig. 48 Centre console:
tyre monitor system
button
leon_ingles Seite 78 Montag, 26. Januar 2009 4:29 16
Page 80 of 293

Cockpit79
Safety First
Operating instructions
Practical tips
Te c h n i c a l D a t a
•
The wheel on one axle is changed.
Tyre pressure adjustment
Following the modification to tyre pressure or after changing one or more
wheels, the button ⇒page 78, fig. 48 must be kept pressed while the igni-
tion is on until an acoustic signal is heard and the warning lamp goes out.
If the wheels are under excessive load (for example, driving with a trailer or
heavy load), the tire pressure must be increased to the recommended value
for a full load (see the sticker on the inside of the fuel flap). If the tyre monitor
system button is pressed down, the new tyre pressures are confirmed.
The tyre pressure monitor indicator
lights up
If the tyre pressure of one or more wheels is much lower than the value set by
the driver, then the tyre co ntrol warning lamp lights up ⇒.
The tyre pressure monitor indicator flashes
If the tyre pressure indicator flashes, this indicates a fault. Go to the nearest
specialist workshop.
WARNING
•
When the tyre pressure indicator l ights, reduce speed immediately and
avoid any sudden manoeuvre or braking. Stop when possible, and check
the tyre pressure and status.
•
The driver is responsible for correct tyre pressure. For this reason, tyre
pressure must be regularly checked.
•
Under certain circumstances (for exam ple, in a sports situation, in
winter conditions or on a dirt track) the tyre monitor indicator may light or
function incorrectly.Note
If the battery is disconne cted, the yellow indicator
lights up after turning
the ignition on. This should turn off after a brief journey.
Brake system* / handbrake
The warning lamp lights up if the handbrake is applied, if the
brake fluid level falls too low or if there is a fault in the brake
system.
This warning lamp
lights up if
•
If the handbrake is on.
If you drive faster than 6 km/h with the handbrake on, the following message
will appear on the instrument panel display
13): HANDBRAKE ON. Also, an
audible warning is given.
•
If the brake fluid level is too low ⇒page 217.
The instrument panel disp lays the following message
13): STOP BRAKE FLUID
INSTRUCTION MANUAL .
•
If there is a fault in the brake system.
The instrument panel disp lays the following message
13): BRAKE SYSTEM
FAULT INSTRUCTIONS MANUAL .
This warning lamp can light up together with the anti-lock brake system
warning lamp.
WARNING
•
Before opening the bonnet, read and observe the warnings on
⇒ page 205.
•
If the brake warning lamp does not go out, or if it lights up when
driving, the brake fluid level ⇒page 217, “Brake fluid” in the reservoir is
too low. Risk of accident. Stop the vehicle and do not drive on. Obtain tech-
nical assistance.
13)Depending on the version of the model.
leon_ingles Seite 79 Montag, 26. Januar 2009 4:29 16