display Seat Leon 5D 2011 MEDIA SYSTEM 2.2
[x] Cancel search | Manufacturer: SEAT, Model Year: 2011, Model line: Leon 5D, Model: Seat Leon 5D 2011Pages: 112, PDF Size: 2.42 MB
Page 73 of 112
72Navigation
Directly excluding a route section further ahead
(congestion)
During a route guidance, the route section of the remaining stretch of route
can be excluded manually.
●Press the unit button
in any of the navigation menus (except SETUP).
● In the information window, press the Route function button.
● Press the Congestion ahead function button in the pop-up window.
● Enter the length of the section to be excluded by turning the setting
knob ⇒ fig. 2 10
.
The length indicated for the route section is shown on the lower line of the
screen. If (Max) is displayed, this indicates that the maximum permitted
length for exclusion has been reached.
● Press the OK
setting knob or function key to confirm the exclusion.
The excluded route section is displayed on the map.
Route guidance will start again when the navigation system has calculated
an alternative route to the excluded section.
Re-opening a section
● Press the unit button
in any of the navigation menus (except SETUP).
● In the information window, press the Route function button.
● Press the Lift cong. excl. function button in the pop-up window.
Note
It is also possible to enter or cancel an exclusion while viewing the TMC traf-
fic announcements using the function button Congestion ahead
⇒ page 73.
Note
Information on manually excluding route sections further ahead ⇒ page 71.Dynamic route guidance with TMC (Traffic Message
Channel)
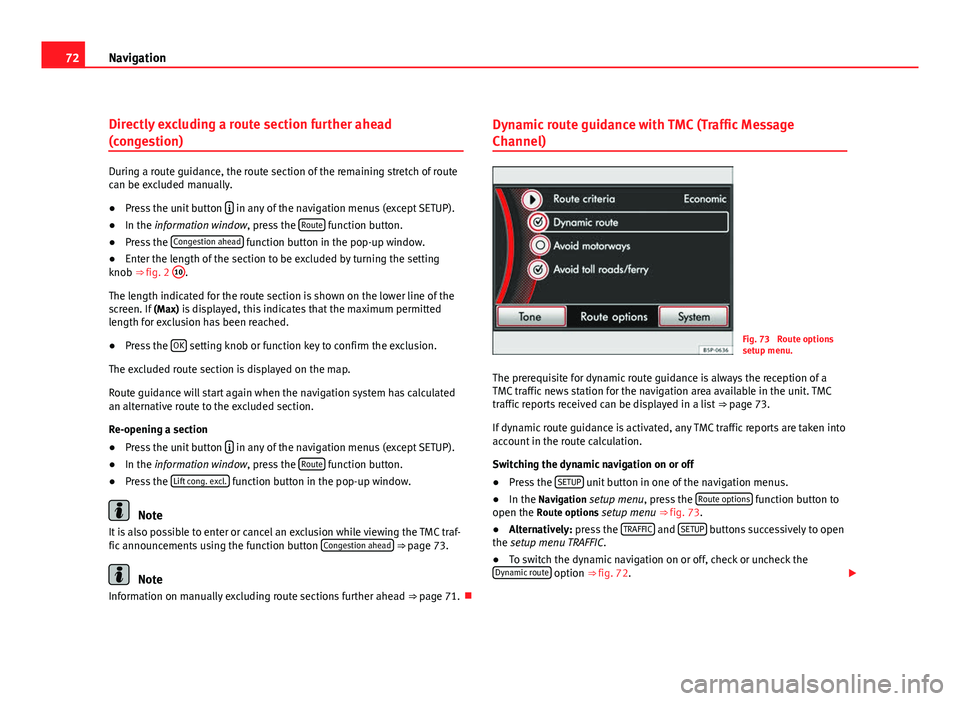
Fig. 73 Route options
setup menu.
The prerequisite for dynamic route guidance is always the reception of a
TMC traffic news station for the navigation area available in the unit. TMC
traffic reports received can be displayed in a list ⇒ page 73.
If dynamic route guidance is activated, any TMC traffic reports are taken into
account in the route calculation.
Switching the dynamic navigation on or off
● Press the SETUP
unit button in one of the navigation menus.
● In the Navigation setup menu, press the Route options function button to
open the Route options setup menu ⇒ fig. 73.
● Alternatively: press the TRAFFIC
and SETUP buttons successively to open
the setup menu TRAFFIC.
● To switch the dynamic navigation on or off, check or uncheck the
Dynamic route
option ⇒ fig. 72.
Page 74 of 112
73
Navigation
Traffic incidents displayed on the map
Traffic congestion reported via TMC that is on the route is shown on the map
by a coloured symbol. Traffic congestion that is not on the route is shown on
the map by a grey symbol. The positioning of the TMC symbol indicates the
start and the direction of the traffic congestion if both are clearly defined in
the TMC traffic message.
Route sections with traffic congestion that are on the route are coloured red.
Route sections with traffic congestion that are not on the route are coloured
grey. If route guidance is not active, all traffic congestion is coloured grey.
Dynamic route guidance
If the Dynamic route
function button is activated and a diversion to avoid
traffic congestion on the route is likely to save time, the navigation system
automatically calculates an alternative route.
An announcement is given when the route is recalculated. The same an-
nouncement is given if traffic congestion that was present when the route
was originally calculated is now no longer reported.
Note
A diversion of the route based on TMC traffic reports may not always save
time, if, for instance, there is also heavy traffic on the alternative route.
Note
If there is traffic congestion on a route section further ahead, it is possible
to exclude the section manually if the TMC traffic report has not yet been
received.
Note
The quality of traffic messages depends on the station broadcasting the
traffic reports. This station is responsible for the content of the traffic re-
ports. Displaying TMC traffic reports (TRAFFIC)
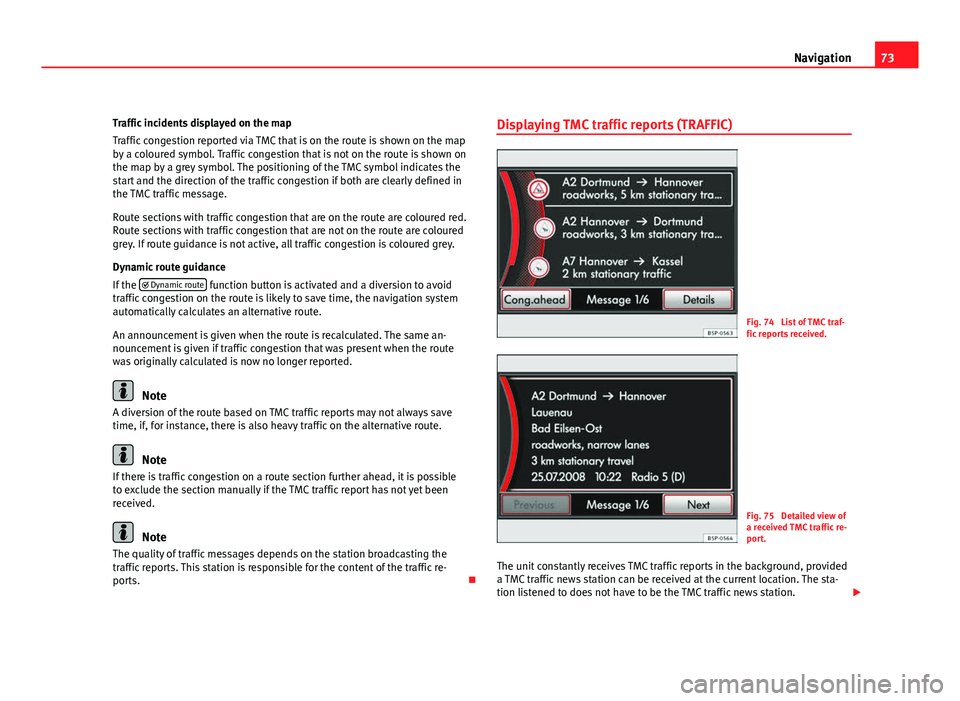
Fig. 74 List of TMC traf-
fic reports received.
Fig. 75 Detailed view of
a received TMC traffic re-
port.
The unit constantly receives TMC traffic reports in the background, provided
a TMC traffic news station can be received at the current location. The sta-
tion listened to does not have to be the TMC traffic news station.
Page 75 of 112
74Navigation
The unit only processes and displays TMC traffic reports affecting the area
within a radius of roughly 100 km from the current vehicle position.
TMC traffic reports are required for dynamic route guidance and are dis-
played on the map ⇒ page 72.
Display TMC traffic reports
● Press the TRAFFIC
unit button to display the list of the current TMC traffic
reports ⇒ fig. 74.
● Press one of the TMC traffic reports on the screen to open the detailed
view ⇒ fig. 75.
● Alternatively: select the TMC report by turning the setting knob
⇒ fig. 2 10
and open the detailed view by pressing
⇒ fig. 75.
● In the detailed view, you can browse through the TMC traffic reports us-
ing the function buttons Previous
and Next.
Display TMC traffic news stations
● Open the list of the current TMC traffic reports.
● Press the
⇒ fig. 2
7 unit button to open the information window. The
current TMC traffic news station is displayed.
● Press the
unit button again to close the information window.
Note
By using the Congestion ahead ⇒ fig. 74 function button it is possible to enter
a manual exclusion from the vehicle position ⇒ page 72.
Note
The radio-navigation system can only process and store TMC traffic reports
if the unit has access to navigation data for the area you are currently travel-
ling through.
Note
The quality of the dynamic route guidance depends on the information con-
tained in the TMC traffic reports. The radio stations are responsible for the
content of the news broadcast.
Route guidance in demo mode
If demo mode is activated in the Navigation setup menu ⇒ page 75, an ad-
ditional pop-up window opens when you start route guidance.
● Pressing the Demo
function button starts a “virtual route guidance” to
the destination you have entered.
● If you press the Normal
function button, a “real route guidance” starts.
The sequence of events and the operations in virtual route guidance are
similar to those in real route guidance.
Virtual route guidance is repeated when you reach the fictitious destination
and always starts again from the starting point if it is interrupted.
If the starting point for demo mode has been defined manually in the Navi-
gation setup menu, virtual route guidance will start from this position.
If the vehicle is moved and the unit can determine its current location by
GPS, any manually entered starting point will be overwritten with the current
vehicle location ⇒ page 75.
When real route guidance is started following virtual route guidance in
demo mode, the unit first has to reorient itself. This may take some time,
depending on the number of satellites the unit can currently receive. Mov-
ing the vehicle may speed up the reorientation process.
Page 76 of 112
75
Navigation
Ending demonstration mode
As a general rule, the Demo mode should be switched off after use, other-
wise you will always have to select between virtual navigation or normal
navigation before starting navigation to a destination.
Normally, the demonstration mode automatically ends on completion of the
route guidance programme or when a new navigation destination (not de-
tour) is entered. When the vehicle starts to move, or when the unit is switch-
ed off, the demonstration mode ends.
If necessary, switch off the demonstration mode in the navigation setup
menu.
● Press the SETUP
unit button in one of the navigation menus.
● Untick the checkbox for the Demo mode function button.
Setup menu Navigation
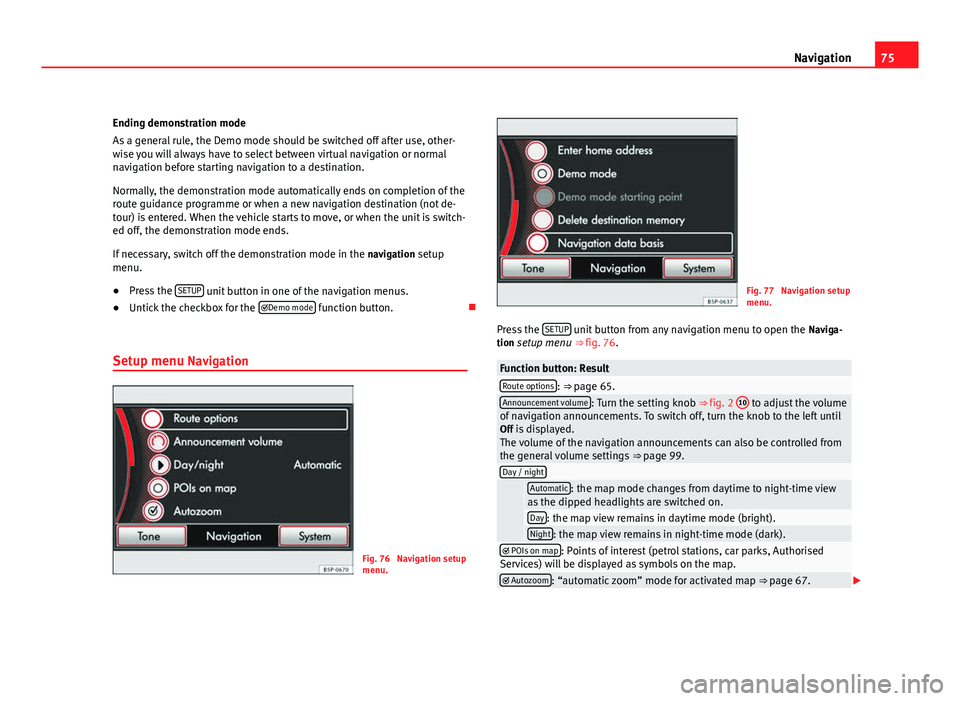
Fig. 76 Navigation setup
menu.
Fig. 77 Navigation setup
menu.
Press the SETUP
unit button from any navigation menu to open the
Naviga-
tion setup menu ⇒ fig. 76.
Function button: ResultRoute options: ⇒ page 65.Announcement volume: Turn the setting knob ⇒ fig. 2 10 to adjust the volume
of navigation announcements. To switch off, turn the knob to the left until
Off is displayed. The volume of the navigation announcements can also be controlled from
the general volume settings ⇒ page 99.
Day / night
Automatic: the map mode changes from daytime to night-time view
as the dipped headlights are switched on.
Day: the map view remains in daytime mode (bright).Night: the map view remains in night-time mode (dark). POIs on map: Points of interest (petrol stations, car parks, Authorised
Services) will be displayed as symbols on the map.
Autozoom: “automatic zoom” mode for activated map ⇒ page 67.
Page 77 of 112
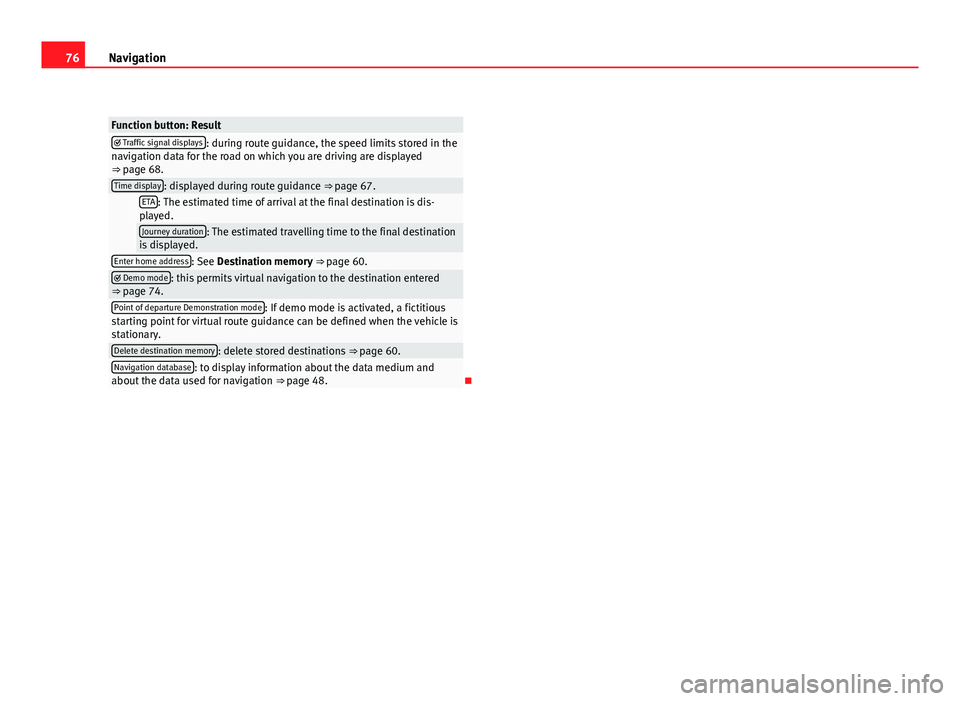
76Navigation
Function button: Result Traffic signal displays: during route guidance, the speed limits stored in the
navigation data for the road on which you are driving are displayed
⇒ page 68.
Time display: displayed during route guidance ⇒ page 67. ETA: The estimated time of arrival at the final destination is dis-
played.
Journey duration: The estimated travelling time to the final destination
is displayed.
Enter home address: See Destination memory ⇒ page 60. Demo mode: this permits virtual navigation to the destination entered
⇒ page 74.
Point of departure Demonstration mode: If demo mode is activated, a fictitious
starting point for virtual route guidance can be defined when the vehicle is
stationary.
Delete destination memory: delete stored destinations ⇒ page 60.Navigation database: to display information about the data medium and
about the data used for navigation ⇒ page 48.
Page 79 of 112
78Telephone control (Phone)
WARNING (Continued)
● Do not keep mobile phones in breast pockets directly above pacemak-
ers.
● Switch off the mobile phone immediately if you suspect there may be
interference.
WARNING
An unfolded armrest may restrict the driver's movements causing a seri-
ous accident.
● While driving, the armrest should always be closed.
CAUTION
High speeds, poor weather or road conditions and the quality of reception
can all affect the quality of a telephone conversation in the vehicle.
Note
The instructions shown on the screen for each telephone menu will depend
on the mobile phone used. There may be variations.
Note
The SOS or emergency call function is not displayed on all appliances and is
not available in all countries even through the mobile phone operator.
Note
Please observe instructions for the use of the mobile phone and phone ac-
cessories, together with instructions referring to the use of headphones.
Note
You may experience problems with reception or your call may be cut off in
areas without network coverage.
Note
Most electronic devices are shielded against high-frequency signals. How-
ever, some electronic devices may not be shielded against radio frequency
signals from the telephone. This could lead to malfunction.
Note
The voice control system is only available in the following languages: Span-
ish, German, English, French, Italian, Portuguese, Czech, Russian and
Dutch. For other languages, the predefined language for the voice control
system will depend on the country in which the vehicle is sold. Please ask
the Technical Service to change the predefined language if required.
Areas with special regulations
Switch off the mobile phone and the pre-installation in areas with a high
risk of explosion. These areas are usually marked, although not always
clearly ⇒
in Introduction on page 77. For example:
● In the vicinity of chemical pipelines and tanks
● Below deck on board ships and ferries.
● In the proximity of vehicles that run on liquid gas (such as propane or
butane)
● Areas with chemical products or particles in the air, such as flour, dust
or metal powder.
● Any area in which the car engine must be switched off.
WARNING
Switch off your mobile phone in areas with a high risk of explosion! The
mobile phone can be automatically reconnected to the mobile phone net-
work if the Bluetooth connection is switched off for the pre-installation.
Page 82 of 112
81
Telephone control (Phone)
The mobile phone can be connected to the radio and navigation system in
two ways:
● active connection
● passive connection
With the active connection, the search for the unit is started using the radio
and navigation system. With the passive connection, the search for the unit
is started using the mobile phone. Sometimes the search process is unable
to find the device it wishes to pair to the radio and navigation system. It
may be necessary to repeat the search several times.
The following settings in the mobile phone and in the radio and navigation
system are required for both types of connection:
● The Bluetooth ®
function must be on or visible in the mobile phone and
in the radio and navigation system.
● The mobile phone keypad must be unlocked.
● The mobile phone notification and keypad tones should be switched off.
It will be necessary to enter information using the telephone keypad during
the connection process. Therefore, the mobile phone should be to hand.
This is followed by the synchronisation process between the two devices.
The mobile phone book and the list of received, missed and last dialled
calls is automatically loaded into the navigation system.
Start active connection of the mobile phone
When making an active connection, any existing connections to other mo-
bile phones are ended.
● Press the PHONE
unit button.
● Press the SETUP unit button.
● Press the Bluetooth Settings function button.
● Press the Bluetooth Settings function button. The search process may last 15 to 20 seconds. On completion, the names of
any mobile phones found are displayed on the screen. Sometimes the
search process is unable to find the device it wishes to pair to the radio and
navigation system. It may be necessary to repeat the search several times.
●
Select the entry corresponding to the mobile phone to be connected
from the list of Bluetooth devices ⇒ fig. 79.
● Establish a connection by pressing the Connect
function button.
● Alternatively: establish the connection by pressing the right unit button.
● Alternatively: establish the connection by pressing the name of the
phone in the entry in the list.
Now establish a connection between the mobile phone and the radio and
navigation system. To confirm the connection between the two units, certain
information should be entered in the mobile phone.
● Confirm connection in the mobile phone.
● Enter PIN shown on the radio and navigation display via the mobile
phone and confirm.
When the PIN has been correctly entered, a message confirming the connec-
tion is displayed on the radio and navigation system screen. The address
book stored in the mobile phone and the call lists are automatically loaded.
The time taken to load the information will depend upon the quantity of da-
ta stored in the mobile phone. Once the data has been loaded, the tele-
phone control data will be available in the radio and navigation system. The
main menu, PHONE, is displayed on the screen.
Start passive connection of the mobile phone
● Press the PHONE
unit button.
● Press the SETUP unit button.
● Press the Bluetooth Settings function button.
● Press the Activate BT visibility function button.
● Start searching for Bluetooth audio accessories in the mobile phone.
Page 83 of 112
82Telephone control (Phone)
The search process may last 15 to 20 seconds. On completion of the proce-
dure, the radio and navigation system is shown in the mobile phone as
SEAT_BT. Sometimes the search process is unable to find the device it wish-
es to pair to the radio and navigation system. It may be necessary to repeat
the search several times.
● Select SEAT_BT on the mobile phone, in the list of entries of Bluetooth
audio accessories found and establish connection.
Now establish a connection between the mobile phone and the radio and
navigation system. To end the connection between the two units, certain in-
formation should be entered in the mobile phone.
● Enter PIN shown on the radio and navigation display via the mobile
phone and confirm.
When the PIN has been correctly entered, the mobile phone address book
and call lists are automatically loaded. The time taken to load the informa-
tion will depend upon the quantity of data stored in the mobile phone. Once
the data has been loaded, the telephone control data will be available in
the radio and navigation system. The main menu, PHONE, is displayed on
the screen.
If the PIN is not entered correctly, the Bluetooth visibility automatically
switches off in the radio and navigation system. To reconnect the phone
again, visibility should be reactivated via the Bluetooth settings.
Changing between user profiles
A maximum of four mobile phones can be connected to the radio and navi-
gation system. When the radio and navigation system is switched on, it au-
tomatically connects to the last connected mobile phone. If it is not possi-
ble to connect to this mobile phone, the system will try to automatically con-
nect to the next mobile phone on the list of connected units.
If four profiles have already been created, and you wish to create a new pro-
file, it will be necessary to delete one of the existing profiles from the list.
Two mobiles cannot be connected at the same time. ●
Press the SETUP
unit button.
● Press the Bluetooth Settings function button.
● Alternatively: select the Bluetooth Settings by turning the setting knob
⇒ fig. 2 10 and press knob to confirm.
● Press the Paired devices list function button.
● ALTERNATIVELY: Select the Paired device list function button by turning the
setting knob and press knob to confirm.
● Select the mobile phone to be deleted from the list of connected units.
● Press the Delete
function button or the lower button to confirm the pro-
cedure.
After deleting the phone, there will only be three entries in the list of con-
nected units. It will now be possible to start a new connection to another
mobile phone.
Note
For safety reasons, Bluetooth visibility in the radio and navigation system is
limited to exactly five minutes.
Note
The Bluetooth connection has a maximum range of 10 metres. An existing
Bluetooth connection will be disconnected if the distance between the con-
nected units is greater than this. The connection is automatically resumed
when the units are back within the range.
Page 84 of 112
83
Telephone control (Phone)
Note
When a mobile phone is connected for the first time from the navigation
system telephone menu, the phone is paired as a telephone and as a media
player (for playing music stored in the phone via Bluetooth). With a mobile
phone that has already been paired with the navigation system:
● If you try to pair a second mobile phone with the telephone menu, the
first mobile phone will be completely disconnected from the navigation sys-
tem.
● If you try to pair a second mobile phone from the media menu, the first
mobile phone will only be disconnected as a media player, but will continue
to be paired as a mobile phone. This means that the first mobile phone will
operate as a telephone, while the music played will be taken from the song
list on the second mobile phone.
Automatic pairing
When the telephone has been connected and the corresponding user pro-
file created, your telephone will automatically link up with the SEAT tele-
phone system under the following conditions:
● The mobile phone is switched on and the Bluetooth function and visibili-
ty are activated. The mobile phone must be close to the vehicle.
● Whenever automatic connection was selected in the questions posed
during the first pairing, and provided that the mobile phone user profile has
not been deleted. Main menu
PHONE main menu
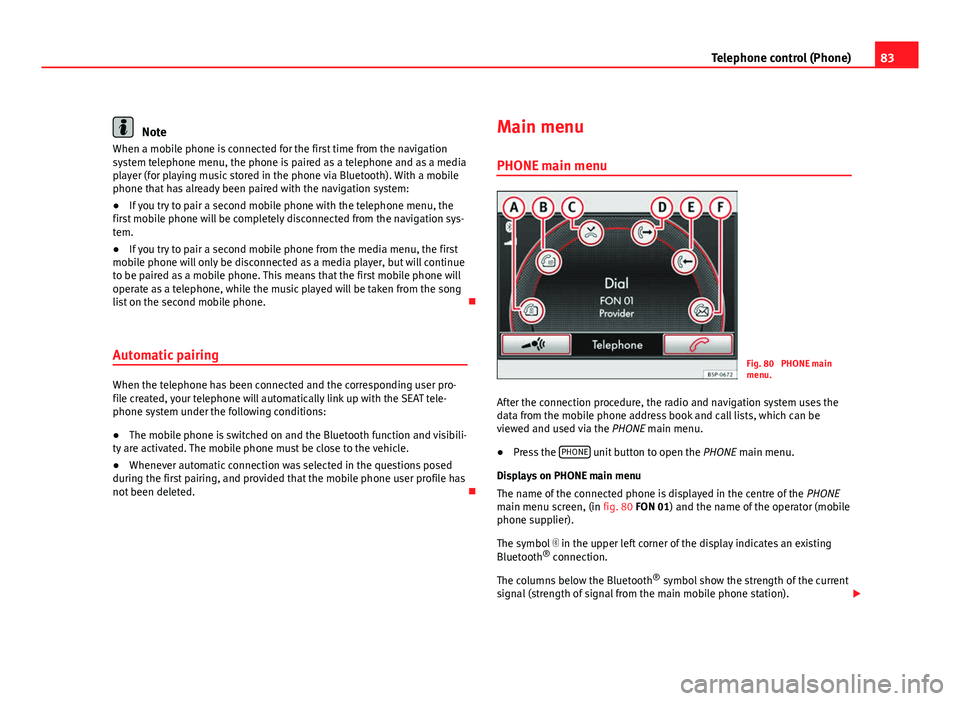
Fig. 80 PHONE main
menu.
After the connection procedure, the radio and navigation system uses the
data from the mobile phone address book and call lists, which can be
viewed and used via the PHONE main menu.
● Press the PHONE
unit button to open the
PHONE main menu.
Displays on PHONE main menu
The name of the connected phone is displayed in the centre of the PHONE
main menu screen, (in fig. 80 FON 01) and the name of the operator (mobile
phone supplier).
The symbol in the upper left corner of the display indicates an existing
Bluetooth ®
connection.
The columns below the Bluetooth ®
symbol show the strength of the current
signal (strength of signal from the main mobile phone station).
Page 85 of 112
84Telephone control (Phone)
To display the above, the mobile phone should accept the hands-free pro-
file 1.5.
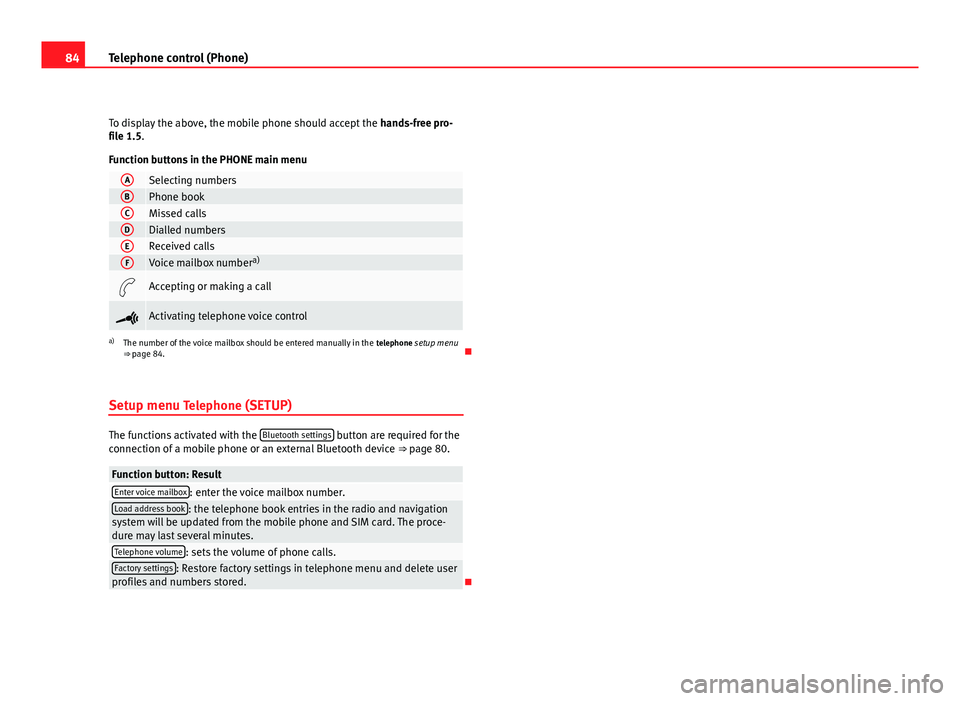
Function buttons in the PHONE main menu
ASelecting numbersBPhone bookCMissed callsDDialled numbersEReceived callsFVoice mailbox number a)
Accepting or making a call
Activating telephone voice control
a)
The number of the voice mailbox should be entered manually in the telephone setup menu
⇒ page 84.
Setup menu Telephone (SETUP)
The functions activated with the Bluetooth settings button are required for the
connection of a mobile phone or an external Bluetooth device ⇒ page 80.
Function button: ResultEnter voice mailbox: enter the voice mailbox number.Load address book: the telephone book entries in the radio and navigation
system will be updated from the mobile phone and SIM card. The proce-
dure may last several minutes.
Telephone volume: sets the volume of phone calls.Factory settings: Restore factory settings in telephone menu and delete user
profiles and numbers stored.