warning light Seat Leon 5D 2011 Owner's Guide
[x] Cancel search | Manufacturer: SEAT, Model Year: 2011, Model line: Leon 5D, Model: Seat Leon 5D 2011Pages: 302, PDF Size: 4.17 MB
Page 90 of 302
88Cockpit
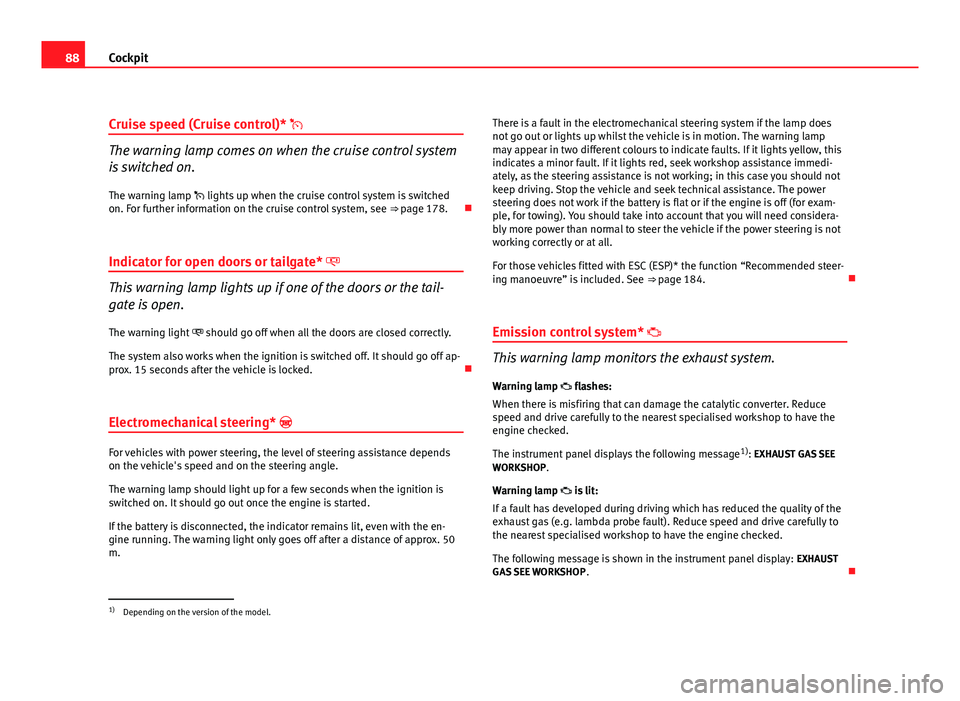
Cruise speed (Cruise control)*
The warning lamp comes on when the cruise control system
is switched on.
The warning lamp lights up when the cruise control system is switched
on. For further information on the cruise control system, see ⇒ page 178.
Indicator for open doors or tailgate*
This warning lamp lights up if one of the doors or the tail-
gate is open. The warning light should go off when all the doors are closed correctly.
The system also works when the ignition is switched off. It should go off ap-
prox. 15 seconds after the vehicle is locked.
Electromechanical steering*
For vehicles with power steering, the level of steering assistance depends
on the vehicle's speed and on the steering angle.
The warning lamp should light up for a few seconds when the ignition is
switched on. It should go out once the engine is started.
If the battery is disconnected, the indicator remains lit, even with the en-
gine running. The warning light only goes off after a distance of approx. 50
m. There is a fault in the electromechanical steering system if the lamp does
not go out or lights up whilst the vehicle is in motion. The warning lamp
may appear in two different colours to indicate faults. If it lights yellow, this
indicates a minor fault. If it lights red, seek workshop assistance immedi-
ately, as the steering assistance is not working; in this case you should not
keep driving. Stop the vehicle and seek technical assistance. The power
steering does not work if the battery is flat or if the engine is off (for exam-
ple, for towing). You should take into account that you will need considera-
bly more power than normal to steer the vehicle if the power steering is not
working correctly or at all.
For those vehicles fitted with ESC (ESP)* the function “Recommended steer-
ing manoeuvre” is included. See
⇒ page 184.
Emission control system*
This warning lamp monitors the exhaust system.
Warning lamp flashes:
When there is misfiring that can damage the catalytic converter. Reduce
speed and drive carefully to the nearest specialised workshop to have the
engine checked.
The instrument panel displays the following message 1)
: EXHAUST GAS SEE
WORKSHOP.
Warning lamp is lit:
If a fault has developed during driving which has reduced the quality of the
exhaust gas (e.g. lambda probe fault). Reduce speed and drive carefully to
the nearest specialised workshop to have the engine checked.
The following message is shown in the instrument panel display: EXHAUST
GAS SEE WORKSHOP .
1)
Depending on the version of the model.
Page 91 of 302

89
Cockpit
Electronic Stability Control ESC (ESP) * /
There are two control lamps for the electronic stability con-
trol. The lamp provides information concerning the func-
tion and the provides information on the disconnection
status
Both lamps come on together when the ignition is switched on and should
go out after approx. 2 seconds, which is how long the function check lasts.
This programme includes the ABS, EDL and ASR (TCS). This also includes
the brake assist system (BAS), automatic cleaning of the brake discs and
the trailer stability programme (TSP).
The warning lamp has the following functions: ● It flashes when the ASR (TCS)/ESC (ESP) is activated when driving.
● It will light up continuously if there is a malfunction in the ESC (ESP).
● The ESC (ESP) lamp will also come on if a fault should occur in the ABS
because the ESC (ESP) operates in conjunction with the ABS.
If the ESP warning lamp lights up and stays on after the engine is started,
this may mean that the control system has temporarily switched off the ESP.
In this case the ESC (ESP) can be reactivated by switching the ignition off
and then on again. If the warning lamp goes out, this means the system is
fully functional.
The lamp provides information about the disconnection status of the
system:
● It stays lit when the ASR (TCS) is disconnected after pressing the
switch. Differential lock fault (EDL)*EDL operates along with the ABS in vehicles equipped with
the Electronic Stability Control ESC (ESP)*
A malfunction in the EDL is indicated by the ABS warning lamp . Take the
vehicle to a specialised workshop as soon as possible. For further informa-
tion on the EDL see ⇒ page 185, Electronic differential lock (EDL)*.
Traction control system ASR (TCS)* /
The traction control system prevents the driven wheels from
spinning when the vehicle is accelerating
There are two warning lamps for the traction control system: and . Both
lamps come on together when the ignition is switched on and should go out
after approx. 2 seconds, which is how long the function check lasts.
The lamp has the following function:
● It flashes when the ASR (TCS) is activated while driving.
If the system is deactivated or if it has any fault, the warning lamp will re-
main lit. The ASR (TCS) lamp will also come on if a fault should occur in the
ABS because the ASR (TCS) operates in conjunction with the ABS. For fur-
ther information, see ⇒ page 182, Brakes
The lamp provides information about the disconnection status of the
system:
● It stays lit when the ASR (TCS) is disconnected after pressing the OFF
switch.
By pressing again, the ASR (TCS) function is reactivated and the warning
lamp switched off.
Safety FirstOperating InstructionsPractical TipsTechnical Specifications
Page 92 of 302

90Cockpit
Operating the foot brake
The brake pedal must be depressed when this warning lamp lights up. This
is necessary when the automatic gearbox* selector lever is moved out of the
positions P or N.
Electronic immobiliser* “Safe”
This warning lamp flashes if an unauthorised key is used.
Inside the key there is a chip that deactivates the electronic immobiliser au-
tomatically when the key is inserted into the ignition. The immobiliser will
be activated again automatically as soon as you pull the key out of the igni-
tion lock.
The instrument panel displays the following message 1)
: SAFE. The vehicle
cannot be used in that case ⇒ page 160.
The engine can, however, be started if the appropriate coded SEAT genuine
key is used.
Note
A perfect operation of the vehicle is ensured if genuine SEAT keys are used.
1)
Depending on the version of the model.
Page 101 of 302
99
Unlocking and locking
Automatic speed dependent locking and unlocking system*
This is a safety system which prevent the access to the vehi-
cle from the outside when it is running (for example, when
stopped at a traffic light).
Locking
The doors and the tailgate are automatically locked when vehicle speed ex-
ceeds 15 km/h.
If the vehicle is stopped and one of the doors is opened, when the vehicle
moves off again and exceeds a speed of 15 km/h, the unlocked door(s) will
be locked once more.
Unlocking
The driver door automatically unlocks when the key is removed from the ig-
nition.
Each door can be unlocked and opened independently from the inside (for
example, when a passenger gets out of it). To do it, simply operate the lever
inside the door.
WARNING
The door handles must not be operated when the vehicle is running: the
door would open.
Automatic locking system for involuntary unlocking*
It is an anti-theft system and prevents the unintentional un-
locking of the vehicle. If the vehicle is unlocked and any of the doors (including the tailgate) are
opened within 30 seconds, it gets re-locked automatically. This function prevents the vehicle from remaining unlocked if the unlock button is press-
ed by mistake.
Emergency unlocking system
If the airbags are triggered during an accident, the vehicle is unlocked, ex-
cept for the luggage compartment. It is possible to lock the vehicle from in-
side with the central locking, after turning the ignition off and back on
again.
If the doors must be locked from the outside, see “Emergency locking of the
doors”
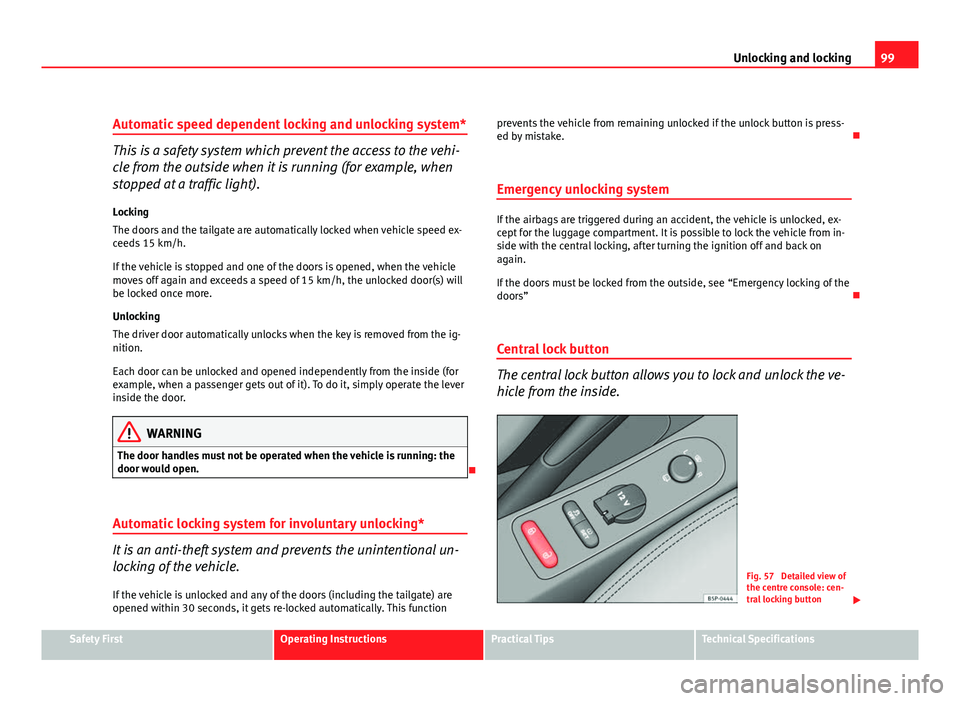
Central lock button
The central lock button allows you to lock and unlock the ve-
hicle from the inside.
Fig. 57 Detailed view of
the centre console: cen-
tral locking button
Safety FirstOperating InstructionsPractical TipsTechnical Specifications
Page 102 of 302
100Unlocking and locking
Locking the vehicle
–Press the button
⇒ .
Unlocking the doors
– Press button
.
The central lock button is still operative when the ignition is switched off.
Except when the Safe security system is activated.
Please note the following if you lock your vehicle with the central lock but-
ton:
● Locking the doors and tailgate prevents access from the outside (for
safety reasons, e.g. when stopped at a traffic light).
● The driver door and/or front passenger door cannot be locked if any of
the vehicle doors (except the tailgate) are open. This avoids the user from
forgetting his key inside the vehicle.
● Repeated operation of the central locking will deactivate the central lock
button for 30 seconds. Once this time has passed, the button if operative
again.
● There is a danger of leaving the key inside the vehicle if the vehicle is
locked by the central locking button when the driver door is closed and any
of the rear doors open. On closing any of the rear doors, the vehicle locks
and the keys remain inside it.
● All doors can be locked separately from inside the vehicle. Do this by
pulling the door release lever once.
WARNING
● If the vehicle is locked, children and disabled people may be trapped
inside it.
● The central lock button is not operative in the following cases:
WARNING (Continued)
● When the vehicle is locked from the outside (with the remote control
or the key).
● While the ignition is not activated after unlocking the door lock cylin-
der with the key.
Note
● Vehicle locked, button , amber
● Vehicle unlocked, button , red
Unlocking and locking - Manual personalisation
Activating selective unlocking
With the driver door open, turn the key to unlock for approx. 3 s
Deactivating selective unlocking
With the driver door open, turn the key to lock for approx. 3 s
The turn signal lamps flash to confirm activation or deactivation.
Activation of automatic locking
Press the lock button
on the central locking button for 3 seconds.
Deactivation of automatic locking
Press the unlock button
on the central locking button for 3 seconds.
The lock button lamp flashes to confirm activation or deactivation.
Page 110 of 302
108Unlocking and locking
Tailgate
Unlocking and locking
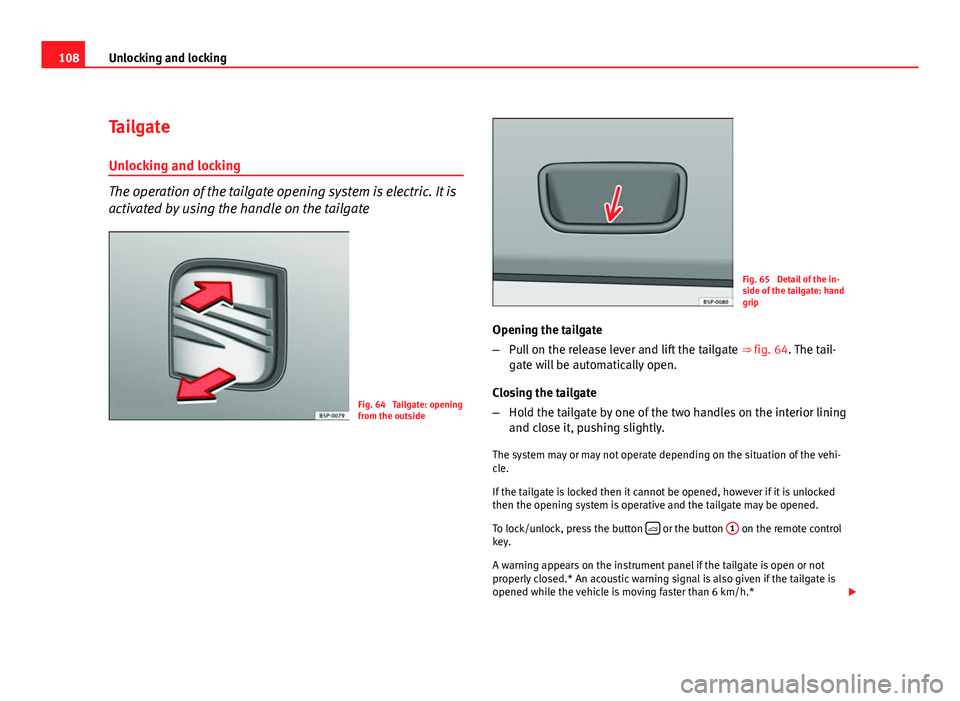
The operation of the tailgate opening system is electric. It is
activated by using the handle on the tailgate
Fig. 64 Tailgate: opening
from the outside
Fig. 65 Detail of the in-
side of the tailgate: hand
grip
Opening the tailgate
– Pull on the release lever and lift the tailgate ⇒ fig. 64. The tail-
gate will be automatically open.
Closing the tailgate
– Hold the tailgate by one of the two handles on the interior lining
and close it, pushing slightly.
The system may or may not operate depending on the situation of the vehi-
cle.
If the tailgate is locked then it cannot be opened, however if it is unlocked
then the opening system is operative and the tailgate may be opened.
To lock/unlock, press the button
or the button
1 on the remote control
key.
A warning appears on the instrument panel if the tailgate is open or not
properly closed.* An acoustic warning signal is also given if the tailgate is
opened while the vehicle is moving faster than 6 km/h.*
Page 111 of 302
109
Unlocking and locking
WARNING
● Always close the tailgate properly. Risk of accident or injury.
● The tailgate must not be opened when the reverse or rear fog lights
are lit. This may damage the tail lights
● Do not close the tailgate by pushing it down with your hand on the
rear window. The glass could smash. Risk of injury!
● Ensure the tailgate is locked after closing it. If not, it may open unex-
pectedly while driving.
● Never allow children to play in or around the vehicle. A locked vehicle
can be subjected to extremely high and low temperatures, depending on
the time of year, thus causing serious injuries/illness. It could even have
fatal consequences. Close and lock both the tailgate and all the other
doors when you are not using the vehicle.
● Closing the tailgate without observing and ensuring it is clear could
cause serious injury to you and to third parties. Make sure that no one is
in the path of the tailgate.
● Never drive with the tailgate open or half-closed, exhaust gases may
penetrate into the interior of the vehicle. Danger of poisoning!
● If you only open the tailgate, do not leave the key inside. The vehicle
will not be opened if the key is left inside.
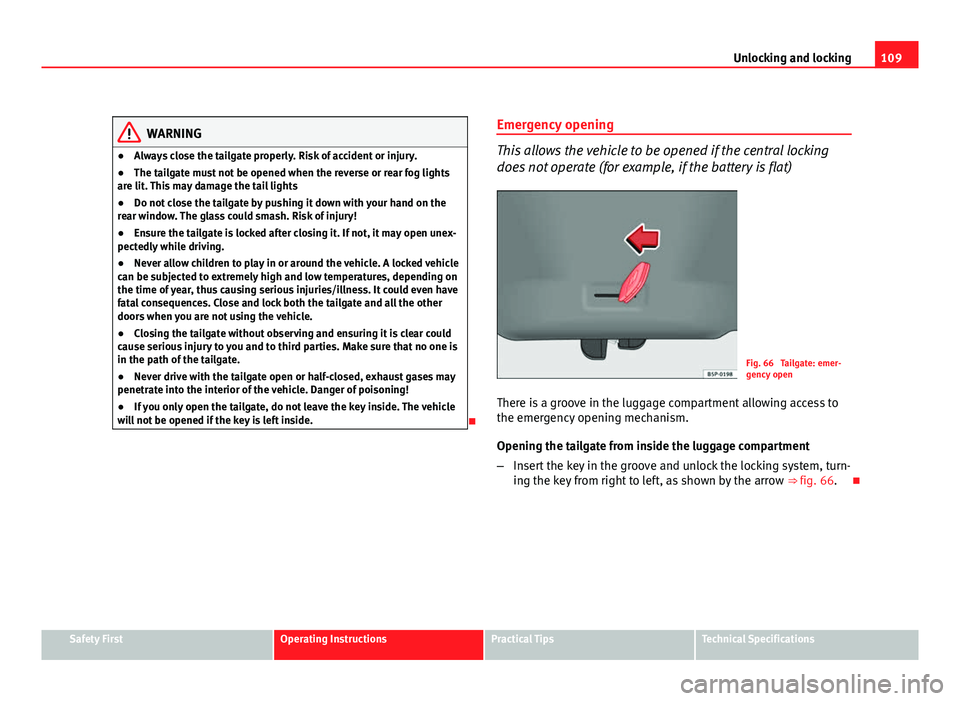
Emergency opening
This allows the vehicle to be opened if the central locking
does not operate (for example, if the battery is flat)
Fig. 66 Tailgate: emer-
gency open
There is a groove in the luggage compartment allowing access to
the emergency opening mechanism.
Opening the tailgate from inside the luggage compartment
– Insert the key in the groove and unlock the locking system, turn-
ing the key from right to left, as shown by the arrow ⇒ fig. 66.
Safety FirstOperating InstructionsPractical TipsTechnical Specifications
Page 117 of 302
115
Lights and visibility
Lights and visibility
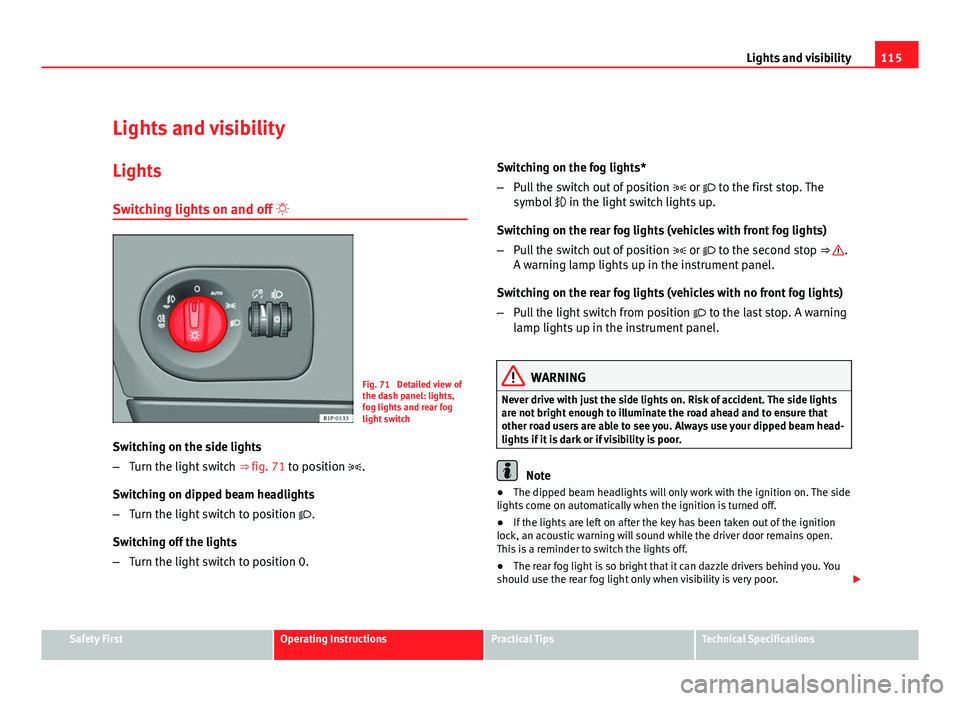
Lights Switching lights on and off
Fig. 71 Detailed view of
the dash panel: lights,
fog lights and rear fog
light switch
Switching on the side lights
– Turn the light switch ⇒ fig. 71 to position .
Switching on dipped beam headlights
– Turn the light switch to position .
Switching off the lights
– Turn the light switch to position 0. Switching on the fog lights*
–
Pull the switch out of position or to the first stop. The
symbol in the light switch lights up.
Switching on the rear fog lights (vehicles with front fog lights)
– Pull the switch out of position or to the second stop ⇒
.
A warning lamp lights up in the instrument panel.
Switching on the rear fog lights (vehicles with no front fog lights)
– Pull the light switch from position to the last stop. A warning
lamp lights up in the instrument panel.
WARNING
Never drive with just the side lights on. Risk of accident. The side lights
are not bright enough to illuminate the road ahead and to ensure that
other road users are able to see you. Always use your dipped beam head-
lights if it is dark or if visibility is poor.
Note
● The dipped beam headlights will only work with the ignition on. The side
lights come on automatically when the ignition is turned off.
● If the lights are left on after the key has been taken out of the ignition
lock, an acoustic warning will sound while the driver door remains open.
This is a reminder to switch the lights off.
● The rear fog light is so bright that it can dazzle drivers behind you. You
should use the rear fog light only when visibility is very poor.
Safety FirstOperating InstructionsPractical TipsTechnical Specifications
Page 118 of 302
116Lights and visibility
● If you are towing a trailer equipped with a rear fog light on a vehicle with
a factory-fitted towing bracket, the rear fog light on the vehicle will automat-
ically be switched off.
● The use of the lighting described here is subject to the relevant statutory
requirements.
● Depending on weather conditions (very cold or wet), the front and tail
lights and the turn signals may be temporarily misted. This has no influence
on the useful life of the lighting system. The lights will soon demist when
they are switched on.
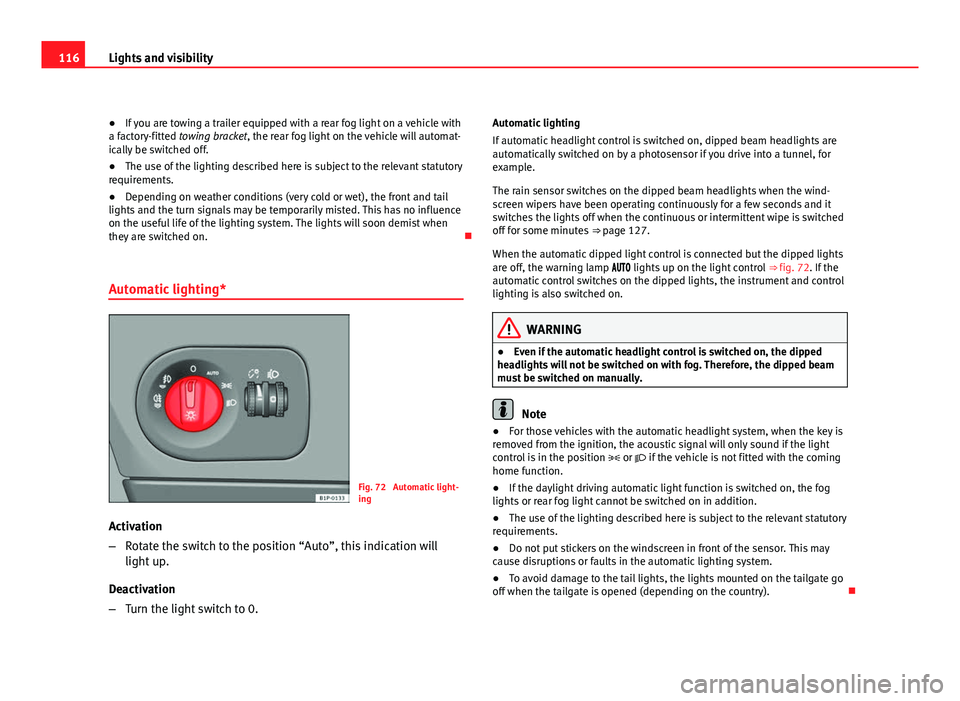
Automatic lighting*
Fig. 72 Automatic light-
ing
Activation
– Rotate the switch to the position “Auto”, this indication will
light up.
Deactivation
– Turn the light switch to 0. Automatic lighting
If automatic headlight control is switched on, dipped beam headlights are
automatically switched on by a photosensor if you drive into a tunnel, for
example.
The rain sensor switches on the dipped beam headlights when the wind-
screen wipers have been operating continuously for a few seconds and it
switches the lights off when the continuous or intermittent wipe is switched
off for some minutes
⇒ page 127.
When the automatic dipped light control is connected but the dipped lights
are off, the warning lamp lights up on the light control ⇒ fig. 72. If the
automatic control switches on the dipped lights, the instrument and control
lighting is also switched on.
WARNING
● Even if the automatic headlight control is switched on, the dipped
headlights will not be switched on with fog. Therefore, the dipped beam
must be switched on manually.
Note
● For those vehicles with the automatic headlight system, when the key is
removed from the ignition, the acoustic signal will only sound if the light
control is in the position or if the vehicle is not fitted with the coming
home function.
● If the daylight driving automatic light function is switched on, the fog
lights or rear fog light cannot be switched on in addition.
● The use of the lighting described here is subject to the relevant statutory
requirements.
● Do not put stickers on the windscreen in front of the sensor. This may
cause disruptions or faults in the automatic lighting system.
● To avoid damage to the tail lights, the lights mounted on the tailgate go
off when the tailgate is opened (depending on the country).
Page 122 of 302
120Lights and visibility
Dynamic cornering lights (AFS)
The dynamic cornering lights only operate if the vehicle is travelling at more
than 10 km/h and the dipped headlights are on. When taking a bend, the
road is illuminated better with directional gas discharge bulbs than with
conventional fixed headlights.
A fault in the system is indicated via the flashing of the control lamp on
the instrument panel. At the same time, a text message with information or
instructions to perform necessary operations may appear on the instrument
panel display. Take the vehicle to a specialised workshop and have the fault
repaired.
If the control bulb lights up on the instrument panel but all the bulbs are
operating correctly ⇒ page 254, there may still be a fault in the dynamic
curve lighting system (AFS). Take the vehicle to a specialised workshop and
have the fault repaired.
WARNING
If the “automatic dipped beam control” is switched on, the dipped beam
headlights will not be switched on in fog. They should be switched on
manually using the light switch. The driver is personally responsible for
the correct use of lights in all situations. “Automatic headlight control”
is merely a system to support the driver. Where necessary, switch on the
lights manually using the light switch.
Fog lights with cornering function*
When the turn signal is switched on to turn or on very tight bends, the right
or left fog lamp automatically comes on to function as a cornering light. The
cornering light only operates if the dipped lights are on.
WARNING
If the “automatic dipped beam control” is switched on, the dipped beam
headlights will not be switched on in fog. They should be switched on
manually using the light switch. The driver is personally responsible for
the correct use of lights in all situations. “Automatic headlight control”
is merely a system to support the driver. Where necessary, switch on the
lights manually using the light switch.
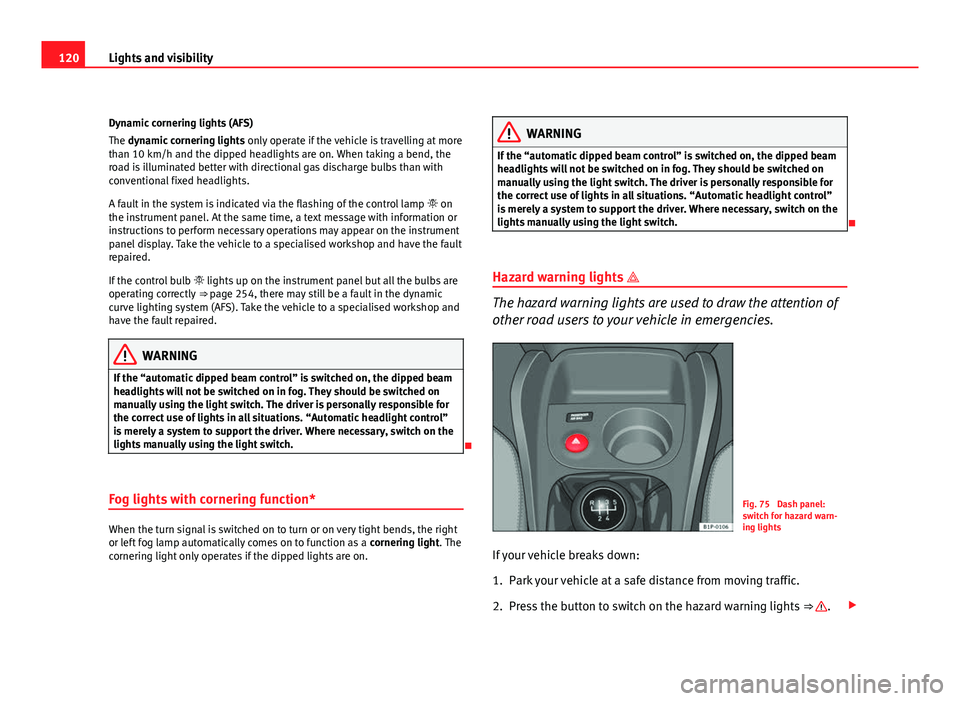
Hazard warning lights
The hazard warning lights are used to draw the attention of
other road users to your vehicle in emergencies.
Fig. 75 Dash panel:
switch for hazard warn-
ing lights
If your vehicle breaks down:
1. Park your vehicle at a safe distance from moving traffic.
2. Press the button to switch on the hazard warning lights ⇒
.