service indicator Seat Leon 5D 2011 Owner's manual
[x] Cancel search | Manufacturer: SEAT, Model Year: 2011, Model line: Leon 5D, Model: Seat Leon 5D 2011Pages: 302, PDF Size: 4.17 MB
Page 34 of 302
32Airbag system
Warning lamp for airbag and seat belt tensioner
This warning lamp monitors the airbag and seat belt ten-
sioner system.
The warning lamp monitors all airbags and seat belt tensioners in the vehi-
cle, including control units and wiring connections.
Monitoring of airbag and belt tensioner system
Both the airbag and belt tensioner systems operation is constantly moni-
tored electronically. Each time the ignition is switched on, the warning lamp
lights for several seconds and the display in the instrument panel*
shows AIRBAG / TENSIONER .
The system must be checked when the warning lamp :
● does not light up when the ignition is switched on,
● after the ignition is switched on, it turns off after 4 seconds,
● turns off and then lights up again after the ignition is switched on,
● lights up or flashes while the vehicle is moving.
In the event of a malfunction, the warning lamp remains on continuously. In
addition, depending on the malfunction, a fault message appears in the
display of the instrument panel for approx. 10 seconds and a short acoustic
signal is given. In this event, you should have a specialised workshop check
the system immediately.
If any of the airbags are de-activated by the Authorised Service Centre, the
indicator lights for several seconds more after the verification and will turn
off if there is no fault.WARNING
● If there is a malfunction, the airbag and belt tensioner system cannot
properly perform its protective function.
● If a malfunction occurred, have the system checked immediately by a
specialised workshop. Otherwise, in the event of an accident, the airbag
system and belt tensioners may not be triggered, or may not be triggered
correctly.
Repairs, maintenance and disposal of airbags
The parts of the airbag system are installed in various places in your vehi-
cle. If work is carried out on the airbag system or parts have to be removed
and fitted on the system when performing other repair work, parts of the air-
bag system may be damaged. In the event of an accident this could cause
the airbag to inflate incorrectly or not inflate at all.
The relevant safety requirements must be observed when the vehicle or
components of the airbag are scrapped. Specialised workshops and vehicle
disposal centres are familiar with these requirements.
WARNING
● If repairs are not carried out by a professional, or if the airbags are
used incorrectly, the risk of severe or fatal injuries is increased. The air-
bags may fail to inflate, or could inflate in the wrong circumstances.
● Do not cover or stick anything on the steering wheel hub or the sur-
face of the airbag unit on the passenger side of the dash panel, and do
not obstruct or modify them in any way.
● It is important not to attach any objects such as cup holders or tele-
phone mountings to the surfaces covering the airbag units.
Page 63 of 302
61
Cockpit
Digital instrument panel display
Display (without warning or information texts)
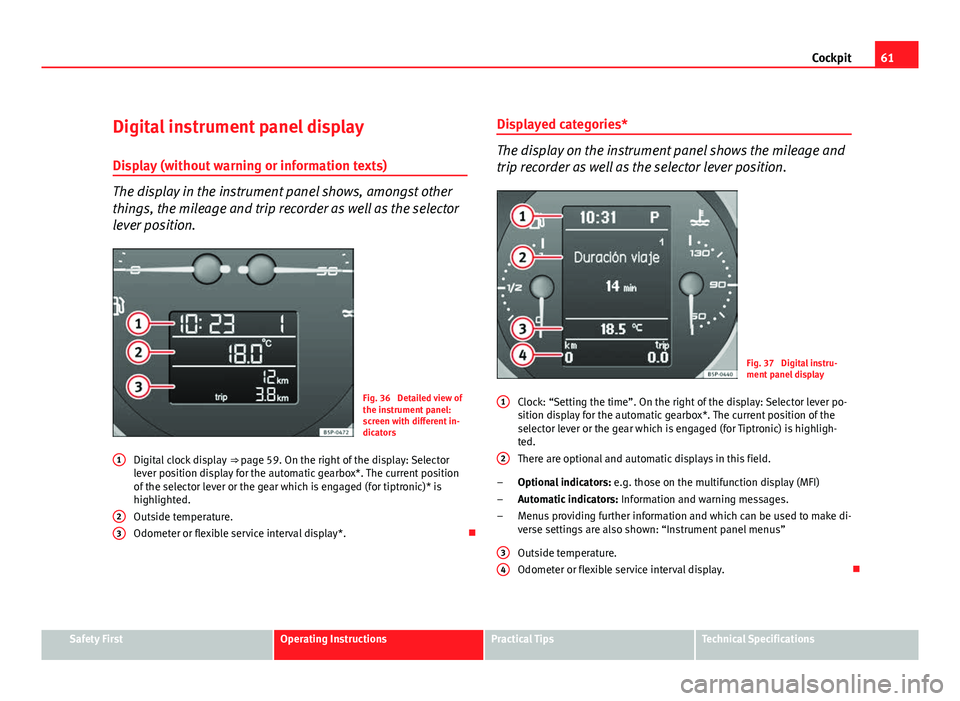
The display in the instrument panel shows, amongst other
things, the mileage and trip recorder as well as the selector
lever position.
Fig. 36 Detailed view of
the instrument panel:
screen with different in-
dicators
Digital clock display ⇒ page 59. On the right of the display: Selector
lever position display for the automatic gearbox*. The current position
of the selector lever or the gear which is engaged (for tiptronic)* is
highlighted.
Outside temperature.
Odometer or flexible service interval display*.
1
23
Displayed categories*
The display on the instrument panel shows the mileage and
trip recorder as well as the selector lever position.
Fig. 37 Digital instru-
ment panel display
Clock: “Setting the time”. On the right of the display: Selector lever po-
sition display for the automatic gearbox*. The current position of the
selector lever or the gear which is engaged (for Tiptronic) is highligh-
ted.
There are optional and automatic displays in this field.
Optional indicators: e.g. those on the multifunction display (MFI)
Automatic indicators: Information and warning messages.
Menus providing further information and which can be used to make di-
verse settings are also shown: “Instrument panel menus”
Outside temperature.
Odometer or flexible service interval display.
1
2
–
–
–
3
4
Safety FirstOperating InstructionsPractical TipsTechnical Specifications
Page 85 of 302
83
Cockpit
Turn signals
The indicator lamp flashes when the turn signals are in op-
eration.
Depending on which turn signal is operating, either the left or right
turn signal lamp flashes. Both indicator lamps will flash at the same time
when the hazard warning lights are switched on.
If any of both turn signals fails, the indicator lamp will start flashing twice
faster than normal.
For further information on the turn signals, please see ⇒ page 122.
Engine management*
This warning lamp monitors the engine management sys-
tem for petrol engines.
The warning lamp (Electronic Power Control) lights up when the ignition
is switched on to show that the lamp is working properly. It should go out
once the engine is started.
If there is a fault in the electronic engine management system while you are
driving, this warning lamp will light up. Stop the vehicle and seek technical
assistance. Glow plug system / engine fault
The warning lamp lights up to show that the glow plugs are
preheating. It flashes if there is an engine fault.
Warning lamp is lit
The warning lamp lights up while the glow plugs are preheating. When
the warning lamp goes off, the engine should be started straight away.
Warning lamp flashes
If a fault develops in the engine management system while you are driving,
the glow plug lamp will flash . Take the vehicle to an Authorised Service
Centre as soon as possible and have the engine checked.
Main beam headlights
This warning lamp lights up when the main beams are on.
The warning lamp is switched on once main beams are on or once the
headlight flasher is operating.
For further information see ⇒ page 122.
Soot accumulation in the diesel engine particulate filter *
If the warning lamp lights up you should help the filter clean itself by
driving in the appropriate manner.
Safety FirstOperating InstructionsPractical TipsTechnical Specifications
Page 107 of 302
105
Unlocking and locking
WARNING
● An improper use of the key can cause serious injuries.
● Never leave children or disabled persons in the vehicle. In case of
emergency, they may not be able to leave the vehicle or manage on their
own.
● Never forget the keys inside the vehicle. Otherwise, this could result
in serious injuries, accidents or even the theft of your vehicle. Always
take the key with you when you leave the vehicle.
● An uncontrolled use of the key could start the engine or activate any
electric equipment (e.g. electric windows), causing risk of accident. The
vehicle can be locked when using the remote control key. This could com-
plicate the aid in case of emergency.
Note
● The remote control can be programmed by means of pressing the un-
locking button once; as a result, only the driver door will unlock. When the
button is pressed once more, all doors and the tailgate will be unlocked.
● The remote control functions only when you are in range ⇒ fig. 63 (red
area).
● If the vehicle is unlocked using the
1 button, it will lock again auto-
matically if any of the doors or the tailgate are not opened within 30 sec-
onds after unlocking it. This function prevents the vehicle from remaining
unlocked if the unlock button is pressed by mistake.
● If the vehicle cannot be opened and closed using the remote control,
the remote control key will have to be re-synchronised ⇒ page 105.
Changing the battery
If the battery indicator does not flash when the buttons are pushed, the bat-
tery must be replaced.
CAUTION
The use of inappropriate batteries may damage the radio frequency remote
control. For this reason, always replace the dead battery with another of the
same size and power.
For the sake of the environment
Used batteries must be disposed of at an appropriate waste facility or
through an authorised service, given that their components can affect the
environment.
Synchronising the remote control key
If it is not possible to unlock or lock the door with the remote
control, it should be re-synchronised.
– Press the
⇒ fig. 62 button on the remote control.
– Then close the vehicle using the key bit within one minute.
It is possible that the vehicle could no longer be opened and closed with
the remote control if the button
is repeatedly pressed outside of the ef-
fective range of the radio frequency remote control. The remote control key
will have to be resynchronised.
Spare remote control keys are available in your Authorised Service Centres,
where they must be matched to the locking system.
Up to eight remote control keys can be used.
Safety FirstOperating InstructionsPractical TipsTechnical Specifications
Page 193 of 302
191
Driving and the environment
Diesel engine particulate filter*
The diesel engine particulate filter eliminates soot produced
by burning diesel.
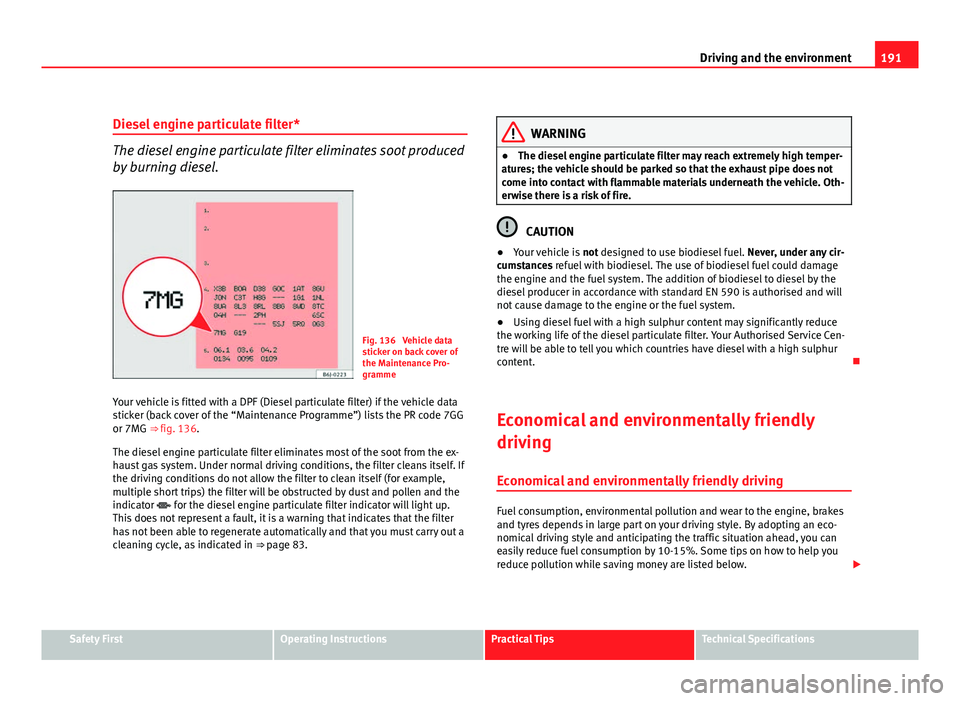
Fig. 136 Vehicle data
sticker on back cover of
the Maintenance Pro-
gramme
Your vehicle is fitted with a DPF (Diesel particulate filter) if the vehicle data
sticker (back cover of the “Maintenance Programme”) lists the PR code 7GG
or 7MG ⇒ fig. 136.
The diesel engine particulate filter eliminates most of the soot from the ex-
haust gas system. Under normal driving conditions, the filter cleans itself. If
the driving conditions do not allow the filter to clean itself (for example,
multiple short trips) the filter will be obstructed by dust and pollen and the
indicator for the diesel engine particulate filter indicator will light up.
This does not represent a fault, it is a warning that indicates that the filter
has not been able to regenerate automatically and that you must carry out a
cleaning cycle, as indicated in ⇒ page 83.
WARNING
● The diesel engine particulate filter may reach extremely high temper-
atures; the vehicle should be parked so that the exhaust pipe does not
come into contact with flammable materials underneath the vehicle. Oth-
erwise there is a risk of fire.
CAUTION
● Your vehicle is not designed to use biodiesel fuel. Never, under any cir-
cumstances refuel with biodiesel. The use of biodiesel fuel could damage
the engine and the fuel system. The addition of biodiesel to diesel by the
diesel producer in accordance with standard EN 590 is authorised and will
not cause damage to the engine or the fuel system.
● Using diesel fuel with a high sulphur content may significantly reduce
the working life of the diesel particulate filter. Your Authorised Service Cen-
tre will be able to tell you which countries have diesel with a high sulphur
content.
Economical and environmentally friendly
driving
Economical and environmentally friendly driving
Fuel consumption, environmental pollution and wear to the engine, brakes
and tyres depends in large part on your driving style. By adopting an eco-
nomical driving style and anticipating the traffic situation ahead, you can
easily reduce fuel consumption by 10-15%. Some tips on how to help you
reduce pollution while saving money are listed below.
Safety FirstOperating InstructionsPractical TipsTechnical Specifications
Page 237 of 302
235
Wheels and tyres
WARNING
● Never adjust tyre pressure when the tyres are hot. This may damage
or even burst the tyres. Risk of accident!
● An insufficiently inflated tyre flexes a lot more at high speeds and
causes significant heating of the tyre. Under these conditions, the tyre
bead may be released or the tyre may burst. Risk of accident!
For the sake of the environment
Under-inflated tyres lead to increased fuel consumption and tyre wear.
Significant tyre pressure loss
The tyre symbol is displayed and indicates that the tyre pressure
of at least one tyre is insufficient.
– Stop the vehicle.
– Switch the engine off.
– Check the tyre(s).
– Change the wheel if necessary. Tyre service life
The service life of tyres is dependent on tyre pressure, driv-
ing style and fitting.
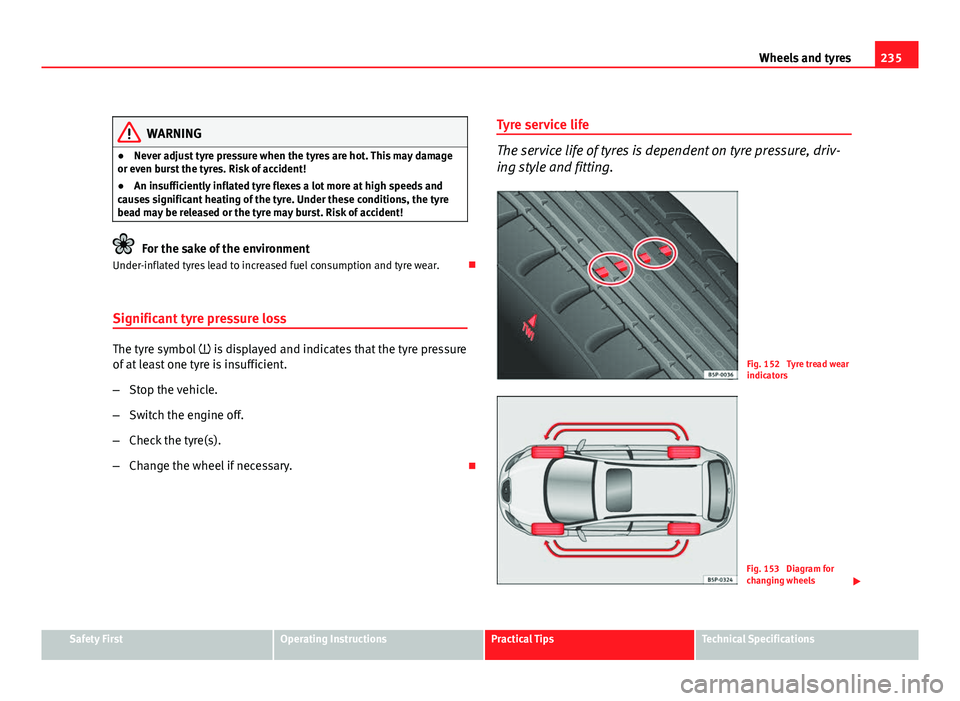
Fig. 152 Tyre tread wear
indicators
Fig. 153 Diagram for
changing wheels
Safety FirstOperating InstructionsPractical TipsTechnical Specifications
Page 238 of 302
236Wheels and tyres
Wear indicators
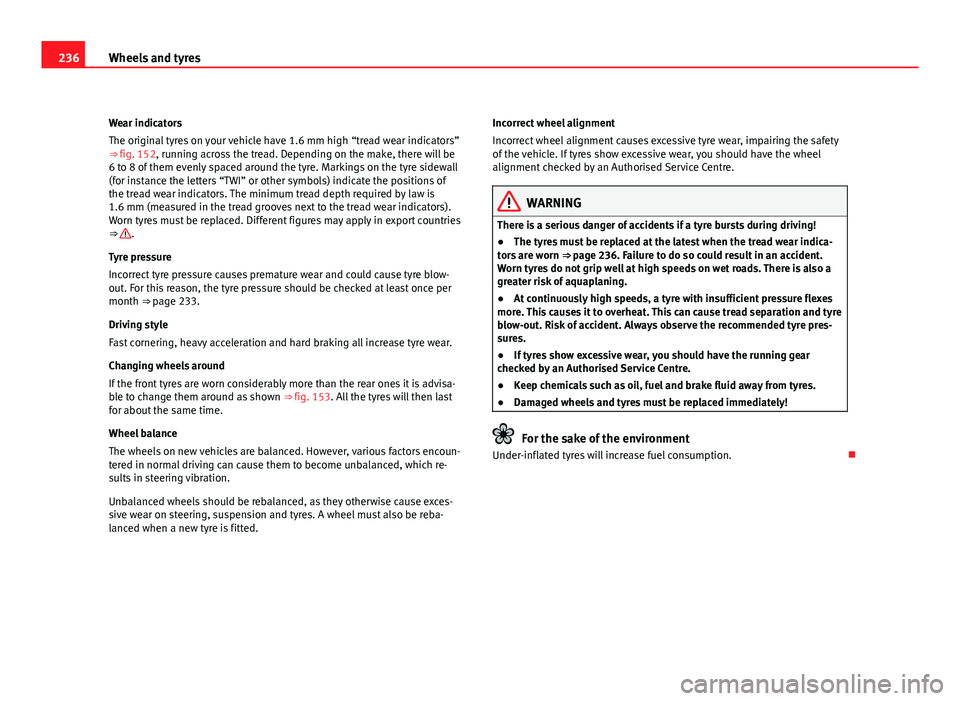
The original tyres on your vehicle have 1.6 mm high “tread wear indicators”
⇒ fig. 152, running across the tread. Depending on the make, there will be
6 to 8 of them evenly spaced around the tyre. Markings on the tyre sidewall
(for instance the letters “TWI” or other symbols) indicate the positions of
the tread wear indicators. The minimum tread depth required by law is
1.6 mm (measured in the tread grooves next to the tread wear indicators).
Worn tyres must be replaced. Different figures may apply in export countries
⇒
.
Tyre pressure
Incorrect tyre pressure causes premature wear and could cause tyre blow-
out. For this reason, the tyre pressure should be checked at least once per
month ⇒ page 233.
Driving style
Fast cornering, heavy acceleration and hard braking all increase tyre wear.
Changing wheels around
If the front tyres are worn considerably more than the rear ones it is advisa-
ble to change them around as shown ⇒ fig. 153. All the tyres will then last
for about the same time.
Wheel balance
The wheels on new vehicles are balanced. However, various factors encoun-
tered in normal driving can cause them to become unbalanced, which re-
sults in steering vibration.
Unbalanced wheels should be rebalanced, as they otherwise cause exces-
sive wear on steering, suspension and tyres. A wheel must also be reba-
lanced when a new tyre is fitted. Incorrect wheel alignment
Incorrect wheel alignment causes excessive tyre wear, impairing the safety
of the vehicle. If tyres show excessive wear, you should have the wheel
alignment checked by an Authorised Service Centre.
WARNING
There is a serious danger of accidents if a tyre bursts during driving!
● The tyres must be replaced at the latest when the tread wear indica-
tors are worn ⇒ page 236. Failure to do so could result in an accident.
Worn tyres do not grip well at high speeds on wet roads. There is also a
greater risk of aquaplaning.
● At continuously high speeds, a tyre with insufficient pressure flexes
more. This causes it to overheat. This can cause tread separation and tyre
blow-out. Risk of accident. Always observe the recommended tyre pres-
sures.
● If tyres show excessive wear, you should have the running gear
checked by an Authorised Service Centre.
● Keep chemicals such as oil, fuel and brake fluid away from tyres.
● Damaged wheels and tyres must be replaced immediately!
For the sake of the environment
Under-inflated tyres will increase fuel consumption.
Page 296 of 302
Engine oil . . . . . . . . . . . . . . . . . . . . . . . . . . . . . 220Changing . . . . . . . . . . . . . . . . . . . . . . . . . . 223
Checking engine oil level . . . . . . . . . . . . . . 221
Oil properties . . . . . . . . . . . . . . . . . . . . . . . 221
Specifications . . . . . . . . . . . . . . . . . . . . . . . 220
Topping up . . . . . . . . . . . . . . . . . . . . . . . . . 222
Engine oil dipstick . . . . . . . . . . . . . . . . . . . . . . 221
Engine oil pressure Warning lamp . . . . . . . . . . . . . . . . . . . . . 66, 87
Environment . . . . . . . . . . . . . . . . . . . . . . . . . . . 191 Environmental friendliness . . . . . . . . . . . . 193
Environmentally friendly driving . . . . . . . . . . . 191
Environmental tip Avoiding pollution . . . . . . . . . . . . . . . . . . . 211
ESC . . . . . . . . . . . . . . . . . . . . . . . . . . 89, 158, 184 see also Electronic Stability Control . . . . . 158
ESP see ESC . . . . . . . . . . . . . . . . . . . . 89, 158, 184
Example of menu use Program a speed limit warning . . . . . . . . . . 69
To activate and deactivate the speed limitwarning . . . . . . . . . . . . . . . . . . . . . . . . . . . 69
Example of the use of the menus Open the Configuration menu with the MFIlever . . . . . . . . . . . . . . . . . . . . . . . . . . . . . . 68
Open the Configuration menu with the steering wheel controls . . . . . . . . . . . . . . 69
Examples of menu use Open the main menu . . . . . . . . . . . . . . . . . . 68
Open the winter tyres menu . . . . . . . . . . . . 69
To close the winter tyres menu . . . . . . . . . . 69
Exhaust gas purification system . . . . . . . . . . . 190
Exterior mirrors . . . . . . . . . . . . . . . . . . . . . . . . . 202 F
Fabric trim cleaning . . . . . . . . . . . . . . . . . . . . . 206
Fastening rings . . . . . . . . . . . . . . . . . . . . . . . . . . 17
Fire extinguisher . . . . . . . . . . . . . . . . . . . . . . . . 142
First-aid kit . . . . . . . . . . . . . . . . . . . . . . . . . . . . 142
Flexible service interval display . . . . . . . . . . . . 62
Floor mats . . . . . . . . . . . . . . . . . . . . . . . . . . . . . . 16
Fog lights . . . . . . . . . . . . . . . . . . . . . . . . . . . . . 115
Fog lights with cornering function . . . . . . . . . 120
Fold down the backrest . . . . . . . . . . . . . . . . . . 137
Front airbags . . . . . . . . . . . . . . . . . . . . . . . . . . . 34 Description . . . . . . . . . . . . . . . . . . . . . . . . . . 34
Operation . . . . . . . . . . . . . . . . . . . . . . . . . . . 35
Safety notes . . . . . . . . . . . . . . . . . . . . . . . . . 37
Front drink holders . . . . . . . . . . . . . . . . . . . . . . 139
Front interior light Switching off . . . . . . . . . . . . . . . . . . . . . . . . 123
Switching on . . . . . . . . . . . . . . . . . . . . . . . . 123
Front passenger airbag deactivation . . . . . . . . 44
Front reading lights . . . . . . . . . . . . . . . . . . . . . 124
Front seat adjustment Lumbar support . . . . . . . . . . . . . . . . . . . . . 135
Fuel Diesel . . . . . . . . . . . . . . . . . . . . . . . . . . . . . 216
Petrol . . . . . . . . . . . . . . . . . . . . . . . . . . . . . . 215
Fuel consumption . . . . . . . . . . . . . . . . . . . . . . . 270
Fuel level Indicator . . . . . . . . . . . . . . . . . . . . . . . . . . . . 58
Fuel reserve . . . . . . . . . . . . . . . . . . . . . . . . . . . . 81 Warning message . . . . . . . . . . . . . . . . . . . . . 67 Fuel tank
see Fuel reserve . . . . . . . . . . . . . . . . . . . . . . 81
Fuel Tank Opening the fuel tank flap . . . . . . . . . . . . . 210
Fuel: save . . . . . . . . . . . . . . . . . . . . . . . . . . . . . 191
Fuses . . . . . . . . . . . . . . . . . . . . . . . . . . . . . . . . . 250
G
G 12 . . . . . . . . . . . . . . . . . . . . . . . . . . . . . . . . . . 224
Gear shift pattern . . . . . . . . . . . . . . . . . . . . . . . 167
General overview of the engine compartment 273
Glove compartment . . . . . . . . . . . . . . . . . . . . . 138
Glow plug system . . . . . . . . . . . . . . . . . . . . . . . 161 Warning lamp . . . . . . . . . . . . . . . . . . . . . . . . 83
H Handbrake . . . . . . . . . . . . . . . . . . . . . . . . . . . . 173 Control lamp . . . . . . . . . . . . . . . . . . . . . . . . . 87
Warning lamp . . . . . . . . . . . . . . . . . . . . . . . 173
Hazard warning lights . . . . . . . . . . . . . . . . . . . 120
HBA . . . . . . . . . . . . . . . . . . . . . . . . . . . . . . . . . . 182
Headlight flashers . . . . . . . . . . . . . . . . . . . . . . 122
Headlight range control . . . . . . . . . . . . . . . . . . 119
Headlights Driving abroad . . . . . . . . . . . . . . . . . . . . . . 194
Fog lights . . . . . . . . . . . . . . . . . . . . . . . . . . 115
Headlight washer system* . . . . . . . . . . . . 128
Head restraints Adjusting . . . . . . . . . . . . . . . . . . . . . . 133, 134
294 Index
Page 300 of 302
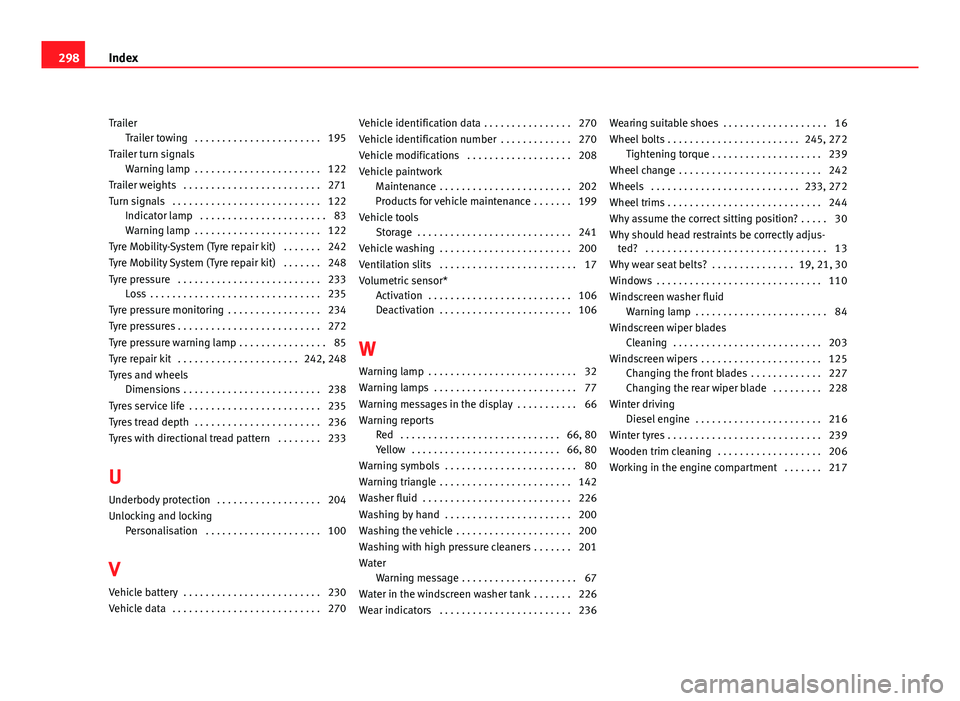
TrailerTrailer towing . . . . . . . . . . . . . . . . . . . . . . . 195
Trailer turn signals Warning lamp . . . . . . . . . . . . . . . . . . . . . . . 122
Trailer weights . . . . . . . . . . . . . . . . . . . . . . . . . 271
Turn signals . . . . . . . . . . . . . . . . . . . . . . . . . . . 122 Indicator lamp . . . . . . . . . . . . . . . . . . . . . . . 83
Warning lamp . . . . . . . . . . . . . . . . . . . . . . . 122
Tyre Mobility-System (Tyre repair kit) . . . . . . . 242
Tyre Mobility System (Tyre repair kit) . . . . . . . 248
Tyre pressure . . . . . . . . . . . . . . . . . . . . . . . . . . 233 Loss . . . . . . . . . . . . . . . . . . . . . . . . . . . . . . . 235
Tyre pressure monitoring . . . . . . . . . . . . . . . . . 234
Tyre pressures . . . . . . . . . . . . . . . . . . . . . . . . . . 272
Tyre pressure warning lamp . . . . . . . . . . . . . . . . 85
Tyre repair kit . . . . . . . . . . . . . . . . . . . . . . 242, 248
Tyres and wheels Dimensions . . . . . . . . . . . . . . . . . . . . . . . . . 238
Tyres service life . . . . . . . . . . . . . . . . . . . . . . . . 235
Tyres tread depth . . . . . . . . . . . . . . . . . . . . . . . 236
Tyres with directional tread pattern . . . . . . . . 233
U Underbody protection . . . . . . . . . . . . . . . . . . . 204
Unlocking and locking Personalisation . . . . . . . . . . . . . . . . . . . . . 100
V Vehicle battery . . . . . . . . . . . . . . . . . . . . . . . . . 230
Vehicle data . . . . . . . . . . . . . . . . . . . . . . . . . . . 270 Vehicle identification data . . . . . . . . . . . . . . . . 270
Vehicle identification number . . . . . . . . . . . . . 270
Vehicle modifications . . . . . . . . . . . . . . . . . . . 208
Vehicle paintwork
Maintenance . . . . . . . . . . . . . . . . . . . . . . . . 202
Products for vehicle maintenance . . . . . . . 199
Vehicle tools Storage . . . . . . . . . . . . . . . . . . . . . . . . . . . . 241
Vehicle washing . . . . . . . . . . . . . . . . . . . . . . . . 200
Ventilation slits . . . . . . . . . . . . . . . . . . . . . . . . . 17
Volumetric sensor* Activation . . . . . . . . . . . . . . . . . . . . . . . . . . 106
Deactivation . . . . . . . . . . . . . . . . . . . . . . . . 106
W Warning lamp . . . . . . . . . . . . . . . . . . . . . . . . . . . 32
Warning lamps . . . . . . . . . . . . . . . . . . . . . . . . . . 77
Warning messages in the display . . . . . . . . . . . 66
Warning reports Red . . . . . . . . . . . . . . . . . . . . . . . . . . . . . 66, 80
Yellow . . . . . . . . . . . . . . . . . . . . . . . . . . . 66, 80
Warning symbols . . . . . . . . . . . . . . . . . . . . . . . . 80
Warning triangle . . . . . . . . . . . . . . . . . . . . . . . . 142
Washer fluid . . . . . . . . . . . . . . . . . . . . . . . . . . . 226
Washing by hand . . . . . . . . . . . . . . . . . . . . . . . 200
Washing the vehicle . . . . . . . . . . . . . . . . . . . . . 200
Washing with high pressure cleaners . . . . . . . 201
Water Warning message . . . . . . . . . . . . . . . . . . . . . 67
Water in the windscreen washer tank . . . . . . . 226
Wear indicators . . . . . . . . . . . . . . . . . . . . . . . . 236 Wearing suitable shoes . . . . . . . . . . . . . . . . . . . 16
Wheel bolts . . . . . . . . . . . . . . . . . . . . . . . . 245, 272
Tightening torque . . . . . . . . . . . . . . . . . . . . 239
Wheel change . . . . . . . . . . . . . . . . . . . . . . . . . . 242
Wheels . . . . . . . . . . . . . . . . . . . . . . . . . . . 233, 272
Wheel trims . . . . . . . . . . . . . . . . . . . . . . . . . . . . 244
Why assume the correct sitting position? . . . . . 30
Why should head restraints be correctly adjus- ted? . . . . . . . . . . . . . . . . . . . . . . . . . . . . . . . . . 13
Why wear seat belts? . . . . . . . . . . . . . . . 19, 21, 30
Windows . . . . . . . . . . . . . . . . . . . . . . . . . . . . . . 110
Windscreen washer fluid Warning lamp . . . . . . . . . . . . . . . . . . . . . . . . 84
Windscreen wiper blades Cleaning . . . . . . . . . . . . . . . . . . . . . . . . . . . 203
Windscreen wipers . . . . . . . . . . . . . . . . . . . . . . 125 Changing the front blades . . . . . . . . . . . . . 227
Changing the rear wiper blade . . . . . . . . . 228
Winter driving Diesel engine . . . . . . . . . . . . . . . . . . . . . . . 216
Winter tyres . . . . . . . . . . . . . . . . . . . . . . . . . . . . 239
Wooden trim cleaning . . . . . . . . . . . . . . . . . . . 206
Working in the engine compartment . . . . . . . 217
298 Index