navigation system Seat Leon 5D 2012 MEDIA SYSTEM 2.2
[x] Cancel search | Manufacturer: SEAT, Model Year: 2012, Model line: Leon 5D, Model: Seat Leon 5D 2012Pages: 112, PDF Size: 2 MB
Page 89 of 112
88Telephone control (Phone)
Control from the navigation system
Telephone book
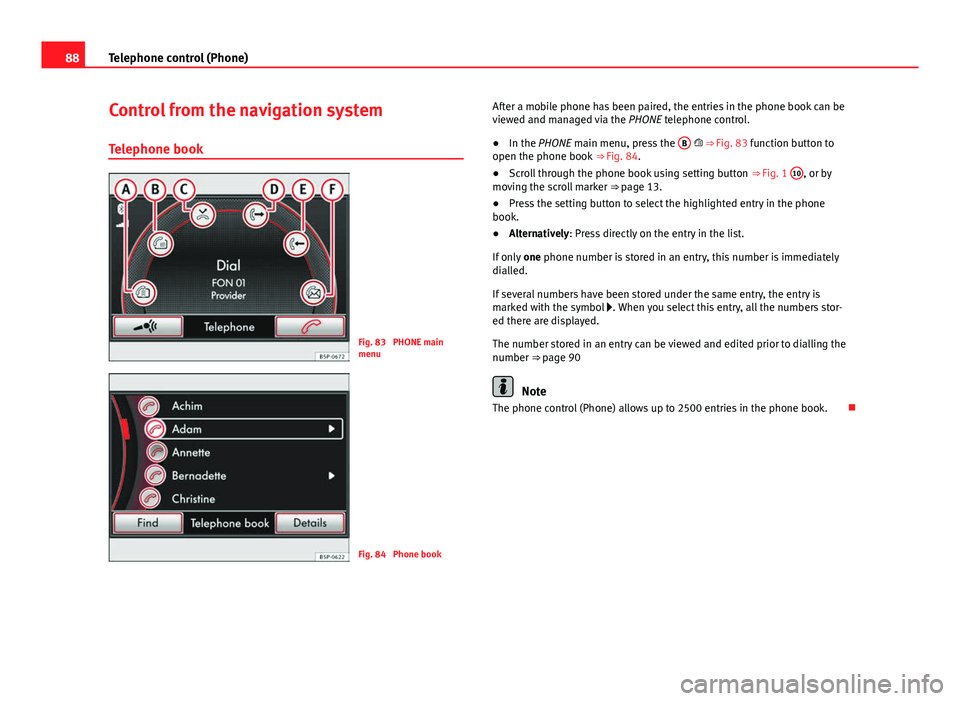
Fig. 83 PHONE main
menu
Fig. 84 Phone book After a mobile phone has been paired, the entries in the phone book can be
viewed and managed via the
PHONE telephone control.
● In the PHONE main menu, press the B
⇒ Fig. 83 function button to
open the phone book ⇒ Fig. 84.
● Scroll through the phone book using setting button ⇒ Fig. 1 10
, or by
moving the scroll marker ⇒ page 13.
● Press the setting button to select the highlighted entry in the phone
book.
● Alternatively: Press directly on the entry in the list.
If only one phone number is stored in an entry, this number is immediately
dialled.
If several numbers have been stored under the same entry, the entry is
marked with the symbol . When you select this entry, all the numbers stor-
ed there are displayed.
The number stored in an entry can be viewed and edited prior to dialling the
number ⇒ page 90
Note
The phone control (Phone) allows up to 2500 entries in the phone book.
Page 90 of 112
89
Telephone control (Phone)
Searching for an entry in the phone book
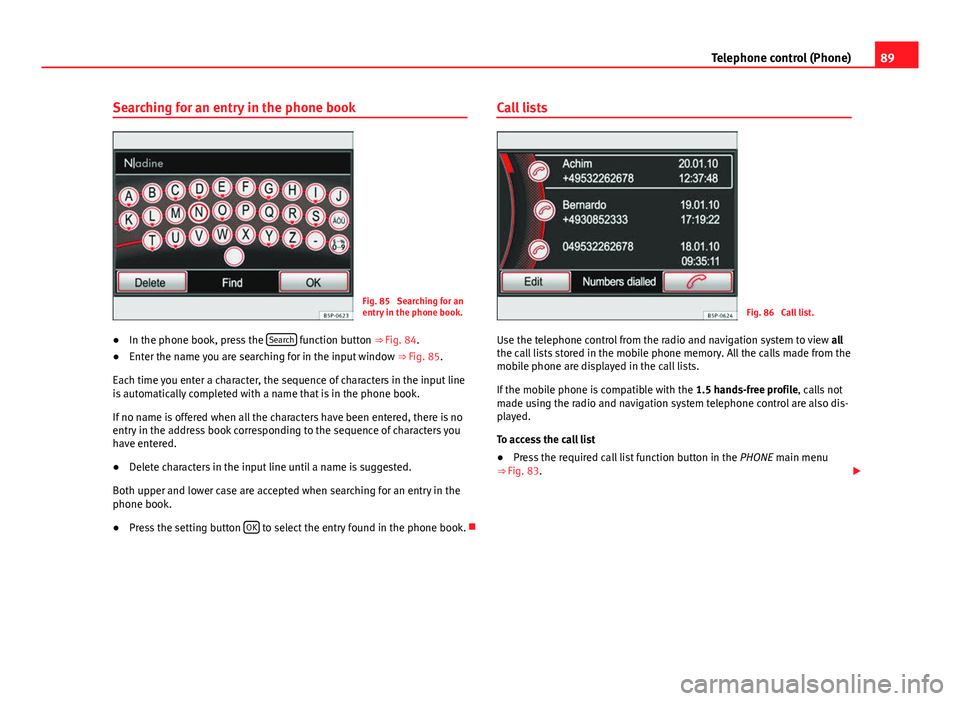
Fig. 85 Searching for an
entry in the phone book.
● In the phone book, press the Search
function button
⇒ Fig. 84.
● Enter the name you are searching for in the input window
⇒ Fig. 85.
Each time you enter a character, the sequence of characters in the input line
is automatically completed with a name that is in the phone book.
If no name is offered when all the characters have been entered, there is no
entry in the address book corresponding to the sequence of characters you
have entered.
● Delete characters in the input line until a name is suggested.
Both upper and lower case are accepted when searching for an entry in the
phone book.
● Press the setting button OK
to select the entry found in the phone book. Call lists
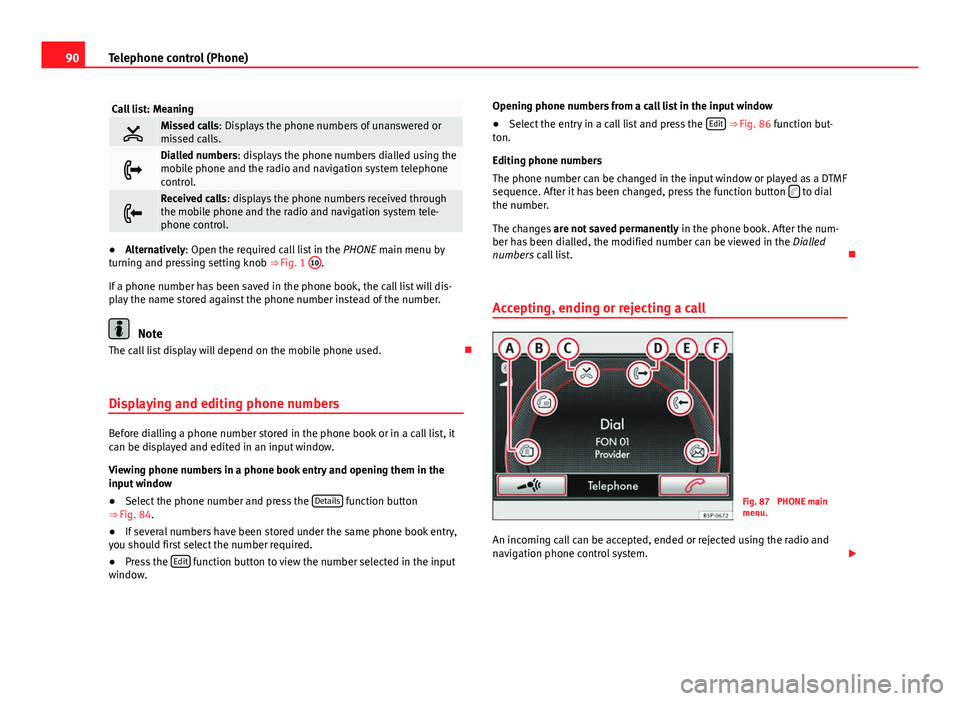
Fig. 86 Call list.
Use the telephone control from the radio and navigation system to view all
the call lists stored in the mobile phone memory. All the calls made from the
mobile phone are displayed in the call lists.
If the mobile phone is compatible with the 1.5 hands-free profile, calls not
made using the radio and navigation system telephone control are also dis-
played.
To access the call list
● Press the required call list function button in the PHONE main menu
⇒ Fig. 83.
Page 91 of 112
90Telephone control (Phone)
Call list: Meaning
Missed calls: Displays the phone numbers of unanswered or
missed calls.
Dialled numbers: displays the phone numbers dialled using the
mobile phone and the radio and navigation system telephone
control.
Received calls: displays the phone numbers received through
the mobile phone and the radio and navigation system tele-
phone control.
●Alternatively: Open the required call list in the PHONE main menu by
turning and pressing setting knob ⇒ Fig. 1 10.
If a phone number has been saved in the phone book, the call list will dis-
play the name stored against the phone number instead of the number.
Note
The call list display will depend on the mobile phone used.
Displaying and editing phone numbers
Before dialling a phone number stored in the phone book or in a call list, it
can be displayed and edited in an input window.
Viewing phone numbers in a phone book entry and opening them in the
input window
● Select the phone number and press the Details
function button
⇒ Fig. 84.
● If several numbers have been stored under the same phone book entry,
you should first select the number required.
● Press the Edit
function button to view the number selected in the input
window. Opening phone numbers from a call list in the input window
●
Select the entry in a call list and press the Edit
⇒ Fig. 86 function but-
ton.
Editing phone numbers
The phone number can be changed in the input window or played as a DTMF
sequence. After it has been changed, press the function button
to dial
the number.
The changes are not saved permanently in the phone book. After the num-
ber has been dialled, the modified number can be viewed in the Dialled
numbers call list.
Accepting, ending or rejecting a call
Fig. 87 PHONE main
menu.
An incoming call can be accepted, ended or rejected using the radio and
navigation phone control system.
Page 95 of 112
94Telephone control (Phone)
While one of the callers is connected, the other caller will be kept on hold.
● To end an active connection with a caller, press the function button
.
During an active conversation it is only possible to place one other caller on
hold at the same time.
Note
The “Call notification” function in the mobile phone must be activated.
Note
The behaviour of the “Alternate” function will depend on the hands-free
profile version The above functions require compatibility with the HFP 1.5
hands-free profile.
Making a conference call
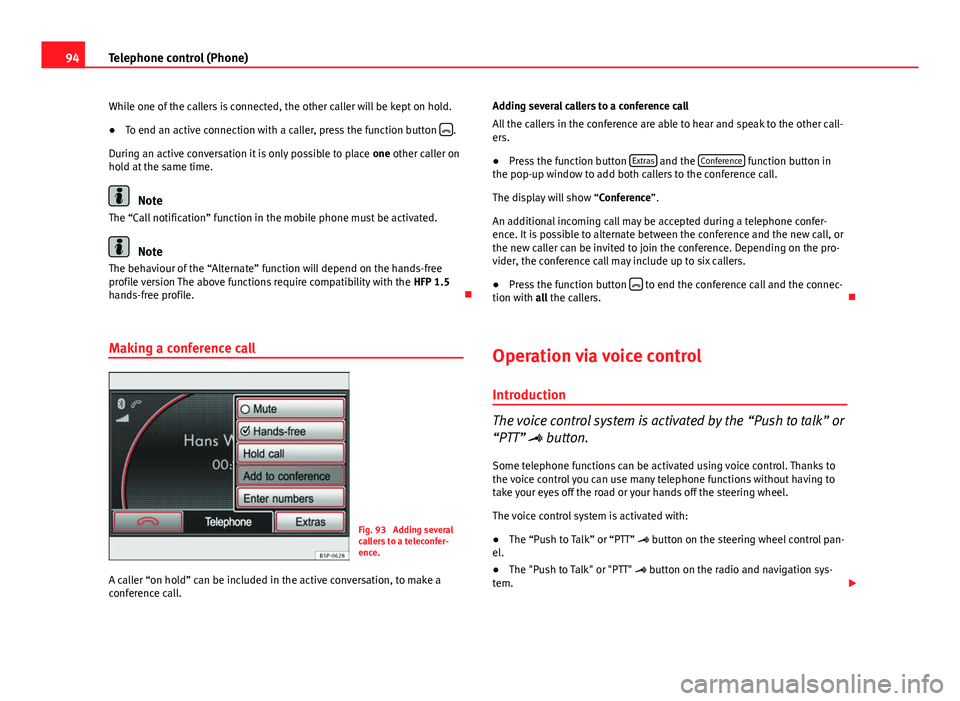
Fig. 93 Adding several
callers to a teleconfer-
ence.
A caller “on hold” can be included in the active conversation, to make a
conference call. Adding several callers to a conference call
All the callers in the conference are able to hear and speak to the other call-
ers.
●
Press the function button Extras
and the Conference function button in
the pop-up window to add both callers to the conference call.
The display will show “Conference”.
An additional incoming call may be accepted during a telephone confer-
ence. It is possible to alternate between the conference and the new call, or
the new caller can be invited to join the conference. Depending on the pro-
vider, the conference call may include up to six callers.
● Press the function button
to end the conference call and the connec-
tion with all the callers.
Operation via voice control
Introduction
The voice control system is activated by the “Push to talk” or
“PTT” button.
Some telephone functions can be activated using voice control. Thanks to
the voice control you can use many telephone functions without having to
take your eyes off the road or your hands off the steering wheel.
The voice control system is activated with:
● The “Push to Talk” or “PTT” button on the steering wheel control pan-
el.
● The "Push to Talk" or "PTT" button on the radio and navigation sys-
tem.
Page 96 of 112
95
Telephone control (Phone)
When the voice recognition system is activated, an increasing acoustic sig-
nal is heard. The recommendations in the next section ⇒ page 95, Correct
use of the voice control system must be observed for the system to operate
correctly.
DIALOGUE is the time during which the voice control system issues messag-
es and is able to receive spoken orders (commands or oral instructions). If a
call is received, then the dialogue is immediately interrupted.
TIMEOUT is the time that the radio and navigation system waits to receive
an instruction.
Assistance for any of the options available can be requested from any part
of the menu by using the voice instruction HELP. If the TIMEOUT expires and
the user has not given any voice instructions, the system will offer the avail-
able options.
You can CANCEL in any part of the menu.
Basic functions when using voice control
Volume adjustment
The volume can be adjusted at any moment using the navigation system
control button or the buttons on the steering wheel multifunction control.
Connecting voice control (Dialogue)
Briefly press the PTT button on the steering wheel multifunction control
to start the dialogue at any moment.
Briefly press the PTT button on the radio and navigation system to start
the dialogue at any moment.
An ascending acoustic signal indicates that the voice control system has
been activated. Voice instructions (Commands)
Start speaking after the sound signal (beep) which is heard after a DIA-
LOGUE.
If the system does not recognise a spoken instruction, an initial assistance
cue is given, with the available options, and the system waits for a new spo-
ken instruction. After the second failed attempt, the system repeats the sec-
ond part of the assistance cue. If the system still does not recognise the in-
struction on the third attempt, it replies “Process interrupted
” and ends the
dialogue.
Interrupting an on-going message
Briefly press the PTT button on the multifunction control or the naviga-
tion system during a dialogue to end the current message, and to give an-
other command.
Disconnecting voice control (Dialogue)
Briefly press the PTT button on the multifunction control or on the navi-
gation system to end the dialogue at any moment. Now it is possible to
leave the voice recognition system by giving the spoken instruction “CAN-
CEL”.
Press and hold the PTT button to leave the voice recognition system di-
rectly. The voice control system closes with a decreasing acoustic signal.
Correct use of the voice control system
Note the following to ensure that you are properly understood:
● Avoid speaking when the system is saying a cue. Wait for the tone at the
end of the DIALOGUE.
● Try to speak clearly.
● Speak in a normal tone and without pauses or exaggerated pronuncia-
tion.
Page 98 of 112
97
Telephone control (Phone)
“CALL + Name” command
With this COMMAND, the user requests a call to be made, and gives the
name of the person they wish to call. It is essential that the name is pro-
nounced exactly as it is stored in the mobile phone book.
“DIAL NUMBER” command
● With this COMMAND, the user requests a call to be made and gives the
number they wish to call.
● When this command is given, the system starts the DIALOGUE “Please
dial the number ”
● The system waits for a new COMMAND with the number to be dialled.
The telephone number can be entered as a sequence of clearly pronounced
figures (full number: 9 9 9 9 9 9 9), as a series of figures (brief pause be-
tween series: 9 9 9 - 9 9 9 - 9 9 9) or as individual figures (9 - 9 - 9 - 9 - 9).
After each series of figures (separation with a brief pause) the system re-
peats the figures to confirm it has correctly identified the numbers.
● If the user remains silent for a time (TIMEOUT T1), the system starts an
initial assistance cue with the DIALOGUE: “Please repeat”. If the user re-
mains silent for a time (T2), the system starts a second assistance cue with
the DIALOGUE: “The number, please”. If the user remains silent for a time
(T3), the system starts the DIALOGUE: “Operation cancelled. Main menu”.
“REDIAL” command
● With this COMMAND, the user asks to make a call using the last number
dialled.
● If there is a previous call, the redialling starts automatically.
● If there is no previous call, the DIALOGUE “No number available ” is star-
ted.
“OTHER OPTIONS” command
If the user remains silent for a time (TIMEOUT T1), the system starts an ini-
tial assistance cue with the DIALOGUE: “Please repeat”. If the user remains
silent for a time (T2), the system starts a second assistance cue with the
DIALOGUE: “The available commands are: phone book, call log, settings or help”. If the user remains silent for a time (T3), the system starts the DIA-
LOGUE: “Operation cancelled. Main menu”.
■ “HELP” command
■ DIALOGUE: “Say phone book, call log, settings or cancel ”
■ “PHONE BOOK ” command
■ This allows the user to lists all the contacts, select one to call or
store/delete its name by voice command.
■ DIALOGUE: “Say a name, list all or update ”.
■ T1: “Please repeat”.
■ T2: “The available commands are: read all, update phone book or
help”.
■ T3: “Operation cancelled. Main menu”.
■ “CALL LOG ” command
■ This lists the Received Calls, Missed Calls and Dialled Numbers.
■ T1: “Please repeat”.
■ T2: “Which call log do you wish to list? Received calls, missed
calls or dialled numbers ”.
■ T3: “Operation cancelled”.
■ “SETTINGS” command
■ T1: “Please repeat”.
■ T2: “The available commands are: short dialogue, long dialogue
or help ”.
■ T3: “Operation cancelled, main menu”.
Additional information
Voice control is available in several languages. The navigation system al-
lows the language to be changed using the SETUP menu. In this menu, the
user can select the option AUTO so that the language is automatically
changed, or they can select the required language. The language can also
be changed through the vehicle instrument panel using the steering wheel
multifunction controls ⇒ Booklet Instruction Manual.
Page 99 of 112
98Telephone control (Phone)
If the language selected through the instrument panel is available in the ra-
dio and navigation system, the language in both systems becomes the se-
lected language.
If the language is modified through the instrument panel, the selected lan-
guage may not be available in the radio and navigation system. In this case,
the voice recognition system uses the default language (defined according
to the country in which the vehicle is sold), and there may be different lan-
guages in each system. It is not a malfunction.
Page 100 of 112
99
Settings (SETUP)
Settings (SETUP)
Sound, volume and system settings
Introduction
Pressing the SETUP unit button first opens a
context-sensitive settings menu
for the currently selected mode.
Additional Information:
● Safety notes ⇒ page 6
● Unit overview ⇒ page 8
● Radio settings menu ⇒ page 14
● Media settings menu ⇒ page 29
● Navigation settings menu ⇒ page 64
● Phone settings menu ⇒ page 76 Sound and volume settings
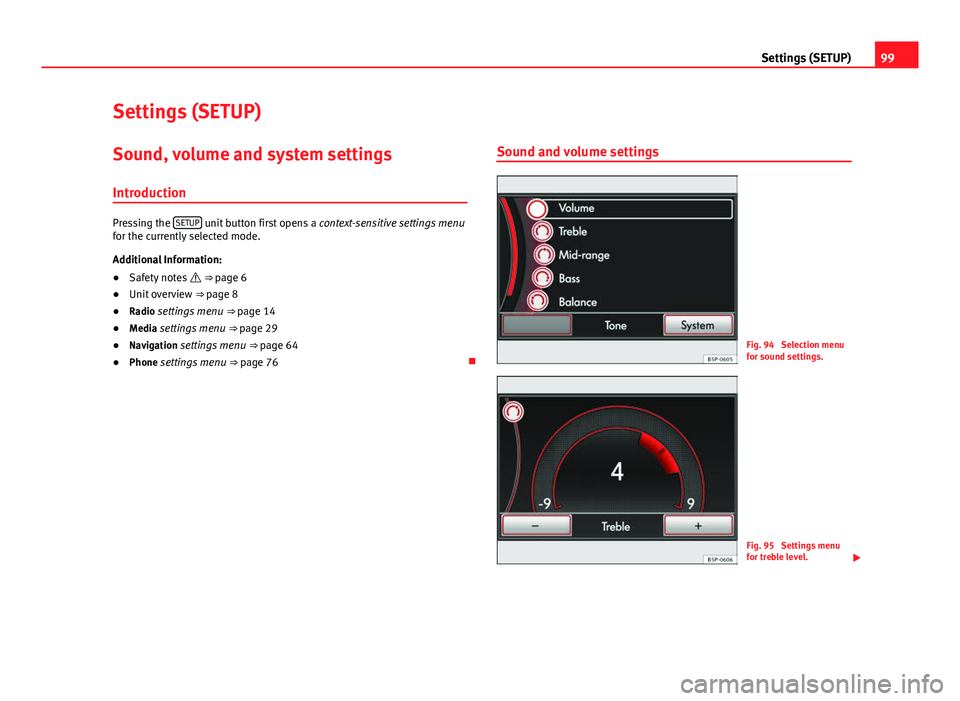
Fig. 94 Selection menu
for sound settings.
Fig. 95 Settings menu
for treble level.
Page 101 of 112
100Settings (SETUP)
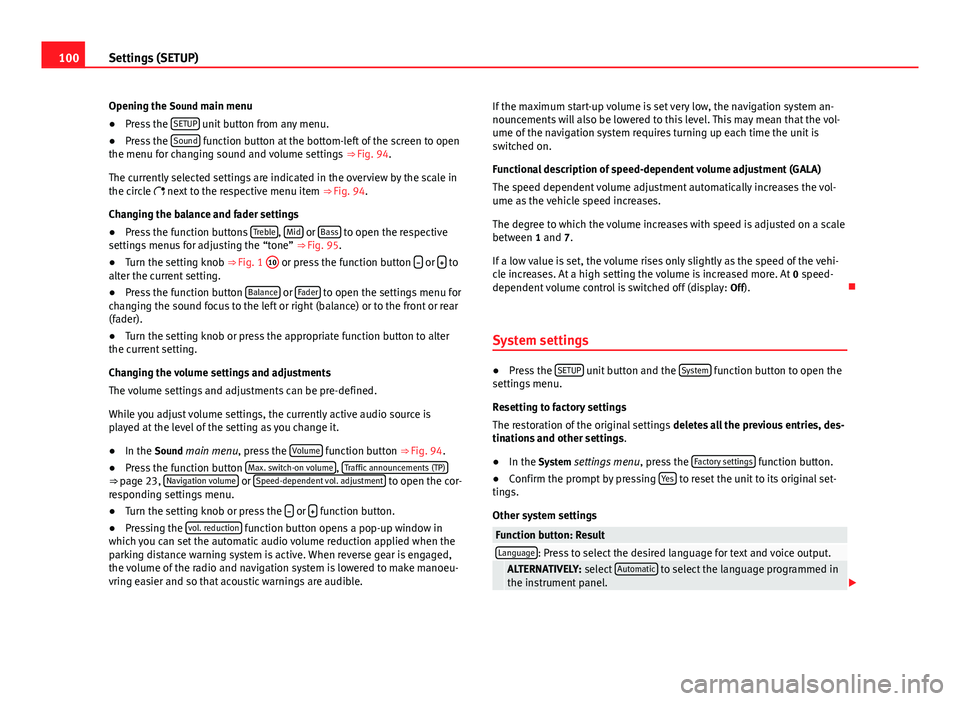
Opening the Sound main menu ● Press the SETUP
unit button from any menu.
● Press the Sound function button at the bottom-left of the screen to open
the menu for changing sound and volume settings ⇒ Fig. 94.
The currently selected settings are indicated in the overview by the scale in
the circle next to the respective menu item ⇒ Fig. 94.
Changing the balance and fader settings
● Press the function buttons Treble
, Mid or Bass to open the respective
settings menus for adjusting the “tone” ⇒ Fig. 95.
● Turn the setting knob ⇒ Fig. 1 10
or press the function button
or to
alter the current setting.
● Press the function button Balance
or Fader to open the settings menu for
changing the sound focus to the left or right (balance) or to the front or rear
(fader).
● Turn the setting knob or press the appropriate function button to alter
the current setting.
Changing the volume settings and adjustments
The volume settings and adjustments can be pre-defined.
While you adjust volume settings, the currently active audio source is
played at the level of the setting as you change it.
● In the Sound main menu, press the Volume
function button ⇒
Fig. 94.
● Press the function button Max. switch-on volume, Traffic announcements (TP)⇒ page 23, Navigation volume or Speed-dependent vol. adjustment to open the cor-
responding settings menu.
● Turn the setting knob or press the
or function button.
● Pressing the vol. reduction function button opens a pop-up window in
which you can set the automatic audio volume reduction applied when the
parking distance warning system is active. When reverse gear is engaged,
the volume of the radio and navigation system is lowered to make manoeu-
vring easier and so that acoustic warnings are audible. If the maximum start-up volume is set very low, the navigation system an-
nouncements will also be lowered to this level. This may mean that the vol-
ume of the navigation system requires turning up each time the unit is
switched on.
Functional description of speed-dependent volume adjustment (GALA)
The speed dependent volume adjustment automatically increases the vol-
ume as the vehicle speed increases.
The degree to which the volume increases with speed is adjusted on a scale
between 1 and 7.
If a low value is set, the volume rises only slightly as the speed of the vehi-
cle increases. At a high setting the volume is increased more. At
0 speed-
dependent volume control is switched off (display: Off).
System settings
● Press the SETUP unit button and the System function button to open the
settings menu.
Resetting to factory settings
The restoration of the original settings deletes all the previous entries, des-
tinations and other settings .
● In the System settings menu , press the Factory settings
function button.
● Confirm the prompt by pressing Yes to reset the unit to its original set-
tings.
Other system settings
Function button: ResultLanguage: Press to select the desired language for text and voice output. ALTERNATIVELY: select Automatic to select the language programmed in
the instrument panel.
Page 102 of 112
101
Settings (SETUP)
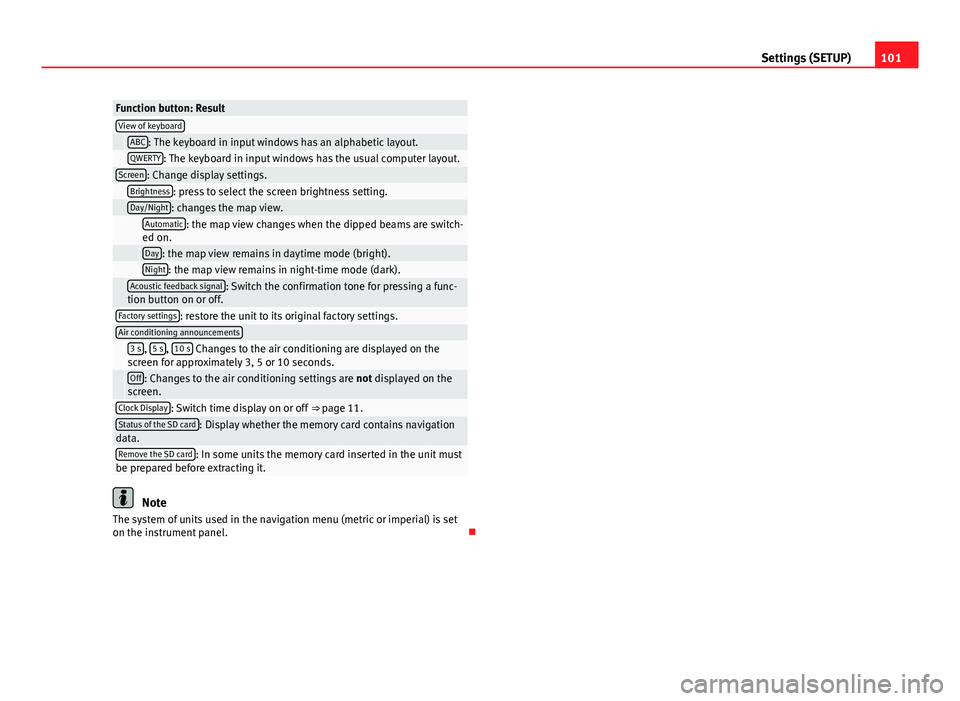
Function button: ResultView of keyboard ABC: The keyboard in input windows has an alphabetic layout. QWERTY: The keyboard in input windows has the usual computer layout.Screen: Change display settings. Brightness: press to select the screen brightness setting. Day/Night: changes the map view.
Automatic: the map view changes when the dipped beams are switch-
ed on.
Day: the map view remains in daytime mode (bright). Night: the map view remains in night-time mode (dark).
Acoustic feedback signal: Switch the confirmation tone for pressing a func-
tion button on or off.
Factory settings: restore the unit to its original factory settings.Air conditioning announcements
3 s, 5 s, 10 s Changes to the air conditioning are displayed on the
screen for approximately 3, 5 or 10 seconds.
Off: Changes to the air conditioning settings are not displayed on the
screen.
Clock Display: Switch time display on or off ⇒ page 11.Status of the SD card: Display whether the memory card contains navigation
data.
Remove the SD card: In some units the memory card inserted in the unit must
be prepared before extracting it.
Note
The system of units used in the navigation menu (metric or imperial) is set
on the instrument panel.