reset Seat Leon 5D 2013 MEDIA SYSTEM PLUS - NAVI SYSTEM
[x] Cancel search | Manufacturer: SEAT, Model Year: 2013, Model line: Leon 5D, Model: Seat Leon 5D 2013Pages: 72, PDF Size: 3 MB
Page 10 of 72
9IntroductionAdjusting the base volumeeffectuseIncrease the vol-ume.Turn the volume control clockwise or turn the rightroller upwards on the multifunction steering wheel⇒ Booklet Instruction manual.
Lower the vol-ume.Turn the volume control anticlockwise or turn the rightthumbwheel downwards on the multifunction steeringwheel.
The volume modification is shown on the screen with a bar. During this timethe unit cannot be operated.
It is possible to preset certain volume settings and adjustments⇒ page 64.
Silence the unit
●
Turn the volume control anticlockwise until you see .
●
OR: Press the MUTE infotainment button.
Note
If the basic playback volume of an audio source has been increased sub-stantially, lower the volume before changing to another audio source.
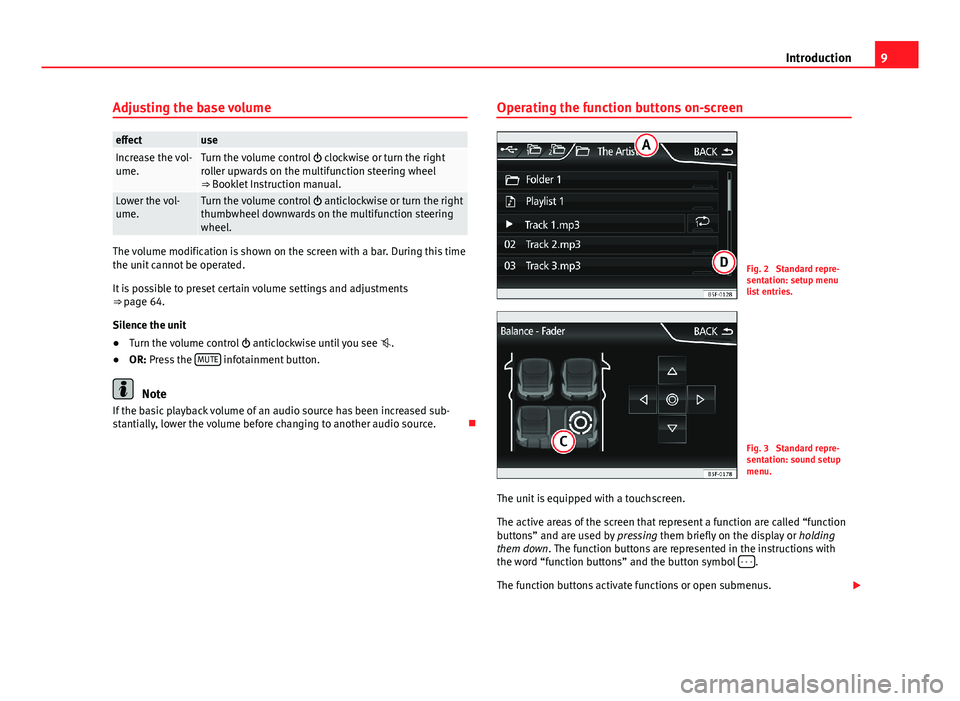
Operating the function buttons on-screenFig. 2
Standard repre-sentation: setup menulist entries.
Fig. 3
Standard repre-sentation: sound setupmenu.
The unit is equipped with a touchscreen.
The active areas of the screen that represent a function are called “functionbuttons” and are used by pressing them briefly on the display or holdingthem down. The function buttons are represented in the instructions withthe word “function buttons” and the button symbol - - -.
The function buttons activate functions or open submenus.
Page 16 of 72
15Audio modeThe station selected at that time is shown on the top line of the screen. Theblock selected is shown underneath it ⇒ Fig. 9.
Additional DAB stations
Some DAB stations temporarily or permanently offer additional pro-grammes, (for example, for broadcasting sports events). Additional stationsare selected in the same way as the conventional DAB stations. The DABmain menu shows the name of the additional station set under the name ofthe main DAB station. The additional stations cannot be stored.
Automatic station tracking: change from DAB to FM
In DAB setup/Advanced setup you can change to the FM frequency band forautomatic station tracking.
When the DAB station you are listening to can no longer be received (for ex-ample, due to DAB no longer being available), the unit will try to locate andtune in this station in the FM band frequency.
For station tracking across various frequencies, the DAB station and the FMstation must broadcast the same station code, or the station in FM that cor-responds to the equivalent in DAB, must be indicated through the DAB.
When a corresponding FM station is found, it will show FM after the stationname. When its DAB equivalent can be received again, it will change to DABmode after a certain time. The FM indication will disappear.
When the signal of a DAB station is very weak and its FM equivalent cannotbe found, the radio will be muted.
DAB displays
Press the function button View ⇒ Fig. 9 and select the additional service de-sired.
Function button View: effectPreset list: shows the stored station buttons.Station info: The radio text and slide show are displayed instead of the stor-ed station buttons in the lower half of the screen.Function button View: effectRadio text: The Radio text is displayed instead of the stored station buttonsin the lower half of the screen.Presentation: The slide show is displayed instead of the station buttons inthe lower half of the screen. Function known as Slideshow; the icon⇒ Fig. 13 will appear in the list of DAB stations.
Note
The radio stations are responsible for the content broadcast.
Stored station buttons
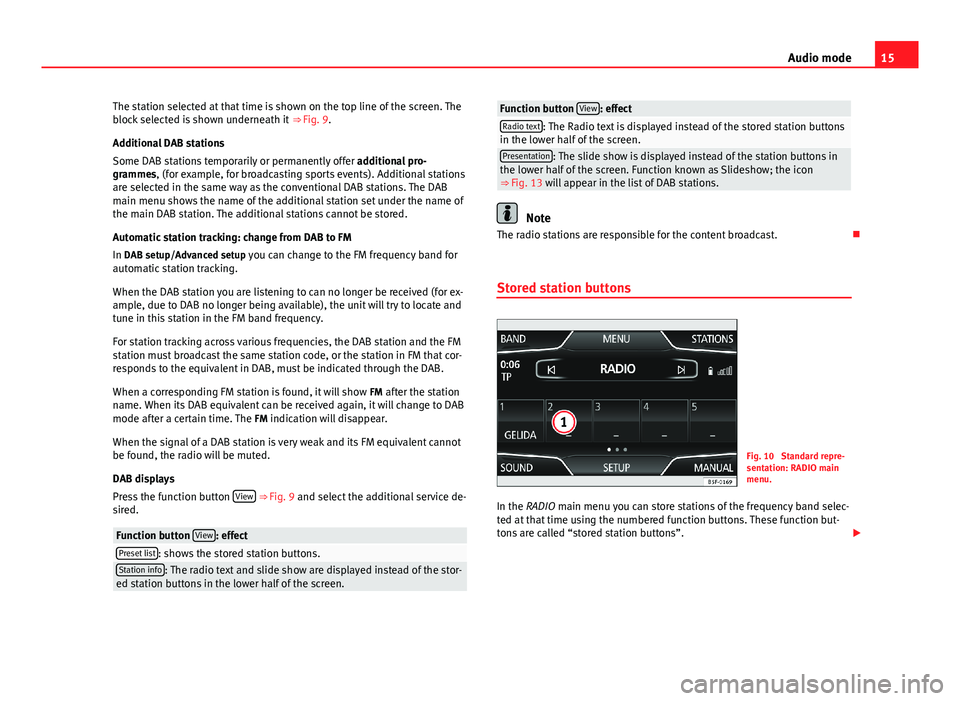
Fig. 10
Standard repre-sentation: RADIO mainmenu.
In the RADIO main menu you can store stations of the frequency band selec-ted at that time using the numbered function buttons. These function but-tons are called “stored station buttons”.
Page 19 of 72
18Audio modeBrowsing the fre-quency bandquickly
Place your finger on the slider in the frequency dial anddrag it along the dial.Hiding the fre-quency bandBriefly press the function button Manual.If you select a station with a stored station button, themanual selection of the frequency is also finalised. Ifyou do not do anything else, after a certain time the fre-quency band will close automatically.
Storing stations
Storing the sta-tion that you arelistening to inone of the storedstation buttons
Hold down the desired stored station button ⇒ Fig. 12until you hear the signal. The station that you are listen-ing to will be stored in this button.
Storing a stationfrom the list ofstations in one ofthe stored stationbuttons
Press the function button Stations ⇒ Fig. 12 to open thelist of stations.The stations already assigned to stored station buttonsare shown in the list of stations marked with the sym-bol ⇒ Fig. 13.Select the desired station holding it down on the dis-play until the screen for storing stations appears.Press the stored station button where you wish to savethe station. A signal will sound and the station will thenbe saved in this stored station button. The system auto-matically returns to the list.
Deleting a storedstationIn the menu Delete presets, available in the menu Radiosetup you can delete the stored stations one by one orall at once ⇒ page 20.
Scan function (SCAN)
When the scan function is running, all available stations on the current fre-quency band are played in sequence for around 5 seconds each.
Starting the scanfunctionBriefly press the setup button.OR: Press the function button Setup and then selectSCAN.
Stopping the scanfunctionPress the function button SCAN “crossed out” tostop the scan function on the station you are listen-ing to.OR: Briefly press the setup button.The scan function also ends when you manually se-lect a station using the stored station buttons, orwhen a traffic report comes in.
Autostore (automatic station storing)
Hold the RADIO button down for approximately 10 seconds to carry out theautostore function for the stations that can be tuned in at the time of run-ning the Autostore. The stations are saved in the stored station buttons.
Note
This function can take several minutes, during which time the radio will re-main muted. In addition, any stored stations assigned previously will be de-leted.
Page 21 of 72
20Audio modeIn FM mode, the station tuned in must have the TP function. If, after activat-ing the TP function, you manually select or use the stored station buttons toselect a station that does not have the TP function, it will not check if thereare traffic reports (display: TP crossed out).
When the traffic report station tuned in stops being received, TP crossed outwill also be displayed, and you must search for a station manually⇒ page 17.
During operation in AM or Media mode, a traffic report station is always setautomatically in the background, provided there is one that can be tuned in.Depending on your location, this process can take some time.
Reception of a traffic report
An incoming traffic report will interrupt the active audio mode.
During the broadcast of the traffic report a pop-up window will appear and,if necessary, the radio will change to the station of the traffic report (EON)for the duration of the broadcast.
Media mode is interrupted and the volume is adjusted according to the pre-set volume ⇒ page 64.
The traffic report volume may be modified with the volume control⇒ Fig. 1. The modified volume will be stored for future traffic reports.
●
Press the function button Cancel to end the current traffic report. The TPfunction remains switched on.
●
OR: Press the function button Deactivate to end the current traffic reportand deactivate the TP function. You can reactivate it in the menu SETUP⇒ page 20.
Setup (FM, AM, DAB)
FM setup
●
Select the frequency band FM by pressing the infotainment buttonRADIO.
●
Press the function button Setup to open the menu FM setup.
Function button: effectSound: sound setup ⇒ page 64.SCAN: scan function (SCAN). When the scan function is running, all availa-ble stations on the current frequency band are played in sequence foraround five seconds each ⇒ page 18.
Search mode: determines the setup of the buttons with arrows and .The setup will be saved for the current frequency band. Preset list: all stored stations on the selected frequency band can be se-lected with the arrow buttons. Stations: all available stations on the selected frequency band can beselected with the arrow buttons.Traffic Program (TP)*: TP function (traffic news monitoring) activated⇒ page 19.If the function button is deactivated (in grey), you must first activate thefunction button radio data system (RDS).
Delete presets: deletes the stored stations (all or separately). All: deletes all the stored stations (FM 1, FM 2, FM 3).To delete stations individually, select the desired preset: FM 1, FM 2 orFM 3. Then press the stored station button of the station to delete.
Managing logos: logos of stations that have been saved in the station but-tons may be assigned/deleted ⇒ page 16. Radio text: The Radio text is active. If the function button is deactivated(in grey), you must first activate it.Advanced setup*: setup of the radio data services RDS.
Page 22 of 72
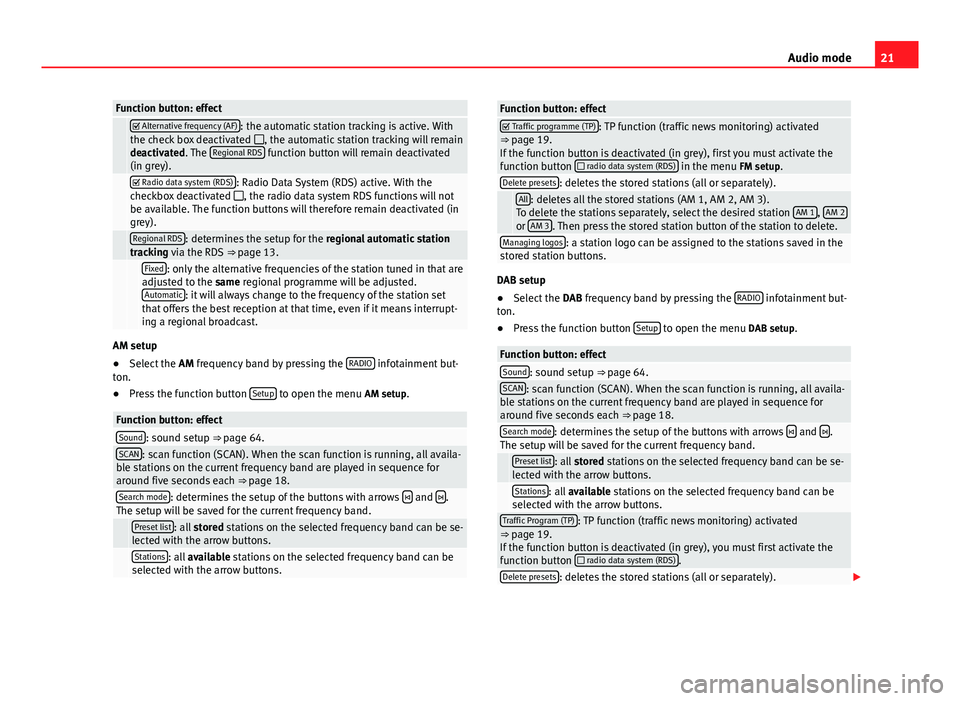
21Audio modeFunction button: effect Alternative frequency (AF): the automatic station tracking is active. Withthe check box deactivated , the automatic station tracking will remaindeactivated. The Regional RDS function button will remain deactivated(in grey).
Radio data system (RDS): Radio Data System (RDS) active. With thecheckbox deactivated , the radio data system RDS functions will notbe available. The function buttons will therefore remain deactivated (ingrey).
Regional RDS: determines the setup for the regional automatic stationtracking via the RDS ⇒ page 13. Fixed: only the alternative frequencies of the station tuned in that areadjusted to the same regional programme will be adjusted.Automatic: it will always change to the frequency of the station setthat offers the best reception at that time, even if it means interrupt-ing a regional broadcast.
AM setup
●
Select the AM frequency band by pressing the RADIO infotainment but-ton.
●
Press the function button Setup to open the menu AM setup.
Function button: effectSound: sound setup ⇒ page 64.SCAN: scan function (SCAN). When the scan function is running, all availa-ble stations on the current frequency band are played in sequence foraround five seconds each ⇒ page 18.
Search mode: determines the setup of the buttons with arrows and .The setup will be saved for the current frequency band. Preset list: all stored stations on the selected frequency band can be se-lected with the arrow buttons. Stations: all available stations on the selected frequency band can beselected with the arrow buttons.Function button: effect Traffic programme (TP): TP function (traffic news monitoring) activated⇒ page 19.If the function button is deactivated (in grey), first you must activate thefunction button radio data system (RDS) in the menu FM setup.
Delete presets: deletes the stored stations (all or separately). All: deletes all the stored stations (AM 1, AM 2, AM 3).To delete the stations separately, select the desired station AM 1, AM 2or AM 3. Then press the stored station button of the station to delete.
Managing logos: a station logo can be assigned to the stations saved in thestored station buttons.
DAB setup
●
Select the DAB frequency band by pressing the RADIO infotainment but-ton.
●
Press the function button Setup to open the menu DAB setup.
Function button: effectSound: sound setup ⇒ page 64.SCAN: scan function (SCAN). When the scan function is running, all availa-ble stations on the current frequency band are played in sequence foraround five seconds each ⇒ page 18.
Search mode: determines the setup of the buttons with arrows and .The setup will be saved for the current frequency band. Preset list: all stored stations on the selected frequency band can be se-lected with the arrow buttons. Stations: all available stations on the selected frequency band can beselected with the arrow buttons.Traffic Program (TP): TP function (traffic news monitoring) activated⇒ page 19.If the function button is deactivated (in grey), you must first activate thefunction button radio data system (RDS).
Delete presets: deletes the stored stations (all or separately).
Page 64 of 72
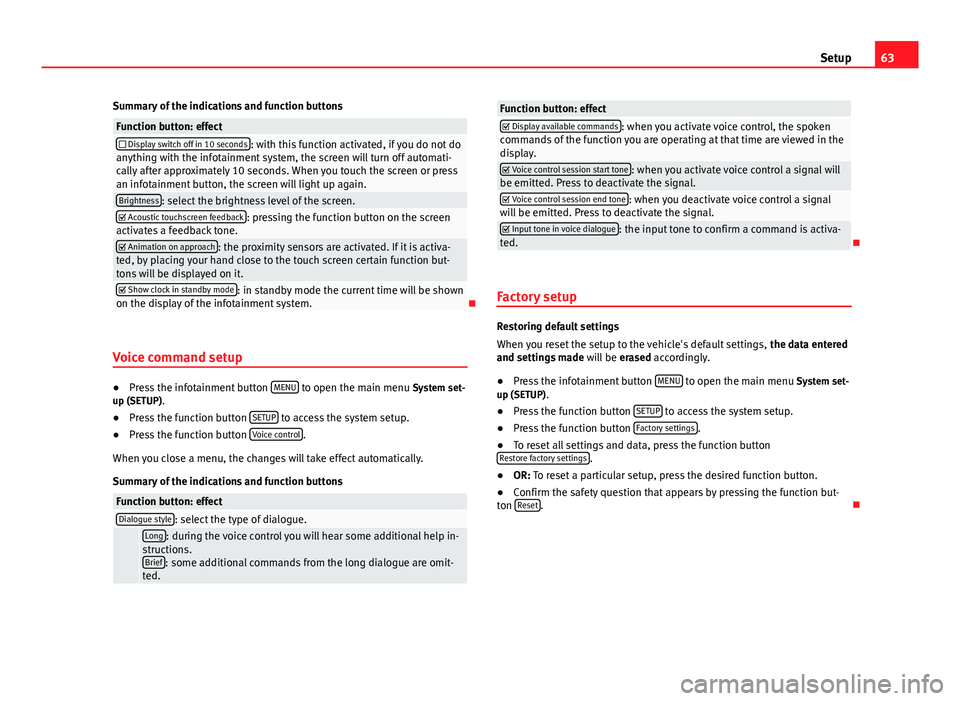
63SetupSummary of the indications and function buttonsFunction button: effect Display switch off in 10 seconds: with this function activated, if you do not doanything with the infotainment system, the screen will turn off automati-cally after approximately 10 seconds. When you touch the screen or pressan infotainment button, the screen will light up again.
Brightness: select the brightness level of the screen. Acoustic touchscreen feedback: pressing the function button on the screenactivates a feedback tone. Animation on approach: the proximity sensors are activated. If it is activa-ted, by placing your hand close to the touch screen certain function but-tons will be displayed on it.
Show clock in standby mode: in standby mode the current time will be shownon the display of the infotainment system.
Voice command setup
●
Press the infotainment button MENU to open the main menu System set-up (SETUP).
●
Press the function button SETUP to access the system setup.
●
Press the function button Voice control.
When you close a menu, the changes will take effect automatically.
Summary of the indications and function buttons
Function button: effectDialogue style: select the type of dialogue. Long: during the voice control you will hear some additional help in-structions.Brief: some additional commands from the long dialogue are omit-ted.
Function button: effect Display available commands: when you activate voice control, the spokencommands of the function you are operating at that time are viewed in thedisplay.
Voice control session start tone: when you activate voice control a signal willbe emitted. Press to deactivate the signal. Voice control session end tone: when you deactivate voice control a signalwill be emitted. Press to deactivate the signal. Input tone in voice dialogue: the input tone to confirm a command is activa-ted.
Factory setup
Restoring default settings
When you reset the setup to the vehicle's default settings, the data enteredand settings made will be erased accordingly.
●
Press the infotainment button MENU to open the main menu System set-up (SETUP).
●
Press the function button SETUP to access the system setup.
●
Press the function button Factory settings.
●
To reset all settings and data, press the function buttonRestore factory settings.
●
OR: To reset a particular setup, press the desired function button.
●
Confirm the safety question that appears by pressing the function but-ton Reset.