window Seat Leon 5D 2013 MEDIA SYSTEM PLUS - NAVI SYSTEM
[x] Cancel search | Manufacturer: SEAT, Model Year: 2013, Model line: Leon 5D, Model: Seat Leon 5D 2013Pages: 72, PDF Size: 3 MB
Page 11 of 72
10IntroductionThe function buttons that appear deactivated (in grey) may not be selectedat that time.Summary of the indications and function buttonsIndications and func-tionsAction and effectA ⇒ Fig. 2The title line shows the menu selected at thattime and, if applicable, other function buttons.
B ⇒ Fig. 4Press to open an additional menu.C
⇒ Fig. 3
Move the little cross around the screen pressinglightly, without resting your finger on it.Or: Press the desired destination on the screen;the cross will move to this position.
D ⇒ Fig. 2Move the control around the screen pressinglightly, without removing your finger.Briefly press to change progressively to lists atthe next level up.BACK Briefly press to return progressively to the mainmenu from a sub-menu, or to undo the changesmade.
Function activated Function deactiva-ted
Some functions or instructions appear to bemarked with a checkbox, and are activated or de-activated by touching them briefly.
OKBriefly press to confirm the data entered or to se-lect.XBriefly press to close a pop-up window or a dataentry screen.+ and -Briefly press to modify the setup progressively.
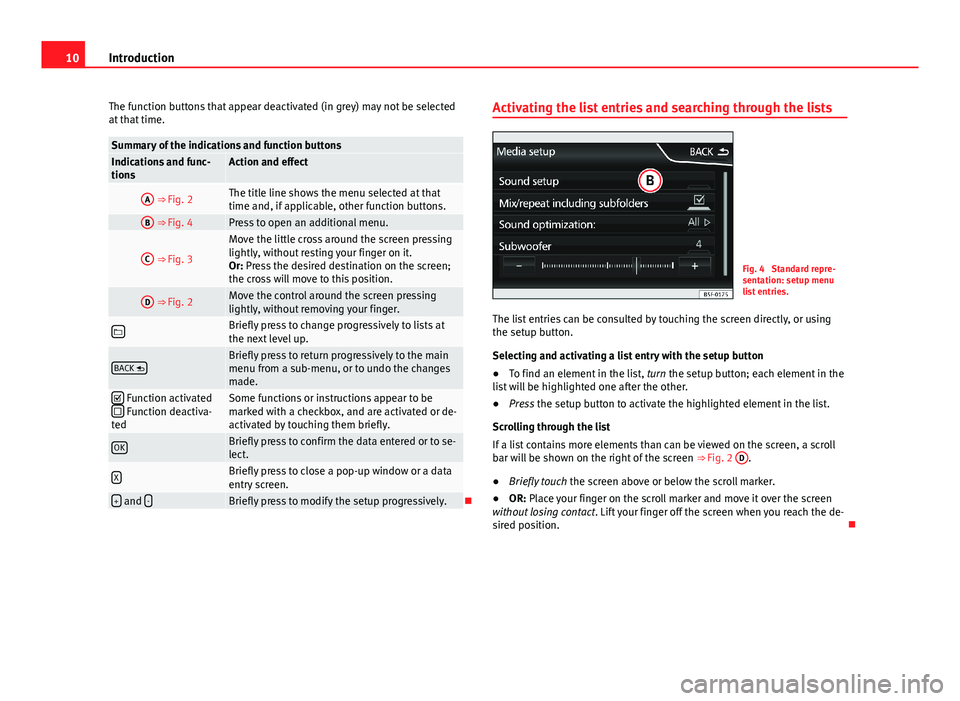
Activating the list entries and searching through the listsFig. 4
Standard repre-sentation: setup menulist entries.
The list entries can be consulted by touching the screen directly, or usingthe setup button.
Selecting and activating a list entry with the setup button
●
To find an element in the list, turn the setup button; each element in thelist will be highlighted one after the other.
●
Press the setup button to activate the highlighted element in the list.
Scrolling through the list
If a list contains more elements than can be viewed on the screen, a scrollbar will be shown on the right of the screen ⇒ Fig. 2
D
.
●
Briefly touch the screen above or below the scroll marker.
●
OR: Place your finger on the scroll marker and move it over the screenwithout losing contact. Lift your finger off the screen when you reach the de-sired position.
Page 13 of 72
12Audio modeAudio modeRadio mode
Introduction
Note
●Multi-storey car parks, tunnels, high buildings and mountains can im-pair radio signals.●
Foil or metal-coated stickers attached to the windows may affect recep-tion on vehicles with a window aerial.
RADIO main menu
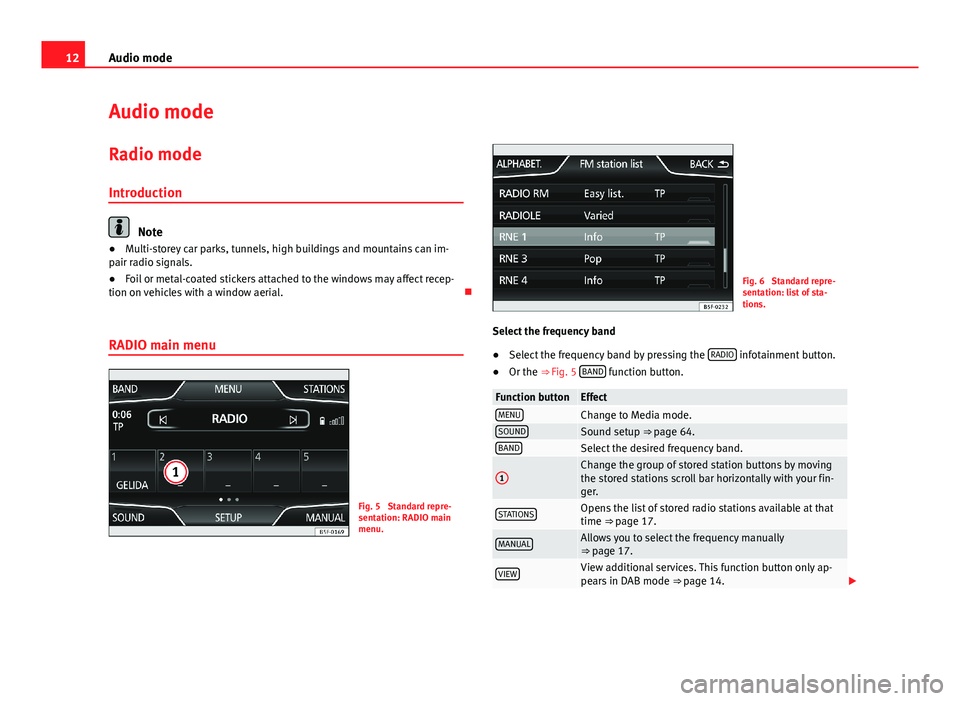
Fig. 5
Standard repre-sentation: RADIO mainmenu.
Fig. 6
Standard repre-sentation: list of sta-tions.
Select the frequency band
●
Select the frequency band by pressing the RADIO infotainment button.
●
Or the ⇒ Fig. 5 BAND function button.
Function buttonEffectMENUChange to Media mode.SOUNDSound setup ⇒ page 64.BANDSelect the desired frequency band.1Change the group of stored station buttons by movingthe stored stations scroll bar horizontally with your fin-ger.
STATIONSOpens the list of stored radio stations available at thattime ⇒ page 17.MANUALAllows you to select the frequency manually⇒ page 17.VIEWView additional services. This function button only ap-pears in DAB mode ⇒ page 14.
Page 21 of 72
20Audio modeIn FM mode, the station tuned in must have the TP function. If, after activat-ing the TP function, you manually select or use the stored station buttons toselect a station that does not have the TP function, it will not check if thereare traffic reports (display: TP crossed out).
When the traffic report station tuned in stops being received, TP crossed outwill also be displayed, and you must search for a station manually⇒ page 17.
During operation in AM or Media mode, a traffic report station is always setautomatically in the background, provided there is one that can be tuned in.Depending on your location, this process can take some time.
Reception of a traffic report
An incoming traffic report will interrupt the active audio mode.
During the broadcast of the traffic report a pop-up window will appear and,if necessary, the radio will change to the station of the traffic report (EON)for the duration of the broadcast.
Media mode is interrupted and the volume is adjusted according to the pre-set volume ⇒ page 64.
The traffic report volume may be modified with the volume control⇒ Fig. 1. The modified volume will be stored for future traffic reports.
●
Press the function button Cancel to end the current traffic report. The TPfunction remains switched on.
●
OR: Press the function button Deactivate to end the current traffic reportand deactivate the TP function. You can reactivate it in the menu SETUP⇒ page 20.
Setup (FM, AM, DAB)
FM setup
●
Select the frequency band FM by pressing the infotainment buttonRADIO.
●
Press the function button Setup to open the menu FM setup.
Function button: effectSound: sound setup ⇒ page 64.SCAN: scan function (SCAN). When the scan function is running, all availa-ble stations on the current frequency band are played in sequence foraround five seconds each ⇒ page 18.
Search mode: determines the setup of the buttons with arrows and .The setup will be saved for the current frequency band. Preset list: all stored stations on the selected frequency band can be se-lected with the arrow buttons. Stations: all available stations on the selected frequency band can beselected with the arrow buttons.Traffic Program (TP)*: TP function (traffic news monitoring) activated⇒ page 19.If the function button is deactivated (in grey), you must first activate thefunction button radio data system (RDS).
Delete presets: deletes the stored stations (all or separately). All: deletes all the stored stations (FM 1, FM 2, FM 3).To delete stations individually, select the desired preset: FM 1, FM 2 orFM 3. Then press the stored station button of the station to delete.
Managing logos: logos of stations that have been saved in the station but-tons may be assigned/deleted ⇒ page 16. Radio text: The Radio text is active. If the function button is deactivated(in grey), you must first activate it.Advanced setup*: setup of the radio data services RDS.
Page 28 of 72
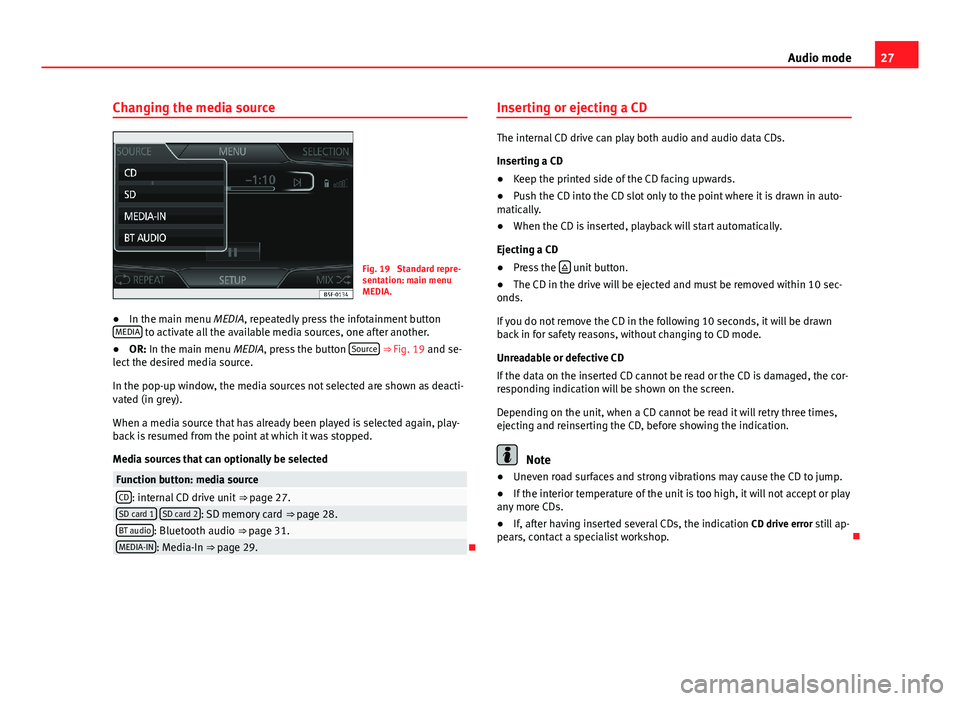
27Audio modeChanging the media sourceFig. 19
Standard repre-sentation: main menuMEDIA.
●
In the main menu MEDIA, repeatedly press the infotainment buttonMEDIA to activate all the available media sources, one after another.
●
OR: In the main menu MEDIA, press the button Source ⇒ Fig. 19 and se-lect the desired media source.
In the pop-up window, the media sources not selected are shown as deacti-vated (in grey).
When a media source that has already been played is selected again, play-back is resumed from the point at which it was stopped.
Media sources that can optionally be selected
Function button: media sourceCD: internal CD drive unit ⇒ page 27.SD card 1 SD card 2: SD memory card ⇒ page 28.BT audio: Bluetooth audio ⇒ page 31.MEDIA-IN: Media-In ⇒ page 29.
Inserting or ejecting a CD
The internal CD drive can play both audio and audio data CDs.
Inserting a CD
●
Keep the printed side of the CD facing upwards.
●
Push the CD into the CD slot only to the point where it is drawn in auto-matically.
●
When the CD is inserted, playback will start automatically.
Ejecting a CD
●
Press the unit button.
●
The CD in the drive will be ejected and must be removed within 10 sec-onds.
If you do not remove the CD in the following 10 seconds, it will be drawnback in for safety reasons, without changing to CD mode.
Unreadable or defective CD
If the data on the inserted CD cannot be read or the CD is damaged, the cor-responding indication will be shown on the screen.
Depending on the unit, when a CD cannot be read it will retry three times,ejecting and reinserting the CD, before showing the indication.
Note
●Uneven road surfaces and strong vibrations may cause the CD to jump.●
If the interior temperature of the unit is too high, it will not accept or playany more CDs.
●
If, after having inserted several CDs, the indication CD drive error still ap-pears, contact a specialist workshop.
Page 40 of 72
39NavigationNote●If you miss a turning during route guidance and are currently unable toturn back, keep on driving until the navigation system offers a new route.●
The quality of the instructions given by the unit will depend on the navi-gation data available and the traffic reports received.
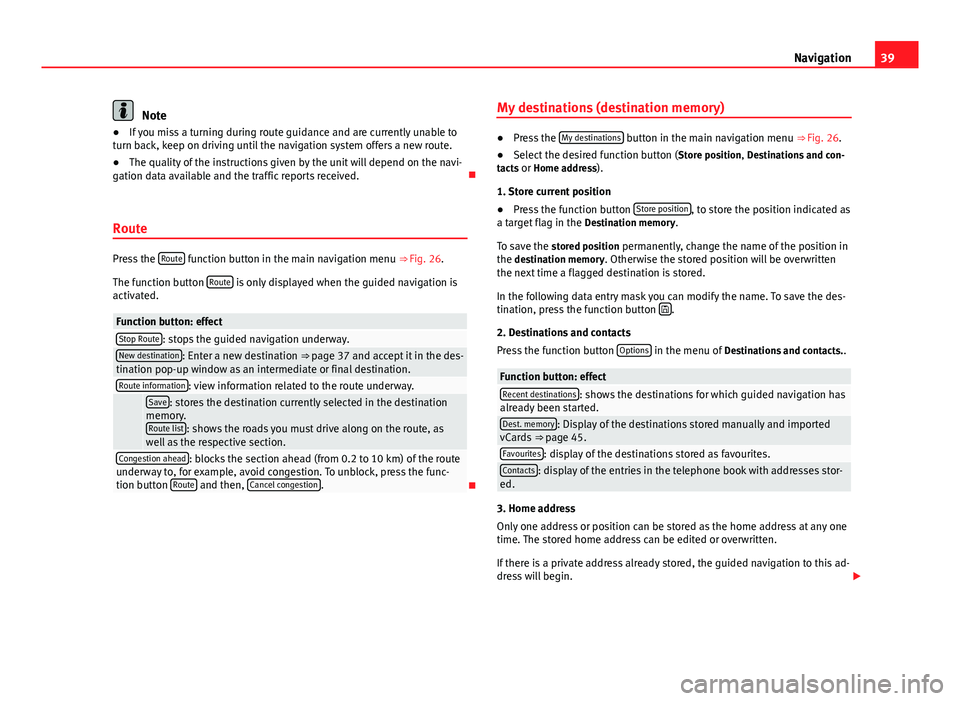
Route
Press the Route function button in the main navigation menu ⇒ Fig. 26.
The function button Route is only displayed when the guided navigation isactivated.
Function button: effectStop Route: stops the guided navigation underway.New destination: Enter a new destination ⇒ page 37 and accept it in the des-tination pop-up window as an intermediate or final destination.Route information: view information related to the route underway. Save: stores the destination currently selected in the destinationmemory.Route list: shows the roads you must drive along on the route, aswell as the respective section.
Congestion ahead: blocks the section ahead (from 0.2 to 10 km) of the routeunderway to, for example, avoid congestion. To unblock, press the func-tion button Route and then, Cancel congestion.
My destinations (destination memory)●
Press the My destinations button in the main navigation menu ⇒ Fig. 26.
●
Select the desired function button (Store position, Destinations and con-tacts or Home address).
1. Store current position
●
Press the function button Store position, to store the position indicated asa target flag in the Destination memory.
To save the stored position permanently, change the name of the position inthe destination memory. Otherwise the stored position will be overwrittenthe next time a flagged destination is stored.
In the following data entry mask you can modify the name. To save the des-tination, press the function button .
2. Destinations and contacts
Press the function button Options in the menu of Destinations and contacts..
Function button: effectRecent destinations: shows the destinations for which guided navigation hasalready been started.Dest. memory: Display of the destinations stored manually and importedvCards ⇒ page 45.Favourites: display of the destinations stored as favourites.Contacts: display of the entries in the telephone book with addresses stor-ed.
3. Home address
Only one address or position can be stored as the home address at any onetime. The stored home address can be edited or overwritten.
If there is a private address already stored, the guided navigation to this ad-dress will begin.
Page 42 of 72
41NavigationFunction button: effect Save: stores the selected point of interest in the destination memo-ry.Dial nr.b): establishes a telephone connection to the number as-signed to the point of interest.Start: starts guided navigation at the selected point of interest.
Find: search for a point of interest by entering its name.a)
The function button is displayed only when guided navigation is activated.
b)
The function button is only displayed when the point of interest contains a telephone num-ber.
View
●
Press the View function button in the main navigation menu ⇒ Fig. 29.
Function button: effect2D: two-dimensional representation of the map, from above (conven-tional).3D: three-dimensional representation of the map, tilted from above(bird's eye view).a): view the final destination on the map.a): view the whole journey on the map.Day/Night: alternate between day and night view.Additional window: press to view the split screen ⇒ page 41. The splitscreen can also be shown or hidden by pressing the infotainment buttonNAV.
a)
The function button is displayed only when guided navigation is activated.
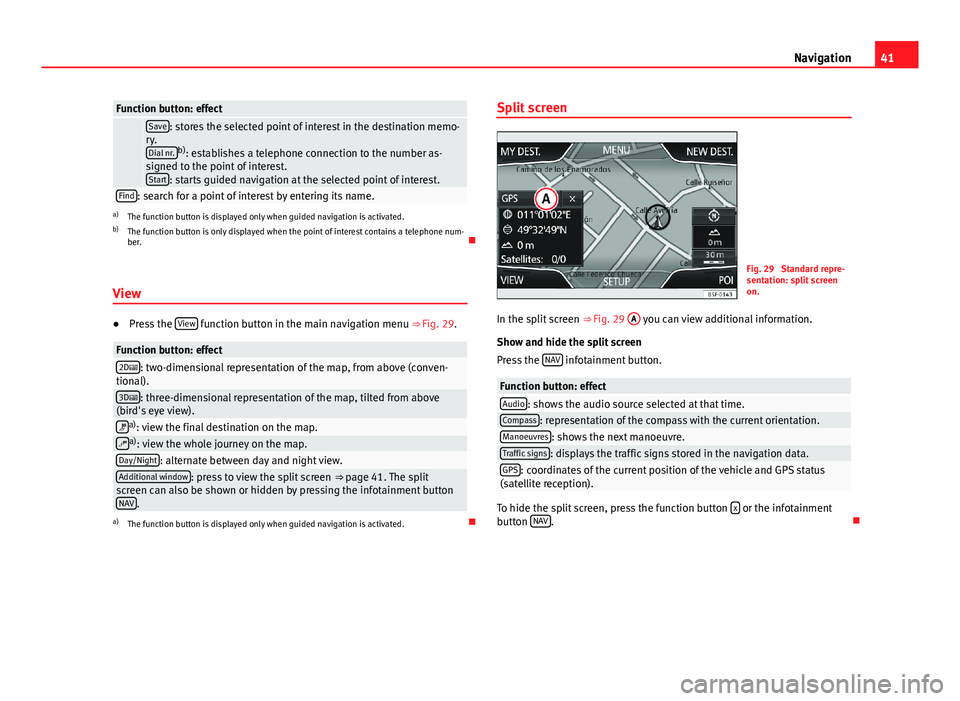
Split screenFig. 29
Standard repre-sentation: split screenon.
In the split screen ⇒ Fig. 29
A
you can view additional information.
Show and hide the split screen
Press the NAV infotainment button.
Function button: effectAudio: shows the audio source selected at that time.Compass: representation of the compass with the current orientation.Manoeuvres: shows the next manoeuvre.Traffic signs: displays the traffic signs stored in the navigation data.GPS: coordinates of the current position of the vehicle and GPS status(satellite reception).
To hide the split screen, press the function button x or the infotainmentbutton NAV.
Page 44 of 72
43Navigationwith traffic. The quality of the dynamic route guidance depends on the infor-mation contained in the TMC traffic reports. The radio stations broadcastingthis information are responsible for the content.
The route to cover can also be blocked manually to force a new route to becalculated ⇒ page 39.
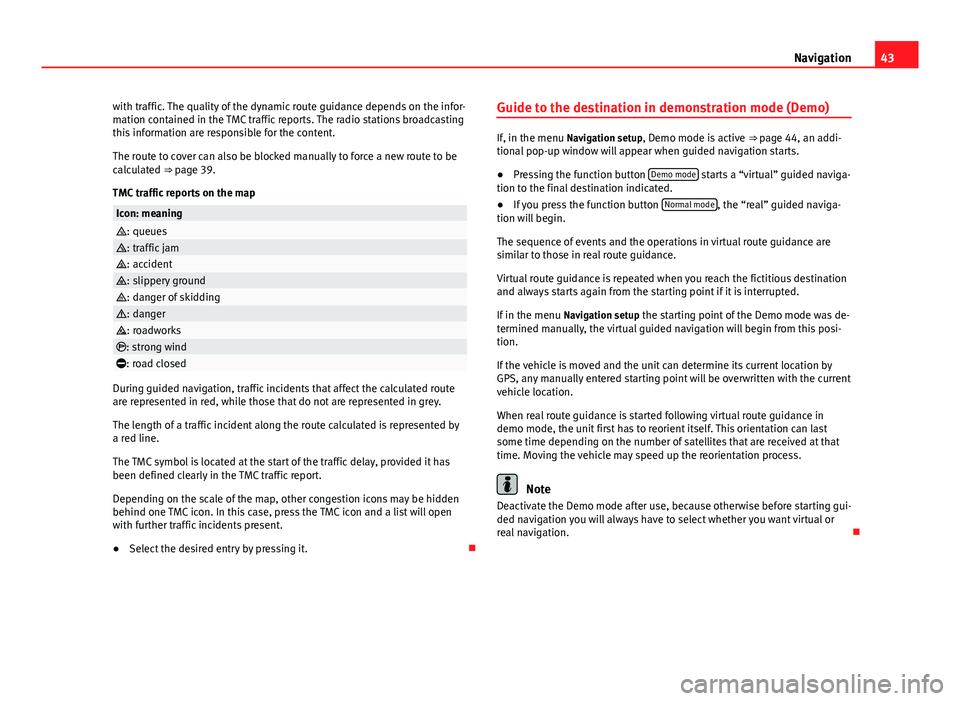
TMC traffic reports on the map
Icon: meaning: queues: traffic jam: accident: slippery ground: danger of skidding: danger: roadworks: strong wind: road closed
During guided navigation, traffic incidents that affect the calculated routeare represented in red, while those that do not are represented in grey.
The length of a traffic incident along the route calculated is represented bya red line.
The TMC symbol is located at the start of the traffic delay, provided it hasbeen defined clearly in the TMC traffic report.
Depending on the scale of the map, other congestion icons may be hiddenbehind one TMC icon. In this case, press the TMC icon and a list will openwith further traffic incidents present.
●
Select the desired entry by pressing it.
Guide to the destination in demonstration mode (Demo)
If, in the menu Navigation setup, Demo mode is active ⇒ page 44, an addi-tional pop-up window will appear when guided navigation starts.
●
Pressing the function button Demo mode starts a “virtual” guided naviga-tion to the final destination indicated.
●
If you press the function button Normal mode, the “real” guided naviga-tion will begin.
The sequence of events and the operations in virtual route guidance aresimilar to those in real route guidance.
Virtual route guidance is repeated when you reach the fictitious destinationand always starts again from the starting point if it is interrupted.
If in the menu Navigation setup the starting point of the Demo mode was de-termined manually, the virtual guided navigation will begin from this posi-tion.
If the vehicle is moved and the unit can determine its current location byGPS, any manually entered starting point will be overwritten with the currentvehicle location.
When real route guidance is started following virtual route guidance indemo mode, the unit first has to reorient itself. This orientation can lastsome time depending on the number of satellites that are received at thattime. Moving the vehicle may speed up the reorientation process.
Note
Deactivate the Demo mode after use, because otherwise before starting gui-ded navigation you will always have to select whether you want virtual orreal navigation.
Page 54 of 72
53Telephone management (PHONE)Setup of voice control ⇒ page 63.
When you activate voice control, you can choose which text and icons takeon the colour of the different functions:
●
Red (RADIO and MEDIA) ⇒ page 54 and ⇒ page 54
●
Green (PHONE) ⇒ page 54
●
Blue (NAV) ⇒ page 54
Start and stop the voice control
●
To activate the voice control, briefly press the button on the multi-func-tion steering wheel . It can also be activated with the VOICE button in theMIB.
●
When voice control is activated there will be an ascending acoustic sig-nal and a main command menu will be displayed within the function (themenu will be displayed if option ⇒ page 63 is activated in the voice con-trol setup). The spoken instructions will guide you through the following“dialogue”.
●
Pronounce the desired order and follow the instructions of the “dia-logue”. A function can often be activated with different spoken commands.In case of doubt, try to give a command. Due to the quantity of commandsthe system can admit, this manual only includes the most important ones.
●
When an action is carried out (e.g. calling a contact), the voice controlautomatically deactivates and must be reactivated when needed again.There are certain commands after which the voice control does not end andwaits with What do you wish to do now?.
●
To end voice control manually, keep the button pressed on the multi-function steering wheel until you hear the corresponding confirmation (de-scending sound), or press the button in the display. You can also brieflypress the VOICE button twice to deactivate voice control. (Voice control isdeactivated in the following ways: by briefly pressing the VOICE button orCommand on the steering wheel twice; or by pressing VOICE or Commandon the steering wheel for a few moments, and touching the screen or anybutton on the radio).
Help with voice control
The first time you use the voice control, listen to the Help.
●
Press the function button .
●
Give the “Help” command in the language established in the Systemsetup, and follow the dialogue instructions.
Operation during the dialogue
While the infotainment system transmits a spoken indication, the displaywill show the symbol .
●
Briefly press the button on the multi-function steering wheel to inter-rupt the spoken indication of the infotainment system and give the nextcommand.
IMPORTANT: The system will ONLY recognise a command when the sym-bol is displayed as “active” on the display or touch screen.
If you make a mistake when giving a command or give an incomplete com-mand, and it has no effect, you can repeat the command. The symbol remains active.
●
Briefly press the button of the multi-function steering wheel to repeatthe command.
Instructions for voice control
For optimum functioning of the voice control, follow these instructions:
●
Speak slowly and clearly, as far as possible. The system will not recog-nise words pronounced unclearly, or words and figures in which syllablesare omitted.
●
Telephone numbers must be indicated figure by figure or in blocks ofnumbers in units, tens or hundreds.
●
Speak at a normal volume, without exaggerated intonation or long pau-ses.
●
Avoid noise from the exterior and nearby (for example, conversations in-side the vehicle). Close all doors, windows and the sliding roof.
Page 69 of 72
MEDIA . . . . . . . . . . . . . . . . . . . . . . . . . . . . . . . . . 23Audio data CD . . . . . . . . . . . . . . . . . . . . . . . . 23AUX-IN multimedia socket . . . . . . . . . . . . . . 28back . . . . . . . . . . . . . . . . . . . . . . . . . . . . . . . . 32bit rate . . . . . . . . . . . . . . . . . . . . . . . . . . . . . . 23Bluetooth audio . . . . . . . . . . . . . . . . . . . . . . 31CD mode . . . . . . . . . . . . . . . . . . . . . . . . . . . . 27changing the media source . . . . . . . . . . . . . 27changing tracks . . . . . . . . . . . . . . . . . . . . . . 32Display information . . . . . . . . . . . . . . . . . . . 25forward . . . . . . . . . . . . . . . . . . . . . . . . . . . . . 32instructions . . . . . . . . . . . . . . . . . . . . . . . . . . 23Main menu . . . . . . . . . . . . . . . . . . . . . . . . . . 25MP3 files . . . . . . . . . . . . . . . . . . . . . . . . . . . . 23playing order . . . . . . . . . . . . . . . . . . . . . . . . 24Playlists . . . . . . . . . . . . . . . . . . . . . . . . . . . . . 24requirements . . . . . . . . . . . . . . . . . . . . . . . . 23selecting a track from the list . . . . . . . . . . . 33selecting tracks . . . . . . . . . . . . . . . . . . . . . . 32Setup . . . . . . . . . . . . . . . . . . . . . . . . . . . . . . . 33Unreadable CD . . . . . . . . . . . . . . . . . . . . . . . 27WMA files . . . . . . . . . . . . . . . . . . . . . . . . . . . 23
MEDIA-IN . . . . . . . . . . . . . . . . . . . . . . . . . . . . . . . 29
MEDIA-IN multimedia interface . . . . . . . . . . . . . 29
Media sources . . . . . . . . . . . . . . . . . . . . . . . . . . 25
Medium wave . . . . . . . . . . . . . . . . . . . . . . . . . . . 65
Memory card (SD card) . . . . . . . . . . . . . . . . . . . 28
Midrange . . . . . . . . . . . . . . . . . . . . . . . . . . . . . . . 64
Mute . . . . . . . . . . . . . . . . . . . . . . . . . . . . . . . . . . . 9
N
Navigation setup . . . . . . . . . . . . . . . . . . . . . . . . 44
NAV (navigation) . . . . . . . . . . . . . . . . . . . . . . . . 35destination memory . . . . . . . . . . . . . . . . . . . 39entering the destination . . . . . . . . . . . . . . . 37guide to the destination (Demo mode) . . . . 43main menu . . . . . . . . . . . . . . . . . . . . . . . . . . 36partially digitised areas . . . . . . . . . . . . . . . . 35point of interest . . . . . . . . . . . . . . . . . . . . . . 40route . . . . . . . . . . . . . . . . . . . . . . . . . . . . . . . 39selecting the destination . . . . . . . . . . . . . . . 37setup . . . . . . . . . . . . . . . . . . . . . . . . . . . . . . . 44split screen . . . . . . . . . . . . . . . . . . . . . . . . . . 41TMC . . . . . . . . . . . . . . . . . . . . . . . . . . . . . . . . 42view . . . . . . . . . . . . . . . . . . . . . . . . . . . . . . . . 41visual presentation of the map . . . . . . . . . . 42
NAV (Navigation)Area of navigation . . . . . . . . . . . . . . . . . . . . 35validity of the navigation data . . . . . . . . . . . 35
O
Operating instructionsfunction buttons . . . . . . . . . . . . . . . . . . . . . . . 9Unit buttons . . . . . . . . . . . . . . . . . . . . . . . . . . 9verification boxes . . . . . . . . . . . . . . . . . . . . . . 9
P
PhoneIntroduction . . . . . . . . . . . . . . . . . . . . . . . . . 49
PHONEBluetooth setup . . . . . . . . . . . . . . . . . . . . . . 61Call lists menu . . . . . . . . . . . . . . . . . . . . . . . 59Enter number . . . . . . . . . . . . . . . . . . . . . . . . 57
Linking and connecting to the infotainmentsystem . . . . . . . . . . . . . . . . . . . . . . . . . . . . 50
Main menu . . . . . . . . . . . . . . . . . . . . . . . . . . 55Phonebook menu . . . . . . . . . . . . . . . . . . . . . 58Places with risk of explosion . . . . . . . . . . . . 50Places with special regulations . . . . . . . . . . 50Setup . . . . . . . . . . . . . . . . . . . . . . . . . . . . . . . 60Voice control . . . . . . . . . . . . . . . . . . . . . . . . . 52
Places with special regulations . . . . . . . . . . . . . 50
Pop-up window . . . . . . . . . . . . . . . . . . . . . . . . . . . 9
Q
Quick reference guide . . . . . . . . . . . . . . . . . . . . . 4
R
Radio . . . . . . . . . . . . . . . . . . . . . . . . . . . . . . . . . . 12
RADIOfrequency bands . . . . . . . . . . . . . . . . . . . . . 17Main menu . . . . . . . . . . . . . . . . . . . . . . . . . . 12RDS radio data services . . . . . . . . . . . . . . . . 13scan function (SCAN) . . . . . . . . . . . . . . . . . . 18selecting, adjusting and storing a station . 17Stored station buttons . . . . . . . . . . . . . . . . . 15
RDS . . . . . . . . . . . . . . . . . . . . . . . . . . . . . . . . . . . 65TP (Traffic Program) . . . . . . . . . . . . . . . . 19, 20
Representation in these operating instructions . 9
Requirements foradaptor (MDI) . . . . . . . . . . . . . . . . . . . . . . . . 29CDs . . . . . . . . . . . . . . . . . . . . . . . . . . . . . . . . 23external data medium (MDI) . . . . . . . . . . . . 29
68Index