ECO mode Seat Leon 5D 2014 MEDIA SYSTEM PLUS - NAVI SYSTEM
[x] Cancel search | Manufacturer: SEAT, Model Year: 2014, Model line: Leon 5D, Model: Seat Leon 5D 2014Pages: 64, PDF Size: 1.71 MB
Page 24 of 64
Audio modeIndication
››› Fig. 18Meaning
RDS radio data service deactivated. The
RDS can be activated in the menu Setup
(FM, AM) ››› page 17.
TPThe TP is active and receiving
››› page 16.
No traffic news station can be received.
No DAB reception possible.
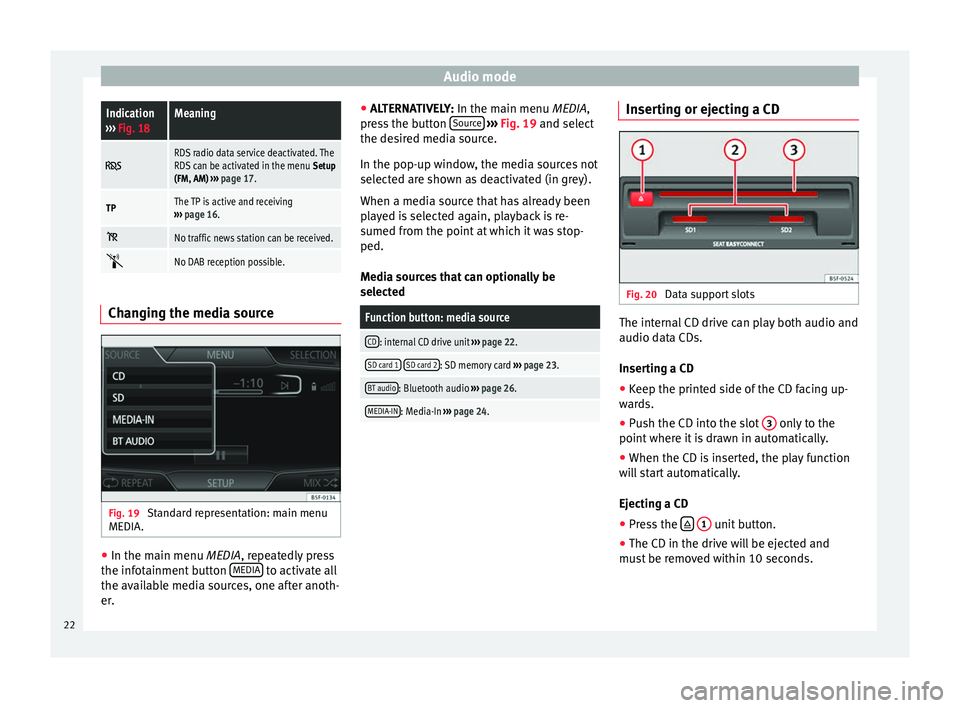
Changing the media source
Fig. 19
Standard representation: main menu
MEDIA. ●
In the main menu MEDIA, repeatedly press
the inf
otainment button MEDIA to activate all
the available media sources, one after anoth-
er. ●
ALTERNATIVELY: In the main menu MEDIA
,
press the button Source
››› Fig. 19 and select
the de s
ired media source.
In the pop-up window, the media sources not
selected are shown as deactivated (in grey).
When a media source that has already been
played is selected again, playback is re-
sumed from the point at which it was stop-
ped.
Media sources that can optionally be
selected
Function button: media source
CD: internal CD drive unit ››› page 22.
SD card 1 SD card 2: SD memory card
››› page 23.
BT audio: Bluetooth audio ››› page 26.
MEDIA-IN: Media-In ››› page 24. Inserting or ejecting a CD
Fig. 20
Data support slots The internal CD drive can play both audio and
audio data CDs.
Inserting a CD
● Keep the printed side of the CD facing up-
wards.
● Push the CD into the slot 3 only to the
point where it is drawn in automatically.
● When the CD is inserted, the play function
will start automatically.
Ejecting a CD
● Press the
1 unit button.
● The CD in the drive will be ejected and
must be removed within 10 seconds.
22
Page 25 of 64
Audio mode
If you do not remove the CD in the following
10 seconds, it will be drawn back in for safety
reasons, without changing to CD mode.
Unreadable or defective CD
If the data on the inserted CD cannot be read
or the CD is damaged, the corresponding in-
dication will be shown on the screen.
Depending on the unit, when a CD cannot be
read it will retry three times, ejecting and re-
inserting the CD, before showing the indica-
tion. Note
● Uneven road surfaces and strong vibrations
may cause the CD to jump.
● If the interior temperature of the unit is too
high, it will not accept or play any more CDs.
● If, after having inserted several CDs, the in-
dication CD drive error still appears, contact a
s pec
ialist workshop. Inserting and removing memory cards
Inserting a memory card
If a memory card cannot be inserted, make
sure it is positioned correctly and is compati-
ble with the unit.
Playback starts automatically if supported
audio files are stored on the memory card. Insert a compatible memory card by pushing
it into the memory card slot with the cut-off
corner first facing
upwards until it locks in
› ›
› Fig. 20.
Remo
ving a memory card
The memory card inserted must be prepared
before it is ejected.
● Press the infotainment button MENU ; then,
press Setup to open the menu
System set-
tin g
s.
● Press the function button
Remove SD card 1 safely or
Remove SD card 2 safely .
After ejecting the memory card, the function
button will be shown in grey.
● Press the memory card inserted. The mem-
ory card “jumps” to the eject position.
● Remove the memory card.
Unreadable memory card
If you insert a memory card containing data
that cannot be read, the unit will not change
to memory card mode after loading.
It will show the indication: There are no playa-
ble files available . External audio source connected to
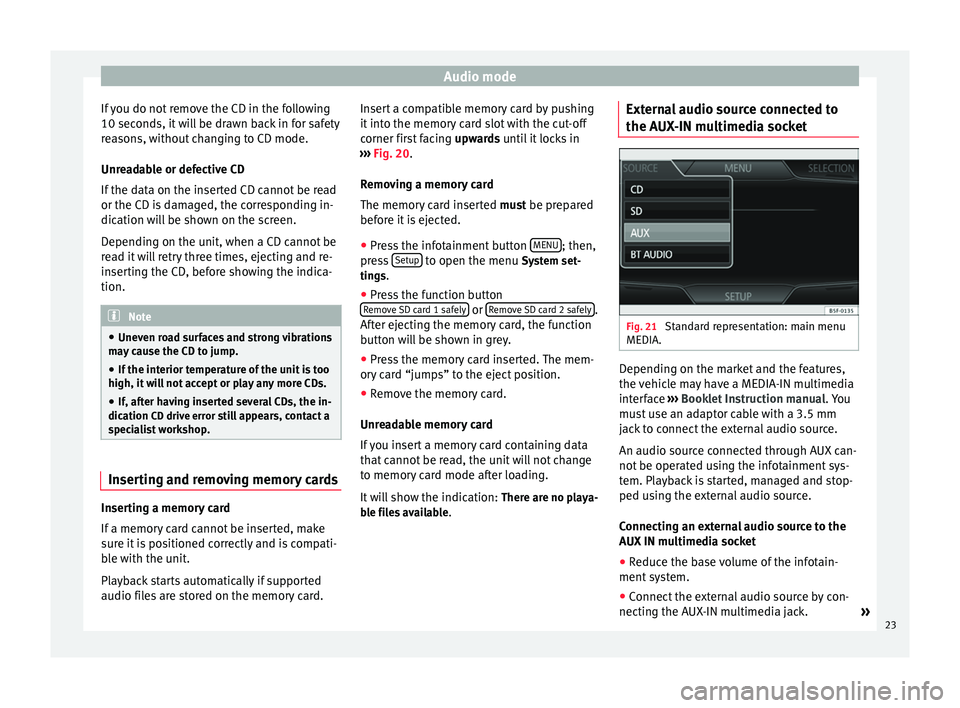
the AUX-IN multimedia socket
Fig. 21
Standard representation: main menu
MEDIA. Depending on the market and the features,
the vehicle may have a MEDIA-IN multimedia
interface
›››
Booklet Instruction manual. You
must use an adaptor cable with a 3.5 mm
jack to connect the external audio source.
An audio source connected through AUX can-
not be operated using the infotainment sys-
tem. Playback is started, managed and stop-
ped using the external audio source.
Connecting an external audio source to the
AUX IN multimedia socket
● Reduce the base volume of the infotain-
ment system.
● Connect the external audio source by con-
necting the AUX-IN multimedia jack. »
23
Page 27 of 64
Audio mode
Notes and restrictions
The infotainment system enables you to view,
play and manage compatible audio files
through the MEDIA-IN multimedia interface.
In the case of MTP players and depending on
the battery charge and the quantity of data, it
may take a few minutes for them to be ready
for use.
External hard discs with a capacity greater
than 32 GB must, in certain circumstances,
be reformatted to the FAT32 file system. On
the Internet, for example, you will find pro-
grams and instructions for this.
If the data carrier has several partitions, only
the first partition will be recognised (except
with USB, in which the first 2 will be visible).
Take into account all other instructions and
limitations regarding requirements for media
sources.
Connecting and disconnecting an external
data medium
● Connect a suitable adaptor to the MEDIA-IN
multimedia interface.
● Connect the external data medium to the
MEDIA-IN multimedia interface via the adapt-
er.
● If necessary, switch on the external data
medium or select the appropriate data mode.
Regardless of any indications to the contrary
that there may be on the matter, the external data medium can be disconnected from the
MEDIA-IN multimedia interface at any time
without losing the data.
When disconnecting an iPod
®
or iPhone ®
from the adaptor, take care to press the two
unlocking tabs on the narrow sides of the
iPod ®
connector simultaneously.
Operating the infotainment system
An external data medium that is correctly
connected to the MEDIA-IN multimedia inter-
face can be operated using the infotainment
system.
● In the main MEDIA
menu, press the SOURC E ›››
Fig. 21 function button and select USB or
iPod ...
››› page 24 .
Other oper ation
s with the external data medi-
um (changing tracks, selecting tracks and ac-
tivating playback modes) are carried out as
described in the corresponding chapters.
iPod ®
and iPhone ®
If you connect an iPod ®
or iPhone ®
, the top
selection level will display the specific lists of
the iPod ( playlists, artist, album,
title, podcasts etc.). The appearance of
these lists is similar to that of the media cen-
tre , and they are managed as described.
Music management is blocked so it can be
managed with the iPod ®
or iPhone ®
that is
connected. The playback volume
of some iPods®
or
iPhones ®
can adapt to the volume of the oth-
er audio sources ››› page 24.
Files from iPods ®
or iPhones ®
cannot be im-
port
ed.
Possible error messages after connecting an ex-
ternal data medium
Error mes-
sageCauseProcedure
Device not
supportedThe external
data medium
cannot be
played– Consult the list of
supported devices
on the web.
– When possible,
update the software
of the external data
medium.
Unit not op-
erationalCommunication
interrupted.Check the connec-
tion and make sure
the external data
medium is working
correctly.
Due to the large number of different data media availa-
ble, it is not possible to guarantee fault-free operation of
all functions described here. Note
● The connecting adaptor used must not be
crushed or bent sharply. This could damage
the adaptor and cause operational faults.
● To play music, do not simultaneously link
the external media player to the infotainment » 25
Page 28 of 64
Audio mode
system using Bluetooth and the MEDIA-IN
multimedia interface, as this can cause play-
back limitations.
● If a connected device is not recognised, un-
plug all connected devices and reconnect the
device. External data support in MEDIA-IN*
port
Only supported audio files can be displayed
and played. Other files are ignored.
Playback starts automatically if there are
readable audio files stored on the data sup-
port.
End connection
The connected data support
must be pre-
pared for disconnection before it can be re-
moved.
● Press the infotainment button MENU ; then,
press Settings to open the menu System set-
tings ››› page 53 .
● Pr e
ss the Safely remove USB data stick function
button. After removing the data stick correct-
ly from the system, the function button be-
comes inactive (grey).
● The data media may now be disconnected. Illegible data medium
If the data on a connected support device
cannot be read, the warning
No playable files
is displayed. Note
Read and bear in mind the manufacturer's in-
struction manual for the external data medi-
um. Connecting an external media player
via Bluetooth
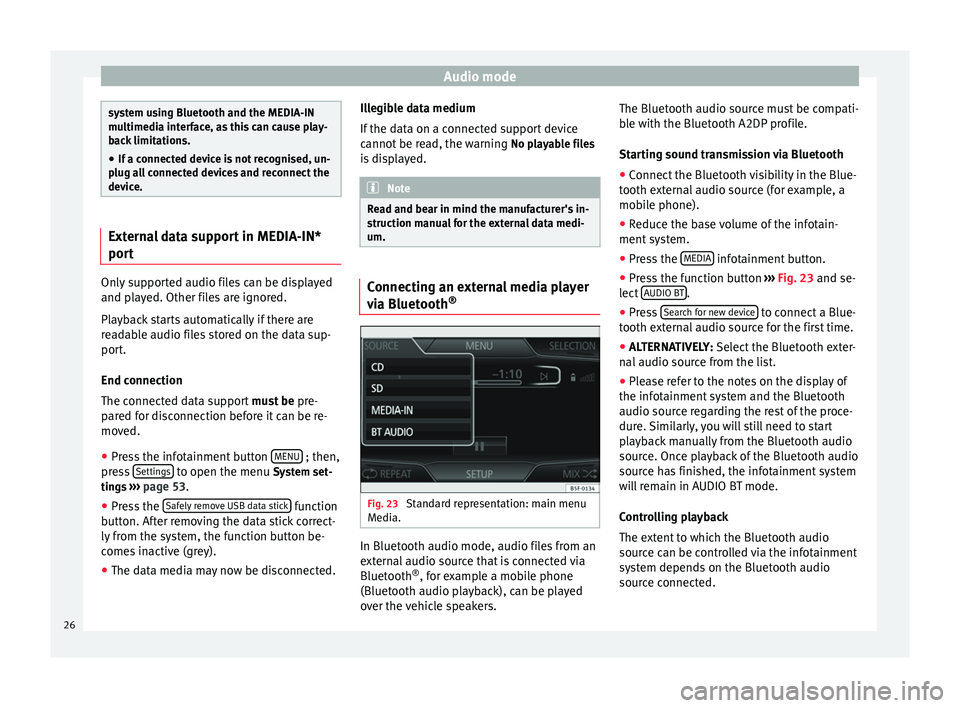
® Fig. 23
Standard representation: main menu
Media. In Bluetooth audio mode, audio files from an
external audio source that is connected via
Bluetooth
®
, for example a mobile phone
(Bluetooth audio playback), can be played
over the vehicle speakers. The Bluetooth audio source must be compati-
ble with the Bluetooth A2DP profile.
Starting sound transmission via Bluetooth
● Connect the Bluetooth visibility in the Blue-
tooth external audio source (for example, a
mobile phone).
● Reduce the base volume of the infotain-
ment system.
● Press the MEDIA infotainment button.
● Press the function button ››› Fig. 23 and se-
l ect
AUDIO BT .
● Press Search for new device to connect a Blue-
tooth external audio source for the first time.
● ALTERNATIVELY: Select the Bluetooth exter-
n al
audio source from the list.
● Please refer to the notes on the display of
the infotainment system and the Bluetooth
audio source regarding the rest of the proce-
dure. Similarly, you will still need to start
playback manually from the Bluetooth audio
source. Once playback of the Bluetooth audio
source has finished, the infotainment system
will remain in AUDIO BT mode.
Controlling playback
The extent to which the Bluetooth audio
source can be controlled via the infotainment
system depends on the Bluetooth audio
source connected.
26
Page 30 of 64
Audio mode
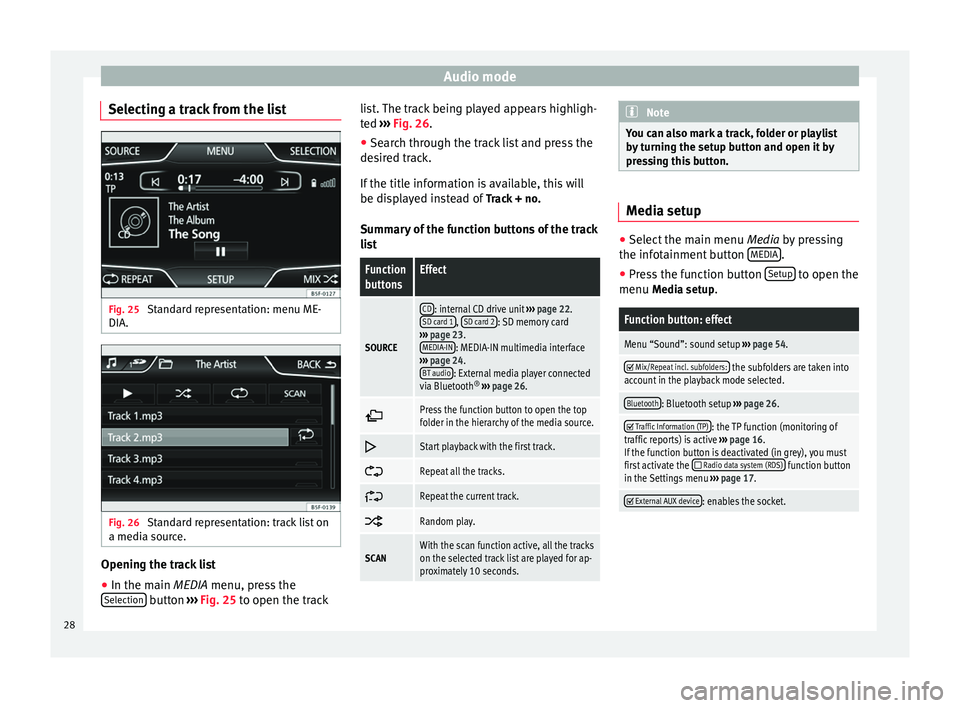
Selecting a track from the list Fig. 25
Standard representation: menu ME-
DIA. Fig. 26
Standard representation: track list on
a media source. Opening the track list
● In the main MEDIA
menu, press the
Sel
ection button
›››
Fig. 25 to open the track li
s t. The track being played appears highligh-
ted ››› Fig. 26
.
● Search through the track list and press the
desired track.
If the title information is available, this will
be displayed instead of Track + no.
Summary of the function buttons of the track
list
Function
buttonsEffect
SOURCE
CD: internal CD drive unit ››› page 22.
SD card 1, SD card 2: SD memory card
››› page 23.
MEDIA-IN
: MEDIA-IN multimedia interface
››› page 24.
BT audio
: External media player connected
via Bluetooth ®
››› page 26.
Press the function button to open the top
folder in the hierarchy of the media source.
Start playback with the first track.
Repeat all the tracks.
Repeat the current track.
Random play.
SCANWith the scan function active, all the tracks
on the selected track list are played for ap-
proximately 10 seconds. Note
You can also mark a track, folder or playlist
by turning the setup button and open it by
pressing this button. Media setup
●
Select the main menu Media by pressing
the inf ot
ainment button MEDIA .
● Press the function button Setup to open the
menu Media setup
.
Function button: effect
Menu “Sound”: sound setup ››› page 54.
Mix/Repeat incl. subfolders: the subfolders are taken into
account in the playback mode selected.
Bluetooth: Bluetooth setup ››› page 26.
Traffic Information (TP): the TP function (monitoring of
traffic reports) is active ››› page 16.
If the function button is deactivated (in grey), you must
first activate the
Radio data system (RDS) function button
in the Settings menu ››› page 17.
External AUX device: enables the socket.
28
Page 41 of 64
CAR menu
CAR menu Introduction to managing the
CAR menu Car menu By pressing the “CAR” infotainment button
you will access the main menu with the fol-
lowing options:
● VIEW
● MINIPLAYER (Radio and Media function)
● PREVIOUS-NEXT (to change screen)
● SETUP ›››
Booklet Instruction Manual,
chapter System setup (CAR)
With the function button View you can access
the following information:
● DRIVING DATA
● ECO
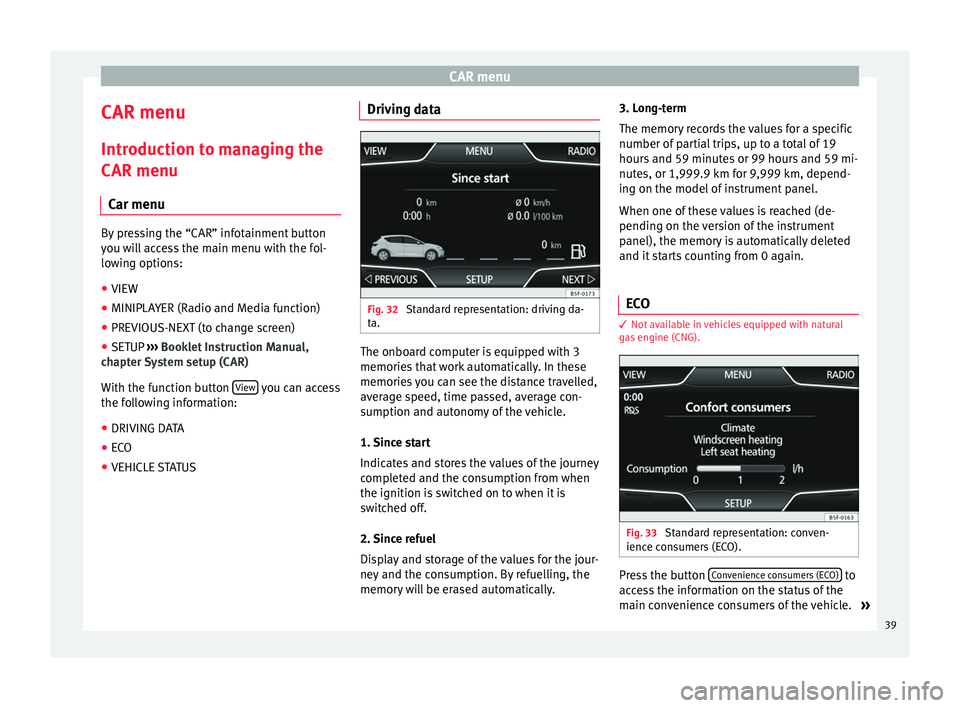
● VEHICLE STATUS Driving data
Fig. 32
Standard representation: driving da-
ta. The onboard computer is equipped with 3
memories that work automatically. In these
memories you can see the distance travelled,
average speed, time passed, average con-
sumption and autonomy of the vehicle.
1. Since start
Indicates and stores the values of the journey
completed and the consumption from when
the ignition is switched on to when it is
switched off.
2. Since refuel
Display and storage of the values for the jour-
ney and the consumption. By refuelling, the
memory will be erased automatically.3. Long-term
The memory records the values for a specific
number of partial trips, up to a total of 19
hours and 59 minutes or 99 hours and 59 mi-
nutes, or 1,999.9 km for 9,999 km, depend-
ing on the model of instrument panel.
When one of these values is reached (de-
pending on the version of the instrument
panel), the memory is automatically deleted
and it starts counting from 0 again.
ECO 3
Not available in vehicles equipped with natural
gas engine (CNG). Fig. 33
Standard representation: conven-
ience consumers (ECO). Press the button
Convenience consumers (ECO) to
access the information on the status of the
main convenience consumers of the vehicle. »
39
Page 47 of 64
Telephone management (PHONE)
● Briefly press the button on the multi-
f u
nction steering wheel to interrupt the spo-
ken indication of the infotainment system
and give the next command.
IMPORTANT: The system will ONLY recognise
a command when the
“active” symbol is
displayed on the panel or the touch screen.
If you make a mistake when giving a com-
mand or give an incomplete command, and it
has no effect, you can repeat the command.
The symbol remains active.
● Briefly pr
ess the button of the multi-
function steering wheel to repeat the com-
mand.
Instructions for voice control
For optimum functioning of the voice control,
follow these instructions:
● Speak slowly and clearly, as far as possi-
ble. The system will not recognise mispro-
nounced words, or words and figures in
which syllables are omitted.
● Telephone numbers must be indicated fig-
ure by figure or in blocks of numbers in units,
tens or hundreds.
● Speak at a normal volume, without exag-
gerated intonation or long pauses.
● Avoid noise from the exterior and nearby
(for example, conversations inside the vehi- cle). Close all doors, windows and the sliding
roof.
●
Do not aim the air from the diffusers at the
roof of the passenger compartment.
● If you are driving very fast, speak a little
louder.
You can access the instructions by saying:
“Instructions, tutorial, introduction”. You can
also li
sten to the instructions in parts. These
are divided into 7 blocks. To access them,
give any of the previous commands followed
by “part +
xample “Tutorial
part 1 ”.
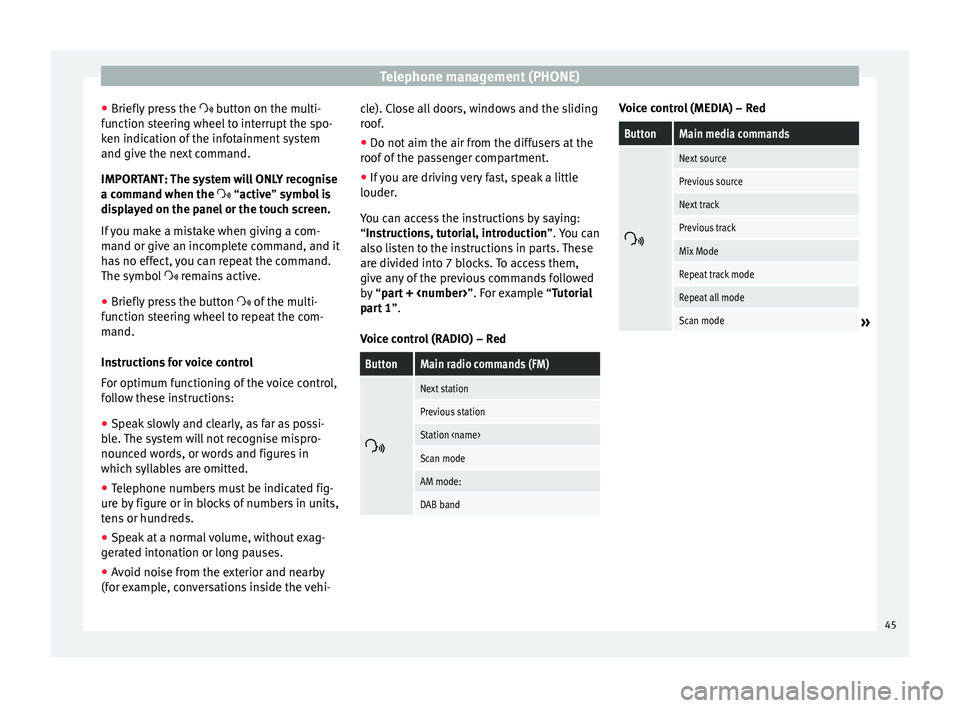
Voice control (RADIO) – Red
ButtonMain radio commands (FM)
Next station
Previous station
Station
Scan mode
AM mode:
DAB band Voice control (MEDIA) – Red
ButtonMain media commands
Next source
Previous source
Next track
Previous track
Mix Mode
Repeat track mode
Repeat all mode
Scan mode»
45
Page 50 of 64
Telephone management (PHONE)
Battery level of the mobile phone connected.
Signal strength of the mobile phone coverage.
Private mode: To activate private mode, go to
the Menu
Setup and deactivate the check-
box: Hands-free (during an active call). With
the private mode activated the active audio
and microphone become that of the mobile
phone connected to the hands-free. When it
is deactivated, the audio reverts to the car-kit
of the vehicle. This configuration is only ap-
plicable to the active call, so for subsequent
calls, the audio will revert by default to the
car-kit of the vehicle.
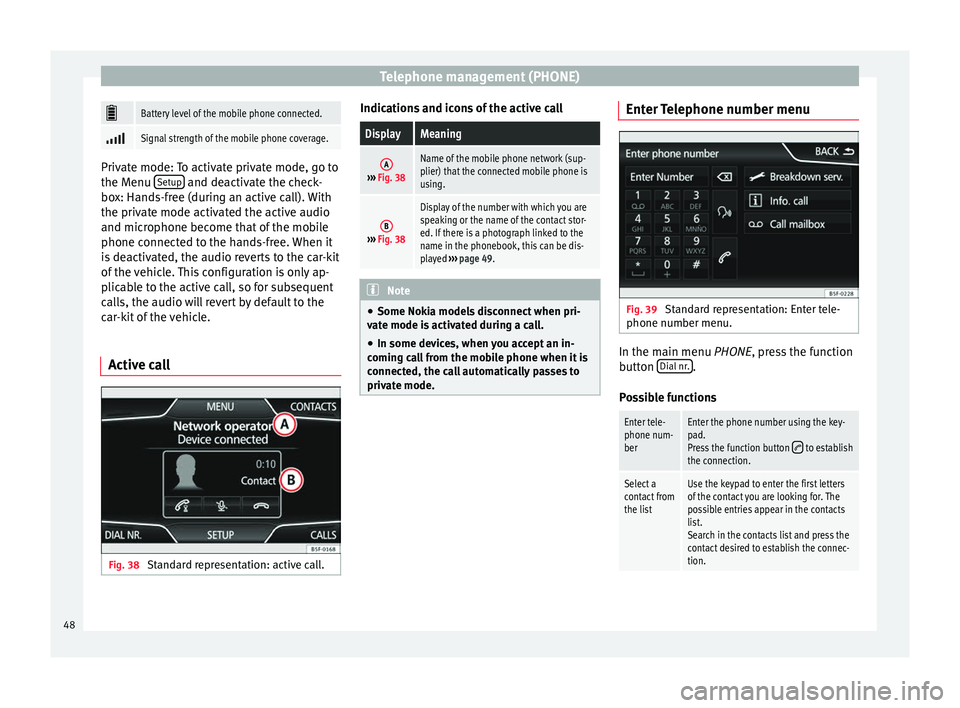
Active call Fig. 38
Standard representation: active call. Indications and icons of the active callDisplayMeaning
A›››
Fig. 38
Name of the mobile phone network (sup-
plier) that the connected mobile phone is
using.
B››› Fig. 38
Display of the number with which you are
speaking or the name of the contact stor-
ed. If there is a photograph linked to the
name in the phonebook, this can be dis-
played ››› page 49. Note
● Some Nokia models disconnect when pri-
vate mode is activated during a call.
● In some devices, when you accept an in-
coming call from the mobile phone when it is
connected, the call automatically passes to
private mode. Enter Telephone number menu
Fig. 39
Standard representation: Enter tele-
phone number menu. In the main menu
PHONE
, press the function
b
utton Dial nr. .
Possible functions
Enter tele-
phone num-
berEnter the phone number using the key-
pad.
Press the function button
to establish
the connection.
Select a
contact from
the listUse the keypad to enter the first letters
of the contact you are looking for. The
possible entries appear in the contacts
list.
Search in the contacts list and press the
contact desired to establish the connec-
tion. 48
Page 51 of 64
Telephone management (PHONE)Redial but-
tonPress the button and the last number
dialled will be shown on the display. To
make a connection press the button
again
.
Call voice
mailbox Keep button number 1 pressed for ap-
proximately 2 seconds or press the button.
If you still have not saved the voice mail
number, enter the number and confirm it
with OK
.
A phone number that has already been
stored can be modified in the User pro-
file settings ››› page 51 menu.
Activating voice control
Enter a na-
tional dial-
ling codeWhen you enter a country code, instead
of the two first digits (for example,
“00”), you can enter the “+” symbol.
Keep the function button pressed
0
for
about 2 seconds to add the + symbol.
Breakdown
service call
Press the function button to obtain help
in the event of breakdown. For this the
network of SEAT dealerships is available
to you with their Mobile Service.
Information
call Press the function button to obtain infor-
mation on the SEAT brand and the addi-
tional services contracted related to traf-
fic and travel. Note
Breakdown service and information calls can
incur an additional cost on your telephone
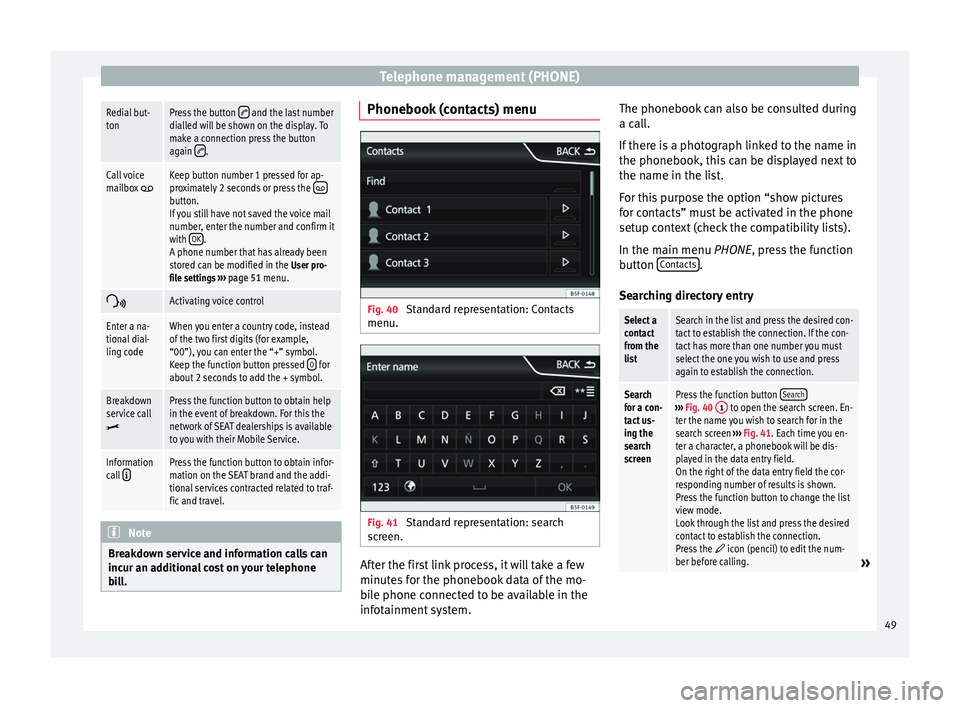
bill. Phonebook (contacts) menu
Fig. 40
Standard representation: Contacts
menu. Fig. 41
Standard representation: search
screen. After the first link process, it will take a few
minutes for the phonebook data of the mo-
bile phone connected to be available in the
infotainment system.The phonebook can also be consulted during
a call.
If there is a photograph linked to the name in
the phonebook, this can be displayed next to
the name in the list.
For this purpose the option “show pictures
for contacts” must be activated in the phone
setup context (check the compatibility lists).
In the main menu
PHONE
, press the function
b
utton Contacts .
Searching directory entry
Select a
contact
from the
listSearch in the list and press the desired con-
tact to establish the connection. If the con-
tact has more than one number you must
select the one you wish to use and press
again to establish the connection.
Search
for a con-
tact us-
ing the
search
screenPress the function button Search›››
Fig. 40 1 to open the search screen. En-
ter the name you wish to search for in the
search screen ››› Fig. 41. Each time you en-
ter a character, a phonebook will be dis-
played in the data entry field.
On the right of the data entry field the cor-
responding number of results is shown.
Press the function button to change the list
view mode.
Look through the list and press the desired
contact to establish the connection.
Press the
icon (pencil) to edit the num-
ber before calling.» 49
Page 55 of 64
Setup
Setup
Menu and system setting
(SETUP) Introduction Depending on the country, the device and
the features of the vehicle, some settings
may be different.
Activating the main menu.
● Press the infotainment button MENU to
open the main menu System setup (SETUP).
● Press the function button SETUP to access
the system setup.
Menu and system setup (SETUP) Activating the main menu.
● Press the infotainment button MENU to
open the main menu System setup (SETUP)
.
● Press the function button SETUP to access
the system setup.Function button: effect
Sound setup: adjust volume and sound setup
››› page 54.
Screen: complete the touch screen setting ››› page 53.
Function button: effect
Date and time: ››› Booklet Instruction Manual, chap-
ter System setup (CAR)
Idioma/Language: set the desired language for the texts
and announcements.
Keyboard: select the desired keyboard (ABC or QWERTY).
Additional keyboard languages: select an additional lan-
guage for the keyboard.
Units: ››› Booklet Instruction Manual, chapter System
setup (CAR)
Voice control: adjust the voice control setup ››› page 54.
Safely remove SD card 1, Safely remove SD card 2: eject the de-
sired memory card from the system. After ejecting the
memory card, the function button will be shown in grey.
Safely remove the USB data medium: eject the USB data medi-
um from the system.
Factory settings: ››› page 54.
Bluetooth: adjust the Bluetooth setup ››› page 51.
System information: indication of the system information
(device number, hardware and software version).
Copyright Note
For all the infotainment systems to work
properly, it is important to set the correct
time and date in the vehicle. Screen settings
Activating the main menu.
●
Press the infotainment button MENU to
open the main menu System setup (SETUP).
● Pr e
ss the function button SETUP to access
the system setup.
● Press the Screen function button. When you
close a menu, the changes will take effect au-
tomatically.
Summary of the indications and function
buttons
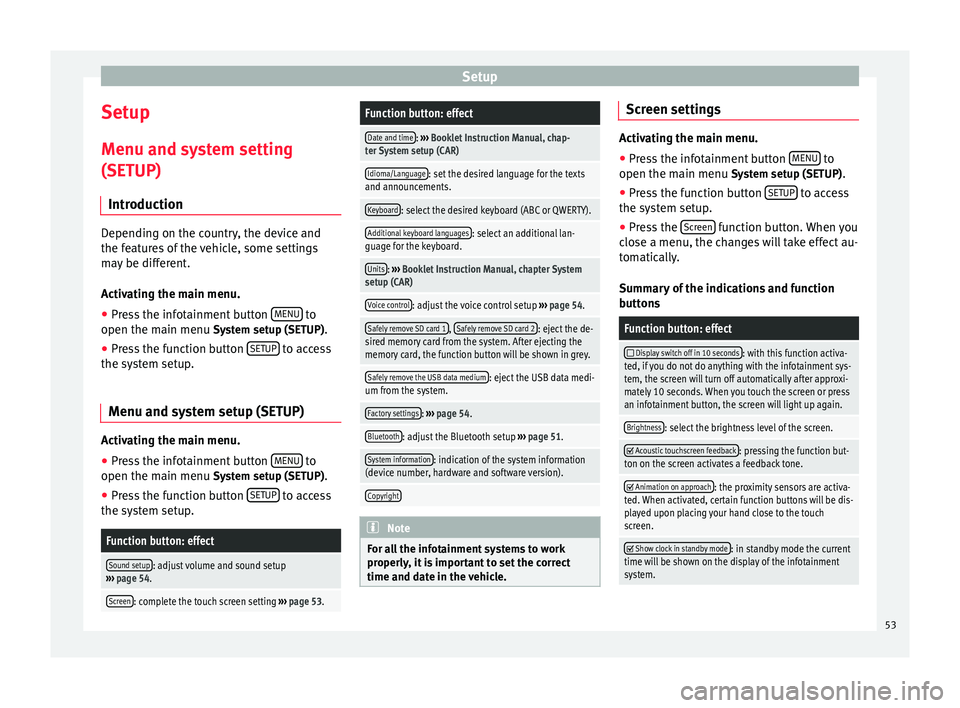
Function button: effect
Display switch off in 10 seconds: with this function activa-
ted, if you do not do anything with the infotainment sys-
tem, the screen will turn off automatically after approxi-
mately 10 seconds. When you touch the screen or press
an infotainment button, the screen will light up again.
Brightness: select the brightness level of the screen.
Acoustic touchscreen feedback: pressing the function but-
ton on the screen activates a feedback tone.
Animation on approach: the proximity sensors are activa-
ted. When activated, certain function buttons will be dis-
played upon placing your hand close to the touch
screen.
Show clock in standby mode: in standby mode the current
time will be shown on the display of the infotainment
system. 53