ESP Seat Leon 5D 2014 MEDIA SYSTEM PLUS - NAVI SYSTEM
[x] Cancel search | Manufacturer: SEAT, Model Year: 2014, Model line: Leon 5D, Model: Seat Leon 5D 2014Pages: 64, PDF Size: 1.71 MB
Page 27 of 64
Audio mode
Notes and restrictions
The infotainment system enables you to view,
play and manage compatible audio files
through the MEDIA-IN multimedia interface.
In the case of MTP players and depending on
the battery charge and the quantity of data, it
may take a few minutes for them to be ready
for use.
External hard discs with a capacity greater
than 32 GB must, in certain circumstances,
be reformatted to the FAT32 file system. On
the Internet, for example, you will find pro-
grams and instructions for this.
If the data carrier has several partitions, only
the first partition will be recognised (except
with USB, in which the first 2 will be visible).
Take into account all other instructions and
limitations regarding requirements for media
sources.
Connecting and disconnecting an external
data medium
● Connect a suitable adaptor to the MEDIA-IN
multimedia interface.
● Connect the external data medium to the
MEDIA-IN multimedia interface via the adapt-
er.
● If necessary, switch on the external data
medium or select the appropriate data mode.
Regardless of any indications to the contrary
that there may be on the matter, the external data medium can be disconnected from the
MEDIA-IN multimedia interface at any time
without losing the data.
When disconnecting an iPod
®
or iPhone ®
from the adaptor, take care to press the two
unlocking tabs on the narrow sides of the
iPod ®
connector simultaneously.
Operating the infotainment system
An external data medium that is correctly
connected to the MEDIA-IN multimedia inter-
face can be operated using the infotainment
system.
● In the main MEDIA
menu, press the SOURC E ›››
Fig. 21 function button and select USB or
iPod ...
››› page 24 .
Other oper ation
s with the external data medi-
um (changing tracks, selecting tracks and ac-
tivating playback modes) are carried out as
described in the corresponding chapters.
iPod ®
and iPhone ®
If you connect an iPod ®
or iPhone ®
, the top
selection level will display the specific lists of
the iPod ( playlists, artist, album,
title, podcasts etc.). The appearance of
these lists is similar to that of the media cen-
tre , and they are managed as described.
Music management is blocked so it can be
managed with the iPod ®
or iPhone ®
that is
connected. The playback volume
of some iPods®
or
iPhones ®
can adapt to the volume of the oth-
er audio sources ››› page 24.
Files from iPods ®
or iPhones ®
cannot be im-
port
ed.
Possible error messages after connecting an ex-
ternal data medium
Error mes-
sageCauseProcedure
Device not
supportedThe external
data medium
cannot be
played– Consult the list of
supported devices
on the web.
– When possible,
update the software
of the external data
medium.
Unit not op-
erationalCommunication
interrupted.Check the connec-
tion and make sure
the external data
medium is working
correctly.
Due to the large number of different data media availa-
ble, it is not possible to guarantee fault-free operation of
all functions described here. Note
● The connecting adaptor used must not be
crushed or bent sharply. This could damage
the adaptor and cause operational faults.
● To play music, do not simultaneously link
the external media player to the infotainment » 25
Page 29 of 64
Audio mode
Media players with the AVRCP Bluetooth pro-
file, the playback of the Bluetooth audio
source can be started and stopped automati-
cally when changing to Bluetooth audio
mode, or to another audio source. In addi-
tion, it is possible to view or change the track
via the infotainment system. Note
Due to the large number of different Blue-
tooth audio sources available, it is not possi-
ble to guarantee fault-free operation of all
functions described here. Note
● Deactivate the service and warning sounds
of a connected Bluetooth audio source (for
example, the key tones of the mobile phone)
to avoid interference noise and anomalies in
the operation.
● Depending on the external player connec-
ted, the response time of the system can
vary.
● To ensure your BT player works correctly,
check the compatibility lists first. Changing tracks in the main menu
MEDIA
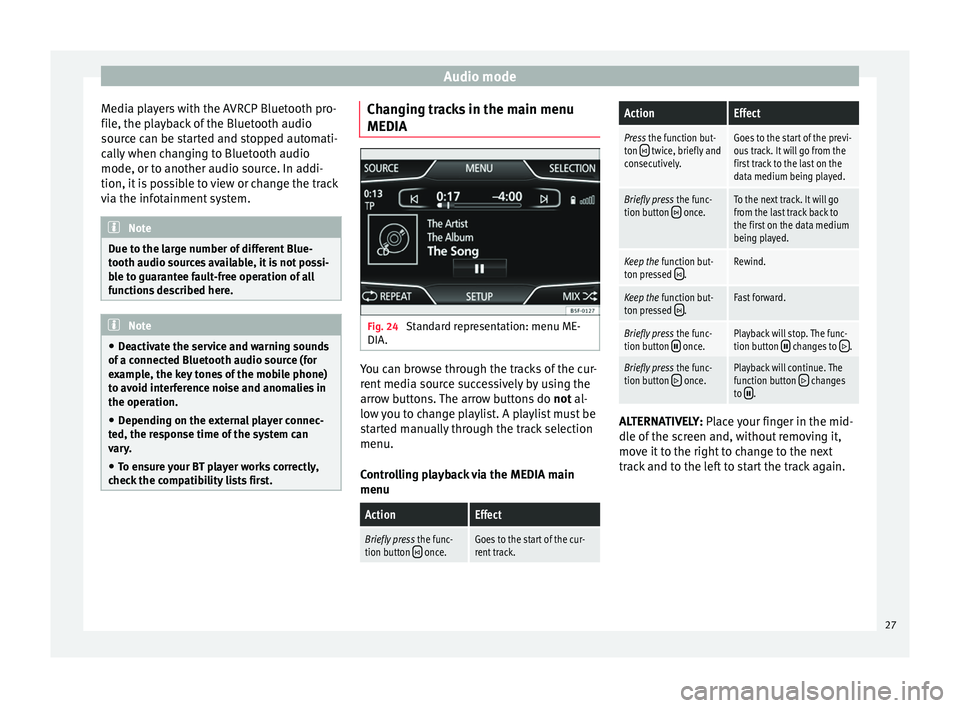
Fig. 24
Standard representation: menu ME-
DIA. You can browse through the tracks of the cur-
rent media source successively by using the
arrow buttons. The arrow buttons do
not al-
lo w
you to change playlist. A playlist must be
started manually through the track selection
menu.
Controlling playback via the MEDIA main
menu
ActionEffect
Briefly press the func-
tion button once.Goes to the start of the cur-
rent track.
ActionEffect
Press the function but-
ton twice, briefly and
consecutively.Goes to the start of the previ-
ous track. It will go from the
first track to the last on the
data medium being played.
Briefly press the func-
tion button once.To the next track. It will go
from the last track back to
the first on the data medium
being played.
Keep the function but-
ton pressed .Rewind.
Keep the function but-
ton pressed .Fast forward.
Briefly press the func-
tion button once.Playback will stop. The func-
tion button changes to .
Briefly press the func-
tion button once.Playback will continue. The
function button changes
to . ALTERNATIVELY:
Place your finger in the mid-
dl e of
the screen and, without removing it,
move it to the right to change to the next
track and to the left to start the track again.
27
Page 34 of 64
Navigation
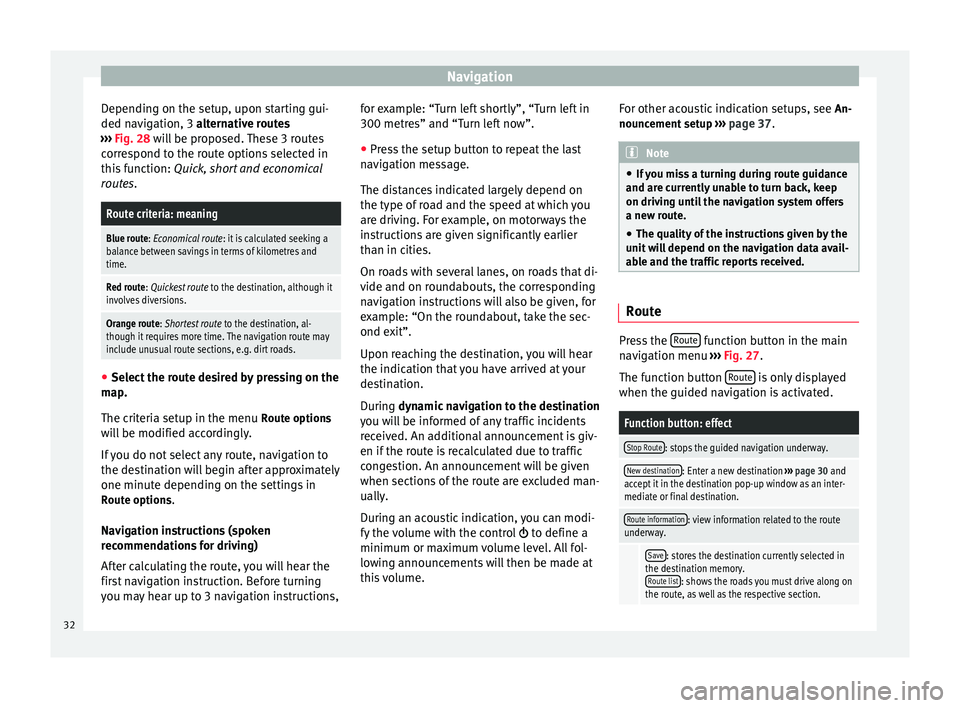
Depending on the setup, upon starting gui-
ded navigation, 3 alternative routes
› ›
› Fig. 28 will be proposed. These 3 routes
correspond to the route options selected in
this function: Quick, short and economical
routes.
Route criteria: meaning
Blue route: Economical route: it is calculated seeking a
balance between savings in terms of kilometres and
time.
Red route: Quickest route to the destination, although it
involves diversions.
Orange route: Shortest route to the destination, al-
though it requires more time. The navigation route may
include unusual route sections, e.g. dirt roads. ●
Select the route desired by pressing on the
map.
The criteria setup in the menu Route options
will be modified accordingly.
If you do not select any route, navigation to
the destination will begin after approximately
one minute depending on the settings in Route options .
Navigation instructions (spoken
recommendations for driving)
After calculating the route, you will hear the
first navigation instruction. Before turning
you may hear up to 3 navigation instructions, for example: “Turn left shortly”, “Turn left in
300 metres” and “Turn left now”.
●
Press the setup button to repeat the last
navigation message.
The distances indicated largely depend on
the type of road and the speed at which you
are driving. For example, on motorways the
instructions are given significantly earlier
than in cities.
On roads with several lanes, on roads that di-
vide and on roundabouts, the corresponding
navigation instructions will also be given, for
example: “On the roundabout, take the sec-
ond exit”.
Upon reaching the destination, you will hear
the indication that you have arrived at your
destination.
During dynamic navigation to the destination
y ou w
ill be informed of any traffic incidents
received. An additional announcement is giv-
en if the route is recalculated due to traffic
congestion. An announcement will be given
when sections of the route are excluded man-
ually.
During an acoustic indication, you can modi-
fy the volume with the control to define a
minimum or maximum volume level. All fol-
lowing announcements will then be made at
this volume. For other acoustic indication setups, see
An-
nouncement setup ››› page 37. Note
● If you miss a turning during route guidance
and are currently unable to turn back, keep
on driving until the navigation system offers
a new route.
● The quality of the instructions given by the
unit will depend on the navigation data avail-
able and the traffic reports received. Route
Press the
Route function button in the main
navigation menu ›››
Fig. 27 .
The f u
nction button Route is only displayed
when the guided navigation is activated.
Function button: effect
Stop Route: stops the guided navigation underway.
New destination: Enter a new destination ››› page 30 and
accept it in the destination pop-up window as an inter-
mediate or final destination.
Route information: view information related to the route
underway.
Save: stores the destination currently selected in
the destination memory. Route list
: shows the roads you must drive along on
the route, as well as the respective section. 32
Page 38 of 64
Navigation
In certain circumstances, avoiding conges-
tion due to a TMC traffic report may not save
time if, for example, the detoured section is
already saturated with traffic. The quality of
the dynamic route guidance depends on the
information contained in the TMC traffic re-
ports. The radio stations broadcasting this in-
formation are responsible for the content.
The route to cover can also be blocked man-
ually to force a new route to be calculated
››› page 32 .
TMC tr
affic reports on the map
Icon: meaning
: queues
: traffic jam
: accident
: slippery ground
: danger of skidding
: danger
: roadworks
: strong wind
Icon: meaning
: road closed
In guided navigation, traffic incidents that af-
fect the calculated route are displayed in red,
while those that do not are displayed in grey.
The length of a traffic incident along the
route calculated is represented by a red line.
The TMC symbol is located at the start of the
traffic delay, provided it has been defined
clearly in the TMC traffic report.
Depending on the scale of the map, other
congestion icons may be hidden behind one
TMC icon. In this case, press the TMC icon
and a list will open with further traffic inci-
dents present.
● Select the desired entry by pressing it.
Guide to the destination in
demonstration mode (Demo) If, in the menu
Navigation setup
, Demo mode
is active ›››
page 37 , an additional pop-up
w indo
w will appear when guided navigation
starts.
● Pressing the function button Demo mode starts a “virtual” guided navigation to the fi-
nal destination indicated.●
If you press the function button
Normal mode , the “real” guided navigation
will begin.
The sequence of events and the operations in
virtual route guidance are similar to those in
real route guidance.
Virtual route guidance is repeated when you
reach the fictitious destination and always
starts again from the starting point if it is in-
terrupted.
If in the menu Navigation setup the starting
point of the Demo mode was determined
manually, the virtual guided navigation will
begin from this position.
A starting point introduced manually is over-
written with the current location of the vehi-
cle, if the vehicle starts to move and if the ve-
hicle's location can be determined by the
GPS.
When real route guidance is started following
virtual route guidance in demo mode, the
unit first has to reorient itself. This orienta-
tion can last some time depending on the
number of satellites that are received at that
time. Moving the vehicle may speed up the
reorientation process. Note
Deactivate the Demo mode after use, because
otherwise before starting guided navigation 36
Page 42 of 64
Telephone management (PHONE)
It is shown via a consumption indicator bar in
l/h (gal/h),
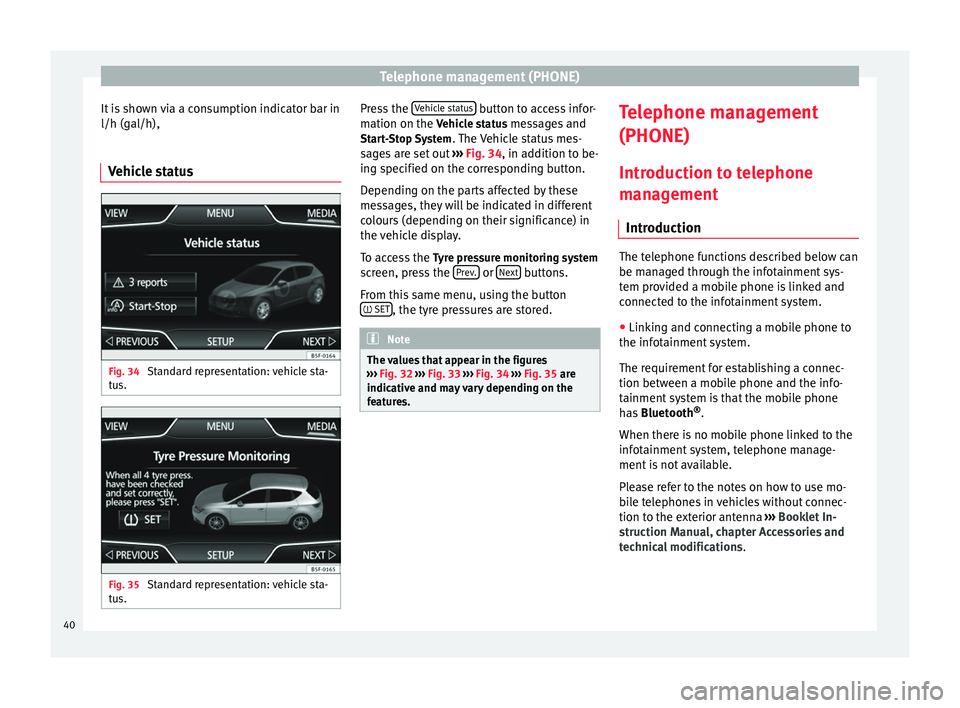
Vehicle status Fig. 34
Standard representation: vehicle sta-
tus. Fig. 35
Standard representation: vehicle sta-
tus. Press the
Vehicle status button to access infor-
mation on the Vehicle status messages and
St ar
t-Stop System . The Vehicle status mes-
sages are set out ››› Fig. 34, in addition to be-
ing s
pecified on the corresponding button.
Depending on the parts affected by these
messages, they will be indicated in different
colours (depending on their significance) in
the vehicle display.
To access the Tyre pressure monitoring system
screen, press the Prev. or
Next buttons.
From this same menu, using the button SET , the tyre pressures are stored.
Note
The values that appear in the figures
››› Fig. 32 ››› Fig. 33
››› Fig. 34 ››› Fig. 35 are
indicativ
e and may vary depending on the
features. Telephone management
(PHONE)
Introduction to telephone
management Introduction The telephone functions described below can
be managed through the infotainment sys-
tem provided a mobile phone is linked and
connected to the infotainment system.
● Linking and connecting a mobile phone to
the infotainment system.
The requirement for establishing a connec-
tion between a mobile phone and the info-
tainment system is that the mobile phone
has Bluetooth ®
.
When there is no mobile phone linked to the
infotainment system, telephone manage-
ment is not available.
Please refer to the notes on how to use mo-
bile telephones in vehicles without connec-
tion to the exterior antenna ›››
Booklet In-
struction Manual, chapter Accessories and
technical modifications .
40
Page 43 of 64
Telephone management (PHONE)
WARNING
Making calls and managing the preinstalla-
tion for mobile phones while driving can
distract you from the traffic and cause an ac-
cident.
● Always stay alert and drive responsibly.
● Select volume settings that allow you to
easily hear signals from outside the vehicle
at all times (e.g. emergency service sirens).
● In areas with no or poor network coverage,
under certain circumstances in tunnels, ga-
rages and underpasses, telephone conversa-
tions may cut out or it may be impossible to
make calls, even in an emergency. WARNING
A loose or incorrectly secured mobile phone
could be thrown inside the vehicle and cause
injury in the event of sudden manoeuvres,
braking or accidents.
● While driving, the mobile phone must al-
ways be correctly secured, outside of the
working radius of the airbag. WARNING
If you carry a mobile phone that is switched
on directly over a pacemaker, this may cause
interference in its functioning.
● Between the antenna of the mobile phone
and the pacemaker there must be a minimum
distance of 20 centimetres for the mobile phone not to affect the functioning of the
pacemaker.
●
Do not carry your mobile phone in your
breast pocket, directly over the pacemaker,
when it is switched on.
● If you suspect your mobile phone is causing
interference, switch it off immediately. Note
● Telephone conversations inside the vehicle
can be affected by high speed, poor atmos-
pheric conditions and the road surface, as
well as by the quality of the network.
● The instructions that appear on the screen
related to the telephone menu depend on the
mobile device used. There may be differen-
ces.
● Take into account the instruction manuals
of the mobile phone and the supplier of the
accessories, and any instructions for using
the headset.
● In areas with poor coverage there may be
anomalies in the reception and calls may be
interrupted.
● If you detect any strange behaviour be-
tween your mobile phone and the radio, re-
start your mobile by switching it off and on
again.
● Consult the compatibility list to ensure
your mobile phone will work properly.
● Most electronic devices are shielded
against high-frequency radio signals. On cer- tain occasions, nevertheless, electronic
equipment might not be protected against
the radio frequency signals of the telephone
management (Phone). This may produce in-
terference.
Places with special regulations
Switch off the mobile phone and the prein-
stallation for mobile telephones in places
with risk of explosion. These areas are com-
mon but are not always clearly marked
››› in Introduction on page 41
. They include, for
e x
ample:
● Areas with piping and reservoirs containing
chemical products.
● Below deck, on boats and ferries.
● Near vehicles that run on liquefied gas
(such as propane or butane).
● In places where there are chemical sub-
stances or particles such as flour, dust or
metal chips in the air.
● In any other place where you must turn off
the engine of your vehicle. WARNING
Switch off your mobile phone in places with
risk of explosion! Your mobile phone will au-
tomatically connect to the mobile phone net-
work as soon as the Bluetooth connection is
cut from the mobile preinstallation. » 41
Page 44 of 64
Telephone management (PHONE)
Note
In areas with special requirements and where
the use of mobile phones is prohibited, you
must keep the mobile phone and its prein-
stallation switched off at all times. The radia-
tion emitted by mobile phones when switch-
ed on can cause interference in sensitive
technical and medical equipment, which
could damage this equipment or cause it to
stop working properly. Linking and connecting your mobile
phone to the infotainment system
To operate a mobile phone through the info-
tainment system, you need to link both devi-
ces
one time only .
F or
your safety, we recommend you make the
link when the vehicle is stationary. In some
countries you cannot
make the link with the
vehicle running.
You must guarantee the following setup in
the mobile phone and the infotainment sys-
tem:
● The
Bluetooth ®
function must be active
and visible on the mobile phone and info-
tainment system, respectively.
● The keypad lock of the mobile phone must
be disconnected.
● The
notification and key tones of your mo-
bile phone must be disconnected. In some countries, after switching the igni-
tion on, the
Bluetooth
®
function of the info-
tainment system should be activated or re-
main visible for around 3 minutes.
During the linking process you must enter da-
ta using your mobile phone's keypad. To do
so, you must have your mobile phone to
hand.
Once the link has been made, the schedule
and call lists stored in your mobile phone will
be loaded. The duration of the loading proc-
ess depends on the amount of data stored on
your mobile phone. When the loading proc-
ess is complete, the data will be available to
the infotainment system.
Starting the link from the system
● Make sure the mobile device is active and
visible.
● Press the PHONE unit button.
● Press the Find phone function button.
ALTERNATIVELY:
● Press the PHONE unit button.
● Press the Setup function button.
● Press the function button Select phone and
then Find phone .
ALTERNATIVELY:
● Press the PHONE unit button.
● Press the Setup function button.●
Press the Bluetooth setup function button.
● Press the Find devices function button.
ALTERNATIVELY:
● Make the connection from the mobile de-
vice itself (ensure that the visibility of the in-
fotainment system in the menu Phone setup >
BT setup is active).
The search process can take up to 1 minute.
On the screen the system will dynamically
update the names of the bluetooth devices
found.
● Select the infotainment system or the mo-
bile phone to which you want to connect from
the list of Bluetooth devices found.
The infotainment system and the mobile
phone will now be connected to each other.
In certain circumstances, it is possible that to
finish the connection between the two devi-
ces, you must enter additional data in the
mobile phone and infotainment system.
● If necessary, confirm the link to the mobile
phone.
● Use your mobile phone to enter and con-
firm your PIN code, as indicated in the dis-
play of the infotainment system.
● ALTERNATIVELY: Compare the PIN code
sho wn in the di
splay of the infotainment sys-
tem with the PIN code that appears on the
42
Page 46 of 64
Telephone management (PHONE)
If a connection has already been established,
some mobile telephones with Bluetooth are
recognised and a connection is established
with them automatically when the ignition is
switched on. For this purpose, the mobile
phone and its Bluetooth must be connected,
and all the live Bluetooth connections with
other devices must be closed.
The Bluetooth wireless connection is free.
Bluetooth R
is a registered trademark of Blue-
tooth ®
SIG, Inc.
Bluetooth ®
profiles
When you connect a mobile phone to the tel-
ephone manager, the data exchange is
through one of the 2 Bluetooth profiles.
● Hands-free Bluetooth profile (HFP): If a mo-
b i
le phone is connected to the telephone
manager through the HFP, calls can be made
wirelessly through the hands-free device.
● Advanced audio profile (A2DP): Bluetooth
profile for transmitting audio signals with
stereo quality.
Voice control Many radio, media, telephone and navigation
functions may be activated through voice
commands. The voice control of the infotainment system
is only available for the language that has
been selected in system settings
››› page 53 .
V oic
e control settings ››› page 54.
When voice control is activated, you can
choose what text and icons take on the col-
our of the different functions:
● Red (RADIO and MEDIA) ››› page 45 and
››› page 45
● Green (PHONE) ››› page 46
● Blue (NAV) ››› page 46
Start and stop the voice control
● To activate the voice control, briefly press
the button on the multi-function steering
wheel . It can also be activated with the
VOICE button in the MIB.
● When voice control is activated, a rising
signal will sound and a menu containing the
main commands will be displayed (the menu
will be displayed if this option ››› page 54 is
activated in the voice control settings). The
spoken instructions will guide you through
the following “dialogue”.
● Pronounce the desired order and follow the
instructions of the “dialogue”. A function can
often be activated with different spoken com-
mands. In case of doubt, try to give a com-
mand. ●
When an action is carried out (e.g. calling a
contact), the voice control automatically de-
activates and must be reactivated when nee-
ded again. There are certain commands after
which the voice control does not end and
waits with What do you wish to do now? .
● To manually end voice control, keep the
button pressed on the multi-function steering
wheel until you hear the corresponding con-
firmation (falling sound), or press the but-
ton on the di
splay. You can also press the
VOICE button twice to deactivate voice con-
trol. (Voice control is deactivated in the fol-
lowing ways: by briefly pressing the VOICE
button or Command on the steering wheel
twice; or by pressing VOICE or Command on
the steering wheel for a few moments, and
touching the screen or any button on the ra-
dio).
Help with voice control
The first time you use the voice control, listen
to the Help.
● Press the function button .
● Give the “
Help” command in the language
established in the System setting, and follow
the dialogue instructions.
Operation during the dialogue
While the infotainment system transmits a
spoken indication, the display will show the
symbol .
44
Page 51 of 64
Telephone management (PHONE)Redial but-
tonPress the button and the last number
dialled will be shown on the display. To
make a connection press the button
again
.
Call voice
mailbox Keep button number 1 pressed for ap-
proximately 2 seconds or press the button.
If you still have not saved the voice mail
number, enter the number and confirm it
with OK
.
A phone number that has already been
stored can be modified in the User pro-
file settings ››› page 51 menu.
Activating voice control
Enter a na-
tional dial-
ling codeWhen you enter a country code, instead
of the two first digits (for example,
“00”), you can enter the “+” symbol.
Keep the function button pressed
0
for
about 2 seconds to add the + symbol.
Breakdown
service call
Press the function button to obtain help
in the event of breakdown. For this the
network of SEAT dealerships is available
to you with their Mobile Service.
Information
call Press the function button to obtain infor-
mation on the SEAT brand and the addi-
tional services contracted related to traf-
fic and travel. Note
Breakdown service and information calls can
incur an additional cost on your telephone
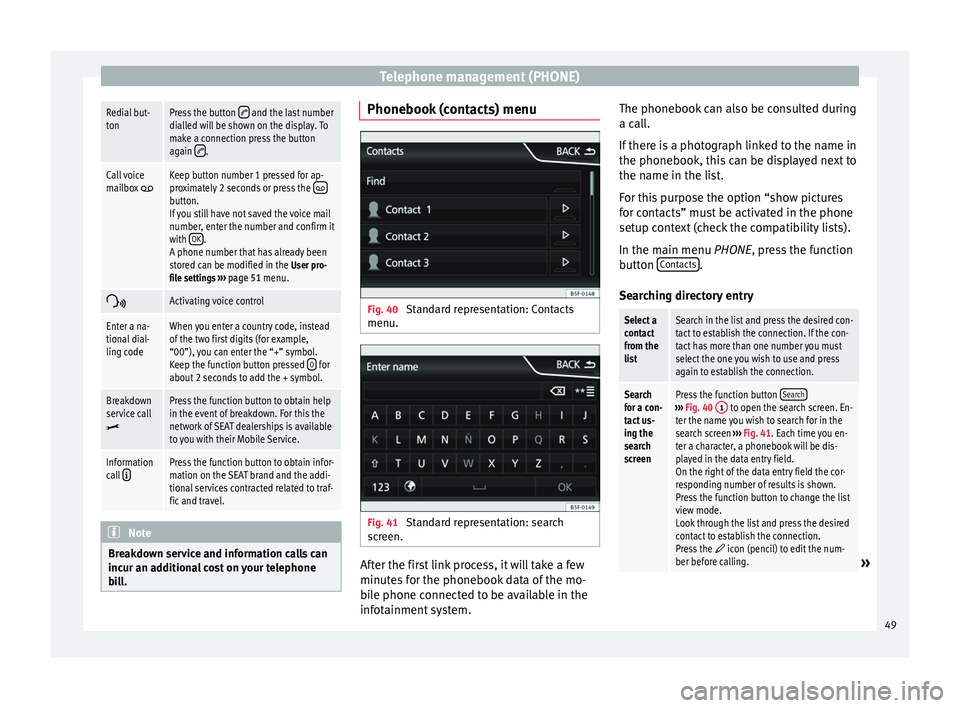
bill. Phonebook (contacts) menu
Fig. 40
Standard representation: Contacts
menu. Fig. 41
Standard representation: search
screen. After the first link process, it will take a few
minutes for the phonebook data of the mo-
bile phone connected to be available in the
infotainment system.The phonebook can also be consulted during
a call.
If there is a photograph linked to the name in
the phonebook, this can be displayed next to
the name in the list.
For this purpose the option “show pictures
for contacts” must be activated in the phone
setup context (check the compatibility lists).
In the main menu
PHONE
, press the function
b
utton Contacts .
Searching directory entry
Select a
contact
from the
listSearch in the list and press the desired con-
tact to establish the connection. If the con-
tact has more than one number you must
select the one you wish to use and press
again to establish the connection.
Search
for a con-
tact us-
ing the
search
screenPress the function button Search›››
Fig. 40 1 to open the search screen. En-
ter the name you wish to search for in the
search screen ››› Fig. 41. Each time you en-
ter a character, a phonebook will be dis-
played in the data entry field.
On the right of the data entry field the cor-
responding number of results is shown.
Press the function button to change the list
view mode.
Look through the list and press the desired
contact to establish the connection.
Press the
icon (pencil) to edit the num-
ber before calling.» 49
Page 56 of 64
Setup
Voice command settings ●
Press the infotainment button MENU to
open the main menu System setup (SETUP).
● Pr e
ss the function button SETUP to access
the system setup.
● Press the function button Voice control .
When you close a menu, the changes will
take effect automatically.
Summary of the indications and function
buttons
Function button: effect
Dialogue style: select the type of dialogue.
Long: during the voice control you will hear some
additional help instructions. Brief
: some additional commands from the long
dialogue are omitted.
Display available commands: when you activate voice con-
trol, the spoken commands of the function you are oper-
ating at that time are viewed in the display.
Voice control session start tone: when you activate voice
control a signal will be emitted. Press to deactivate the
signal.
Voice control session end tone: when you deactivate voice
control a signal will be emitted. Press to deactivate the
signal.
Function button: effect
Input tone in voice dialogue: the input tone to confirm a
command is activated. Factory settings
Restoring default settings
When you reset the setup to the vehicle's de-
fault settings,
the data entered and settings
made will be erased
accordingly.
● Press the infotainment button MENU to
open the main menu System setup (SETUP)
.
● Press the function button SETUP to access
the system setup.
● Press the function button Factory settings .
● To reset all settings and data, press the
function button Restore factory settings .
● ALTERNATIVELY: To reset a particular setup,
pr e
ss the desired function button.
● Confirm the safety question that appears
by pressing the function button Reset .Sound and volume setup
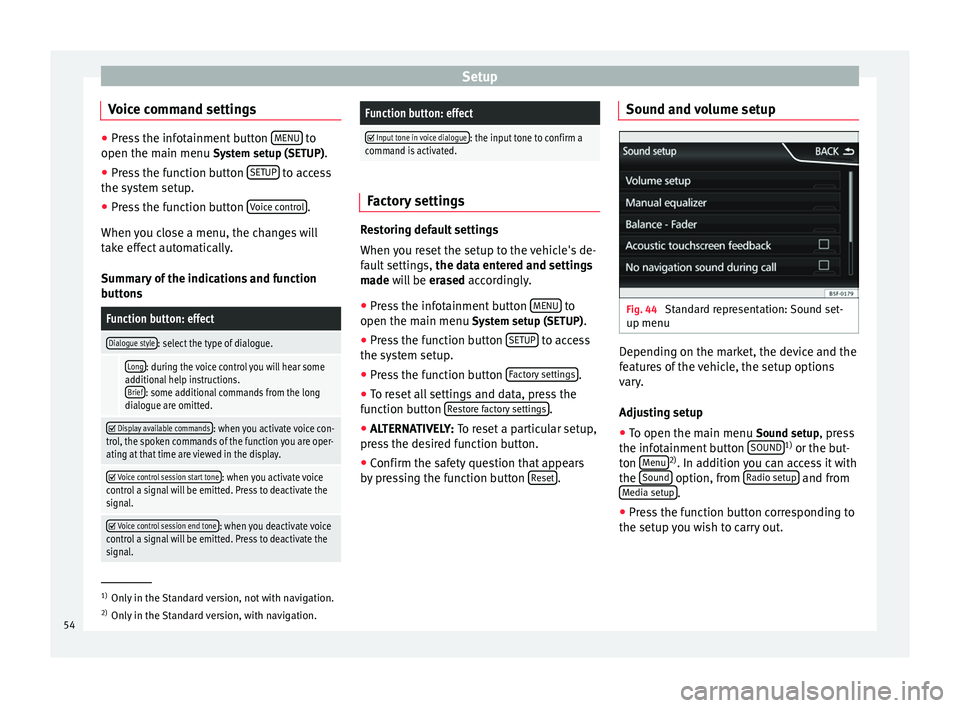
Fig. 44
Standard representation: Sound set-
up menu Depending on the market, the device and the
features of the vehicle, the setup options
vary.
Adjusting setup
● To open the main menu Sound setup
, press
the infotainment button SOUND 1)
or the but-
ton Menu 2)
. In addition you can access it with
the Sound option, from
Radio setup and from
Media setup .
● Press the function button corresponding to
the setup you wish to carry out. 1)
Only in the Standard version, not with navigation.
2) Only in the Standard version, with navigation.
54