ECO mode Seat Leon SC 2013 MEDIA SYSTEM PLUS - NAVI SYSTEM
[x] Cancel search | Manufacturer: SEAT, Model Year: 2013, Model line: Leon SC, Model: Seat Leon SC 2013Pages: 72, PDF Size: 3 MB
Page 27 of 72
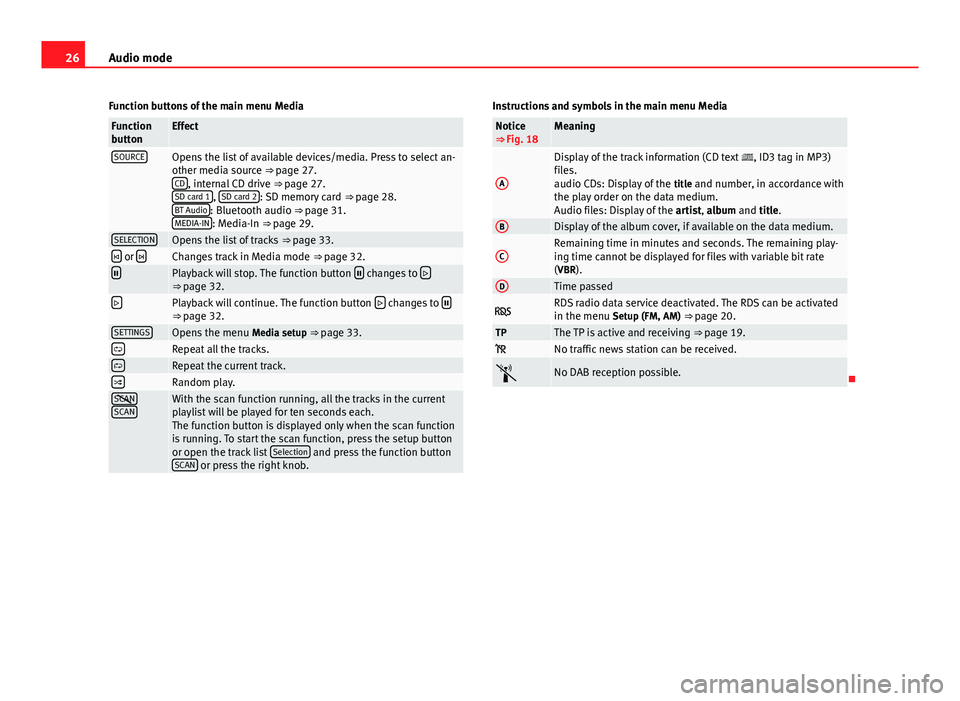
26Audio modeFunction buttons of the main menu MediaFunctionbuttonEffectSOURCEOpens the list of available devices/media. Press to select an-other media source ⇒ page 27.CD, internal CD drive ⇒ page 27.SD card 1, SD card 2: SD memory card ⇒ page 28.BT Audio: Bluetooth audio ⇒ page 31.MEDIA-IN: Media-In ⇒ page 29.
SELECTIONOpens the list of tracks ⇒ page 33. or Changes track in Media mode ⇒ page 32.Playback will stop. The function button changes to ⇒ page 32.Playback will continue. The function button changes to ⇒ page 32.SETTINGSOpens the menu Media setup ⇒ page 33.Repeat all the tracks.Repeat the current track.Random play.SCANSCANWith the scan function running, all the tracks in the currentplaylist will be played for ten seconds each.The function button is displayed only when the scan functionis running. To start the scan function, press the setup buttonor open the track list Selection and press the function buttonSCAN or press the right knob.
Instructions and symbols in the main menu MediaNotice⇒ Fig. 18MeaningADisplay of the track information (CD text , ID3 tag in MP3)files.audio CDs: Display of the title and number, in accordance withthe play order on the data medium.Audio files: Display of the artist, album and title.
BDisplay of the album cover, if available on the data medium.CRemaining time in minutes and seconds. The remaining play-ing time cannot be displayed for files with variable bit rate(VBR).
DTime passed RDS radio data service deactivated. The RDS can be activatedin the menu Setup (FM, AM) ⇒ page 20.TPThe TP is active and receiving ⇒ page 19. No traffic news station can be received.No DAB reception possible.
Page 28 of 72
27Audio modeChanging the media sourceFig. 19
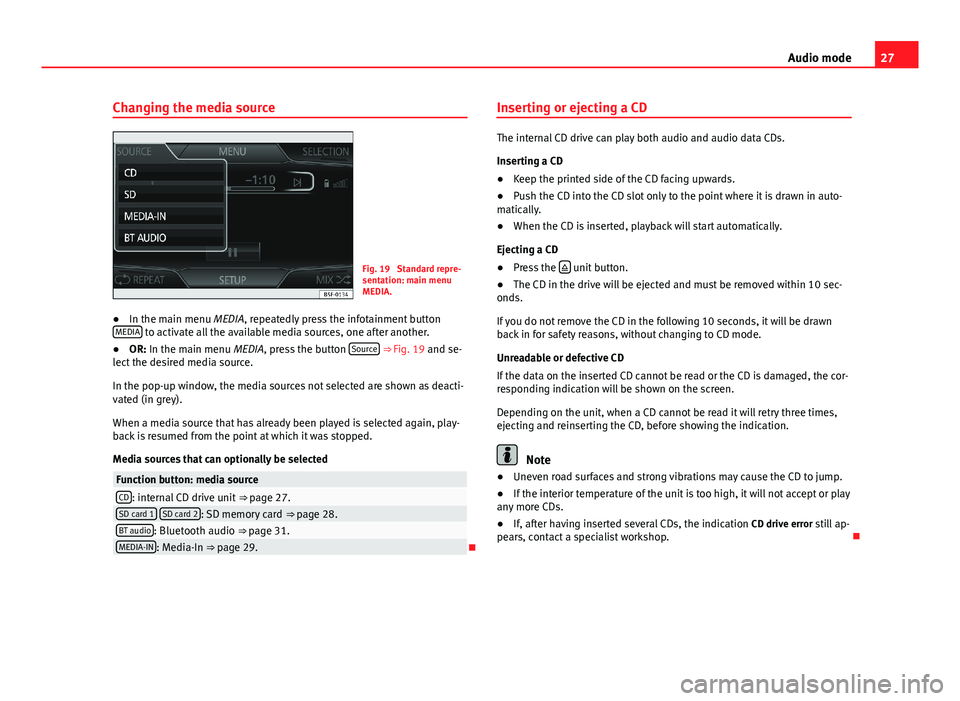
Standard repre-sentation: main menuMEDIA.
●
In the main menu MEDIA, repeatedly press the infotainment buttonMEDIA to activate all the available media sources, one after another.
●
OR: In the main menu MEDIA, press the button Source ⇒ Fig. 19 and se-lect the desired media source.
In the pop-up window, the media sources not selected are shown as deacti-vated (in grey).
When a media source that has already been played is selected again, play-back is resumed from the point at which it was stopped.
Media sources that can optionally be selected
Function button: media sourceCD: internal CD drive unit ⇒ page 27.SD card 1 SD card 2: SD memory card ⇒ page 28.BT audio: Bluetooth audio ⇒ page 31.MEDIA-IN: Media-In ⇒ page 29.
Inserting or ejecting a CD
The internal CD drive can play both audio and audio data CDs.
Inserting a CD
●
Keep the printed side of the CD facing upwards.
●
Push the CD into the CD slot only to the point where it is drawn in auto-matically.
●
When the CD is inserted, playback will start automatically.
Ejecting a CD
●
Press the unit button.
●
The CD in the drive will be ejected and must be removed within 10 sec-onds.
If you do not remove the CD in the following 10 seconds, it will be drawnback in for safety reasons, without changing to CD mode.
Unreadable or defective CD
If the data on the inserted CD cannot be read or the CD is damaged, the cor-responding indication will be shown on the screen.
Depending on the unit, when a CD cannot be read it will retry three times,ejecting and reinserting the CD, before showing the indication.
Note
●Uneven road surfaces and strong vibrations may cause the CD to jump.●
If the interior temperature of the unit is too high, it will not accept or playany more CDs.
●
If, after having inserted several CDs, the indication CD drive error still ap-pears, contact a specialist workshop.
Page 31 of 72
30Audio modeNotes and restrictions
The infotainment system enables you to view, play and manage compatibleaudio files through the MEDIA-IN multimedia interface.
In the case of MTP players and depending on the battery charge and thequantity of data, it may take a few minutes for them to be ready for use.
External hard discs with a capacity greater than 32 GB must, in certain cir-cumstances, be reformatted to the FAT32 file system. On the Internet, for ex-ample, you will find programs and instructions for this.
If the data carrier has several partitions, only the first partition will be recog-nised (except with USB, in which the first 2 will be visible). Take into ac-count all other instructions and limitations regarding requirements for me-dia sources.
Connecting and disconnecting an external data medium
●
Connect a suitable adaptor to the MEDIA-IN multimedia interface.
●
Connect the external data medium to the MEDIA-IN multimedia interfacevia the adapter.
●
If necessary, switch on the external data medium or select the appropri-ate data mode.
Regardless of any indications to the contrary that there may be on the mat-ter, the external data medium can be disconnected from the MEDIA-IN multi-media interface at any time without losing the data.
When disconnecting an iPod® or iPhone® from the adaptor, take care topress the two unlocking tabs on the narrow sides of the iPod® connector si-multaneously.
Operating the infotainment system
An external data medium that is correctly connected to the MEDIA-IN multi-media interface can be operated using the infotainment system.
●
In the main MEDIA menu, press the button SOURCE ⇒ Fig. 20 and selectUSB or iPod.... ⇒ page 29.
Other operations with the external data medium (changing tracks, selectingtracks and activating playback modes) are carried out as described in thecorresponding chapters.
iPod® and iPhone®
If you connect an iPod® or iPhone®, the top selection level will display thespecific lists of the iPod ( playlists, artist, album, title, pod-casts etc.). The appearance of these lists is similar to that of the media cen-tre, and they are managed as described.
Music management is blocked so it can be managed with the iPod® oriPhone® that is connected.
The playback volume of some iPods® or iPhones® can adapt to the volumeof the other audio sources ⇒ page 29.
Files from iPods® or iPhones® cannot be imported.
Possible error messages after connecting an external data mediumError messageCauseProcedureDevice not suppor-tedThe external data me-dium cannot be played– Consult the list of suppor-ted devices on the web.– When possible, update thesoftware of the external datamedium.
Unit not operationalCommunication fault.Check the connection andmake sure the external datamedium is working correctly.
Due to the large number of different data media available, it is not possi-ble to guarantee fault-free operation of all functions described here.
Page 34 of 72
33Audio modeSelecting a track from the listFig. 24
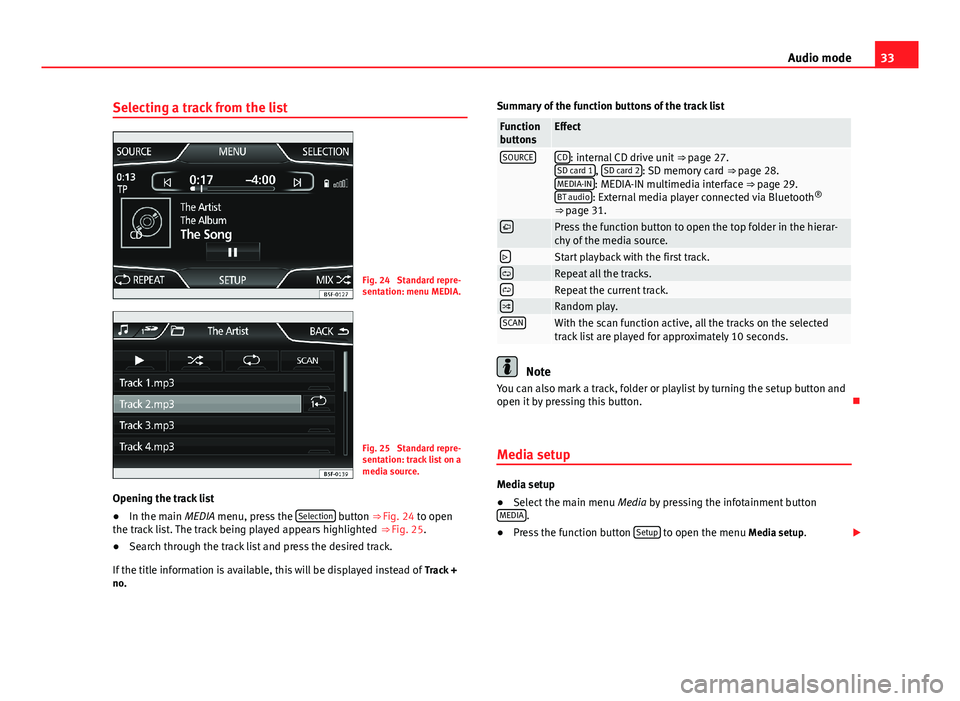
Standard repre-sentation: menu MEDIA.
Fig. 25
Standard repre-sentation: track list on amedia source.
Opening the track list
●
In the main MEDIA menu, press the Selection button ⇒ Fig. 24 to openthe track list. The track being played appears highlighted ⇒ Fig. 25.
●
Search through the track list and press the desired track.
If the title information is available, this will be displayed instead of Track +no.
Summary of the function buttons of the track listFunctionbuttonsEffectSOURCECD: internal CD drive unit ⇒ page 27.SD card 1, SD card 2: SD memory card ⇒ page 28.MEDIA-IN: MEDIA-IN multimedia interface ⇒ page 29.BT audio: External media player connected via Bluetooth®
⇒ page 31.
Press the function button to open the top folder in the hierar-chy of the media source.Start playback with the first track.Repeat all the tracks.Repeat the current track.Random play.SCANWith the scan function active, all the tracks on the selectedtrack list are played for approximately 10 seconds.
Note
You can also mark a track, folder or playlist by turning the setup button andopen it by pressing this button.
Media setup
Media setup
●
Select the main menu Media by pressing the infotainment buttonMEDIA.
●
Press the function button Setup to open the menu Media setup.
Page 47 of 72
46CAR menuCAR menuIntroduction to managing the CAR menu
Car menu
By pressing the “CAR” infotainment button you will access its main menuwith the following options:
●
VIEW
●
MINIPLAYER (Radio and Media function)
●
PREVIOUS-NEXT (to change screen)
●
SETUP ⇒ Booklet Instruction Manual, chapter System setup (CAR)
With the function button View you can access the following information:
●
DRIVING DATA
●
ECO
●
VEHICLE STATUS
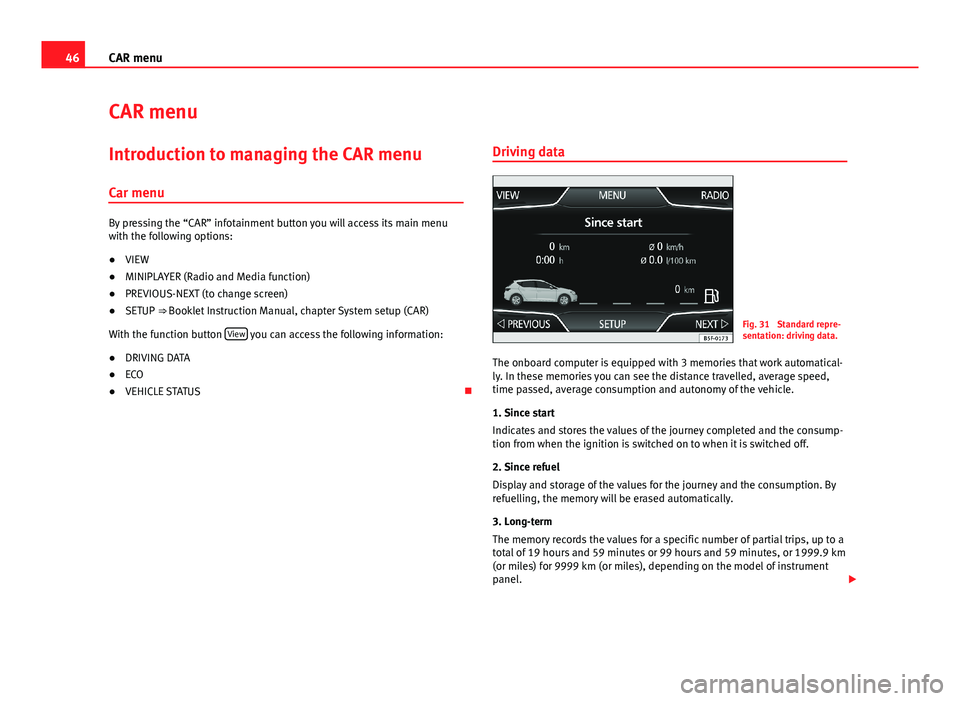
Driving dataFig. 31
Standard repre-sentation: driving data.
The onboard computer is equipped with 3 memories that work automatical-ly. In these memories you can see the distance travelled, average speed,time passed, average consumption and autonomy of the vehicle.
1. Since start
Indicates and stores the values of the journey completed and the consump-tion from when the ignition is switched on to when it is switched off.
2. Since refuel
Display and storage of the values for the journey and the consumption. Byrefuelling, the memory will be erased automatically.
3. Long-term
The memory records the values for a specific number of partial trips, up to atotal of 19 hours and 59 minutes or 99 hours and 59 minutes, or 1999.9 km(or miles) for 9999 km (or miles), depending on the model of instrumentpanel.
Page 57 of 72
56Telephone management (PHONE)Assign a user profile
In the telephone management, the contact list data, the call lists and thespeed dial numbers are assigned and saved in the user's profile. As soonas you connect the corresponding mobile phone with the telephone man-agement, they will be available once more.
If entries are modified in the phonebook of the mobile phone, you can up-date the phonebook data manually through the menu User profile setup⇒ page 61.
Telephone management lets you store a maximum of 4 user profiles for mo-bile telephones. If you wish to link/connect another mobile phone, the old-est user profile will automatically be replaced. If you do not want it to dothis, you must previously delete one of the user profiles. To delete a profilemanually: Menu Phone Setup > press User profile setup > press Delete otheruser profiles.
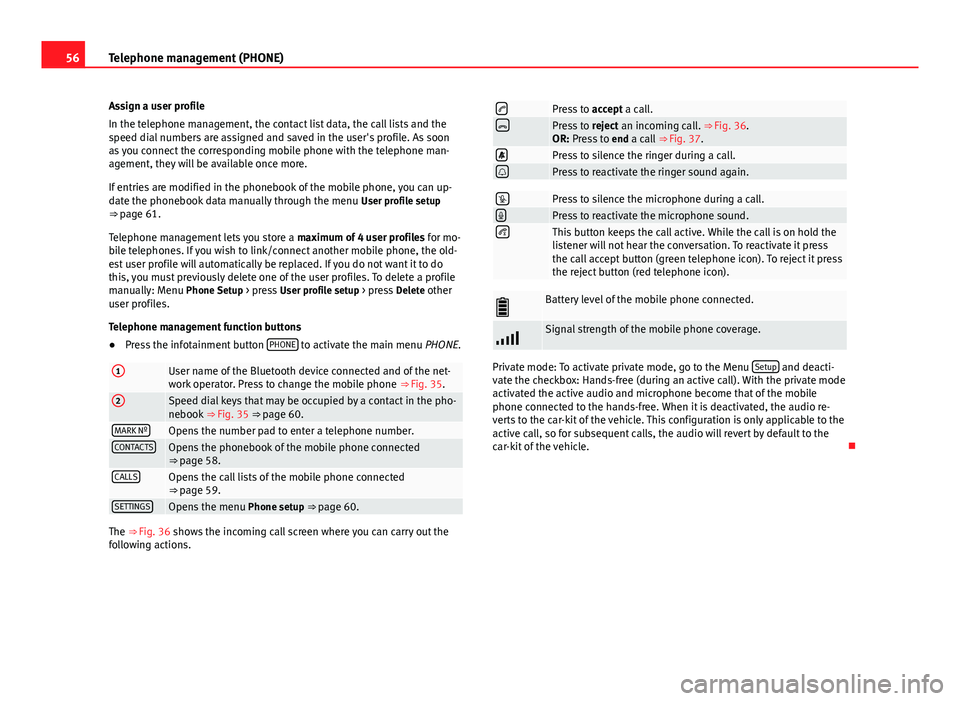
Telephone management function buttons
●
Press the infotainment button PHONE to activate the main menu PHONE.
1User name of the Bluetooth device connected and of the net-work operator. Press to change the mobile phone ⇒ Fig. 35.
2Speed dial keys that may be occupied by a contact in the pho-nebook ⇒ Fig. 35 ⇒ page 60.MARK NºOpens the number pad to enter a telephone number.CONTACTSOpens the phonebook of the mobile phone connected⇒ page 58.CALLSOpens the call lists of the mobile phone connected⇒ page 59.SETTINGSOpens the menu Phone setup ⇒ page 60.
The ⇒ Fig. 36 shows the incoming call screen where you can carry out thefollowing actions.
Press to accept a call.Press to reject an incoming call. ⇒ Fig. 36.OR: Press to end a call ⇒ Fig. 37.Press to silence the ringer during a call.Press to reactivate the ringer sound again.Press to silence the microphone during a call.Press to reactivate the microphone sound.This button keeps the call active. While the call is on hold thelistener will not hear the conversation. To reactivate it pressthe call accept button (green telephone icon). To reject it pressthe reject button (red telephone icon).
Battery level of the mobile phone connected.Signal strength of the mobile phone coverage.
Private mode: To activate private mode, go to the Menu Setup and deacti-vate the checkbox: Hands-free (during an active call). With the private modeactivated the active audio and microphone become that of the mobilephone connected to the hands-free. When it is deactivated, the audio re-verts to the car-kit of the vehicle. This configuration is only applicable to theactive call, so for subsequent calls, the audio will revert by default to thecar-kit of the vehicle.
Page 58 of 72
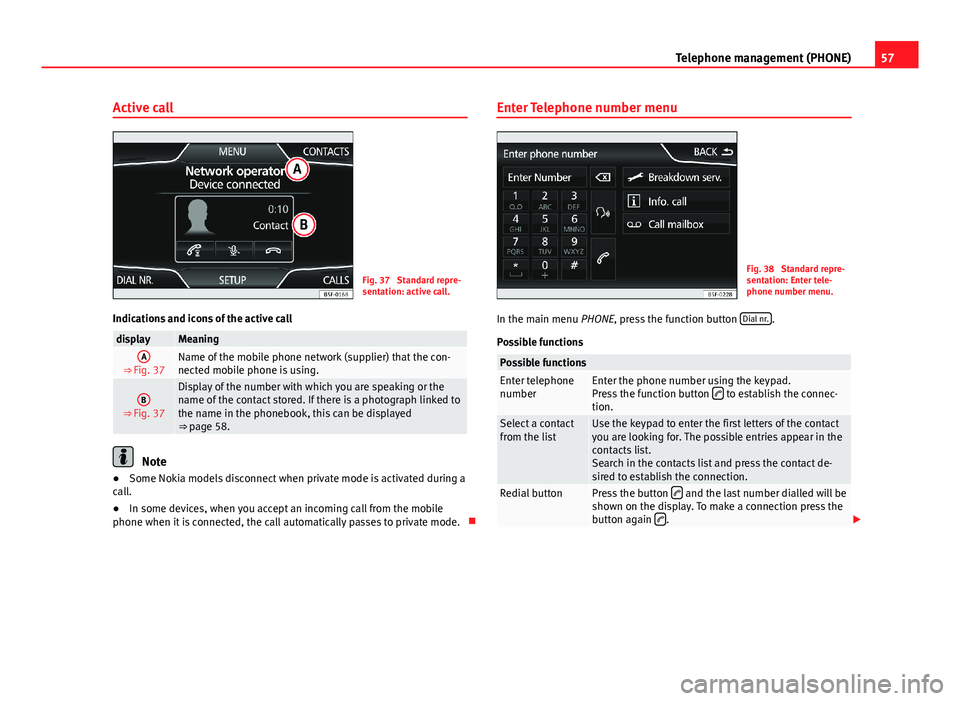
57Telephone management (PHONE)Active callFig. 37
Standard repre-sentation: active call.
Indications and icons of the active call
displayMeaningA
⇒ Fig. 37Name of the mobile phone network (supplier) that the con-nected mobile phone is using.
B
⇒ Fig. 37
Display of the number with which you are speaking or thename of the contact stored. If there is a photograph linked tothe name in the phonebook, this can be displayed⇒ page 58.
Note
●Some Nokia models disconnect when private mode is activated during acall.●
In some devices, when you accept an incoming call from the mobilephone when it is connected, the call automatically passes to private mode.
Enter Telephone number menuFig. 38
Standard repre-sentation: Enter tele-phone number menu.
In the main menu PHONE, press the function button Dial nr..
Possible functions
Possible functionsEnter telephonenumberEnter the phone number using the keypad.Press the function button to establish the connec-tion.
Select a contactfrom the listUse the keypad to enter the first letters of the contactyou are looking for. The possible entries appear in thecontacts list.Search in the contacts list and press the contact de-sired to establish the connection.
Redial buttonPress the button and the last number dialled will beshown on the display. To make a connection press thebutton again .
Page 64 of 72
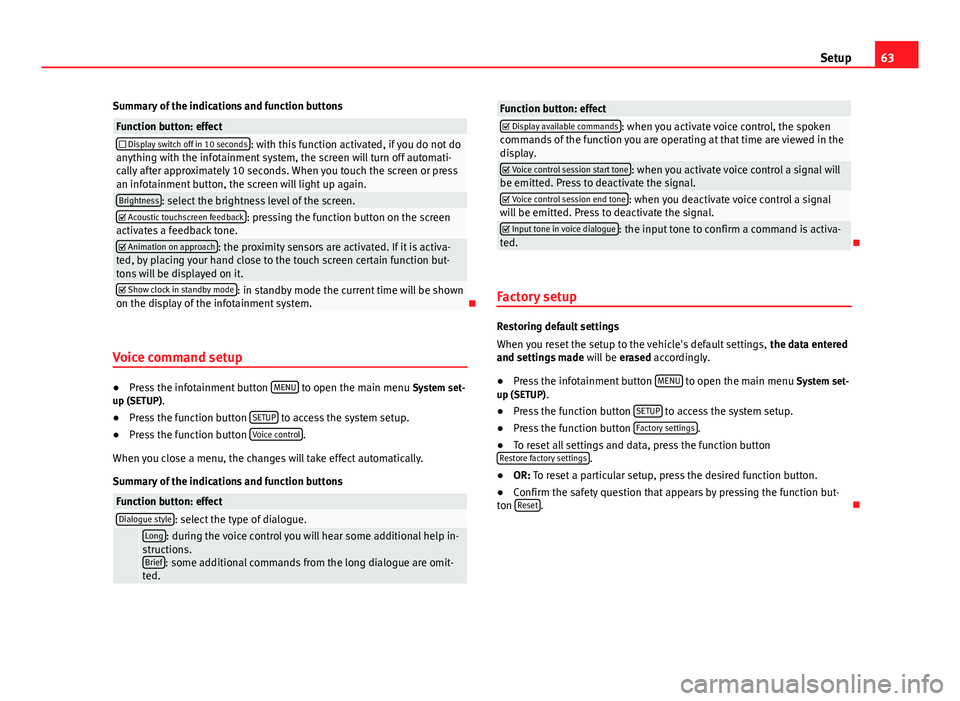
63SetupSummary of the indications and function buttonsFunction button: effect Display switch off in 10 seconds: with this function activated, if you do not doanything with the infotainment system, the screen will turn off automati-cally after approximately 10 seconds. When you touch the screen or pressan infotainment button, the screen will light up again.
Brightness: select the brightness level of the screen. Acoustic touchscreen feedback: pressing the function button on the screenactivates a feedback tone. Animation on approach: the proximity sensors are activated. If it is activa-ted, by placing your hand close to the touch screen certain function but-tons will be displayed on it.
Show clock in standby mode: in standby mode the current time will be shownon the display of the infotainment system.
Voice command setup
●
Press the infotainment button MENU to open the main menu System set-up (SETUP).
●
Press the function button SETUP to access the system setup.
●
Press the function button Voice control.
When you close a menu, the changes will take effect automatically.
Summary of the indications and function buttons
Function button: effectDialogue style: select the type of dialogue. Long: during the voice control you will hear some additional help in-structions.Brief: some additional commands from the long dialogue are omit-ted.
Function button: effect Display available commands: when you activate voice control, the spokencommands of the function you are operating at that time are viewed in thedisplay.
Voice control session start tone: when you activate voice control a signal willbe emitted. Press to deactivate the signal. Voice control session end tone: when you deactivate voice control a signalwill be emitted. Press to deactivate the signal. Input tone in voice dialogue: the input tone to confirm a command is activa-ted.
Factory setup
Restoring default settings
When you reset the setup to the vehicle's default settings, the data enteredand settings made will be erased accordingly.
●
Press the infotainment button MENU to open the main menu System set-up (SETUP).
●
Press the function button SETUP to access the system setup.
●
Press the function button Factory settings.
●
To reset all settings and data, press the function buttonRestore factory settings.
●
OR: To reset a particular setup, press the desired function button.
●
Confirm the safety question that appears by pressing the function but-ton Reset.