ECO mode Seat Leon SC 2013 MEDIA SYSTEM TOUCH - COLOUR
[x] Cancel search | Manufacturer: SEAT, Model Year: 2013, Model line: Leon SC, Model: Seat Leon SC 2013Pages: 56, PDF Size: 2.47 MB
Page 33 of 56
32PHONE mode*●Consult the compatibility list to ensure your mobile phone will workproperly.●
If you detect any strange behaviour between your mobile phone and theradio, restart your mobile by switching it off and on again.
●
Most electronic devices are shielded against high-frequency radio sig-nals. On certain occasions, nevertheless, electronic equipment might notbe protected against the radio frequency signals of the telephone manage-ment (Phone). This may produce interference.
Places with special regulations
Switch off the mobile phone and the preinstallation for mobile telephonesin places with risk of explosion. These areas are common but are not alwaysclearly marked ⇒ in Introduction to telephone management on page 31.They include, for example:
●
Areas with piping and reservoirs containing chemical products.
●
Below deck, on boats and ferries.
●
Near vehicles that run on liquefied gas (such as propane or butane).
●
In places where there are chemical substances or particles such as flour,dust or metal chips in the air.
●
In any other place where you must turn off the engine of your vehicle.
WARNINGSwitch off your mobile phone in places with risk of explosion! Your mo-bile phone will automatically connect to the mobile phone network assoon as the Bluetooth connection is cut from the mobile preinstallation.
NoteIn areas with special requirements and where the use of mobile phones isprohibited, you must keep the mobile phone and its preinstallation switch-ed off at all times. The radiation emitted by mobile phones when switchedon can cause interference in sensitive technical and medical equipment,which could damage this equipment or cause it to stop working properly.
Linking and connecting your mobile phone to
the infotainment system
To operate a mobile phone through the infotainment system, you need tolink both devices one time only.
For your safety, we recommend you carry out this connection when the vehi-cle is stationary. In some countries you cannot perform the pairing with thevehicle running.
You must guarantee the following setup in the mobile phone and the info-tainment system:
●
The Bluetooth® function must be active and visible on the mobile phoneand infotainment system, respectively.
●
The keypad lock of the mobile phone must be disconnected.
●
The notification and key tones of your mobile phone must be disconnec-ted.
In some countries, after switching the ignition on, the Bluetooth® functionof the infotainment system must be activated or remain visible for around 3minutes.
During the linking process you must enter data using your mobile phone'skeypad. To do so, you must have your mobile phone to hand.
Page 35 of 56
34PHONE mode*Note●The behaviour may vary depending on the device connected.●
For some android mobile devices you must accept the request to accessthe PBAP phonebook after linking, to be able to access the phonebook. It isrecommended to activate the option “always” so as not to have to accept itevery time you connect.
General information
Please refer to the notes on using a mobile phone in the vehicle withoutconnection to exterior antenna ⇒ Booklet Instruction Manual, chapter Ac-cessories and technical modifications.
Only use devices that support Bluetooth. At your SEAT dealership, or on theInternet, you will find information about products that support Bluetooth.
Take into account the instruction manual of the mobile phone and of themanufacturer of the accessories. In areas with poor coverage there may beanomalies in the reception and calls may be interrupted.
Most electronic devices are shielded against radio frequency signals (high-frequency). On some occasions, nevertheless, electronic devices cannot beprotected against the radio frequency signals from the telephone manager.This may produce interference.
Note
●There may be restrictions on the use of Bluetooth devices in some coun-tries. Information is available from the local authorities.●
To connect the phone manager to a device via Bluetooth technology,read the corresponding instruction manual for the particular safety instruc-tions. Only use products that support Bluetooth.
Bluetooth®
Bluetooth®
Bluetooth technology is used to connect a mobile phone to the vehicle'sphone manager. To use the phone manager with a mobile phone with Blue-tooth, the pairing process must be performed once.
If a connection has already been established, some mobile phones withBluetooth are recognised and a connection is established with them auto-matically when the ignition is switched on. For this purpose, the mobilephone and its Bluetooth must be switched on, and all the live Bluetoothconnections with other devices must be closed.
The Bluetooth wireless connection is free.
Bluetooth® is a registered trademark of Bluetooth® SIG, Inc.
Bluetooth profiles®
When you connect a mobile phone to the phone manager, the data ex-change is through one of the 2 Bluetooth profiles.
●
Hands-free Bluetooth profile (HFP): If a mobile phone is connected tothe telephone manager through the HFP, calls can be made wirelesslythrough the hands-free device.
●
Advanced audio profile (A2DP): Bluetooth profile for transmitting audiosignals with stereo quality.
Description of the telephone manager
Some functions and settings can only be carried out when the vehicle is sta-tionary, and are not compatible with all mobile telephones.
Page 36 of 56
35PHONE mode*Description1)
The telephone manager described in these instructions is approved for useon the following networks: GSM 850, GSM 900, GSM 1800 and GSM 1900.
With the help of the telephone manager, up to 2 mobile telephones can beconnected to the infotainment system via the Bluetooth profiles (for exam-ple, one used as a Bluetooth-audio player and another as a hands-free tele-phone).
Note
●Using a mobile phone inside the vehicle may provoke noise in thespeakers.●
It is possible that some networks may not offer the characters of all lan-guages, nor certain services.
PHONE main menu
Fig. 22
Standard repre-sentation: main menuTelephone Management.
Fig. 23
Standard repre-sentation: incoming call.
After the first connection, it will take a few minutes for the data from thephonebook of the paired mobile phone to be available in the infotainmentsystem.
Assign a user profile
In phone management, the entries stored in the phone book and the calllist are assigned to the user profile, and also stored in the user profile. Assoon as you connect the corresponding mobile phone with the telephonemanagement, they will be available once more.
If entries are modified in the phonebook of the mobile phone, you can up-date the phonebook data manually through the menu User profile setup⇒ page 40.
Telephone management lets you store a maximum of 4 user profiles for mo-bile telephones. If you wish to link/connect another mobile phone, the old-est user profile will automatically be replaced.
1)
Depending on country
Page 38 of 56
37PHONE mode*Indications and icons of the active calldisplayMeaningPress to silence the microphone during a call.Press to reactivate the microphone function.
With the private mode activated the active audio and micro-phone become that of the mobile phone connected to thehands-free. When it is deactivated, the audio reverts to thecar-kit of the vehicle.
D
⇒ Fig. 26Display of the number of the contact you are speaking to orthe name of the contact stored.
Note
Some Nokia models disconnect when private mode is activated during acall.
Enter Telephone number menu
Fig. 27
Standard repre-sentation: Enter tele-phone number menu.
In the main menu PHONE, press the function button Dial nr..
Possible functionsEnter telephonenumberEnter the phone number using the keypad.Press the function button to establish the connec-tion.
Select a contactfrom the listUse the keypad to enter the first letters of the contactyou are looking for. Possible entries appear in the listof contacts. If the selected contact has more than onenumber it will call the predefined default number.Search the phonebook and press the required contactto dial the number.
RCall the last number dialled.
Page 42 of 56
41CAR menuCAR menuIntroduction to managing the CAR menu
CAR menu
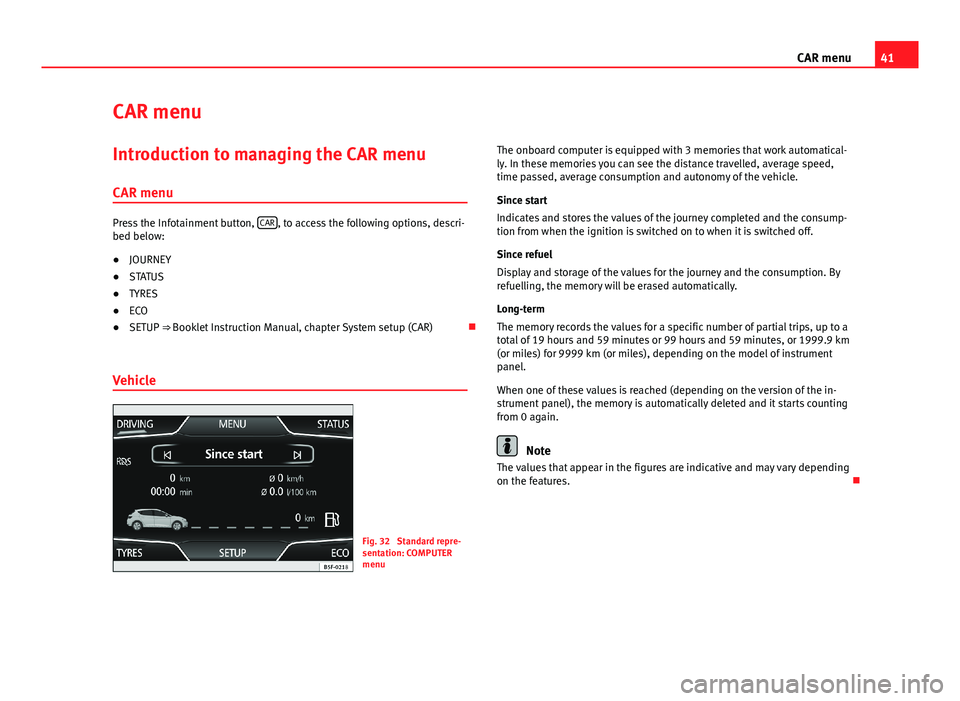
Press the Infotainment button, CAR, to access the following options, descri-bed below:
●
JOURNEY
●
STATUS
●
TYRES
●
ECO
●
SETUP ⇒ Booklet Instruction Manual, chapter System setup (CAR)
Vehicle
Fig. 32
Standard repre-sentation: COMPUTERmenu
The onboard computer is equipped with 3 memories that work automatical-ly. In these memories you can see the distance travelled, average speed,time passed, average consumption and autonomy of the vehicle.
Since start
Indicates and stores the values of the journey completed and the consump-tion from when the ignition is switched on to when it is switched off.
Since refuel
Display and storage of the values for the journey and the consumption. Byrefuelling, the memory will be erased automatically.
Long-term
The memory records the values for a specific number of partial trips, up to atotal of 19 hours and 59 minutes or 99 hours and 59 minutes, or 1999.9 km(or miles) for 9999 km (or miles), depending on the model of instrumentpanel.
When one of these values is reached (depending on the version of the in-strument panel), the memory is automatically deleted and it starts countingfrom 0 again.
Note
The values that appear in the figures are indicative and may vary dependingon the features.
Page 45 of 56
44Air Conditioning MenuAir Conditioning MenuAir conditioning
Adjust through the Easy Connect system*
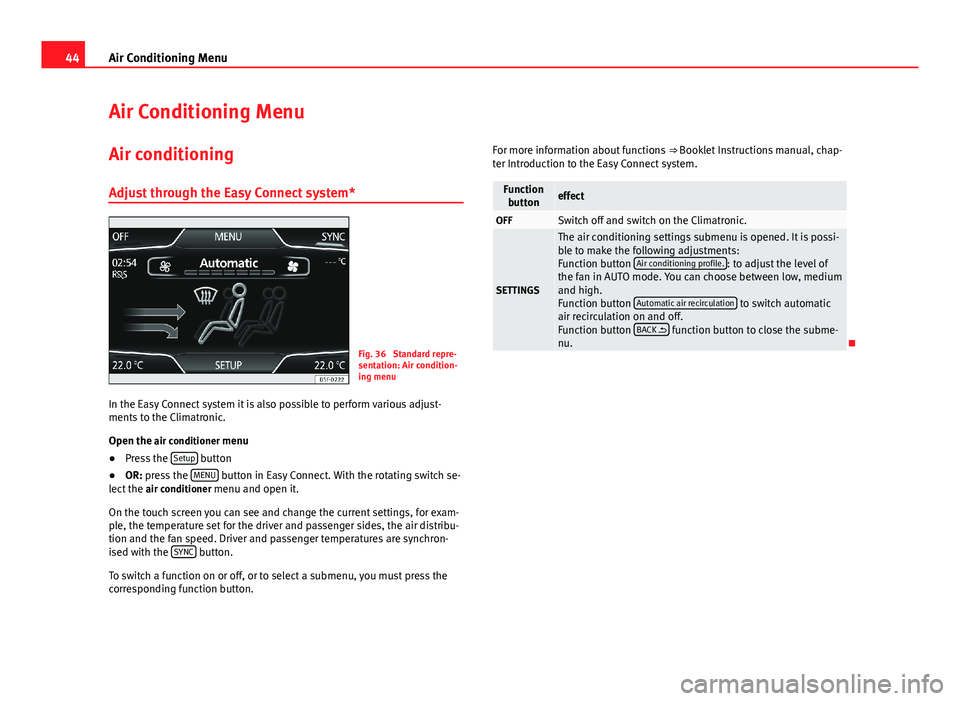
Fig. 36
Standard repre-sentation: Air condition-ing menu
In the Easy Connect system it is also possible to perform various adjust-ments to the Climatronic.
Open the air conditioner menu
●
Press the Setup button
●
OR: press the MENU button in Easy Connect. With the rotating switch se-lect the air conditioner menu and open it.
On the touch screen you can see and change the current settings, for exam-ple, the temperature set for the driver and passenger sides, the air distribu-tion and the fan speed. Driver and passenger temperatures are synchron-ised with the SYNC button.
To switch a function on or off, or to select a submenu, you must press thecorresponding function button.
For more information about functions ⇒ Booklet Instructions manual, chap-ter Introduction to the Easy Connect system.FunctionbuttoneffectOFFSwitch off and switch on the Climatronic.
SETTINGS
The air conditioning settings submenu is opened. It is possi-ble to make the following adjustments:Function button Air conditioning profile.: to adjust the level ofthe fan in AUTO mode. You can choose between low, mediumand high.Function button Automatic air recirculation to switch automaticair recirculation on and off.Function button BACK function button to close the subme-nu.