ECO mode Seat Leon SC 2013 MEDIA SYSTEM TOUCH - COLOUR
[x] Cancel search | Manufacturer: SEAT, Model Year: 2013, Model line: Leon SC, Model: Seat Leon SC 2013Pages: 56, PDF Size: 2.47 MB
Page 3 of 56
2General informationGeneral informationThis manual contains information, recommendations, advice and warningsrelated to your radio system. The other publications in the vehicle documen-tation contain further information of which you should be aware for yourown safety and for that of your passengers.
Ensure that the onboard documentation is kept in the vehicle at all times.This is especially important when lending or selling the vehicle to anotherperson.
This manual contains a description of the equipment supplied with the ve-hicle at the time of press. Some of the units described herein will not beavailable until a later date or is only available in certain markets.
The illustrations are intended as a general guide and may vary from theequipment fitted in your vehicle in some details.
The screen colour and the colour of the information displayed on it can varyaccording to vehicle model.
The images in this manual correspond to the colour screen variant, there isalso a monochrome screen option.
Directions and positions of components (e.g. right, left, front, rear) are al-ways relative to the direction of travel of the vehicle unless otherwise sta-ted.
The equipment marked with an asterisk is only supplied as standard incertain model versions, is optional in others or is only available in spe-cific countries.
Registered trademarks are marked ®. The absence of this symbol doesnot constitute a waiver of the rights concerning any proprietary name.
The section is continued on the following page.
Marks the end of a section.
®WARNINGTexts preceded by this symbol contain information on safety. They warnyou about possible dangers of accident or injury.
CAUTION
Texts with this symbol draw your attention to potential sources of damageto your vehicle.
For the sake of the environment
Texts preceded by this symbol contain relevant information concerning envi-ronmental protection.
Note
Texts preceded by this symbol contain additional information.
Page 15 of 56
14Audio modeSelecting, adjusting and storing a stationFig. 8
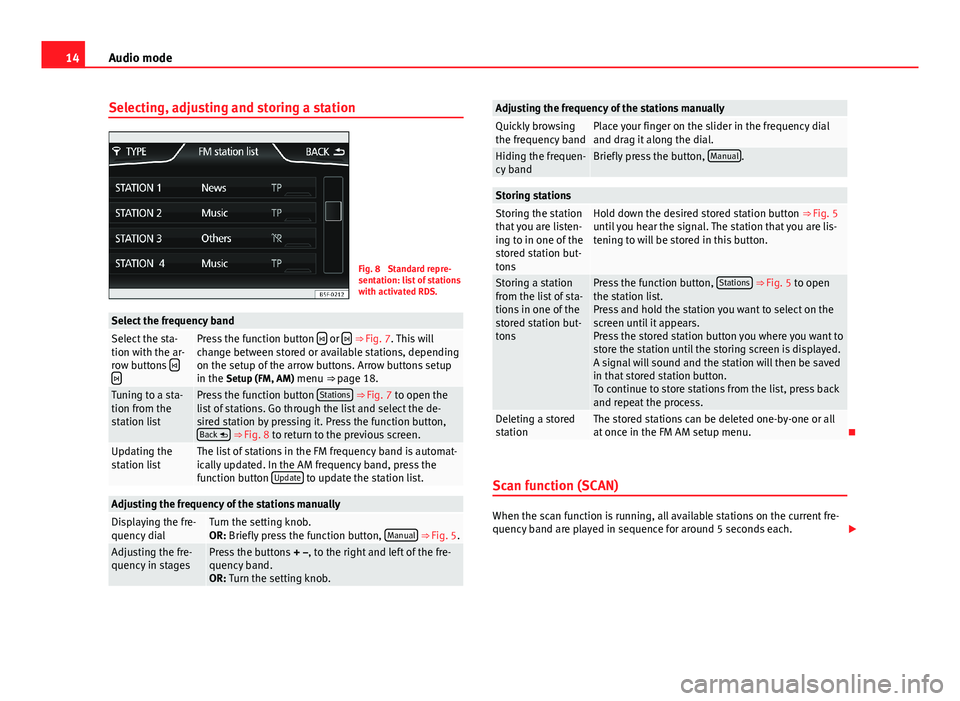
Standard repre-sentation: list of stationswith activated RDS.
Select the frequency bandSelect the sta-tion with the ar-row buttons
Press the function button or ⇒ Fig. 7. This willchange between stored or available stations, dependingon the setup of the arrow buttons. Arrow buttons setupin the Setup (FM, AM) menu ⇒ page 18.
Tuning to a sta-tion from thestation list
Press the function button Stations ⇒ Fig. 7 to open thelist of stations. Go through the list and select the de-sired station by pressing it. Press the function button,Back ⇒ Fig. 8 to return to the previous screen.
Updating thestation listThe list of stations in the FM frequency band is automat-ically updated. In the AM frequency band, press thefunction button Update to update the station list.
Adjusting the frequency of the stations manuallyDisplaying the fre-quency dialTurn the setting knob.OR: Briefly press the function button, Manual ⇒ Fig. 5.Adjusting the fre-quency in stagesPress the buttons + –, to the right and left of the fre-quency band.OR: Turn the setting knob.
Adjusting the frequency of the stations manuallyQuickly browsingthe frequency bandPlace your finger on the slider in the frequency dialand drag it along the dial.Hiding the frequen-cy bandBriefly press the button, Manual.Storing stationsStoring the stationthat you are listen-ing to in one of thestored station but-tons
Hold down the desired stored station button ⇒ Fig. 5until you hear the signal. The station that you are lis-tening to will be stored in this button.
Storing a stationfrom the list of sta-tions in one of thestored station but-tons
Press the function button, Stations ⇒ Fig. 5 to openthe station list.Press and hold the station you want to select on thescreen until it appears.Press the stored station button you where you want tostore the station until the storing screen is displayed.A signal will sound and the station will then be savedin that stored station button.To continue to store stations from the list, press backand repeat the process.
Deleting a storedstationThe stored stations can be deleted one-by-one or allat once in the FM AM setup menu.
Scan function (SCAN)
When the scan function is running, all available stations on the current fre-quency band are played in sequence for around 5 seconds each.
Page 16 of 56
15Audio modeStart stationscan functionBriefly press the setting knob.OR: Press the function button, Setup and then selectSCAN
End station scanfunctionPress the function button OFF to stop the scan functionon the station you are listening to.OR: Briefly press the setting knob. The scan function al-so ends when you manually select a station using thestored station buttons, or when a traffic report comes in.
Autostore (automatic station storing)
Hold the RADIO button down for approximately 5 seconds to carry out theautostore function for the stations that can be tuned in at the time of run-ning the Autostore. The stations are stored in the stored station buttons (on-ly the first bank of each frequency band is stored).
Note
This function can take several minutes, during which time the radio will re-main muted. In addition, any stored stations assigned previously will be de-leted.
Radio data services RDS
The RDS (Radio Data System) offers additional information in FM such as thevisualisation of the station name, automatic station tracking (AF), text emit-ted by radio (Radio Text ⇒ Fig. 5), traffic reports (TP) and programme type(PTY).
Not all units have RDS, nor do all FM stations offer this service.
Without RDS it is not possible to obtain radio data services.
Note●The broadcasting companies are responsible for the content broadcast.●
Due to infrastructure issues, RDS functions may be limited in certaincountries, and you may not be able to use traffic reports, automatic stationtracking (AF) or programme types (PTY).
●
In some cases the name of the station is too long. This text may beblocked/unblocked by pressing on the station name for 3 seconds. Twoicons will appear (wave + locked) on the right of the screen at mid height.
Station name and automatic station tracking
When the RDS is available, you can view the names of the stations provid-ing this service in the RADIO main menu and in the list of FM stations.
The FM stations send different content under one name (for example, Radio3) in various regional frequencies, provisionally or permanently ⇒ Fig. 5.
When driving, the automatic station tracking automatically changes to thefrequency that provides the best reception of the currently-selected station.However, this can interrupt the regional station currently tuned.
The automatic change of frequencies and automatic station tracking can belinked through the FM setup ⇒ page 18.
Page 19 of 56
18Audio modeSetup (FM, AM)
FM setup
●
Select the frequency band FM by pressing the infotainment buttonRADIO.
●
Press the function button Setup to open the menu FM setup.
Function button: effectSCAN: scan function. When the scan function is running, all available sta-tions on the current frequency band are played in sequence for aroundfive seconds each ⇒ page 14.
Traffic program*: TP function (traffic news monitoring) activated ⇒ page 16 a) Radio text: radio text is activated ⇒ page 16.a)Search mode: determines the setup of the buttons with arrows and .The setup will only be stored for the current band (FM, AM). Station list: All available stations on the selected frequency band can beselected with the arrow buttons. Presets: Using the arrow buttons, only switches between the stored sta-tions.Sort by*: choose the mode in which the stations will be arrangeda). Group: group the stations.Alphabetically: sort by alphabetical order.Delete presets: deletes the stored stations (all or separately). All stored stations are deleted (FM 1, FM 2, FM 3). To delete stations in-dividually, select the required memory bank. Then press the stored sta-tion button of the station to delete.
Advanced setup*: setup of the radio data services RDS.Function button: effect Radio data system (RDS): radio data system (RDS) activated ⇒ page 15.With the checkbox deselected , the functions depending on the RDSsystem will not be available. The function buttons depending on theRDS system will remain inactive (in grey). Alternative frequency (AF): the automatic station tracking is active. If thecheckbox is deselected , automatic station tracking is switched off.The function button Regional RDS will remain inactive (in grey).a)
Regional RDS: determines the setup for the regional automatic stationtracking via the RDS ⇒ page 15a). Fixed: only the alternative frequencies of the station tuned in that areadjusted to the same regional programme will be adjusted. Automatic: it will always change to the frequency of the station setthat offers the best reception at that time, even if it means interrupt-ing a regional broadcast.
a)
If the function button is deactivated (in grey), you must first activate the function button radio data system (RDS).
AM setup
●
Select the AM frequency band by pressing the RADIO infotainment but-ton.
●
Press the function button Setup to open the menu AM setup.
Function button: effectSCAN: scan function. When the scan function is running, all available sta-tions on the current frequency band are played in sequence for aroundfive seconds each ⇒ page 14.
Traffic program: The TP function (traffic news monitoring) is activated⇒ page 16.Search mode: determines the setup of the buttons with arrows and .The setup will only be stored for the current band (FM, AM). Station list: All available stations on the selected frequency band can beselected with the arrow buttons.
Page 22 of 56
21Audio moderecording. Information can be found on the internet regarding the best waysto create audio files and data media (compression rate, ID3 tag etc.).
Depending on the size, its condition due to use (copy and delete process-es), the folder structure and file type, the read time of the data media usedcan vary considerably.
Playlists only determine a certain playing order. There are no files stored ina playlist. The unit will not play a playlist if the files are not on the data me-dium at the locations referred to by the playlist (relative file paths).
Note
●Do not use adaptors for memory cards.●
We will not accept any responsibility for files damaged or lost on the da-ta medium.
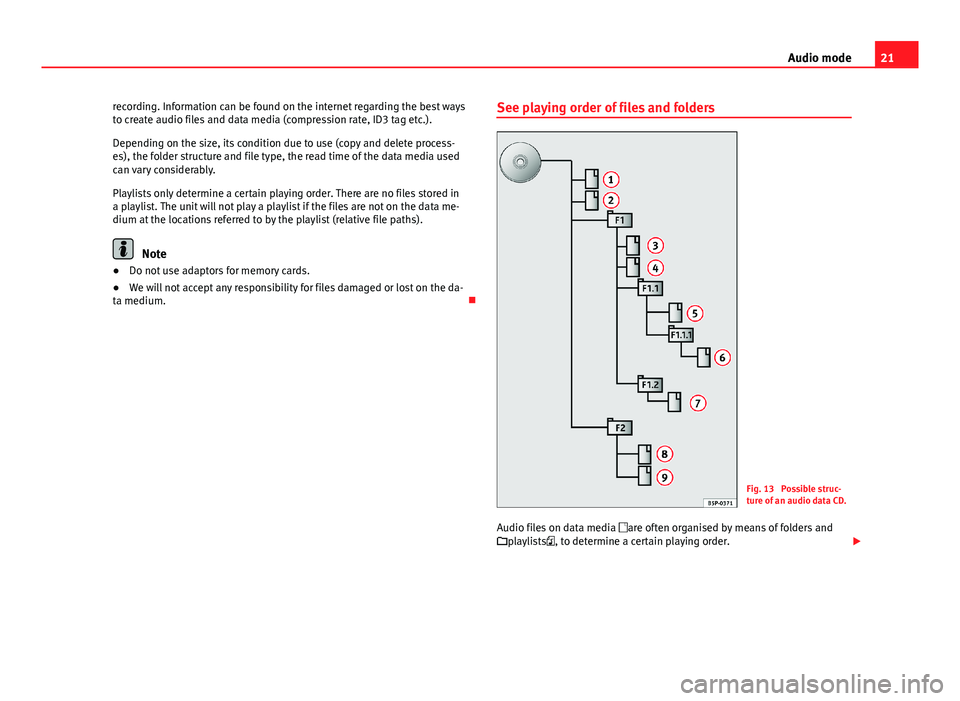
See playing order of files and foldersFig. 13
Possible struc-ture of an audio data CD.
Audio files on data media are often organised by means of folders andplaylists, to determine a certain playing order.
Page 23 of 56
22Audio modeTracks, folders and playlists on a data medium are sorted by name in alpha-betic or numeric order.
The diagram shows an example of a conventional audio data CD containingtracks , folders and subfolders ⇒ Fig. 13 that are played in the follow-ing way:1)
Tracks
1
and
2
in the root directory (ROOT) of the CD
Tracks
3
and
4
in the first folder F1 of the CD root directory
Track
5
in the first subfolder F1.1 of the folder F1
Track
6
in the first subfolder F1.1.1 of the subfolder F1.1
Track
7
in the second subfolder F1.2 of the folder F1
Tracks
8
and
9
in the second folder F2
Note
●The play order can be modified by selecting between the different play-back modes ⇒ page 22.●
The playlists are not automatically activated; they must be selectedthrough the track selection menu ⇒ page 27.
1.2.3.4.5.6.MEDIA main menuFig. 14
Standard repre-sentation: main menuMEDIA.
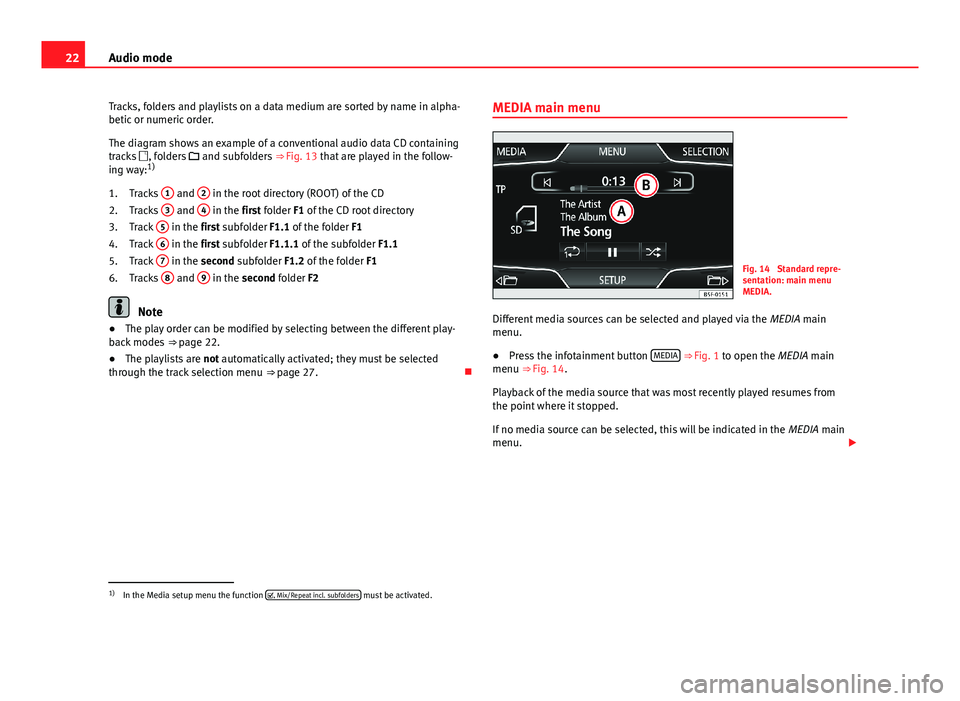
Different media sources can be selected and played via the MEDIA mainmenu.
●
Press the infotainment button MEDIA ⇒ Fig. 1 to open the MEDIA mainmenu ⇒ Fig. 14.
Playback of the media source that was most recently played resumes fromthe point where it stopped.
If no media source can be selected, this will be indicated in the MEDIA mainmenu.
1)
In the Media setup menu the function , Mix/Repeat incl. subfolders must be activated.
Page 24 of 56
23Audio modeFunction buttons of the main menu MediaFunction but-tonEffect
MEDIA
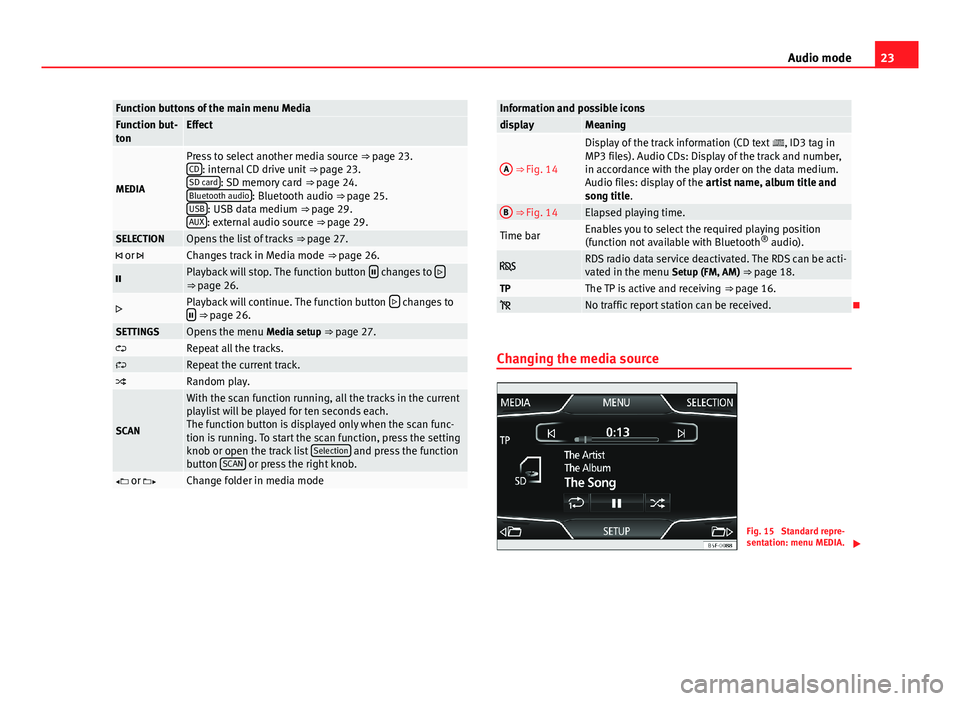
Press to select another media source ⇒ page 23.CD: internal CD drive unit ⇒ page 23.SD card: SD memory card ⇒ page 24.Bluetooth audio: Bluetooth audio ⇒ page 25.USB: USB data medium ⇒ page 29.AUX: external audio source ⇒ page 29.
SELECTIONOpens the list of tracks ⇒ page 27. or Changes track in Media mode ⇒ page 26.Playback will stop. The function button changes to ⇒ page 26.Playback will continue. The function button changes to ⇒ page 26.SETTINGSOpens the menu Media setup ⇒ page 27.Repeat all the tracks.Repeat the current track.Random play.
SCAN
With the scan function running, all the tracks in the currentplaylist will be played for ten seconds each.The function button is displayed only when the scan func-tion is running. To start the scan function, press the settingknob or open the track list Selection and press the functionbutton SCAN or press the right knob.
or Change folder in media modeInformation and possible iconsdisplayMeaningA
⇒ Fig. 14
Display of the track information (CD text , ID3 tag inMP3 files). Audio CDs: Display of the track and number,in accordance with the play order on the data medium.Audio files: display of the artist name, album title andsong title.
B ⇒ Fig. 14Elapsed playing time.Time barEnables you to select the required playing position(function not available with Bluetooth® audio). RDS radio data service deactivated. The RDS can be acti-vated in the menu Setup (FM, AM) ⇒ page 18.TPThe TP is active and receiving ⇒ page 16. No traffic report station can be received.
Changing the media source
Fig. 15
Standard repre-sentation: menu MEDIA.
Page 25 of 56
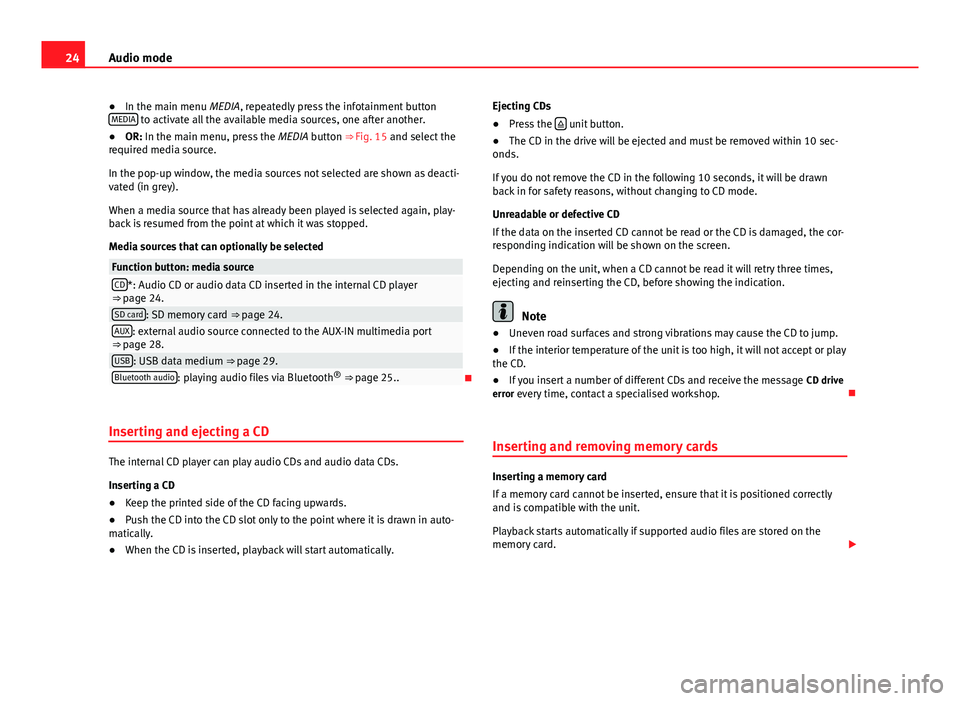
24Audio mode●In the main menu MEDIA, repeatedly press the infotainment buttonMEDIA to activate all the available media sources, one after another.●
OR: In the main menu, press the MEDIA button ⇒ Fig. 15 and select therequired media source.
In the pop-up window, the media sources not selected are shown as deacti-vated (in grey).
When a media source that has already been played is selected again, play-back is resumed from the point at which it was stopped.
Media sources that can optionally be selected
Function button: media sourceCD*: Audio CD or audio data CD inserted in the internal CD player⇒ page 24.SD card: SD memory card ⇒ page 24.AUX: external audio source connected to the AUX-IN multimedia port⇒ page 28.USB: USB data medium ⇒ page 29.Bluetooth audio: playing audio files via Bluetooth® ⇒ page 25..
Inserting and ejecting a CD
The internal CD player can play audio CDs and audio data CDs.
Inserting a CD
●
Keep the printed side of the CD facing upwards.
●
Push the CD into the CD slot only to the point where it is drawn in auto-matically.
●
When the CD is inserted, playback will start automatically.
Ejecting CDs●
Press the unit button.
●
The CD in the drive will be ejected and must be removed within 10 sec-onds.
If you do not remove the CD in the following 10 seconds, it will be drawnback in for safety reasons, without changing to CD mode.
Unreadable or defective CD
If the data on the inserted CD cannot be read or the CD is damaged, the cor-responding indication will be shown on the screen.
Depending on the unit, when a CD cannot be read it will retry three times,ejecting and reinserting the CD, before showing the indication.
Note
●Uneven road surfaces and strong vibrations may cause the CD to jump.●
If the interior temperature of the unit is too high, it will not accept or playthe CD.
●
If you insert a number of different CDs and receive the message CD driveerror every time, contact a specialised workshop.
Inserting and removing memory cards
Inserting a memory card
If a memory card cannot be inserted, ensure that it is positioned correctlyand is compatible with the unit.
Playback starts automatically if supported audio files are stored on thememory card.
Page 28 of 56
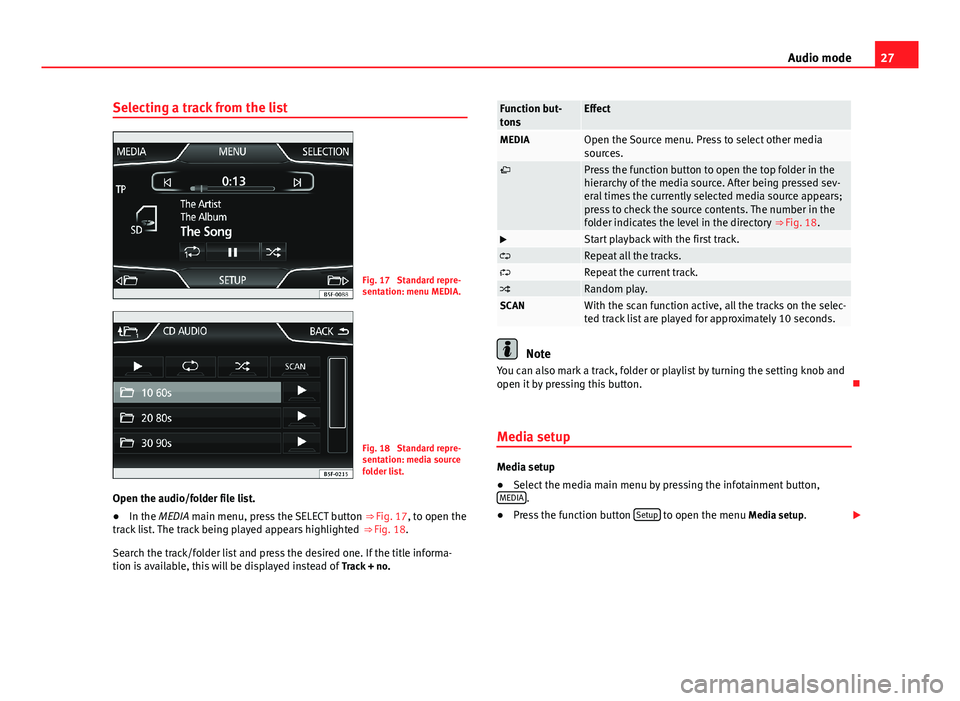
27Audio modeSelecting a track from the listFig. 17
Standard repre-sentation: menu MEDIA.
Fig. 18
Standard repre-sentation: media sourcefolder list.
Open the audio/folder file list.
●
In the MEDIA main menu, press the SELECT button ⇒ Fig. 17, to open thetrack list. The track being played appears highlighted ⇒ Fig. 18.
Search the track/folder list and press the desired one. If the title informa-tion is available, this will be displayed instead of Track + no.
Function but-tonsEffectMEDIAOpen the Source menu. Press to select other mediasources.Press the function button to open the top folder in thehierarchy of the media source. After being pressed sev-eral times the currently selected media source appears;press to check the source contents. The number in thefolder indicates the level in the directory ⇒ Fig. 18.
Start playback with the first track.Repeat all the tracks.Repeat the current track.Random play.SCANWith the scan function active, all the tracks on the selec-ted track list are played for approximately 10 seconds.
Note
You can also mark a track, folder or playlist by turning the setting knob andopen it by pressing this button.
Media setup
Media setup
●
Select the media main menu by pressing the infotainment button,MEDIA.
●
Press the function button Setup to open the menu Media setup.
Page 31 of 56
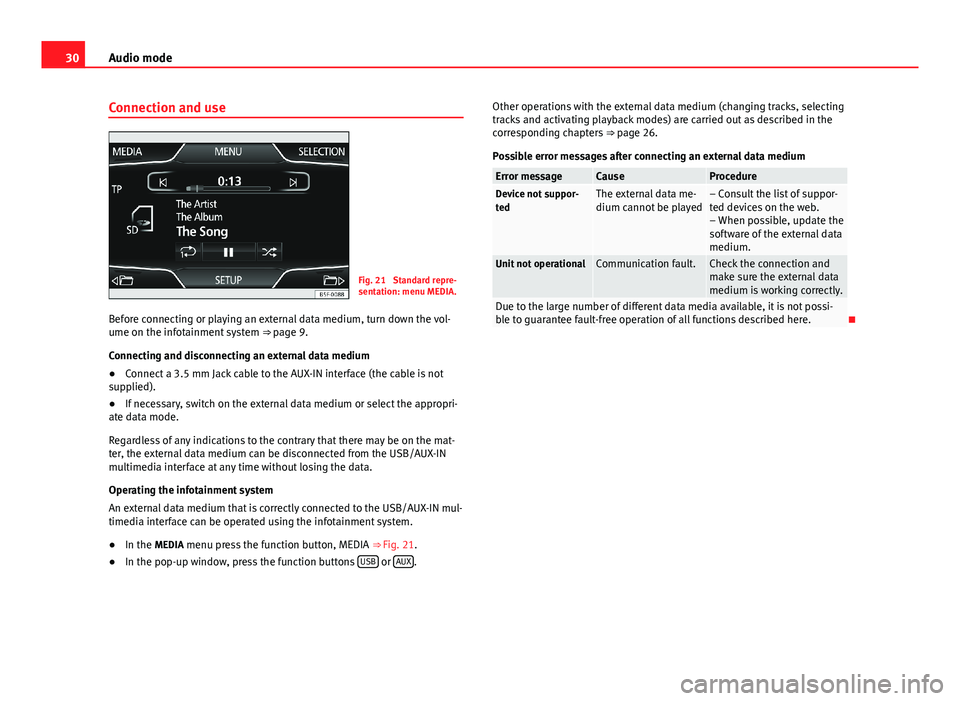
30Audio modeConnection and useFig. 21
Standard repre-sentation: menu MEDIA.
Before connecting or playing an external data medium, turn down the vol-ume on the infotainment system ⇒ page 9.
Connecting and disconnecting an external data medium
●
Connect a 3.5 mm Jack cable to the AUX-IN interface (the cable is notsupplied).
●
If necessary, switch on the external data medium or select the appropri-ate data mode.
Regardless of any indications to the contrary that there may be on the mat-ter, the external data medium can be disconnected from the USB/AUX-INmultimedia interface at any time without losing the data.
Operating the infotainment system
An external data medium that is correctly connected to the USB/AUX-IN mul-timedia interface can be operated using the infotainment system.
●
In the MEDIA menu press the function button, MEDIA ⇒ Fig. 21.
●
In the pop-up window, press the function buttons USB or AUX.
Other operations with the external data medium (changing tracks, selectingtracks and activating playback modes) are carried out as described in thecorresponding chapters ⇒ page 26.
Possible error messages after connecting an external data medium
Error messageCauseProcedureDevice not suppor-tedThe external data me-dium cannot be played– Consult the list of suppor-ted devices on the web.– When possible, update thesoftware of the external datamedium.
Unit not operationalCommunication fault.Check the connection andmake sure the external datamedium is working correctly.
Due to the large number of different data media available, it is not possi-ble to guarantee fault-free operation of all functions described here.