buttons Seat Leon SC 2014 MEDIA SYSTEM 2.2
[x] Cancel search | Manufacturer: SEAT, Model Year: 2014, Model line: Leon SC, Model: Seat Leon SC 2014Pages: 114, PDF Size: 2.47 MB
Page 66 of 114
65
Navigation
Stopping and resuming route guidance
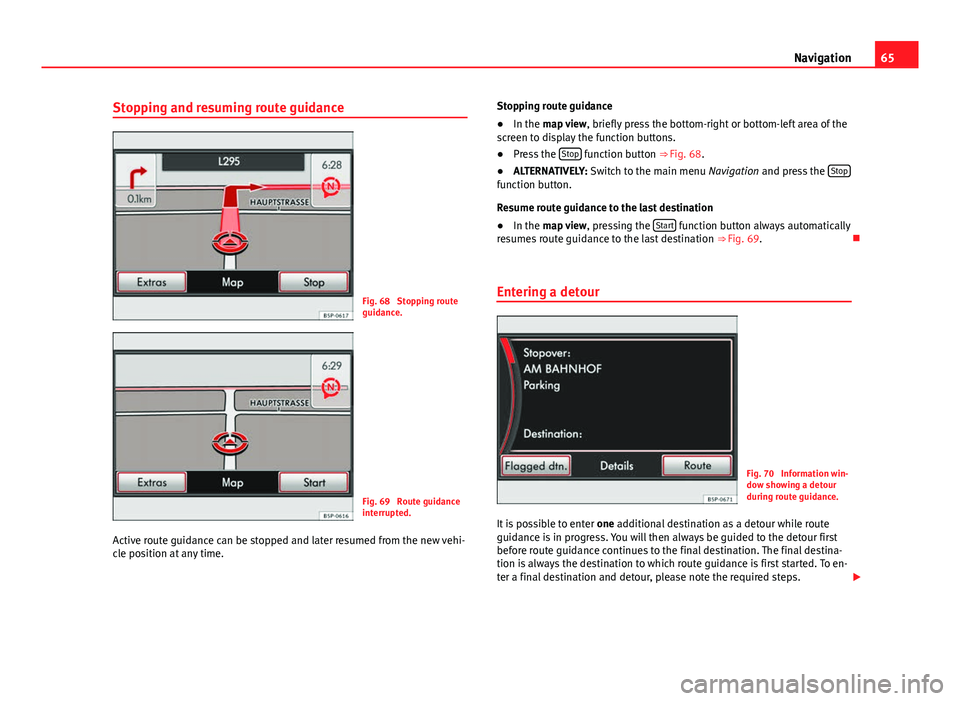
Fig. 68 Stopping route
guidance.
Fig. 69 Route guidance
interrupted.
Active route guidance can be stopped and later resumed from the new vehi-
cle position at any time. Stopping route guidance
● In the map view , briefly press the bottom-right or bottom-left area of the
screen to display the function buttons.
● Press the Stop
function button ⇒
Fig. 68.
● ALTERNATIVELY: Switch to the main menu Navigation and press the Stop
function button.
Resume route guidance to the last destination
● In the map view , pressing the Start
function button always automatically
resumes route guidance to the last destination ⇒ Fig. 69.
Entering a detour
Fig. 70 Information win-
dow showing a detour
during route guidance.
It is possible to enter one additional destination as a detour while route
guidance is in progress. You will then always be guided to the detour first
before route guidance continues to the final destination. The final destina-
tion is always the destination to which route guidance is first started. To en-
ter a final destination and detour, please note the required steps.
Page 69 of 114
68Navigation
Directly excluding a route section further ahead
(congestion)
During a route guidance, the route section of the remaining stretch of route
can be excluded manually.
● Press the unit button
in any of the navigation menus (except SETUP).
● In the information window, press the Route function button.
● Press the Congestion ahead function button in the pop-up window.
● Enter the length of the section to be excluded by turning the setting
knob ⇒ Fig. 1 10
.
The length indicated for the route section is shown on the lower line of the
screen. If (Max) is displayed, this indicates that the maximum permitted
length for exclusion has been reached.
● Press the OK
setting knob or function button to confirm the exclusion.
The excluded route section is displayed on the map.
Route guidance will start again when the navigation system has calculated
an alternative route to the excluded section.
Re-opening a section
● Press the unit button
in any of the navigation menus (except SETUP).
● In the information window, press the Route function button.
● Press the Lift cong. excl. function button in the pop-up window.
Note
It is also possible to enter or cancel an exclusion while viewing the TMC traf-
fic announcements using the function button Congestion ahead
⇒ page 69.
Note
Information on manually excluding route sections further ahead ⇒ page 67.Dynamic route guidance with TMC (Traffic Message
Channel)
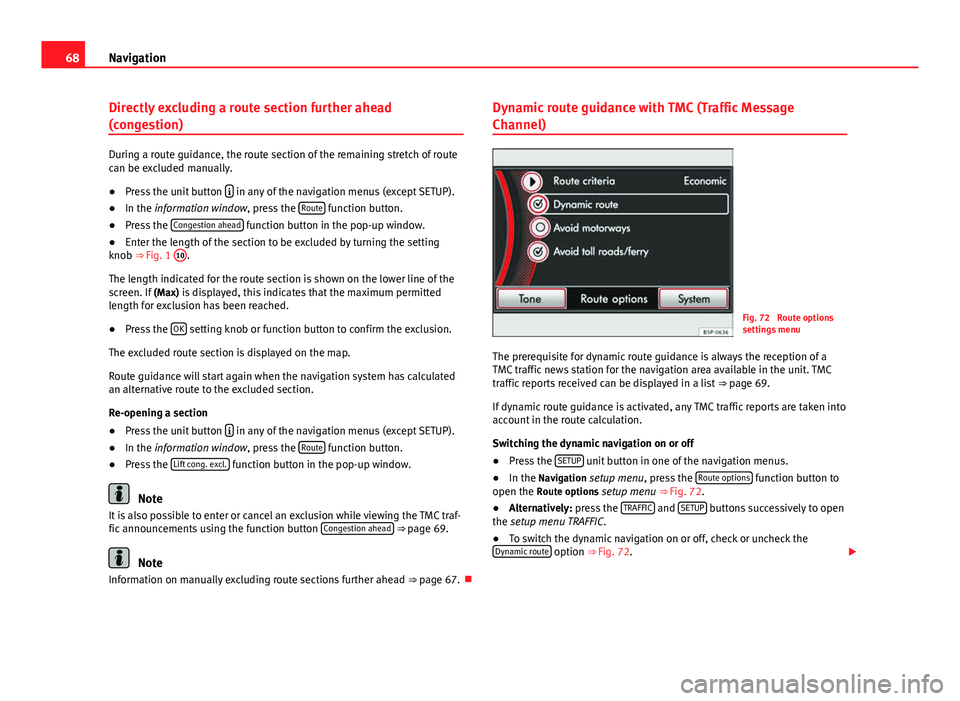
Fig. 72 Route options
settings menu
The prerequisite for dynamic route guidance is always the reception of a
TMC traffic news station for the navigation area available in the unit. TMC
traffic reports received can be displayed in a list ⇒ page 69.
If dynamic route guidance is activated, any TMC traffic reports are taken into
account in the route calculation.
Switching the dynamic navigation on or off
● Press the SETUP
unit button in one of the navigation menus.
● In the Navigation setup menu, press the Route options function button to
open the Route options setup menu ⇒ Fig. 72.
● Alternatively: press the TRAFFIC
and SETUP buttons successively to open
the setup menu TRAFFIC.
● To switch the dynamic navigation on or off, check or uncheck the
Dynamic route
option ⇒ Fig. 72.
Page 71 of 114
70Navigation
The unit only processes and displays TMC traffic reports affecting the area
within a radius of roughly 100 km from the current vehicle position.
TMC traffic reports are required for dynamic route guidance and are dis-
played on the map ⇒ page 68.
Display TMC traffic reports
● Press the TRAFFIC
unit button to display the list of the current TMC traffic
reports ⇒ Fig. 73.
● Press one of the TMC traffic reports on the screen to open the detailed
view ⇒ Fig. 74.
● Alternatively: select the TMC report by turning setting button ⇒ Fig. 1 10
and press to open a detailed view
⇒ Fig. 74.
● In the detailed view, you can browse through the TMC traffic reports us-
ing the function buttons Previous
and Next.
Display TMC traffic news stations
● Open the list of the current TMC traffic reports.
● Press the
⇒ Fig. 1 7 unit button to open the information window. The
current TMC traffic news station is displayed.
● Press the
unit button again to close the information window.
Note
By using the Congestion ahead ⇒ Fig. 73 function button it is possible to enter
a manual exclusion from the vehicle position ⇒ page 68.
Note
The radio-navigation system can only process and store TMC traffic reports
if the unit has access to navigation data for the area you are currently travel-
ling through.
Note
The quality of the dynamic route guidance depends on the information con-
tained in the TMC traffic reports. The radio stations are responsible for the
content of the news broadcast.
Route guidance in demo mode
If demo mode is activated in the Navigation setup menu ⇒ page 71, an ad-
ditional pop-up window opens when you start route guidance.
● Pressing the Demo
function button starts a “virtual route guidance” to
the destination you have entered.
● If you press the Normal
function button, a “real route guidance” starts.
The sequence of events and the operations in virtual route guidance are
similar to those in real route guidance.
Virtual route guidance is repeated when you reach the fictitious destination
and always starts again from the starting point if it is interrupted.
If the starting point for demo mode has been defined manually in the Navi-
gation setup menu, virtual route guidance will start from this position.
If the vehicle is moved and the unit can determine its current location by
GPS, any manually entered starting point will be overwritten with the current
vehicle location ⇒ page 71.
When real route guidance is started following virtual route guidance in
demo mode, the unit first has to reorient itself. This may take some time,
depending on the number of satellites the unit can currently receive. Mov-
ing the vehicle may speed up the reorientation process.
Page 78 of 114
77
Telephone control (Phone)
● The mobile phone is switched on and the Bluetooth function and visibili-
ty are activated. The mobile phone must be close to the vehicle.
● Whenever automatic connection was selected in the questions posed
during the first pairing, and provided that the mobile phone user profile has
not been deleted.
Main menu PHONE main menu
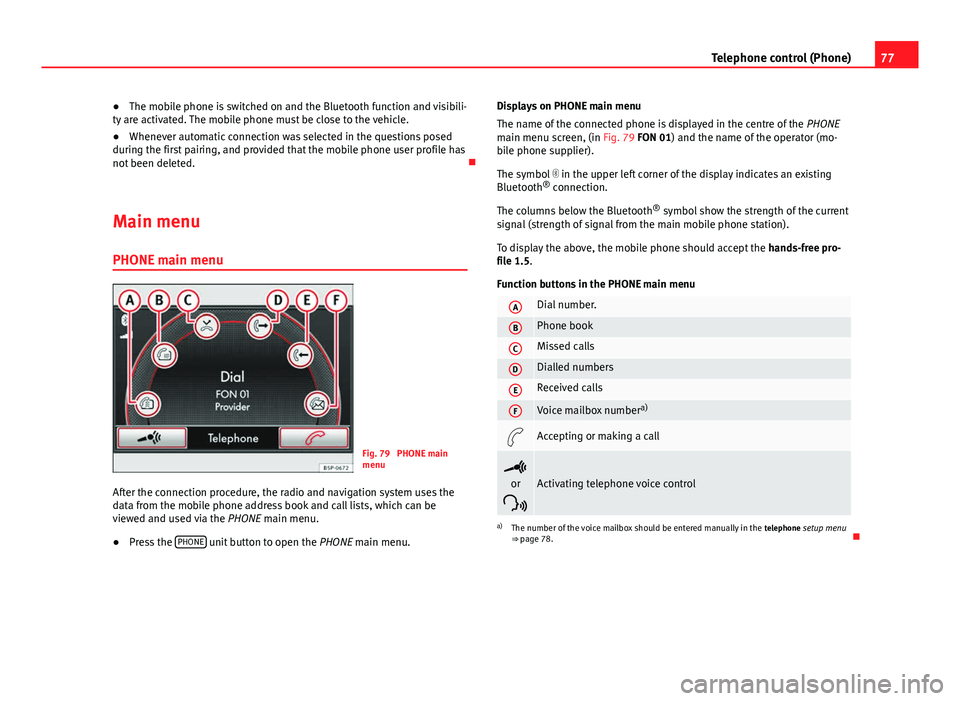
Fig. 79 PHONE main
menu
After the connection procedure, the radio and navigation system uses the
data from the mobile phone address book and call lists, which can be
viewed and used via the PHONE main menu.
● Press the PHONE
unit button to open the
PHONE main menu. Displays on PHONE main menu
The name of the connected phone is displayed in the centre of the PHONE
main menu screen, (in Fig. 79 FON 01) and the name of the operator (mo-
bile phone supplier).
The symbol in the upper left corner of the display indicates an existing
Bluetooth ®
connection.
The columns below the Bluetooth ®
symbol show the strength of the current
signal (strength of signal from the main mobile phone station).
To display the above, the mobile phone should accept the hands-free pro-
file 1.5.
Function buttons in the PHONE main menu
ADial number.
BPhone book
CMissed calls
DDialled numbers
EReceived calls
FVoice mailbox number a)
Accepting or making a call
or
Activating telephone voice control
a) The number of the voice mailbox should be entered manually in the telephone setup menu
⇒ page 78.
Page 84 of 114
83
Telephone control (Phone)
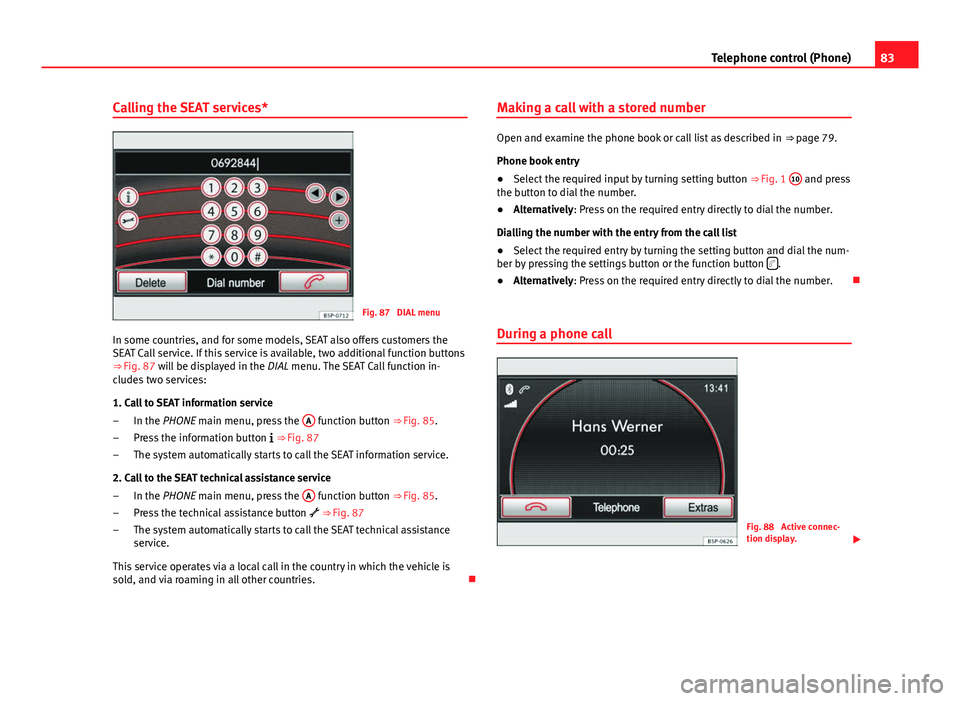
Calling the SEAT services*
Fig. 87 DIAL menu
In some countries, and for some models, SEAT also offers customers the
SEAT Call service. If this service is available, two additional function buttons
⇒ Fig. 87 will be displayed in the
DIAL menu. The SEAT Call function in-
cludes two services:
1. Call to SEAT information service
In the PHONE main menu, press the A
function button
⇒ Fig. 85.
Press the information button
⇒ Fig. 87
The system automatically starts to call the SEAT information service.
2. Call to the SEAT technical assistance service In the PHONE main menu, press the A
function button
⇒ Fig. 85.
Press the technical assistance button
⇒ Fig. 87
The system automatically starts to call the SEAT technical assistance
service.
This service operates via a local call in the country in which the vehicle is
sold, and via roaming in all other countries.
–
–
–
–
–
– Making a call with a stored number
Open and examine the phone book or call list as described in
⇒ page 79.
Phone book entry
● Select the required input by turning setting button ⇒ Fig. 1 10
and press
the button to dial the number.
● Alternatively: Press on the required entry directly to dial the number.
Dialling the number with the entry from the call list
● Select the required entry by turning the setting button and dial the num-
ber by pressing the settings button or the function button
.
● Alternatively: Press on the required entry directly to dial the number.
During a phone call
Fig. 88 Active connec-
tion display.
Page 92 of 114
91
Bluetooth System
the system will ask you to confirm that the password shown on the dash
panel display is the same as that displayed on the mobile phone. Confirma-
tion must be made both on the mobile device and on the instrument panel
using controls on the steering wheel. This password will be a 6 digit code
generated randomly each time according to SSP technology. The system is
capable of supporting SSP (Secure Simple Pairing) in order for the pairing to
be performed in a completely secure manner. SSP pairing can only be car-
ried out if your device supports the SSP function.
● Next, accept the connection instructions on the mobile phone.
● When asked to do so, enter the PIN number 1234 and confirm.
● The contacts from the mobile phone's memory and/or SIM card 1)
are
transferred to the vehicle system. Some mobile phones may display a mes-
sage asking for confirmation of access to the phone book or other options,
these messages should be accepted in order for the hands free system to
access the information contained on the mobile and in order to carry out the
complete functions of the system.
● The pairing is complete.
Note
● The visibility of the Bluetooth system in the vehicle is activated for 3 mi-
nutes when the ignition is turned on with the key. After 3 minutes, if you
want to reactivate the visibility you can do so by using the menus on the in-
strument panel ⇒ page 98 or via voice control ⇒ page 93.
● If for any reason you take more than 3 minutes to perform these steps or
more than 30 seconds to enter the PIN, you will have to start the process
over again. Automatic pairing
When the telephone has been connected and the corresponding user pro-
file created, your telephone will automatically link up with the SEAT tele-
phone system under the following conditions:
● The mobile phone is switched on and the Bluetooth function and visibili-
ty are activated. The mobile phone must be close to the vehicle.
● The vehicle system has Bluetooth visibility switched on (during the 3 mi-
nutes following activation of the contact or after pressing the button “PTT”).
● The automatic connection was accepted during the questions of the first
connection.
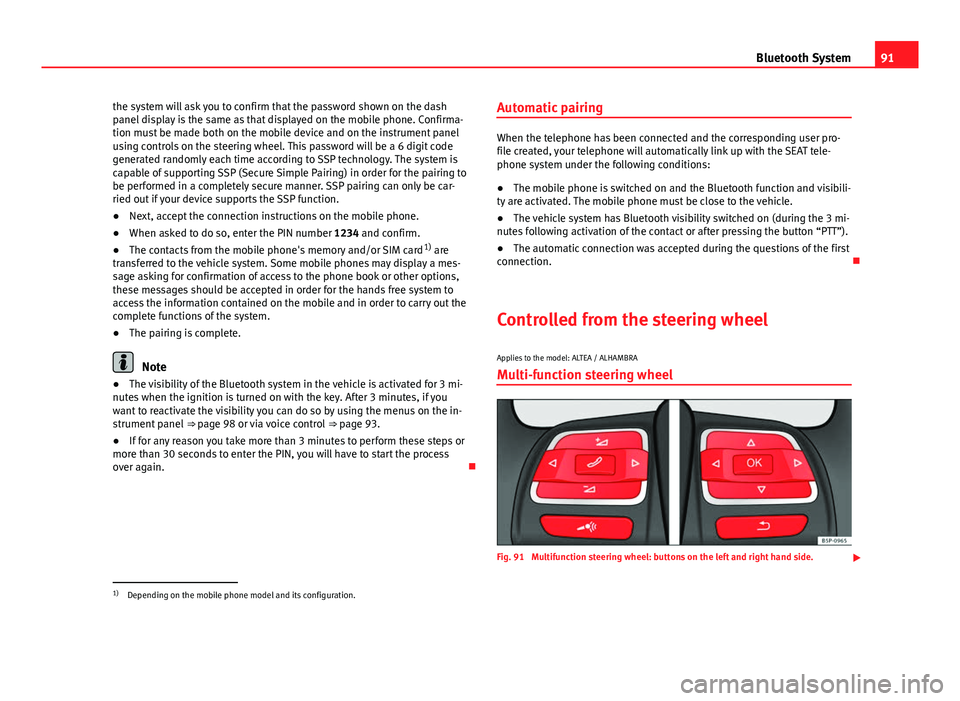
Controlled from the steering wheel
Applies to the model: ALTEA / ALHAMBRA Multi-function steering wheel
Fig. 91 Multifunction steering wheel: buttons on the left and right hand side.
1)
Depending on the mobile phone model and its configuration.
Page 93 of 114
92Bluetooth System
Buttoneffect
Button “Push to talk” or “PTT” button.
Short press: start or cancel the speech control system, in-
terrupt message in process in order to talk promptly, turn
on Bluetooth visible for 3 minutes.
Short press: Confirm telephone menu selection.
/
Short press: Select number/letter. Select an element from
the telephone menu.
/
Short press: Change menu.
/
Short press: Adjust volume of telephone function.
Short press: Answer, Start, End a call.
Long press: Reject a call. During a call, switch between
normal mode and “private” mode
Short press: Returning to the last-opened menuApplies to the model: TOLEDO
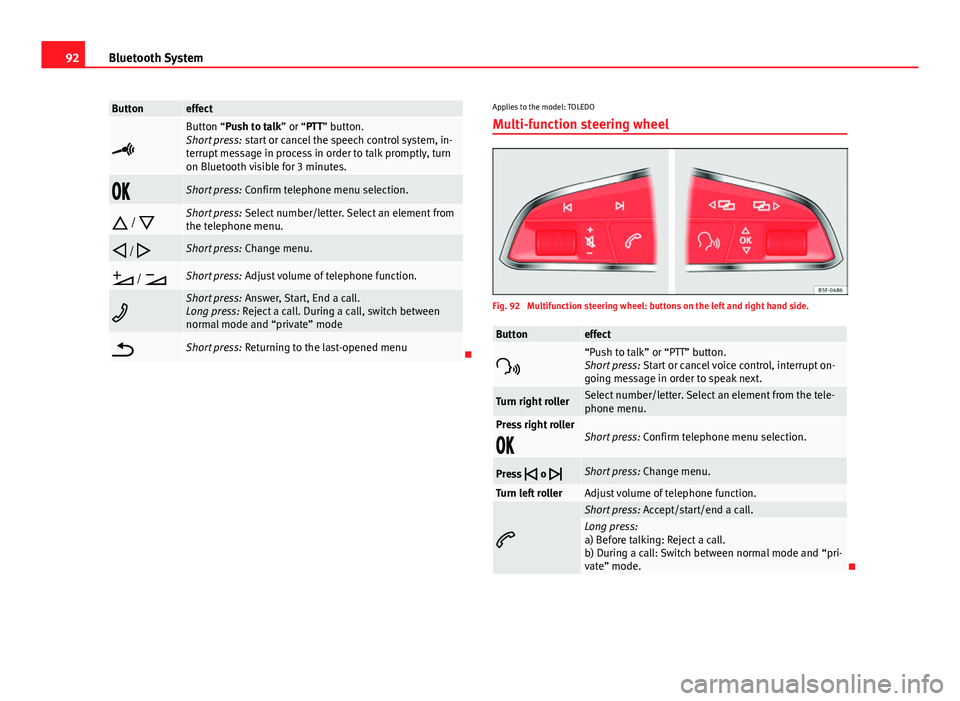
Multi-function steering wheel
Fig. 92 Multifunction steering wheel: buttons on the left and right hand side.
Buttoneffect
“Push to talk” or “PTT” button.
Short press: Start or cancel voice control, interrupt on-
going message in order to speak next.
Turn right rollerSelect number/letter. Select an element from the tele-
phone menu.
Press right roller
Short press: Confirm telephone menu selection.
Press
o
Short press: Change menu.
Turn left rollerAdjust volume of telephone function.
Short press: Accept/start/end a call.Long press:
a) Before talking: Reject a call.
b) During a call: Switch between normal mode and “pri-
vate” mode.
Page 95 of 114
94Bluetooth System
You can use the HELP in any part of the menu. If you have any doubts or
cannot decide the Command to use, the system will provide you with the
available options.
You can CANCEL in any part of the menu.
Basic functions when using voice control
Adjusting the volume
You can change the sound volume at any time with the radio button or with
the buttons on the multifunction control.
The volume transmitted by the speaker depends, among other aspects, on
the volume transmitted by the mobile. If the volume of the mobile is low, or
on silent, it is possible that no sound will be heard through the car speaker.
Adjust the volume of your Bluetooth device to the maximum.
Do not leave headphones connected to the Bluetooth device when you wish
to use the hands free system.
Complying with these requirements, if the speaker volume is very high, ad-
just it using the controls on the steering wheel or the volume control on the
radio.
Connecting voice control (Dialogue)
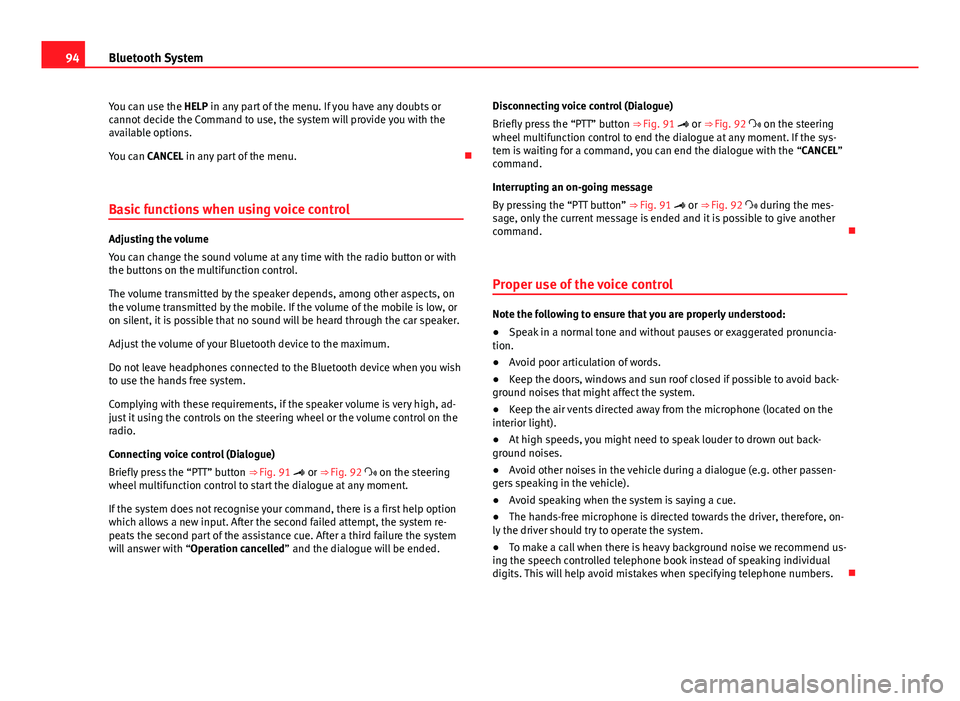
Briefly press the “PTT” button ⇒ Fig. 91 or ⇒ Fig. 92 on the steering
wheel multifunction control to start the dialogue at any moment.
If the system does not recognise your command, there is a first help option
which allows a new input. After the second failed attempt, the system re-
peats the second part of the assistance cue. After a third failure the system
will answer with “Operation cancelled” and the dialogue will be ended. Disconnecting voice control (Dialogue)
Briefly press the “PTT” button ⇒ Fig. 91 or ⇒ Fig. 92 on the steering
wheel multifunction control to end the dialogue at any moment. If the sys-
tem is waiting for a command, you can end the dialogue with the “CANCEL”
command.
Interrupting an on-going message
By pressing the “PTT button” ⇒ Fig. 91 or ⇒ Fig. 92 during the mes-
sage, only the current message is ended and it is possible to give another
command.
Proper use of the voice control
Note the following to ensure that you are properly understood:
● Speak in a normal tone and without pauses or exaggerated pronuncia-
tion.
● Avoid poor articulation of words.
● Keep the doors, windows and sun roof closed if possible to avoid back-
ground noises that might affect the system.
● Keep the air vents directed away from the microphone (located on the
interior light).
● At high speeds, you might need to speak louder to drown out back-
ground noises.
● Avoid other noises in the vehicle during a dialogue (e.g. other passen-
gers speaking in the vehicle).
● Avoid speaking when the system is saying a cue.
● The hands-free microphone is directed towards the driver, therefore, on-
ly the driver should try to operate the system.
● To make a call when there is heavy background noise we recommend us-
ing the speech controlled telephone book instead of speaking individual
digits. This will help avoid mistakes when specifying telephone numbers.
Page 97 of 114
96Bluetooth System
Dialogue options
The voice control system includes the options, short dialogue and long dia-
logue. The default setting is the long dialogue. The short dialogue is recom-
mended when you are familiar with the orders and the structure of the voice
control menu. The long dialogue offers more tips and information about the
voice control procedure. It can be changed via voice control ⇒ page 95.
Display on the dash panel Telephone information display
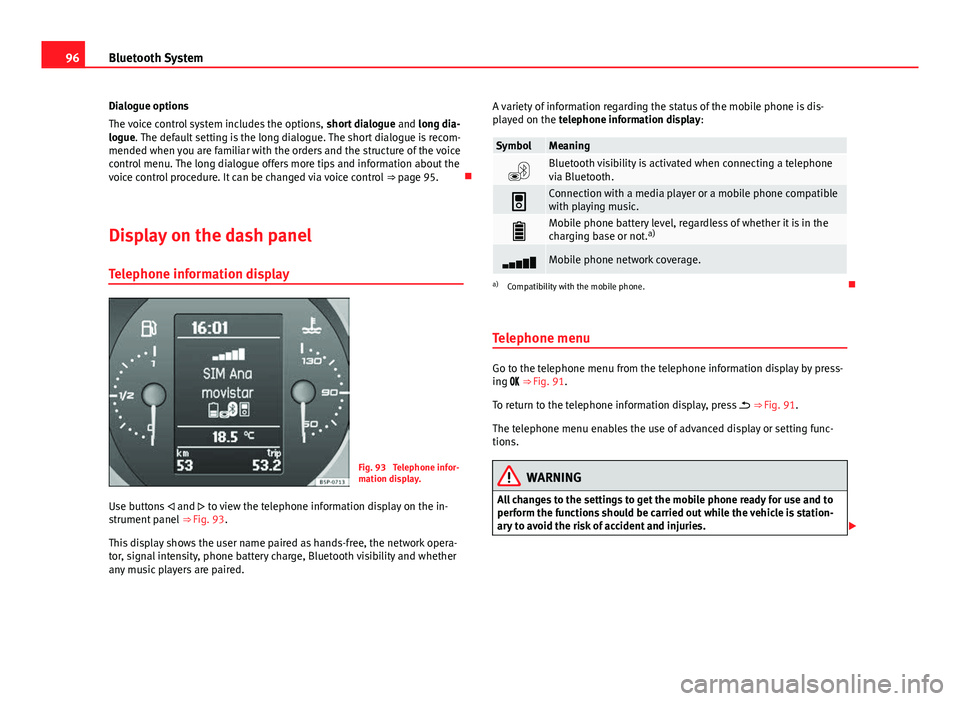
Fig. 93 Telephone infor-
mation display.
Use buttons and to view the telephone information display on the in-
strument panel ⇒ Fig. 93.
This display shows the user name paired as hands-free, the network opera-
tor, signal intensity, phone battery charge, Bluetooth visibility and whether
any music players are paired. A variety of information regarding the status of the mobile phone is dis-
played on the telephone information display:
SymbolMeaning
Bluetooth visibility is activated when connecting a telephone
via Bluetooth.
Connection with a media player or a mobile phone compatible
with playing music.
Mobile phone battery level, regardless of whether it is in the
charging base or not. a)
Mobile phone network coverage.
a)
Compatibility with the mobile phone.
Telephone menu
Go to the telephone menu from the telephone information display by press-
ing ⇒ Fig. 91.
To return to the telephone information display, press ⇒ Fig. 91.
The telephone menu enables the use of advanced display or setting func-
tions.
WARNING
All changes to the settings to get the mobile phone ready for use and to
perform the functions should be carried out while the vehicle is station-
ary to avoid the risk of accident and injuries.
Page 98 of 114
97
Bluetooth System
Note
● Some functions on the telephone menu are only available when a mo-
bile phone is connected. Please bear in mind the phone and/or accessory
manufacturer's instruction manuals.
● The text displayed on the instrument panel may vary slightly from the
texts shown below. This does not affect the working of the system.
Functions in the telephone menu
The following functions are available in the telephone menu:
On-screeneffectPhone bookDisplays contacts previously downloaded from the tel-
ephone memory and/or SIM card. Use the buttons
and to select the required contact. When a contact
is selected, the name and number of the contact are
displayed together with the option “Call name ” which
allows you to listen to the name and record it again in
your own voice ⇒ page 95.
DiallingAllows to enter a phone number to make a call.Call logsYou can display calls and select the number/name you
wish to call.
Voice MailboxSelect the voice mailbox to listen to saved messages
⇒ page 98. The voice mailbox settings depend on
the network operator.
BluetoothAllows to manage the display of mobile phones or
multimedia devices, as well as activating the Blue-
tooth visibility ⇒ page 98.
SettingsAllows to update the phone book, change the classifi-
cation of contacts or modify the call tone ⇒ page 99.Menu Phone book
The address book shown is a copy of the mobile phone address book.
effectProcedureMaking a call us-
ing an entry in
the address book- In the Telephone menu, select the option
Address
Book.
- Using the buttons and , select the required entry
from the address book. Hold down the buttons to scroll
through the address book in alphabetical order.
- Select the required number ( : mobile, : work, :
private, : general no.).
- Confirm selection, or select the option Call. The call
will be connected.
Recording a
name for the
voice control- When recording a name, make sure there is no back-
ground noise that could interfere. Up to a maximum of
15 names can be stored.
- From the Phone Book menu, select an entry.
- Select Name of call .
- Select Record and wait for the audible signal. Next,
say the name you wish to assign to the entry for use
with the voice control function. When asked to do so,
repeat the name. The recording stops automatically
and the system replays the entry.
Play or restore
the call name for
voice control- In the Phone book menu, select a contact from the
phone book.
- Select Name of call .
- Select and confirm Play or Reset.
Updating the mo-
bile phone ad-
dress booka)To update the copy, you can copy the phone book from
the mobile phone manually, or from the SIM card to the
Bluetooth system memory a)
⇒ page 99.
a) Depending on the mobile phone.