bluetooth Seat Leon SC 2014 MEDIA SYSTEM TOUCH - COLOUR
[x] Cancel search | Manufacturer: SEAT, Model Year: 2014, Model line: Leon SC, Model: Seat Leon SC 2014Pages: 44, PDF Size: 1.45 MB
Page 3 of 44
Table of Contents
Table of Contents
Important Information . . . . . . . . . . . . . . . . . 2
Introduction . . . . . . . . . . . . . . . . . . . . . . . . . . 3
Before using the unit for the first time . . . . . . . 3
Safety notes . . . . . . . . . . . . . . . . . . . . . . . . . . . . 3
Unit overview . . . . . . . . . . . . . . . . . . . . . . . . . . . 5
General operating information . . . . . . . . . . . . . 6
Audio mode . . . . . . . . . . . . . . . . . . . . . . . . . . . 9
Radio mode . . . . . . . . . . . . . . . . . . . . . . . . . . . . 9
Media mode . . . . . . . . . . . . . . . . . . . . . . . . . . . . 14
USB/AUX-IN multimedia interface* . . . . . . . . . 21
PHONE mode* . . . . . . . . . . . . . . . . . . . . . . . . 24
Introduction to telephone management . . . . . 24
Places with special regulations . . . . . . . . . . . . 25
Linking and connecting your mobile phone to
the infotainment system . . . . . . . . . . . . . . . . . . 25
General information . . . . . . . . . . . . . . . . . . . . . . 26
Bluetooth ®
. . . . . . . . . . . . . . . . . . . . . . . . . . . . . 27
Description of the telephone manager . . . . . . . 27
PHONE main menu . . . . . . . . . . . . . . . . . . . . . . . 28
Phone management function buttons . . . . . . . 28
Active call . . . . . . . . . . . . . . . . . . . . . . . . . . . . . . 29
Enter Telephone number menu . . . . . . . . . . . . . 29
Phonebook (contacts) menu . . . . . . . . . . . . . . . 30
Call lists menu . . . . . . . . . . . . . . . . . . . . . . . . . . 30
Phonebook shortcut keys . . . . . . . . . . . . . . . . . 31
Telephone setup . . . . . . . . . . . . . . . . . . . . . . . . . 31
Bluetooth setup . . . . . . . . . . . . . . . . . . . . . . . . . 31
User profile setup . . . . . . . . . . . . . . . . . . . . . . . 32
CAR menu . . . . . . . . . . . . . . . . . . . . . . . . . . . . 33
Introduction to managing the CAR menu . . . . . 33
Air Conditioning Menu . . . . . . . . . . . . . . . . 35
Air conditioning . . . . . . . . . . . . . . . . . . . . . . . . . 35 Setup
. . . . . . . . . . . . . . . . . . . . . . . . . . . . . . . . . 36
System setup Menu (SETUP) . . . . . . . . . . . . . . . 36
Sound and volume setup . . . . . . . . . . . . . . . . . . 37
Abbreviations . . . . . . . . . . . . . . . . . . . . . . . . . 38
Abbreviations . . . . . . . . . . . . . . . . . . . . . . . . . . . 38
Index . . . . . . . . . . . . . . . . . . . . . . . . . . . . . . . . . 39
1
Page 8 of 44
Introduction
Setting knob : The function of this knob
depend s
on the mode that is currently ac-
tive.
CD slot*
››› page 18.
Memory card slot .
General operating information Introduction Note
● Lightly pressing the buttons or briefly
pressing the touchscreen is sufficient to op-
erate the unit.
● It is possible that not all the functions and
function buttons are available as the software
of the unit responds to the specific character-
istics of each market. A missing function but-
ton on the screen is not the result of an error
in the unit.
● Due to country-specific legislation, certain
functions cannot be selected on the screen
when the vehicle is travelling above a certain
speed.
● Using a mobile phone inside the vehicle
can cause noise in the speakers.
● There may be restrictions on the use of
Bluetooth devices in some countries. Infor-
mation is available from the local authorities.
● In some vehicles equipped with a parking
distance warning system, the volume of the 4
5
6 audio source is automatically lowered when
the gear is engaged.
● If the steering wheel has a voice control
button , it will not work in this radio mod-
el, so it has no function in relation to the ra-
dio. Rotary knobs and buttons
Rotary knobs
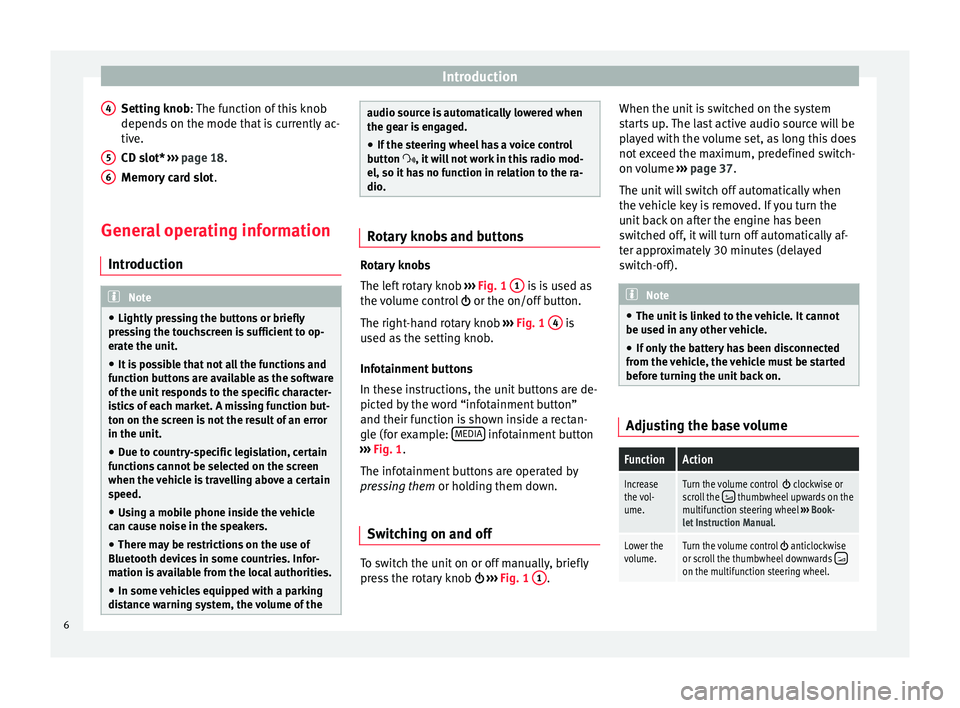
The left rotary knob
››› Fig. 1 1 is is used as
the volume control or the on/off button.
The right-hand rotary knob ››› Fig. 1 4 is
used as the setting knob.
Infotainment buttons
In these instructions, the unit buttons are de-
picted by the word “infotainment button”
and their function is shown inside a rectan-
gle (for example: MEDIA infotainment button
››› Fig. 1 .
The inf ot
ainment buttons are operated by
pressing them or holding them down.
Switching on and off To switch the unit on or off manually, briefly
press the rotary knob
››› Fig. 1 1 .When the unit is switched on the system
starts up. The last active audio source will be
played with the volume set, as long this does
not exceed the maximum, predefined switch-
on volume
››› page 37.
The unit will switch off automatically when
the vehicle key is removed. If you turn the
unit back on after the engine has been
switched off, it will turn off automatically af-
ter approximately 30 minutes (delayed
switch-off). Note
● The unit is linked to the vehicle. It cannot
be used in any other vehicle.
● If only the battery has been disconnected
from the vehicle, the vehicle must be started
before turning the unit back on. Adjusting the base volumeFunctionAction
Increase
the vol-
ume.Turn the volume control clockwise or
scroll the thumbwheel upwards on the
multifunction steering wheel ››› Book-
let Instruction Manual.
Lower the
volume.Turn the volume control anticlockwise
or scroll the thumbwheel downwards on the multifunction steering wheel. 6
Page 17 of 44
Audio mode
●
The infotainment system allows you to
view, play and manage compatible audio files
only. Other files are ignored.
● Consult the list of supported devices on the
web. Media source and audio file
requirements
Factory-fitted CD players conform to safety
class 1 according to standard DIN IEC 76 (CO)
6/ VDE 0837.
The unit only accepts 12-cm standard CDs
and memory cards with the dimensions
32 mm x 24 mm x 2.1 mm or 1.4 mm.
The supported file formats listed are collec-
tively referred to below as "audio files". CDs
containing this type of audio file are referred
to as “audio data CD”.Media sourcesRequirements for play-
ing in the unit
Audio CDs (up to 80
min).– CD Digital Audio specifica-
tion .
Media sourcesRequirements for play-
ing in the unit
Audio data CD, CD-
ROM, CD-R, CD-RW with
a maximum of 700 Mb
(megabytes) in accord-
ance with ISO 9660 lev-
els 1 and 2 file system,
Joliet or UDF 1.02, 1.5,
2.01, 2.5.
SD and MMC memory
cards in accordance
with FAT12, FAT16,
FAT32, XFAT or VFAT file
systems with a maxi-
mum of 2 Gb (giga-
bytes), in addition to
SDHC and SDXC memo-
ry cards.
USB data medium
meeting the specifica-
tion 2.0 in accordance
with FAT12, FAT16,
FAT32 or VFAT file sys-
tems with a maximum of
2 Gb (gigabytes).
– MP3 files (.mp3) with a
rate of 8 to 320 kbit/s or var-
iable.
– WMA files (.wma) up to 9.2
mono/stereo without copy-
right protection.
– Playlists in formats PLS,
M3U, WPL, ASX and B4S.
– Playlists smaller than 20
Kb and with no more than
255 elements in the case of
CDs or 1000 elements in the
case of memory cards.
– File names and paths no
greater than 256 characters.
– Hierarchically structured
folders with no more than 16
levels.
– CDs with audio data: maxi-
mum of 509 folders and
files.
– Memory cards: a maximum
of 1000 folders and a maxi-
mum of 2048 files.
Playing audio files via
Bluetooth ®a)
.– The external media player
must support the Bluetooth
profile A2DP.
a)Bluetooth ®
is a registered trademark of Bluetooth SIG, Inc.
Restrictions and notes
Contamination, exposure to high tempera-
tures and mechanical damage may render a data medium unusable. Observe the manu-
facturer's instructions.
Variations in the quality of data media pro-
duced by different manufacturers may lead to
anomalies during playback.
Observe copyright laws!
The unit may be unable to read individual
tracks or the entire data medium due to the
data medium configuration or the devices
and programs used for recording. Informa-
tion can be found on the internet regarding
the best ways to create audio files and data
media (compression rate, ID3 tag etc.).
Depending on the size, its condition due to
use (copy and delete processes), the folder
structure and file type, the read time of the
data media used can vary considerably.
Playlists only determine a certain playing or-
der. There are no files stored in a playlist. The
unit will not play a playlist if the files are not
on the data medium at the locations referred
to by the playlist (relative file paths).
Note
● Do not use adaptors for memory cards.
● We will not accept any responsibility for
files damaged or lost on the data medium. 15
Page 19 of 44
Audio mode
Function buttons of the main menu MediaFunction
buttonEffect
MEDIA
Press to select another media source
››› page 17.
CD
: internal CD drive unit ››› page 17.
SD card: SD memory card ››› page 18.
Bluetooth audio: Bluetooth audio
››› page 19.
USB
: USB data medium ››› page 22.
AUX: external audio source ››› page 22.
SELECTIONOpens the list of tracks ››› page 20.
or Changes track in Media mode
››› page 19.
Playback will stop. The function button changes to
››› page 19.
Playback will continue. The function button changes to
››› page 19.
SETTINGSOpens the menu Media setup ››› page 21.
Repeat all the tracks.
Repeat the current track.
Random play.
Function
buttonEffect
SCAN
With the scan function running, all the
tracks in the current playlist will be played
for ten seconds each.
The function button is displayed only when
the scan function is running. To start the
scan function, press the setting knob or
open the track list
Selection
and press the
function button SCAN or press the right
knob.
or
Change folder in media mode
Information and possible icons
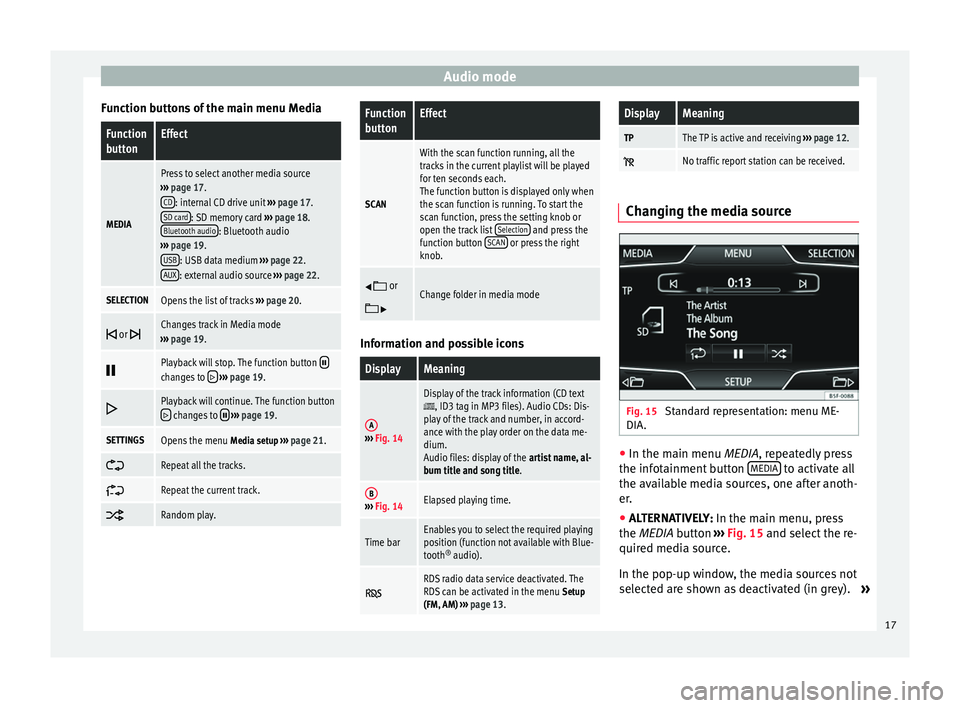
DisplayMeaning
A›››
Fig. 14
Display of the track information (CD text, ID3 tag in MP3 files). Audio CDs: Dis-
play of the track and number, in accord-
ance with the play order on the data me-
dium.
Audio files: display of the artist name, al-
bum title and song title.
B››› Fig. 14Elapsed playing time.
Time barEnables you to select the required playing
position (function not available with Blue-
tooth ®
audio).
RDS radio data service deactivated. The
RDS can be activated in the menu Setup
(FM, AM) ››› page 13.
DisplayMeaning
TPThe TP is active and receiving ››› page 12.
No traffic report station can be received. Changing the media source
Fig. 15
Standard representation: menu ME-
DIA. ●
In the main menu MEDIA
, repeatedly press
the inf
otainment button MEDIA to activate all
the available media sources, one after anoth-
er.
● ALTERNATIVELY: In the main menu, press
the MEDIA
button ››› Fig. 15 and select the re-
quired media source.
In the pop-up window, the media sources not
selected are shown as deactivated (in grey). »
17
Page 20 of 44
Audio mode
When a media source that has already been
played is selected again, playback is re-
sumed from the point at which it was stop-
ped.
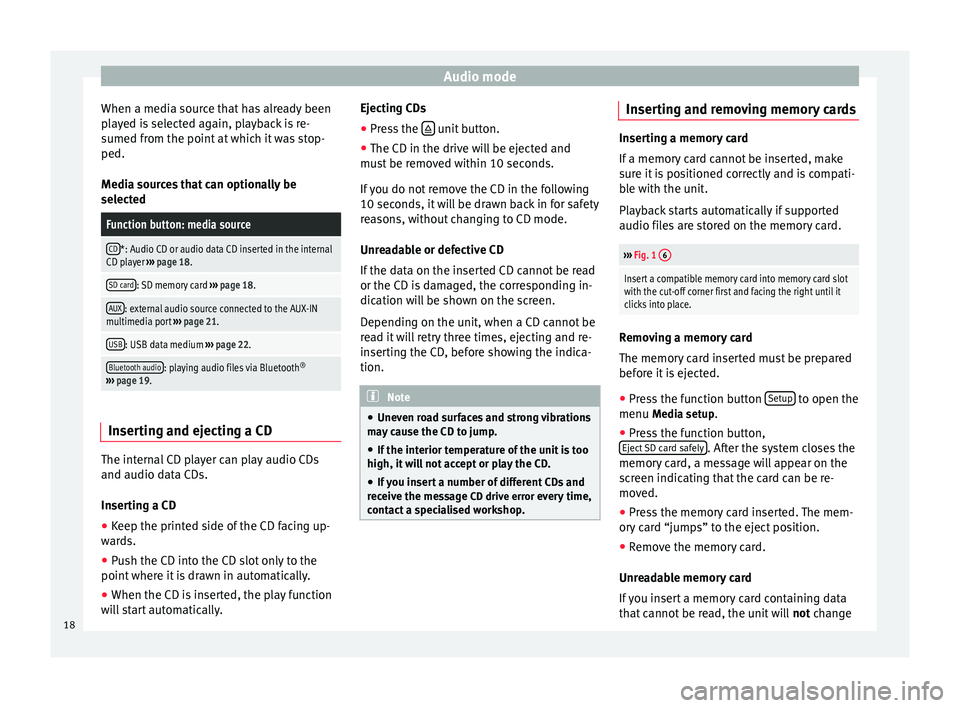
Media sources that can optionally be
selectedFunction button: media source
CD*: Audio CD or audio data CD inserted in the internal
CD player ››› page 18.
SD card: SD memory card ››› page 18.
AUX: external audio source connected to the AUX-IN
multimedia port ››› page 21.
USB: USB data medium ››› page 22.
Bluetooth audio: playing audio files via Bluetooth ®
››› page 19. Inserting and ejecting a CD
The internal CD player can play audio CDs
and audio data CDs.
Inserting a CD
● Keep the printed side of the CD facing up-
wards.
● Push the CD into the CD slot only to the
point where it is drawn in automatically.
● When the CD is inserted, the play function
will start automatically. Ejecting CDs
●
Press the unit button.
● The CD in the drive will be ejected and
must be removed within 10 seconds.
If you do not remove the CD in the following
10 seconds, it will be drawn back in for safety
reasons, without changing to CD mode.
Unreadable or defective CD
If the data on the inserted CD cannot be read
or the CD is damaged, the corresponding in-
dication will be shown on the screen.
Depending on the unit, when a CD cannot be
read it will retry three times, ejecting and re-
inserting the CD, before showing the indica-
tion. Note
● Uneven road surfaces and strong vibrations
may cause the CD to jump.
● If the interior temperature of the unit is too
high, it will not accept or play the CD.
● If you insert a number of different CDs and
receive the message CD drive error every time,
c ont
act a specialised workshop. Inserting and removing memory cards
Inserting a memory card
If a memory card cannot be inserted, make
sure it is positioned correctly and is compati-
ble with the unit.
Playback starts automatically if supported
audio files are stored on the memory card.
›››
Fig. 1 6
Insert a compatible memory card into memory card slot
with the cut-off corner first and facing the right until it
clicks into place. Removing a memory card
The memory card inserted must be prepared
before it is ejected.
● Press the function button Setup to open the
menu Media setup
.
● Press the function button,
Eject SD card safely . After the system closes the
memory card, a message will appear on the
screen indicating that the card can be re-
moved.
● Press the memory card inserted. The mem-
ory card “jumps” to the eject position.
● Remove the memory card.
Unreadable memory card
If you insert a memory card containing data
that cannot be read, the unit will not change
18
Page 21 of 44
Audio mode
to memory card mode after loading. It will
show the corresponding indication.
External media player connected via
Bluetooth ®In Bluetooth audio mode, audio files from an
external audio source that is connected via
Bluetooth
®
, for example a mobile phone
(Bluetooth audio playback), can be played
over the vehicle speakers.
The Bluetooth audio source must be compati-
ble with the Bluetooth A2DP profile.
Starting sound transmission via Bluetooth
● Reduce the base volume of the infotain-
ment system.
● Pair or connect the Bluetooth audio source
with the Bluetooth interface from the mobile
preinstallation, according to the operating in-
structions.
Playing through the vehicle speakers
In Media Setup
, the default setup
Bluetooth audio autoplay is deactivated. After
making the connection with the Bluetooth
audio source, Bluetooth audio mode must be
selected manually.
● If you require the system to change to Blue-
tooth audio automatically each time the con-
nection is established with the connected Bluetooth audio source, you can activate the
setup
Bluetooth audio autoplay in
Media Setup
.
● In the MEDIA main menu, press the func-
tion b
utton, MEDIA ››› Fig. 15 and select
Bluetooth audio .
Once playback of the Bluetooth audio source
has finished, the infotainment system will re-
main in Bluetooth audio mode.
Controlling playback
The extent to which the Bluetooth audio
source can be controlled via the infotainment
system depends on the Bluetooth audio
source connected.
Media players with the AVRCP Bluetooth pro-
file, the playback of the Bluetooth audio
source can be started and stopped automati-
cally when changing to Bluetooth audio
mode, or to another audio source. In addi-
tion, it is possible to view or change the track
via the infotainment system.
It is possible to connect a device as a player
and another as hands-free at the same time. Note
● Due to the large number of different Blue-
tooth audio sources available, it is not possi-
ble to guarantee fault-free operation of all
functions described here.
● Deactivate the service and warning sounds
of a connected Bluetooth audio source (for example, the key tones of the mobile phone)
to avoid interference noise and anomalies in
the operation.
● To play music, do not link the external me-
dia player simultaneously to Bluetooth and
the USB interface of the infotainment system,
as this can cause limitations during playback.
● Depending on the external player connec-
ted, the response time of the system can
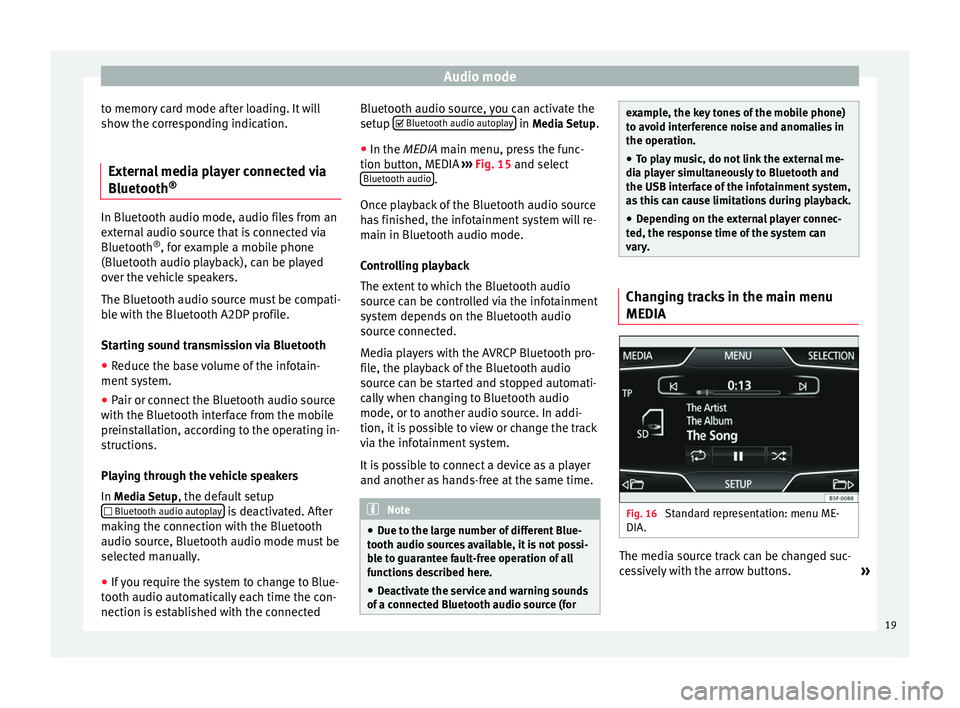
vary. Changing tracks in the main menu
MEDIA
Fig. 16
Standard representation: menu ME-
DIA. The media source track can be changed suc-
cessively with the arrow buttons.
»
19
Page 23 of 44
Audio mode
Note
You can also mark a track, folder or playlist
by turning the setting knob and open it by
pressing this button. Media setup
Media setup
● Select the media main menu by pressing
the infotainment button, MEDIA .
● Press the function button Setup to open the
menu Media setup
.Function button: effect
Remove the SD card safely: the system closes the SD card,
subsequently enabling it to be ejected safely ››› page 18.
Traffic Information (TP): The TP function (traffic news
monitoring) is activated ››› page 12. If the function but-
ton is deactivated (in grey), you must first activate the
function button
radio data system (RDS) in the FM Setup
menu ››› page 13.
Mix/Repeat incl. subfolders: the subfolders are taken into
account in the playback mode selected ››› page 16.
SCAN: actives the SCAN function.
External AUX device: enables or disables the AUX source.
Bluetooth audio autoplay: ››› page 19.
Bluetooth setup: ››› page 31.
Function button: effect
Safely remove the USB device: the system closes the USB,
subsequently enabling it to be ejected safely. USB/AUX-IN multimedia
interface*
Introduction Depending on the market and the features,
the vehicle may have a USB - AUX-IN connec-
tion
›››
Fig. 20 .
The inf ot
ainment system enables you to play
and manage audio files from an external data
medium connected to the USB/AUX-IN multi-
media interface.
Where this manual refers to external data me-
dia, this means USB mass storage devices
containing supported audio files, such as
MP3 players and USB sticks.
The USB - AUX-IN multimedia interface sup-
plies the usual USB voltage of 5 volts. External audio source connected to
the AUX-IN multimedia socket
Fig. 19
Standard representation: AUX-IN
menu. The external audio source connected to it is
played over the vehicle speakers and
cannot
be controlled via the radio-navigation sys-
tem.
An external audio source connected to the
socket is indicated by AUX
on the screen.
Connecting an external audio source to the
AUX IN multimedia socket
● Reduce the base volume of the infotain-
ment system.
● Connect the external audio source by con-
necting the AUX-IN multimedia jack.
● Start playback of the external audio source. »
21
Page 24 of 44
Audio mode
● In the MEDIA
main menu press the function
b
utton MEDIA and select AUX
››› Fig. 19 .
The output volume of
the connected external
audio source should be adjusted to the vol-
ume of the other audio sources ››› page 37.
Things to note when operating an external
audio source using the AUX-IN multimedia
ActionEffect
Selection of another audio
source on the radio-navi-
gation system.The external audio source
continues to run in the
background.
Stopping playback on the
external audio source.The infotainment system
remains in the AUX menu.
Disconnecting the plug
from the AUX-IN multime-
dia socket.The infotainment system
changes, and plays the
last media source that was
active. Note
● Please read and observe the external audio
source manufacturer operating manual.
● Interference noise may be heard if the ex-
ternal audio source is powered from the 12-
volt power socket of the vehicle.
● If the sound from the external audio source
is too low, if possible, increase the output
volume on the external audio source. If this is
not sufficient, increase the input volume.
● If the sound from the connected external
audio source is too loud or distorted, if possi- ble, lower the output volume on the external
audio source. If this is not sufficient, reduce
the input volume.
Instructions for connecting data
media
Fig. 20
USB/AUX-IN multimedia interface. In the case of multimedia players and de-
pending on the battery charge and the quan-
tity of data, it may take a few minutes for
them to be ready for use.
If the data medium has several partitions, on-
ly the
first partition will be recognised.
T ak
e into account all other instructions and
limitations regarding requirements for media
sources ››› page 15. Note
● Read and bear in mind the manufacturer's
instruction manual for the external data me-
dium.
● The connecting adaptor used must not be
crushed or bent sharply. This could damage
the adaptor and cause operational faults.
● To play music, do not simultaneously link
the external media player to the infotainment
system using Bluetooth or the USB/AUX-IN
multimedia interface, as this can cause limi-
tations in the playback.
● The use of USB cable extensions and USB
hubs may cause operating errors. External data support in USB port*
Only supported audio files can be displayed
and played. Other files are ignored.
Playback starts automatically if there are
readable audio files stored on the data sup-
port.
End connection
The connected data support
must be pre-
pared for disconnection before it can be re-
moved.
● On the main MEDIA menu, press the
Settings function button to open the
Media
Settings menu.
22
Page 26 of 44
PHONE mode*
PHONE mode* Introduction to telephone
management The telephone functions described below can
be managed through the infotainment sys-
tem provided a mobile phone is paired and
connected to the infotainment system.
● Linking and connecting a mobile phone to
the infotainment system.
The requirement for establishing a connec-
tion between a mobile phone and the info-
tainment system is that the mobile phone
has Bluetooth ®
.
When there is no mobile phone linked to the
infotainment system, telephone manage-
ment is not available.
Please refer to the notes on how to use mo-
bile telephones in vehicles without connec-
tion to the exterior antenna ›››
Booklet In-
struction Manual, chapter Accessories and
technical modifications .WARNING
Making calls and managing the preinstalla-
tion for mobile phones while driving can dis-
tract you from the traffic and cause an acci-
dent.
● Always stay alert and drive responsibly. ●
Select volume settings that allow you to
easily hear signals from outside the vehicle
at all times (e.g. emergency service sirens).
● In areas with no or poor network coverage,
under certain circumstances in tunnels, ga-
rages and underpasses, telephone conversa-
tions may cut out or it may be impossible to
make calls, even in an emergency. WARNING
A loose or incorrectly secured mobile phone
could be thrown inside the vehicle and cause
injury in the event of sudden manoeuvres,
braking or accidents.
● While driving, the mobile phone must al-
ways be correctly secured, outside of the
working radius of the airbag. WARNING
If you carry a mobile phone that is switched
on directly over a pacemaker, this may cause
interference in its functioning.
● Between the antenna of the mobile phone
and the pacemaker there must be a minimum
distance of 20 centimetres for the mobile
phone not to affect the functioning of the
pacemaker.
● Do not carry your mobile phone in your
breast pocket, directly over the pacemaker,
when it is switched on.
● If you suspect your mobile phone is causing
interference, switch it off immediately. Note
● Telephone conversations inside the vehicle
can be affected by high speed, poor atmos-
pheric conditions and the road surface, as
well as by the quality of the network.
● The instructions that appear on the screen
related to the menu of each phone depend on
the mobile phone used. There may be differ-
ences.
● Take into account the instruction manuals
of the mobile phone and the supplier of the
accessories, and any instructions for using
the headset.
● In areas with poor coverage there may be
anomalies in the reception and calls may be
interrupted.
● Consult the compatibility list to ensure
your mobile phone will work properly.
● If you detect any strange behaviour be-
tween your mobile phone and the radio, re-
start your mobile by switching it off and on
again.
● Most electronic devices are shielded
against high-frequency radio signals. On cer-
tain occasions, nevertheless, electronic
equipment might not be protected against
the radio frequency signals of the telephone
management (Phone). This may produce in-
terference. 24
Page 27 of 44
PHONE mode*
Places with special regulations Switch off the mobile phone and the prein-
stallation for mobile telephones in places
with risk of explosion. These areas are com-
mon but are not always clearly marked
››› in Introduction to telephone management on
page 24. They include, for example:
●
Ar e
as with piping and reservoirs containing
chemical products.
● Below deck, on boats and ferries.
● Near vehicles that run on liquefied gas
(such as propane or butane).
● In places where there are chemical sub-
stances or particles such as flour, dust or
metal chips in the air.
● In any other place where you must turn off
the engine of your vehicle. WARNING
Switch off your mobile phone in places with
risk of explosion! Your mobile phone will au-
tomatically connect to the mobile phone net-
work as soon as the Bluetooth connection is
cut from the mobile preinstallation. Note
In areas with special requirements and where
the use of mobile phones is prohibited, you
must keep the mobile phone and its prein-
stallation switched off at all times. The radia- tion emitted by mobile phones when switch-
ed on can cause interference in sensitive
technical and medical equipment, which
could damage this equipment or cause it to
stop working properly.
Linking and connecting your mobile
phone to the infotainment system
To operate a mobile phone through the info-
tainment system, you need to link both devi-
ces
one time only .
F or
your safety, we recommend you carry out
this connection when the vehicle is station-
ary. In some countries you cannot perform
the pairing with the vehicle running.
You must guarantee the following setup in
the mobile phone and the infotainment sys-
tem:
● The
Bluetooth ®
function must be active
and visible on the mobile phone and info-
tainment system, respectively.
● The
keypad lock of the mobile phone must
be disconnected.
● The
notification and key tones of your mo-
bile phone must be disconnected.
In some countries, after switching the igni-
tion on, the
Bluetooth ®
function of the info-
tainment system should be activated or re-
main visible for around 3 minutes. During the linking process you must enter da-
ta using your mobile phone's keypad. To do
so, you must have your mobile phone at
hand.
Once the link has been made, the schedule
and call lists stored in your mobile phone will
be loaded. The duration of the loading proc-
ess depends on the amount of data stored on
your mobile phone. When the loading proc-
ess is complete, the data will be available to
the infotainment system.
Starting the link from the system
Make sure the mobile device is active and
visible.
● Press the PHONE unit button.
● Press the function button Find .
ALTERNATIVELY: ● Press the PHONE unit button.
● Press the Setup function button.
● Press the function button Select phone and
then Find .
The search process can take up to 1 minute.
On the screen the system will dynamically
update the names of the Bluetooth devices
found. ● Select the mobile phone to which you want
to pair from the list of Bluetooth devices
found. »
25