radio Seat Leon SC 2014 SOUND SYSTEM 2.0
[x] Cancel search | Manufacturer: SEAT, Model Year: 2014, Model line: Leon SC, Model: Seat Leon SC 2014Pages: 62, PDF Size: 1.14 MB
Page 2 of 62
Table of Contents
General information . . . . . . . . . . . . . . . . 2
Important Information . . . . . . . . . . . . . . 3
Introduction . . . . . . . . . . . . . . . . . . . . . . . . . . 4
Before using the unit for the first time . . . . . . 4
Safety notes . . . . . . . . . . . . . . . . . . . . . . . . . . . . . . 4
Unit overview . . . . . . . . . . . . . . . . . . . . . . . . . . . . . 6
General information on operating the unit . . 8
Audio mode . . . . . . . . . . . . . . . . . . . . . . . . . . . 10
FM and AM Radio mode . . . . . . . . . . . . . . . . . . . . 10
RDS* and TP* radio data services (Traffic
Programme) . . . . . . . . . . . . . . . . . . . . . . . . . . . . . . . 15
DAB* radio mode . . . . . . . . . . . . . . . . . . . . . . . . . . 18
Media mode . . . . . . . . . . . . . . . . . . . . . . . . . . . . . . 21
External audio sources (AUX and audio
Bluetooth ®
) . . . . . . . . . . . . . . . . . . . . . . . . . . . . . . . 28
MEDIA-IN multimedia interface . . . . . . . . . . . . . 30
External CD changer* . . . . . . . . . . . . . . . . . . . . . . 34
Phone mode . . . . . . . . . . . . . . . . . . . . . . . . . . 37
Bluetooth System . . . . . . . . . . . . . . . . . . . . . . . . . 37
Getting started: pairing . . . . . . . . . . . . . . . . . . . . 39
Operation using the steering wheel buttons . 41
Operation via voice control . . . . . . . . . . . . . . . . . 43Display on the dash panel
. . . . . . . . . . . . . . . . . 45
Audiostreaming (Wireless communication
Interface) . . . . . . . . . . . . . . . . . . . . . . . . . . . . . . . . . 49
Settings menus . . . . . . . . . . . . . . . . . . . . . . 51
Sound settings (SOUND) . . . . . . . . . . . . . . . . . . . 51
System and function settings (SETUP) . . . . . . 52
Abbreviations . . . . . . . . . . . . . . . . . . . . . . . . 56
Abbreviations . . . . . . . . . . . . . . . . . . . . . . . . . . . . . 56
Index . . . . . . . . . . . . . . . . . . . . . . . . . . . . . . . . . . . 57
1
Table of Contents
Page 3 of 62
2General information
General information
This manual contains information, recommendations, advice and warnings
related to your radio system. The other publications in the vehicle documen-
tation contain further information of which you should be aware for your
own safety and for that of your passengers.
Ensure that the onboard documentation is kept in the vehicle at all times.
This is especially important when lending or selling the vehicle to another
person.
This manual contains a description of the equipment supplied with the ve-
hicle at the time of press. Some of the units described herein will not be
available until a later date or is only available in certain markets.
The illustrations are intended as a general guide and may vary from the
equipment fitted in your vehicle in some details.
The screen colour and the colour of the information displayed on it can vary
according to vehicle model.
Directions and positions of components (e.g. right, left, front, rear) are al-
ways relative to the direction of travel of the vehicle unless otherwise sta-
ted.
The equipment marked with an asterisk is only supplied as standard in
certain model versions, is optional in others or is only available in spe-
cific countries.
Registered trademarks are marked ®. The absence of this symbol does
not constitute a waiver of the rights concerning any proprietary name.
The section is continued on the following page.
Marks the end of a section .
®
WARNING
Texts preceded by this symbol contain information on safety. They warn
you about possible dangers of accident or injury.
CAUTION
Texts with this symbol draw your attention to potential sources of damage
to your vehicle.
For the sake of the environment
Texts preceded by this symbol contain relevant information concerning envi-
ronmental protection.
Note
Texts preceded by this symbol contain additional information.
Page 4 of 62
3
Important Information
Important Information Important Information. Traffic safety
Travelling on today's roads requires the driver's full attention at all times.
Only operate the radio system and its various functions when the traffic sit-
uation really permits this.
WARNING
● Before starting the trip, you should familiarise yourself with the dif-
ferent radio functions.
● High audio volume may represent a danger to you and to others.
● Adjust the volume in a way that you can distinguish surrounding
noise, for example, horns and sirens, etc.
● Radio settings should be made when the car is stopped or by a pas-
senger.
Note
Separate the radio card and keep it in a safe place, but never inside the ve-
hicle. If the card bearing the radio code is lost, go to a SEAT dealership,
where you will be given help.
Note
● The anti-theft coding does not need re-entering if the battery has only
been disconnected. In this case, switch the ignition on before switching on
the sound system.
● The card bearing the radio code is available according to the model of
the vehicle.
Page 7 of 62
6Introduction
Unit overview
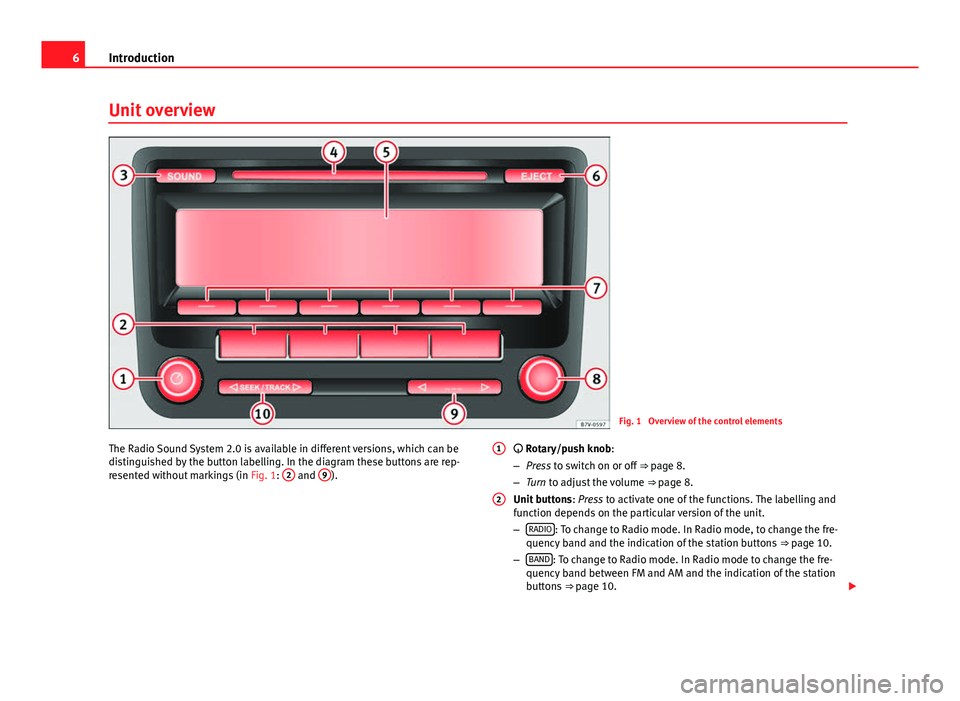
Fig. 1 Overview of the control elements
The Radio Sound System 2.0 is available in different versions, which can be
distinguished by the button labelling. In the diagram these buttons are rep-
resented without markings (in Fig. 1: 2
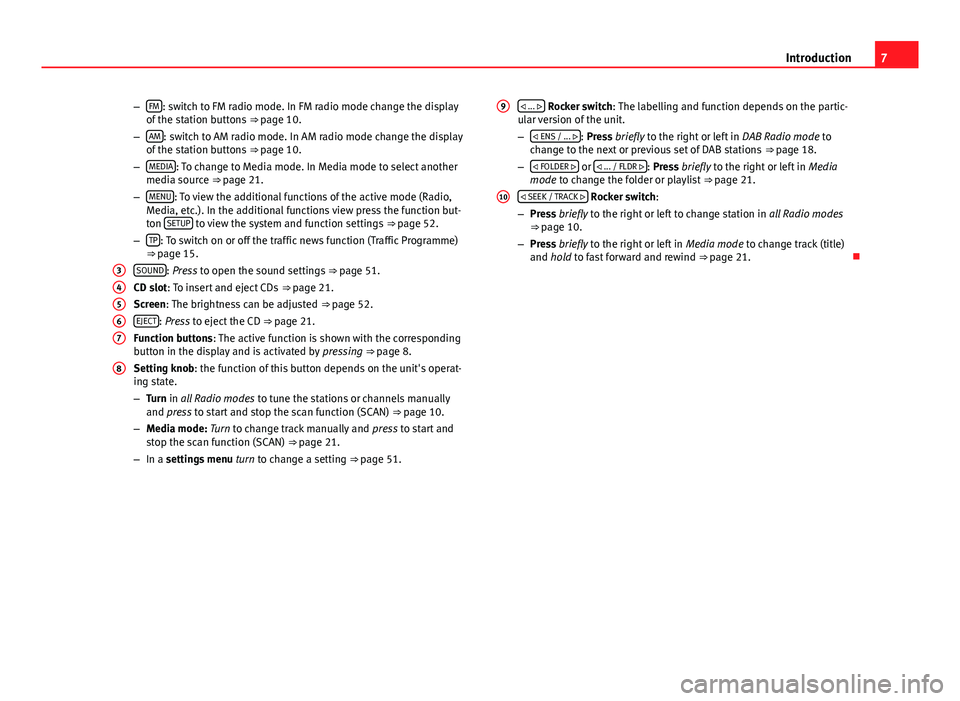
and 9). Rotary/push knob:
–
Press to switch on or off ⇒ page 8.
– Turn to adjust the volume ⇒ page 8.
Unit buttons : Press to activate one of the functions. The labelling and
function depends on the particular version of the unit.
– RADIO
: To change to Radio mode. In Radio mode, to change the fre-
quency band and the indication of the station buttons ⇒ page 10.
– BAND
: To change to Radio mode. In Radio mode to change the fre-
quency band between FM and AM and the indication of the station
buttons ⇒ page 10.
1
2
Page 8 of 62
7
Introduction
– FM
: switch to FM radio mode. In FM radio mode change the display
of the station buttons ⇒ page 10.
– AM
: switch to AM radio mode. In AM radio mode change the display
of the station buttons ⇒ page 10.
– MEDIA
: To change to Media mode. In Media mode to select another
media source ⇒ page 21.
– MENU
: To view the additional functions of the active mode (Radio,
Media, etc.). In the additional functions view press the function but-
ton SETUP
to view the system and function settings
⇒ page 52.
– TP: To switch on or off the traffic news function (Traffic Programme)
⇒ page 15.
SOUND
: Press to open the sound settings ⇒ page 51.
CD slot: To insert and eject CDs ⇒ page 21.
Screen: The brightness can be adjusted ⇒ page 52.
EJECT
: Press to eject the CD ⇒ page 21.
Function buttons: The active function is shown with the corresponding
button in the display and is activated by pressing ⇒ page 8.
Setting knob: the function of this button depends on the unit's operat-
ing state.
– Turn in all Radio modes to tune the stations or channels manually
and press to start and stop the scan function (SCAN) ⇒ page 10.
– Media mode: Turn to change track manually and press to start and
stop the scan function (SCAN) ⇒ page 21.
– In a settings menu turn to change a setting ⇒ page 51.
3
4567
8
... Rocker switch: The labelling and function depends on the partic-
ular version of the unit.
–
ENS / ...
: Press briefly to the right or left in DAB Radio mode to
change to the next or previous set of DAB stations ⇒ page 18.
– FOLDER
or ... / FLDR : Press briefly to the right or left in
Media
mode to change the folder or playlist ⇒ page 21.
SEEK / TRACK
Rocker switch:
– Press briefly to the right or left to change station in all Radio modes
⇒ page 10.
– Press briefly to the right or left in Media mode to change track (title)
and hold to fast forward and rewind ⇒ page 21.
9
10
Page 10 of 62
9
Introduction
Depending on the unit and country, the unit is switched off when the engine
is turned off or the key is removed. If the unit comes on again without the
ignition being switched on, it will switch off automatically after 30 minutes
(switch-off delay).
Energy management
If, when the ignition is switched off and the unit switched on, the battery
voltage falls below the minimum onboard power supply voltage, an audible
warning sounds and LOW BATTERY appears. You should switch the unit off.
If the battery voltage level continues to fall, LOW BATTERY and RADIO OFF are
briefly shown on the display. The unit will switch off automatically.
Adjusting the base volume
effectActionIncrease the vol-
ume.On the radio: Turn the volume control ⇒ Fig. 1 1clockwise.
On the multifunction steering wheel:
Turn the volume
control up or press the corresponding button (depend-
ing on equipment fitted) ⇒ Booklet Instruction Manual,
chapter Overview of vehicle
Decreasing the
volumeOn the radio: Turn the volume control ⇒ Fig. 1 1counter-clockwise.
On the multifunction steering wheel:
Turn the volume
control down or press the corresponding button (de-
pending on equipment fitted) ⇒ Booklet Instruction
Manual, chapter Overview of vehicle
Changes to the volume are indicated by a “bar” on the screen.
At “0” the unit is muted (display: ) and any media source currently being
played will be stopped. It is possible to preset certain volume settings and adjustments
⇒ page 52.
Note
If the basic playback volume of an audio source has been increased sub-
stantially, lower the volume before changing to another audio source.
Page 11 of 62
10Audio mode
Audio mode
FM and AM Radio mode Introduction
The radio system is supplied in different versions depending on the country
and model in which it is installed and the vehicle equipment. The overview
of the unit shows all the possible versions ⇒ Fig. 1.
How the Radio mode is activated and operated depends partly on the ver-
sion of the unit.
Additional information and warnings:
● Safety notes ⇒ page 4
● Unit overview ⇒ page 6
● RDS and TP radio data services (Traffic Programme) ⇒ page 15
● System and function settings (SETUP) ⇒ page 52
Note
● Multi-storey car parks, tunnels, high buildings and mountains can im-
pair radio signals.
● Foil or metal-coated stickers attached to the windows may affect recep-
tion on vehicles with a window aerial. RADIO main menu
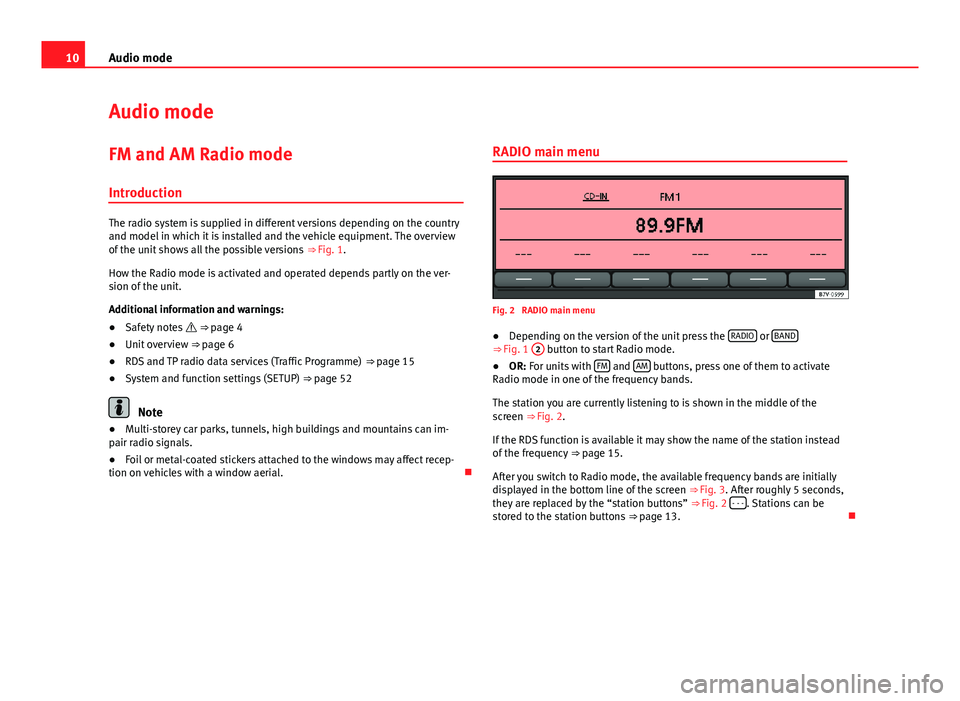
Fig. 2 RADIO main menu
● Depending on the version of the unit press the RADIO
or BAND⇒
Fig. 1 2 button to start Radio mode.
● OR: For units with FM and AM buttons, press one of them to activate
Radio mode in one of the frequency bands.
The station you are currently listening to is shown in the middle of the
screen ⇒ Fig. 2.
If the RDS function is available it may show the name of the station instead
of the frequency ⇒ page 15.
After you switch to Radio mode, the available frequency bands are initially
displayed in the bottom line of the screen ⇒ Fig. 3. After roughly 5 seconds,
they are replaced by the “station buttons” ⇒ Fig. 2 - - -
. Stations can be
stored to the station buttons ⇒ page 13.
Page 12 of 62
11
Audio mode
Changing frequency band
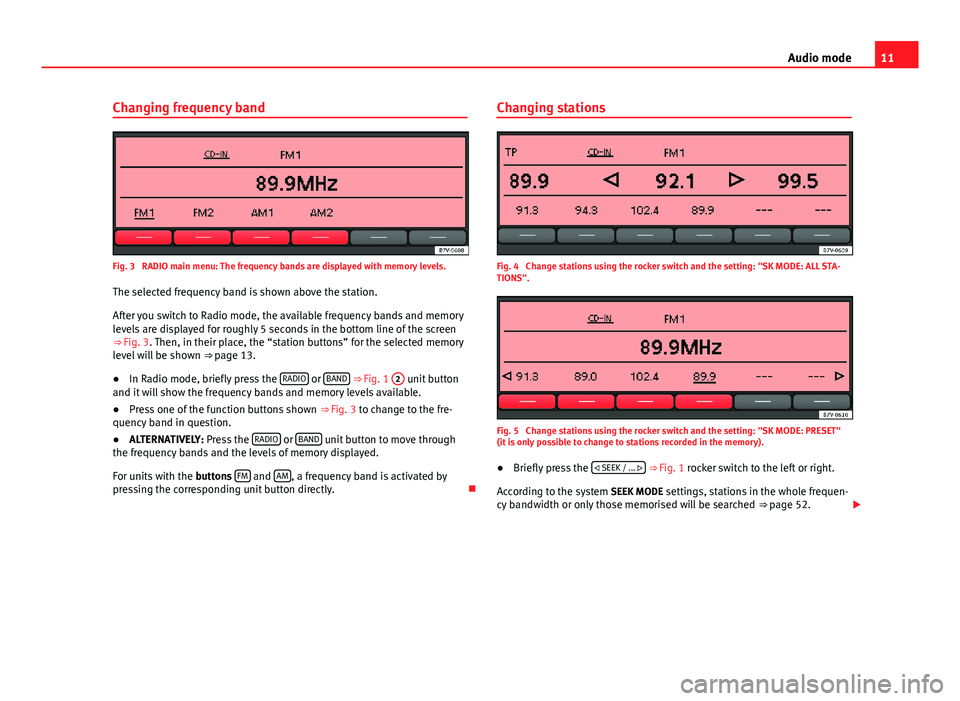
Fig. 3 RADIO main menu: The frequency bands are displayed with memory levels. The selected frequency band is shown above the station.
After you switch to Radio mode, the available frequency bands and memory
levels are displayed for roughly 5 seconds in the bottom line of the screen
⇒ Fig. 3. Then, in their place, the “station buttons” for the selected memory
level will be shown ⇒ page 13.
● In Radio mode, briefly press the RADIO
or BAND
⇒ Fig. 1 2 unit button
and it will show the frequency bands and memory levels available.
● Press one of the function buttons shown ⇒ Fig. 3 to change to the fre-
quency band in question.
● ALTERNATIVELY: Press the RADIO
or BAND unit button to move through
the frequency bands and the levels of memory displayed.
For units with the buttons FM
and AM, a frequency band is activated by
pressing the corresponding unit button directly. Changing stations
Fig. 4 Change stations using the rocker switch and the setting: "SK MODE: ALL STA-
TIONS".
Fig. 5 Change stations using the rocker switch and the setting: "SK MODE: PRESET"
(it is only possible to change to stations recorded in the memory).
● Briefly press the
SEEK / ...
⇒ Fig. 1 rocker switch to the left or right.
According to the system SEEK MODE settings, stations in the whole frequen-
cy bandwidth or only those memorised will be searched ⇒ page 52.
Page 13 of 62
12Audio mode
StatuseffectRadio mode with ... displayed in
the centre line of the screen
⇒ Fig. 4.Switches to the next available station
on the current frequency band. As you
scroll through the subsequent sta-
tions will be shown.
Radio mode with ... displayed in
the bottom line of the screen
⇒ Fig. 5.Switches to the next stored station
⇒ page 13.
Radio mode with ... displayed in
the centre line of the screen and TP
indication ⇒ Fig. 4.Switches to the next available traffic
news station ⇒ page 15.
AM mode: quickly browsing the frequency band
In AM mode it is possible to skip stations.
●Press and hold the
SEEK / ...
rocker switch.
● When the rocker switch
SEEK / ... is released a search will be per-
formed until the next tunable station is found.
Tuning to a station frequency manually
● Select the desired frequency band ⇒ page 10.
● Turn the setting knob ⇒ Fig. 1 8
until the desired station frequency
(e.g. 89.9 MHz) is displayed on the screen. Scan function (SCAN)
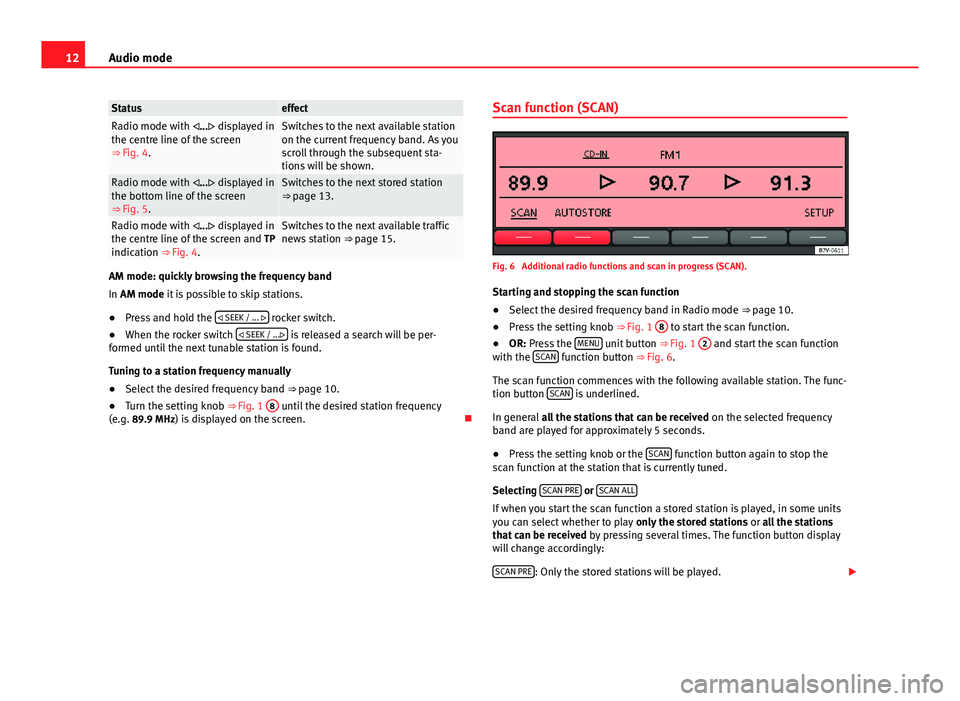
Fig. 6 Additional radio functions and scan in progress (SCAN).
Starting and stopping the scan function
● Select the desired frequency band in Radio mode ⇒ page 10.
● Press the setting knob ⇒ Fig. 1 8
to start the scan function.
● OR: Press the MENU unit button
⇒ Fig. 1 2 and start the scan function
with the SCAN function button
⇒ Fig. 6.
The scan function commences with the following available station. The func-
tion button SCAN
is underlined.
In general all the stations that can be received on the selected frequency
band are played for approximately 5 seconds.
● Press the setting knob or the SCAN
function button again to stop the
scan function at the station that is currently tuned.
Selecting SCAN PRE
or SCAN ALLIf when you start the scan function a stored station is played, in some units
you can select whether to play only the stored stations or all the stations
that can be received by pressing several times. The function button display
will change accordingly:
SCAN PRE
: Only the stored stations will be played.
Page 14 of 62
13
Audio mode
SCAN ALL
: All the stations that can be received in the selected frequency
band will be played.
Special case: Search using the
SEEK / ...
rocker switch after completing
the scan function (SCAN)
If all tunable stations have been listened to, and the scan function (SCAN)
has stopped, the search for stations using the rocker switch SEEK / ...
will,
in this case, search all tunable stations, even if the SEEK MODE function set-
ting is PRESET ⇒ page 52.
Note
If traffic news monitoring is switched on (display: TP), the scan function only
tunes to stations that support the TP function ⇒ page 15.
Selecting the memory level
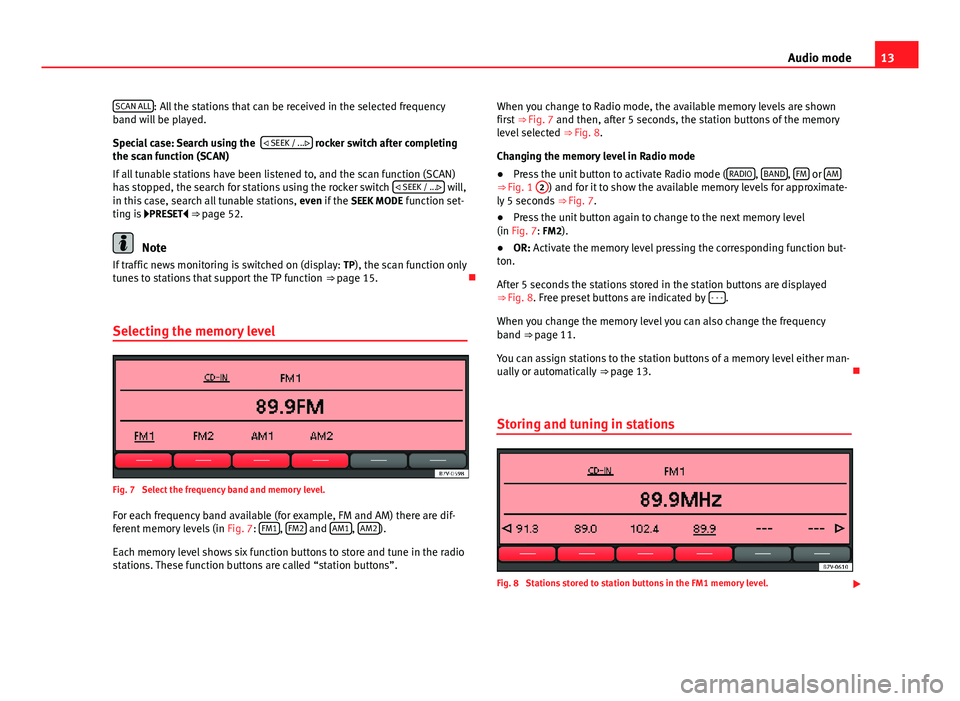
Fig. 7 Select the frequency band and memory level.
For each frequency band available (for example, FM and AM) there are dif-
ferent memory levels (in Fig. 7: FM1
, FM2 and AM1, AM2).
Each memory level shows six function buttons to store and tune in the radio
stations. These function buttons are called “station buttons”. When you change to Radio mode, the available memory levels are shown
first ⇒ Fig. 7 and then, after 5 seconds, the station buttons of the memory
level selected ⇒ Fig. 8.
Changing the memory level in Radio mode
● Press the unit button to activate Radio mode ( RADIO
, BAND, FM or AM⇒ Fig. 1
2) and for it to show the available memory levels for approximate-
ly 5 seconds ⇒ Fig. 7.
● Press the unit button again to change to the next memory level
(in Fig. 7: FM2).
● OR: Activate the memory level pressing the corresponding function but-
ton.
After 5 seconds the stations stored in the station buttons are displayed
⇒ Fig. 8. Free preset buttons are indicated by - - -
.
When you change the memory level you can also change the frequency
band ⇒ page 11.
You can assign stations to the station buttons of a memory level either man-
ually or automatically ⇒ page 13.
Storing and tuning in stations
Fig. 8 Stations stored to station buttons in the FM1 memory level.