ECO mode Seat Leon SC 2015 MEDIA SYSTEM PLUS - NAVI SYSTEM
[x] Cancel search | Manufacturer: SEAT, Model Year: 2015, Model line: Leon SC, Model: Seat Leon SC 2015Pages: 88, PDF Size: 2.23 MB
Page 2 of 88
SEAT S.A. is permanently concerned about continuous development of its t\
ypes and models. For this reason we ask you to under-
stand, that at any given time, changes regarding shape, equipment and te\
chnique may take place on the car delivered. For this reason
no right at all may derive based on the data, drawings and descriptions \
in this current handbook.
All texts, illustrations and standards in this handbook are based on the\
status of information at the time of printing. Except for error
or omission, the information included in the current handbook is valid a\
s of the date of closing print.
Re-printing, copying or translating, whether total or partial is not all\
owed unless SEAT allows it in written form.
SEAT reserves all rights in accordance with the “Copyright” Act.
All rights on changes are reserved.
❀This paper has been manufactured using bleached non-chlorine cellulose.
© SEAT S.A. - Reprint: 15.11.15
About this manual
This manual contains information, recommen-
dations, advice and warnings related to your
radio system. The other publications in the
vehicle documentation contain further infor -
mation of which you should be aware for your
own safety and for that of your passengers.
Ensure that the onboard documentation is
kept in the vehicle at all times. This is espe -
cially important when lending or selling the
vehicle to another person.
This manual contains a description of the
equipment supplied with the vehicle at the
time of press. Some of the units described
herein will not be available until a later date or
is only available in certain markets.
The illustrations are intended as a general
guide and may vary from the equipment �tted
in your vehicle in some details.
The screen colour and the colour of the infor -
mation displayed on it can vary according to
vehicle model. Directions and positions
of components (e.g.
right, left, front, rear) are always relative to the
direction of travel of the vehicle unless other -
wise stated.
The audiovisual material only is intended to
help users to understand certain car function -
alities better. It does not replace the instruc -
tion manual. Please use the instruction manu-
al to obtain more comprehensive information
and indications.
The equipment marked with an aster -
isk* is �tted as standard only in certain
versions, and is only supplied as op -
tional extras for some versions, or are
only offered in certain countries.
® All registered marks are indicated with
®. Although the copyright symbol does
not appear, it is a copyrighted mark.
>> The section is continued on the follow -
ing page.
Audiovisual material on a given page
WARNING
Texts preceded by this symbol contain infor -
mation on safety. They warn you about possi -
ble dangers of accident or injury.
CAUTION
Texts with this symbol draw your attention to
potential sources of damage to your vehicle.
For the sake of the environment
Texts preceded by this symbol contain rele-
vant information concerning environmental
protection.
Note
Texts preceded by this symbol contain additio -
nal information.
Page 7 of 88
Overview
Radio
››› page 15
Stations ››› page 19
Station list ››› page 21
RDS ››› page 16
Digital radio mode (DAB, DAB+ and DMB audio)
››› page 17
Memory buttons ››› page 18
Storing station logos ››› page 18
SCAN ››› page 20
Radio text ››› page 16
TP ››› page 21
FM, AM, DAB frequencies ››› page 22
Media
››› page 23
Data and file storage devices ››› page 24
Playing order ››› page 26 ››› page 26
Changing the media source ››› page 28
Track change ››› page 28
Selection of an album by cover ››› page 29
Selection of a track from a list of tracks ››› page 29
Database view ››› page 30
Inserting or ejecting a CD ››› page 30
Memory card ››› page 31
External data storage device connected to the USB port
››› page 31
External audio source connected to the AUX-IN multime-
dia socket ››› page 33
External audio source with Bluetooth ®
››› page 33
Images ››› page 35
Setup ››› page 34 ››› page 35
Telephone
››› page 52
Pairing ››› page 54
Bluetooth ®
››› page 53
Function buttons ››› page 55
Entering a number ››› page 57
Phonebook ››› page 58
Short messages (SMS) ››› page 59
Call list ››› page 60
Speed dial buttons ››› page 60
Settings ››› page 61
Navigation
››› page 36
New destination ››› page 37
Route options ››› page 38 ››› page 39
My destinations ››› page 40
My tour ››› page 40
Points of interest (POI) ››› page 41
View ››› page 42
Split screen ››› page 42
Map display ››› page 42
Traffic reports and dynamic route guidance to the desti-
nation (TRAFFIC) ››› page 43
Predictive navigation ››› page 44
Importing vCards ››› page 44
Importing Personal POI ››› page 45
Navigation with images ››› page 45
Road signs ››› page 45
Route guidance in Demo mode ››› page 46
Setup ››› page 46
Traffic
››› page 43
Traffic news station TP (Traffic Program) ››› page 21
Traffic reports and dynamic route guidance to the desti-
nation (TRAFFIC) ››› page 43
Vehicle
››› Booklet Instruction Manual
Sport ››› page 48
Offroad ››› page 49
Consumers ››› page 49
Driving data ››› page 49
Ecotrainer ››› page 50
Vehicle status ››› page 51
Images
››› page 35
Setup ››› page 35
Sound
››› page 73
Settings
››› page 72
Full Link
››› page 63
Pairing of portable devices ››› page 67
MirrorLink ››› page 68
Apple CarPlay™ ››› page 69
Android Auto™ ››› page 69 5
Page 14 of 88
Introduction
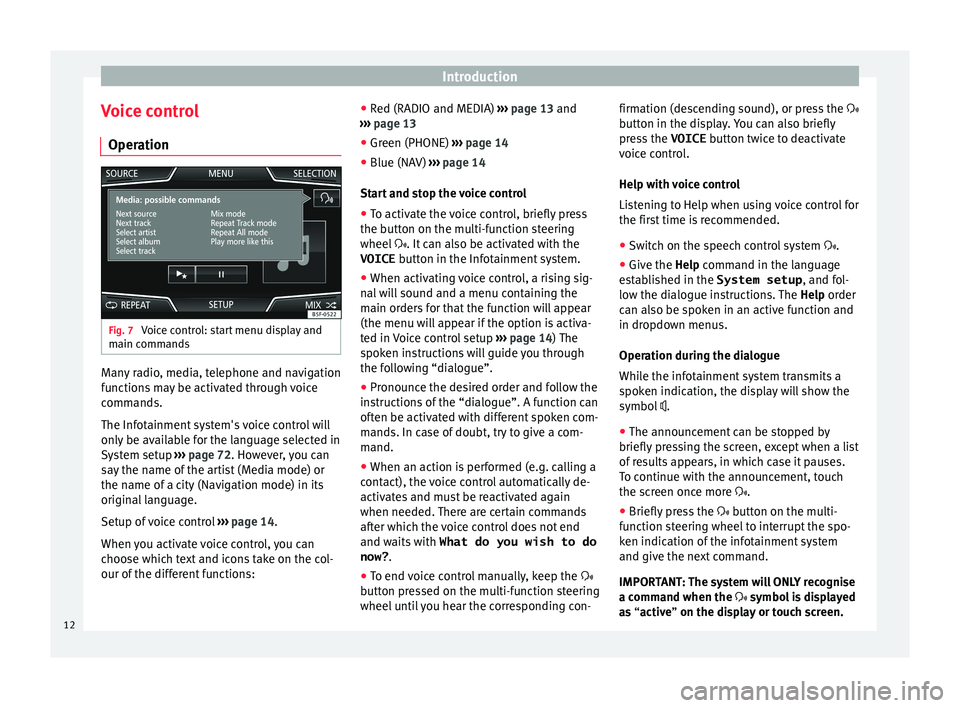
Voice control Oper ation Fig. 7
Voice control: start menu display and
m ain c
omm
ands Many radio, media, telephone and navigation
f
u
nction
s may be activated through voice
commands.
The Infotainment system's voice control will
only be available for the language selected in
System setup ››› page 72. However, you can
say the name of the artist (Media mode) or
the name of a city (Navigation mode) in its
original language.
Setup of voice control ››› page 14.
When you activate voice control, you can
choose which text and icons take on the col-
our of the different functions: ●
Red (RADIO and MEDIA) ››
› page 13 and
››› page 13
● Green (PHONE) ›››
page 14
● Blue (NAV) ››› pag
e 14
Start and stop the voice control
● To activate the voice control, briefly press
the button on the mu
lti-function steering
wheel . It can also be activated with the
VOICE button in the Infotainment system.
● When activating voice control, a rising sig-
nal w
ill sound and a menu containing the
main orders for that the function will appear
(the menu will appear if the option is activa-
ted in Voice control setup ››› page 14) The
spoken instructions will guide you through
the following “dialogue”.
● Pronounce the desired order and follow the
instruction
s of the “dialogue”. A function can
often be activated with different spoken com-
mands. In case of doubt, try to give a com-
mand.
● When an action is performed (e.g. calling a
contact), the
voice control automatically de-
activates and must be reactivated again
when needed. There are certain commands
after which the voice control does not end
and waits with What do you wish to do
now? .
● To end voice control manually, keep the
button pr
essed on the multi-function steering
wheel until you hear the corresponding con- firmation (descending sound), or press the
button in the di
splay. You can also briefly
press the VOICE button twice to deactivate
voice control.
Help with voice control
Listening to Help when using voice control for
the first time is recommended.
● Switch on the speech control system .
● Give the Help command in the l
anguage
established in the System setup , and fol-
low the dialogue instructions. The Help order
can also be spoken in an active function and
in dropdown menus.
Operation during the dialogue
While the infotainment system transmits a
spoken indication, the display will show the
symbol .
● The announcement can be stopped by
briefly pre
ssing the screen, except when a list
of results appears, in which case it pauses.
To continue with the announcement, touch
the screen once more .
● Briefly press the button on the mu
lti-
function steering wheel to interrupt the spo-
ken indication of the infotainment system
and give the next command.
IMPORTANT: The system will ONLY recognise
a command when the symbol is displayed
as “active” on the display or touch screen.
12
Page 15 of 88
Introduction
If you make a mistake when giving a com-
m and or giv
e an inc
omplete command, and it
has no effect, you can repeat the command.
The symbol remains active.
● Briefly press the button of the multi-
f
unction steering wheel to repeat the com-
mand.
Instructions for voice control
For optimum functioning of the voice control,
follow these instructions:
● Speak slowly and clearly, as far as possi-
ble.
The system will not recognise words that
are not pronounced clearly, or words and fig-
ures in which syllables are omitted.
● Telephone numbers must be given digit by
digit or in bloc
ks of numbers in ones, tens or
hundreds.
● Speak at a normal volume, without exag-
gerat
ed intonation or long pauses.
● Avoid noise from the exterior and nearby
(for ex
ample, conversations inside the vehi-
cle). Close all doors, windows and the sliding
roof.
● Do not aim the air from the diffusers at the
roof of
the passenger compartment.
● If you are driving very fast, speak a little
louder.
You c
an access the instructions by saying:
“Instructions/tutorial/introduction”. You can also listen to the instructions in parts. These
are divided int
o 7 blocks. To access them,
give any of the previous commands followed
by “part +
part 1 ”.
Voice control (RADIO) – Red
But-
tonMain radio commands (FM)
Next station
Previous station
Radio station
Wavelength
Scan mode Voice control (MEDIA) – Red
But-
tonMain media commands
Next source
Previous source
Next track
Previous track
Mix Mode
Repeat track mode
Repeat all mode
Select
Source (USB/CD/SD)
Pause/play»
13
Page 19 of 88
Audio and Media Mode
Digital radio mode (DAB, DAB+ and
audio DMB) Fig. 12
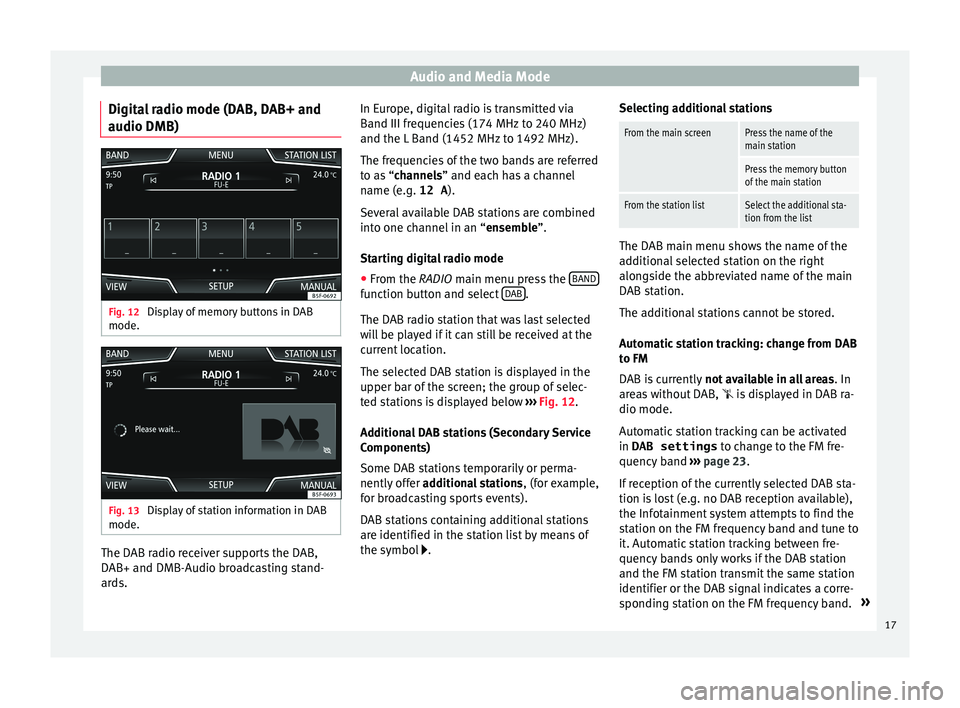
Display of memory buttons in DAB
mode. Fig. 13
Display of station information in DAB
mode. The DAB radio receiver supports the DAB,
D
AB+ and DMB-Audio br
o
adcasting stand-
ards. In Europe, digital radio is transmitted via
Band III frequenc
ies (174 MHz to 240 MHz)
and the L Band (1452 MHz to 1492 MHz).
The frequencies of the two bands are referred
to as “channels” and each has a channel
name (e.g. 12 A ).
Several available DAB stations are combined
into one channel in an “ensemble”.
Starting digital radio mode ● From the RADIO main menu pre
ss the BAND function button and select
D
AB .
The D AB r
a
dio station that was last selected
will be played if it can still be received at the
current location.
The selected DAB station is displayed in the
upper bar of the screen; the group of selec-
ted stations is displayed below ››› Fig. 12.
Additional DAB stations (Secondary Service
Components)
Some DAB stations temporarily or perma-
nently offer additional stations , (for example,
for broadcasting sports events).
DAB stations containing additional stations
are identified in the station list by means of
the symbol . Selecting additional stations
From the main screenPress the name of the
main station
Press the memory button
of the main station
From the station listSelect the additional sta-
tion from the list
The DAB main menu shows the name of the
ad
dition
al selected station on the right
alongside the abbreviated name of the main
DAB station.
The additional stations cannot be stored.
Automatic station tracking: change from DAB
to FM
DAB is currently not available in all areas . In
areas without DAB,
is displayed in DAB ra-
dio mode.
Automatic station tracking can be activated
in DAB settings to change to the FM fre-
quency band ›››
page 23.
If reception of the currently selected DAB sta-
tion is lost (e.g. no DAB reception available),
the Infotainment system attempts to find the
station on the FM frequency band and tune to
it. Automatic station tracking between fre-
quency bands only works if the DAB station
and the FM station transmit the same station
identifier or the DAB signal indicates a corre-
sponding station on the FM frequency band. »
17
Page 21 of 88
Audio and Media Mode
Storing station logos manually The station logos can be imported from a
comp
atib
le data medium (for example, mem-
ory card or memories with USB port).
● Press the function button Setup and then
Station log o
s .
● Press the station button where you wish to
st or
e the logo of a station.
● Select the source where the logo is stored
(for ex
ample, SD card 1 ). We recommend sav-
ing log o
s in the memory unit’s root directory.
● Select the station logo.
● Repeat the process to assign other logos;
pre s
s the infotainment button RADIO to re-
t urn t
o the RADIO m
ain menu.
● If you wish to change the logo of a memory
button th
at already has one assigned to it, it
must first be deleted from the button in ques-
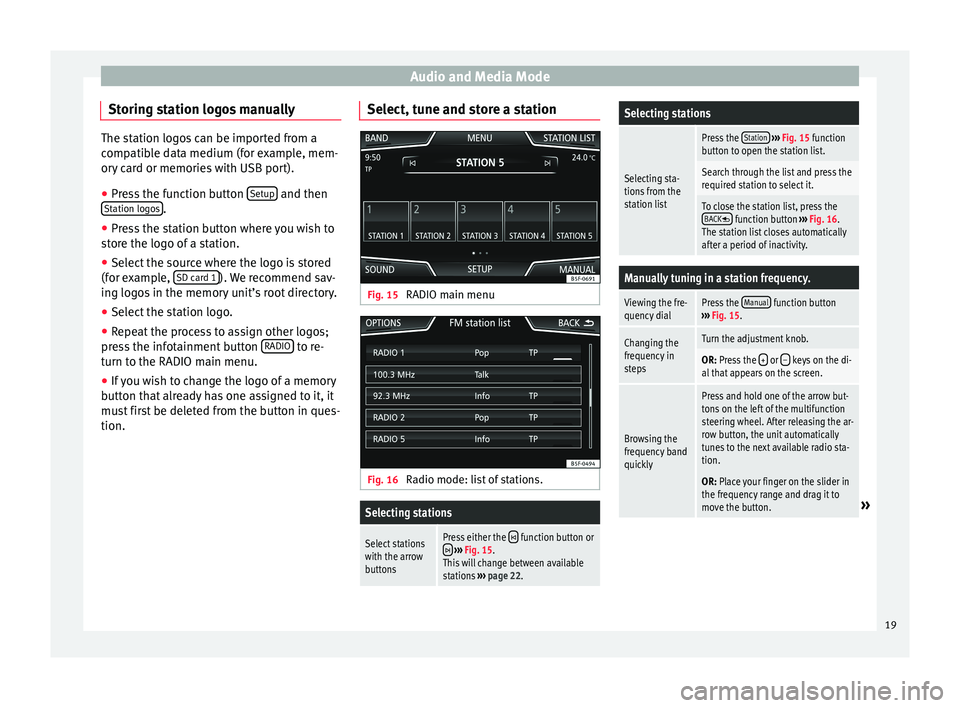
tion. Select, tune and store a station Fig. 15
RADIO main menu Fig. 16
Radio mode: list of stations.
Selecting stations
Select stations
with the arrow
buttonsPress either the function button or ››› Fig. 15.
This will change between available
stations ››› page 22.
Selecting stations
Selecting sta-
tions from the
station list
Press the Station
››› Fig. 15 function
button to open the station list.
Search through the list and press the
required station to select it.
To close the station list, press the BACK function button ››› Fig. 16.
The station list closes automatically
after a period of inactivity.
Manually tuning in a station frequency.
Viewing the fre-
quency dialPress the Manual function button
››› Fig. 15.
Changing the
frequency in
stepsTurn the adjustment knob.
OR: Press the + or – keys on the di-
al that appears on the screen.
Browsing the
frequency band
quickly
Press and hold one of the arrow but-
tons on the left of the multifunction
steering wheel. After releasing the ar-
row button, the unit automatically
tunes to the next available radio sta-
tion.
OR: Place your finger on the slider in
the frequency range and drag it to
move the button.
» 19
Page 22 of 88
Audio and Media ModeManually tuning in a station frequency.
Hiding the fre-
quency band
Briefly press the setting knob
››› Fig. 1 12.
Manual frequency selection is also
closed if you select a station with a
memory button. If no operation is
performed, the frequency range will
disappear after a period of inactivity.
Storing stations
Storing the sta-
tion that is cur-
rently being lis-
tened to.Press and hold
the desired memory
button ››› Fig. 15 until an audible sig-
nal is heard.
The station tuned in will be stored on
this memory button.
Storing stations
Storing a sta-
tion on the list
of stations
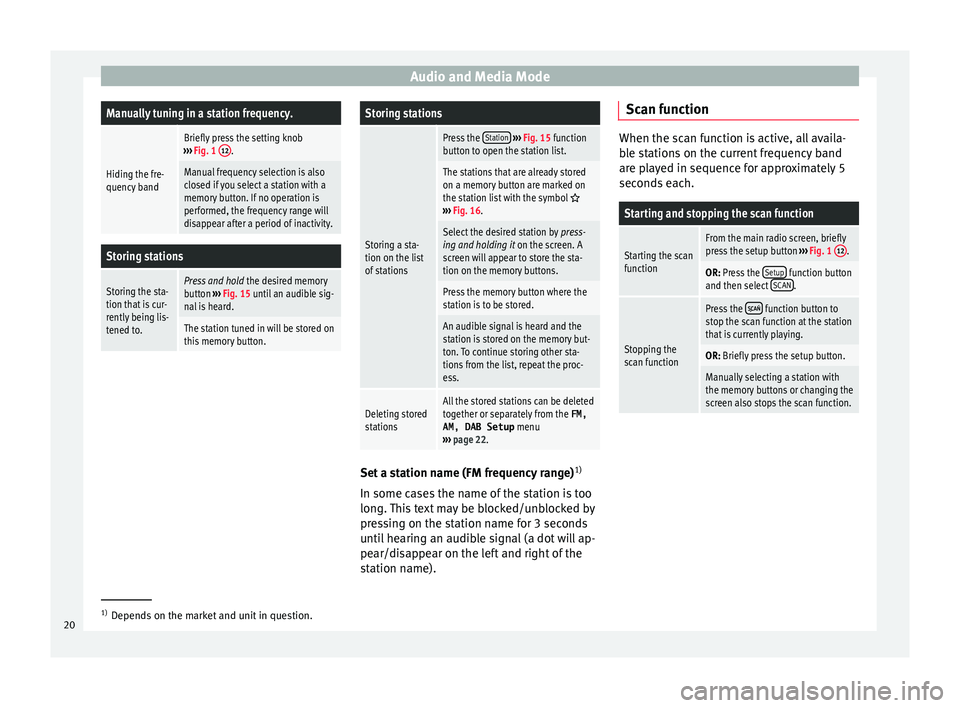
Press the Station
››› Fig. 15 function
button to open the station list.
The stations that are already stored
on a memory button are marked on
the station list with the symbol
››› Fig. 16.
Select the desired station by press-
ing and holding it on the screen. A
screen will appear to store the sta-
tion on the memory buttons.
Press the memory button where the
station is to be stored.
An audible signal is heard and the
station is stored on the memory but-
ton. To continue storing other sta-
tions from the list, repeat the proc-
ess.
Deleting stored
stationsAll the stored stations can be deleted
together or separately from the FM,
AM, DAB Setup menu
››› page 22. Set a station name (FM frequency range)
1)
In some c a
se
s the name of the station is too
long. This text may be blocked/unblocked by
pressing on the station name for 3 seconds
until hearing an audible signal (a dot will ap-
pear/disappear on the left and right of the
station name). Scan function When the scan function is active, all availa-
bl
e s
tations on the current frequency band
are played in sequence for approximately 5
seconds each.
Starting and stopping the scan function
Starting the scan
functionFrom the main radio screen, briefly
press the setup button ››› Fig. 1 12.
OR: Press the
Setup function button
and then select SCAN.
Stopping the
scan function
Press the function button to
stop the scan function at the station
that is currently playing.
OR: Briefly press the setup button.
Manually selecting a station with
the memory buttons or changing the
screen also stops the scan function. 1)
Depends on the market and unit in question.
20
Page 24 of 88
Audio and Media Mode
Incoming traffic announcement In active Audio mode, an incoming traffic an-
nounc
ement
will play automatically.
During the traffic announcement, a pop-up
window is displayed and the radio changes,
depending on the case, to the traffic news
station (EON).
The media mode is paused and the volume is
adjusted to the preset level ››› page 73.
The volume of the traffic announcement can
be modified with the volume control . The
adjusted volume setting will be applied to
subsequent announcements.
● Press the Canc
el function button to end the
c urr
ent
traffic announcement. The TP function
remains switched on.
● OR: Press the De
activate function button to
end the tr affic
annou
ncement and disconnect
the TP function permanently.
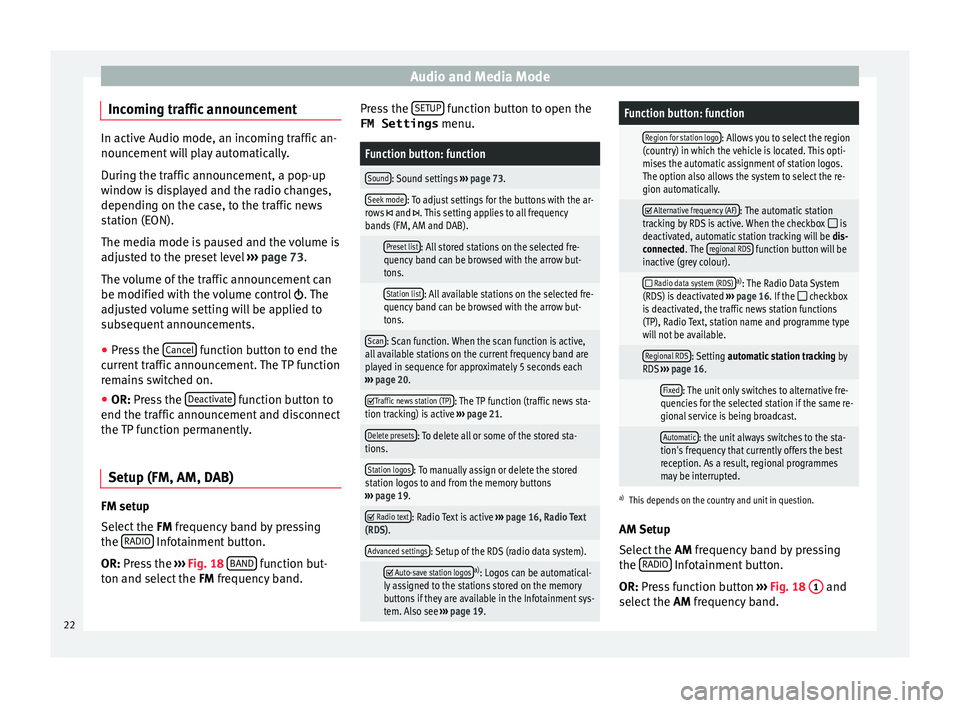
Setup (FM, AM, DAB) FM setup
Sel
ect
the FM
frequency band by pressing
the RADIO Infotainment button.
OR: Pr e
s
s the ›››
Fig. 18 BAND function but-
t on and sel
ect
the FM frequency band. Press the
SETUP function button to open the
FM Settings menu.
Function button: function
Sound: Sound settings ››› page 73.
Seek mode: To adjust settings for the buttons with the ar-
rows and . This setting applies to all frequency
bands (FM, AM and DAB).
Preset list: All stored stations on the selected fre-
quency band can be browsed with the arrow but-
tons.
Station list: All available stations on the selected fre-
quency band can be browsed with the arrow but-
tons.
Scan: Scan function. When the scan function is active,
all available stations on the current frequency band are
played in sequence for approximately 5 seconds each
››› page 20.
Traffic news station (TP): The TP function (traffic news sta-
tion tracking) is active ››› page 21.
Delete presets: To delete all or some of the stored sta-
tions.
Station logos: To manually assign or delete the stored
station logos to and from the memory buttons
››› page 19.
Radio text: Radio Text is active
››› page 16, Radio Text
(RDS).
Advanced settings: Setup of the RDS (radio data system).
Auto-save station logosa)
: Logos can be automatical-
ly assigned to the stations stored on the memory
buttons if they are available in the Infotainment sys-
tem. Also see ››› page 19.
Function button: function
Region for station logo: Allows you to select the region
(country) in which the vehicle is located. This opti-
mises the automatic assignment of station logos.
The option also allows the system to select the re-
gion automatically.
Alternative frequency (AF): The automatic station
tracking by RDS is active. When the checkbox is
deactivated, automatic station tracking will be dis-
connected. The regional RDS
function button will be
inactive (grey colour).
Radio data system (RDS)a)
: The Radio Data System
(RDS) is deactivated ››› page 16. If the checkbox
is deactivated, the traffic news station functions
(TP), Radio Text, station name and programme type
will not be available.
Regional RDS: Setting automatic station tracking by
RDS ››› page 16.
Fixed: The unit only switches to alternative fre-
quencies for the selected station if the same re-
gional service is being broadcast.
Automatic: the unit always switches to the sta-
tion's frequency that currently offers the best
reception. As a result, regional programmes
may be interrupted.
a) This depends on the country and unit in question.
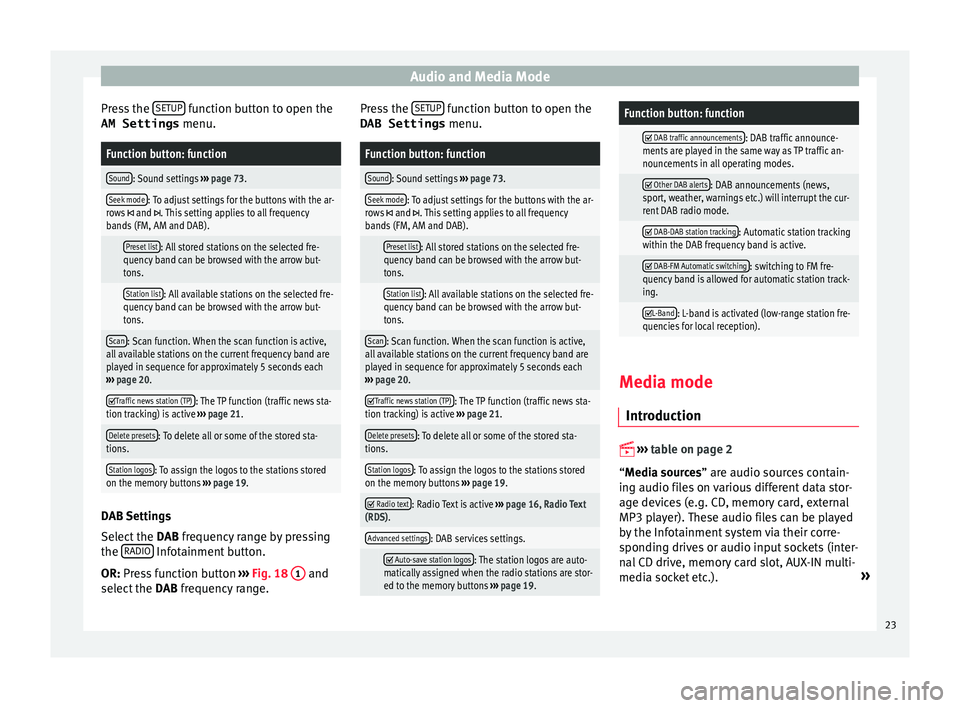
AM Setup
Select the AM frequency band by pressing
the RADIO Infotainment button.
OR: Pr e
s
s function button ››› Fig. 18 1 and
sel ect
the AM
frequency band.
22
Page 25 of 88
Audio and Media Mode
Press the S
ETUP function button to open the
AM Settings menu.Function button: function
Sound: Sound settings ››› page 73.
Seek mode: To adjust settings for the buttons with the ar-
rows and . This setting applies to all frequency
bands (FM, AM and DAB).
Preset list: All stored stations on the selected fre-
quency band can be browsed with the arrow but-
tons.
Station list: All available stations on the selected fre-
quency band can be browsed with the arrow but-
tons.
Scan: Scan function. When the scan function is active,
all available stations on the current frequency band are
played in sequence for approximately 5 seconds each
››› page 20.
Traffic news station (TP): The TP function (traffic news sta-
tion tracking) is active ››› page 21.
Delete presets: To delete all or some of the stored sta-
tions.
Station logos: To assign the logos to the stations stored
on the memory buttons ››› page 19. DAB Settings
Sel
ect
the D
AB frequency range by pressing
the RADIO Infotainment button.
OR: Pr e
s
s function button ››› Fig. 18 1 and
sel ect
the D
AB frequency range. Press the
SETUP function button to open the
DAB Settings menu.
Function button: function
Sound: Sound settings ››› page 73.
Seek mode: To adjust settings for the buttons with the ar-
rows and . This setting applies to all frequency
bands (FM, AM and DAB).
Preset list: All stored stations on the selected fre-
quency band can be browsed with the arrow but-
tons.
Station list: All available stations on the selected fre-
quency band can be browsed with the arrow but-
tons.
Scan: Scan function. When the scan function is active,
all available stations on the current frequency band are
played in sequence for approximately 5 seconds each
››› page 20.
Traffic news station (TP): The TP function (traffic news sta-
tion tracking) is active ››› page 21.
Delete presets: To delete all or some of the stored sta-
tions.
Station logos: To assign the logos to the stations stored
on the memory buttons ››› page 19.
Radio text: Radio Text is active
››› page 16, Radio Text
(RDS).
Advanced settings: DAB services settings.
Auto-save station logos: The station logos are auto-
matically assigned when the radio stations are stor-
ed to the memory buttons ››› page 19.
Function button: function
DAB traffic announcements: DAB traffic announce-
ments are played in the same way as TP traffic an-
nouncements in all operating modes.
Other DAB alerts: DAB announcements (news,
sport, weather, warnings etc.) will interrupt the cur-
rent DAB radio mode.
DAB-DAB station tracking: Automatic station tracking
within the DAB frequency band is active.
DAB-FM Automatic switching: switching to FM fre-
quency band is allowed for automatic station track-
ing.
L-Band: L-band is activated (low-range station fre-
quencies for local reception). Media mode
Intr oduction
››
›
table on page 2
“Media sources” are audio sources contain-
ing audio files on various different data stor-
age devices (e.g. CD, memory card, external
MP3 player). These audio files can be played
by the Infotainment system via their corre-
sponding drives or audio input sockets (inter-
nal CD drive, memory card slot, AUX-IN multi-
media socket etc.). »
23
Page 27 of 88
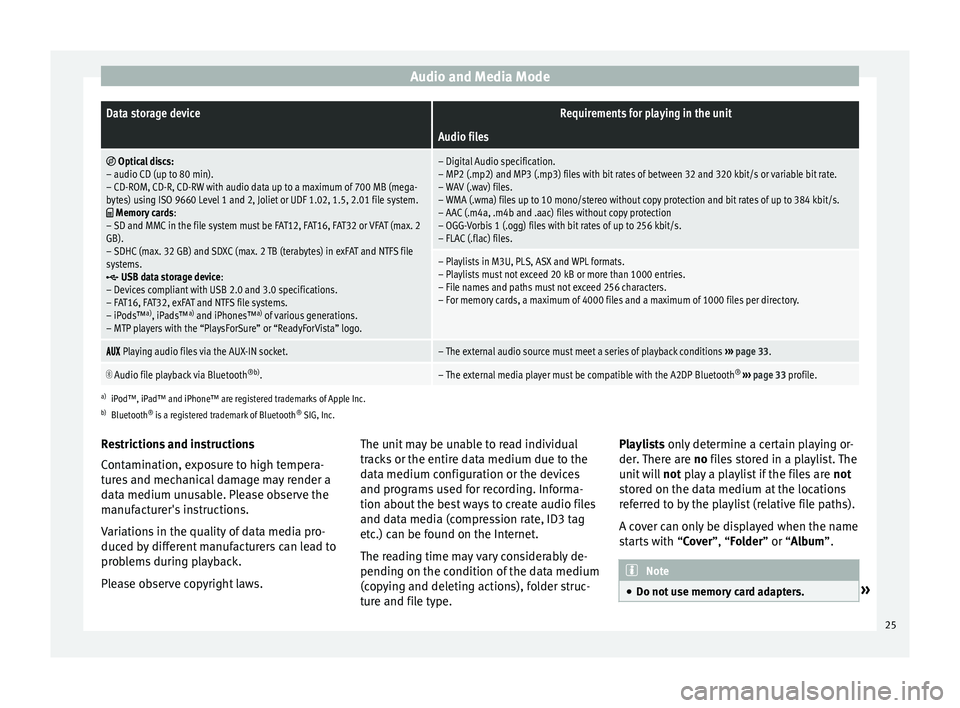
Audio and Media ModeData storage deviceRequirements for playing in the unit
Audio files
Optical discs:
– audio CD (up to 80 min).
– CD-ROM, CD-R, CD-RW with audio data up to a maximum of 700 MB (mega-
bytes) using ISO 9660 Level 1 and 2, Joliet or UDF 1.02, 1.5, 2.01 file system.
Memory cards :
– SD and MMC in the file system must be FAT12, FAT16, FAT32 or VFAT (max. 2
GB).
– SDHC (max. 32 GB) and SDXC (max. 2 TB (terabytes) in exFAT and NTFS file
systems.
USB data storage device:
– Devices compliant with USB 2.0 and 3.0 specifications.
– FAT16, FAT32, exFAT and NTFS file systems.
– iPods™ a)
, iPads™ a)
and iPhones™ a)
of various generations.
– MTP players with the “PlaysForSure” or “ReadyForVista” logo.
– Digital Audio specification.
– MP2 (.mp2) and MP3 (.mp3) files with bit rates of between 32 and 320 kbit/s or variable bit rate.
– WAV (.wav) files.
– WMA (.wma) files up to 10 mono/stereo without copy protection and bit rates of up to 384 kbit/s.
– AAC (.m4a, .m4b and .aac) files without copy protection
– OGG-Vorbis 1 (.ogg) files with bit rates of up to 256 kbit/s.
– FLAC (.flac) files.
– Playlists in M3U, PLS, ASX and WPL formats.
– Playlists must not exceed 20 kB or more than 1000 entries.
– File names and paths must not exceed 256 characters.
– For memory cards, a maximum of 4000 files and a maximum of 1000 files per directory.
Playing audio files via the AUX-IN socket.– The external audio source must meet a series of playback conditions
››› page 33.
Audio file playback via Bluetooth
®b)
.– The external media player must be compatible with the A2DP Bluetooth ®
››› page 33 profile.
a)
iPod™, iPad™ and iPhone™ are registered trademarks of Apple Inc.
b) Bluetooth ®
is a registered trademark of Bluetooth ®
SIG, Inc.
Restrictions and instructions
Contamination, exposure to high tempera-
tures and mechanical damage may render a
data medium unusable. Please observe the
manufacturer's instructions.
Variations in the quality of data media pro-
duced by different manufacturers can lead to
problems during playback.
Please observe copyright laws. The unit may be unable to read individual
track
s or the entire data medium due to the
data medium configuration or the devices
and programs used for recording. Informa-
tion about the best ways to create audio files
and data media (compression rate, ID3 tag
etc.) can be found on the Internet.
The reading time may vary considerably de-
pending on the condition of the data medium
(copying and deleting actions), folder struc-
ture and file type. Playlists only determine a certain playing or-
der.
There are no files stored in a playlist. The
unit will not play a playlist if the files are not
stored on the data medium at the locations
referred to by the playlist (relative file paths).
A cover can only be displayed when the name
starts with “Cover”, “Folder” or “Album”. Note
● Do not u se memor
y card adapters. » 25