key Seat Mii 2012 User Guide
[x] Cancel search | Manufacturer: SEAT, Model Year: 2012, Model line: Mii, Model: Seat Mii 2012Pages: 308, PDF Size: 4.13 MB
Page 38 of 308

36Unlocking and locking
Locking and unlocking the vehicle from the inside
Fig. 19 In the driver
door: central locking but-
ton
Fig. 20 In the passenger
door: Door handle for me-
chanical locking Central locking
Push the button ⇒ Fig. 19:
Unlocking the vehicle.
Locking the vehicle.
The central locking button is still operative when the ignition is switched off.
If the vehicle has been locked with the vehicle key, the central locking but-
ton does not operate.
Please note the following when you use the central locking button to lock
your vehicle:
●
The deadlock will not activate ⇒ page 37.
● It will not be possible to open the doors or the rear lid from the outside,
when stopped at traffic lights for example.
● The doors can be opened and unlocked individually from the inside by
pulling the inside door handle. If necessary, pull the door release lever
twice.
● The driver door cannot be locked when it is still open. This avoids lock-
ing the vehicle key inside the vehicle when there is nobody inside.
Mechanical locking
The doors are locked by pressing the door lever, so that the red mark be-
comes visible ⇒ Fig. 20 1
.
To unlock a door, pull its corresponding door lever.
If the vehicle becomes locked, take note of the following:
● The deadlock will not activate ⇒ page 37.
● It will not be possible to open the doors from the outside, when stopped
at traffic lights for example.
Page 39 of 308

37
Unlocking and locking
● The doors can be opened and unlocked individually from the inside by
pulling the inside door handle.
● The driver door cannot be locked using the central locking system when
it is still open. This avoids locking the vehicle key inside the vehicle when
there is nobody inside.
Deadlock*
FunctionNecessary operationsLocks the vehicle with the dead-
lock.Press the button once on the vehicle
key.
Locks the vehicle without the
deadlock.Press the button twice on the vehicle
key.
Press the central locking button on
the driver door once.
When the vehicle is locked, the deadlock deactivates the door handles,
making the vehicle difficult to open. The doors cannot be opened from in-
side ⇒
.
Upon switching off the ignition, the deadlock switched on warning will ap-
pear on the instrument panel display ( deadlock or SAFELOCK).
When the deadlock is switched off:
● The vehicle can be opened and unlocked from the inside using an inside
door handle. Control lamp on the driver door
When the vehicle is locked:MeaningThe red LED flashes for approximately 2
seconds at short intervals and then more
slowly.The deadlock is switched on.
The red LED flashes for about two sec-
onds then turns off. After 30 seconds, the
LED flashes again.The deadlock is switched off.
The red LED flashes for about two sec-
onds at short intervals. Subsequently,
the light will remain switched on for
about. 30 seconds.There is a fault in the locking
system. Contact a Specialised
workshop.
WARNING
Careless use of the deadlock can cause serious injury.
● Never leave anybody inside the vehicle if this is locked using the key.
When the deadlock is activated, doors cannot be opened from the inside!
● When the doors are locked, it is difficult to get to passengers in the
interior in case of an emergency. Passengers could remain trapped inside
in case of emergency.
Vehicle diagramPrior to a journey...While drivingCare, cleaning and mainte-
nanceIf and whenTechnical Data
Page 40 of 308

38Unlocking and locking
Doors
Introduction
Additional information and warnings:
● Vehicle key set ⇒ page 28
● Central locking and locking system ⇒ page 33
● Emergency locking and unlocking ⇒ page 243
WARNING
If a door is not correctly closed, it could open unexpectedly when driving
and cause serious injuries.
● Always stop immediately and close the door.
● When closing, ensure that the door has closed correctly. A closed
door should be flush with the corresponding parts of the bodywork.
● Open and close doors only when nobody is in the way of the door.
WARNING
A door held open by its retainer could be blown closed by the wind or
close if the vehicle is on a hill causing injury.
● When opening and closing doors, always use the door handle.
Note
On the display of the SEAT Portable System (supplied by SEAT), ⇒ page 222
can be seen if at least one vehicle door has been left open or is not correctly
closed. Childproof lock
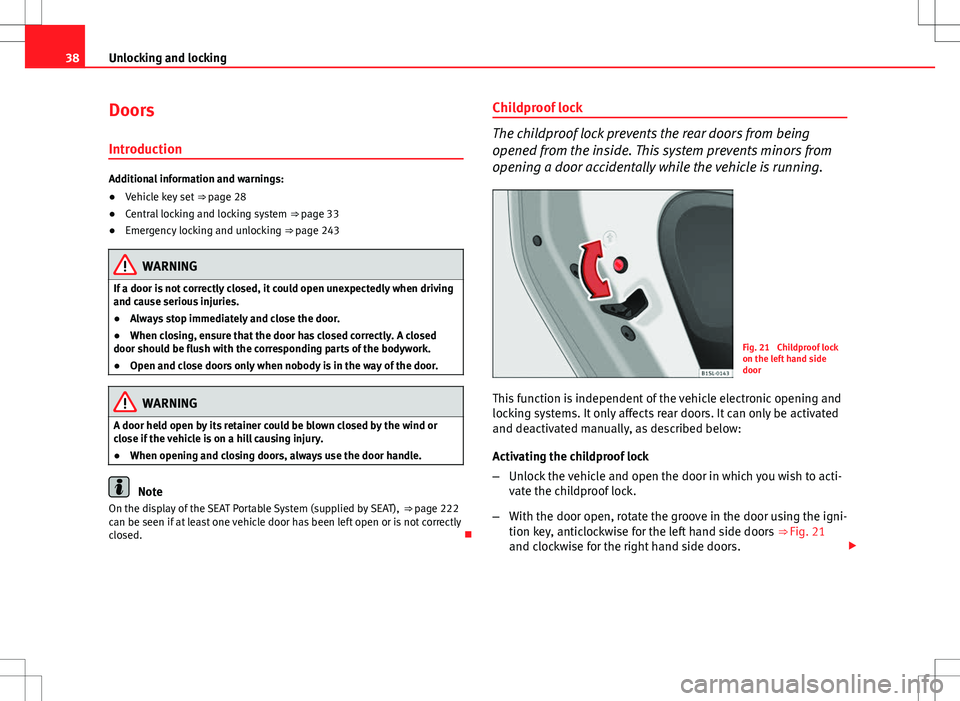
The childproof lock prevents the rear doors from being
opened from the inside. This system prevents minors from
opening a door accidentally while the vehicle is running.
Fig. 21 Childproof lock
on the left hand side
door
This function is independent of the vehicle electronic opening and
locking systems. It only affects rear doors. It can only be activated
and deactivated manually, as described below:
Activating the childproof lock
– Unlock the vehicle and open the door in which you wish to acti-
vate the childproof lock.
– With the door open, rotate the groove in the door using the igni-
tion key, anticlockwise for the left hand side doors ⇒ Fig. 21
and clockwise for the right hand side doors.
Page 41 of 308

39
Unlocking and locking
Deactivating the childproof lock
– Unlock the vehicle and open the door whose childproof lock you
want to deactivate.
– With the door open, rotate the groove in the door using the igni-
tion key, anticlockwise for the right hand side doors and clock-
wise for the left hand side doors ⇒ Fig. 21.
Once the childproof lock is activated, the door can only be opened from the
outside. The childproof lock can be activated and deactivated by inserting
the key in the groove when the door is open, as described above.
Vehicle diagramPrior to a journey...While drivingCare, cleaning and mainte-
nanceIf and whenTechnical Data
Page 42 of 308

40Unlocking and locking
Rear lid
Introduction
Additional information and warnings:
● Exterior detail ⇒ page 6
● Central locking ⇒ page 33
● Transporting ⇒ page 97
● Emergency locking and unlocking ⇒ page 243
WARNING
Careless and unsuitable locking, opening and closing of the rear lid can
cause accidents and serious injury.
● Open and close the rear lid only when nobody is in the way.
● Do not close the rear lid by pushing it down with your hand on the
rear window. The rear window could break and cause injury.
● Ensure the rear lid is closed and locked correctly after closing, other-
wise, it may open unexpectedly while driving. A closed rear lid should be
flush with the corresponding parts of the bodywork.
● Always keep the rear lid closed while driving to avoid toxic gases en-
tering the interior.
● Do not open the rear lid when there is a load installed, for example a
carrier system. Likewise, the rear lid cannot be opened when a load is at-
tached to it, for example bicycles. An open rear lid could close itself if
there is an additional weight on it. If necessary, press down on the rear
lid and remove the load.
● Close and lock both the rear lid and all the other doors when you are
not using the vehicle. Ensure that nobody remains inside the vehicle.
WARNING (Continued)
● Never allow children to play inside or around the vehicle without su-
pervision, especially if the rear lid is open. Children could enter the lug-
gage compartment, close the rear lid and become trapped. Depending on
the time of the year, temperatures inside a locked and closed vehicle can
be extremely high or extremely low resulting in serious injuries and ill-
ness or even death, particularly for young children.
● Never leave children or disabled people alone in the vehicle. If the ve-
hicle key or the central locking button is used, they may be locked in the
vehicle.
CAUTION
Before opening the rear lid, ensure that there is sufficient free space to
open and close it, for example if you are in a garage.
Note
On the display of the Portable Navigation System (supplied by SEAT)
⇒ page 222 can be seen if the rear lid has been left open or is not correctly
shut.
Page 43 of 308

41
Unlocking and locking
Opening the rear lid
Fig. 22 On the vehicle
key: Button to unlock and
open the rear lid
If there are bicycles attached to a carrier situated on the rear lid, in some
cases, it may not automatically open ⇒
. Remove the load from the carrier
and support the open rear lid.
Opening with central locking
● Press the button
on the vehicle key
⇒ Fig. 22 for about one second
to unlock the rear lid.
● ALTERNATIVELY: Press the button
on the vehicle key until the rear lid
opens automatically several centimetres.
● Opening the rear lid with the button.
Opening with the vehicle mechanical key
● Insert the vehicle key into the lock cylinder of the driver door and turn
the key in an anticlockwise direction
⇒ page 33.
● Opening the rear lid with the button.
WARNING
Unsuitable or careless unlocking and opening of the rear lid could cause
serious injuries.
● If there is a loaded luggage carrier on the rear lid, it could be un-
locked or open but not recognised as such. An unlocked or open rear lid
could open unexpectedly while driving.
Note
At outside temperatures of less than 0 °C (+32 °F), the pressurised gas
struts cannot always automatically lift the tailgate. In this case, open the
rear lid manually.
Closing the rear lid
Fig. 23 Rear lid open:
hand grip
Vehicle diagramPrior to a journey...While drivingCare, cleaning and mainte-
nanceIf and whenTechnical Data
Page 44 of 308

42Unlocking and locking
Closing the rear lid
● Grab the handgrip inside the rear lid ⇒ Fig. 23 (arrow).
● Push the rear lid downwards until it locks into place in the lock.
● Ensure that it is correctly closed by pulling on it firmly.
Locking the rear lid with central locking*
If the vehicle is unlocked and no doors or the rear lid are opened during
about. 30 seconds, it will automatically lock again. This function prevents
the vehicle from remaining unlocked if the unlocking button is pressed by
mistake.
Locking is only possible when the rear lid is correctly and fully closed.
● The rear lid is also locked by a central locking.
● If the vehicle rear lid is locked or unlocked using the
button, when it
is closed once more it will lock automatically.
● A closed but not locked rear lid will lock automatically at a speed above
about 9 km/h (6 mph).
Locking the rear lid with the vehicle mechanical key
Locking is only possible when the rear lid is correctly and fully closed.
● Insert the vehicle key into the lock cylinder of the driver door and turn
the key in a clockwise direction ⇒ page 33.
WARNING
Unsuitable or careless closing and locking of the rear lid could cause se-
rious injuries.
● Never leave the vehicle unattended, and never allow children to play
inside or around the vehicle without supervision, especially if the rear lid
is open. Children could enter the luggage compartment, close the rear lid
and become trapped. A locked vehicle can be subjected to extremely high
and low temperatures, depending on the time of year, thus causing seri-
ous injuries/illness and even death.
Note
Before closing the rear lid, make sure that the key has not been left inside
the boot.
Page 45 of 308

43
Unlocking and locking
Windows Introduction
Additional information and warnings:
● SEAT information system ⇒ page 22
● Central locking and locking system ⇒ page 33
WARNING
Careless use of the electric windows can cause serious injury.
● Only operate the electric windows when nobody is in the way.
● Never leave children or disabled people alone in the vehicle if the
doors are to be locked. The windows cannot be opened in case of an
emergency.
● Always take all the keys with you whenever you leave the vehicle. Af-
ter turning off the ignition, the windows can be opened and closed for a
short time using the buttons on the door as long as the driver door or
passenger side door is not open.
CAUTION
When the windows are open, rain can enter into the vehicle, dampening the
interior equipment and causing damage to the vehicle. Opening and closing the electric windows
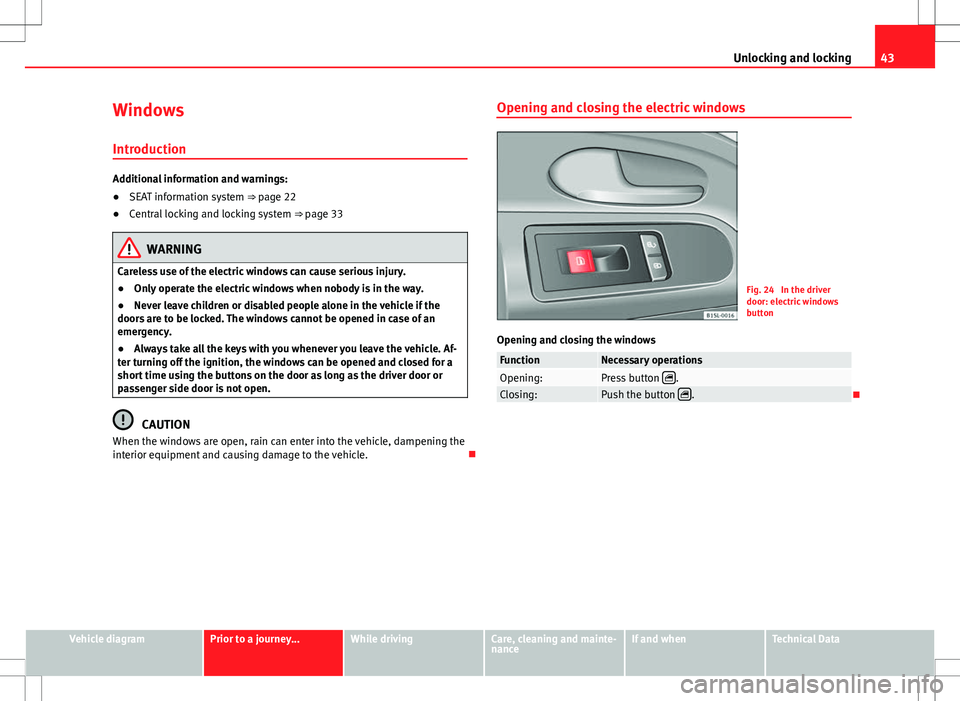
Fig. 24 In the driver
door: electric windows
button
Opening and closing the windows
FunctionNecessary operationsOpening:Press button .Closing:Push the button .
Vehicle diagramPrior to a journey...While drivingCare, cleaning and mainte-
nanceIf and whenTechnical Data
Page 66 of 308

64Ensuring you are correctly and safely seated
Fig. 45 Correct position-
ing of seat belts during
pregnancy
Seat belts offer their maximum protection in the event of an accident and
reduce the risk of sustaining severe or fatal injuries only when they are
properly positioned. Furthermore, if the webbing is correctly positioned, the
seat belt will hold the occupants in the optimum position to ensure the air-
bag provides the utmost protection. The seat belt must therefore always be
worn and the webbing correctly positioned.
Incorrectly worn seat belts can cause severe or even fatal injuries
⇒ page 48, Adjusting the seat position.
Correct seat belt position
● The shoulder part of the seat belt must lie on the centre of the shoulder,
never across the neck or the arm, under the arm or behind the shoulder.
● The lap part of the seat belt must lie across the pelvis, never across the
stomach.
● The seat belt must lie flat and fit comfortably. Pull the seat belt tight if
necessary to take up any slack.
In the case of pregnant women , the seat belt must lie evenly across the
chest and as low as possible over the pelvis, never across the stomach.
Pregnant women must wear the seat belt properly at all times during the
pregnancy ⇒ Fig. 45. Adapting the position of the seat belt webbing to your size
The seat belt can be adapted using the following equipment:
●
Front seat height adjustment.
WARNING
An incorrectly worn seat belt web can cause severe injuries in the event
of an accident or sudden braking or manoeuvre.
● The seat belt cannot provide optimum protection if it is not correctly
worn and the backrest is not tilted slightly backwards.
● The seat belt itself or a loose seat belt can cause severe injuries if the
belt moves from hard areas of the body to soft areas (e.g. the stomach).
● The shoulder part of the seat belt must lie on the centre of the shoul-
der, never across the neck or the arm.
● The seat belt must lie flat and fit comfortably on the torso.
● The lap part of the seat belt must lie across the pelvis, never across
the stomach. The seat belt must lie flat and fit comfortably on the pelvis.
Pull the seat belt tight if necessary to take up any slack.
● Pregnant women must wear the lap part of the seat belt as low as
possible over the pelvis and always lie it flat, “surrounding” the stom-
ach.
● Do not twist the seat belt while it is fastened.
● Never pull the seat belt away from your body using your hand.
● Do not lie the seat belt across rigid or fragile objects, e.g. glasses,
pens or keys.
● Never use seat belt clips, retaining rings or similar instruments to al-
ter the position of the belt webbing.
Page 71 of 308

69
Ensuring you are correctly and safely seated
Types of front passenger airbag systems
There are 2 different SEAT front passenger airbag systems:ABCharacteristics of the passenger
front airbag without disabling.Characteristics of the front passen-
ger front airbag that can be disabled
manually ⇒ page 73.
- * Control lamp on the instru-
ment panel.– Control lamp on the instrument
panel.
- Front passenger airbag located in
dash panel.- PASSENGER AIR BAG control
lamp on the dash panel.
- Key switch in the glove compart-
ment on the front passenger side of
the dash panel.
- Front passenger airbag located in
dash panel.
- Description: airbag system- Description: airbag system with
front passenger airbag disabling.
- Description: airbag system without
disabling.* Control lamps
Fig. 46 Control lamp for
disabling the front pas-
senger airbag on the
dash panel
lights
upLocationPossible causeSolution
Instrument
panelFault in airbag system
and seat belt tension-
ers.Have the system checked
immediately by a Special-
ised workshop.
Dash panel.
Fault in the airbag
system.Have the system checked
immediately by a Special-
ised workshop.
Front passenger air-
bag disabled.Check whether the airbag
should remain disabled.
Several warning and control lamps light up for a few seconds when the igni-
tion is switched on while a test of the function is being carried out. They will
switch off after a few seconds.
If the PASSENGER AIR BAG warning lamp does not remain lit or if it is
lit together with the control lamp on the instrument panel and the front
passenger airbag is disabled, there may be a fault in the airbag system
⇒
.
Vehicle diagramPrior to a journey...While drivingCare, cleaning and mainte-
nanceIf and whenTechnical Data