Seat Mii 2012 SOUND SYSTEM 1.X
Manufacturer: SEAT, Model Year: 2012, Model line: Mii, Model: Seat Mii 2012Pages: 35, PDF Size: 1.13 MB
Page 21 of 35
20Audio modeInserting a CD●
Keep the printed side of the CD facing upwards.
●
Push the CD into the CD slot
4
⇒ page 6 only to the point where it isdrawn in automatically.
●
When the CD is inserted, the play function will start automatically.
When other functions are selected, CD-IN is displayed at the top left of thescreen if a CD is inserted in the internal CD drive.
Ejecting CDs
●
Press the setting knob ⇒ Fig. 1
6
.
●
The CD in the drive will be ejected and must be removed within 10 sec-onds.
If the CD is not removed within approximately 10 seconds, it is retractedagain for safety reasons.
Error messages on the screen
A reading error is indicated by ERROR in the title bar.
An error message in the bottom line of the screen indicates the possiblecause of the error.
NO CD: Illegible data medium. It is not possible to switch to Media mode.
CD ROM: Inserted data CD. The CD will be returned.
CHECK CD: The inserted CD cannot be read. The CD will be returned. Checkfor damage.
TEMPERATURE: The CD drive is overheated. No more CDs can be inserted.Another audio source will be played.
SERVICE: The CD drive has a mechanical anomaly. Visit the specialised work-shop.
NoteUneven road surfaces and strong vibrations may cause the CD to jump.
Selecting a media source
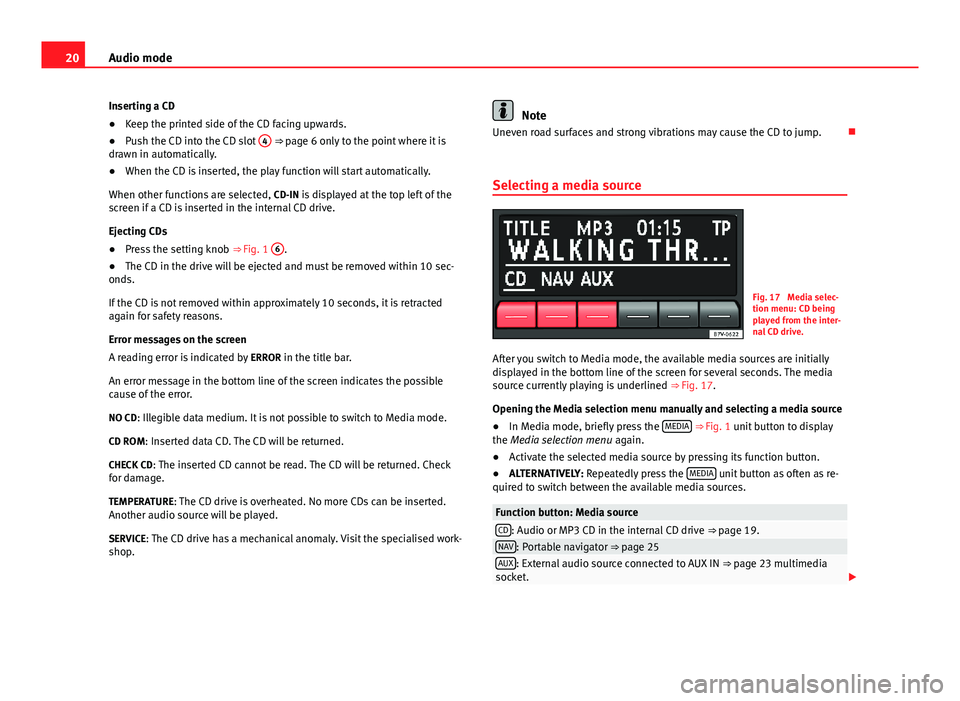
Fig. 17
Media selec-tion menu: CD beingplayed from the inter-nal CD drive.
After you switch to Media mode, the available media sources are initiallydisplayed in the bottom line of the screen for several seconds. The mediasource currently playing is underlined ⇒ Fig. 17.
Opening the Media selection menu manually and selecting a media source
●
In Media mode, briefly press the MEDIA ⇒ Fig. 1 unit button to displaythe Media selection menu again.
●
Activate the selected media source by pressing its function button.
●
ALTERNATIVELY: Repeatedly press the MEDIA unit button as often as re-quired to switch between the available media sources.
Function button: Media sourceCD: Audio or MP3 CD in the internal CD drive ⇒ page 19.NAV: Portable navigator ⇒ page 25AUX: External audio source connected to AUX IN ⇒ page 23 multimediasocket.
Page 22 of 35
21Audio modeWhen a media source that has already been played is selected again, play-back is resumed from the point that was last played (except: AUX⇒ page 23).
Track information display
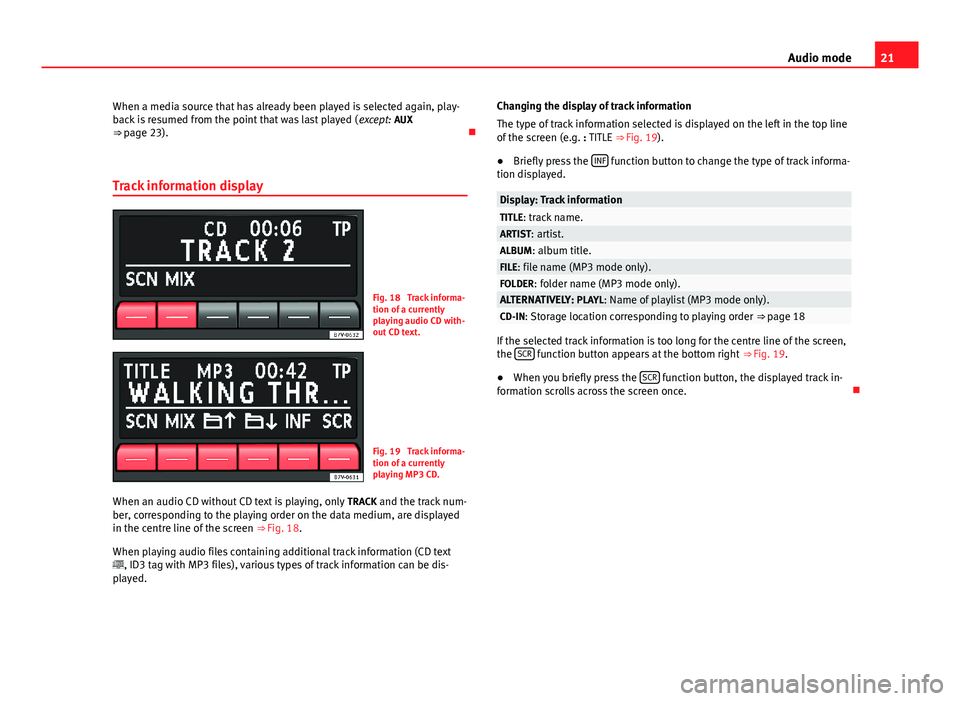
Fig. 18
Track informa-tion of a currentlyplaying audio CD with-out CD text.
Fig. 19
Track informa-tion of a currentlyplaying MP3 CD.
When an audio CD without CD text is playing, only TRACK and the track num-ber, corresponding to the playing order on the data medium, are displayedin the centre line of the screen ⇒ Fig. 18.
When playing audio files containing additional track information (CD text, ID3 tag with MP3 files), various types of track information can be dis-played.
Changing the display of track information
The type of track information selected is displayed on the left in the top lineof the screen (e.g. : TITLE ⇒ Fig. 19).
●
Briefly press the INF function button to change the type of track informa-tion displayed.
Display: Track informationTITLE: track name.ARTIST: artist.ALBUM: album title.FILE: file name (MP3 mode only).FOLDER: folder name (MP3 mode only).ALTERNATIVELY: PLAYL: Name of playlist (MP3 mode only).CD-IN: Storage location corresponding to playing order ⇒ page 18
If the selected track information is too long for the centre line of the screen,the SCR function button appears at the bottom right ⇒ Fig. 19.
●
When you briefly press the SCR function button, the displayed track in-formation scrolls across the screen once.
Page 23 of 35
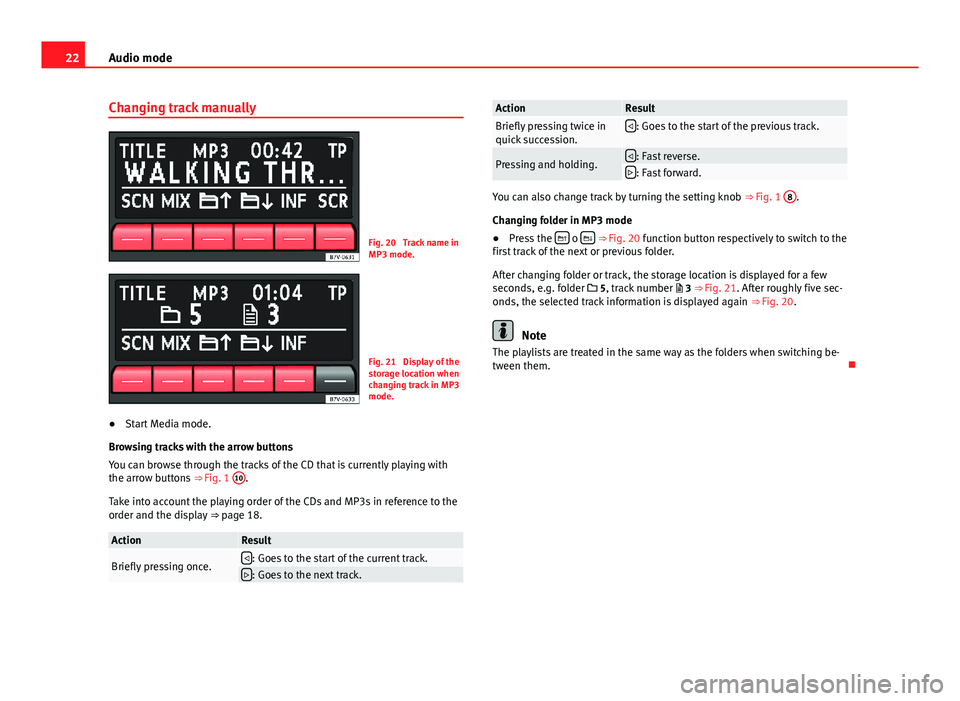
22Audio modeChanging track manuallyFig. 20
Track name inMP3 mode.
Fig. 21
Display of thestorage location whenchanging track in MP3mode.
●
Start Media mode.
Browsing tracks with the arrow buttons
You can browse through the tracks of the CD that is currently playing withthe arrow buttons ⇒ Fig. 1
10
.
Take into account the playing order of the CDs and MP3s in reference to theorder and the display ⇒ page 18.
ActionResultBriefly pressing once.: Goes to the start of the current track.: Goes to the next track.ActionResultBriefly pressing twice inquick succession.: Goes to the start of the previous track.Pressing and holding.: Fast reverse.: Fast forward.
You can also change track by turning the setting knob ⇒ Fig. 1
8
.
Changing folder in MP3 mode
●
Press the o ⇒ Fig. 20 function button respectively to switch to thefirst track of the next or previous folder.
After changing folder or track, the storage location is displayed for a fewseconds, e.g. folder 5, track number 3 ⇒ Fig. 21. After roughly five sec-onds, the selected track information is displayed again ⇒ Fig. 20.
Note
The playlists are treated in the same way as the folders when switching be-tween them.
Page 24 of 35
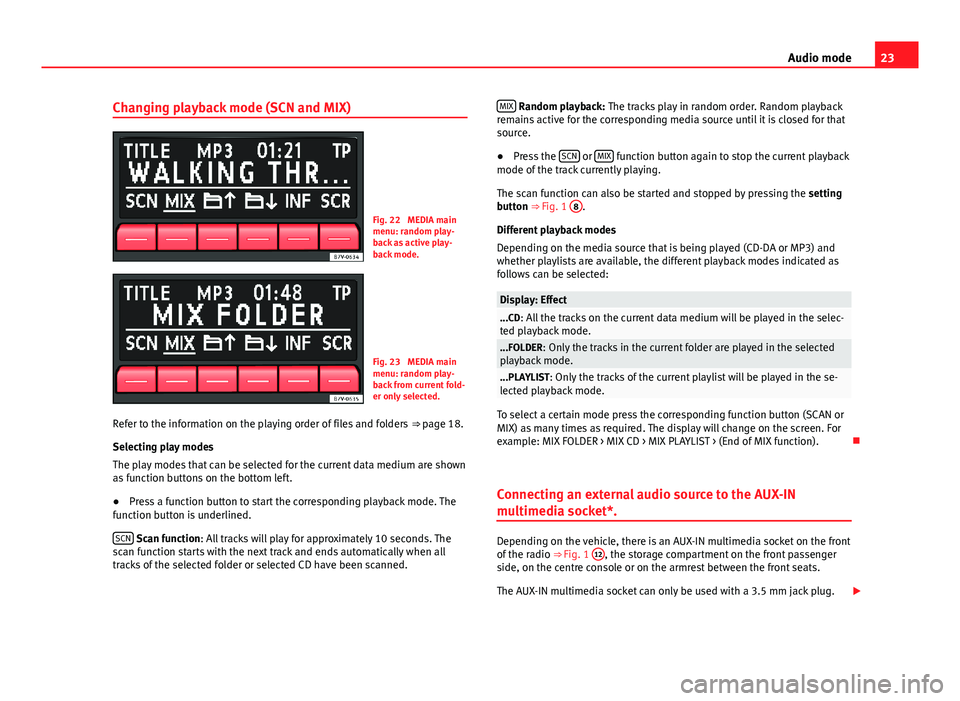
23Audio modeChanging playback mode (SCN and MIX)Fig. 22
MEDIA mainmenu: random play-back as active play-back mode.
Fig. 23
MEDIA mainmenu: random play-back from current fold-er only selected.
Refer to the information on the playing order of files and folders ⇒ page 18.
Selecting play modes
The play modes that can be selected for the current data medium are shownas function buttons on the bottom left.
●
Press a function button to start the corresponding playback mode. Thefunction button is underlined.
SCN Scan function: All tracks will play for approximately 10 seconds. Thescan function starts with the next track and ends automatically when alltracks of the selected folder or selected CD have been scanned.
MIX Random playback: The tracks play in random order. Random playbackremains active for the corresponding media source until it is closed for thatsource.
●
Press the SCN or MIX function button again to stop the current playbackmode of the track currently playing.
The scan function can also be started and stopped by pressing the settingbutton ⇒ Fig. 1
8
.
Different playback modes
Depending on the media source that is being played (CD-DA or MP3) andwhether playlists are available, the different playback modes indicated asfollows can be selected:
Display: Effect...CD: All the tracks on the current data medium will be played in the selec-ted playback mode....FOLDER: Only the tracks in the current folder are played in the selectedplayback mode....PLAYLIST: Only the tracks of the current playlist will be played in the se-lected playback mode.
To select a certain mode press the corresponding function button (SCAN orMIX) as many times as required. The display will change on the screen. Forexample: MIX FOLDER > MIX CD > MIX PLAYLIST > (End of MIX function).
Connecting an external audio source to the AUX-IN
multimedia socket*.
Depending on the vehicle, there is an AUX-IN multimedia socket on the frontof the radio ⇒ Fig. 1
12
, the storage compartment on the front passengerside, on the centre console or on the armrest between the front seats.
The AUX-IN multimedia socket can only be used with a 3.5 mm jack plug.
Page 25 of 35
24Audio modeAn external audio source connected to it can only be played over the vehiclespeakers, but cannot be controlled via the radio system.
An external audio source connected to the socket is indicated by AUX in theMedia selection menu.
If AUX is not displayed, AUX must be activated in the SETUP menu⇒ page 28.
Connecting an external audio source to the AUX IN multimedia socket
●
Lower the basic volume of the radio.
●
Connect an external audio source to the AUX-IN multimedia socket.
●
Begin playback of an external audio source.
●
In media mode, briefly press the MEDIA ⇒ Fig. 1 unit button to displaythe selection menu for available media sources ⇒ Fig. 17.
●
Press the AUX function button.
The output volume of a connected external audio source should be adjustedto that of the other audio sources.
Adjusting the output volume
If you need to increase the output volume for the external audio source, firstlower the base volume on the radio system ⇒ page 9.
If the sound from the external audio source is too quiet, if possible, in-crease the output volume on the external audio source. If this is not suffi-cient, set the input volume (AUX VOL LEVEL) in the system settings to level 2or level 3.
If the sound from the connected external audio source is too loud or distor-ted, if possible, lower the output volume on the external audio source. Ifthis is not sufficient, set AUX VOL LEVEL to level 2 or level 1.
NoteIf playback of the external audio source finishes or if the connector of theAUX-IN multimedia socket is unplugged, the radio will remain in the AUXmenu.
Note
Interference noise may be heard if the external audio source is poweredfrom the vehicle's 12-volt power socket.
Note
Please read and observe the external audio source manufacturer operatingmanual.
Note
If the external audio source is connected and playing and you select anoth-er audio source in the radio system the external audio source continues tofunction in the background.
Page 26 of 35
25Audio modeConnecting a portable navigator*
Introduction
The radio system will only operate with a special portable navigator, theSEAT Portable System, bought through SEAT.
Different media sources can be played through the portable navigator.
The portable navigator allows an additional display and controls of CD andMP3 played through the radio system (track display, track selected from thetrack list).
Additional information and warnings:
●
Safety notes ⇒ page 4
●
Unit overview ⇒ page 6
●
Basic information on use ⇒ page 8
●
Media mode ⇒ page 17
Note
Please read and observe the manufacturer operating manual for the Mediaand Telephone modes for navigating with the portable navigator.
Connection and use
Mount and connect the portable navigator in the holder as described in themanufacturer operating manual.
Playing through the vehicle speakers●
With the radio system in media mode, press the MEDIA ⇒ Fig. 1 unit but-ton to display the selection menu for available media sources, and follow-ing this, press the NAV function button.
●
ALTERNATIVELY: Repeatedly press the MEDIA unit button until NAV is se-lected.
PORTABLE will be shown on the screen of the radio system.
Playback will continue from the last track played when the correspondingmedia source is still available through the portable navigator.
When, at this moment, there is no media source available through the port-able navigator, NO MEDIA will be briefly displayed on the screen of the radiosystem and playback will resume from the last audio source activated onthe radio system.
Portable navigator media mode
Different media sources can be played through the portable navigator usingthe vehicle speakers. Practically all playback control is carried out throughthe portable navigator.
It is also possible to change tracks with the arrow button ⇒ Fig. 1
10
of theradio system ⇒ page 17.
Displaying the track on the radio system is not possible.
The change to another audio source played through the portable navigationsystem is carried out through the portable navigation system.
Only audio sources available on the system (Radio, CD, AUX) can bechanged through the radio system.
Navigation instructions
Navigation announcements are made through the vehicle speakers.
Operations are controlled through the portable navigator.
Page 27 of 35
26Audio modeUsing the telephone
Linking, connecting and controlling is carried out on the portable navigator.
Telephone call playback is carried out through the vehicle speakers. PHONEwill be shown on the screen of the radio system.
When voice activation is activated on the portable navigator, at the sametime, the voice instructions are given through the vehicle speakers.
Changing the volume
Media, phone call and traffic announcements via the portable navigator areplayed through the vehicle speakers.
Changing playback volume can be done with the volume control ⇒ Fig. 1
1
.
When the system is muted (display: ) the portable navigator also stopsthe media source that was being played.
Page 28 of 35
27Settings menuSettings menuSound settings (SOUND)
Introduction
Additional information and warnings:
●
Safety notes ⇒ page 4
●
Unit overview ⇒ page 6
●
Basic information on use ⇒ page 8
Configuring the sound and volume settings
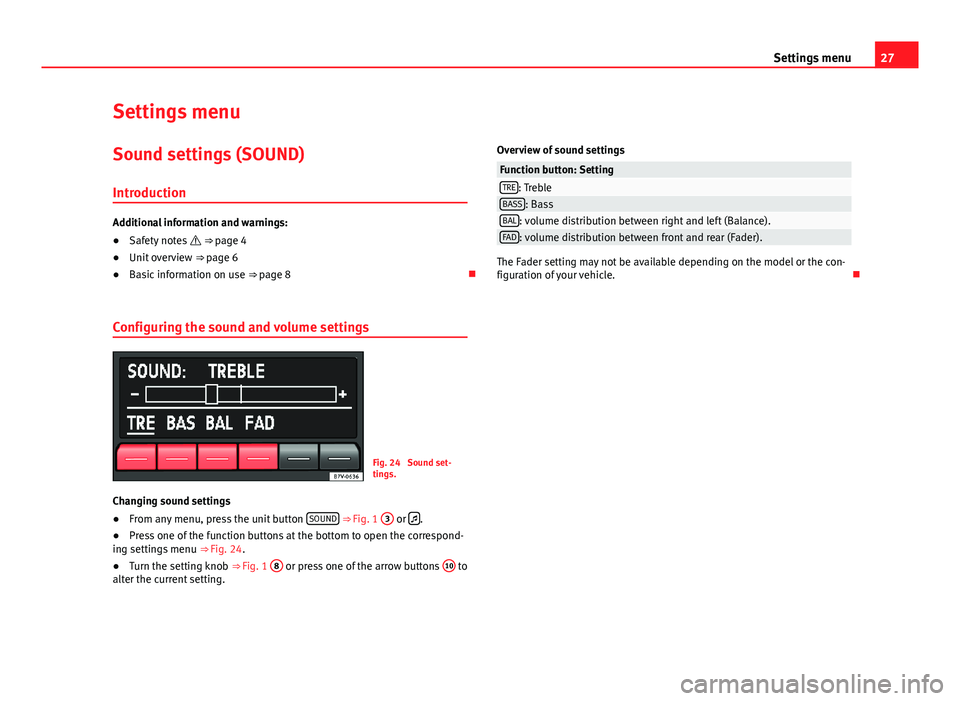
Fig. 24
Sound set-tings.
Changing sound settings
●
From any menu, press the unit button SOUND ⇒ Fig. 1
3
or .
●
Press one of the function buttons at the bottom to open the correspond-ing settings menu ⇒ Fig. 24.
●
Turn the setting knob ⇒ Fig. 1
8
or press one of the arrow buttons
10
toalter the current setting.
Overview of sound settingsFunction button: SettingTRE: TrebleBASS: BassBAL: volume distribution between right and left (Balance).FAD: volume distribution between front and rear (Fader).
The Fader setting may not be available depending on the model or the con-figuration of your vehicle.
Page 29 of 35
28Settings menuSystem and function settings (SETUP)
Introduction
Additional information and warnings:
●
Safety notes ⇒ page 4
●
Unit overview ⇒ page 6
●
Basic information on use ⇒ page 8
Modifying the settings
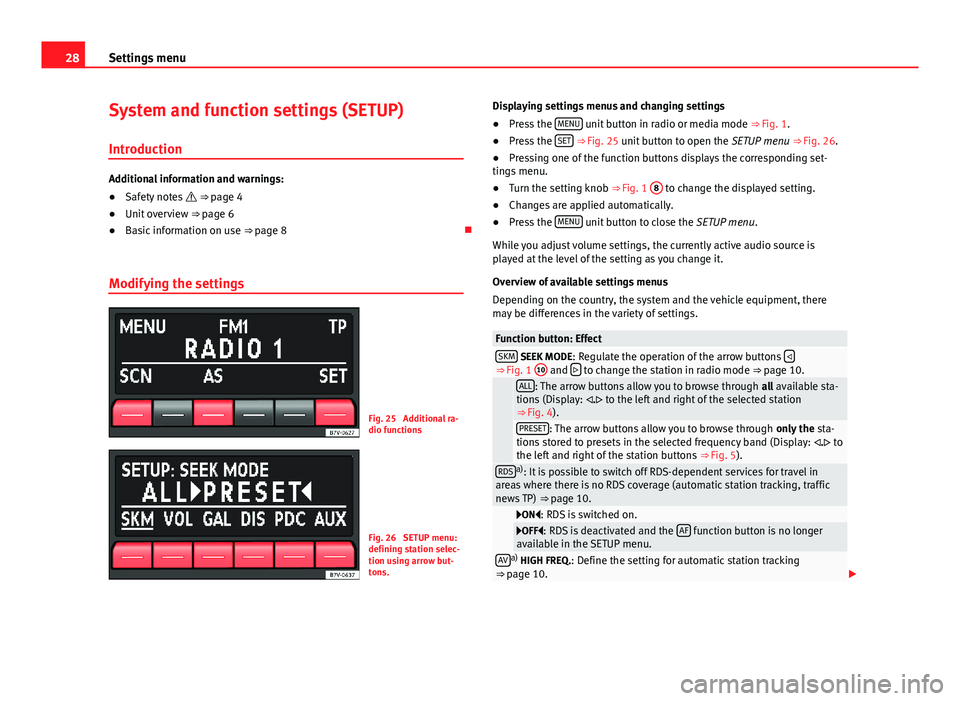
Fig. 25
Additional ra-dio functions
Fig. 26
SETUP menu:defining station selec-tion using arrow but-tons.
Displaying settings menus and changing settings●
Press the MENU unit button in radio or media mode ⇒ Fig. 1.
●
Press the SET ⇒ Fig. 25 unit button to open the SETUP menu ⇒ Fig. 26.
●
Pressing one of the function buttons displays the corresponding set-tings menu.
●
Turn the setting knob ⇒ Fig. 1
8
to change the displayed setting.
●
Changes are applied automatically.
●
Press the MENU unit button to close the SETUP menu.
While you adjust volume settings, the currently active audio source isplayed at the level of the setting as you change it.
Overview of available settings menus
Depending on the country, the system and the vehicle equipment, theremay be differences in the variety of settings.
Function button: EffectSKM SEEK MODE: Regulate the operation of the arrow buttons ⇒ Fig. 1
10
and to change the station in radio mode ⇒ page 10.
ALL: The arrow buttons allow you to browse through all available sta-tions (Display: . to the left and right of the selected station⇒ Fig. 4).
PRESET: The arrow buttons allow you to browse through only the sta-tions stored to presets in the selected frequency band (Display: . tothe left and right of the station buttons ⇒ Fig. 5).
RDSa): It is possible to switch off RDS-dependent services for travel inareas where there is no RDS coverage (automatic station tracking, trafficnews TP) ⇒ page 10.
ON: RDS is switched on.OFF: RDS is deactivated and the AF function button is no longeravailable in the SETUP menu.AVa) HIGH FREQ.: Define the setting for automatic station tracking⇒ page 10.
Page 30 of 35
29Settings menuFunction button: Effect
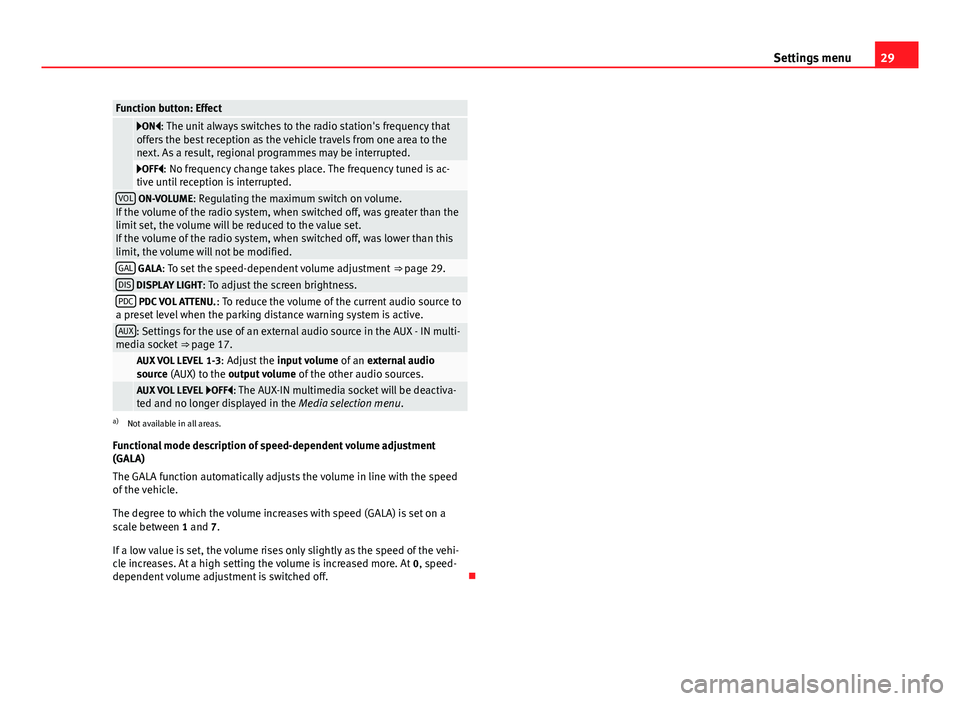
ON: The unit always switches to the radio station's frequency thatoffers the best reception as the vehicle travels from one area to thenext. As a result, regional programmes may be interrupted.
OFF: No frequency change takes place. The frequency tuned is ac-tive until reception is interrupted.VOL ON-VOLUME: Regulating the maximum switch on volume.If the volume of the radio system, when switched off, was greater than thelimit set, the volume will be reduced to the value set.If the volume of the radio system, when switched off, was lower than thislimit, the volume will not be modified.
GAL GALA: To set the speed-dependent volume adjustment ⇒ page 29.DIS DISPLAY LIGHT: To adjust the screen brightness.PDC PDC VOL ATTENU.: To reduce the volume of the current audio source toa preset level when the parking distance warning system is active.AUX: Settings for the use of an external audio source in the AUX - IN multi-media socket ⇒ page 17. AUX VOL LEVEL 1-3: Adjust the input volume of an external audiosource (AUX) to the output volume of the other audio sources. AUX VOL LEVEL OFF: The AUX-IN multimedia socket will be deactiva-ted and no longer displayed in the Media selection menu.
a)
Not available in all areas.
Functional mode description of speed-dependent volume adjustment(GALA)
The GALA function automatically adjusts the volume in line with the speedof the vehicle.
The degree to which the volume increases with speed (GALA) is set on ascale between 1 and 7.
If a low value is set, the volume rises only slightly as the speed of the vehi-cle increases. At a high setting the volume is increased more. At 0, speed-dependent volume adjustment is switched off.