fuse box diagram Seat Mii 2013 Owner's manual
[x] Cancel search | Manufacturer: SEAT, Model Year: 2013, Model line: Mii, Model: Seat Mii 2013Pages: 306, PDF Size: 4.3 MB
Page 265 of 306

263
Practical information
Fuses
Introduction
Due to the constant update of vehicles, fuse assignments depending on
equipment and the use of the same fuse for various electrical components,
at the time of printing this manual it is not possible to provide an up-to-date
summary of the electrical components fuse positions. For detailed informa-
tion about the fuse positions, please consult a Technical Service.
In general, a fuse can be assigned to various electrical components. Like-
wise, an electrical component can be protected by several fuses.
Only replace fuses when the cause of the problem has been solved. If a
newly inserted fuse blows after a short time, you must have the electrical
system checked by a specialised workshop as soon as possible.
Additional information and warnings:
● Working in the engine compartment ⇒ page 180
WARNING
The high voltages in the electrical system can give serious electrical
shocks, causing burns and even death!
● Never touch the electrical wiring of the ignition system.
● Take care not to cause short circuits in the electrical system.
WARNING
Using unsuitable fuses, repairing fuses or bridging a current circuit with-
out fuses can cause a fire and serious injury.
● Never use a fuse with a higher value. Only replace fuses with a fuse of
the same amperage (same colour and markings) and size.
● Never repair a fuse.
● Never replace a fuse by a metal strip, staple or similar.
CAUTION
● To avoid damage to the vehicles electric system, before replacing a fuse
turn off the ignition, the lights and all electrical elements and remove the
keys from the ignition.
● If you replace a fuse with higher-rating fuse, you could cause damage to
another part of the electrical system.
● Protect the fuse boxes when open to avoid the entry of dust or humidity.
Dirt and humidity inside fuse boxes can cause damage to the electrical sys-
tem.
Note
One single consumer could have more than one fuse.
Note
Several consumers could run over one single fuse.
Vehicle diagramPrior to a journey...While drivingCare, cleaning and mainte-
nanceIf and whenTechnical specifications
Page 267 of 306

265
Practical information
CAUTION
● Always carefully remove the fuse box covers and refit them correctly to
avoid problems with your vehicle.
● Protect the fuse boxes when open to avoid the entry of dust or humidity.
Dirt and humidity inside fuse boxes can cause damage to the electrical sys-
tem.
Note
In the vehicle, there are more fuses than those indicated in this chapter.
These should only be changed by a specialised workshop.
Replacing a blown fuse
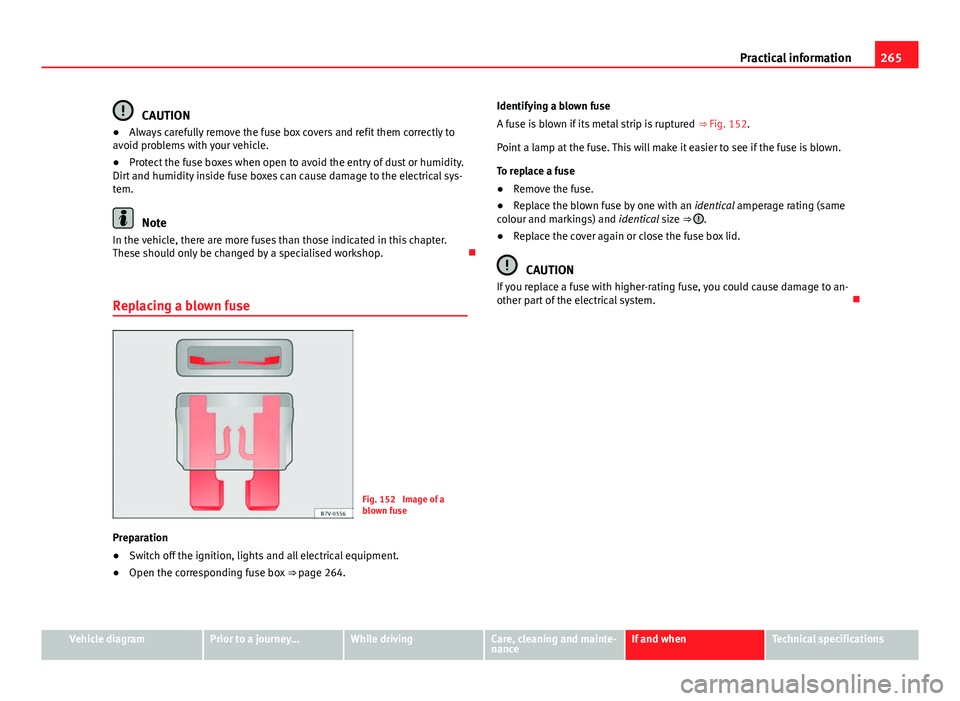
Fig. 152 Image of a
blown fuse
Preparation
● Switch off the ignition, lights and all electrical equipment.
● Open the corresponding fuse box ⇒ page 264. Identifying a blown fuse
A fuse is blown if its metal strip is ruptured
⇒ Fig. 152.
Point a lamp at the fuse. This will make it easier to see if the fuse is blown.
To replace a fuse
● Remove the fuse.
● Replace the blown fuse by one with an identical amperage rating (same
colour and markings) and identical size ⇒
.
● Replace the cover again or close the fuse box lid.
CAUTION
If you replace a fuse with higher-rating fuse, you could cause damage to an-
other part of the electrical system.
Vehicle diagramPrior to a journey...While drivingCare, cleaning and mainte-
nanceIf and whenTechnical specifications
Page 269 of 306

267
Practical information
Information for replacing bulbs
Checklist
To replace a bulb, carry out the following operations always in the order giv-
en ⇒
:
1. Park the vehicle a safe distance from traffic and on suitable ground.
2. Apply the handbrake firmly ⇒ page 134.
3. Turn the light switch to position 0 ⇒ page 82.
4. Move the gear lever into the neutral position ⇒ page 82.
5. Stop the engine and remove the key from the ignition ⇒ page 119.
6. Automatic gearbox: move the selector lever to position P
⇒ page 124.
7. Manual gearbox: Select a gear ⇒ page 124.
8. Allow the corresponding bulb to cool.
9. Visually inspect fuses to see if any are blown ⇒ page 263.
10. Replace the bulb according to the instructions ⇒
. Bulbs should
only be replaced by new identical models. Bulb information is dis-
played on the bulb socket or on the bulb itself.
11. In general, never touch the bulb glass directly. The heat of the bulb would cause the fingerprint to evaporate and condense on the reflec-
tor. This will impair the brightness of the headlight.
12. Check if the new bulb is working. If the bulb is not working, it maynot have been correctly fitted, it could be damaged or the connector
may not be correctly connected.
13. Every time a bulb for the headlights is replaced, visit a specialised workshop to check the headlights.
WARNING
Failure to follow the checklist prepared for your own safety could lead to
accidents and severe injuries.
● Always complete the operations given in the checklist and observe
the general rules of safety.
CAUTION
Always remove and fit headlights carefully to avoid damage to the paint-
work and other vehicle parts.
Vehicle diagramPrior to a journey...While drivingCare, cleaning and mainte-
nanceIf and whenTechnical specifications