child seat Seat Mii 2014 User Guide
[x] Cancel search | Manufacturer: SEAT, Model Year: 2014, Model line: Mii, Model: Seat Mii 2014Pages: 219, PDF Size: 4.19 MB
Page 28 of 219

Safety
the safety information included in the
following chapters:
● Child seats and passenger side airbag
››› page 28, Use of the child seat on the
front passenger seat .
● Safety distance with respect to the passen-
ger airbag ››› in Introduction on page 18.
● Objects between the passenger and the
passenger side airbag ››› in Front airbags
on page 21 .26
Page 29 of 219
Transporting children safely
General information on transporting
children in the vehicle Legal regulations and provisions will always
take priority over the descriptions of this in-
struction manual. There are different regula-
tions and provisions for the use of child seats
and their mountings (
››› table on page 27).
In some countries, for example, the use of
child seats on certain seats in the vehicle
may be forbidden.
The physical principles and the forces acting
on the vehicle in the event of a collision or
other type of accidents also apply to children
››› page 11
. However, unlike adults and
y ou
ngsters, children do not have fully devel-
oped muscle and bone structures. In the
event of an accident, children are subject to a
greater risk than adults of sustaining severe
injuries.
Given that children's bodies are not yet fully
developed, child restraint systems must be
used that are especially adapted to their
height, weight and constitution. There are
laws in force in many countries that indicate the use of approved seat systems for trans-
porting babies and children.
Only used authorised, approved child seats
that are suitable for the vehicle. Always con-
sult with a SEAT dealership or a Specialised
workshop should you have any doubts.
Specific child seat regulations for each
country (selection)
Child seats must comply with the ECE-R 44
1)
regulation. You can consult additional infor-
mation at your SEAT dealership at the inter-
net address www.seat.es.
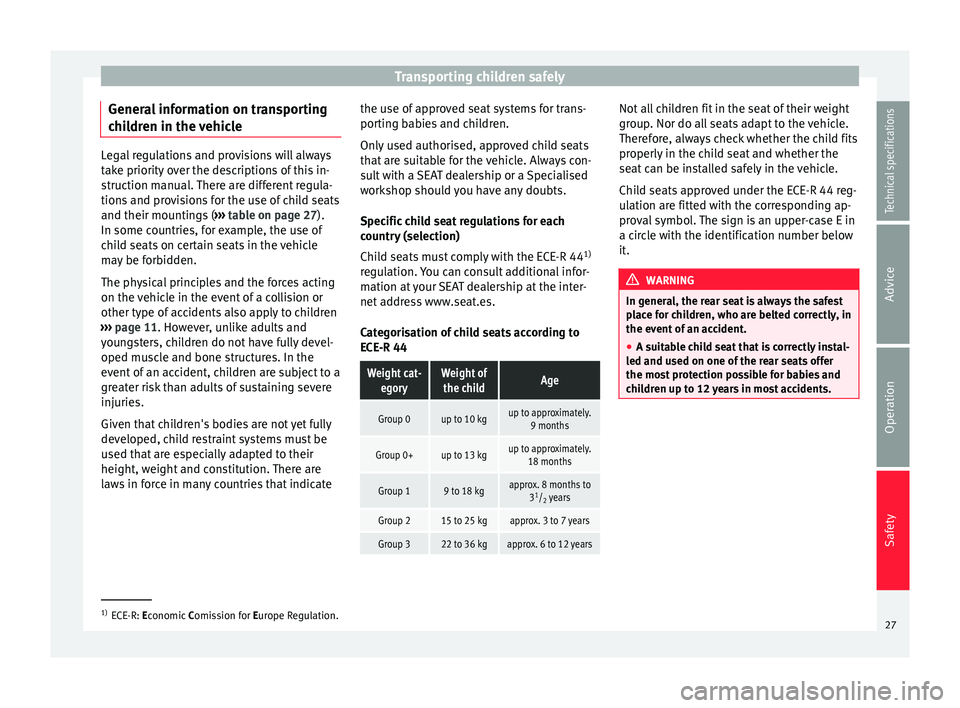
Categorisation of child seats according to
ECE-R 44
Weight cat- egoryWeight ofthe childAge
Group 0up to 10 kgup to approximately. 9 months
Group 0+up to 13 kgup to approximately.18 months
Group 19 to 18 kgapprox. 8 months to 31
/ 2 years
Group 215 to 25 kgapprox. 3 to 7 years
Group 322 to 36 kgapprox. 6 to 12 years Not all children fit in the seat of their weight
group. Nor do all seats adapt to the vehicle.
Therefore, always check whether the child fits
properly in the child seat and whether the
seat can be installed safely in the vehicle.
Child seats approved under the ECE-R 44 reg-
ulation are fitted with the corresponding ap-
proval symbol. The sign is an upper-case E in
a circle with the identification number below
it.
WARNING
In general, the rear seat is always the safest
place for children, who are belted correctly, in
the event of an accident.
● A suitable child seat that is correctly instal-
led and used on one of the rear seats offer
the most protection possible for babies and
children up to 12 years in most accidents. 1)
ECE-R: E conomic C
omission for Europe Regulation.
27
Technical specifications
Advice
Operation
Safety
Page 30 of 219
Safety
Different mounting systems Fig. 20
On the rear seats: Possible installations for the child seat. Always secure child seats properly and safely
in the vehicle according to the child seat
manufacturer's installation instructions.
Mounted child seats must rest correctly on
the vehicle's seat and must not move or rock
more than 2.5 cm.
Child seats equipped for a Top Tether strap
must also be secured using the Top Tether re-
taining strap in the vehicle
››› page 32. At-
tach the retaining strap to the corresponding
retaining rings only. Not all rings can be used
with the Top Tether system. Always tighten
the Top Tether retaining strap so that the
child seat fits snugly against the correspond-
ing seat in the vehicle.
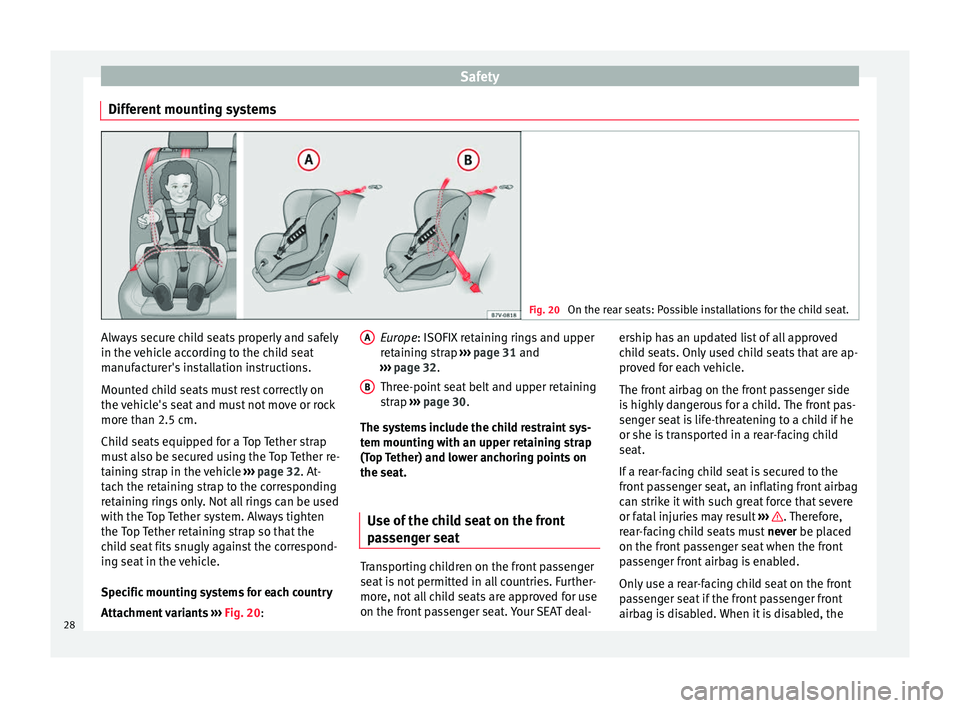
Specific mounting systems for each country
Attachment variants ››› Fig. 20 : E
ur ope
: ISOFIX retaining rings and upper
retaining strap ››› page 31 and
››› page 32.
Three-point
seat belt and upper retaining
strap ››› page 30
.
The systems include the child restraint sys-
tem mounting with an upper retaining strap
(Top Tether) and lower anchoring points on
the seat.
Use of the child seat on the front
passenger seat Transporting children on the front passenger
seat is not permitted in all countries. Further-
more, not all child seats are approved for use
on the front passenger seat. Your SEAT deal-A
B ership has an updated list of all approved
child seats. Only used child seats that are ap-
proved for each vehicle.
The front airbag on the front passenger side
is highly dangerous for a child. The front pas-
senger seat is life-threatening to a child if he
or she is transported in a rear-facing child
seat.
If a rear-facing child seat is secured to the
front passenger seat, an inflating front airbag
can strike it with such great force that severe
or fatal injuries may result
››› . Therefore,
rear-facing child seats must never be placed
on the fr ont
passenger seat when the front
passenger front airbag is enabled.
Only use a rear-facing child seat on the front
passenger seat if the front passenger front
airbag is disabled. When it is disabled, the
28
Page 31 of 219
Transporting children safely
yellow
››› page 17 con-
trol lamp on the dash panel will be lit. If you
cannot disable the front passenger front air-
bag and it remains activated, it is forbidden
to transport children on the front passenger
seat
››› .
Things to note if using a child seat on the
front passenger seat:
● The front passenger front airbag must be
disabled
when using a rear-facing child
se
at ››› page 17.
● The seat
backrest of the front passenger
seat must be upright.
● The front passenger seat must be moved as
far back as possible.
● The seat backrest of the front passenger
seat must be upright.
Suitable child seats
The child seat must be authorised by the
manufacturer especially for use on a front
passenger seat with a front or side airbag.
Universal seats for children can be fitted in
the front passenger seat, in groups 0, 0+, 1,
2 or 3 according to the ECE-R 44 regulation. WARNING
If a child seat is mounted on the front passen-
ger seat, the risk of the child sustaining se-
vere or fatal injuries in the event of an acci- dent increases. Rear-facing child seats must
never be mounted on the front passenger
seat when the front passenger front airbag is
enabled. This is life-threatening to the child
should the front airbag deploy, as the child
seat would be struck by the inflated airbag
and thrown against the seat backrest.
WARNING
If, in exceptional circumstances, a child must
be transported in a rear-facing child seat on
the front passenger seat, strictly observe the
following:
● Always disable the front passenger front
airbag and leave it disabled.
● The child seat must be approved by the
manufacturer for use on a front passenger
seat with front and side airbag.
● Follow the installation instructions of the
child seat manufacturer and observe the
warnings.
● Move the front passenger seat as far back
as possible and adjust it to its highest posi-
tion to keep as far away as possible from the
front airbag.
● Move the seat backrest to the upright posi-
tion.
● Children must always be protected with an
approved child restraint system suited to
their height and weight. Use of the child seat on the rear seat
If a child seat is mounted on the rear seat,
adapt the position of the front passenger
seat so that the child has enough space.
Therefore, adapt the front passenger seat to
the size of the child seat and the height of
the child. Ensure the passenger is in the cor-
rect position
››› page 6.
Suitable child seats
The manufacturer must authorise the child
seat for use in the rear seats with side air-
bags.
Universal seats for children can be fitted in
the passenger seat, in groups 0, 0+, 1, 2 or 3
according to the ECE-R 44 regulation.
The rear seats are suitable for child seats
with the ISOFIX system spec
ially designed
for this type of vehicle in accordance with
regulation ECE-R 44.
ISOFIX child seats approved for rear seats
ISOFIX child seats are divided into the follow-
ing certified categories: “universal”, “semi-
universal” or “specific categories for the ve-
hicle”.
● If the ISOFIX child seat is certified “univer-
sal”, it must be supported by the lower an-
chor points and the Top Tether retaining
strap. »
29
Technical specifications
Advice
Operation
Safety
Page 32 of 219
Safety
● If the ISOFIX child seat is certified “semi-
universal” or “specific categories for the ve-
hicle”, check that the child seat is certified
for the vehicle before employing it. The child
seat manufacturer supplies, in addition to
the ISOFIX child seat, a list of vehicles for
which the corresponding ISOFIX child seat
has been certified. If necessary, contact the
child seat manufacturer for an updated list of
vehicles.
Securing child seats with the seat belt The seat belt may be used to secure child
seats with the
universal marking (on the or-
an g
e label) to the vehicle seats marked with
a
u in the table below.
CategoryFront passen- gerRear seats
Group 0
Up to 10 kguu
Category 0+ Up to 13 kguu
Group 1
9 to 18 kguu
CategoryFront passen-
gerRear seats
Group 2
15 to 25 kguu
Group 3
22 to 36 kguu Securing the child seat using the seat belt
●
Please read and observe the child seat
manufacturer's handling instructions.
● Move the front passenger seat, or the rear
seat bench back as far as possible and, in
the case of an adjustable backrest, set it in
the upright position ›››
page 6.
● Positioning the child seat on the seat ac-
cording to the manufacturer's instructions.
● Fasten the seat belt or pass it around the
child seat structure in the manner described
in the manufacturer's instructions.
● Make sure the seat belt is not twisted.
● Insert the latch plate into the buckle for the
appropriate seat and push it down until it is
securely locked with an audible click.
● Ensure that the upper belt web lies tightly
on the child seat. ●
Pull the belt (it must be no longer possible
to pull the lower belt webbing out).
Removing the child seat
The seat belt must not be unfastened until
the vehicle has come to a standstill ››› .
● Press the red button on the buckle. The
latch plate is released from the buckle.
● Guide the belt back by hand so that it rolls
up easily and the trim will not be damaged.
● Remove the child seat from the vehicle. WARNING
Unbuckling the seat belt while the vehicle is
in motion can cause severe or fatal injuries in
the event of an accident or sudden braking.
● The seat belt must not be unfastened until
the vehicle has come to a standstill. 30
Page 33 of 219
Transporting children safely
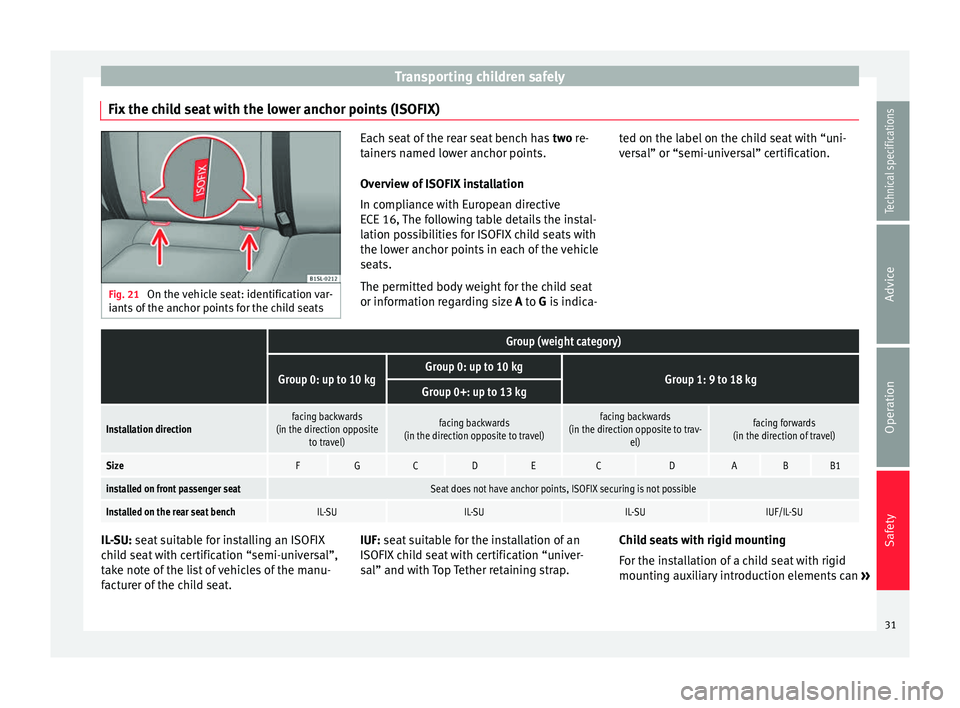
Fix the child seat with the lower anchor points (ISOFIX) Fig. 21
On the vehicle seat: identification var-
iants of the anchor points for the child seats Each seat of the rear seat bench has
two re-
t ainer
s named lower anchor points.
Overview of ISOFIX installation
In compliance with European directive
ECE 16, The following table details the instal-
lation possibilities for ISOFIX child seats with
the lower anchor points in each of the vehicle
seats.
The permitted body weight for the child seat
or information regarding size A to G is indica- ted on the label on the child seat with “uni-
versal” or “semi-universal” certification.
Group (weight category)
Group 0: up to 10 kgGroup 0: up to 10 kgGroup 1: 9 to 18 kgGroup 0+: up to 13 kg
Installation directionfacing backwards
(in the direction opposite to travel)facing backwards
(in the direction opposite to travel)facing backwards
(in the direction opposite to trav- el)facing forwards
(in the direction of travel)
SizeFGCDECDABB1
installed on front passenger seatSeat does not have anchor points, ISOFIX securing is not possible
Installed on the rear seat benchIL-SUIL-SUIL-SUIUF/IL-SU IL-SU:
seat suitable for installing an ISOFIX
c hi
ld seat with certification “semi-universal”,
take note of the list of vehicles of the manu-
facturer of the child seat. IUF: seat suitable for the installation of an
ISOFIX child seat with certification “univer-
sal” and with Top Tether retaining strap. Child seats with rigid mounting
For the installation of a child seat with rigid
mounting auxiliary introduction elements can
»
31
Technical specifications
Advice
Operation
Safety
Page 34 of 219
Safety
be used. Using auxiliary introduction ele-
ments facilitates installation and protects up-
holstery. Auxiliary introduction elements
form part of the supply volume of the child
seat or can be acquired at a SEAT dealership.
If necessary, auxiliary introduction elements
are inserted in both anchor points of the ve-
hicle ››› .
● Observe the manufacturer's instructions
when installing and removing the child seat
››› .
● Press the child seat onto the retaining rings
››› Fig. 21 in the direction of the arrow. The
c hi
ld seat must be safely engaged and click
audibly into place.
● Pull on both sides of the child seat to en-
sure that it is secure.
Child seat with adjustable retaining straps
● Observe the manufacturer's instructions
when installing and removing the child seat
››› .
● Place the child seat on the seat cushion
and attach the retaining strap hooks to the
retaining rings ››› Fig. 21 .
● Tight en the s
traps evenly using the corre-
sponding adjustment device. The child seat
must sit flush against the vehicle seat.
● Pull on both sides of the child seat to en-
sure that it is secure. WARNING
The lower anchor points for child seats do not
include rings. Only secure booster seats to
lower anchor points. CAUTION
● To avoid making permanent marks in the
padding, remove the auxiliary introduction
elements from the anchor points when the
child seat is not installed in the vehicle an-
chor points.
● To prevent damage being done to the up-
holstery, the padding or the auxiliary intro-
duction elements, always remove the auxili-
ary introduction elements from the anchor
points before folding the rear seat bench. Securing a child seat using a Top
Tether retaining strap
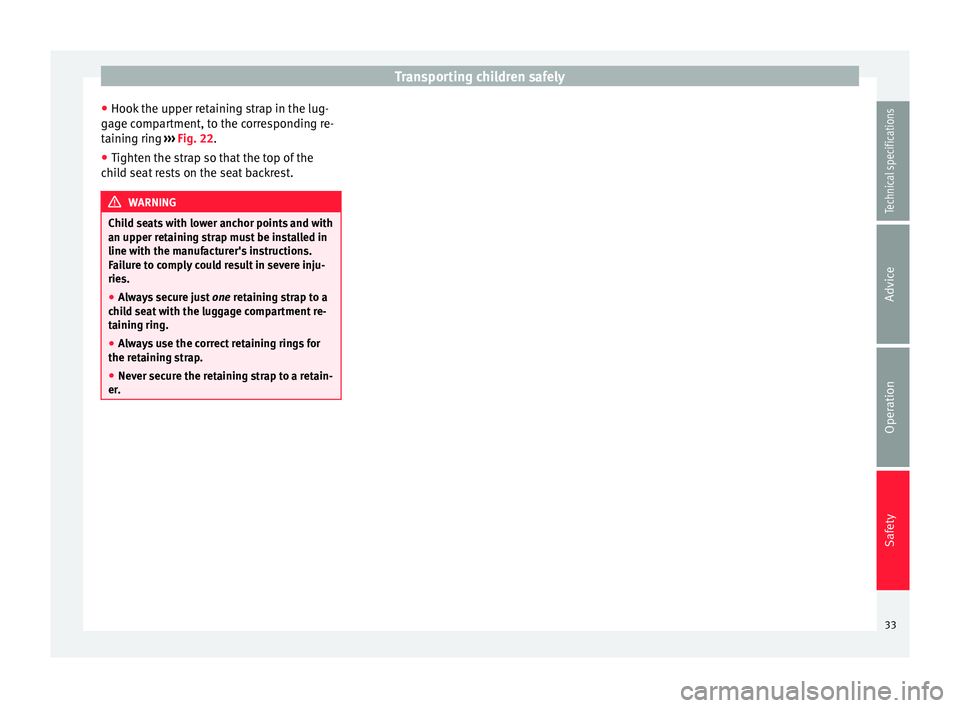
Fig. 22
Example of an upper retaining strap
connected. ●
Observe the manufacturer's instructions
when installing and removing the child seat
››› .
● Unlock the seat backrest and fold it gently
forward ››› page 64 .
● Remo
ve the head restraints situated be-
hind the child seat and store them safely in
the vehicle ››› page 6.
● Guide the upper r
etaining strap from of the
child seat back to the luggage compartment,
feeding it through the seat backrest and the
rear shelf.
● Fold back the seat backrest and push it
firmly into the lock.
● Secure the child seat to the lower anchor
points ››› page 31
32
Page 35 of 219
Transporting children safely
● Hook the upper retaining strap in the lug-
gage compartment, to the corresponding re-
taining ring ››› Fig. 22 .
● Tight en the s
trap so that the top of the
child seat rests on the seat backrest. WARNING
Child seats with lower anchor points and with
an upper retaining strap must be installed in
line with the manufacturer's instructions.
Failure to comply could result in severe inju-
ries.
● Always secure just one retaining strap to a
c hi
ld seat with the luggage compartment re-
taining ring.
● Always use the correct retaining rings for
the retaining strap.
● Never secure the retaining strap to a retain-
er. 33
Technical specifications
Advice
Operation
Safety
Page 45 of 219
Opening and closing
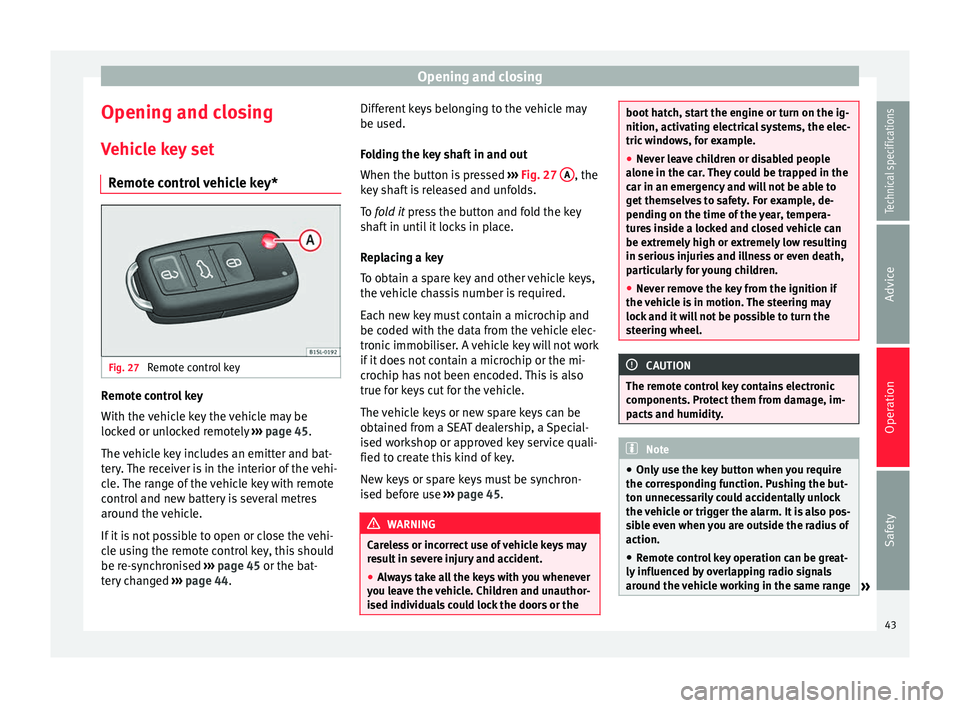
Opening and closing Vehicle key set Remote control vehicle key* Fig. 27
Remote control key Remote control key
With the vehicle key the vehicle may be
locked or unlocked remotely
››› page 45.
The vehicle key includes an emitter and bat-
tery. The receiver is in the interior of the vehi-
cle. The range of the vehicle key with remote
control and new battery is several metres
around the vehicle.
If it is not possible to open or close the vehi-
cle using the remote control key, this should
be re-synchronised ››› page 45 or the bat-
tery changed ››› page 44. Different keys belonging to the vehicle may
be used.
Folding the key shaft in and out
When the button is pressed
››› Fig. 27 A , the
key shaft is released and unfolds.
To fold it
press the button and fold the key
sh
aft in until it locks in place.
Replacing a key
To obtain a spare key and other vehicle keys,
the vehicle chassis number is required.
Each new key must contain a microchip and
be coded with the data from the vehicle elec-
tronic immobiliser. A vehicle key will not work
if it does not contain a microchip or the mi-
crochip has not been encoded. This is also
true for keys cut for the vehicle.
The vehicle keys or new spare keys can be
obtained from a SEAT dealership, a Special-
ised workshop or approved key service quali-
fied to create this kind of key.
New keys or spare keys must be synchron-
ised before use ››› page 45. WARNING
Careless or incorrect use of vehicle keys may
result in severe injury and accident.
● Always take all the keys with you whenever
you leave the vehicle. Children and unauthor-
ised individuals could lock the doors or the boot hatch, start the engine or turn on the ig-
nition, activating electrical systems, the elec-
tric windows, for example.
●
Never leave children or disabled people
alone in the car. They could be trapped in the
car in an emergency and will not be able to
get themselves to safety. For example, de-
pending on the time of the year, tempera-
tures inside a locked and closed vehicle can
be extremely high or extremely low resulting
in serious injuries and illness or even death,
particularly for young children.
● Never remove the key from the ignition if
the vehicle is in motion. The steering may
lock and it will not be possible to turn the
steering wheel. CAUTION
The remote control key contains electronic
components. Protect them from damage, im-
pacts and humidity. Note
● Only use the key button when you require
the corresponding function. Pushing the but-
ton unnecessarily could accidentally unlock
the vehicle or trigger the alarm. It is also pos-
sible even when you are outside the radius of
action.
● Remote control key operation can be great-
ly influenced by overlapping radio signals
around the vehicle working in the same range » 43Technical specifications
Advice
Operation
Safety
Page 47 of 219
Opening and closing
SEAT recommend having the batteries
changed in a specialised workshop.
The battery is located to the rear of the vehi-
cle key, under a cover.
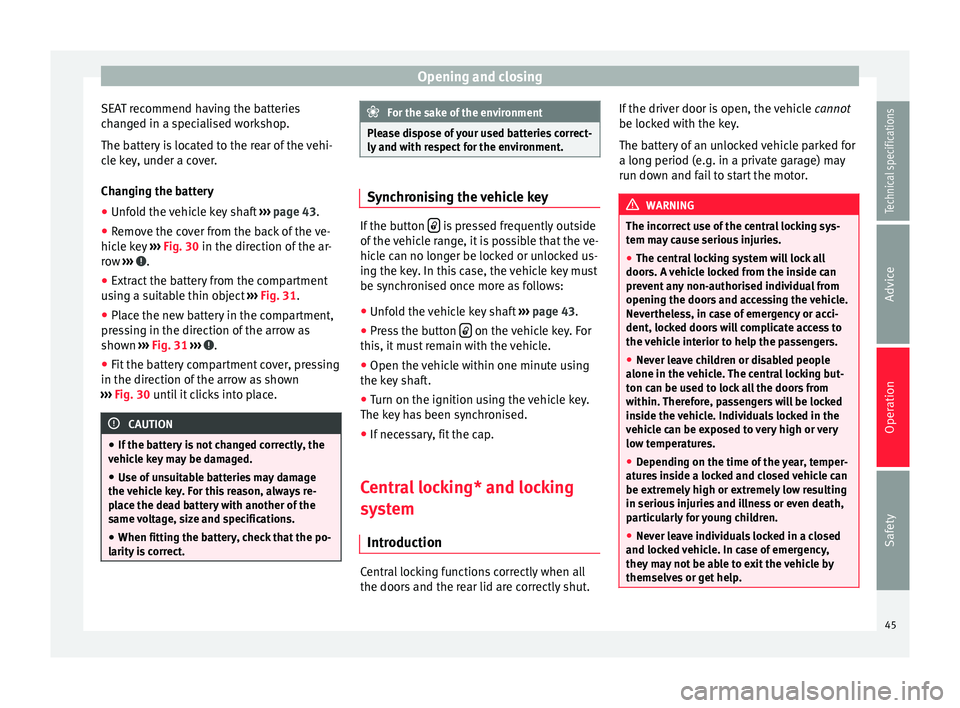
Changing the battery
● Unfold the vehicle key shaft ››› page 43.
● Remove the cover from the back of the ve-
hicle key ››› Fig. 30 in the direction of the ar-
r o
w ››› .
● Extract the battery from the compartment
using a suitable thin object ››› Fig. 31 .
● Plac
e the new battery in the compartment,
pressing in the direction of the arrow as
shown ››› Fig. 31 ››› .
● Fit the battery compartment cover, pressing
in the direction of the arrow as shown
››› Fig. 30 until it clicks into place. CAUTION
● If the battery is not changed correctly, the
vehicle key may be damaged.
● Use of unsuitable batteries may damage
the vehicle key. For this reason, always re-
place the dead battery with another of the
same voltage, size and specifications.
● When fitting the battery, check that the po-
larity is correct. For the sake of the environment
Please dispose of your used batteries correct-
ly and with respect for the environment. Synchronising the vehicle key
If the button
is pressed frequently outside
of the vehicle range, it is possible that the ve-
hicle can no longer be locked or unlocked us-
ing the key. In this case, the vehicle key must
be synchronised once more as follows:
● Unfold the vehicle key shaft ›››
page 43.
● Press the button on the vehicle key. For
this, it must remain with the vehicle.
● Open the vehicle within one minute using
the key shaft.
● Turn on the ignition using the vehicle key.
The key has been synchronised.
● If necessary, fit the cap.
Central locking* and locking
system Introduction Central locking functions correctly when all
the doors and the rear lid are correctly shut.If the driver door is open, the vehicle
cannot
be locked with the key.
The battery of an unlocked vehicle parked for
a long period (e.g. in a private garage) may
run down and fail to start the motor. WARNING
The incorrect use of the central locking sys-
tem may cause serious injuries.
● The central locking system will lock all
doors. A vehicle locked from the inside can
prevent any non-authorised individual from
opening the doors and accessing the vehicle.
Nevertheless, in case of emergency or acci-
dent, locked doors will complicate access to
the vehicle interior to help the passengers.
● Never leave children or disabled people
alone in the vehicle. The central locking but-
ton can be used to lock all the doors from
within. Therefore, passengers will be locked
inside the vehicle. Individuals locked in the
vehicle can be exposed to very high or very
low temperatures.
● Depending on the time of the year, temper-
atures inside a locked and closed vehicle can
be extremely high or extremely low resulting
in serious injuries and illness or even death,
particularly for young children.
● Never leave individuals locked in a closed
and locked vehicle. In case of emergency,
they may not be able to exit the vehicle by
themselves or get help. 45
Technical specifications
Advice
Operation
Safety